This section allows for managing the columns present in different
grids throughout the application. The EHR grids specification defines which columns
are locked by default and which optional columns can be added per grid.
Grids Manager
Column Specification
View the complete grid column reference to see every grid and
which columns are Default versus Optional.
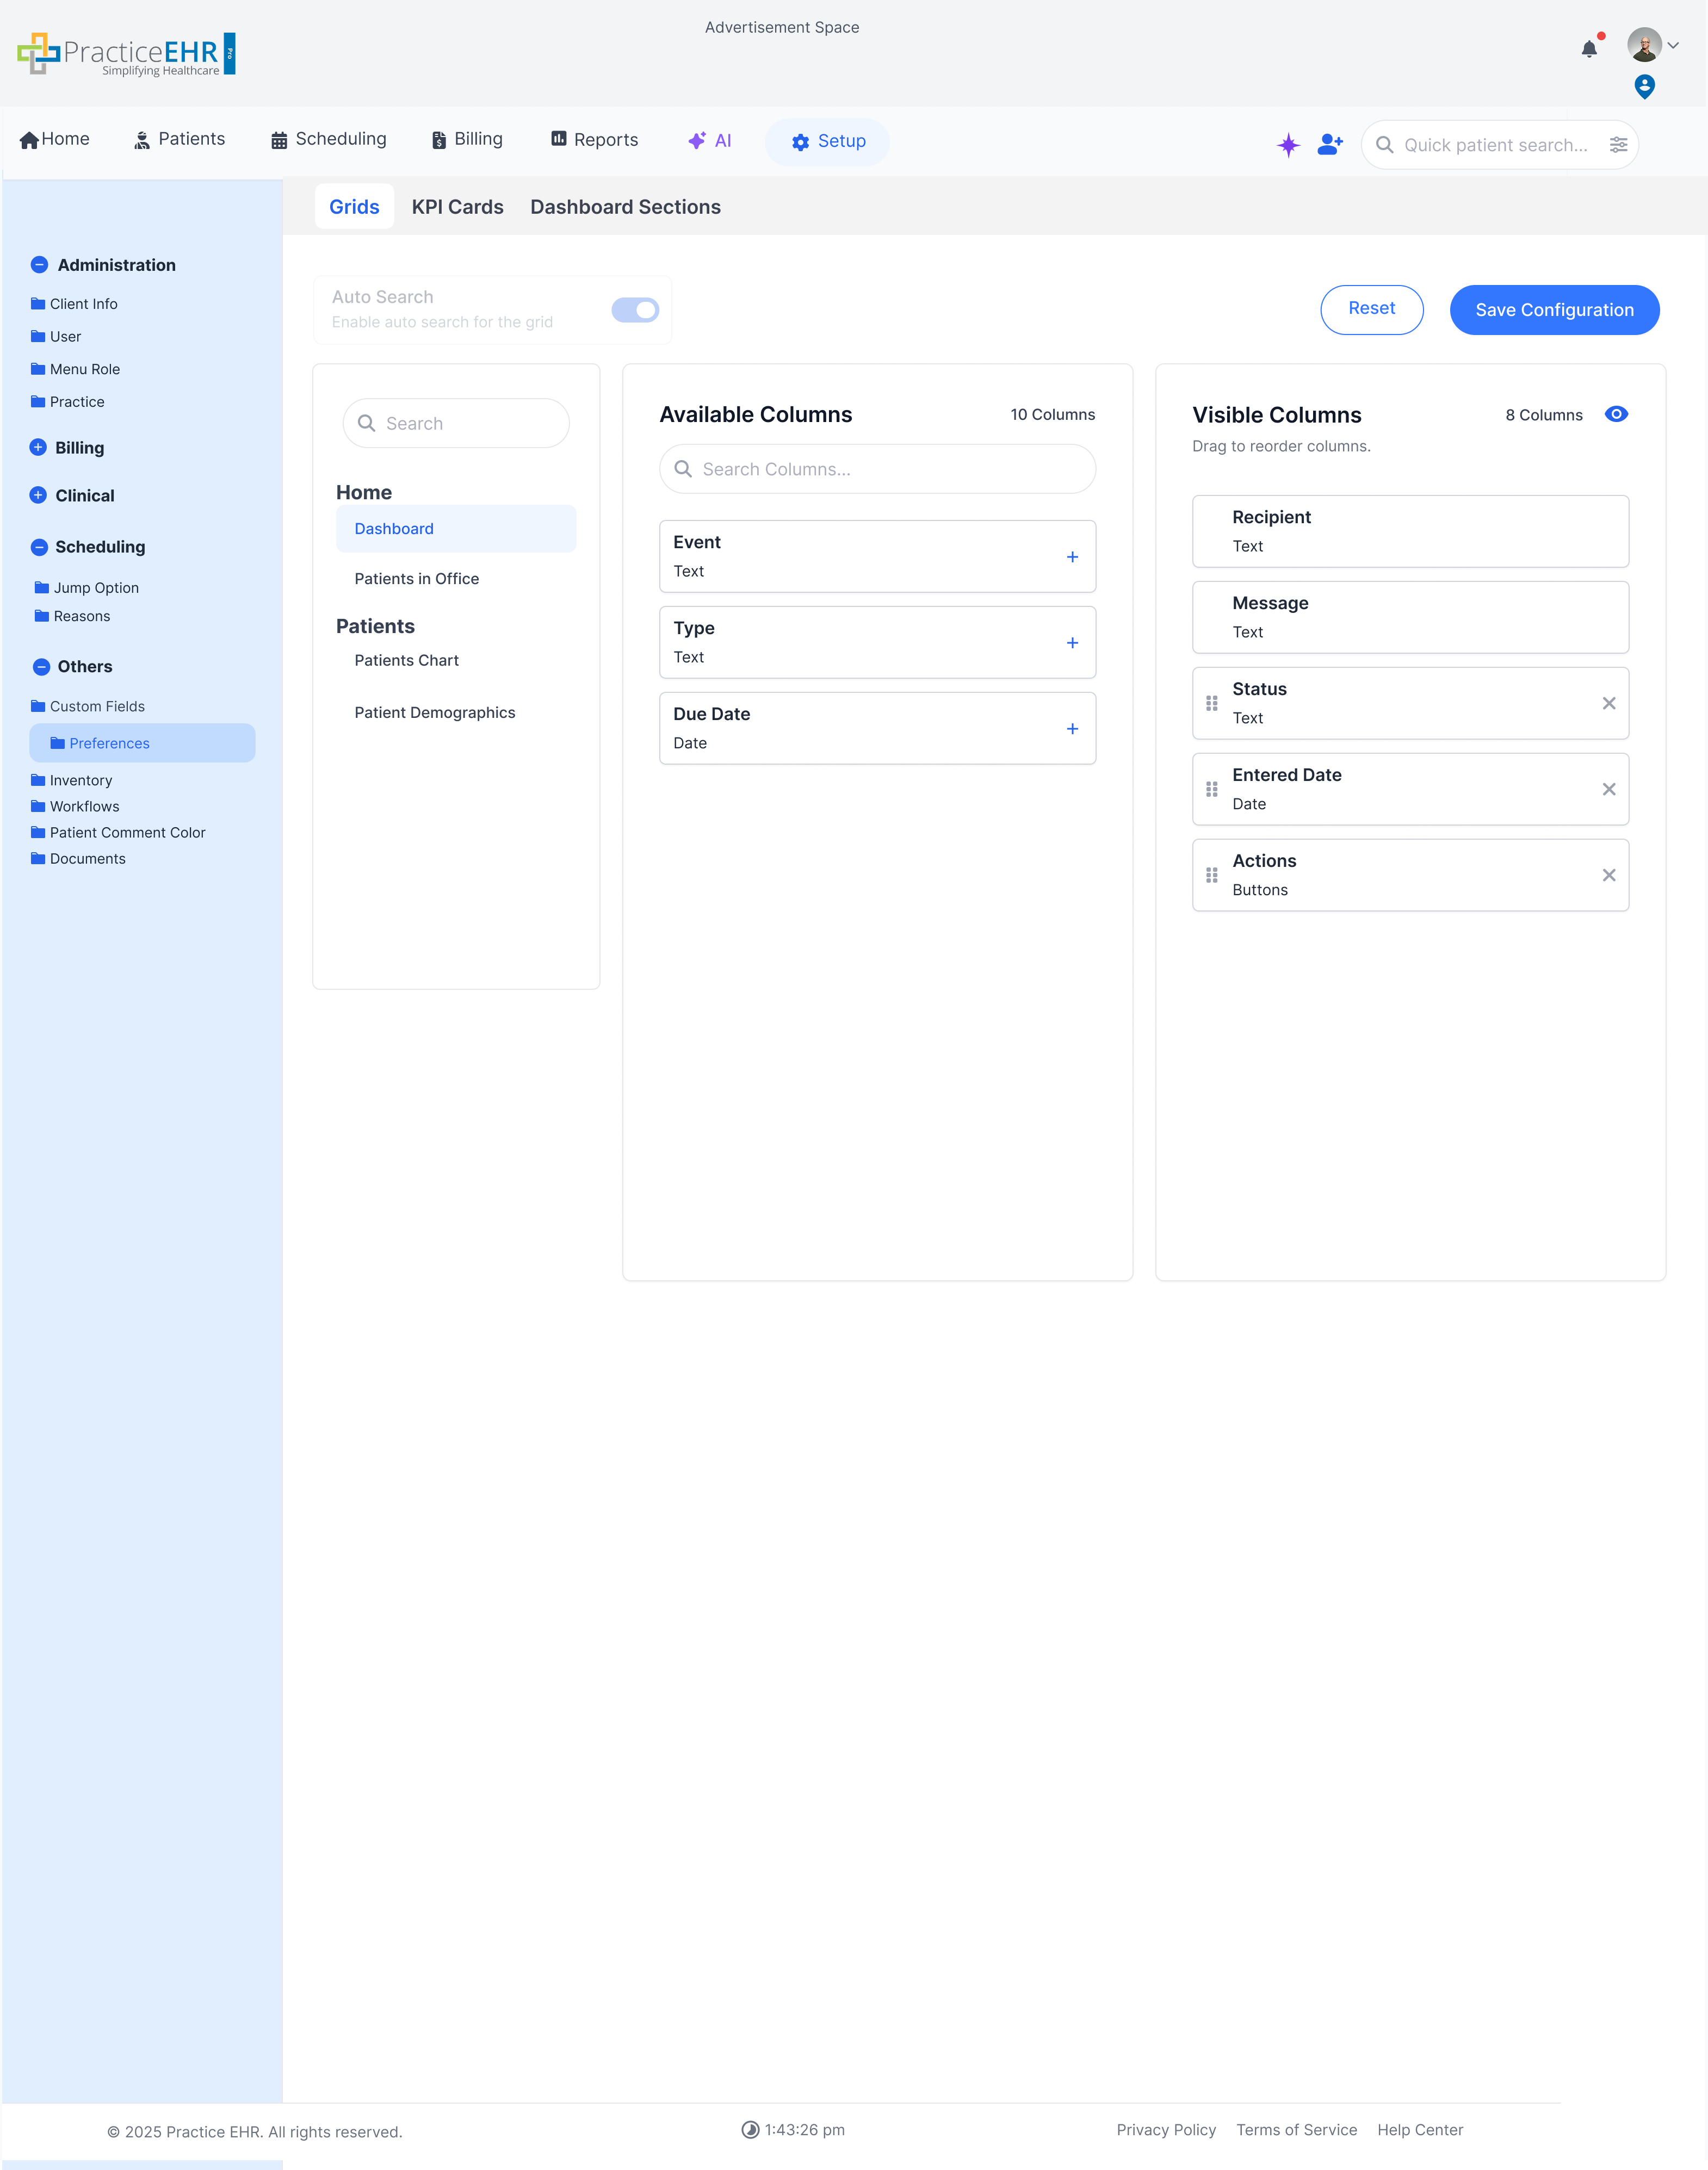
The behavior of Grids Manager is very similar to the Cards Manger
Default columns stay locked in the order defined by the grid specification and
cannot be removed or reordered by the user.
Optional columns can be shown, hidden, and reordered, and those preferences are
saved for the selected grid.
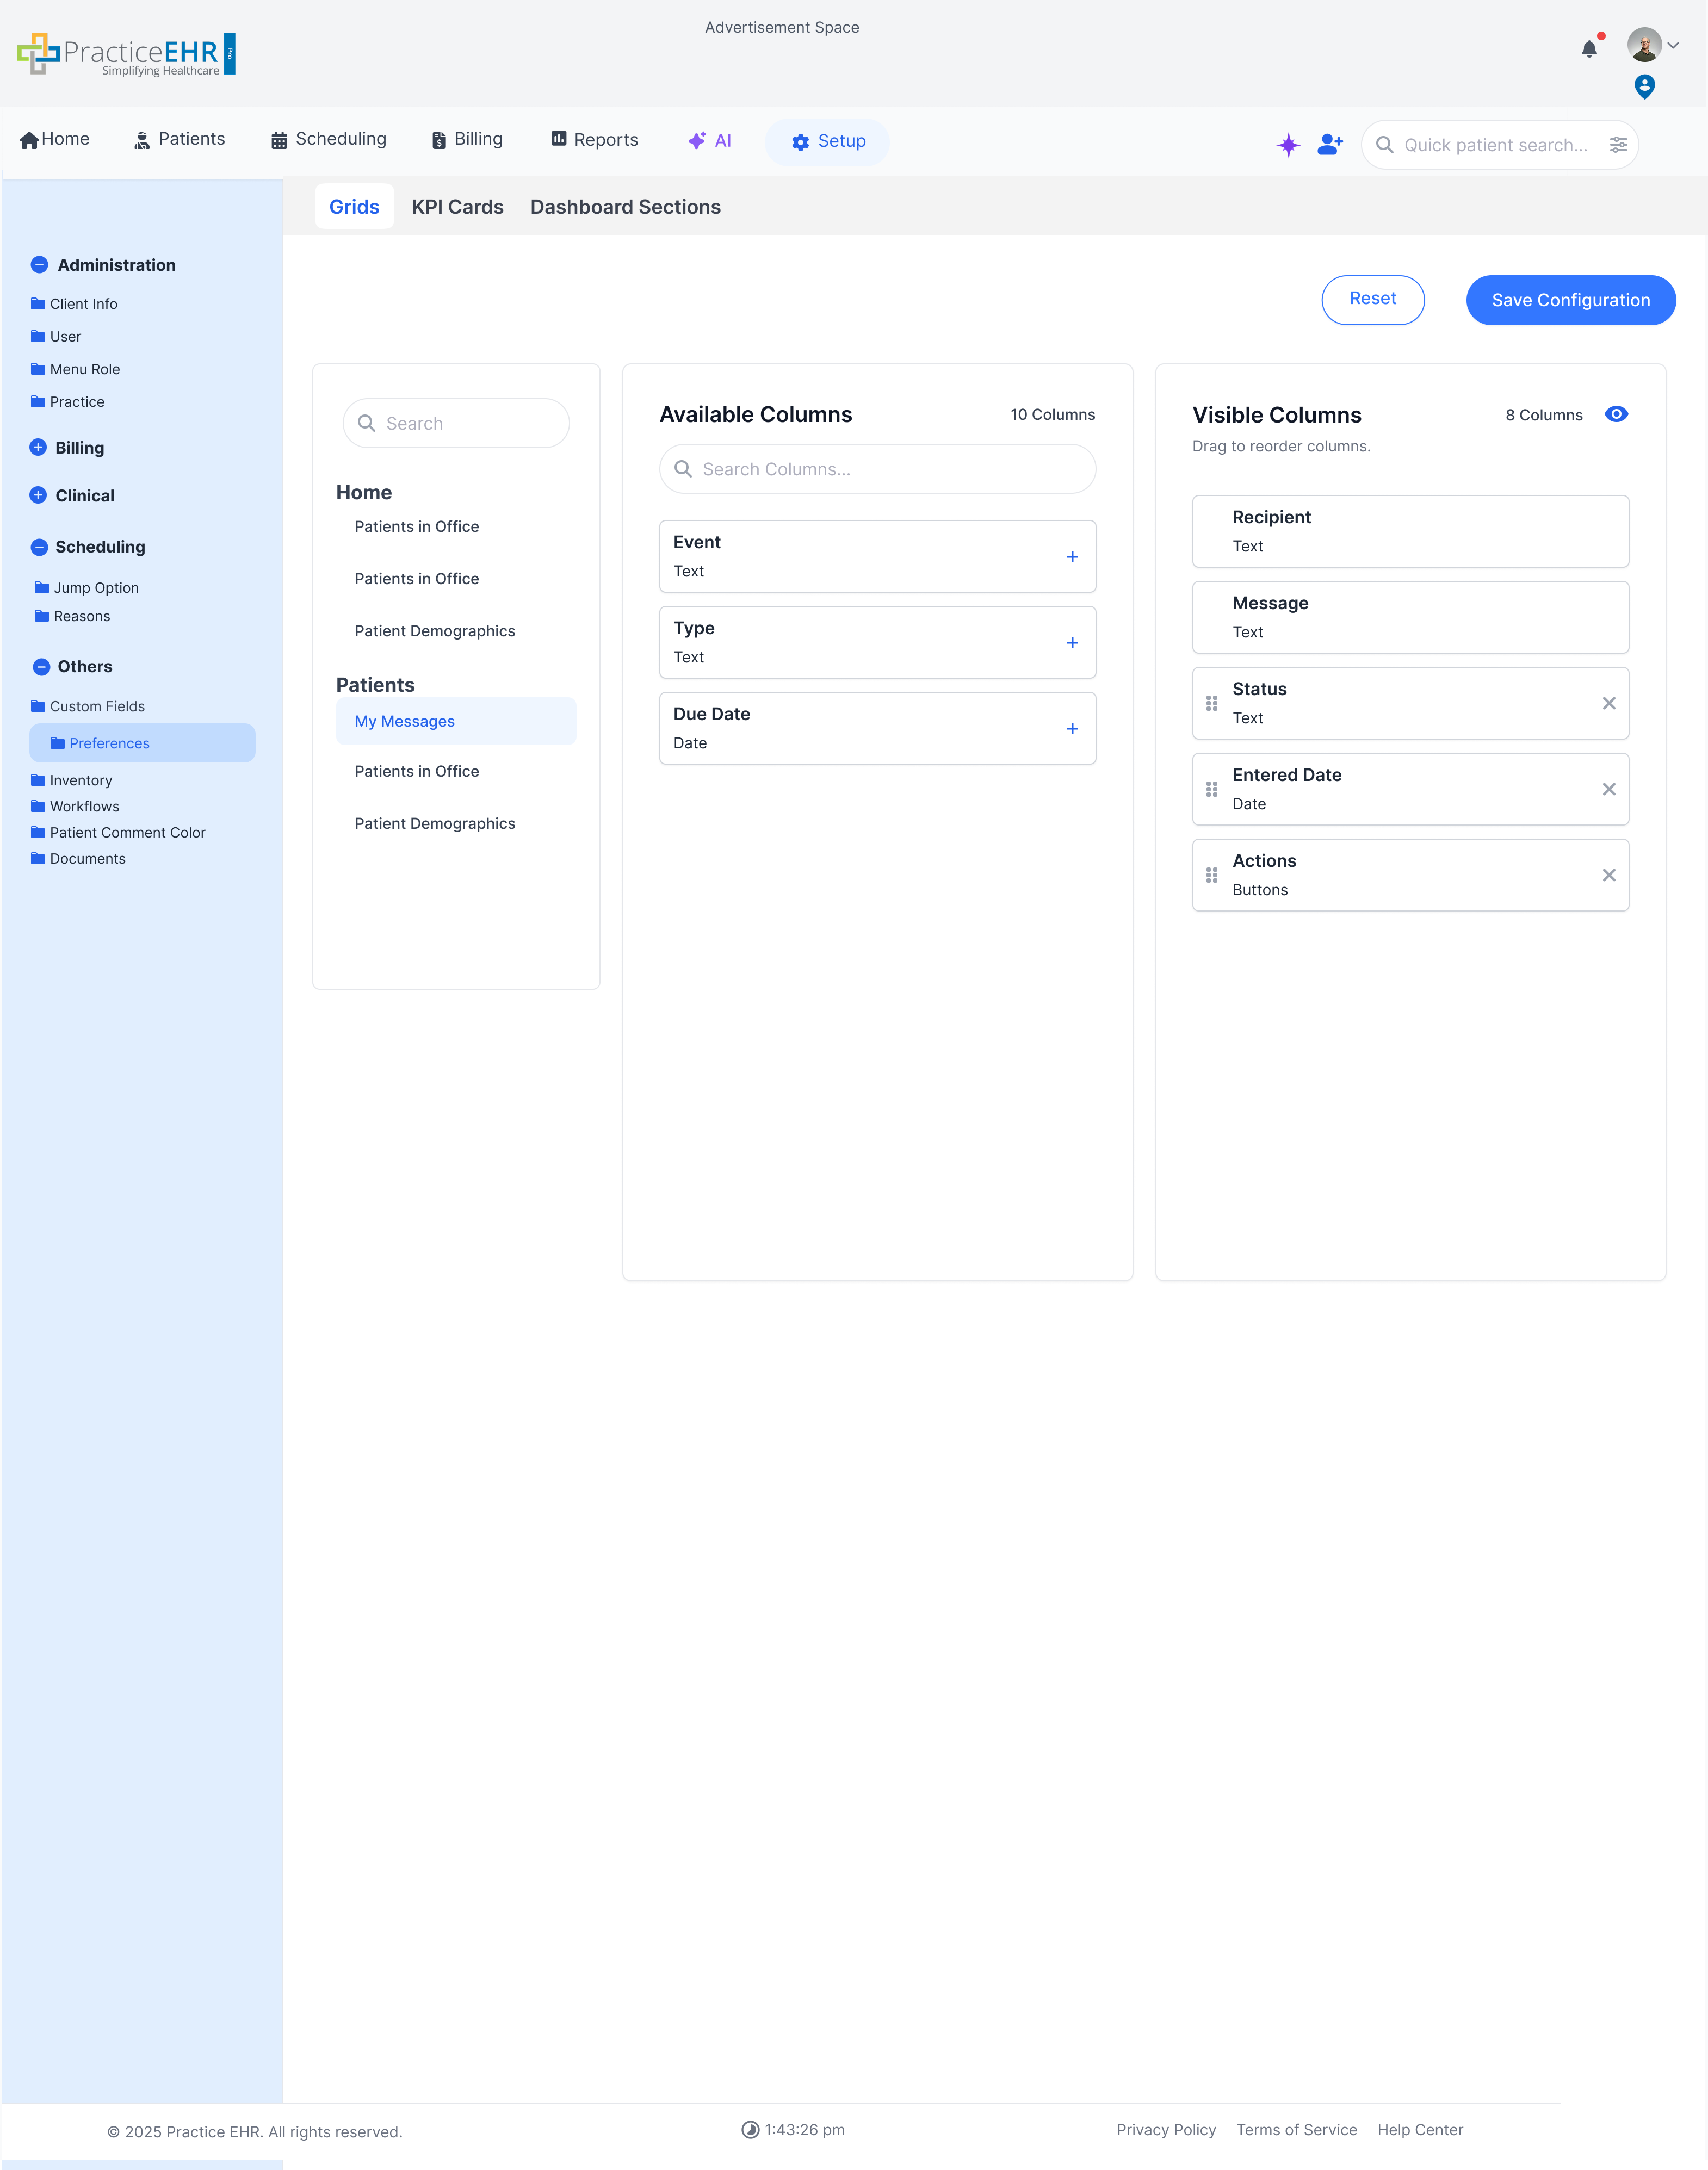
Search and Sidebar (1)
A sidebar container that has all the grids in a list.
The user can select one grid to view that grid's Visible and Available
Columns.
Available Columns Section (2)
Users can use the Available Columns section to see which columns they can
display on the selected grid
The number of available columns are displayed on the top right of the
section
A search bar is also added so that the users can search for specific cards
The Users can drag a column from the available columns section to the
displayed columns section in order to display that column on the screen
The user can also click on the plus icon present on each column card to add
it to the displayed columns section
The full grid column specification linked above defines which columns can appear
in this list for each grid.
Displayed Columns Section (3)
The Displayed Columns Section shows what columns are currently displayed on
the grid
The user can drag a column to change its position
Columns can be removed from the displayed section by dragging them back to
the available columns section OR by clicking on the X icon present
Columns without a X icon means they cannot be removed from the grid
Columns without a drag icon means that their position cannot be changed
A preview icon is present at the top right of the section which shows a
preview of how the grid will look with the mentioned columns
This section is for managing the different KPI cards displayed on
different screens.
Cards Manager
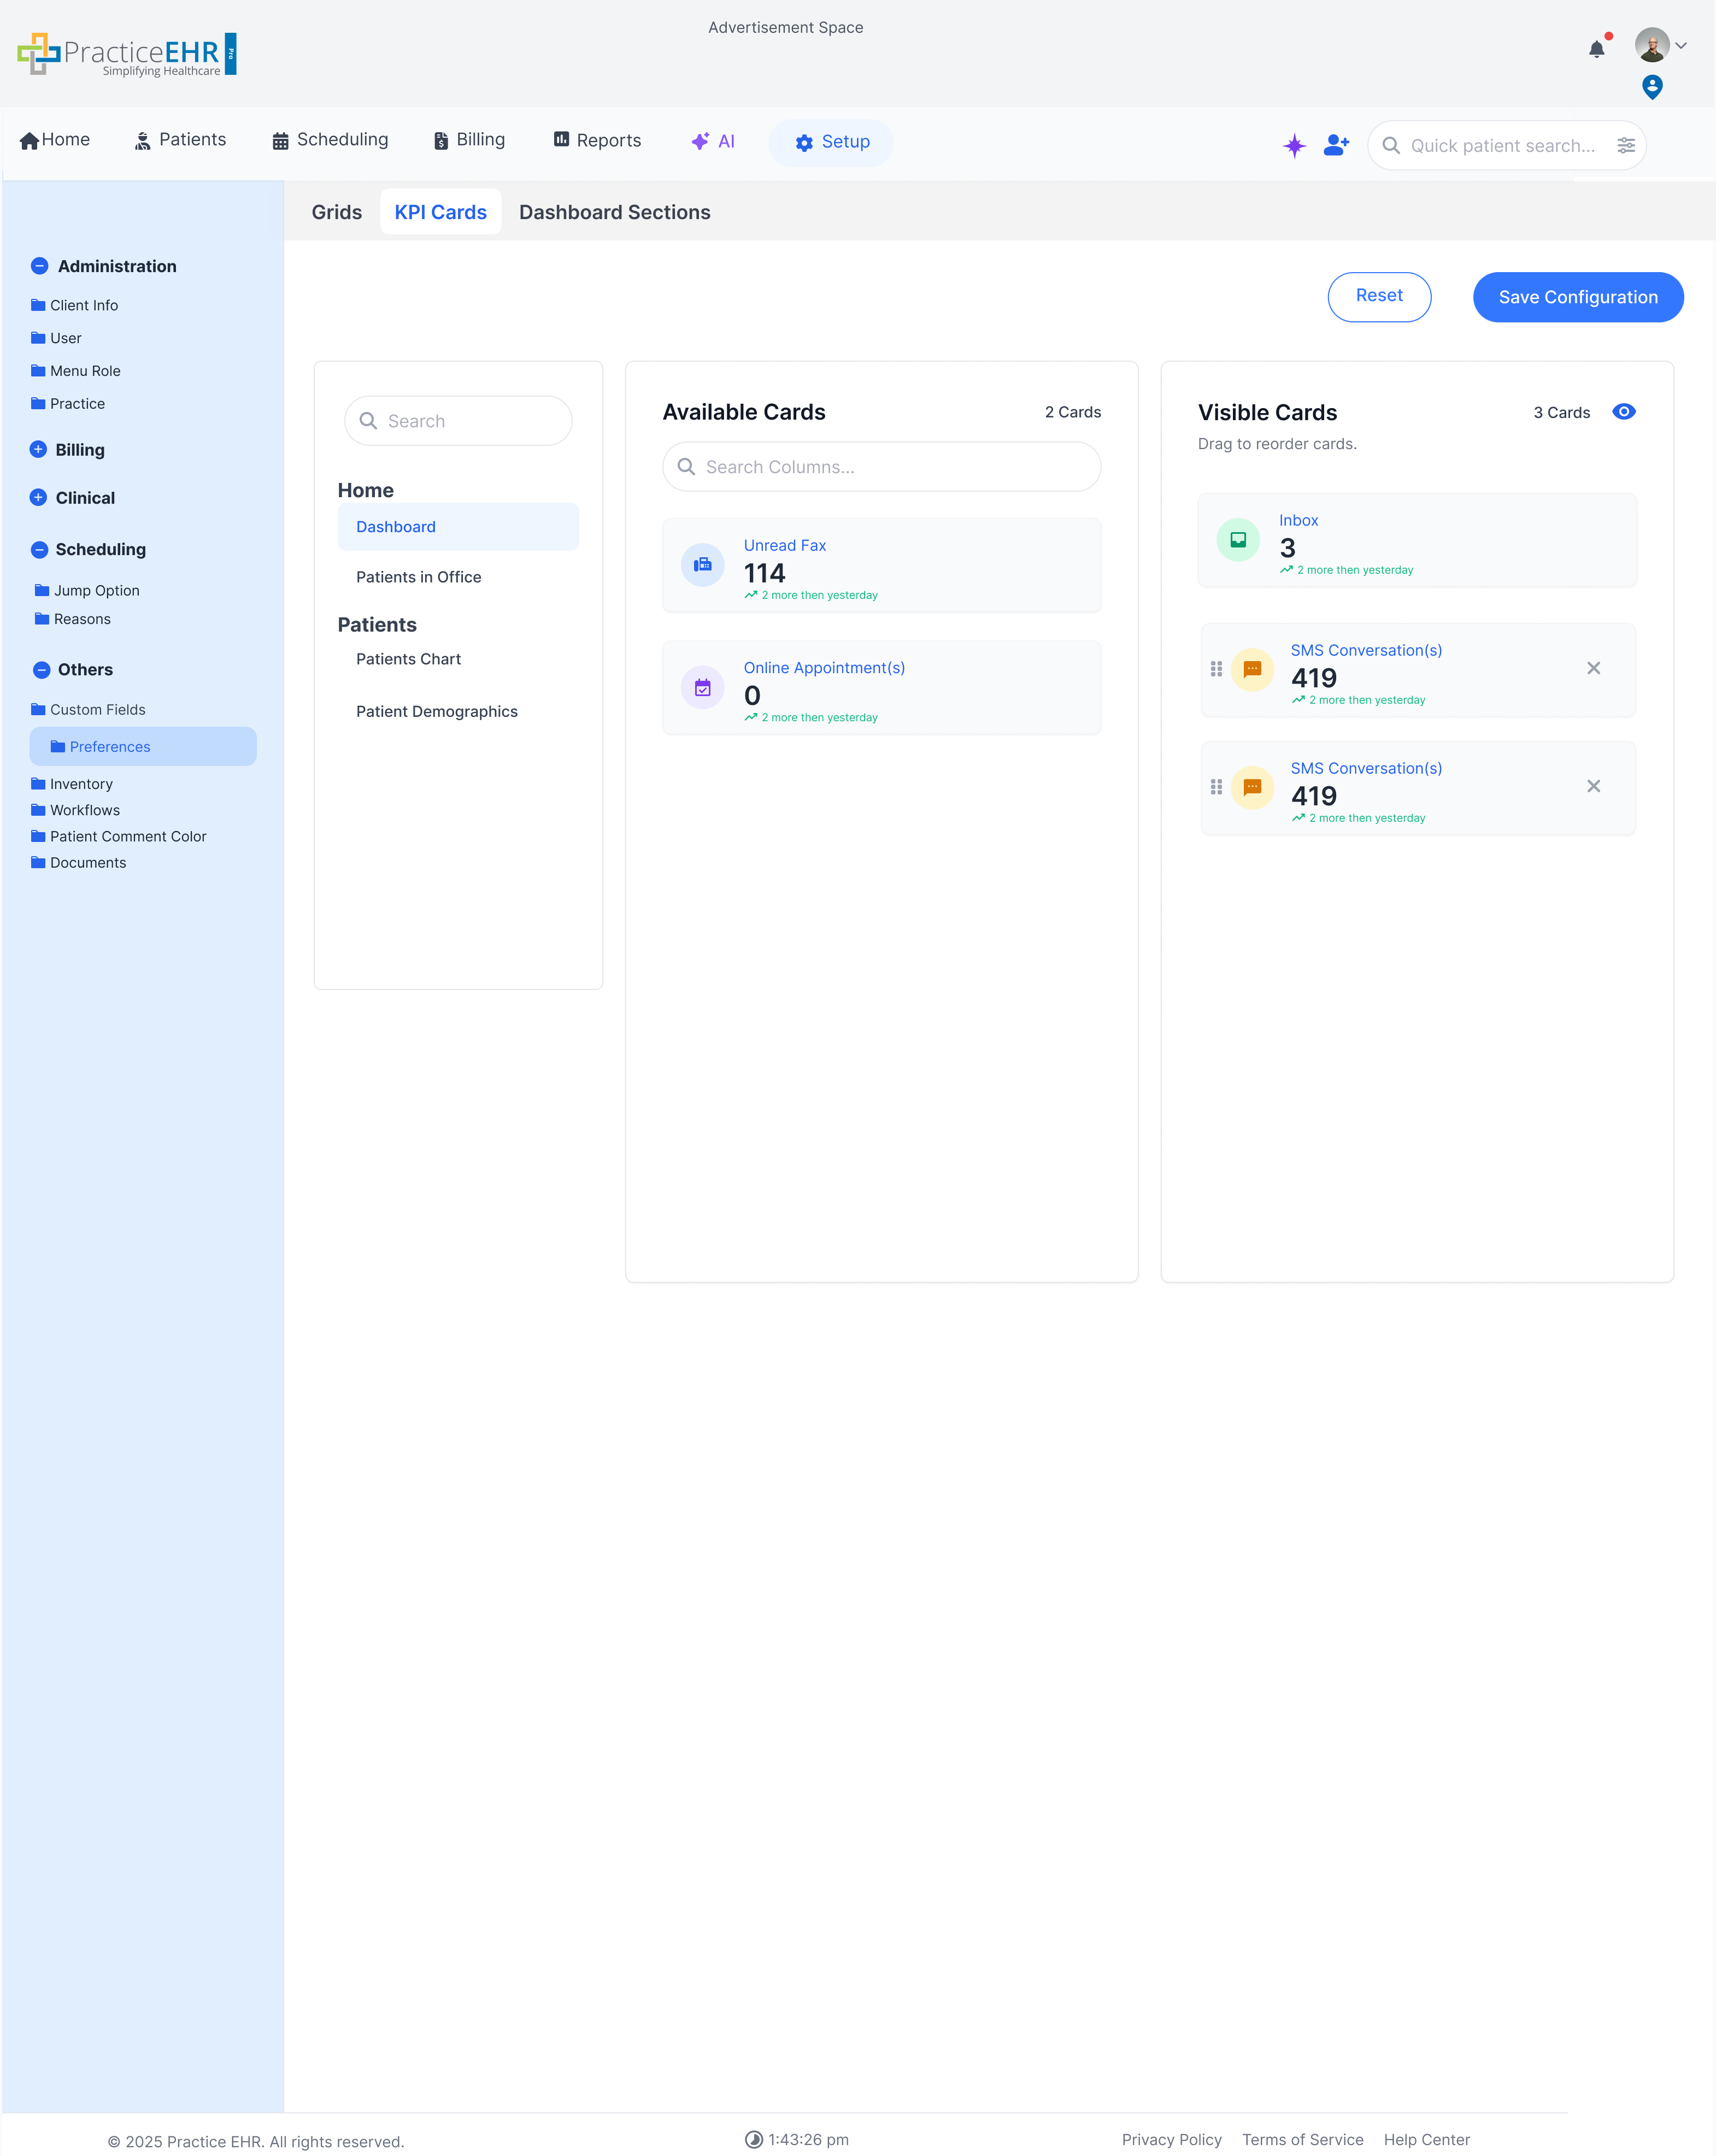
Search and Sidebar (1)
A sidebar container that has all the screens containing KPI cards
The user can select one screen to view that screen's Visible and Available
KPI cards
Available Cards Section (2)
Users can use the Available Cards section to see which cards they can
display on the selected screen
The number of available cards are displayed on the top right of the
section
A search bar is also added so that the users can search for specific cards
The Users can drag a card from the available cards section to the displayed
cards section in order to display that card on the screen
Displayed Cards Section (3)
The Displayed Cards Section shows what KPI cards are currently displayed on
the screen
The user can drag a card to change its position
Cards can be removed from the displayed section by dragging them back to the
available cards section OR by clicking on the X icon present
Cards without a X icon means they cannot be removed from the screen
Cards without a drag icon means that their position cannot be changed
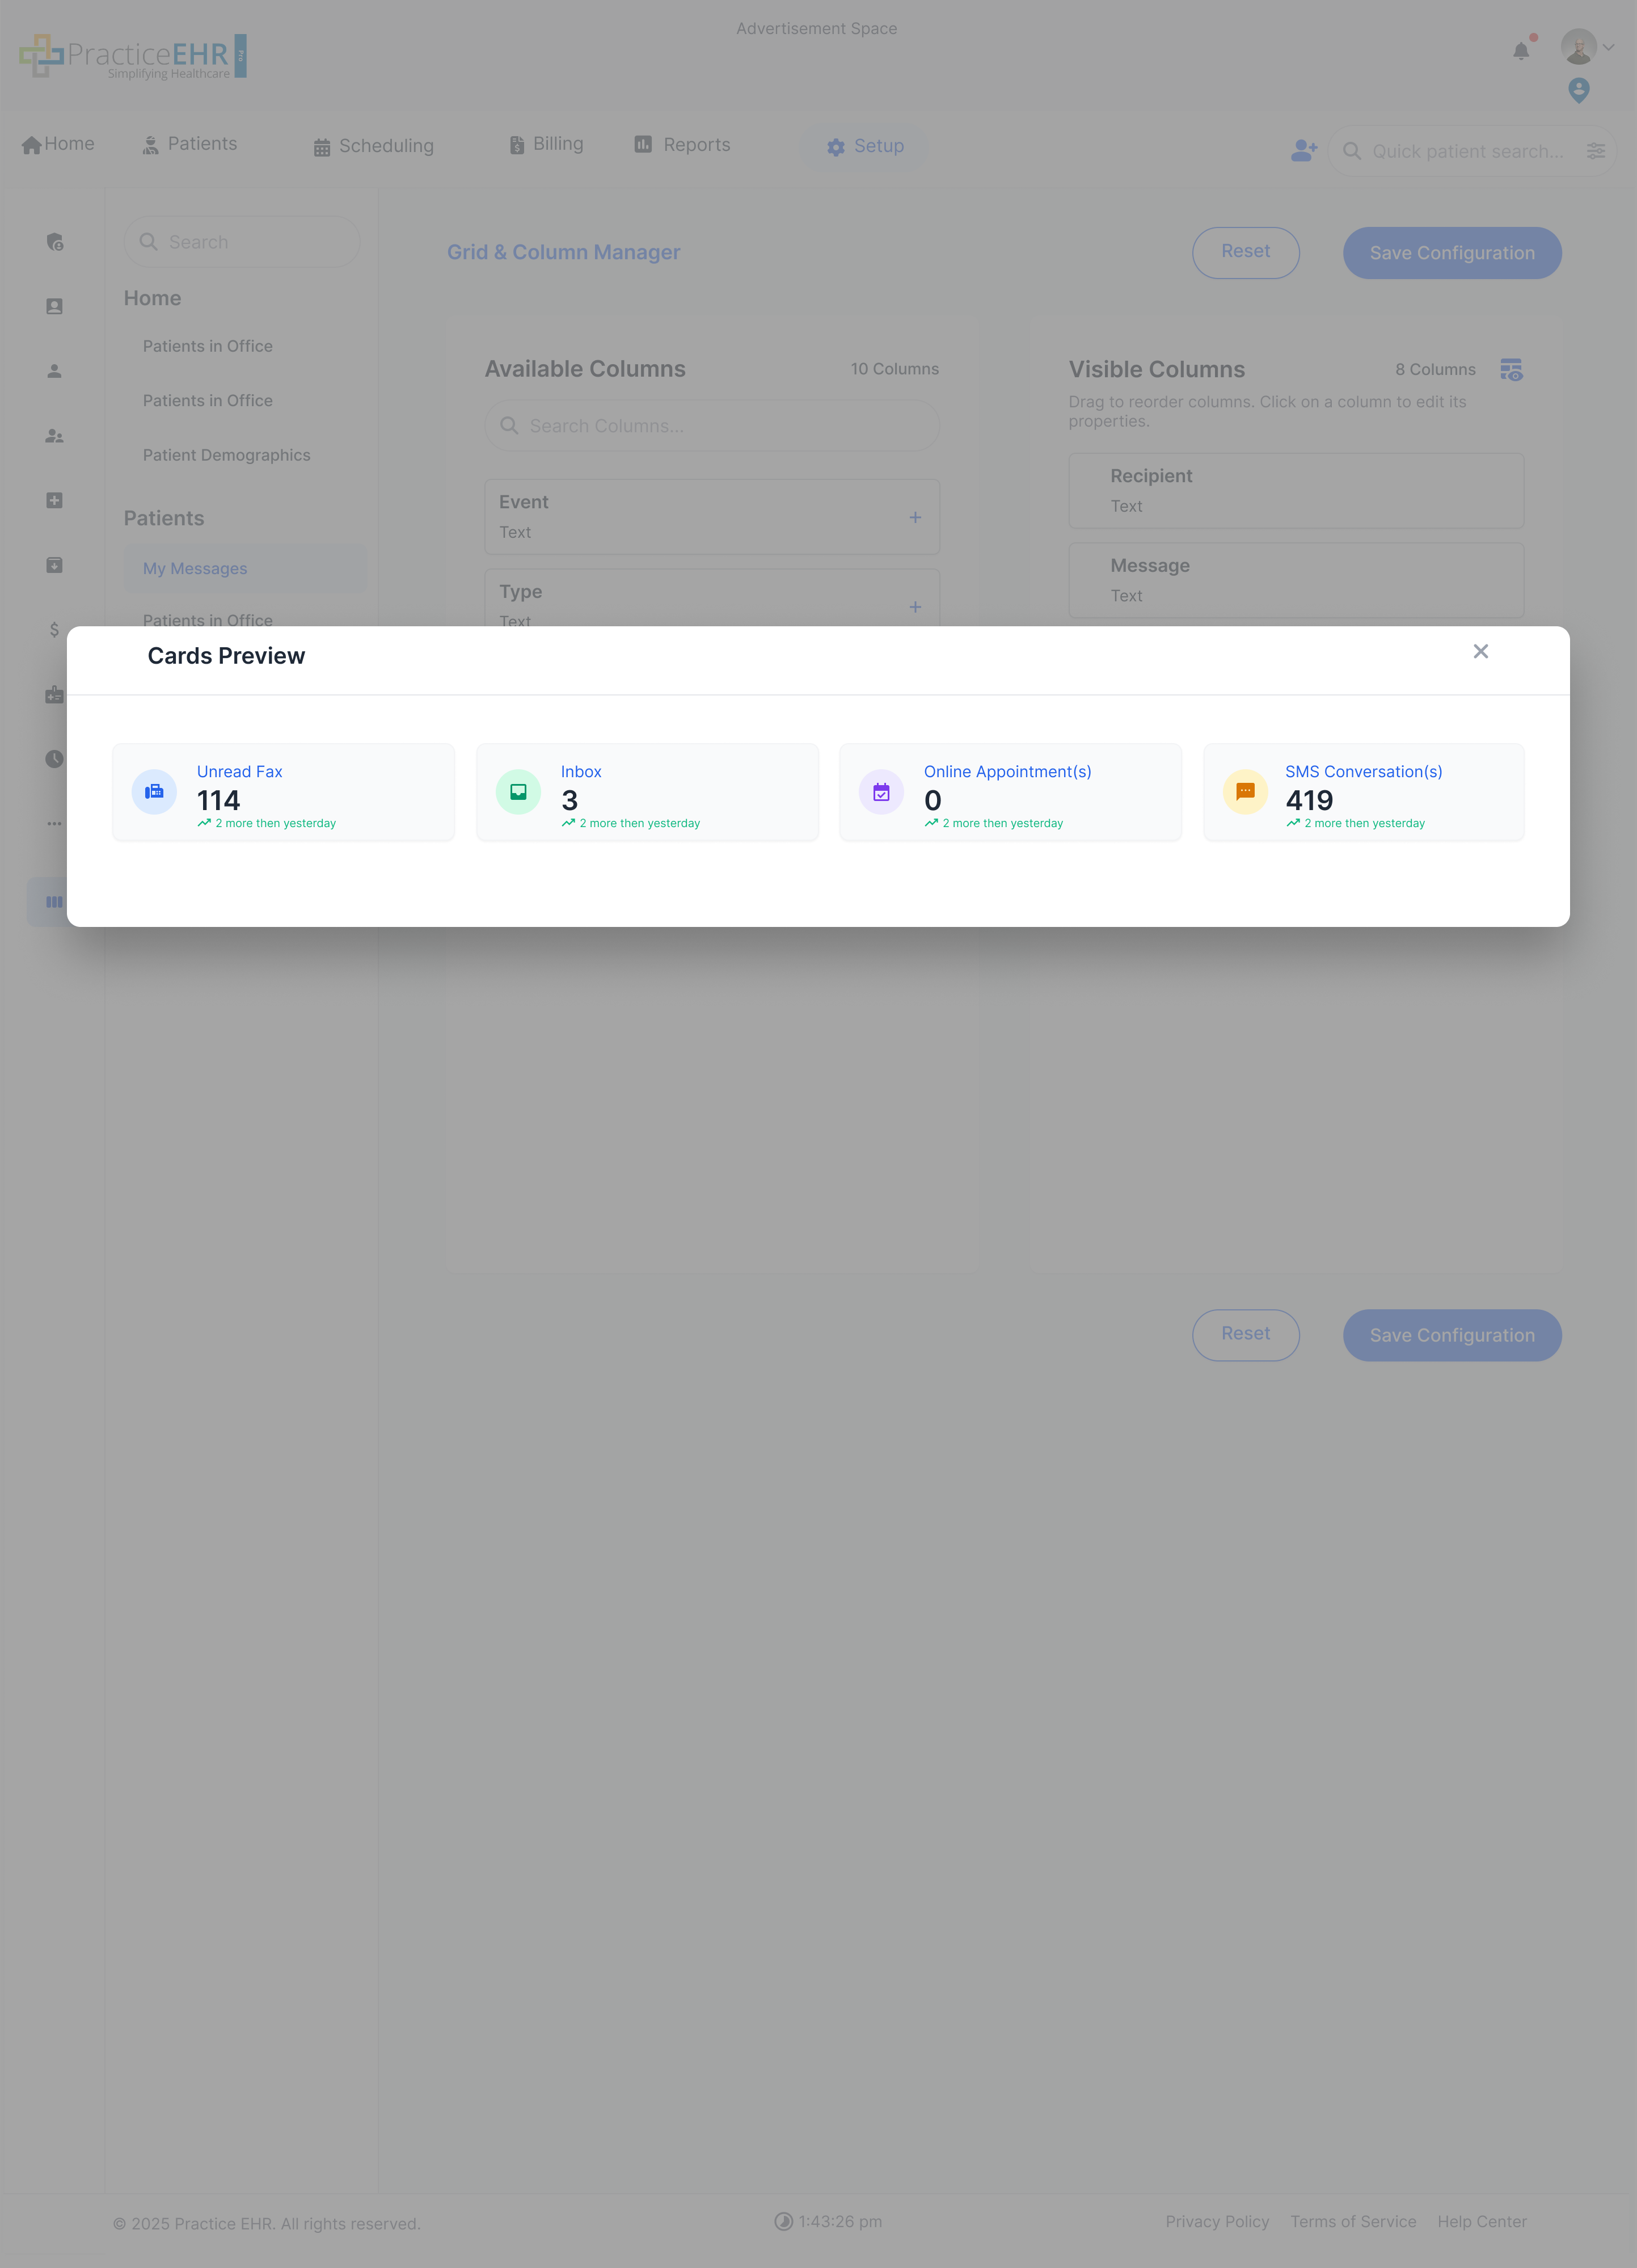
A preview icon is present at the top right of the section which shows a
preview of how the displayed cards will look
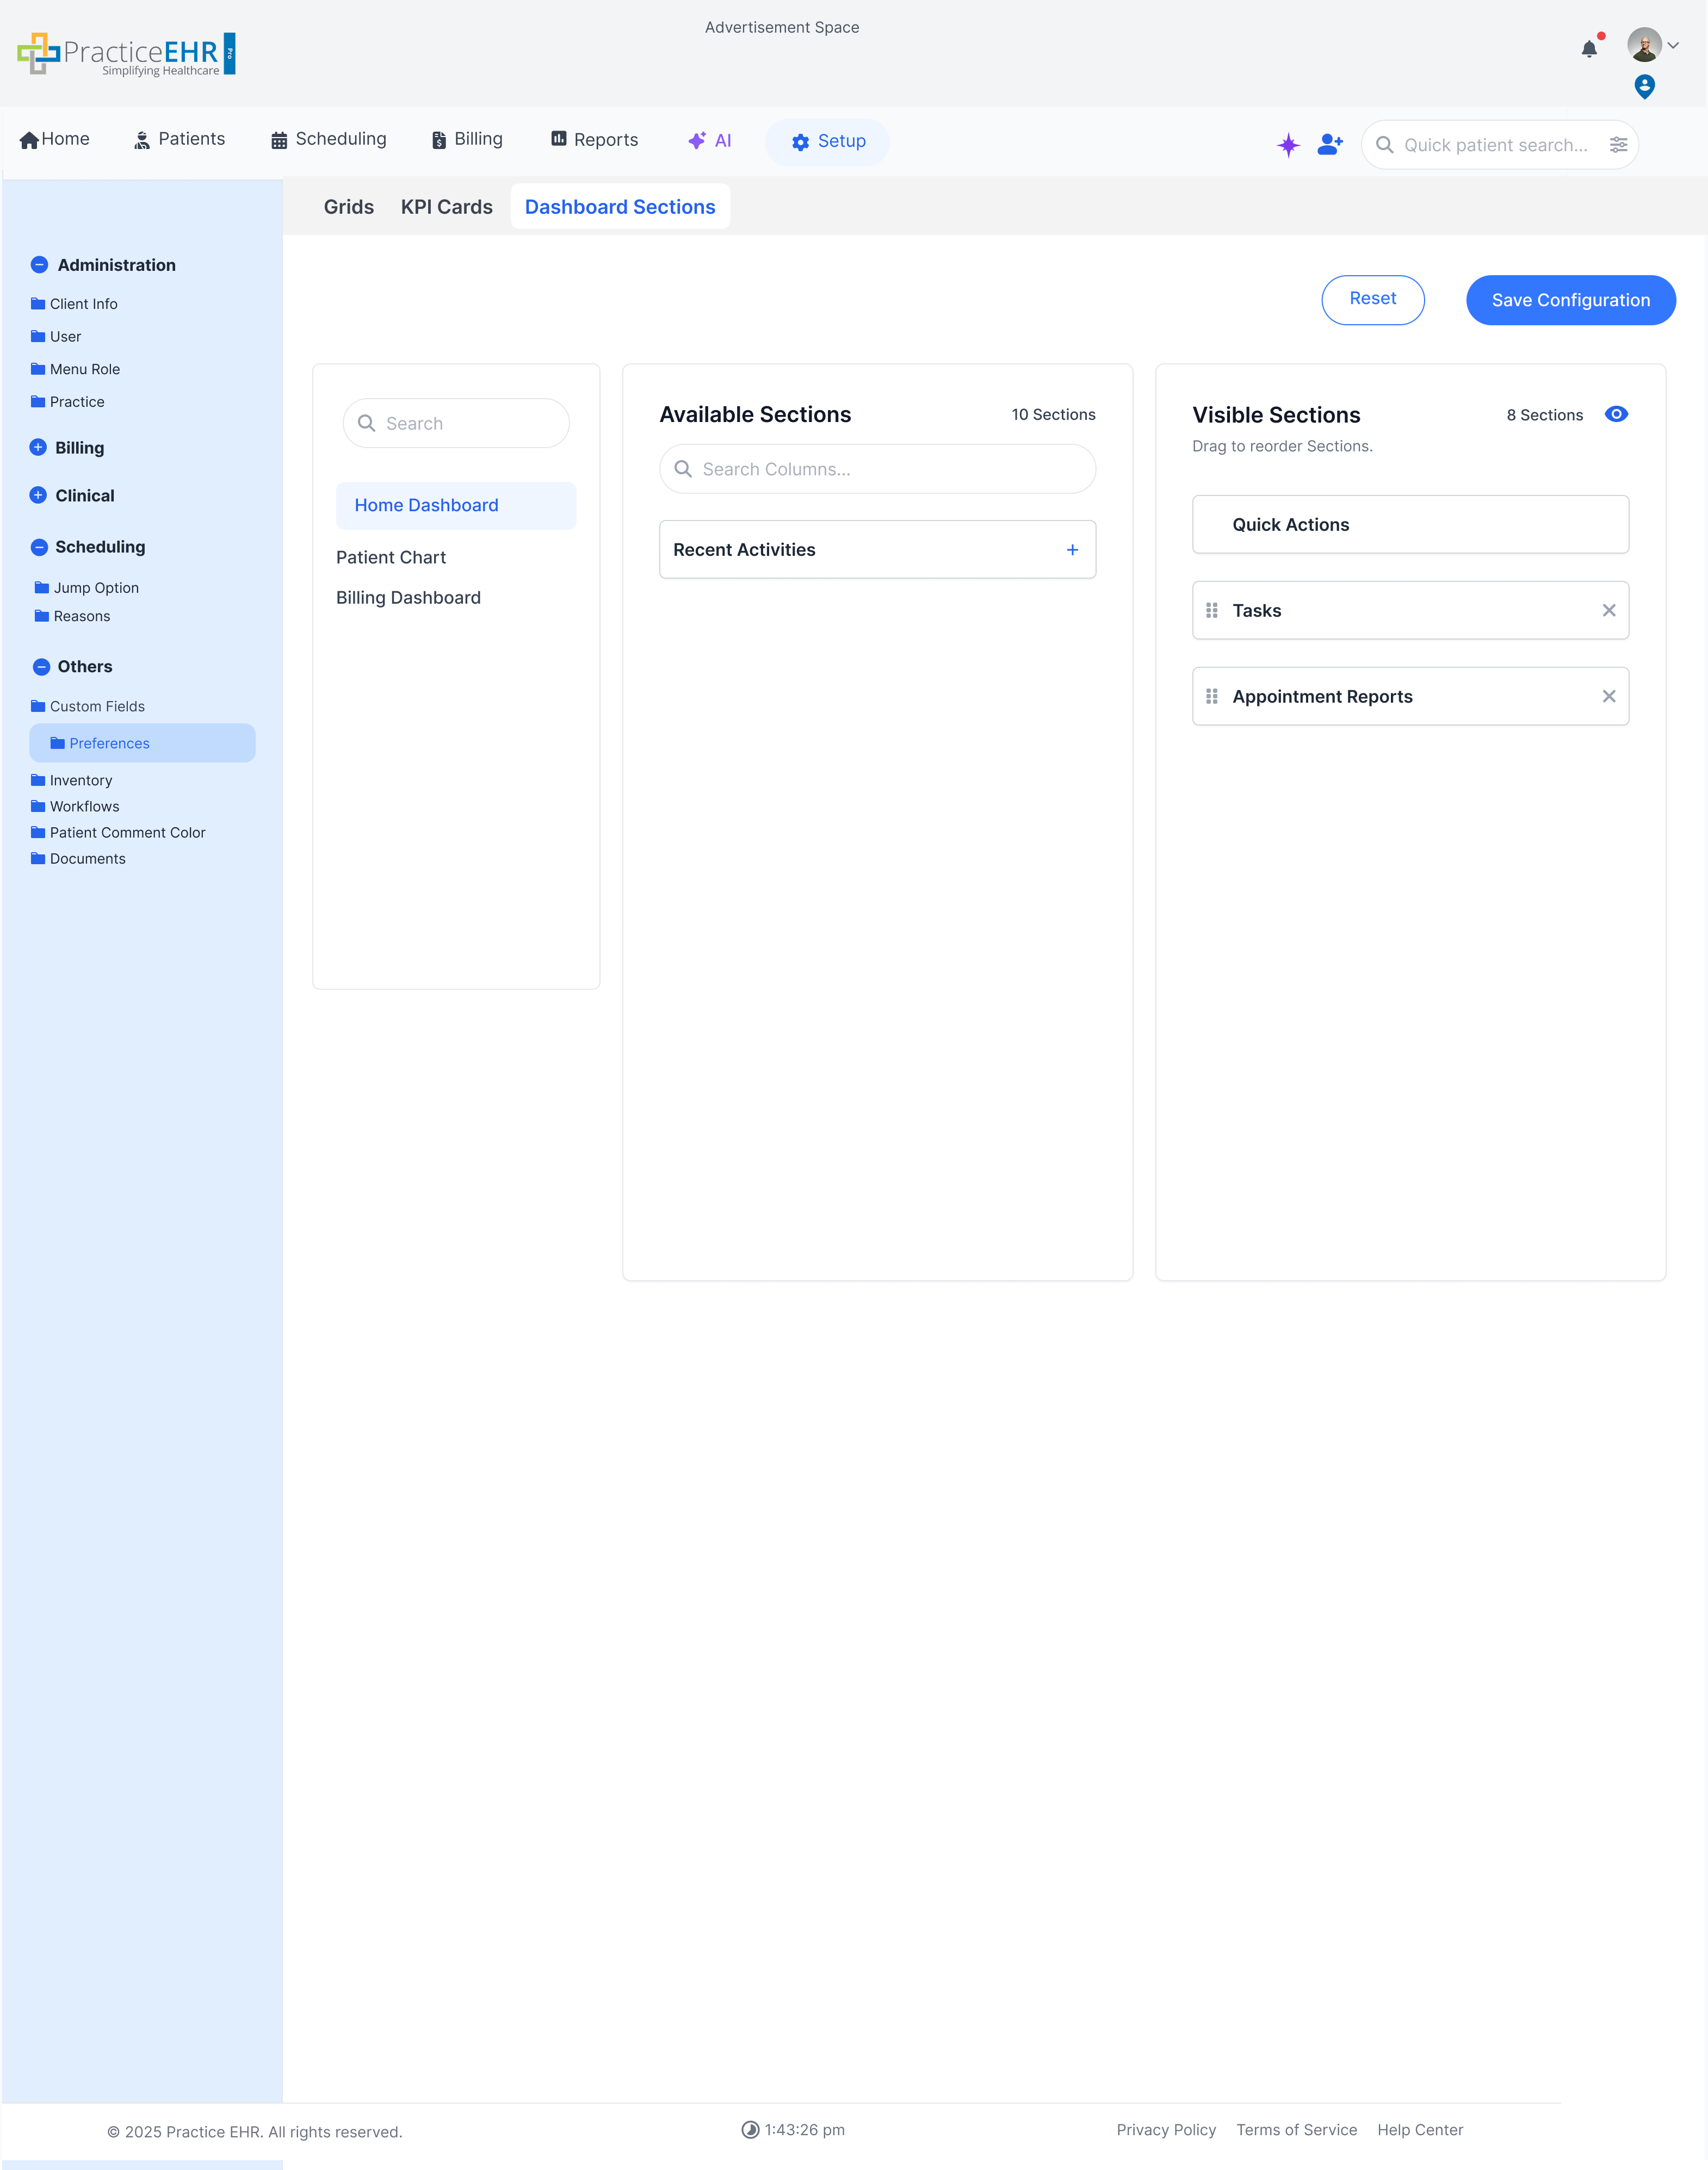
This section is for managing sections displayed on different
dashboard screens.
Sections Manager
Behavior
The behavior of Sections Manager is very similar to the Cards Manger
Search and Sidebar
A sidebar container that has all the Dashboards or screens that have similar
scections in a list.
The user can select one Screen to view that screen's Visible and Available
Sections.
Available Sections
Users can use the Available Sections section to see which sections they can
display on the selected screen
The number of available sections are displayed on the top right of the
section
A search bar is also added so that the users can search for specific cards
The Users can drag a column from the available sections section to the
displayed sections section in order to display that column on the screen
The user can also click on the plus icon present on each column card to add
it to the displayed sections section
Displayed sections
The Displayed sections Section shows what sections are currently displayed
on the screen
The user can drag a column to change its position
sections can be removed from the displayed section by dragging them back to
the available sections section OR by clicking on the X icon present
sections without a X icon means they cannot be removed from the screen
sections without a drag icon means that their position cannot be changed
A preview icon is present at the top right of the section which shows a
preview of how the screen will look with the mentioned Sections
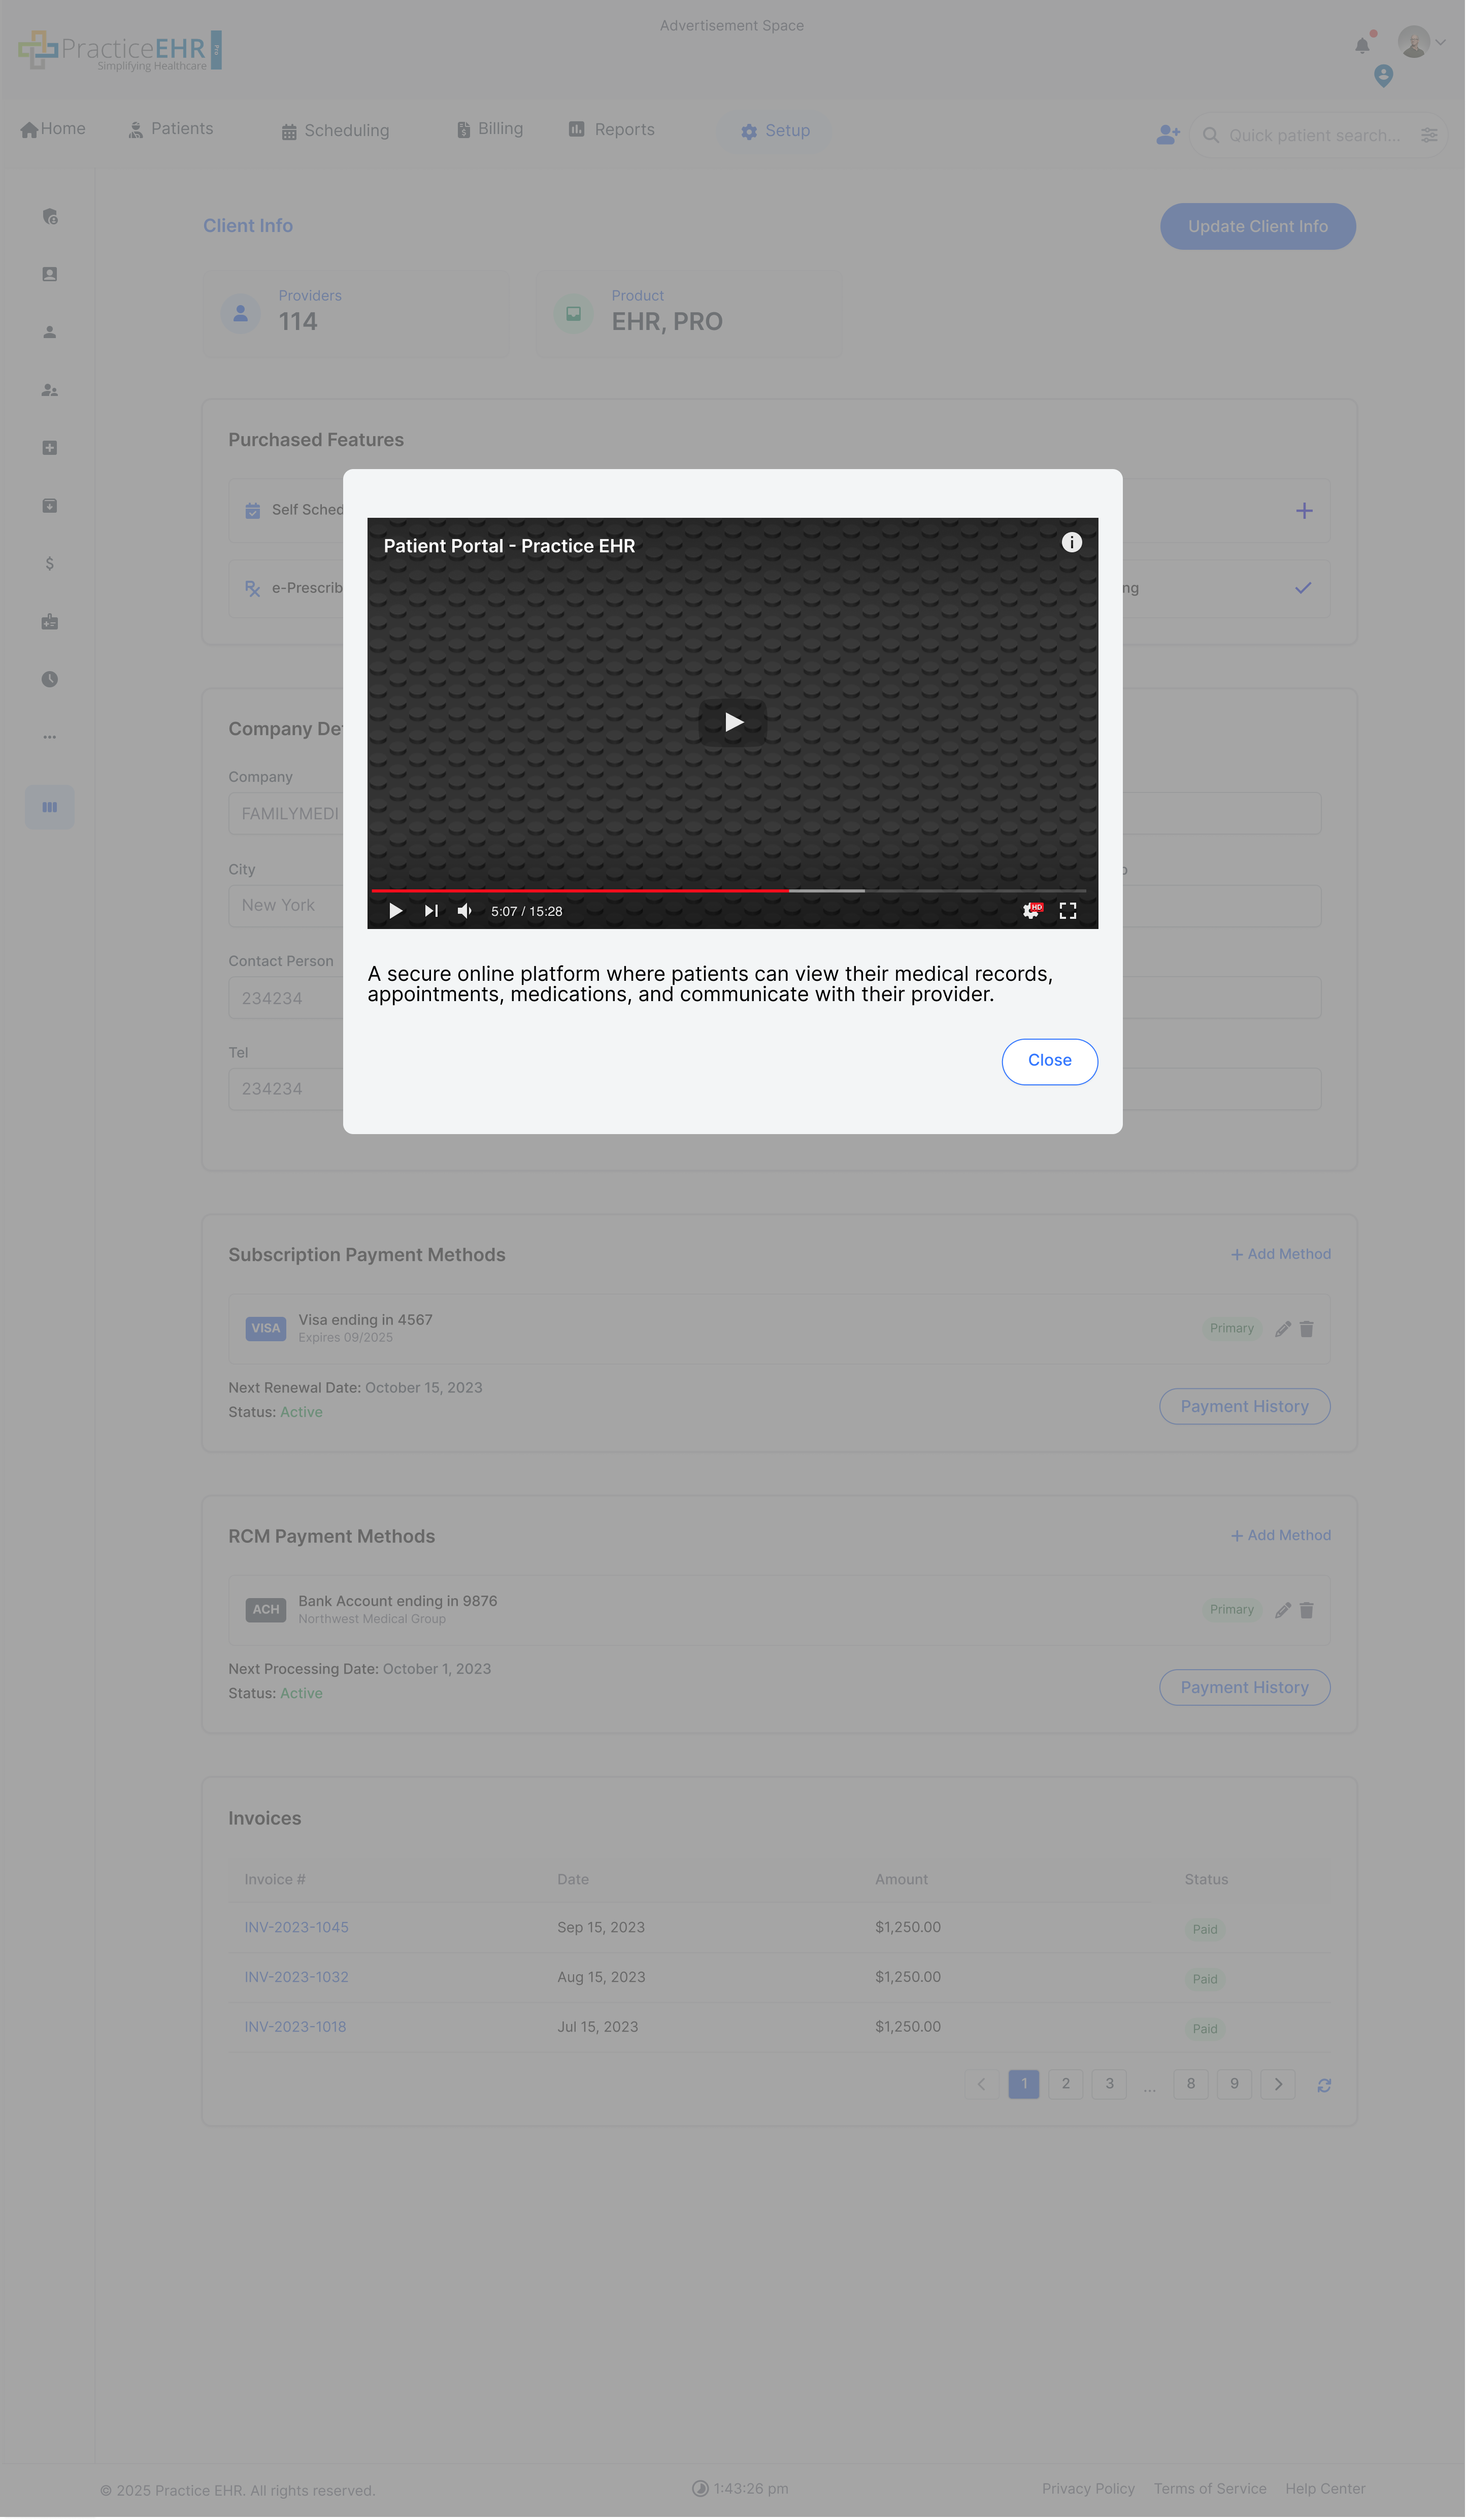
Client Info
Setup / Administration
When the user clicks on the Client Info option present in the
administration folder of the sidebar
Purchased Features (1)
Shows the list of features of PEHR.
The features with a checkmark (tick) next to them show that these are purchased
features
Features with a plus icon next to them show that these features can be purchased
Clicking on the plus icon sends a message to the support portal in order to provide
the selected feature to the user
On Hover Tooltip (2)
Hovering on a specific feature shows a tooltip with basic information about that
feature
Clicking on a feature shows a modal with a video demonstration and more information
about the feature
Field Warning Tooltip (3)
A field warning tooltip appears when a user tries to update without filling out a
mandatory field.
Payment History (4)
Payment History Buttons have been added to Subscription Payment and RCM Payment
Methods, these show the past payment history in a modal
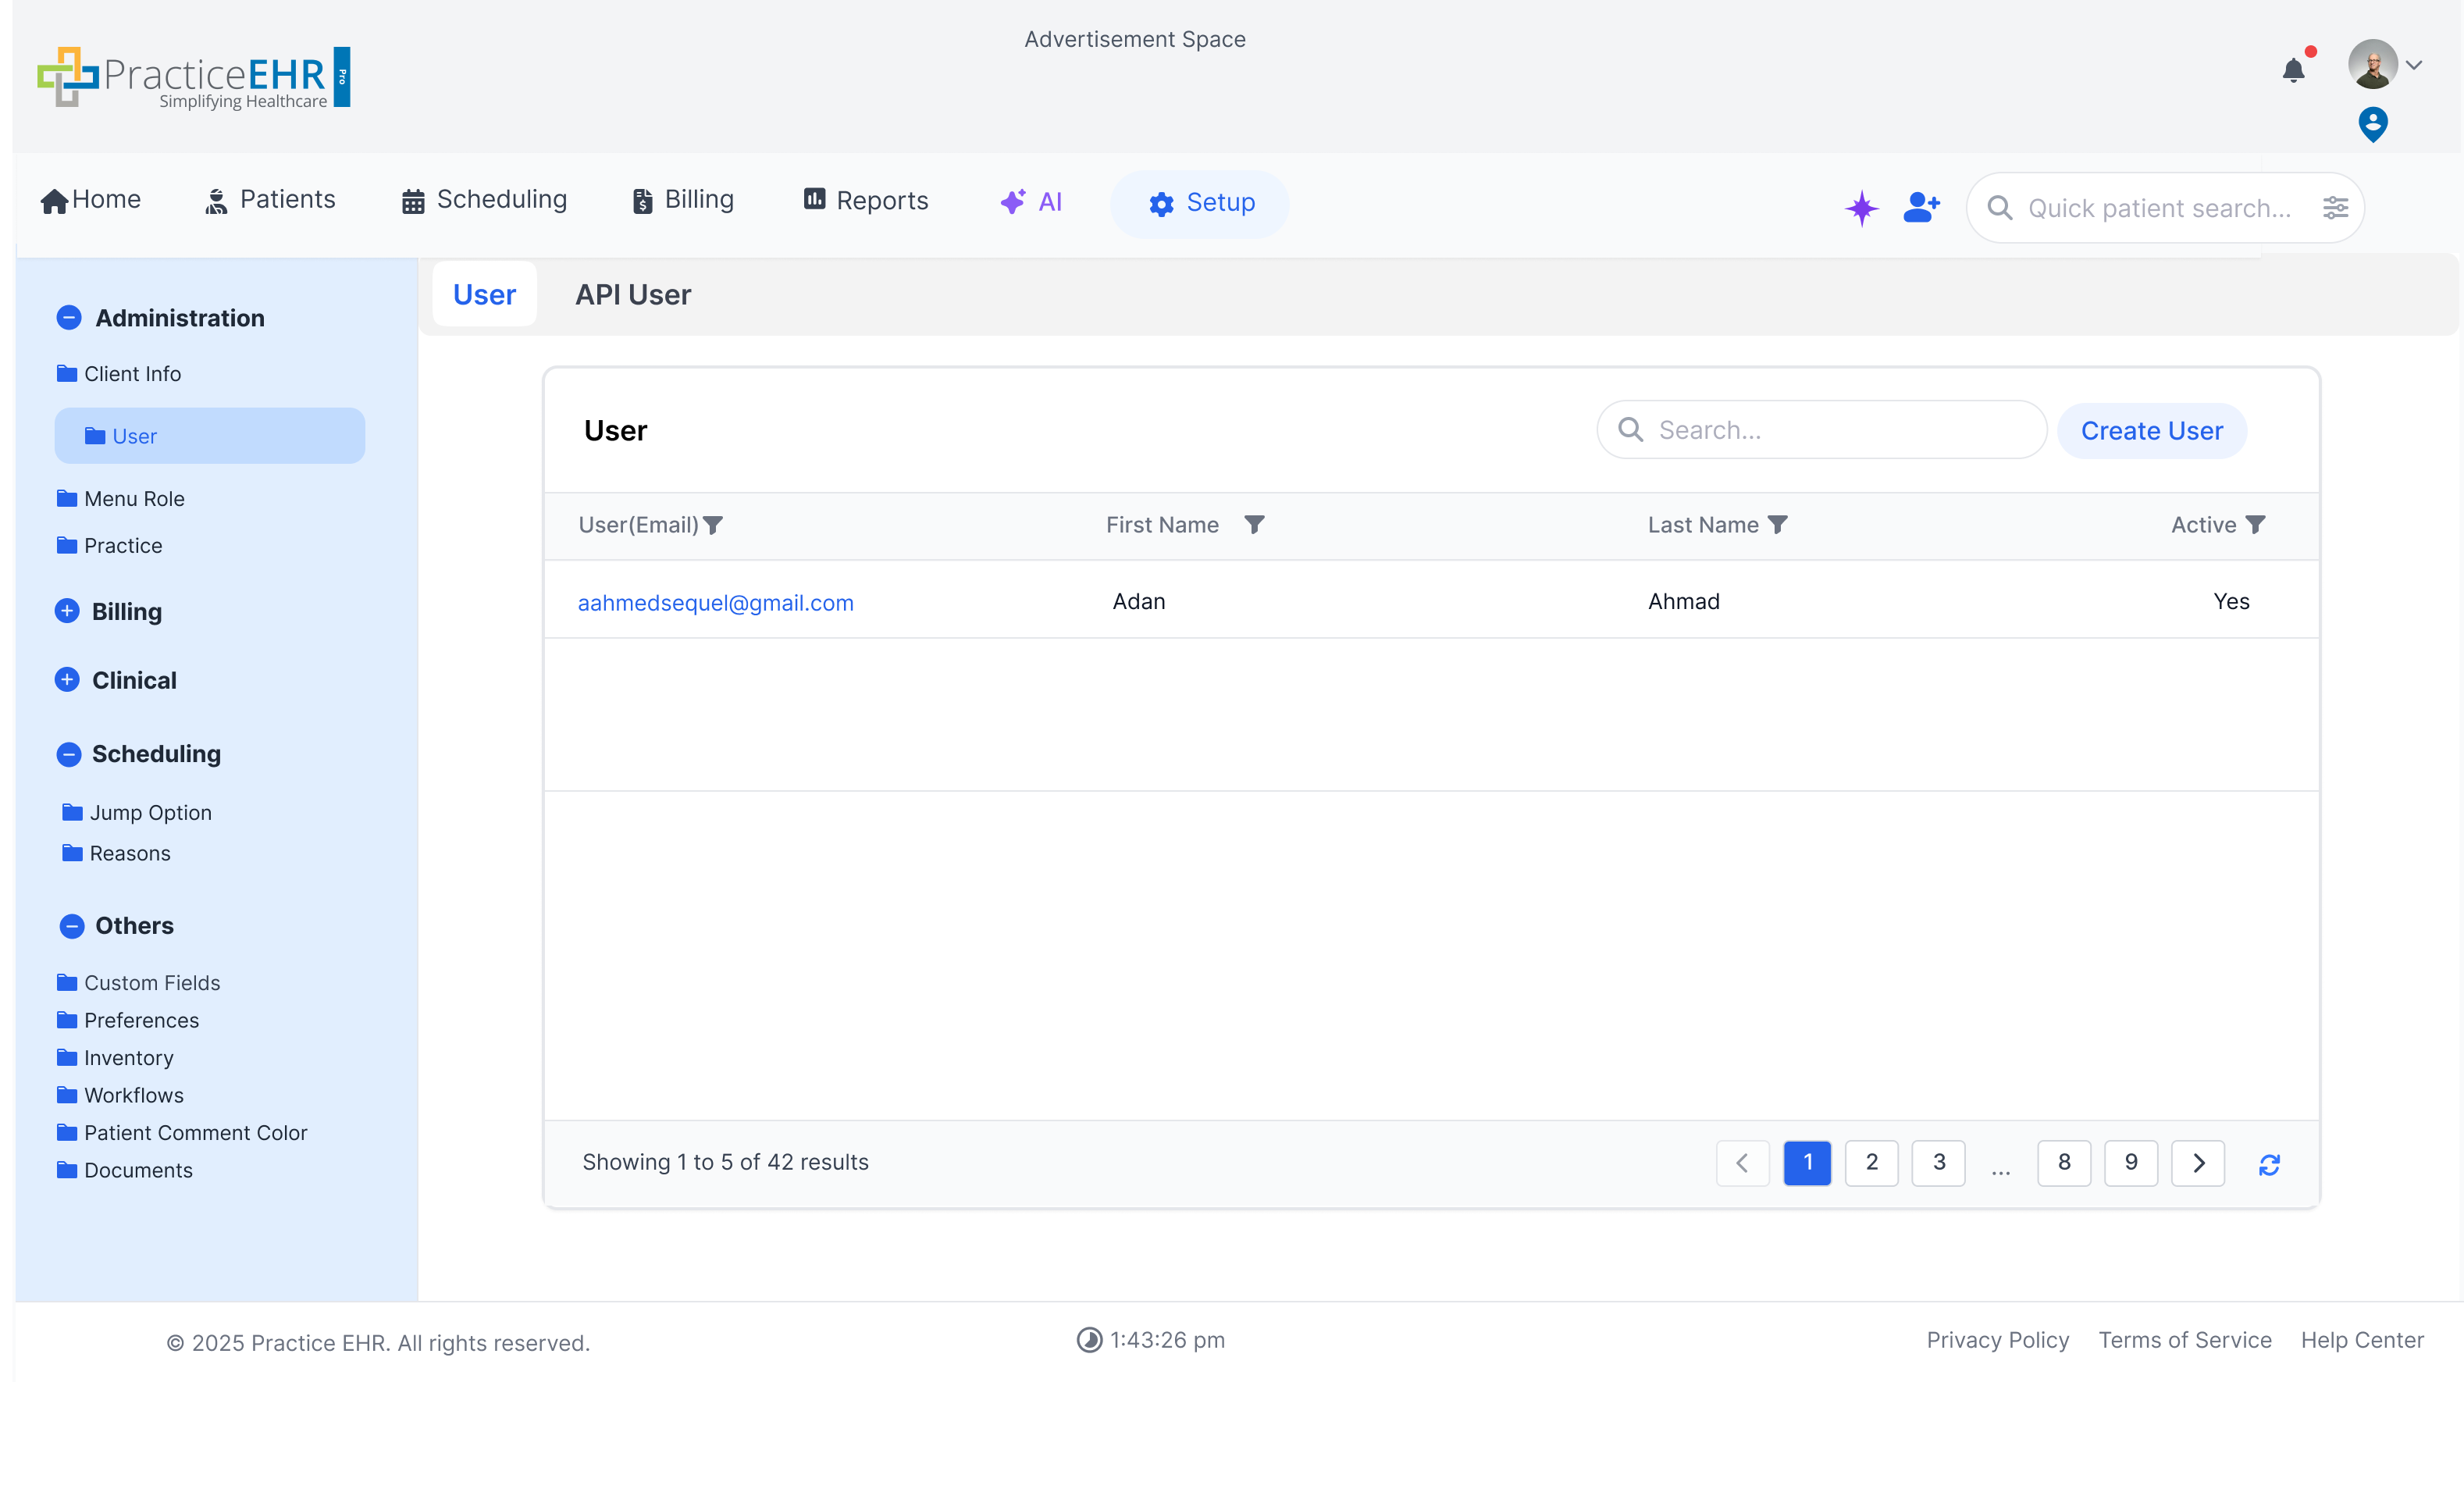
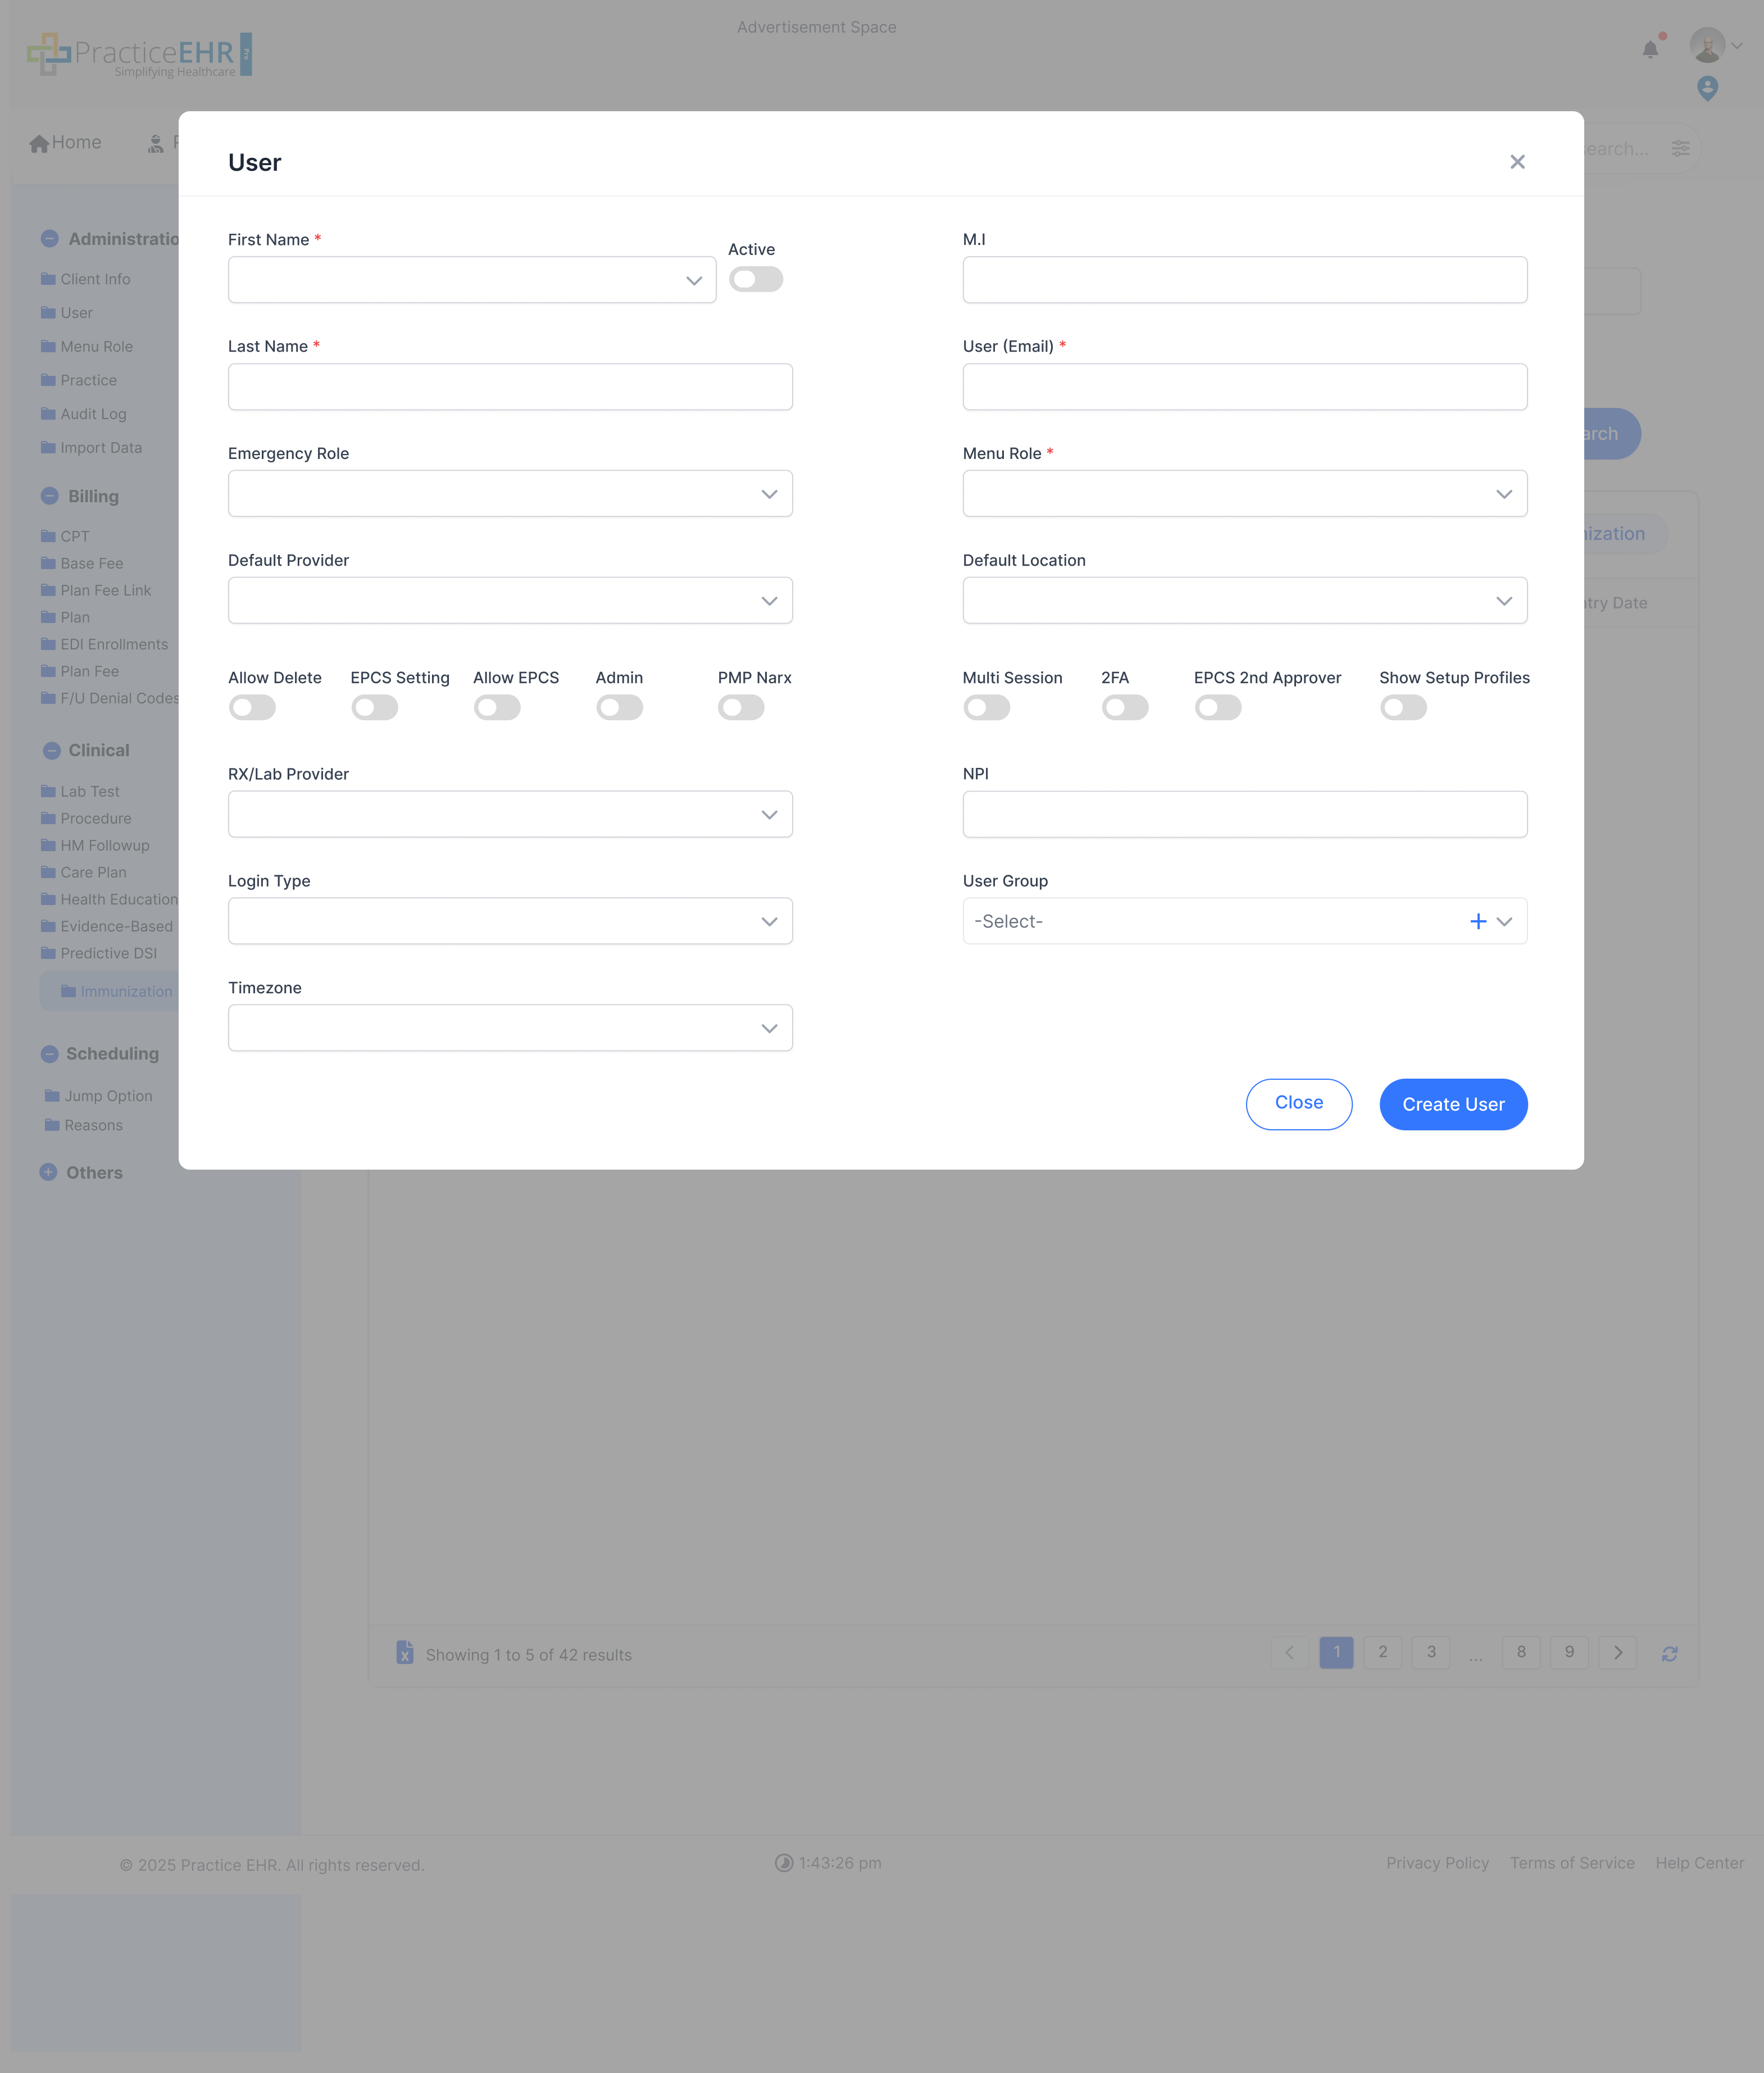
User
Setup / Administration
This section allows administrators to manage user accounts. Users can be
created, edited, or deactivated from this screen.
User Management
Displays a grid of all users, including their email, first name, last name, and
active status.
Use the "Create User" button to add a new user to the system.
The grid includes search and filter controls in each column header for easy
lookup.
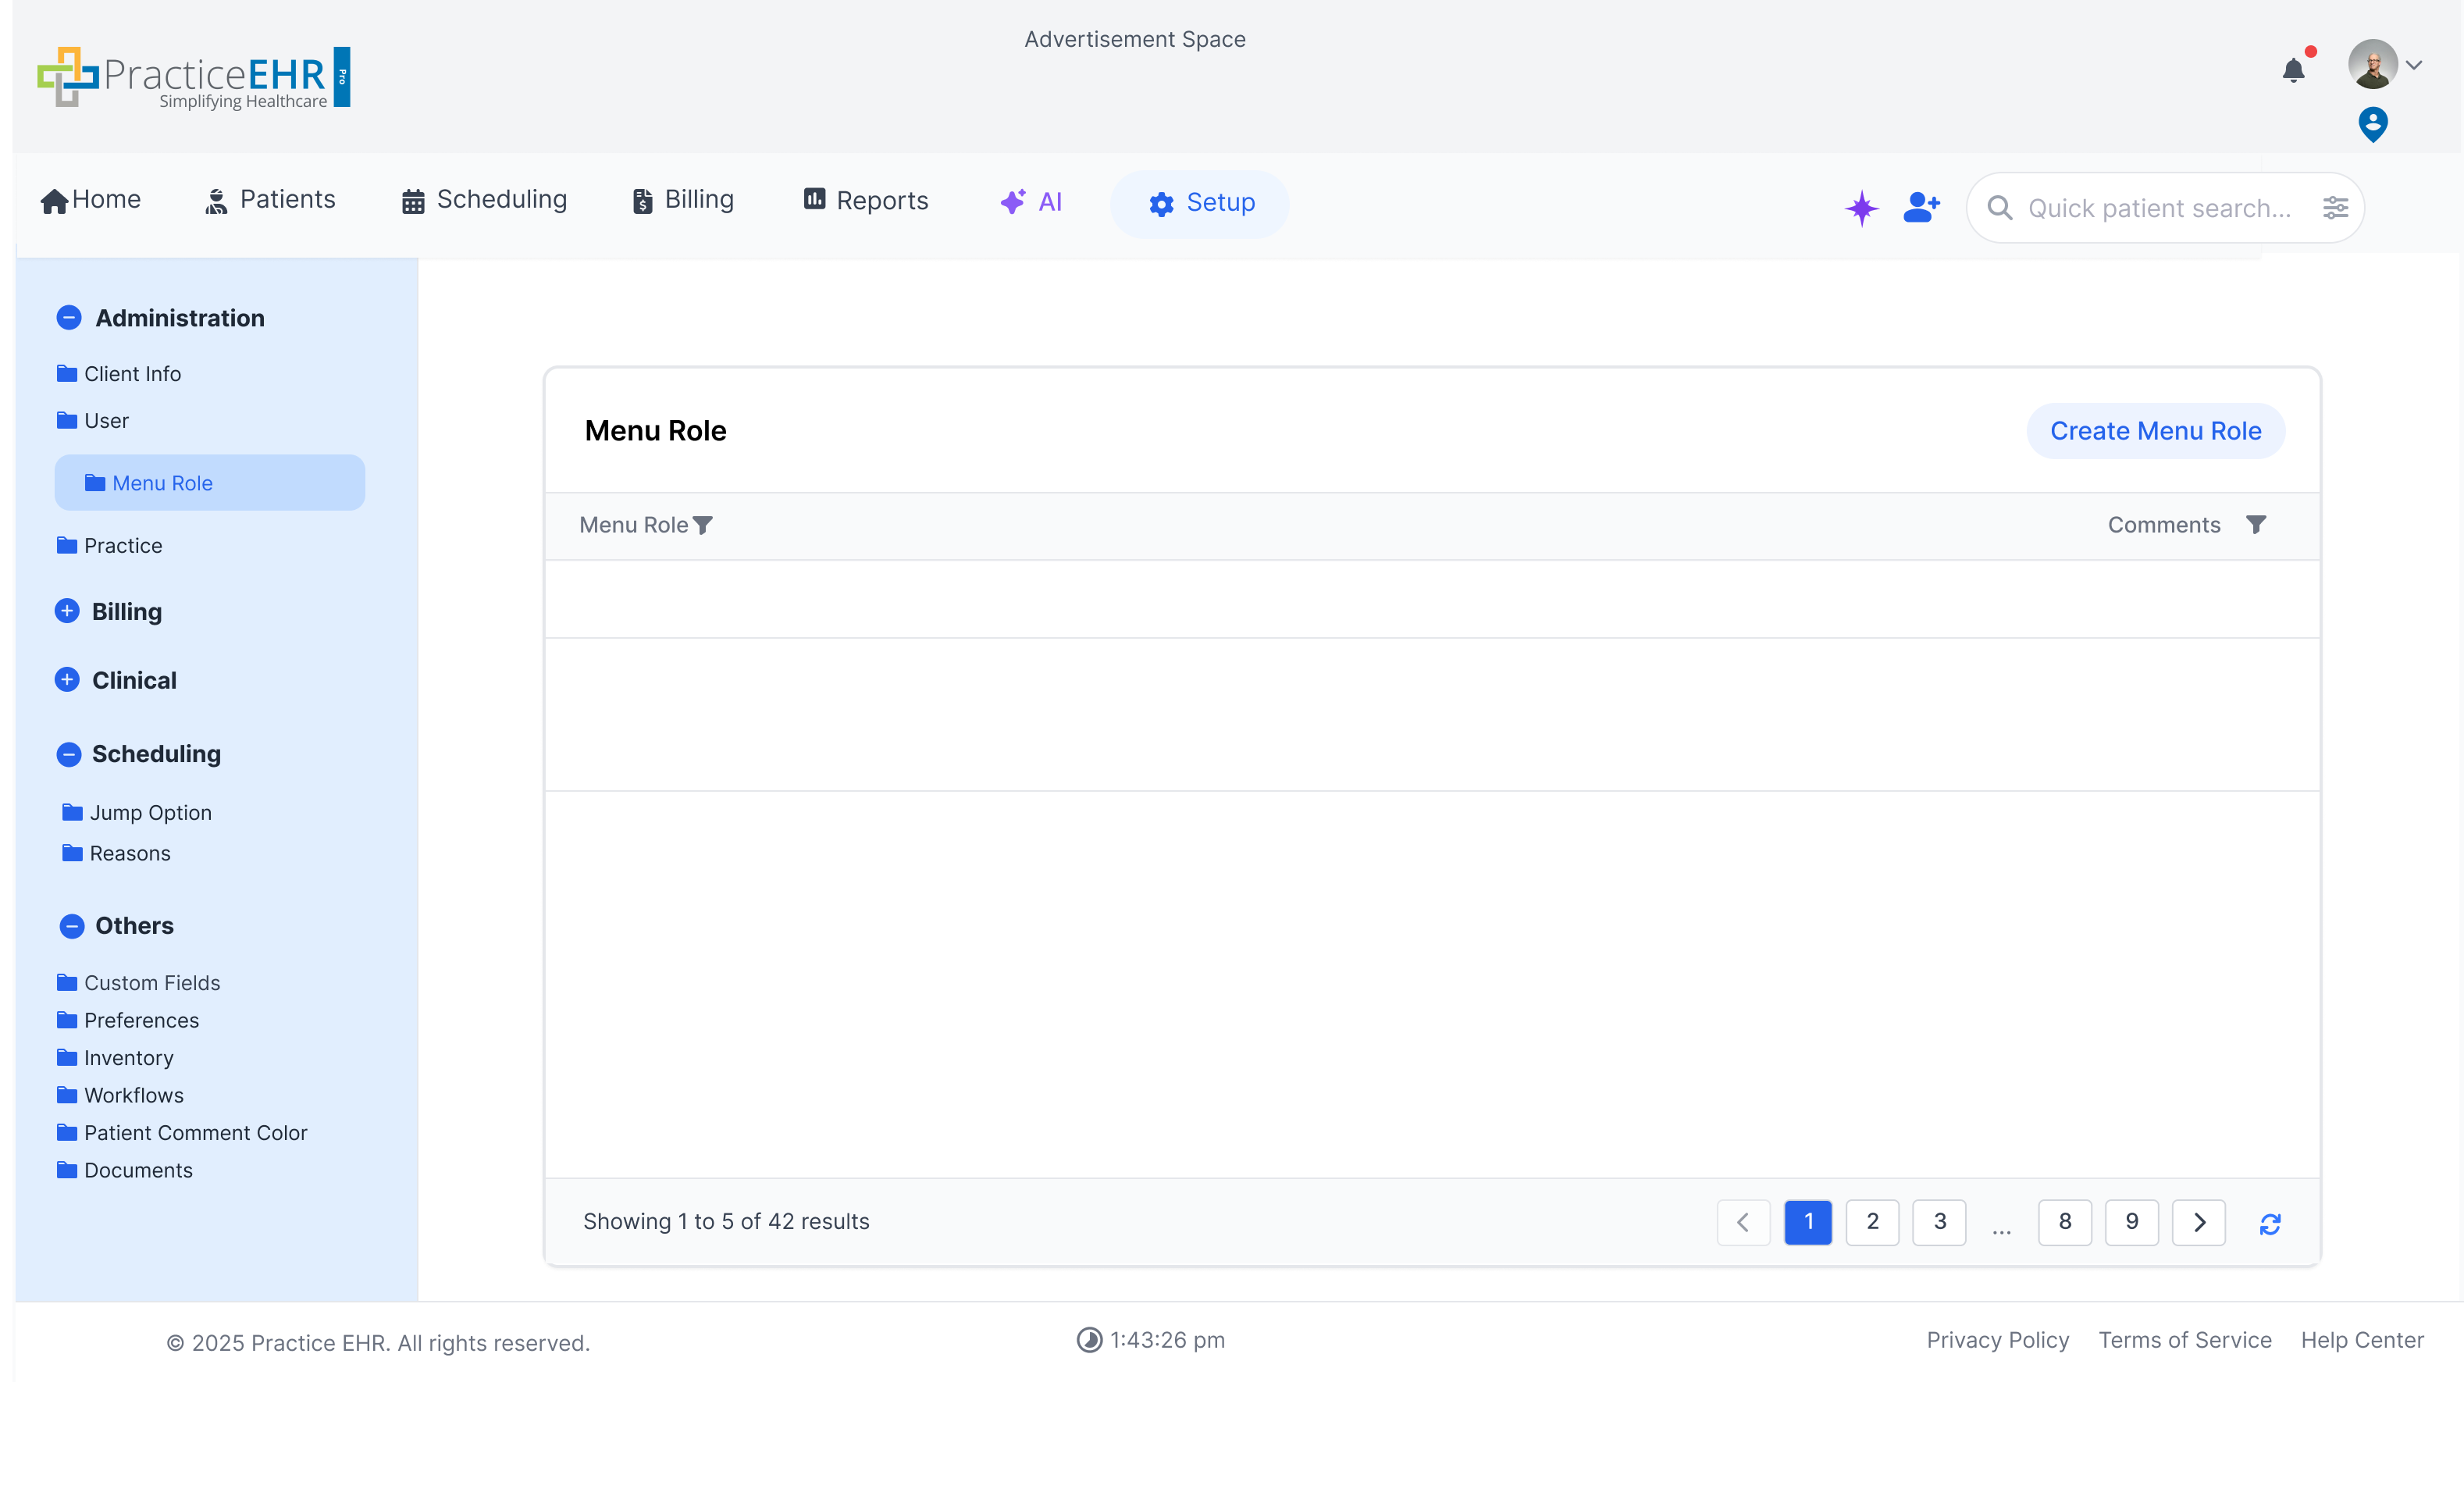
Menu Role
Setup / Administration
Configure menu roles to define access permissions and visibility of
different modules for various user groups.
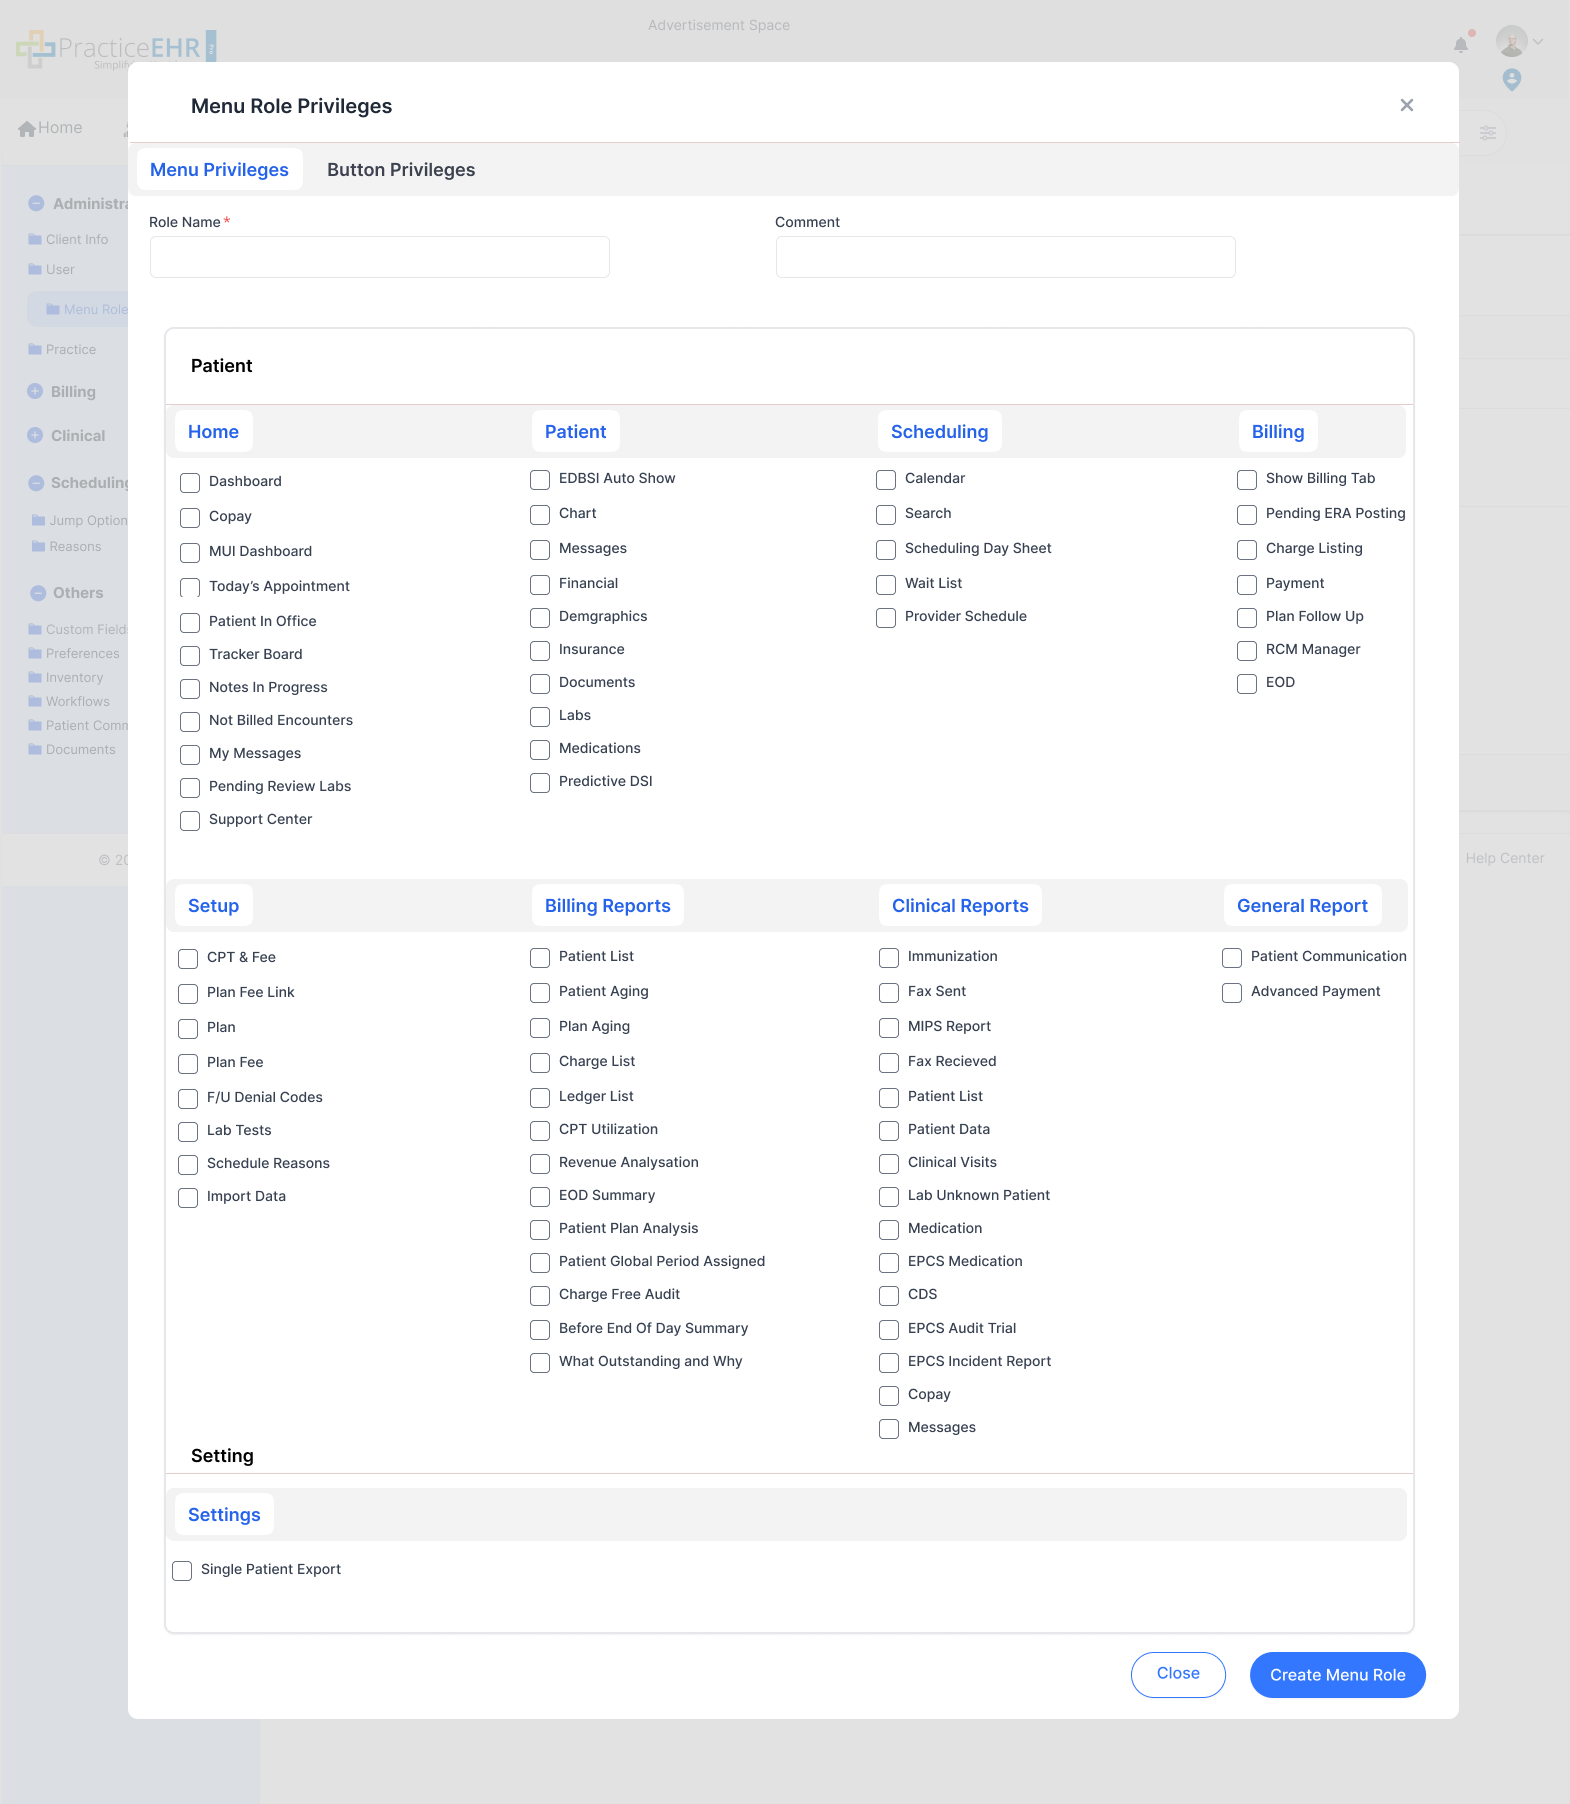
Role Configuration
Lists all available menu roles.
Click "Create Menu Role" to define a new set of permissions.
This screen is critical for controlling what different types of users (e.g., front
desk, provider, biller) can see and do within the application.
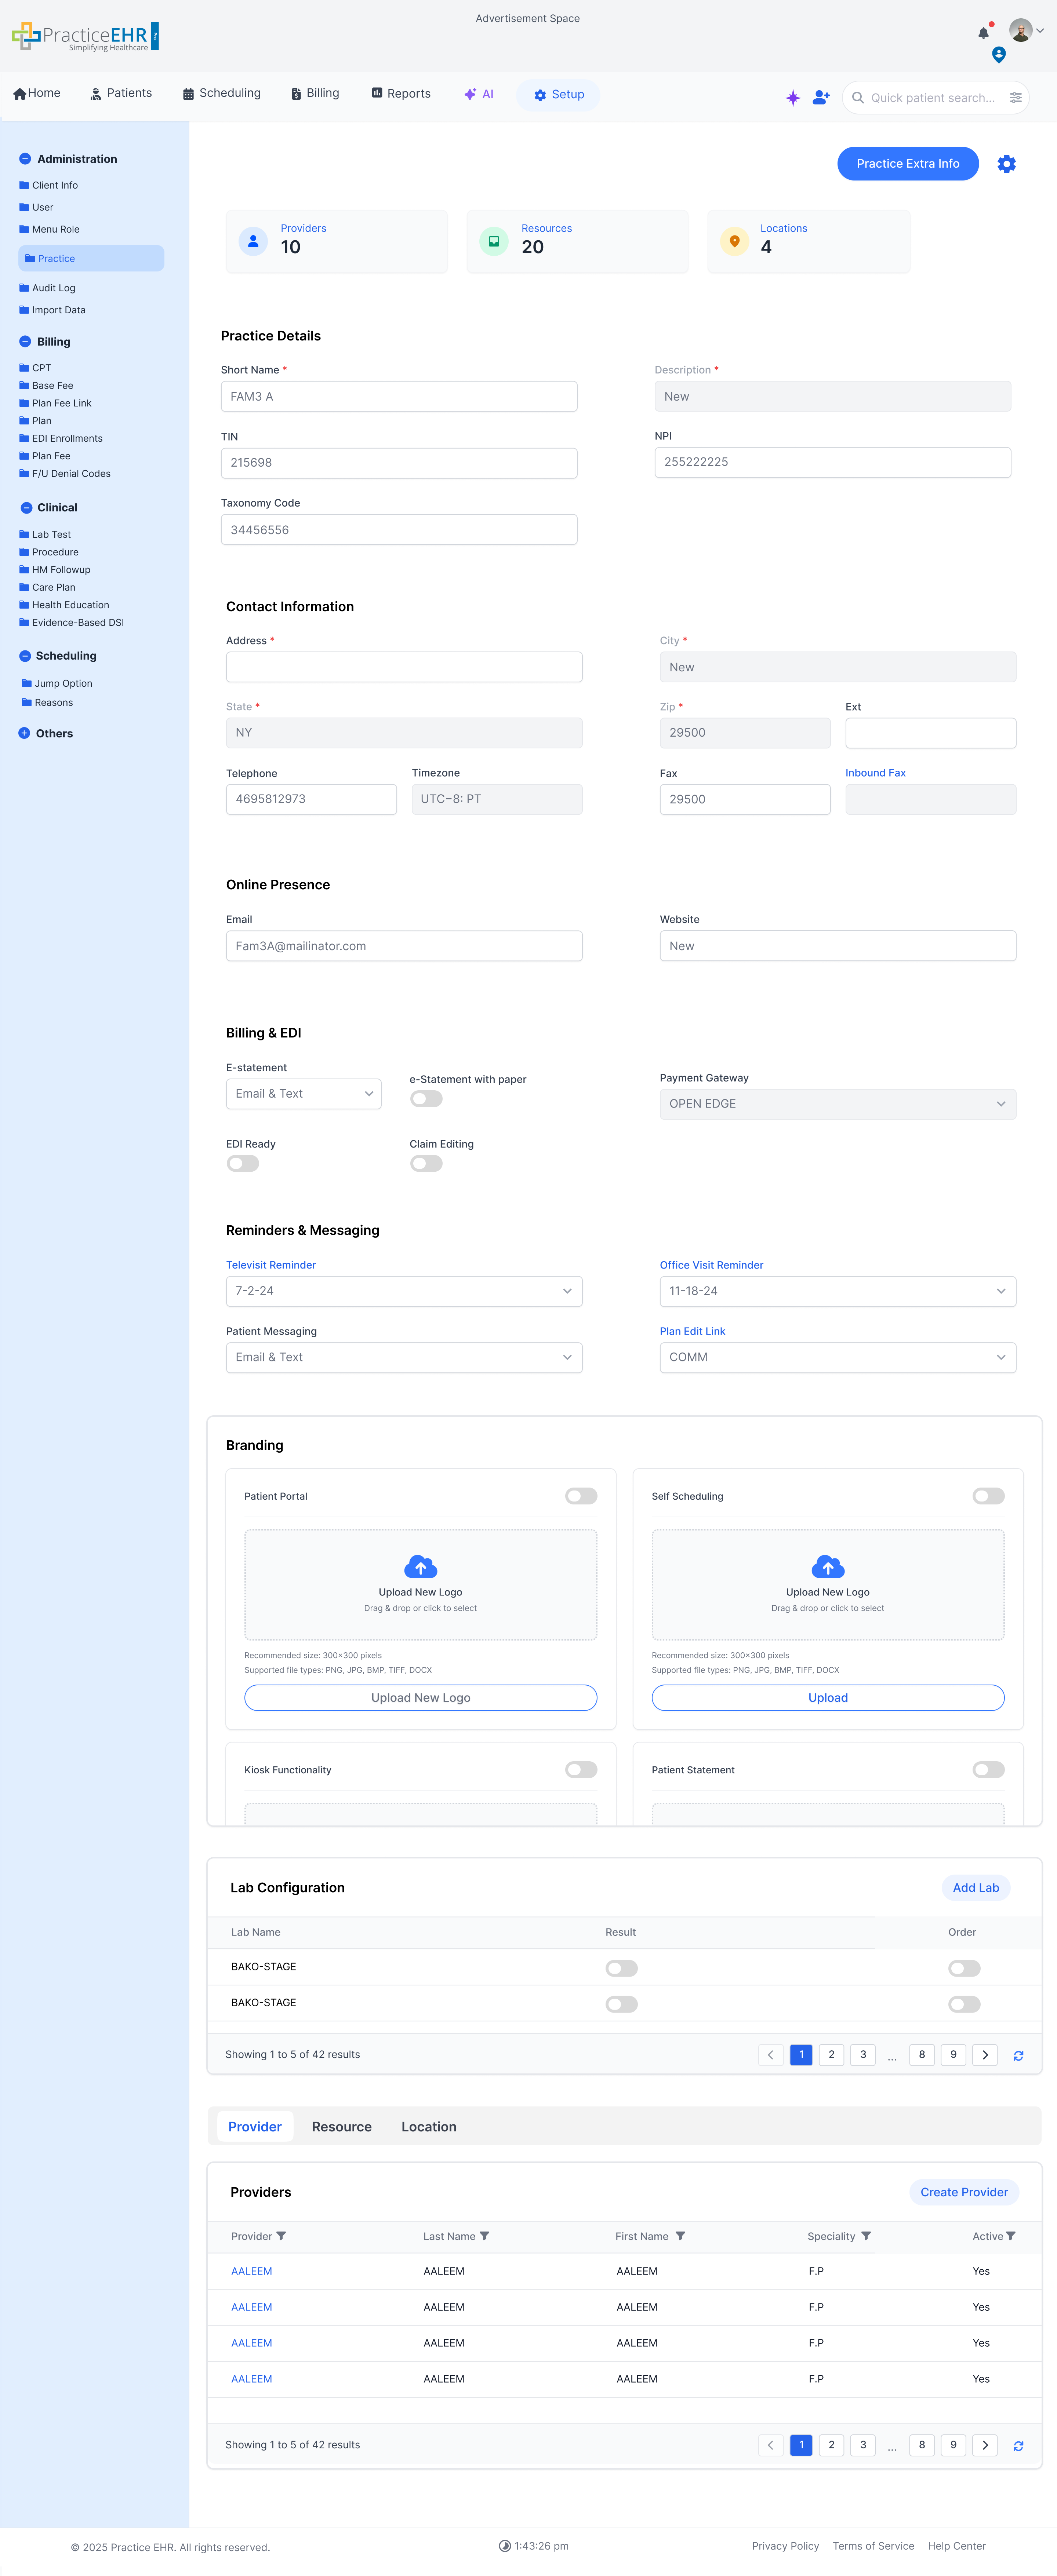
Practice Info
Setup / Administration
Layout
The general layout has been enhanced by dividing the input fields into sections for
better readability
KPI Cards (1)
KPI cards have been added to the top of the screen in order to show information like
number of providers, locations and resources of a practice at a glance
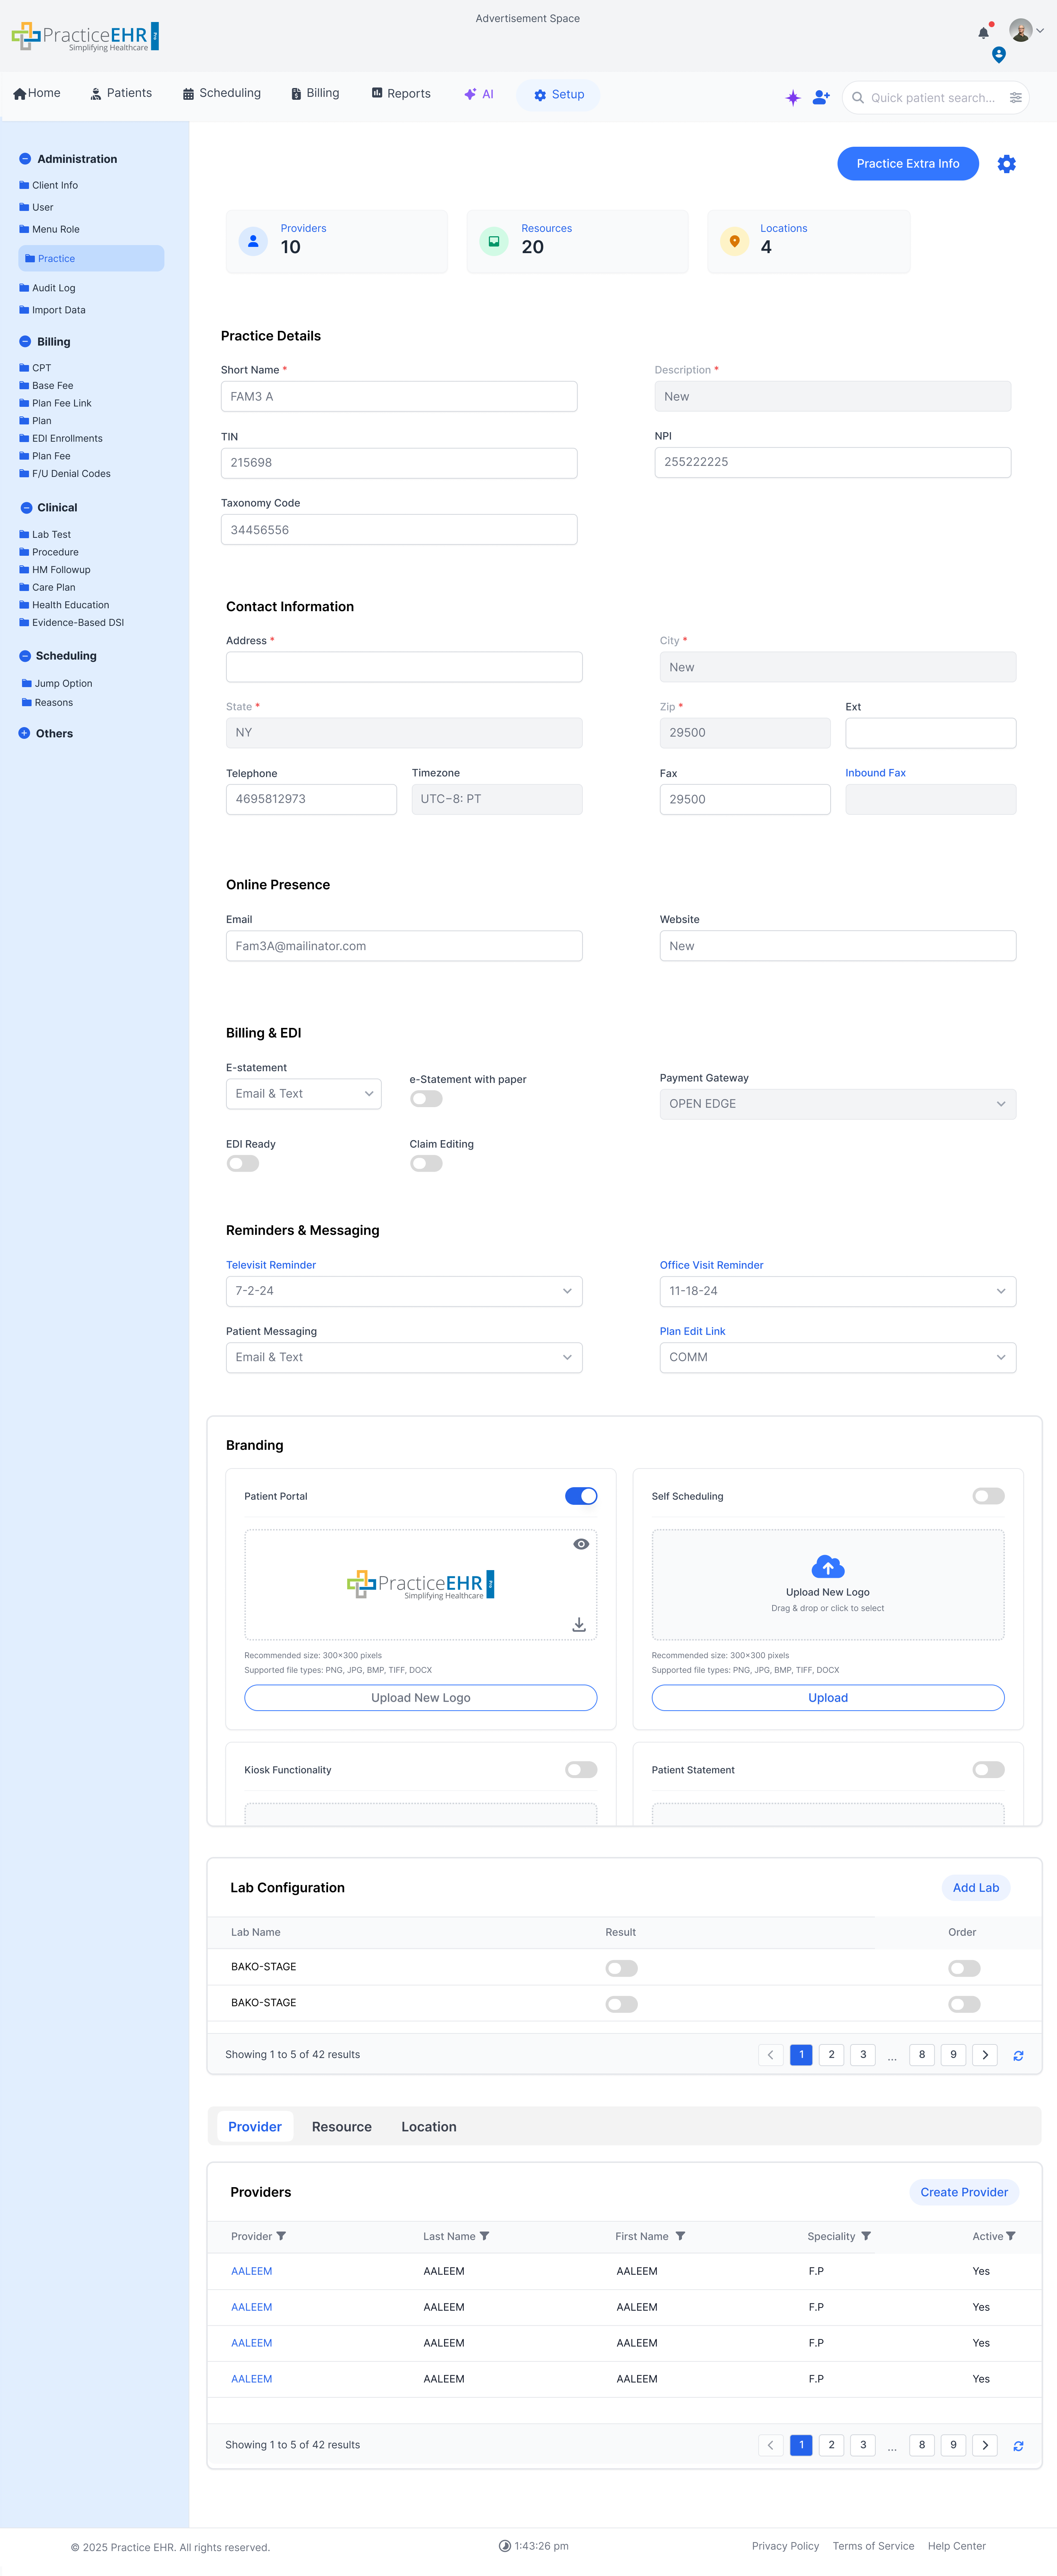
Branding (2)
The Branding section (where the user can upload the practice logo) has been
updated
The section shows all the parts of PEHR where the practice logo is displayed
The section has cards for each part
The user can choose to show their logo on different windows/parts of PEHR by
enabling or disabling the toggles next to each card
Each card has the dimensions and file types mentioned for the user
Once the user has uploaded their logo after enabling a card, the card updates to
show a preview of the uploaded logo
Practice Extra Info
This screen captures additional practice-level details that sit outside the primary
demographic and branding fields.
It gives administrators one place to review secondary setup values before leaving
Practice Info.
Gear - Global Payments
The gear menu opens global payment settings tied to practice-wide billing behavior.
Use it when payment defaults should be maintained once and applied consistently
across the practice.
Create Provider / Portal Message Recipients
This setup lets users map portal message types like Amendment, Billing Questions,
Clinical Questions, Laboratory, Medication, Other, Patient Refill, and Pharmacy
eRefill to an Individual or Group recipient.
Saved mappings route portal messages to the selected recipient, while unassigned
message types fall back to the system default recipient and still remain available in
the Patient Portal.
Create Location
This screen is used to create or update a practice location with core details such as
short name, POS, address, contact information, website, and comments.
Users can configure operational settings for the location including room tags,
self-scheduling, online appointment type, multiple DOS behavior, and location-level
identifiers like NPI and extensions.
The action buttons at the top also provide quick access to location-specific custom
fields and global payment settings from the same workflow.
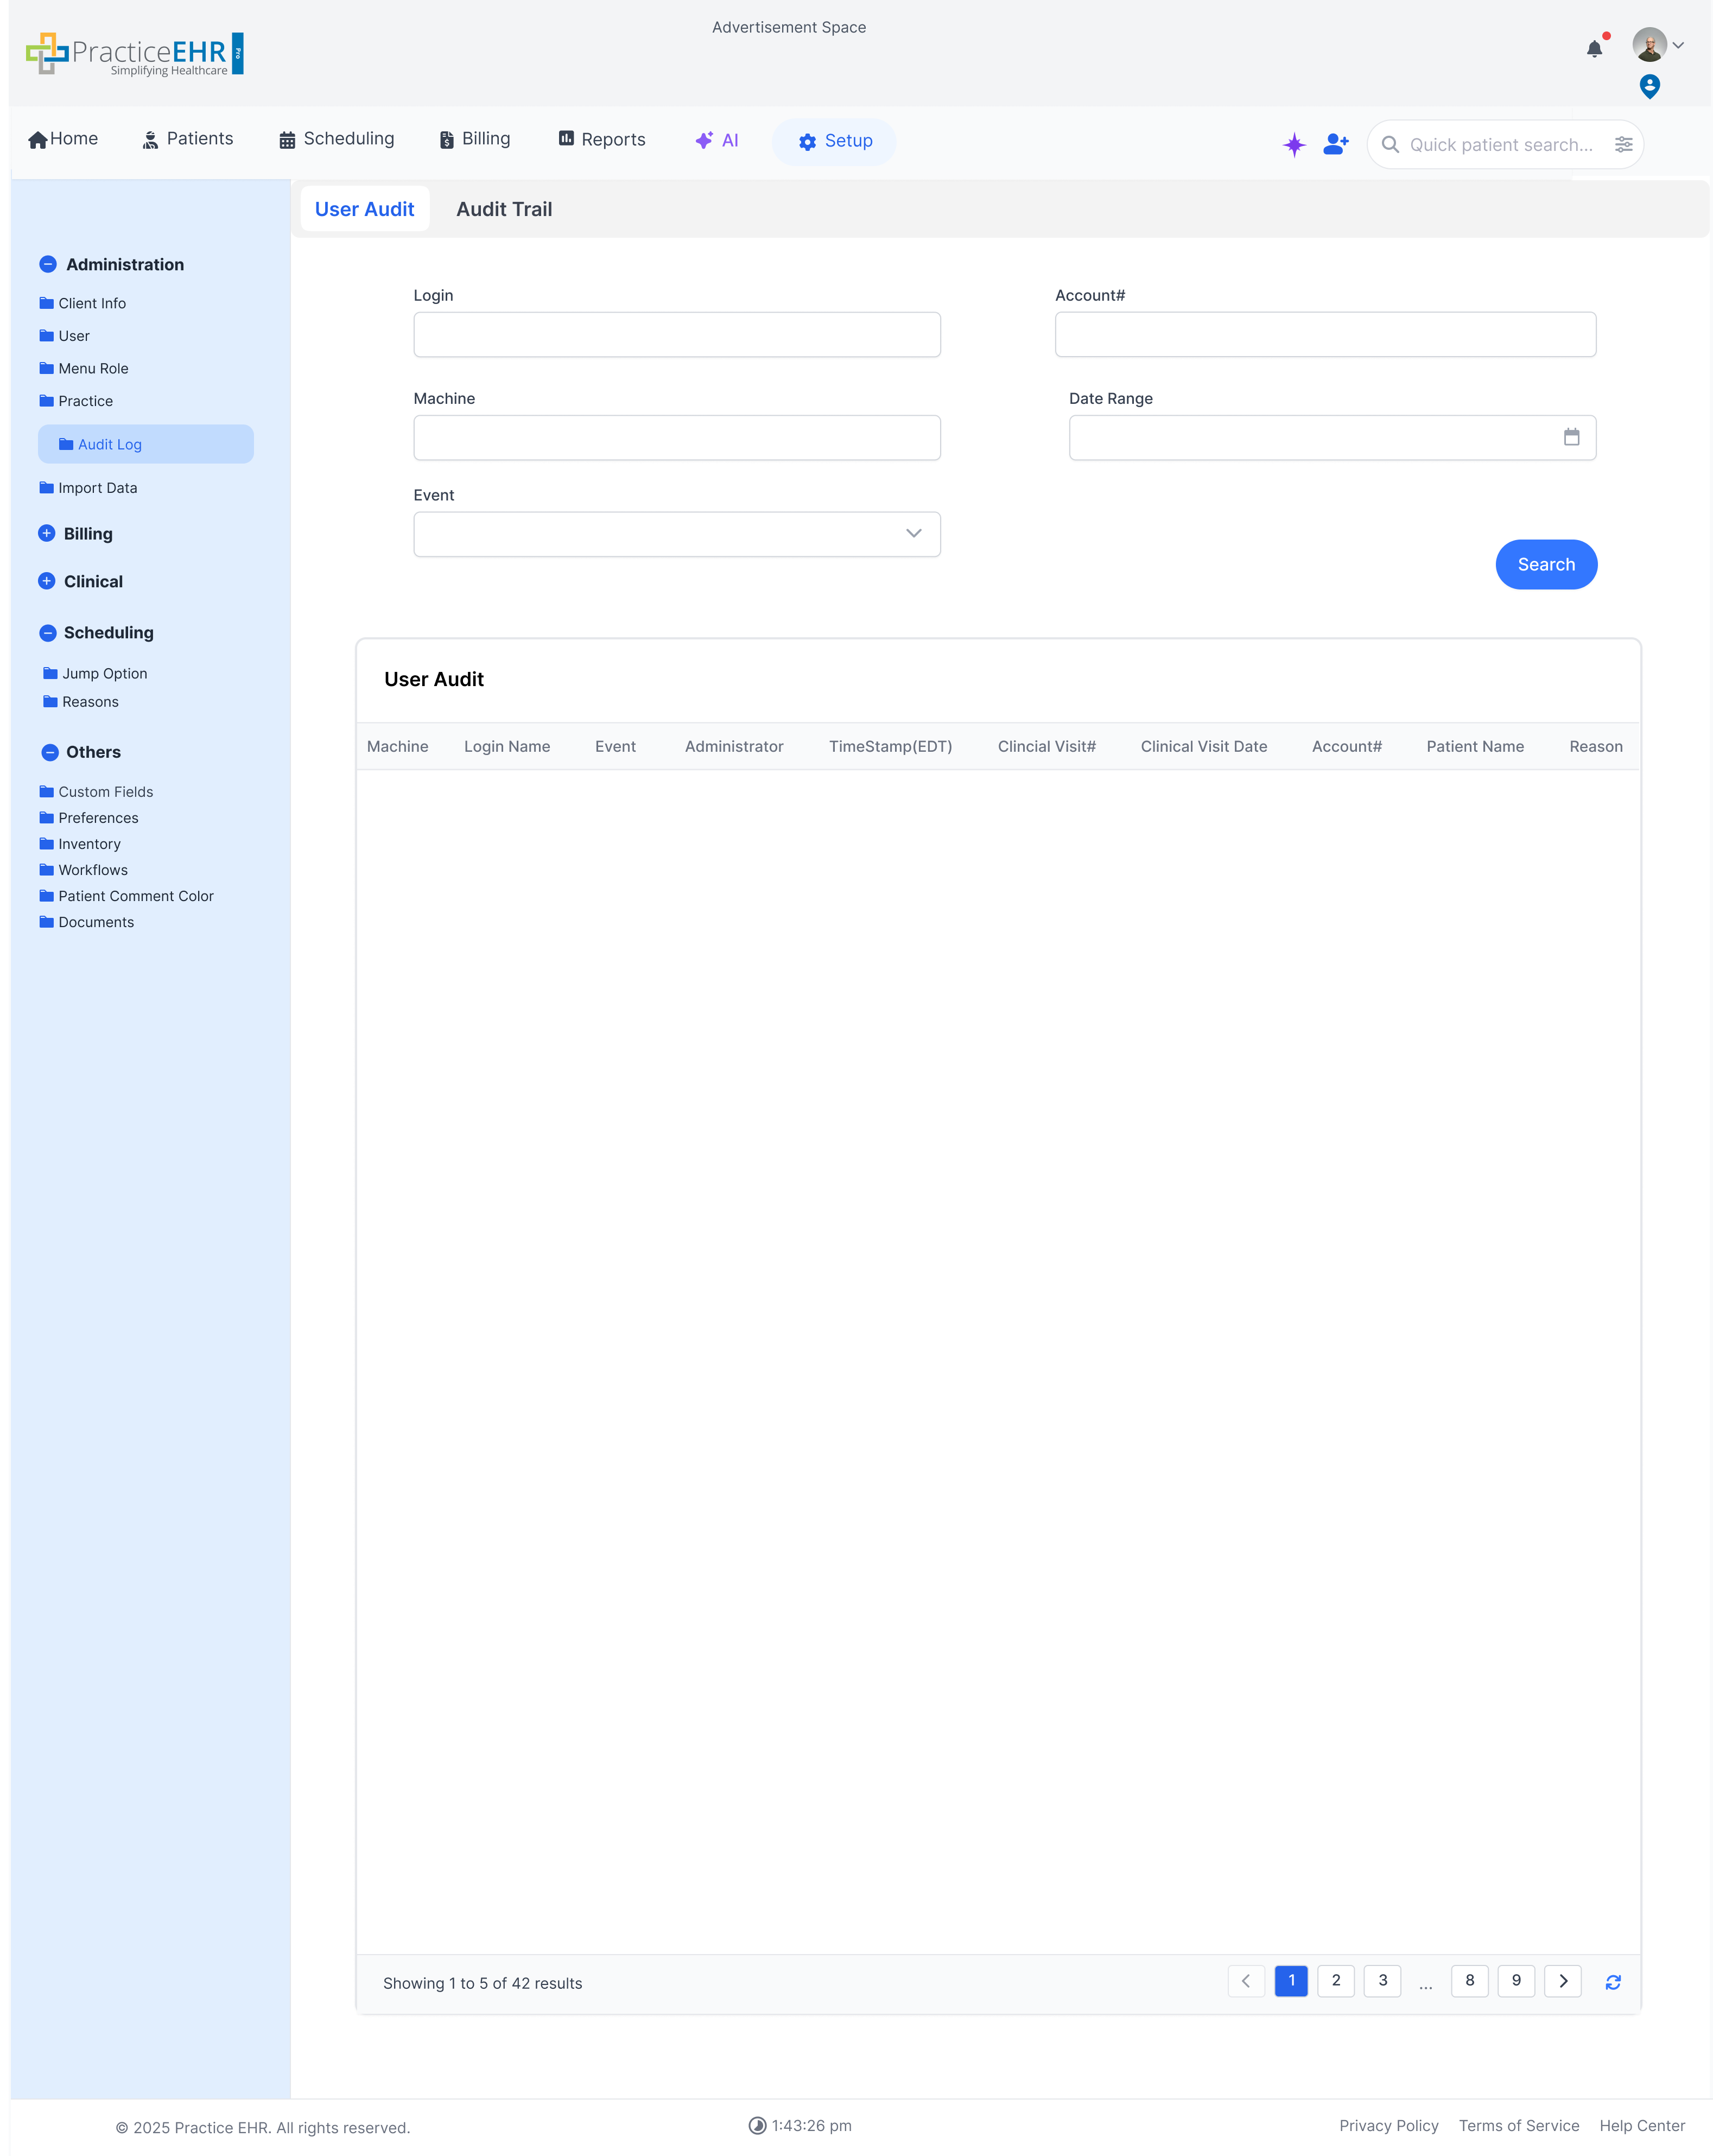
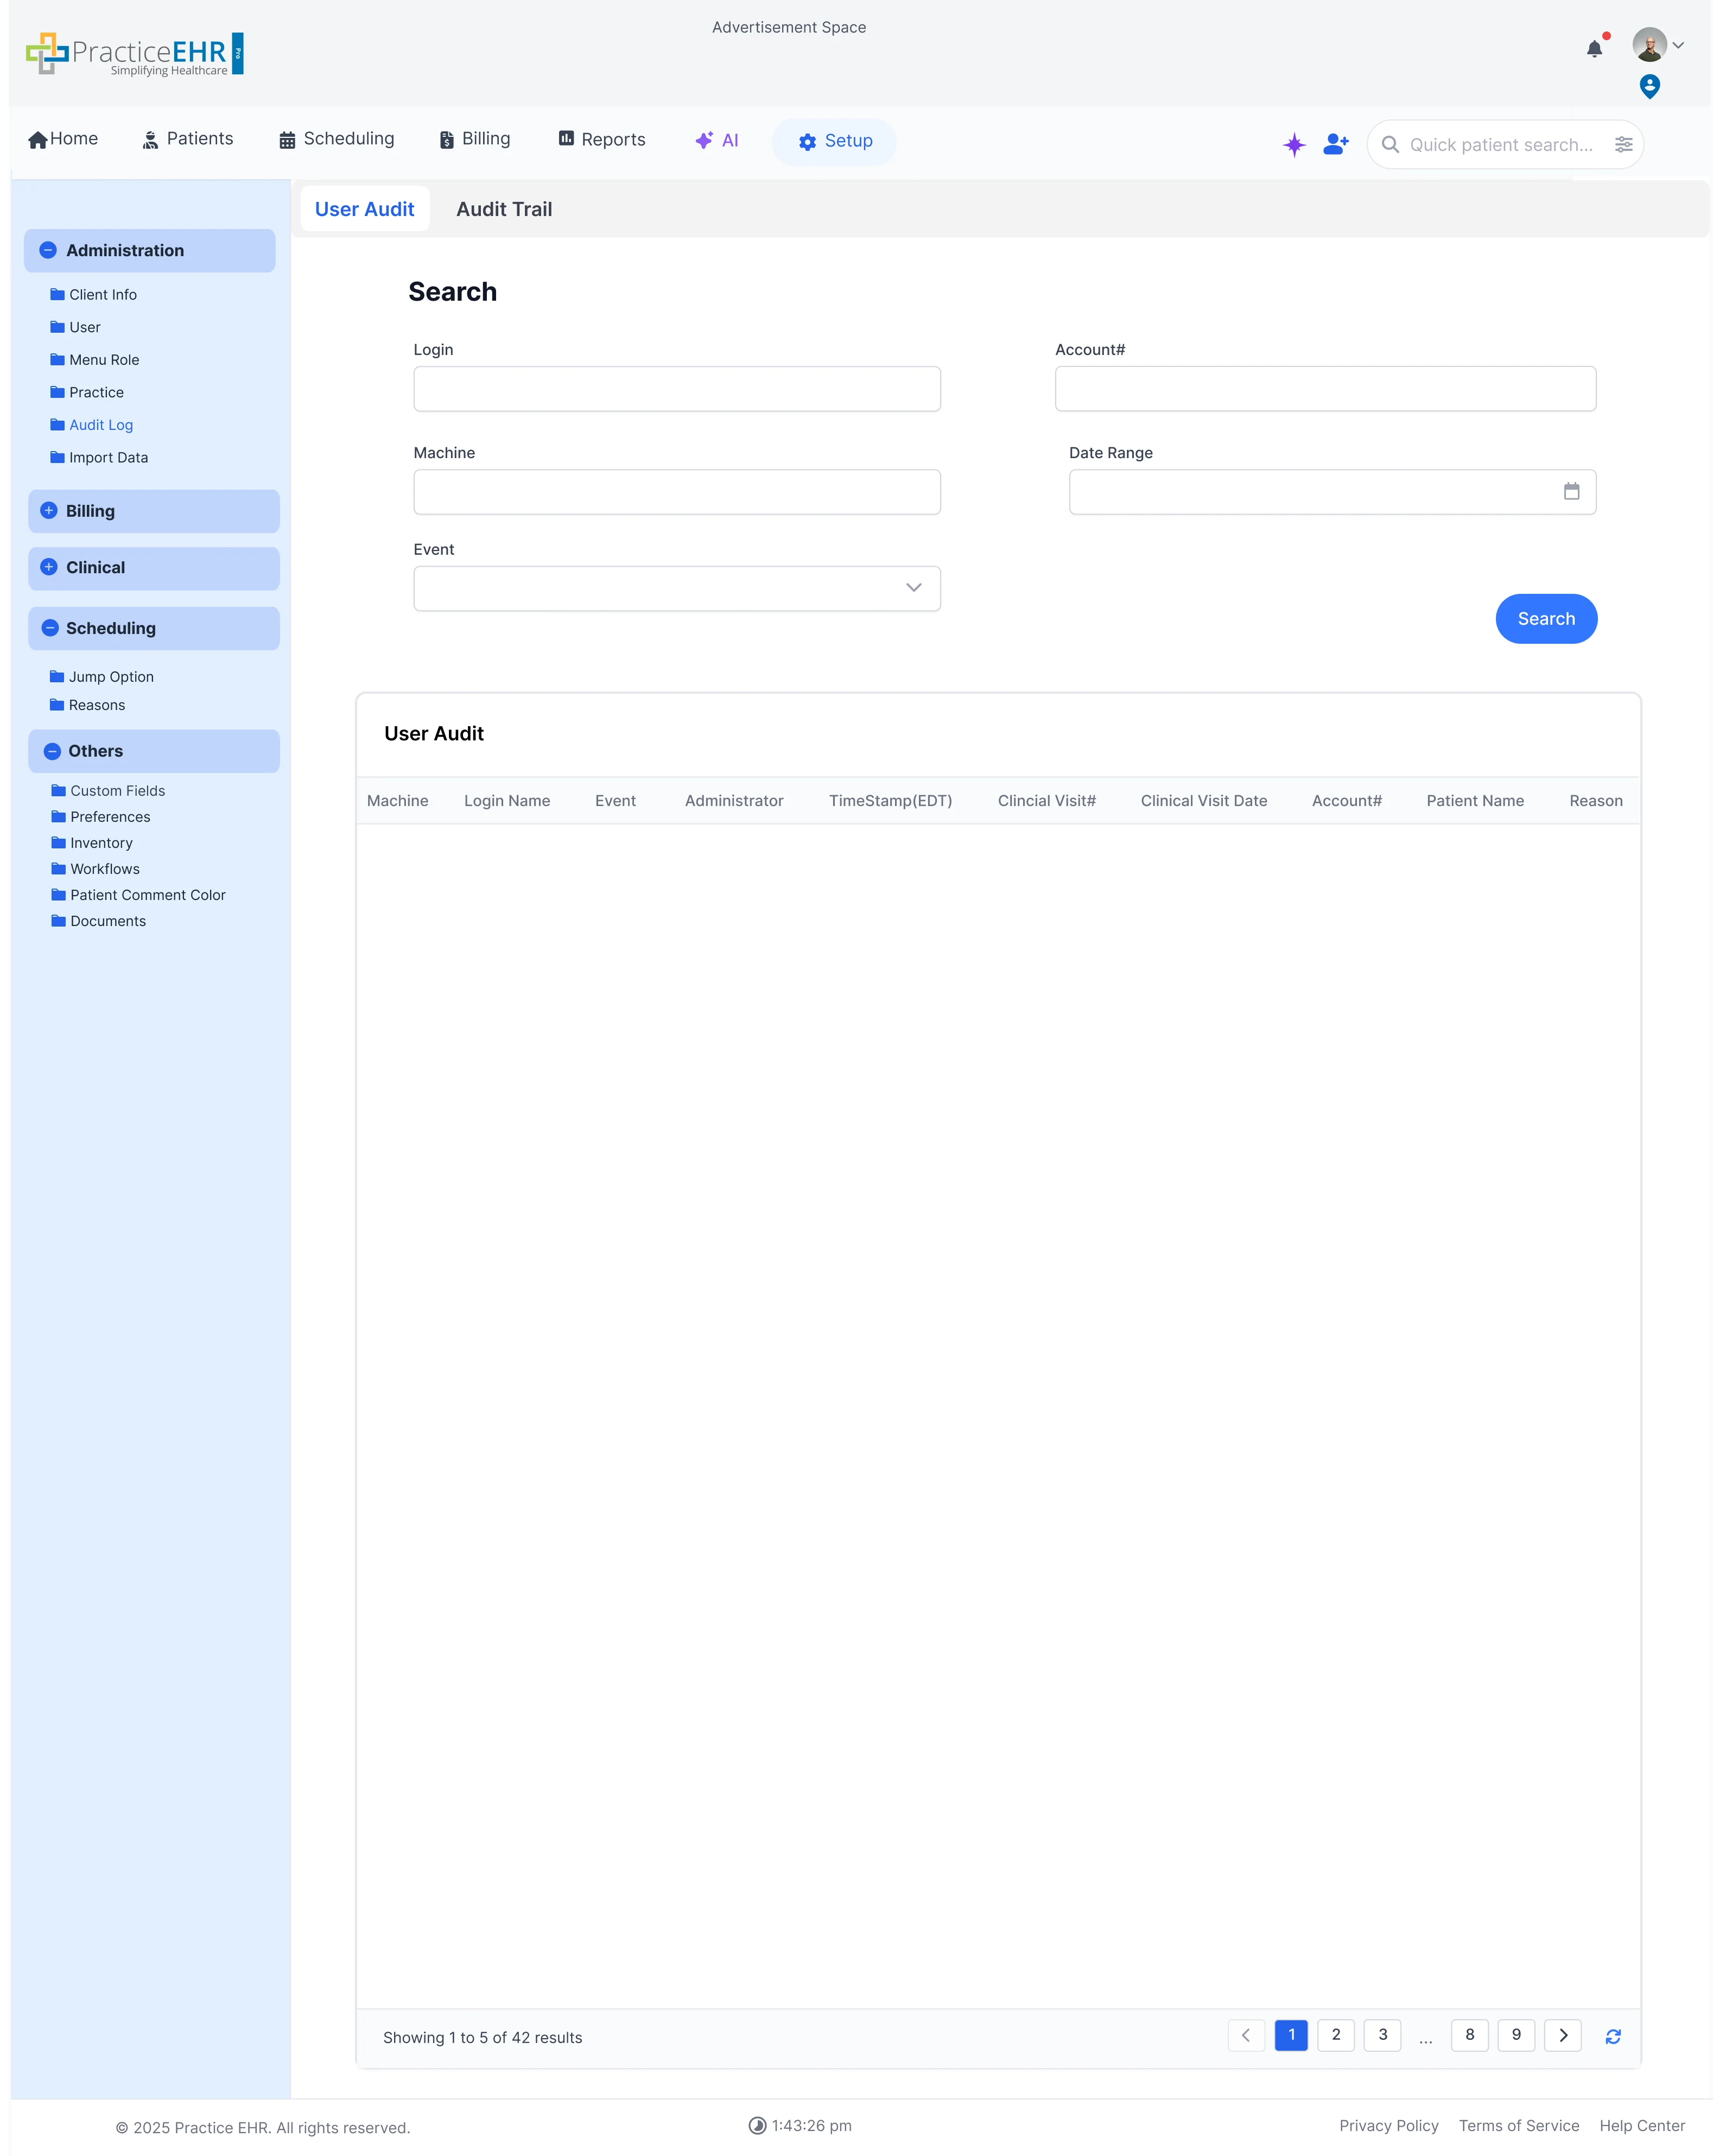
Audit Log
Setup / Administration
The Audit Log provides a detailed trail of user activities and system
changes. It is divided into "User Audit" and "Audit Trail" tabs.
User Audit & Audit Trail
**User Audit:** Tracks user-specific actions, such as logins, machine access, and
events.
**Audit Trail:** Provides a comprehensive search interface to find specific changes,
allowing filtering by Menu, Original Value, Action By, Date Range, and more.
Both views feature powerful search and filtering capabilities to ensure transparency
and accountability.
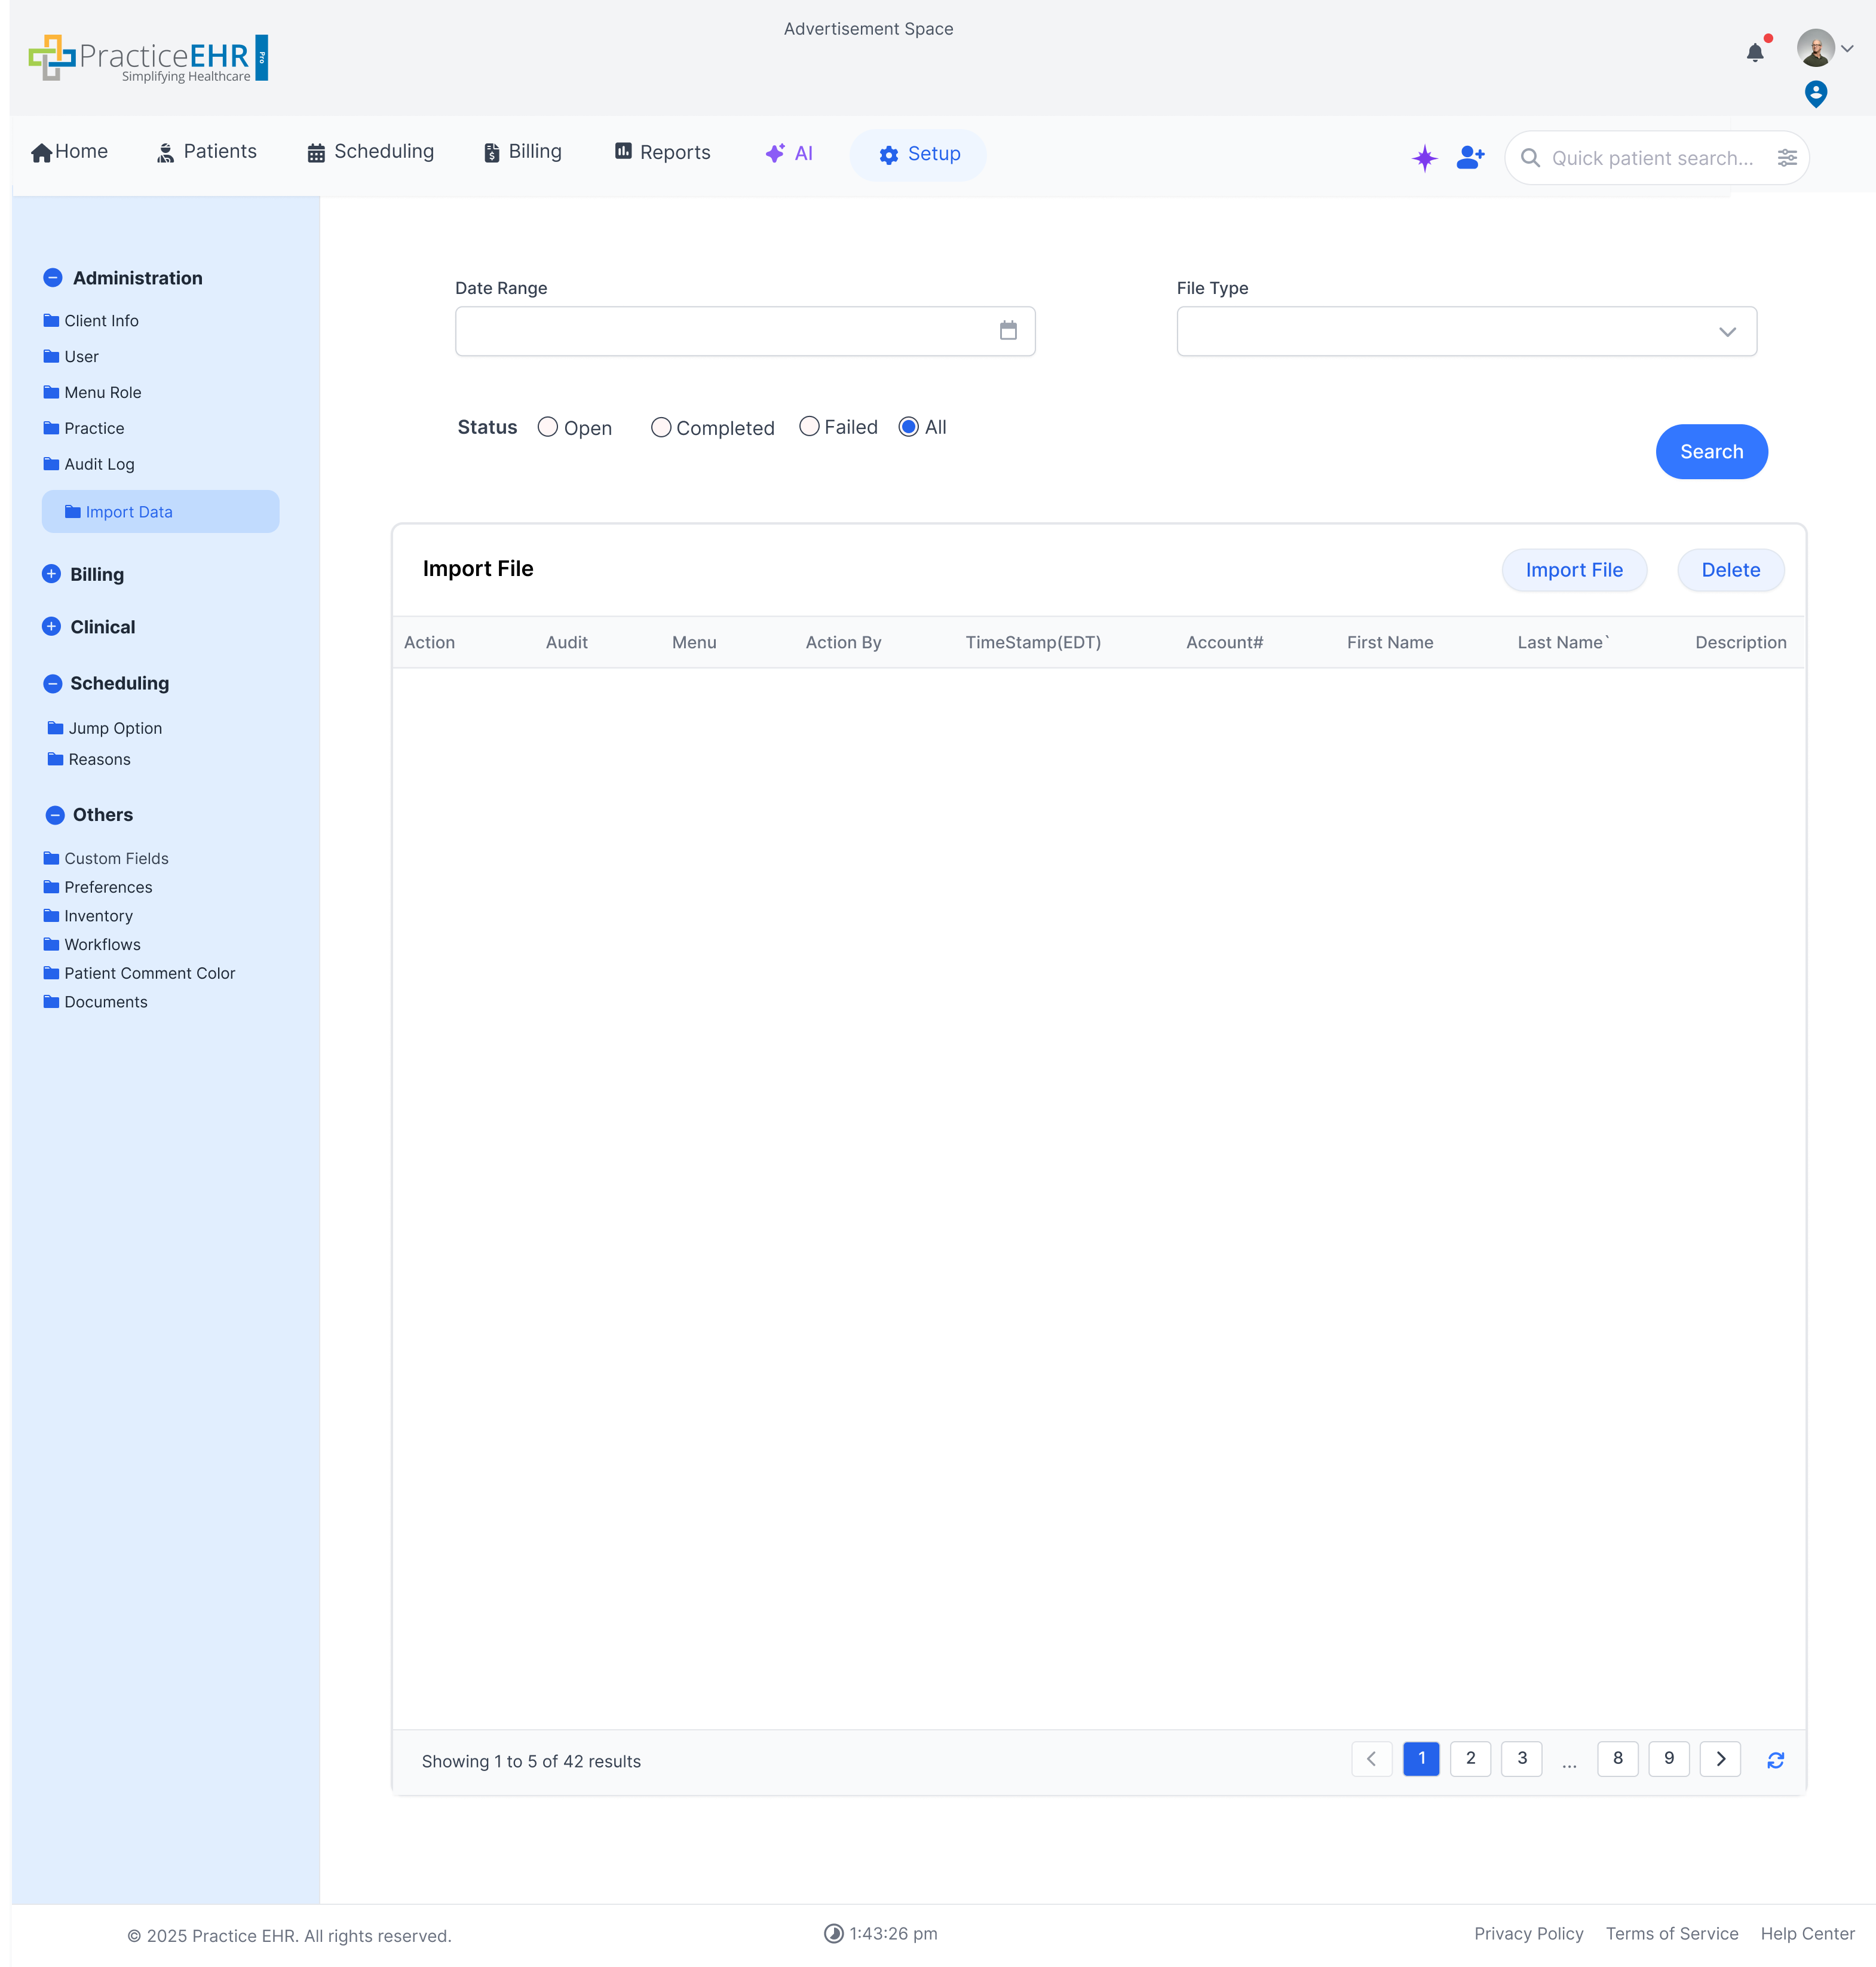
Import Data
Setup / Administration
Use this tool to import data into the system. This screen shows the status
of past and ongoing import jobs.
Data Import Utility
Search for import jobs by Date Range, File Type, or Status (Open, Completed, Failed,
All).
The "Import File" grid shows a log of all import actions, including who performed
the action and when.
Users can import new files or delete previous import records.
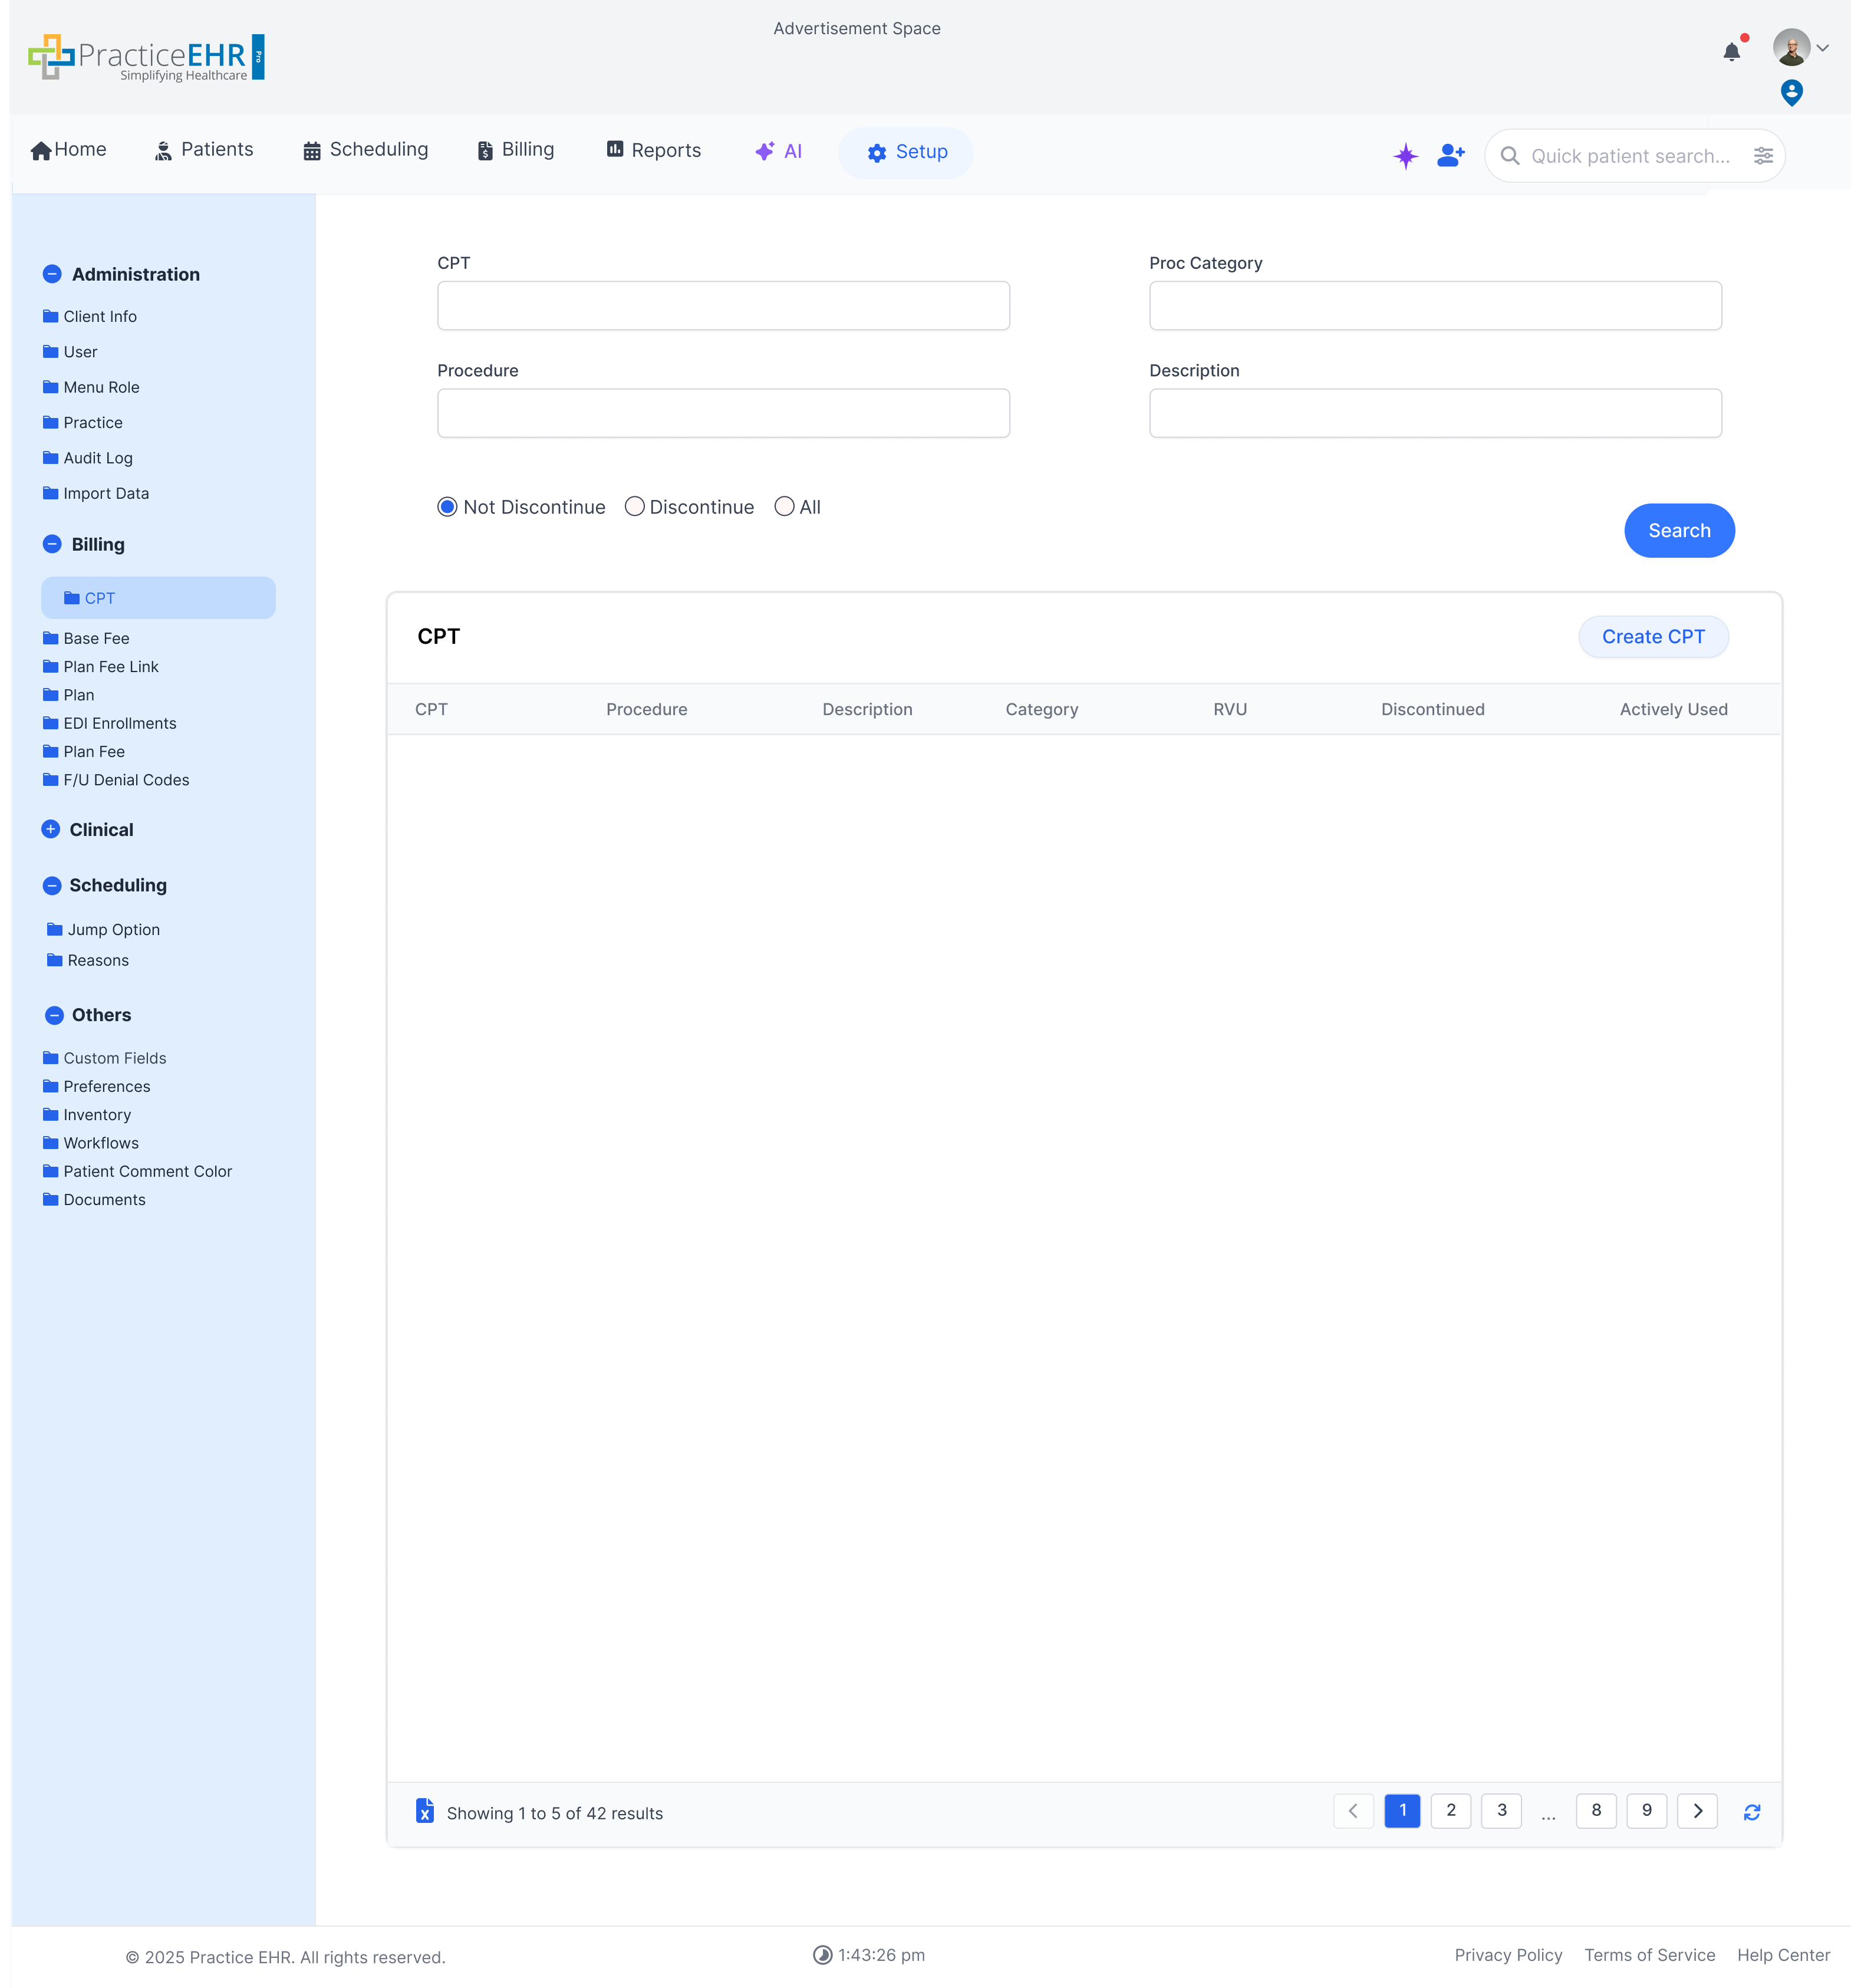
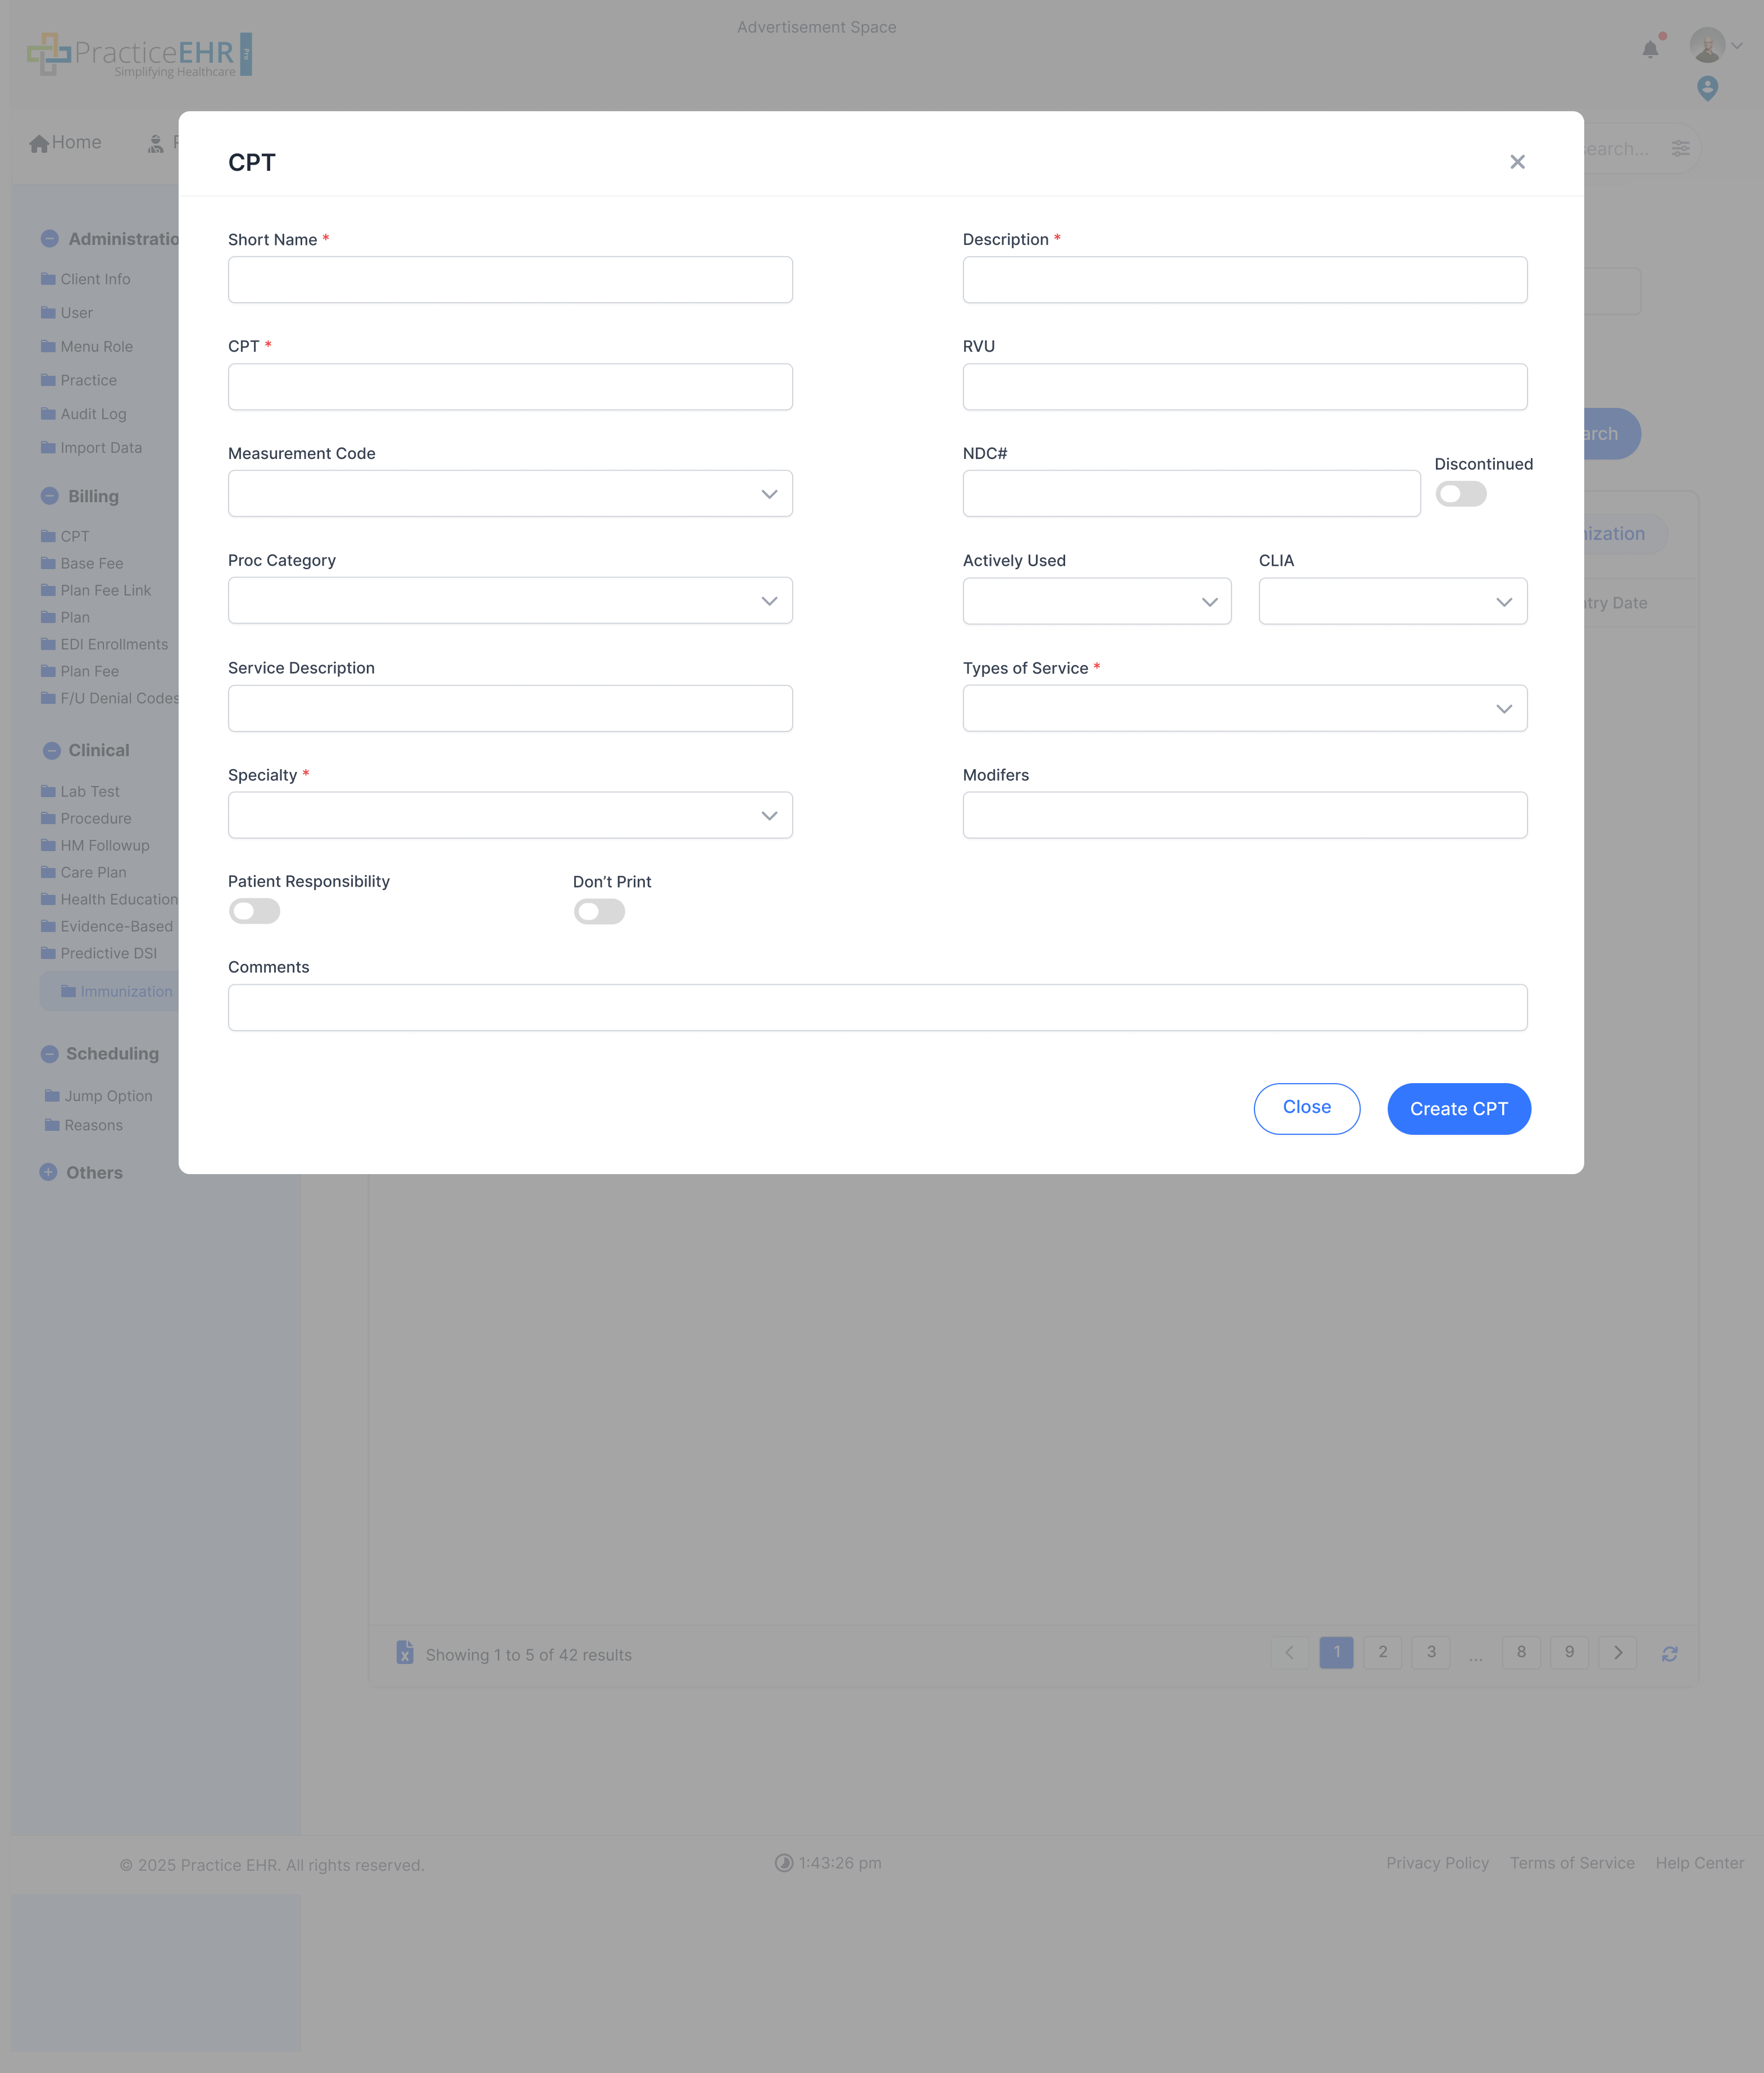
CPT
Setup / Billing
Manage CPT codes, including their descriptions, procedure categories, and
RVU values.
CPT Code Management
Search for specific CPT codes using various criteria like CPT, Proc Category,
Procedure, or Description.
Filter results by status: Not Discontinue, Discontinue, or All.
The grid displays detailed information for each code.
Click "Create CPT" to add a new code to the system.
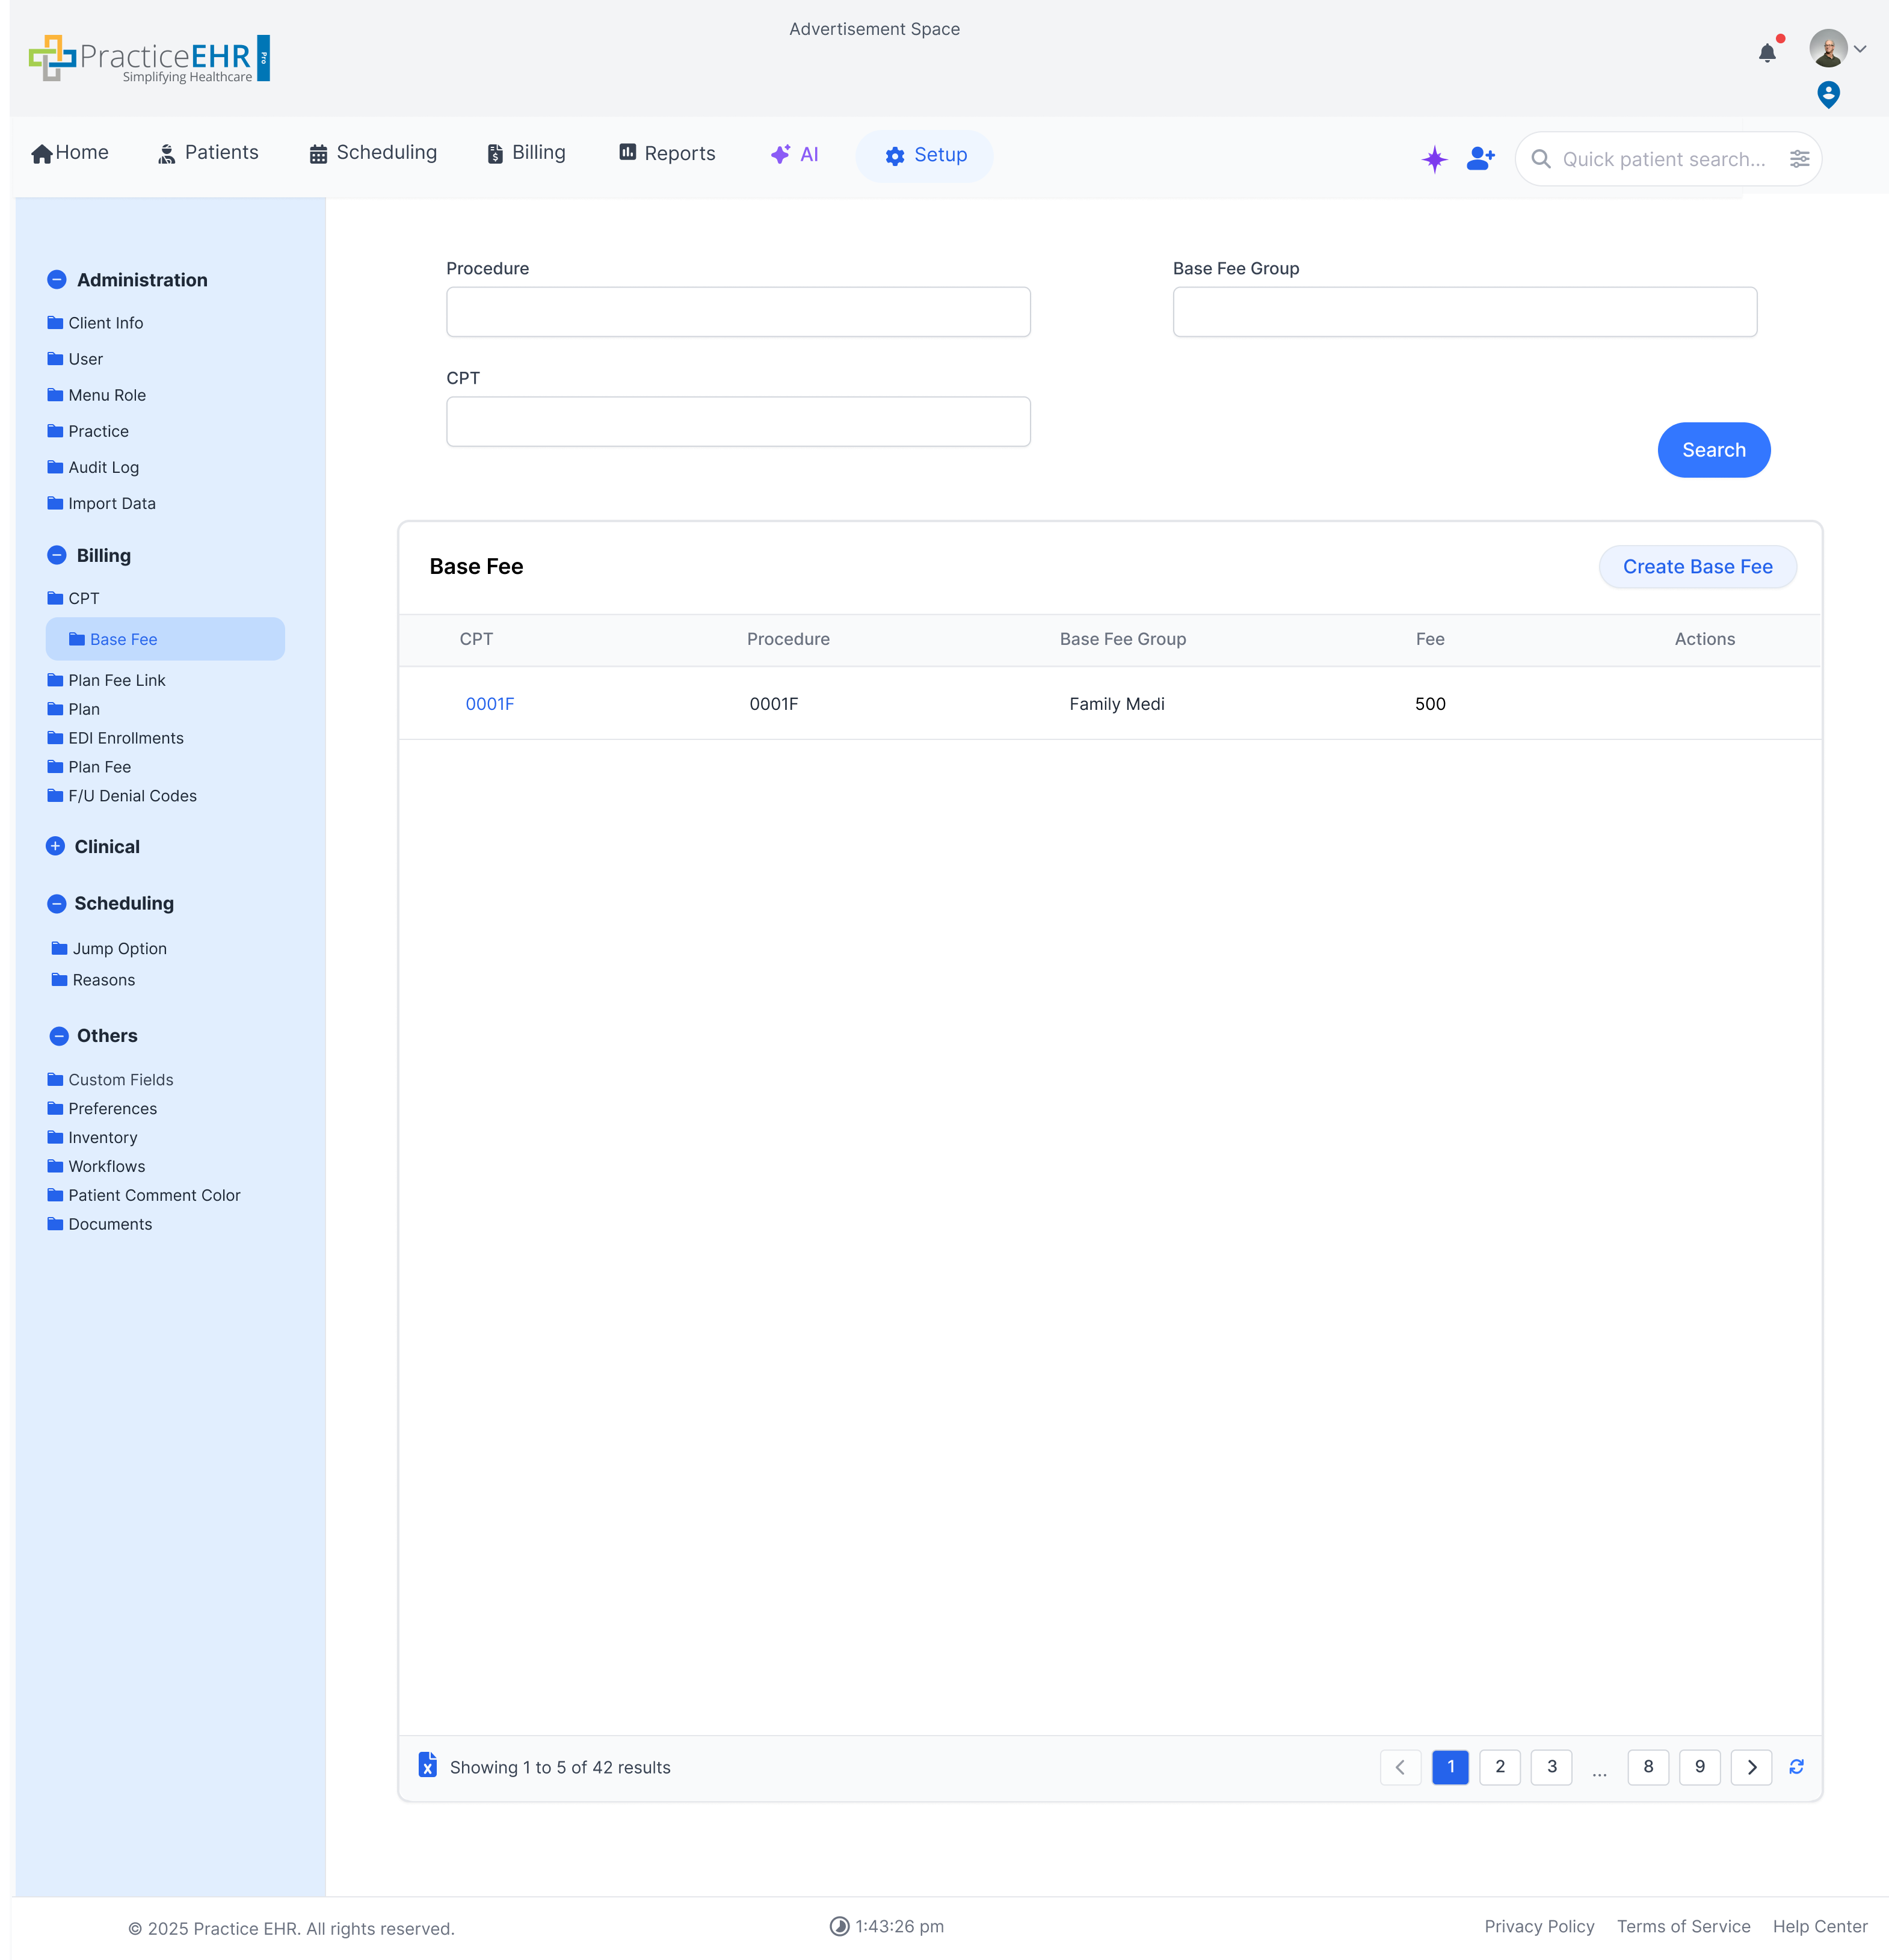
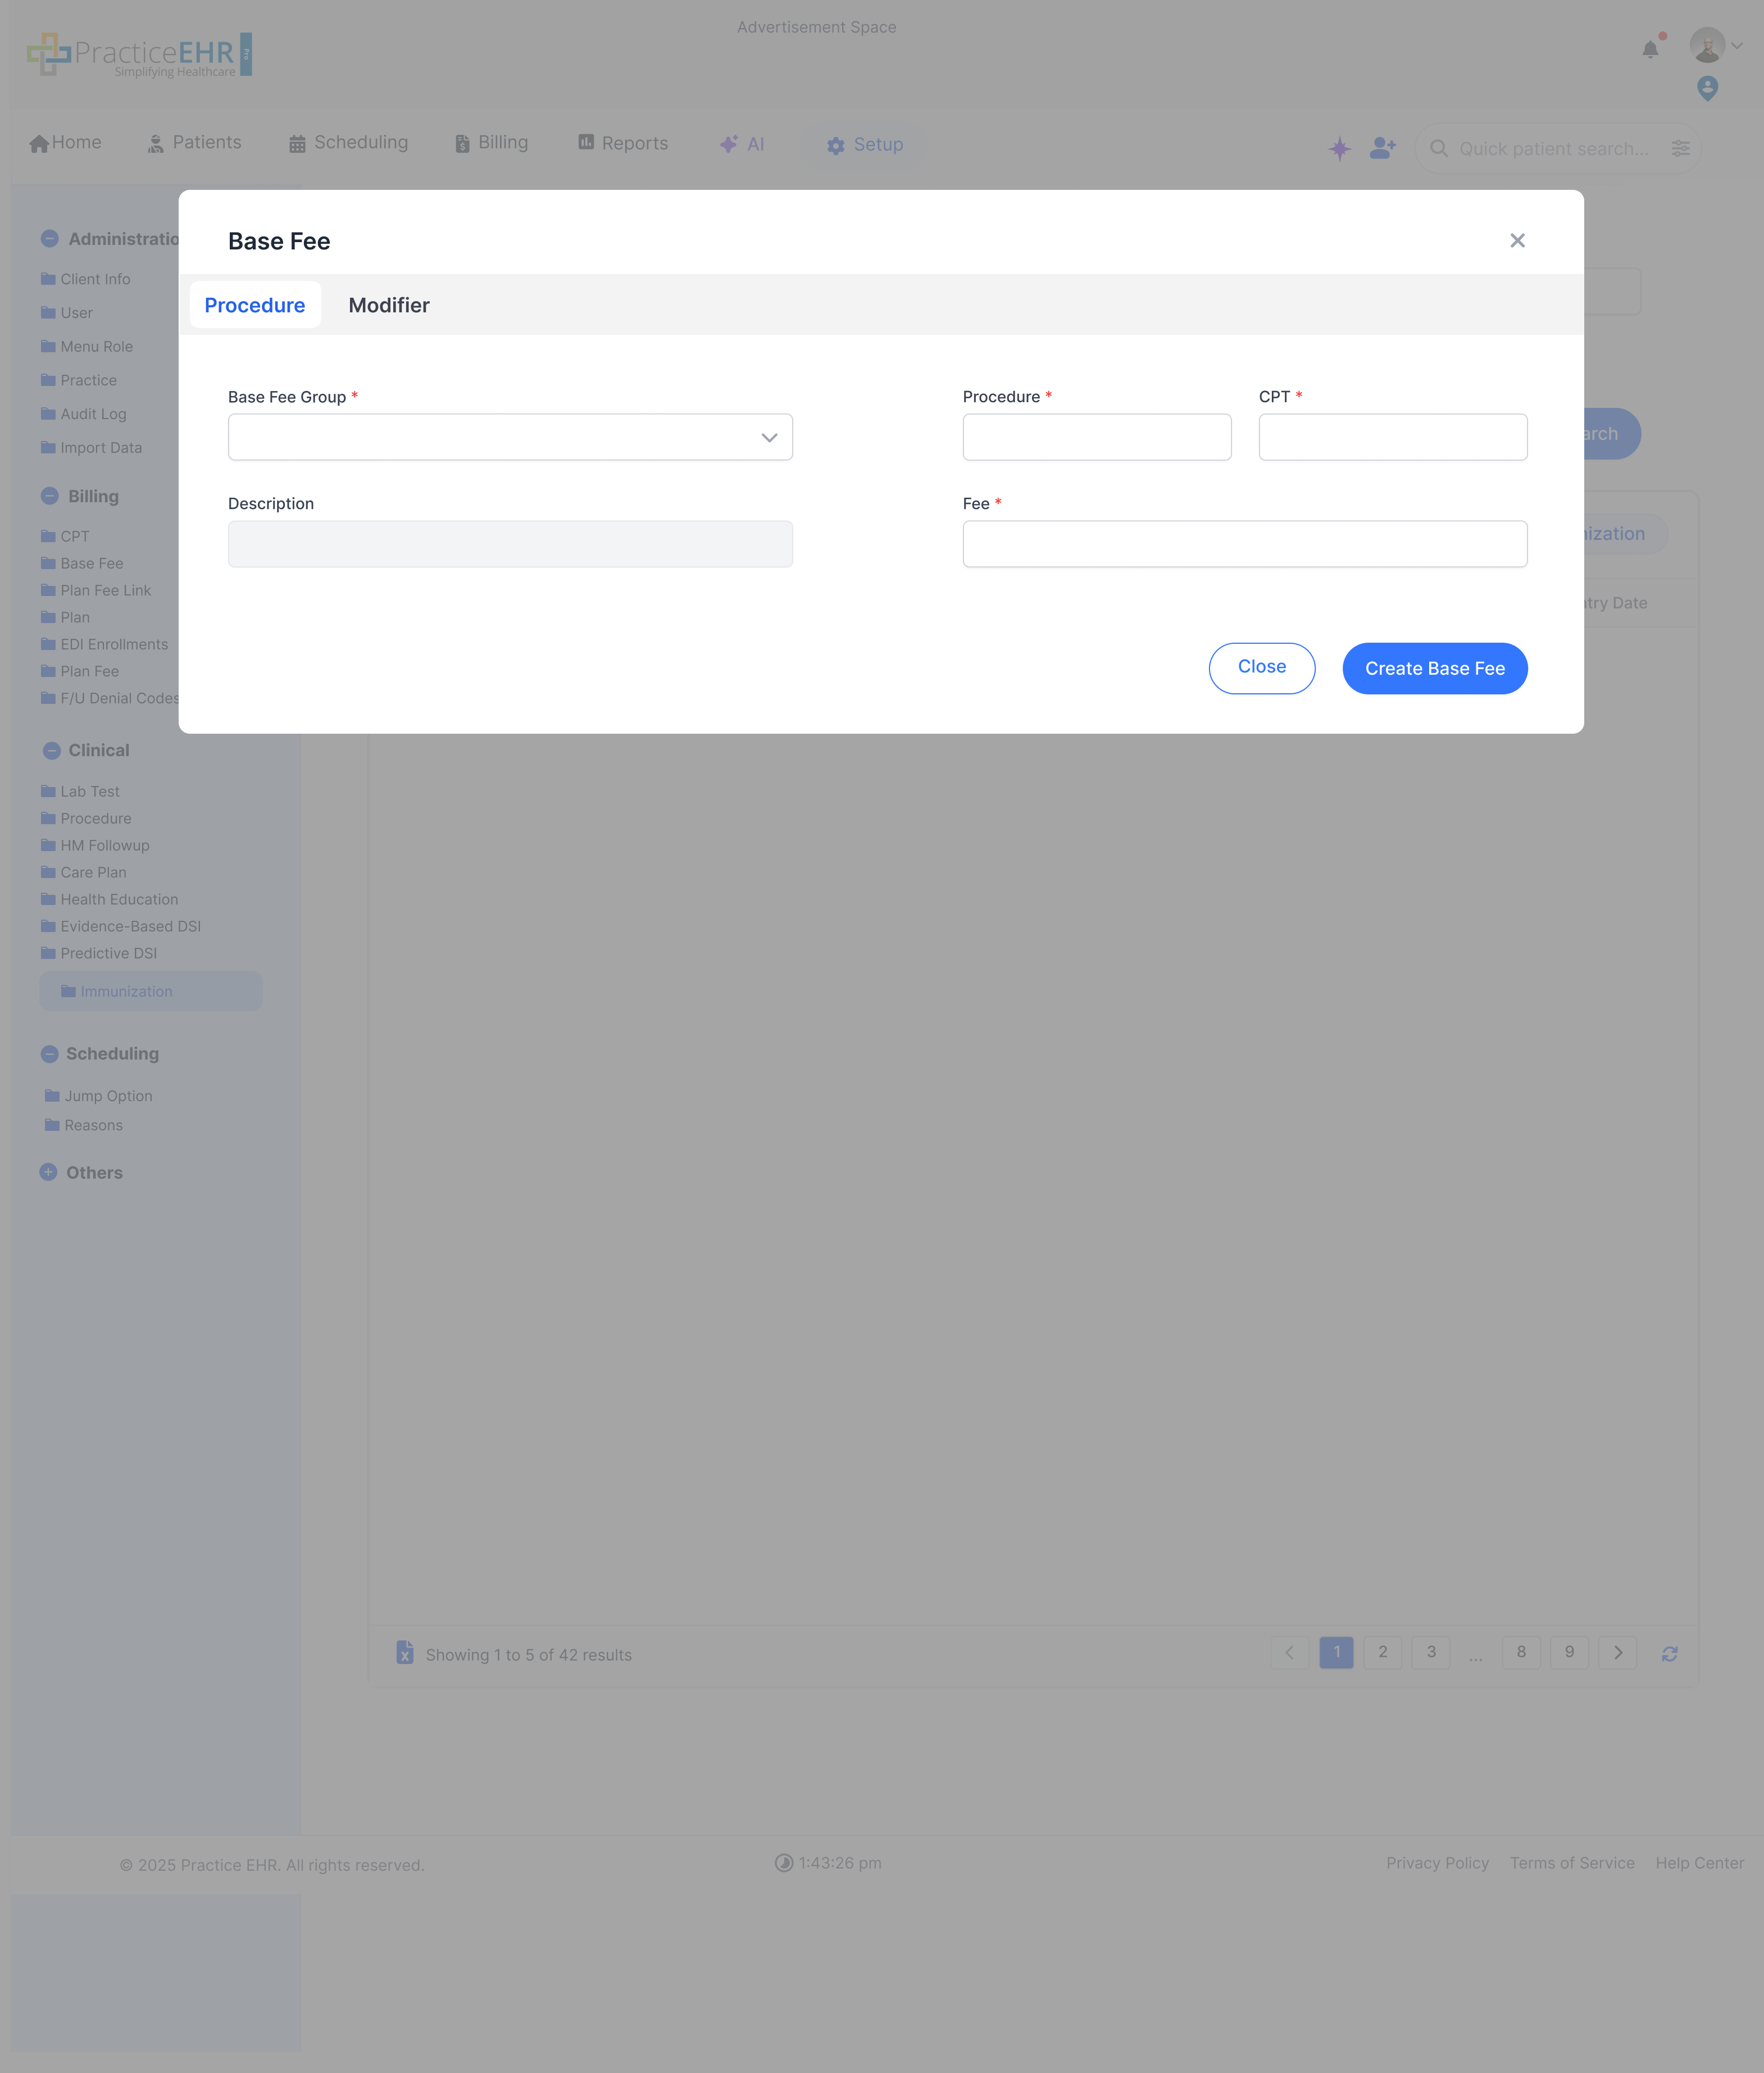
Base Fee
Setup / Billing
Define and manage the base fee schedule for different procedures within the
practice.
Base Fee Schedule
Search for existing fees by Procedure, Base Fee Group, or CPT code.
The grid lists all procedures and their associated base fee.
Click "Create Base Fee" to establish a new fee for a procedure.
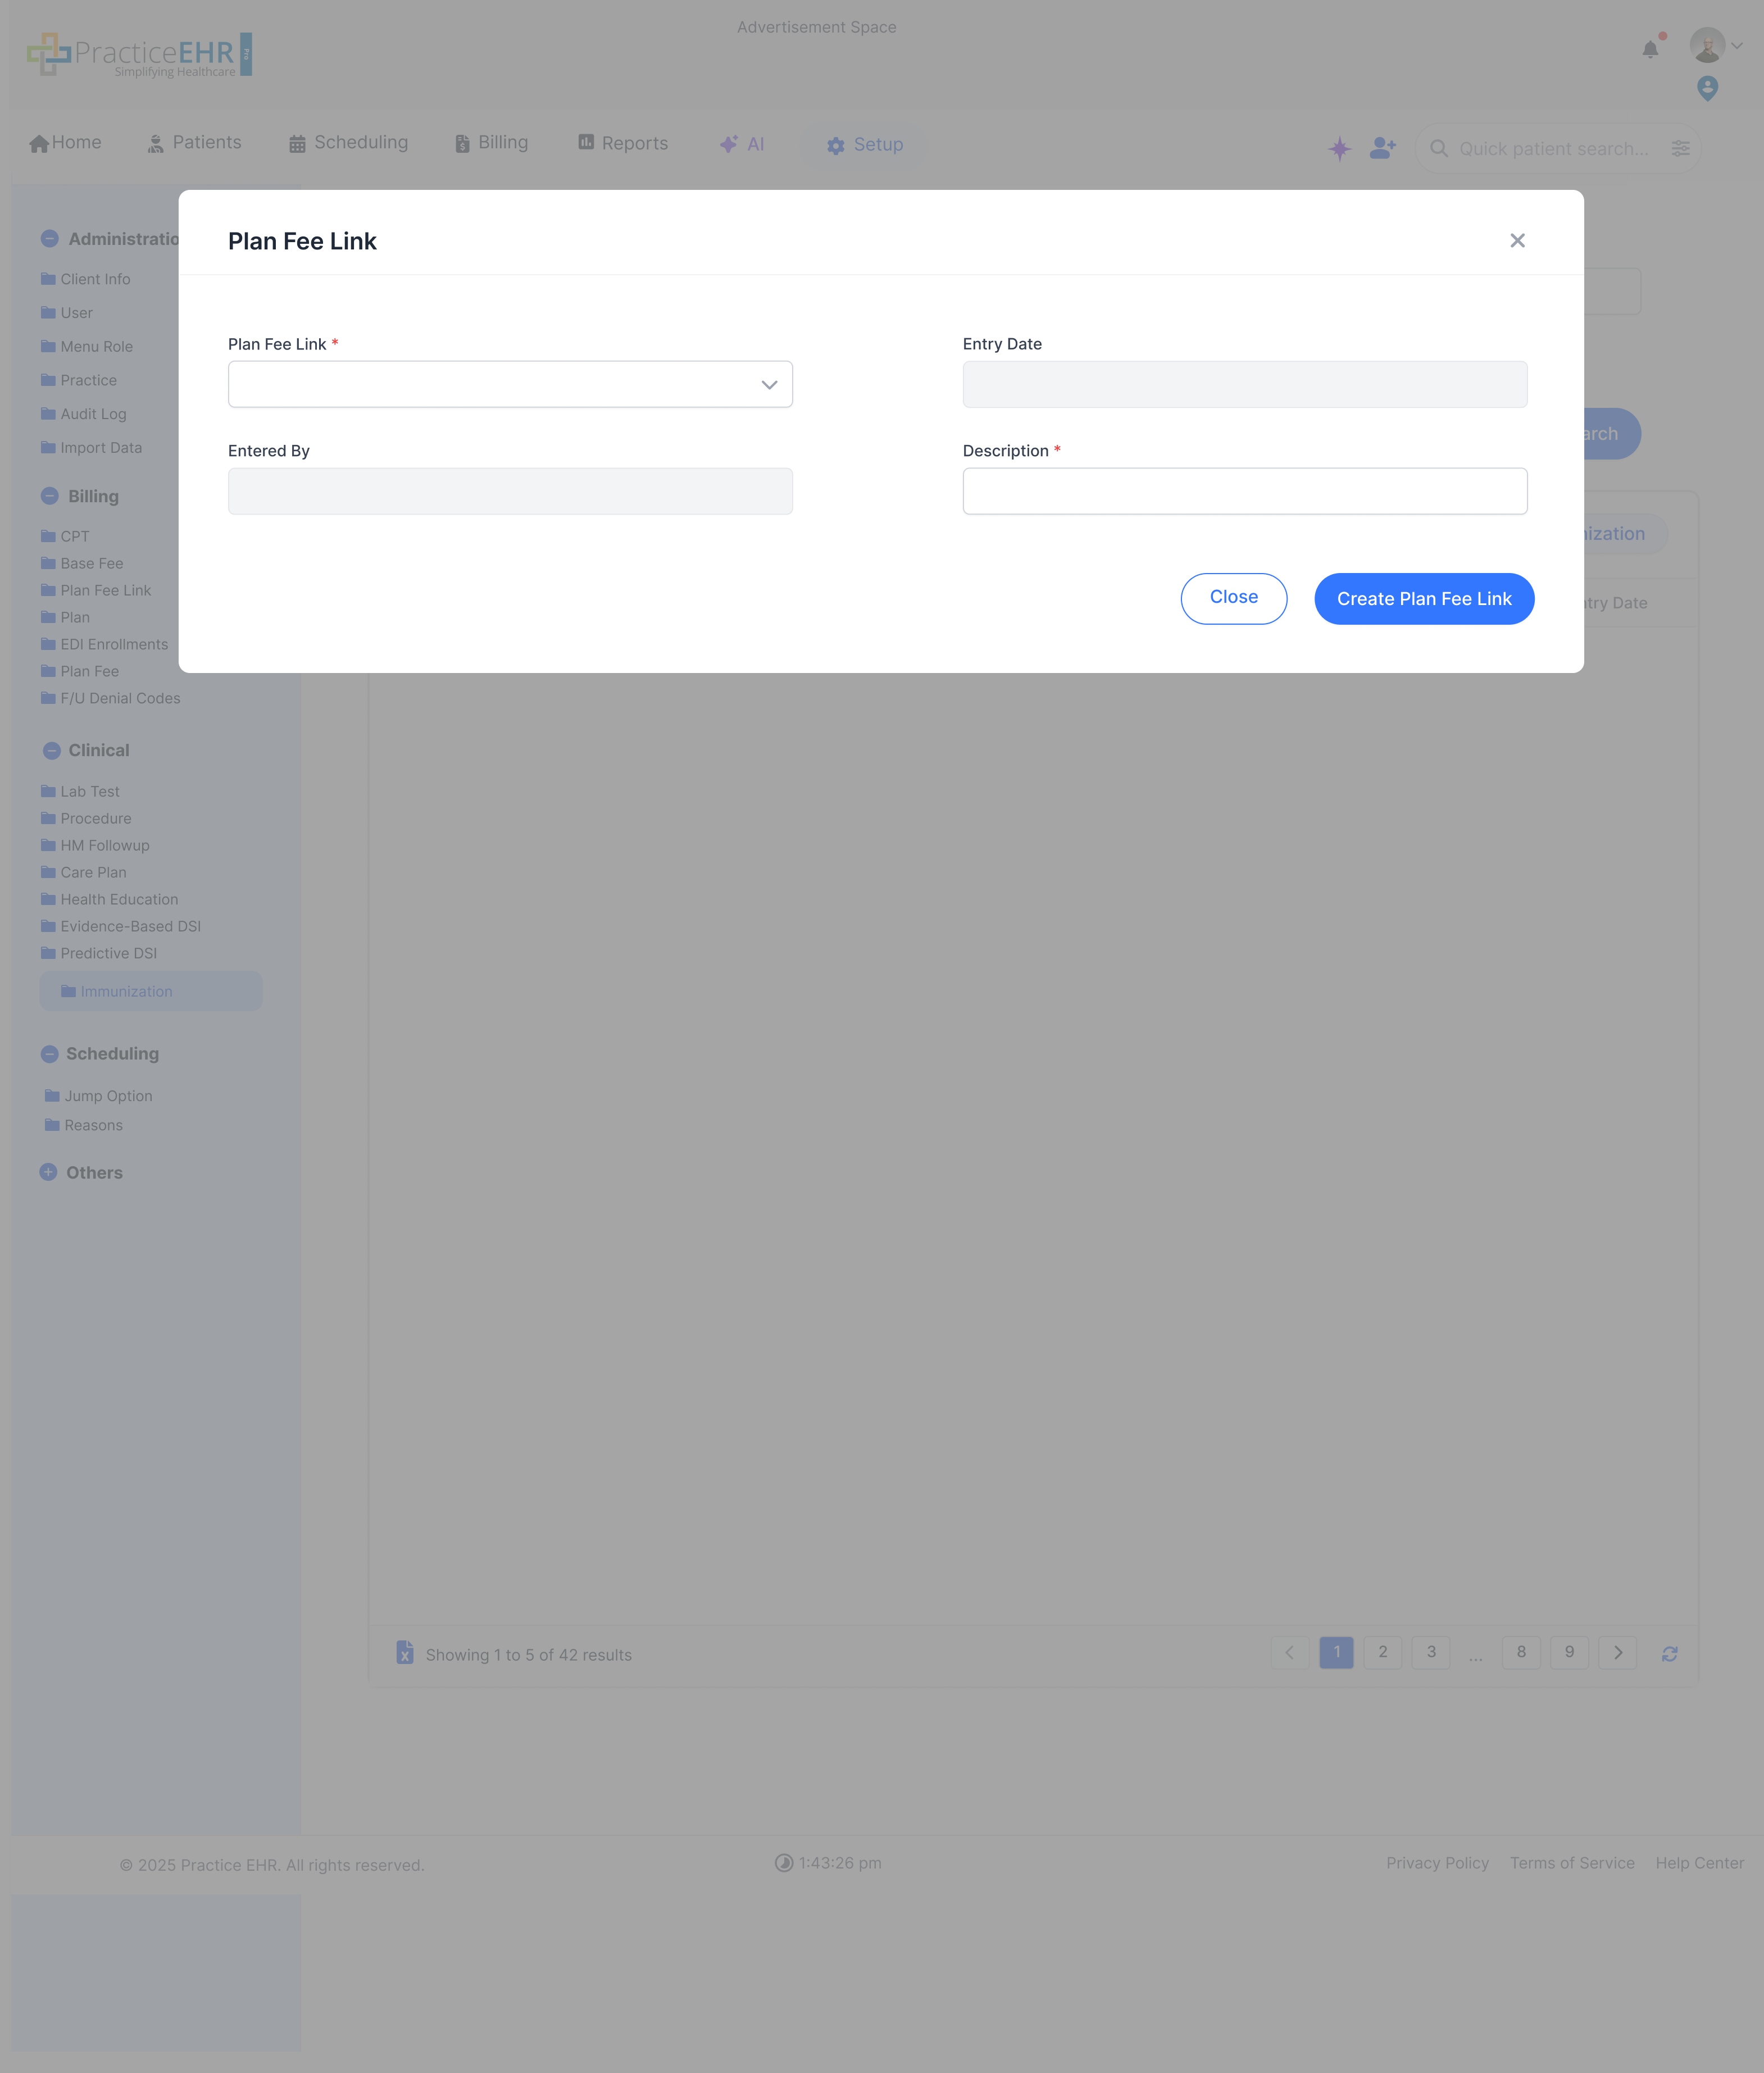
Plan Fee Link
Setup / Billing
This section allows users to link specific fee schedules to different
insurance plans.
Fee Schedule Linking
Search for existing links by Plan Fee Link name or Description.
The grid displays all configured links.
Click "Create Plan Fee Link" to associate a fee schedule with a plan.
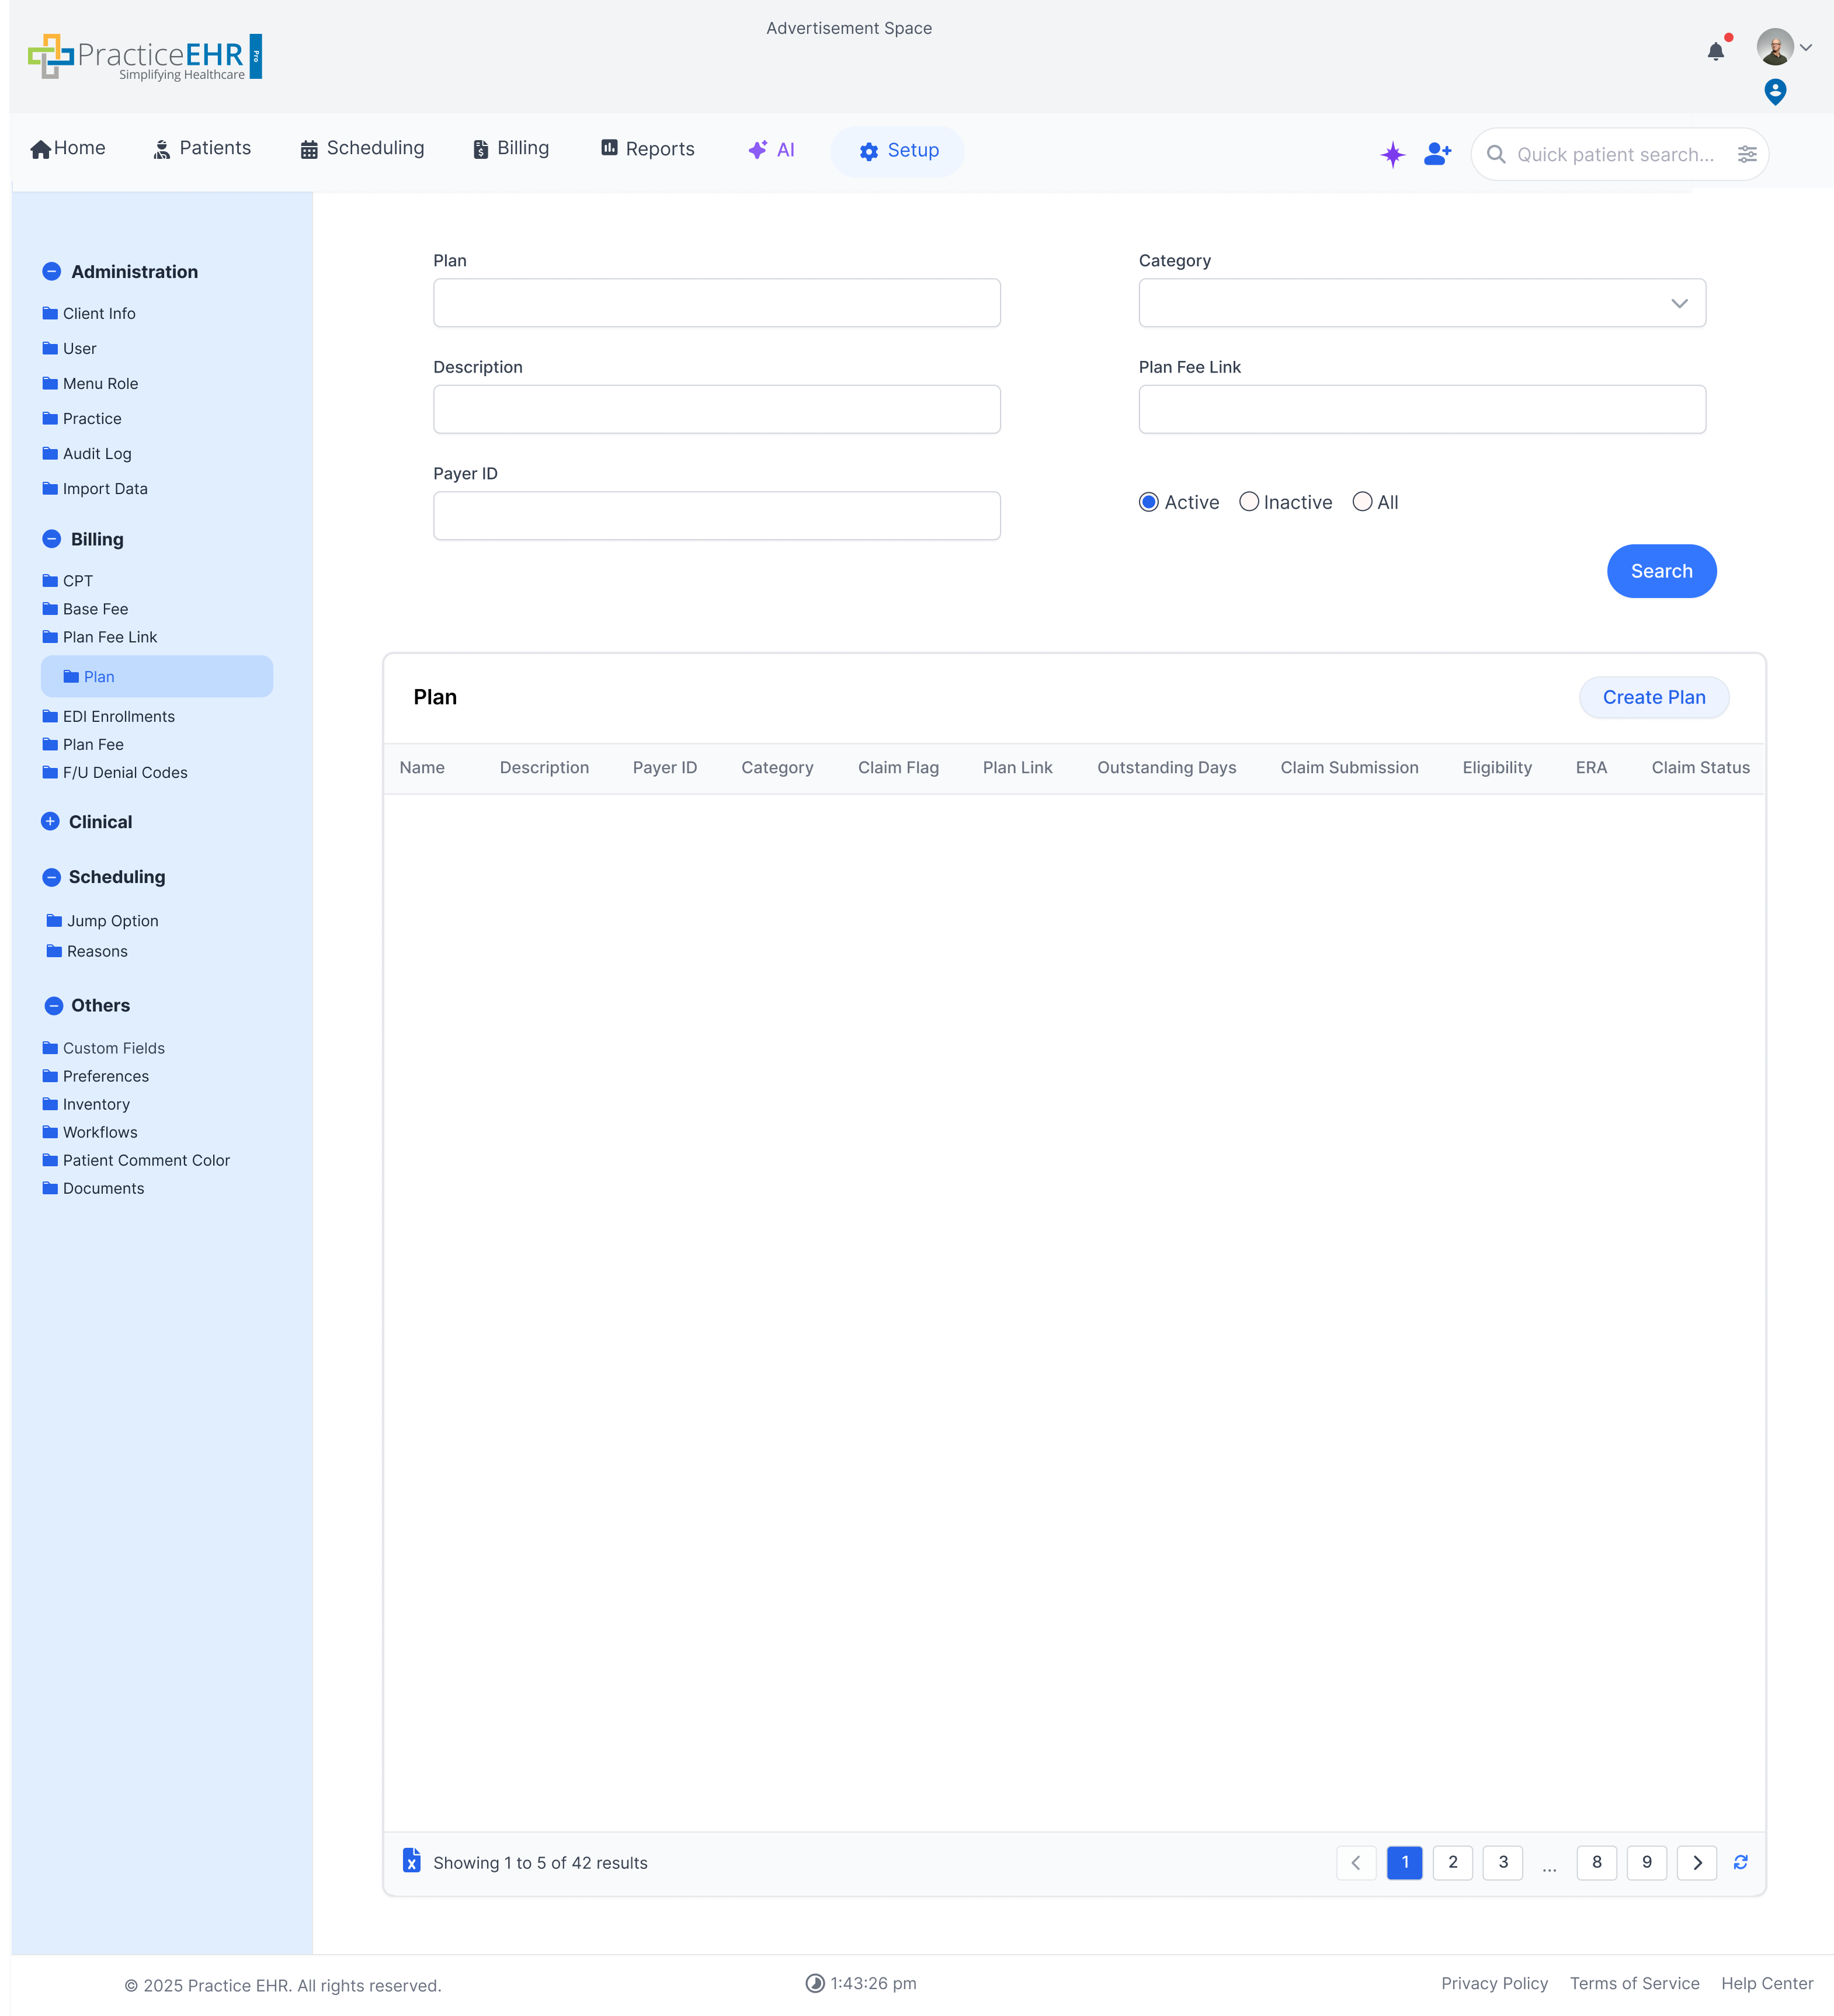
Plan
Setup / Billing
Manage insurance plans, including Payer ID, category, and fee link
associations.
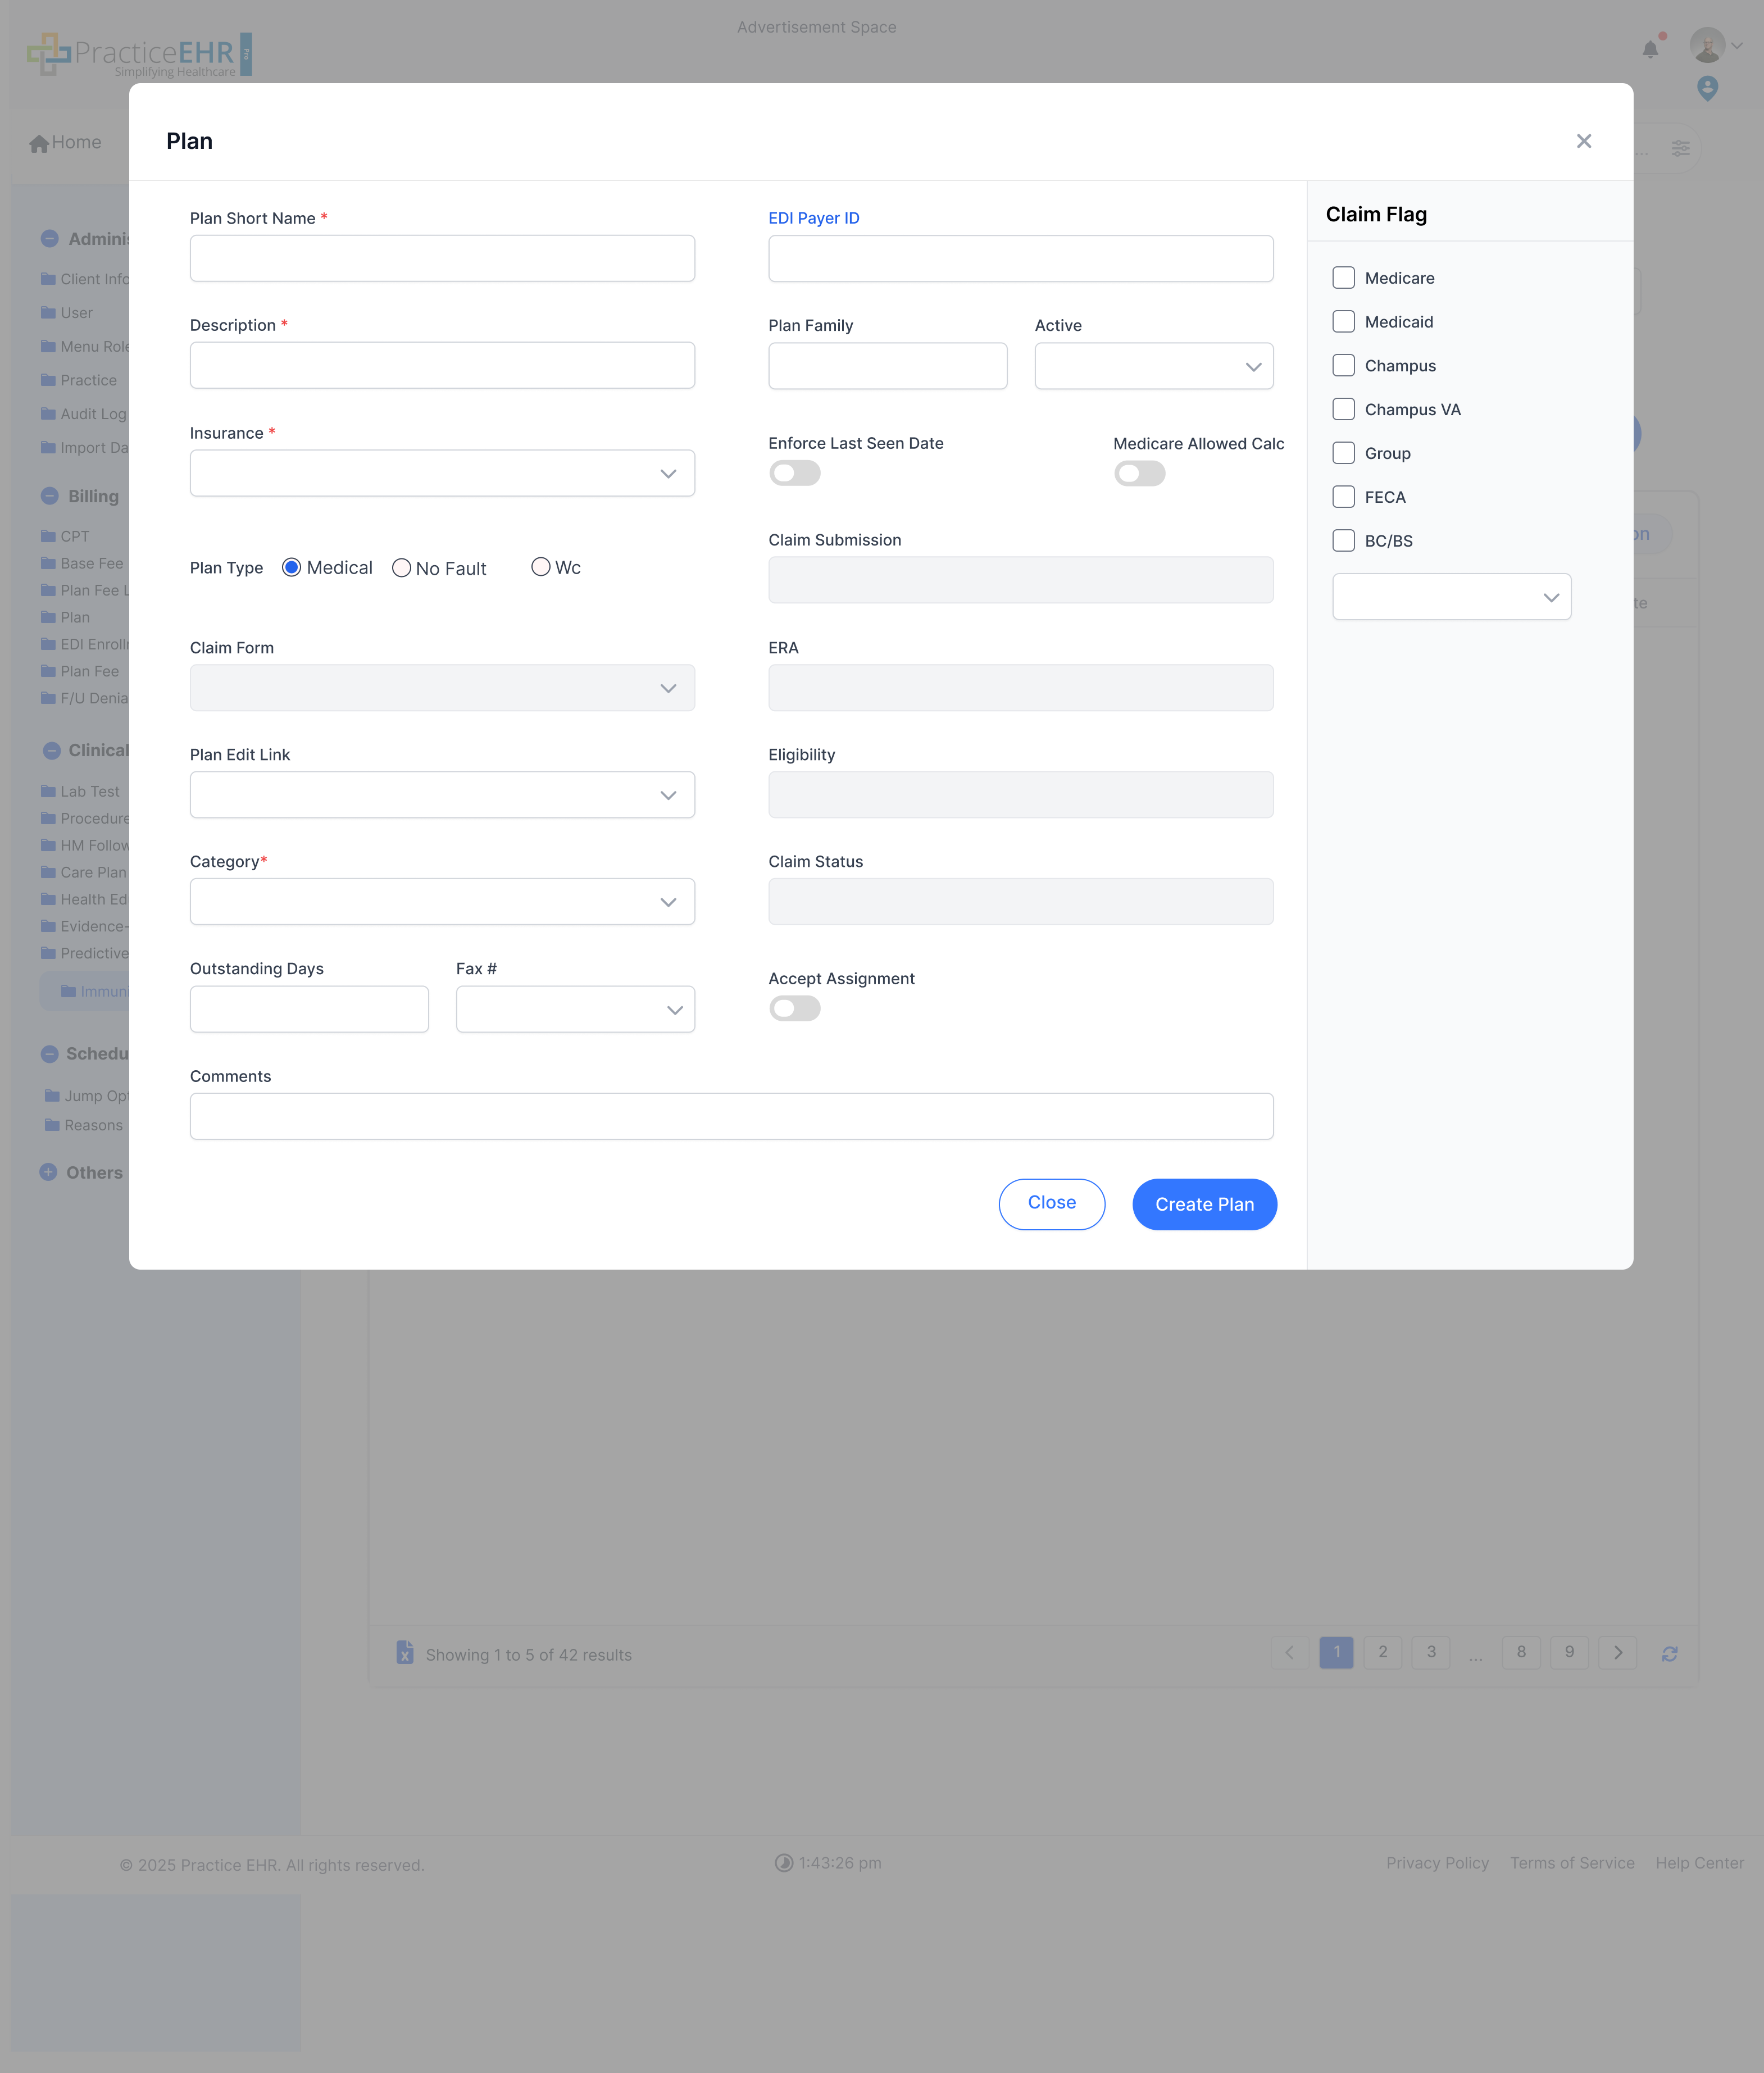
Insurance Plan Management
Search for plans by name, Payer ID, category, or description.
Filter plans by status (Active, Inactive, All).
The grid shows plan details, including eligibility, ERA, and claim submission
status.
Click "Create Plan" to add a new insurance plan.
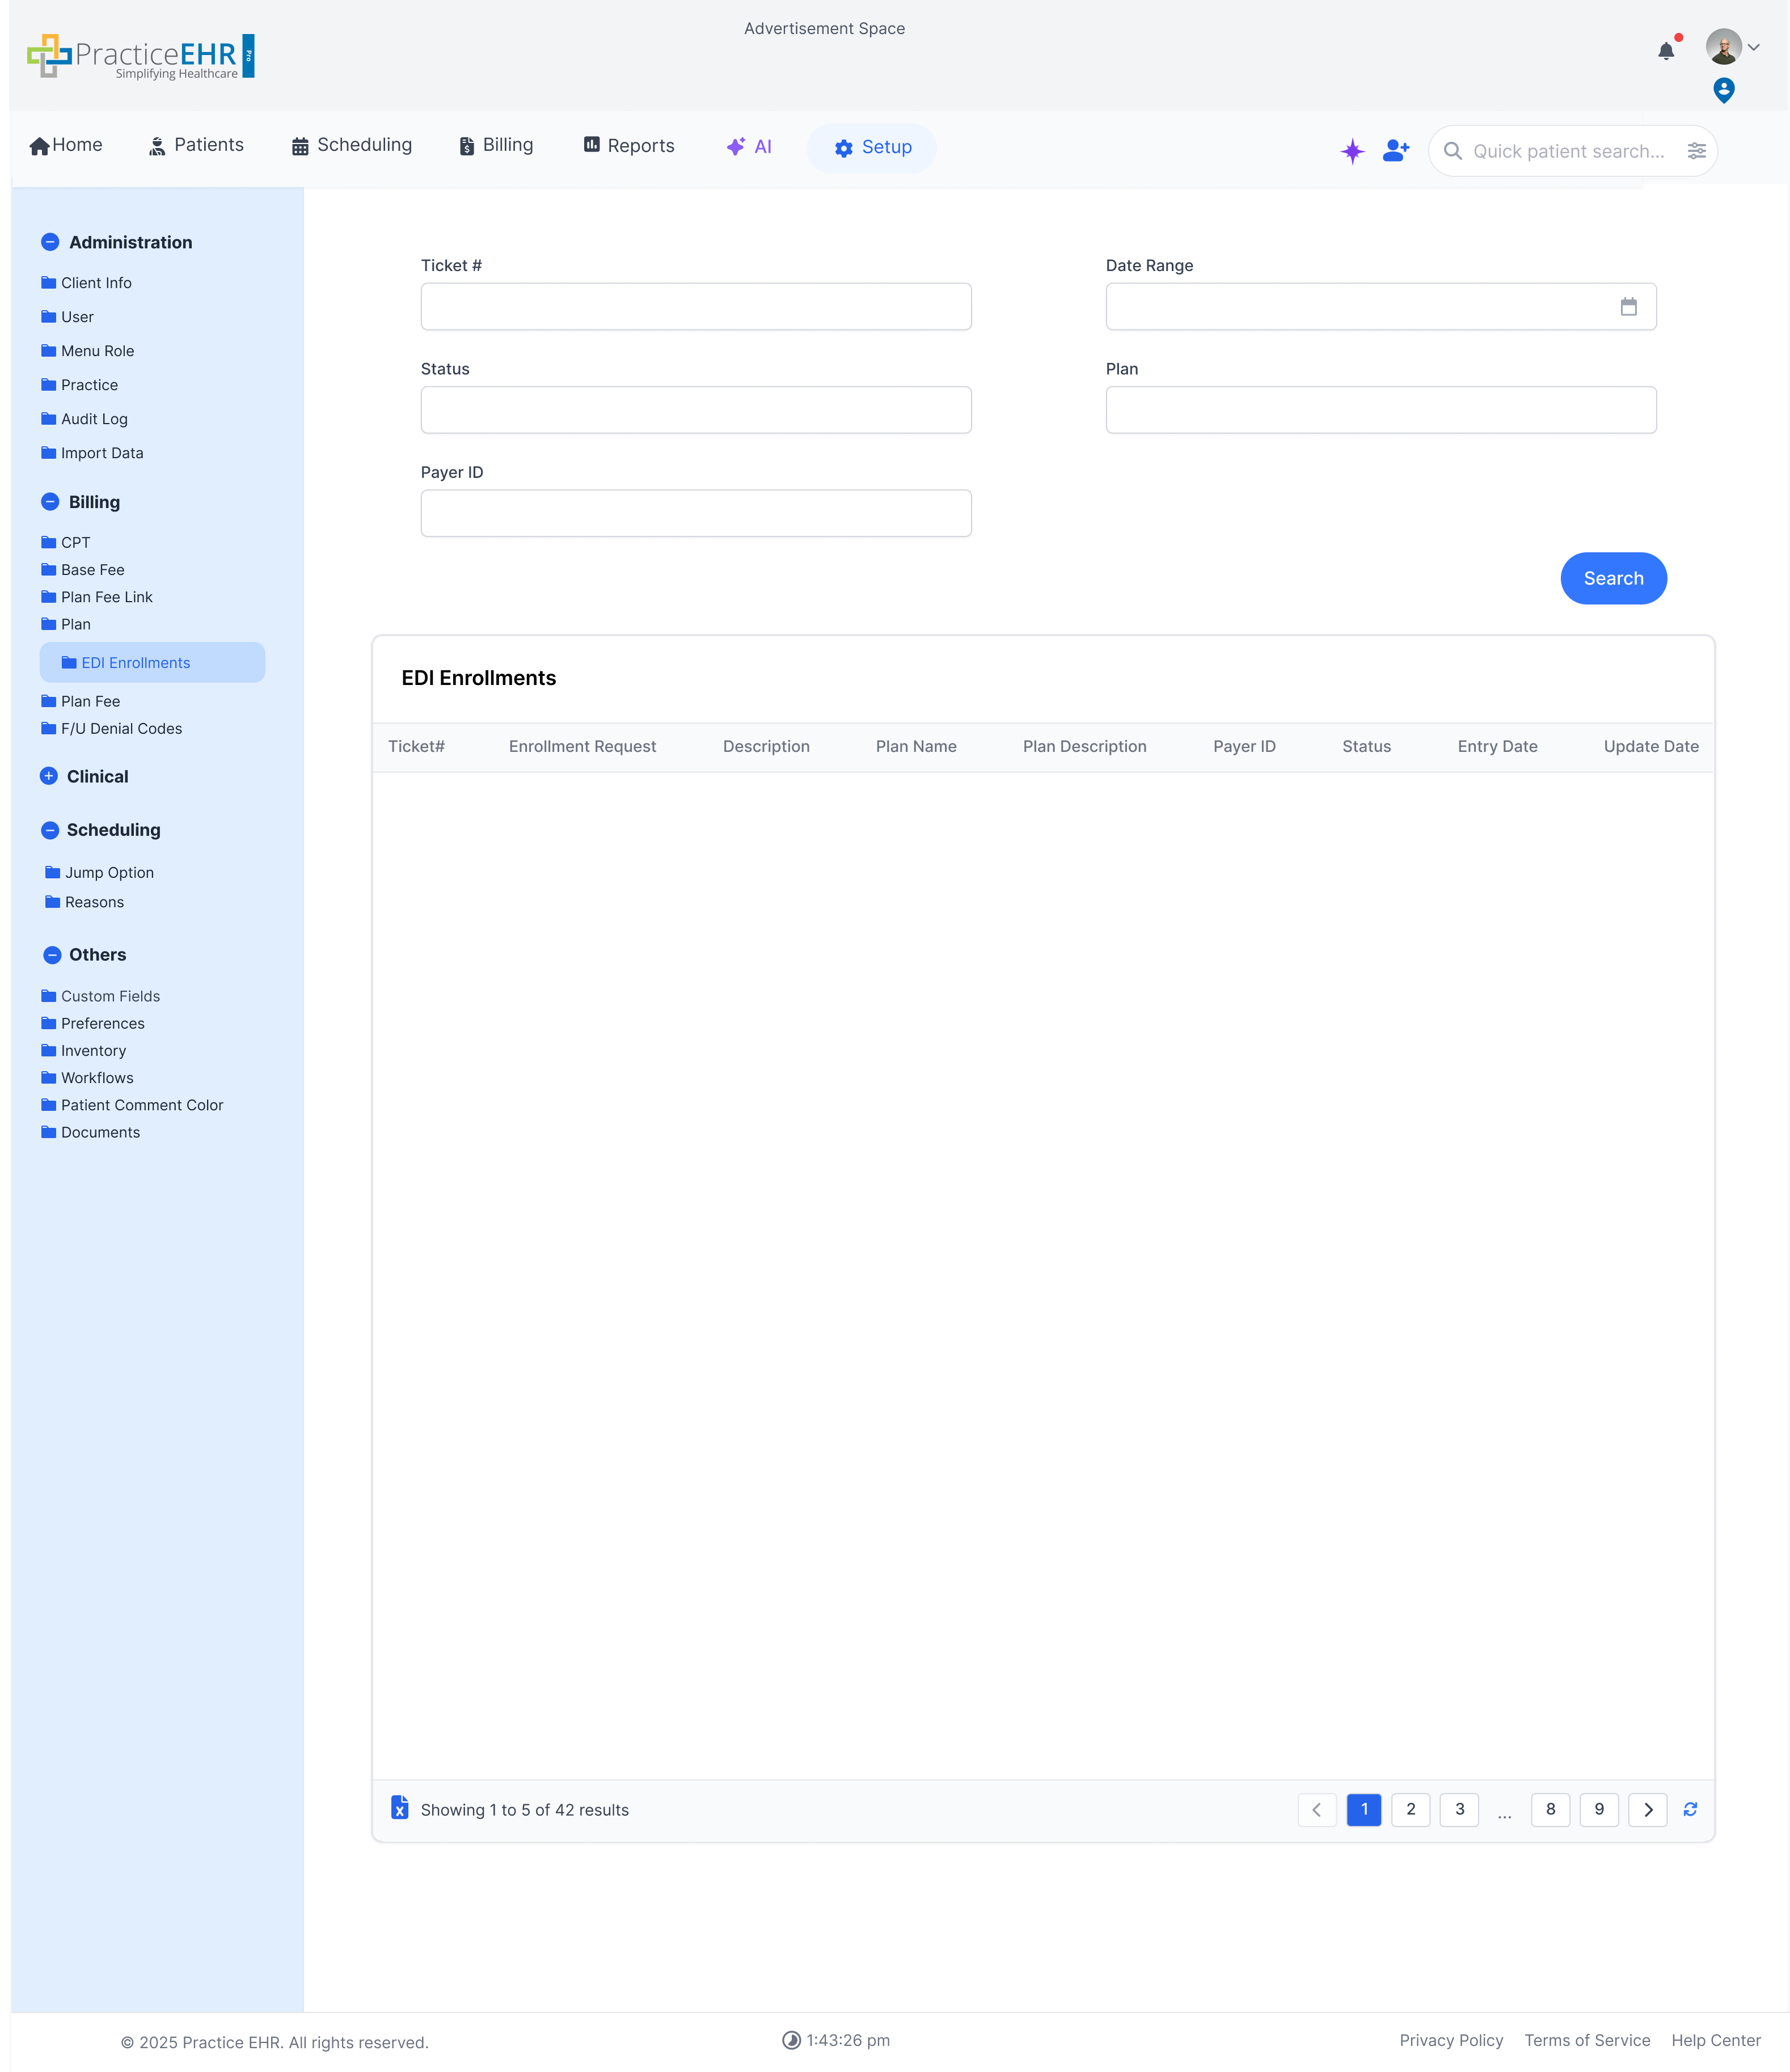
EDI Enrollments
Setup / Billing
Track the status of EDI (Electronic Data Interchange) enrollments with
various payers.
Enrollment Tracking
Search for enrollments by Ticket #, Status, Payer ID, Plan, or Date Range.
The grid displays the status and details of each enrollment request.
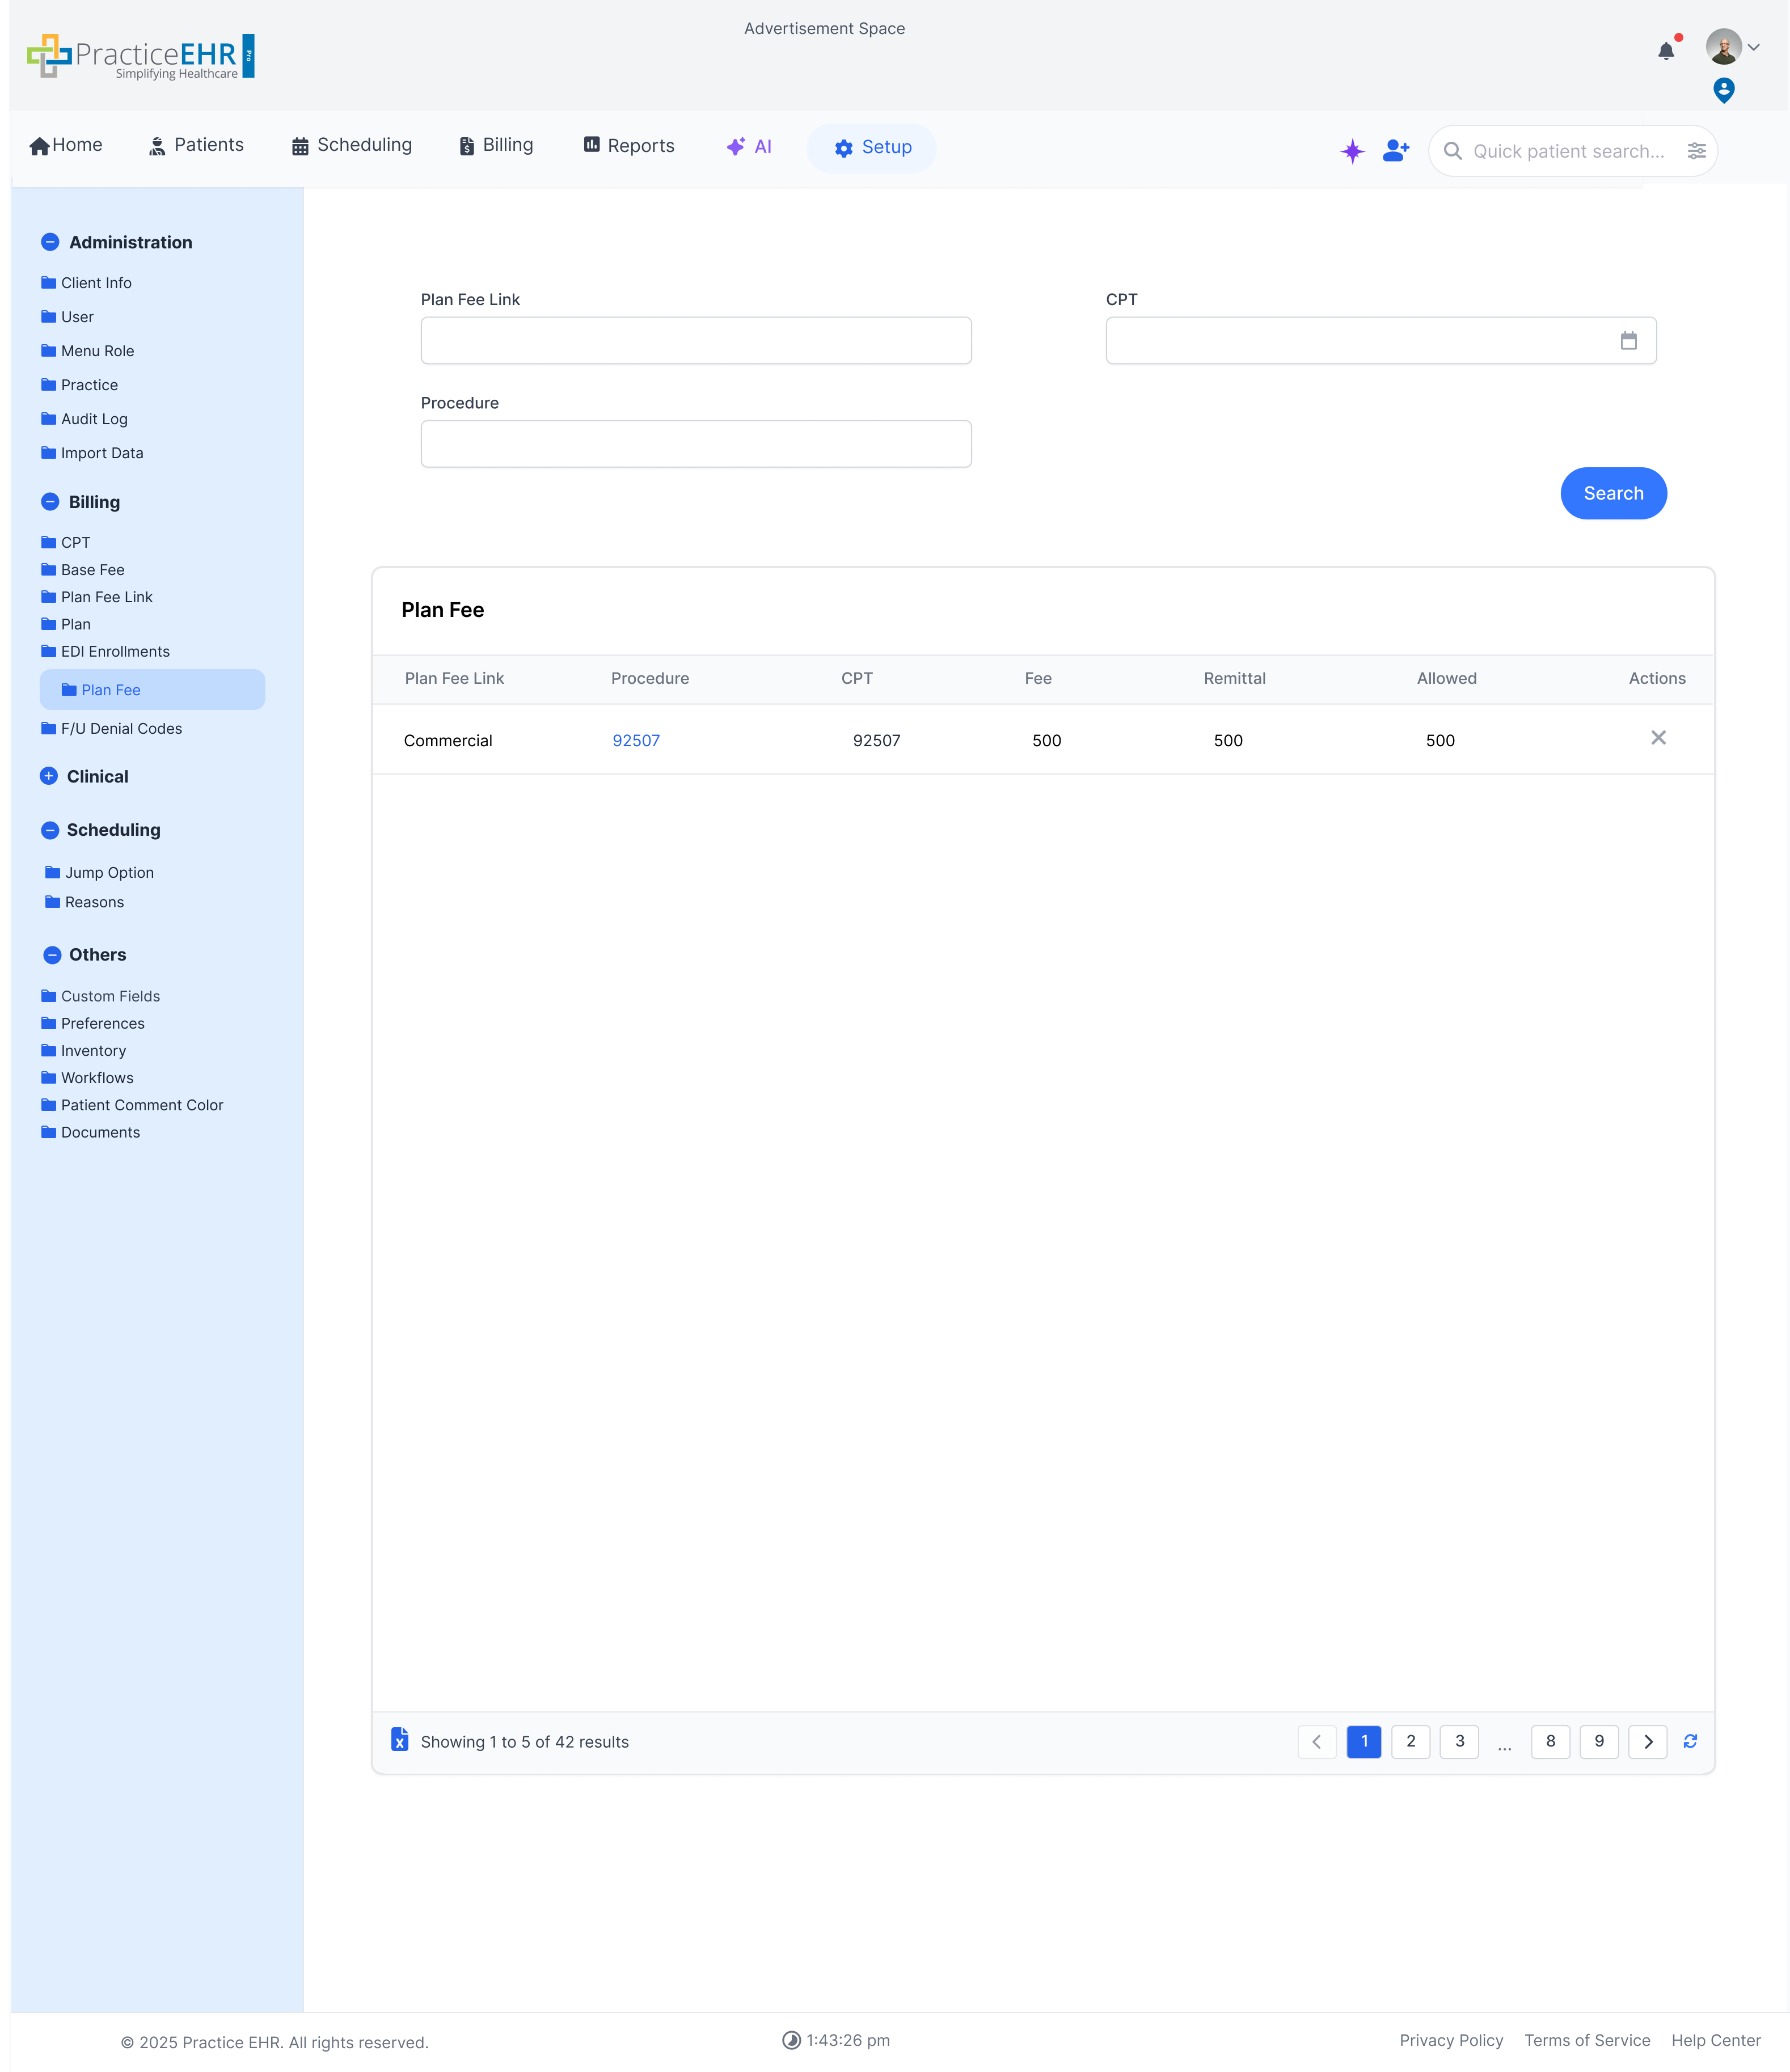
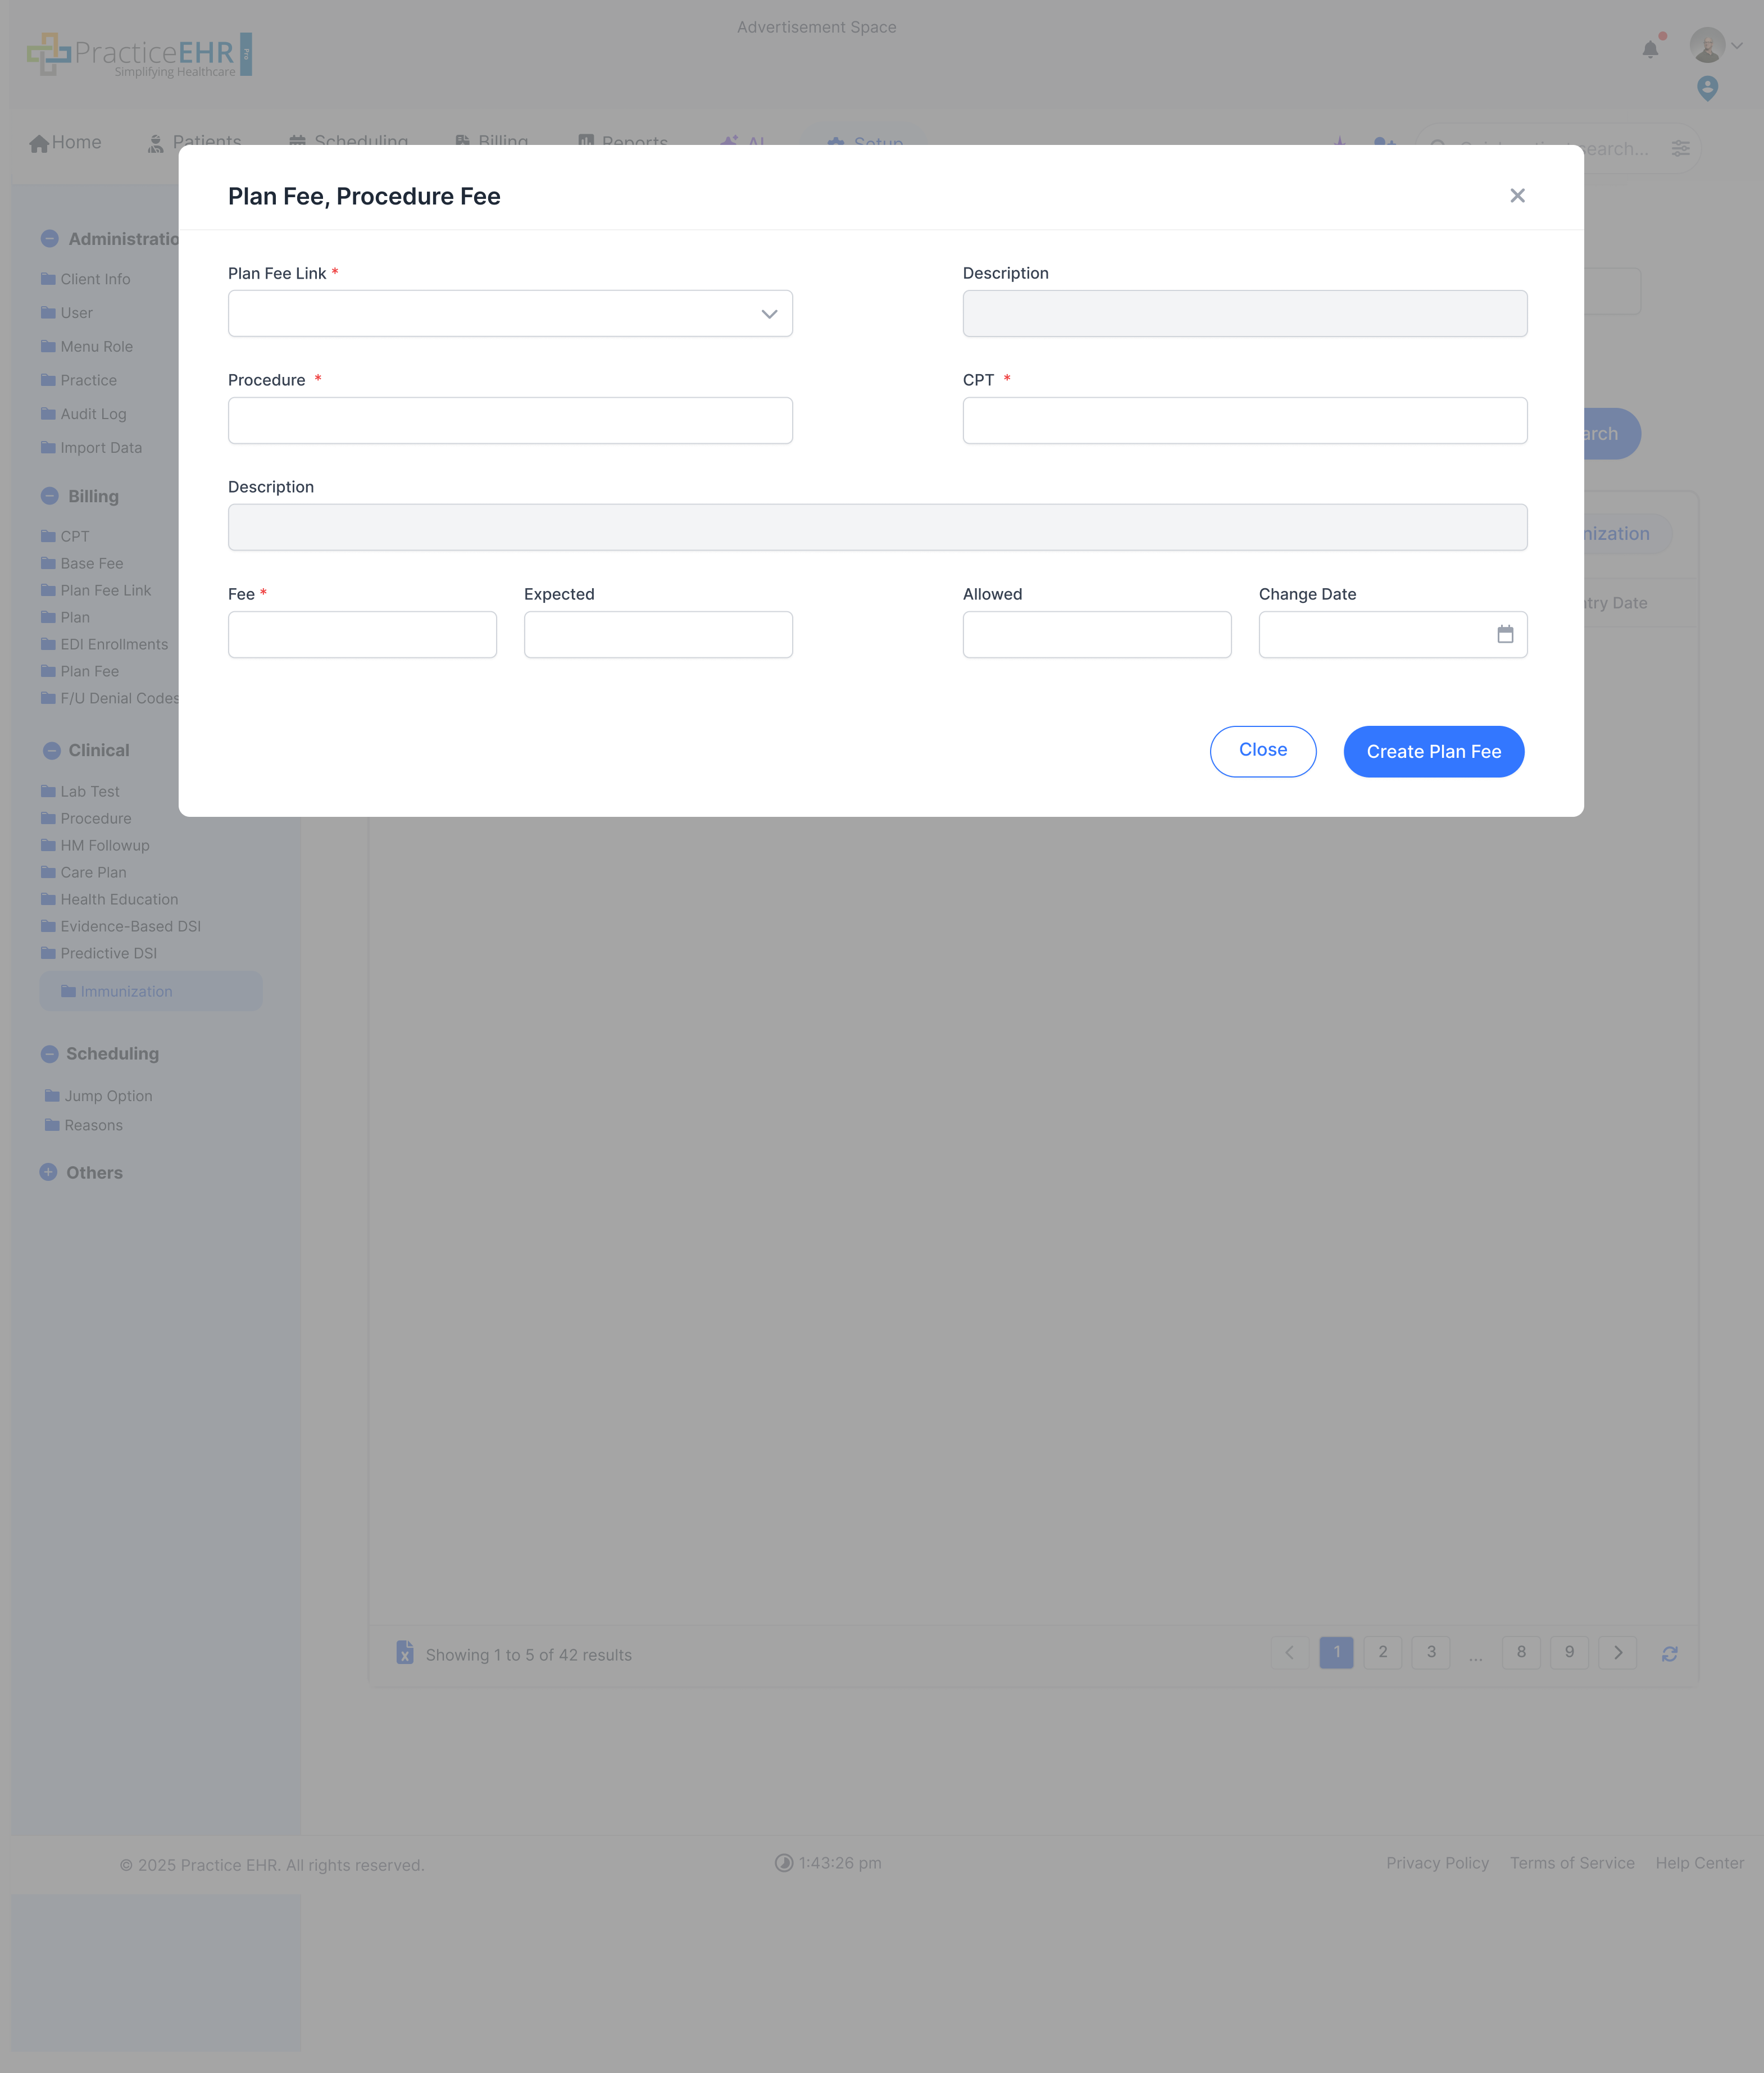
Plan Fee
Setup / Billing
Manage specific fee amounts associated with different insurance plan links
and procedures.
Plan-Specific Fees
Search by Plan Fee Link, Procedure, or CPT code.
The grid shows the specific fee, remittal, and allowed amounts for each procedure
under a plan link.
Click "Create Plan Fee" to add or update a plan-specific allowed amount from the
setup grid.
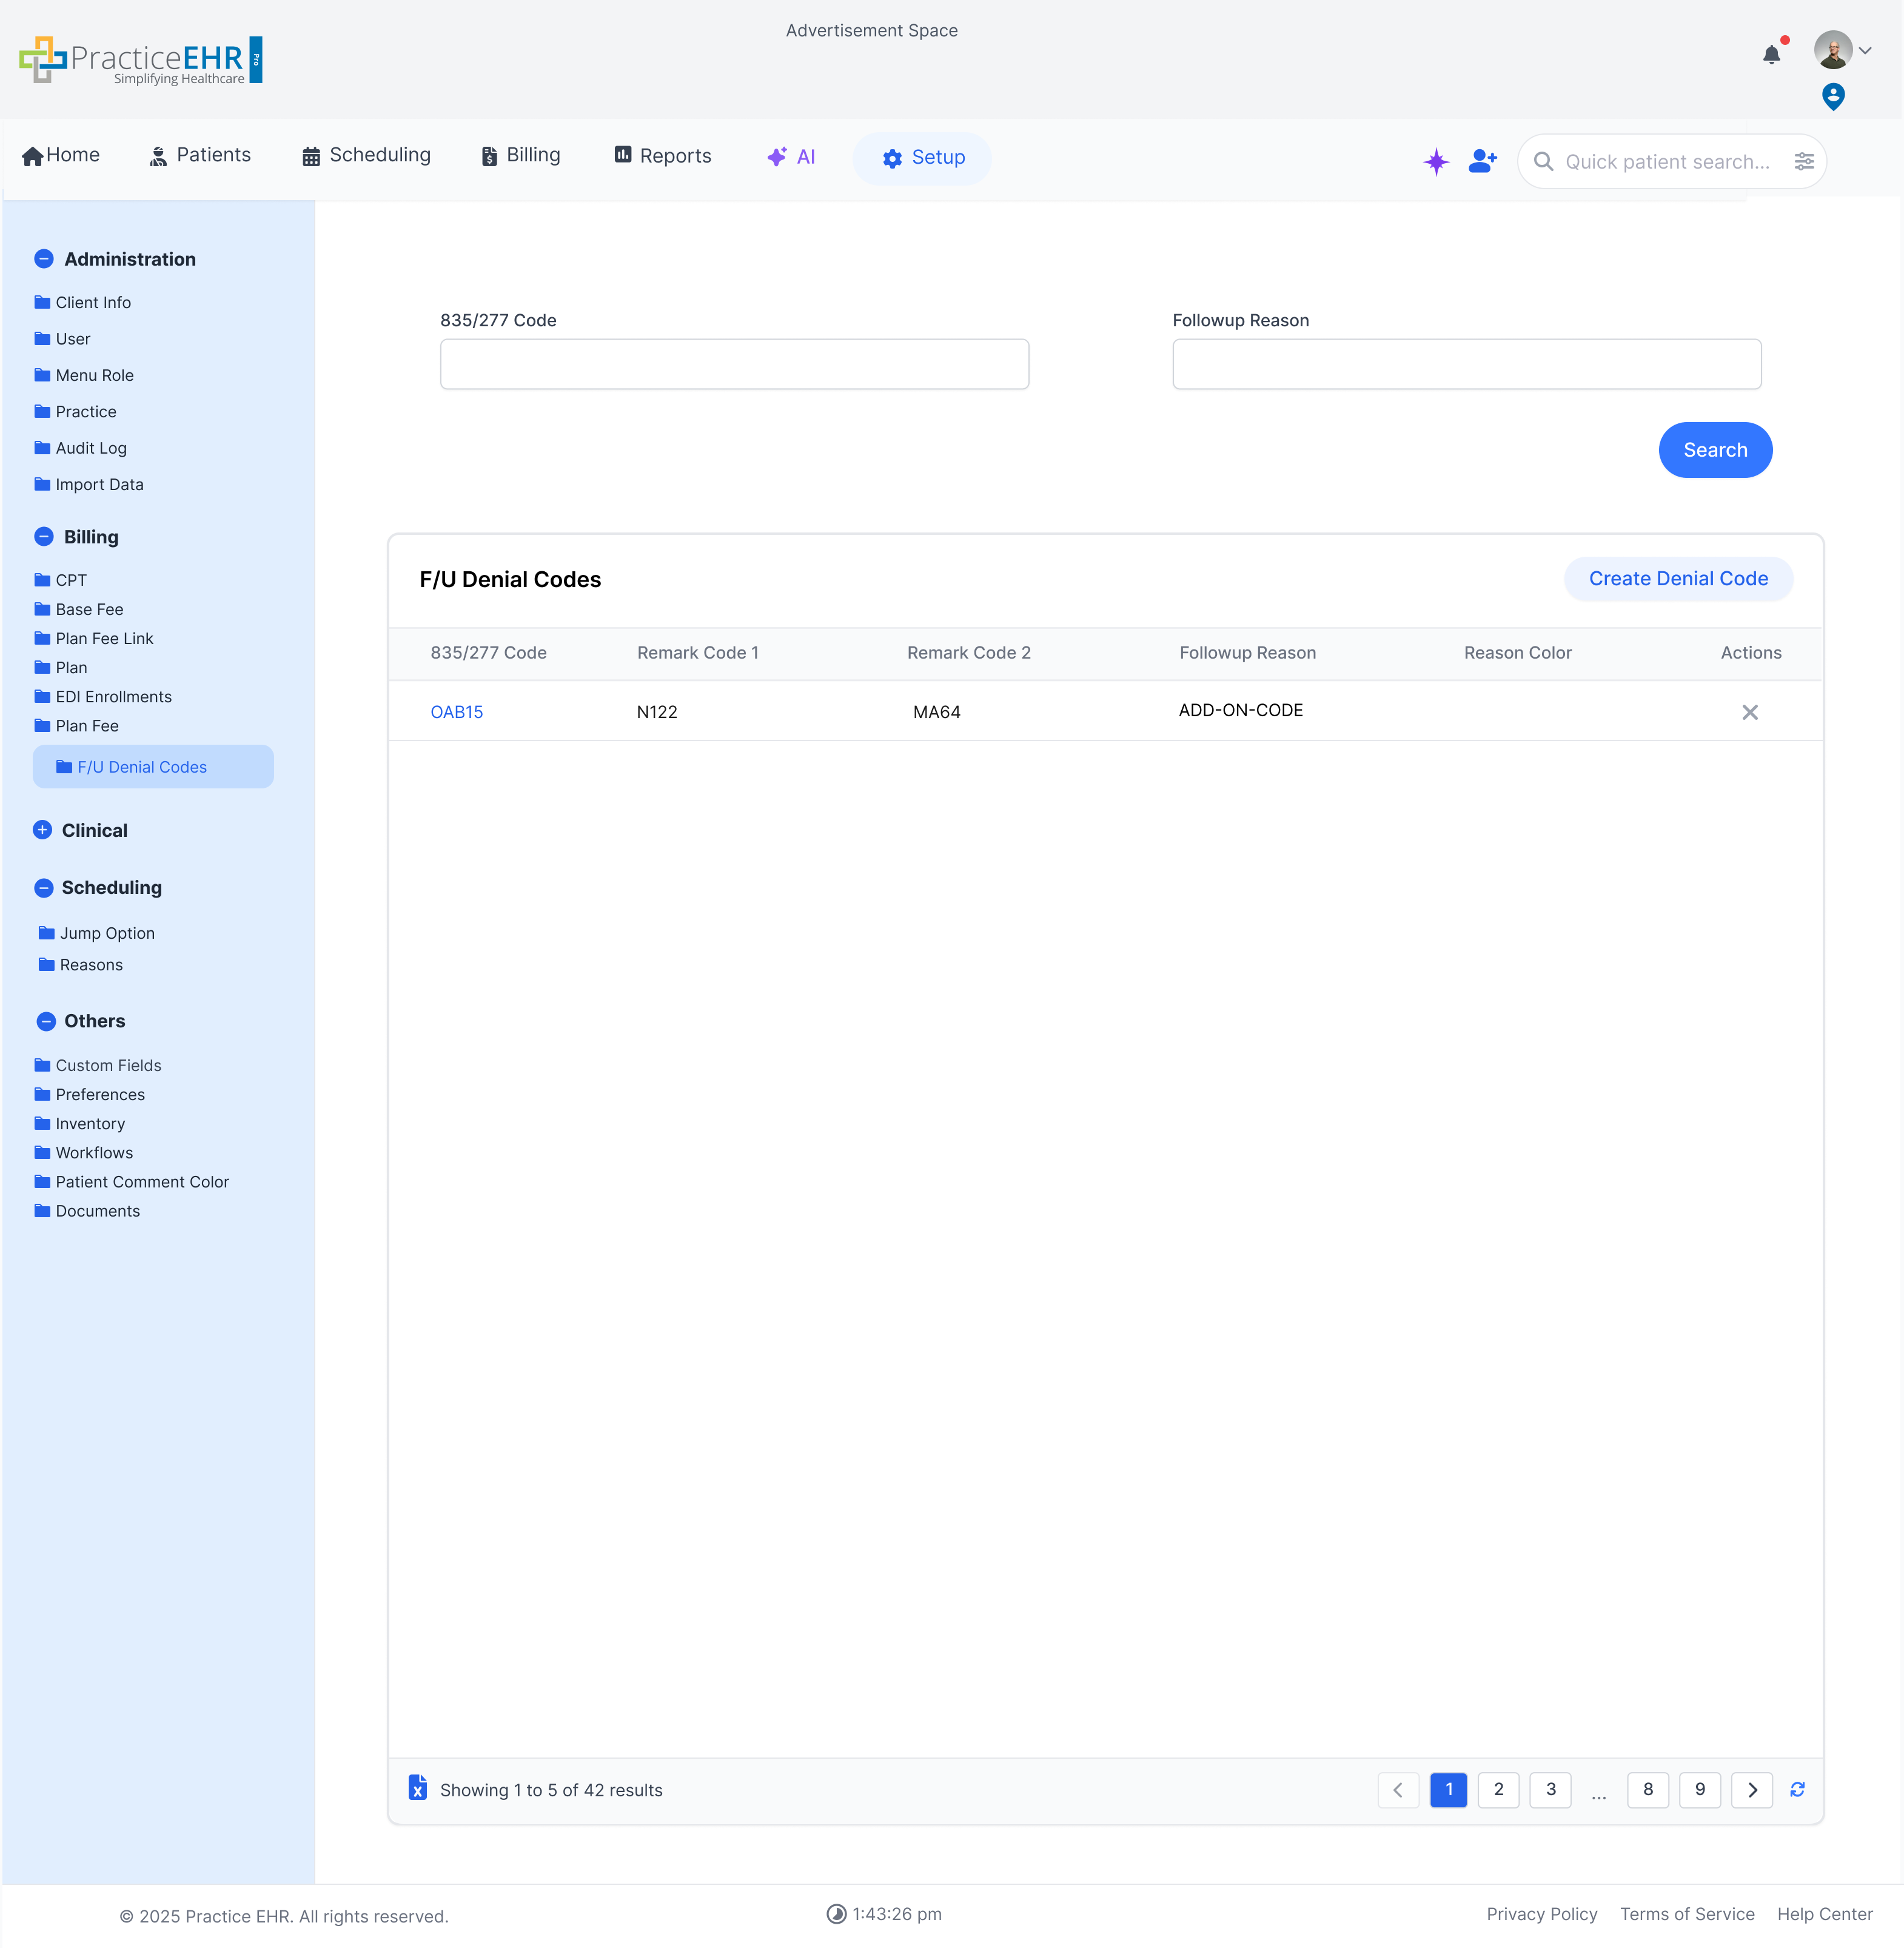
F/U Denial Codes
Setup / Billing
Configure follow-up actions and reasons for specific denial codes (e.g.,
835/277 codes).
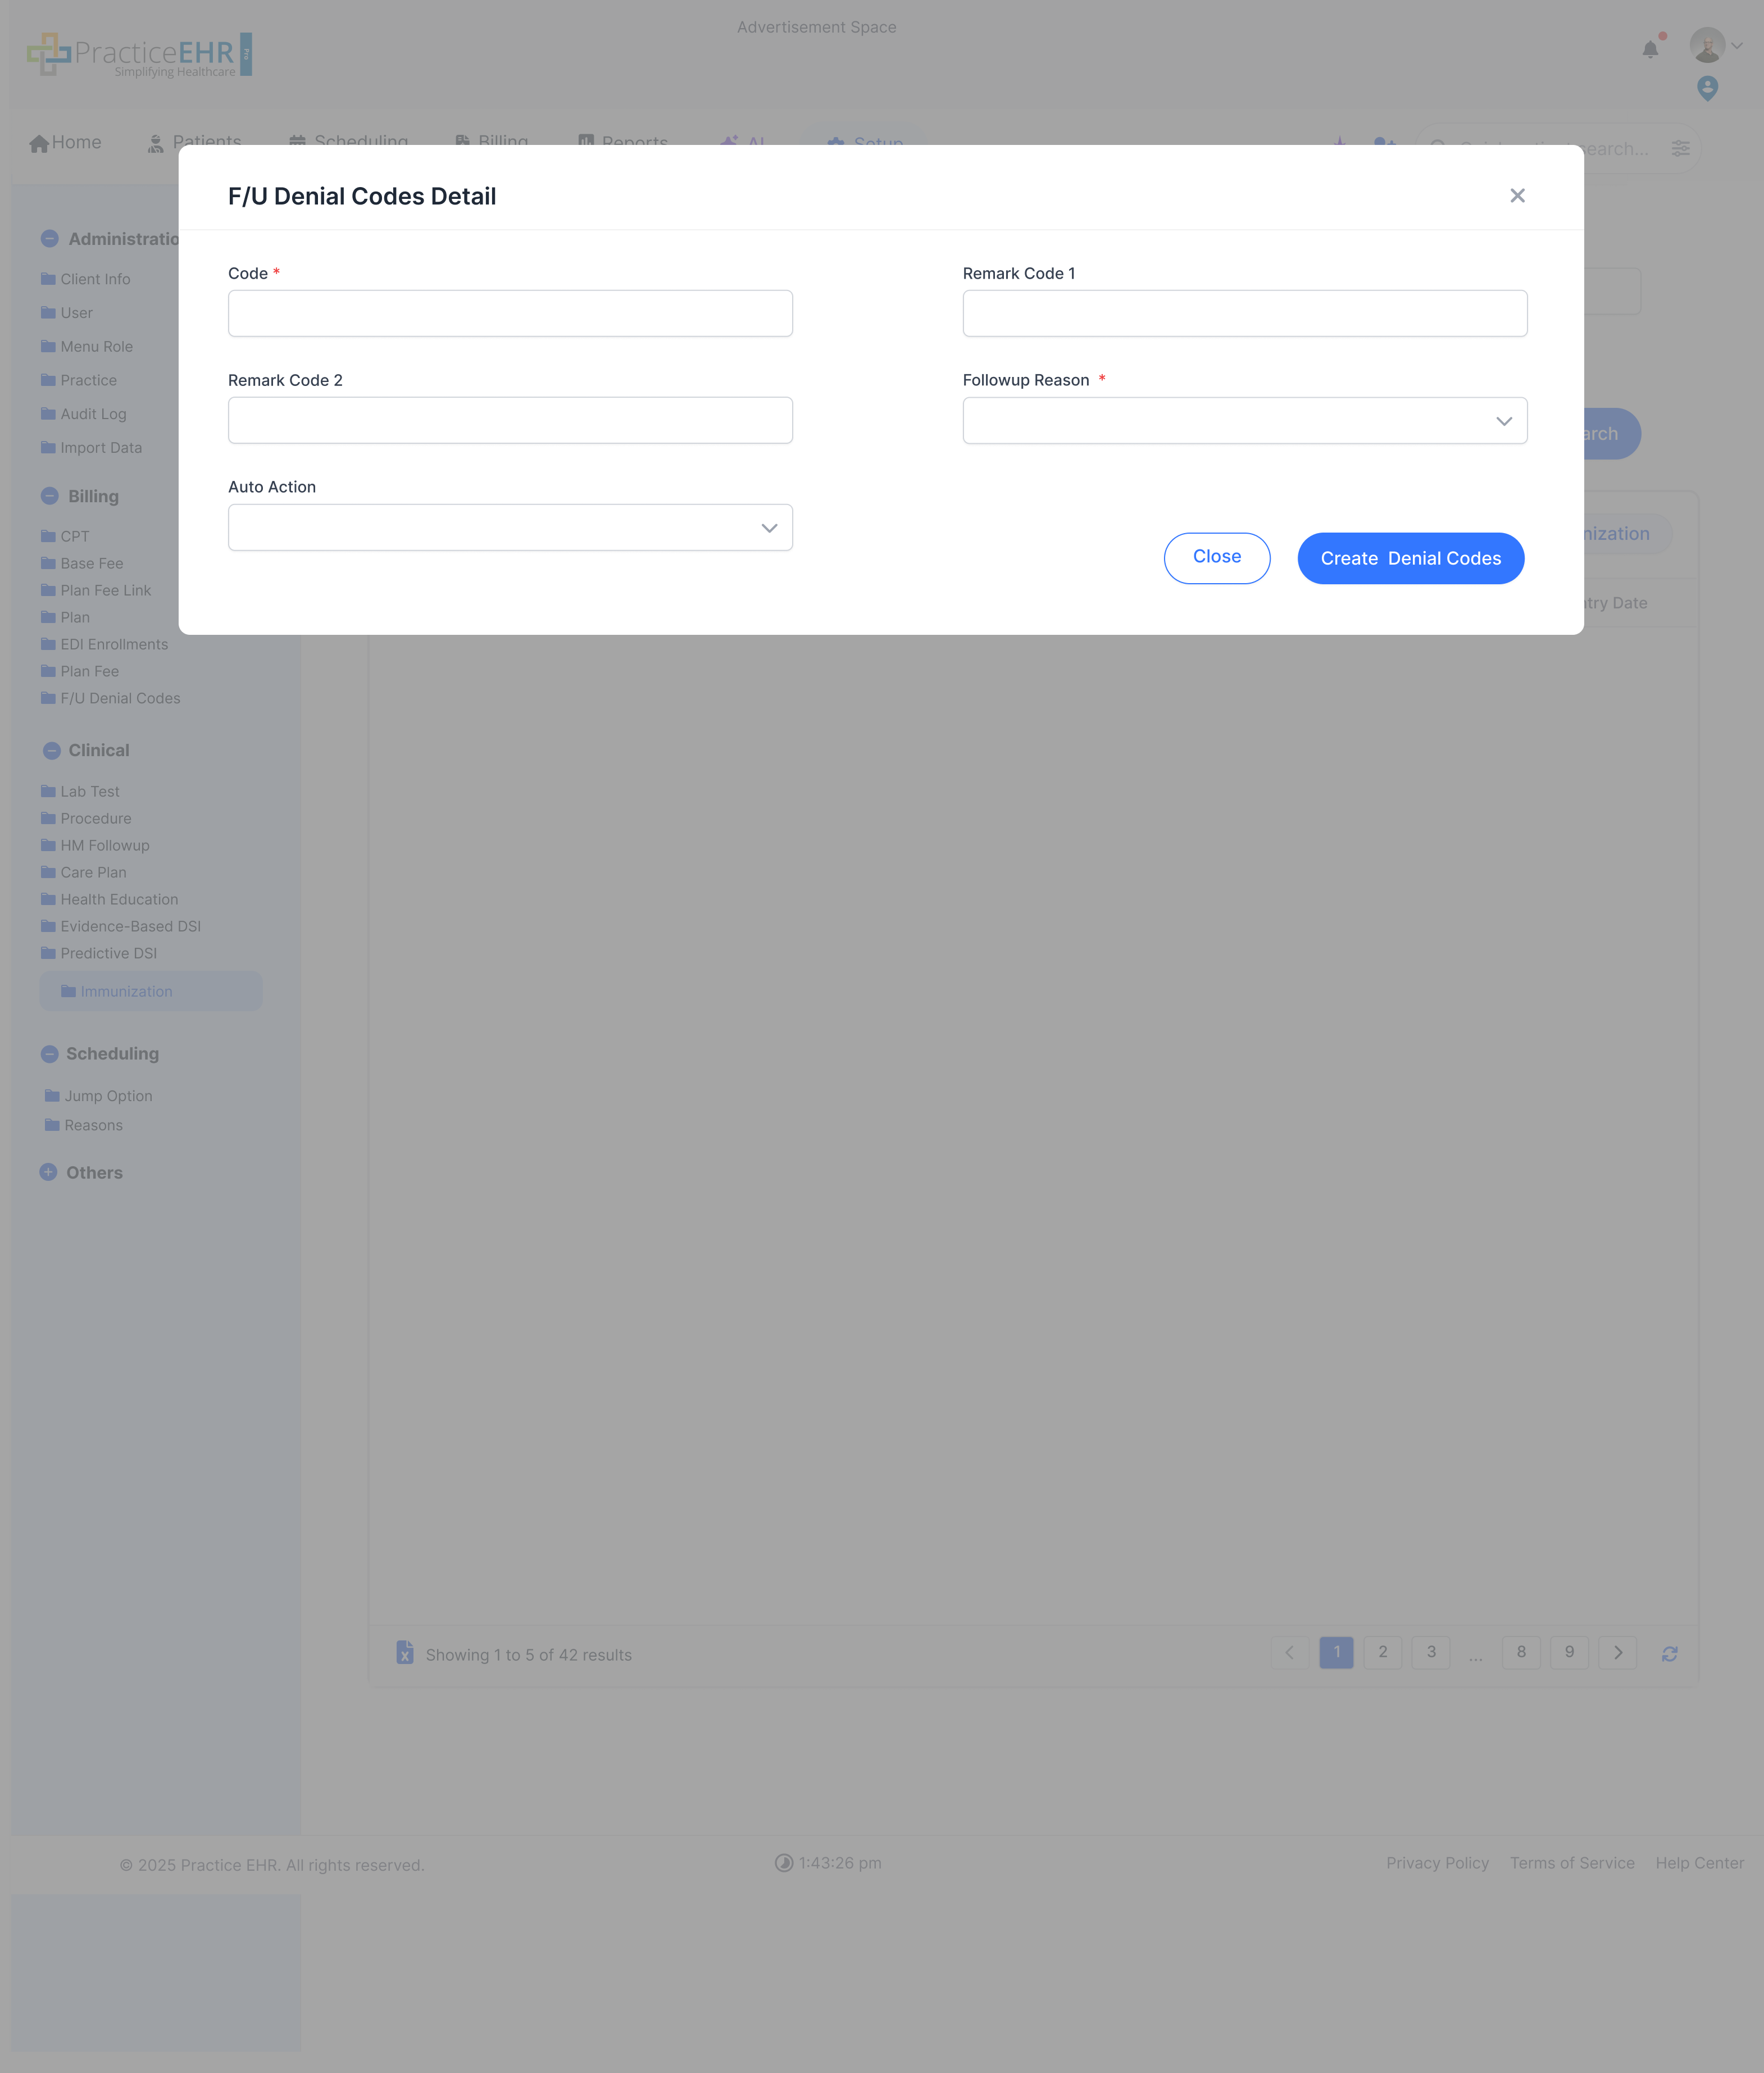
Denial Code Management
Search by 835/277 Code or Followup Reason.
The grid links denial codes (Remark Code 1, Remark Code 2) to a specific Followup
Reason, streamlining the denial management process.
Use "Create Denial Code" to add a new denial mapping and tie it to the correct
follow-up workflow.
The color column helps users visually organize denial reasons and can also be used
as a search filter.
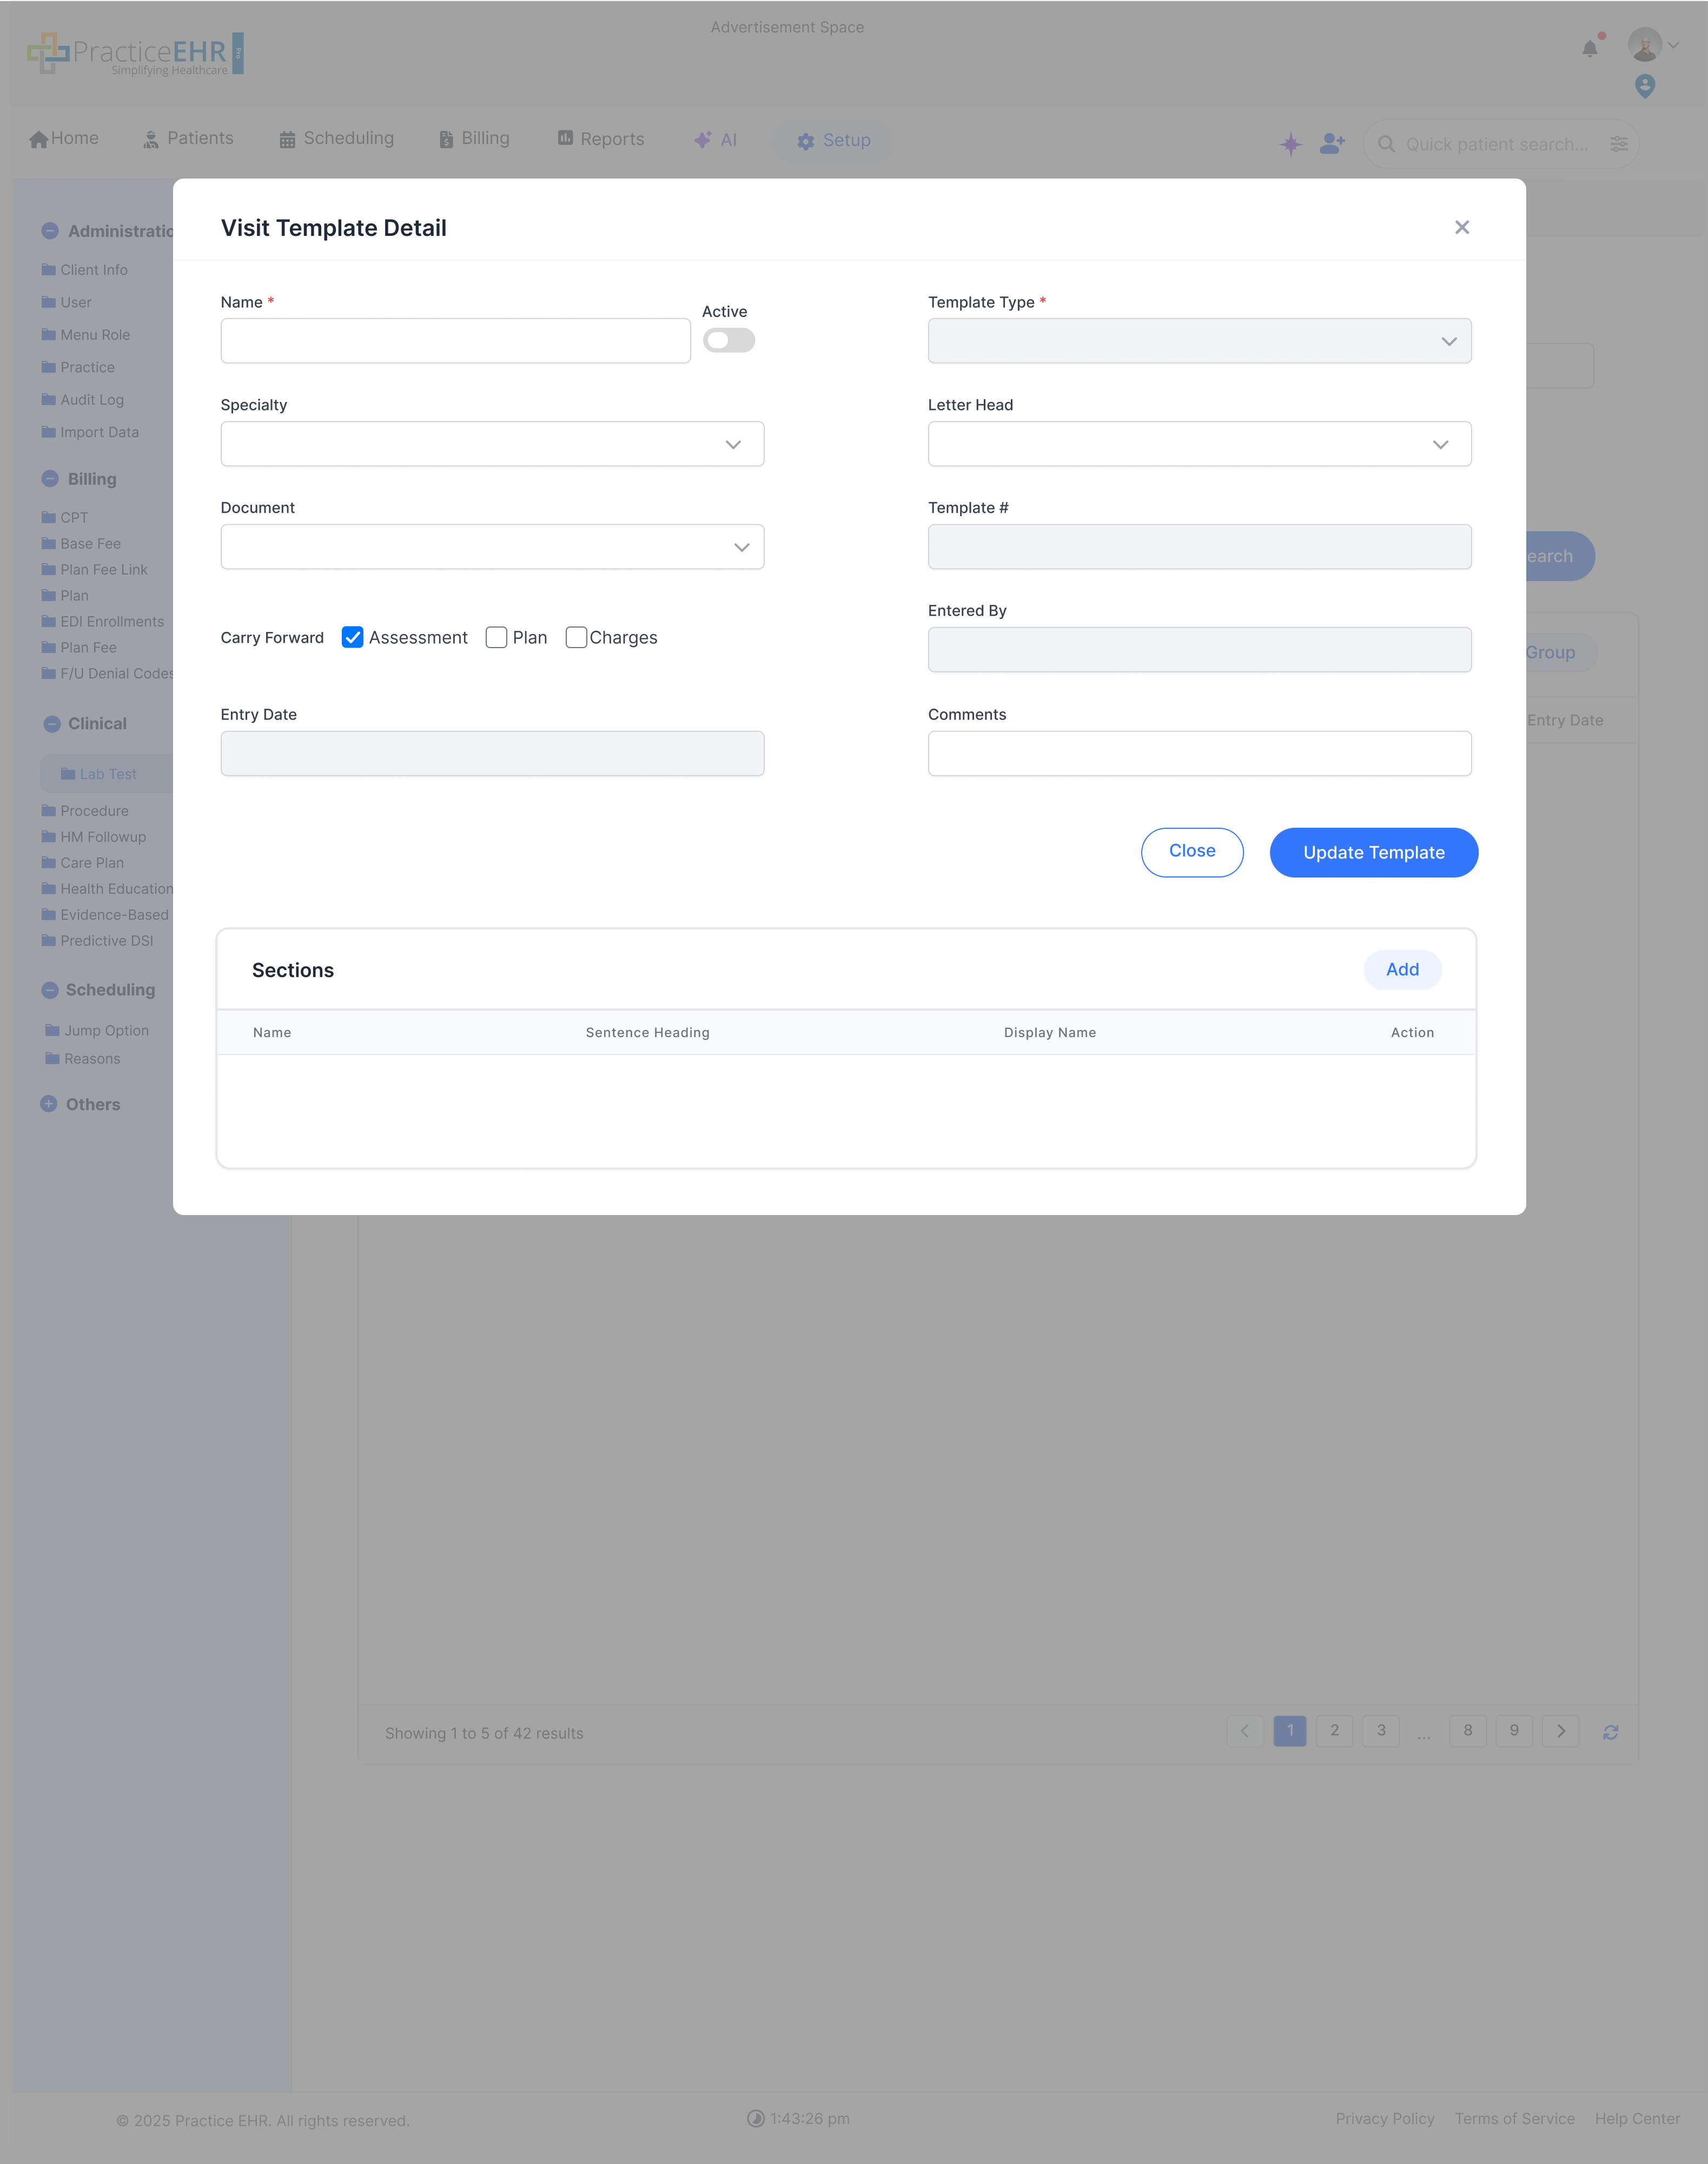
Template
Setup / Clinical
Visit templates let teams assemble reusable clinical note structures by
linking sections into a repeatable documentation flow.
Visit Template Detail
This is the working detail view for a visit template, where the section stack and
template-level settings are reviewed together.
It helps teams update a template without rebuilding the note structure from
scratch.
Add (Section Search)
Selecting Add opens section search so users can find the right documentation block
and attach it to the template.
This keeps template maintenance fast when a section needs to be inserted,
reordered, or replaced.
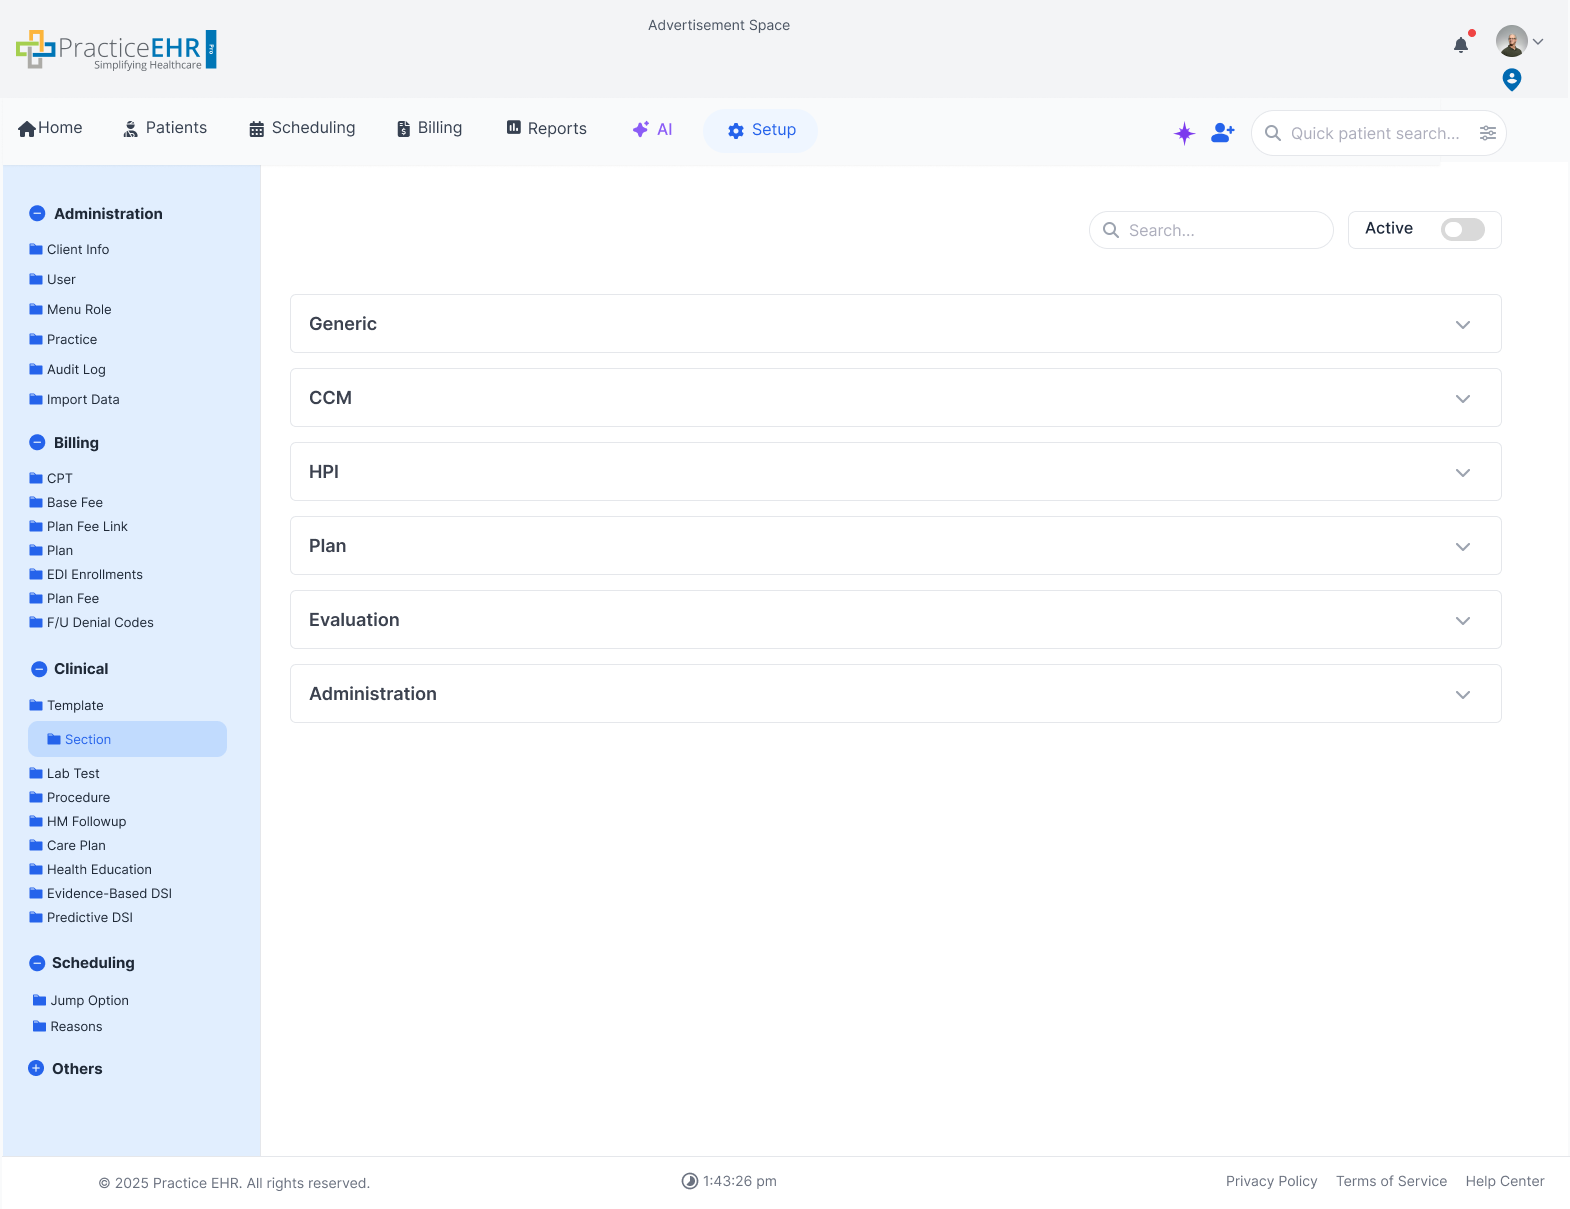
Section
Setup / Clinical
Clinical sections are reusable documentation blocks that can be opened from
a section hyperlink and managed centrally for use in templates and notes.
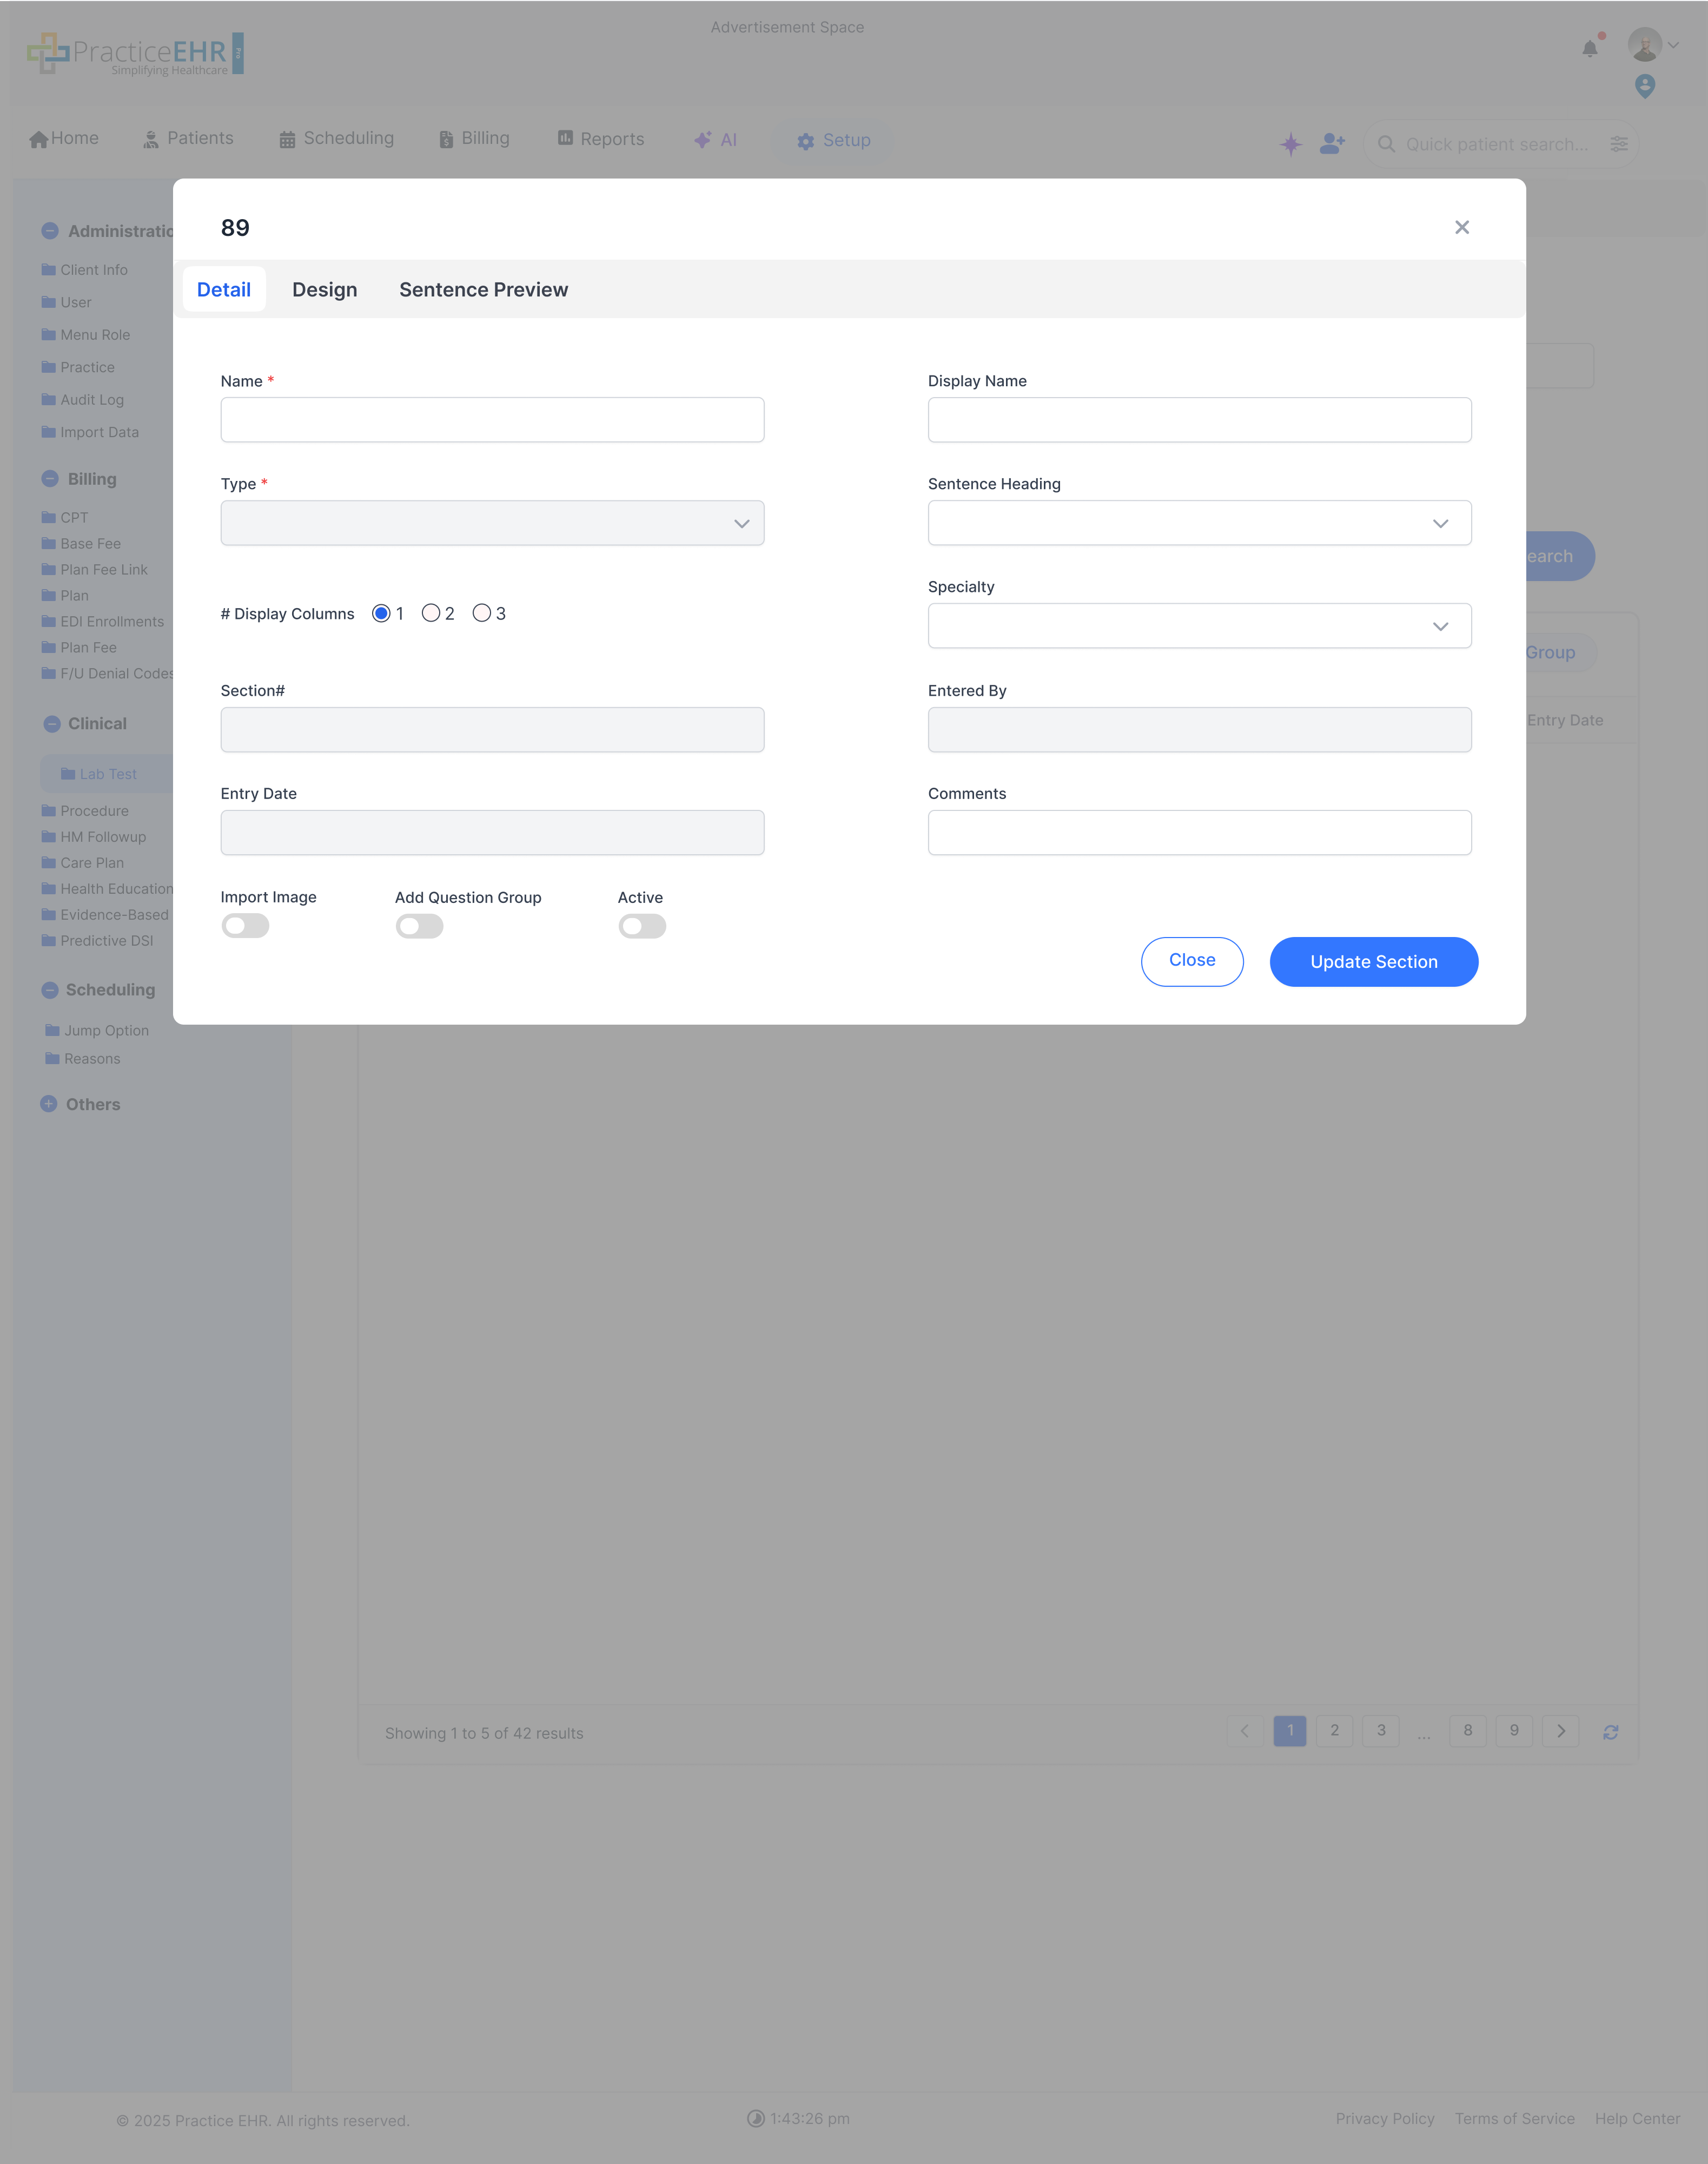
Section Details
Clicking a section hyperlink opens the section detail flow so users can review the
selected section before editing it.
This is useful when teams need to confirm the section content, label, or placement
rules before saving updates.
Section Search
The search step helps narrow down available sections by name or relevance before a
detail view is opened.
It keeps long clinical libraries easier to navigate when many reusable sections are
already configured.
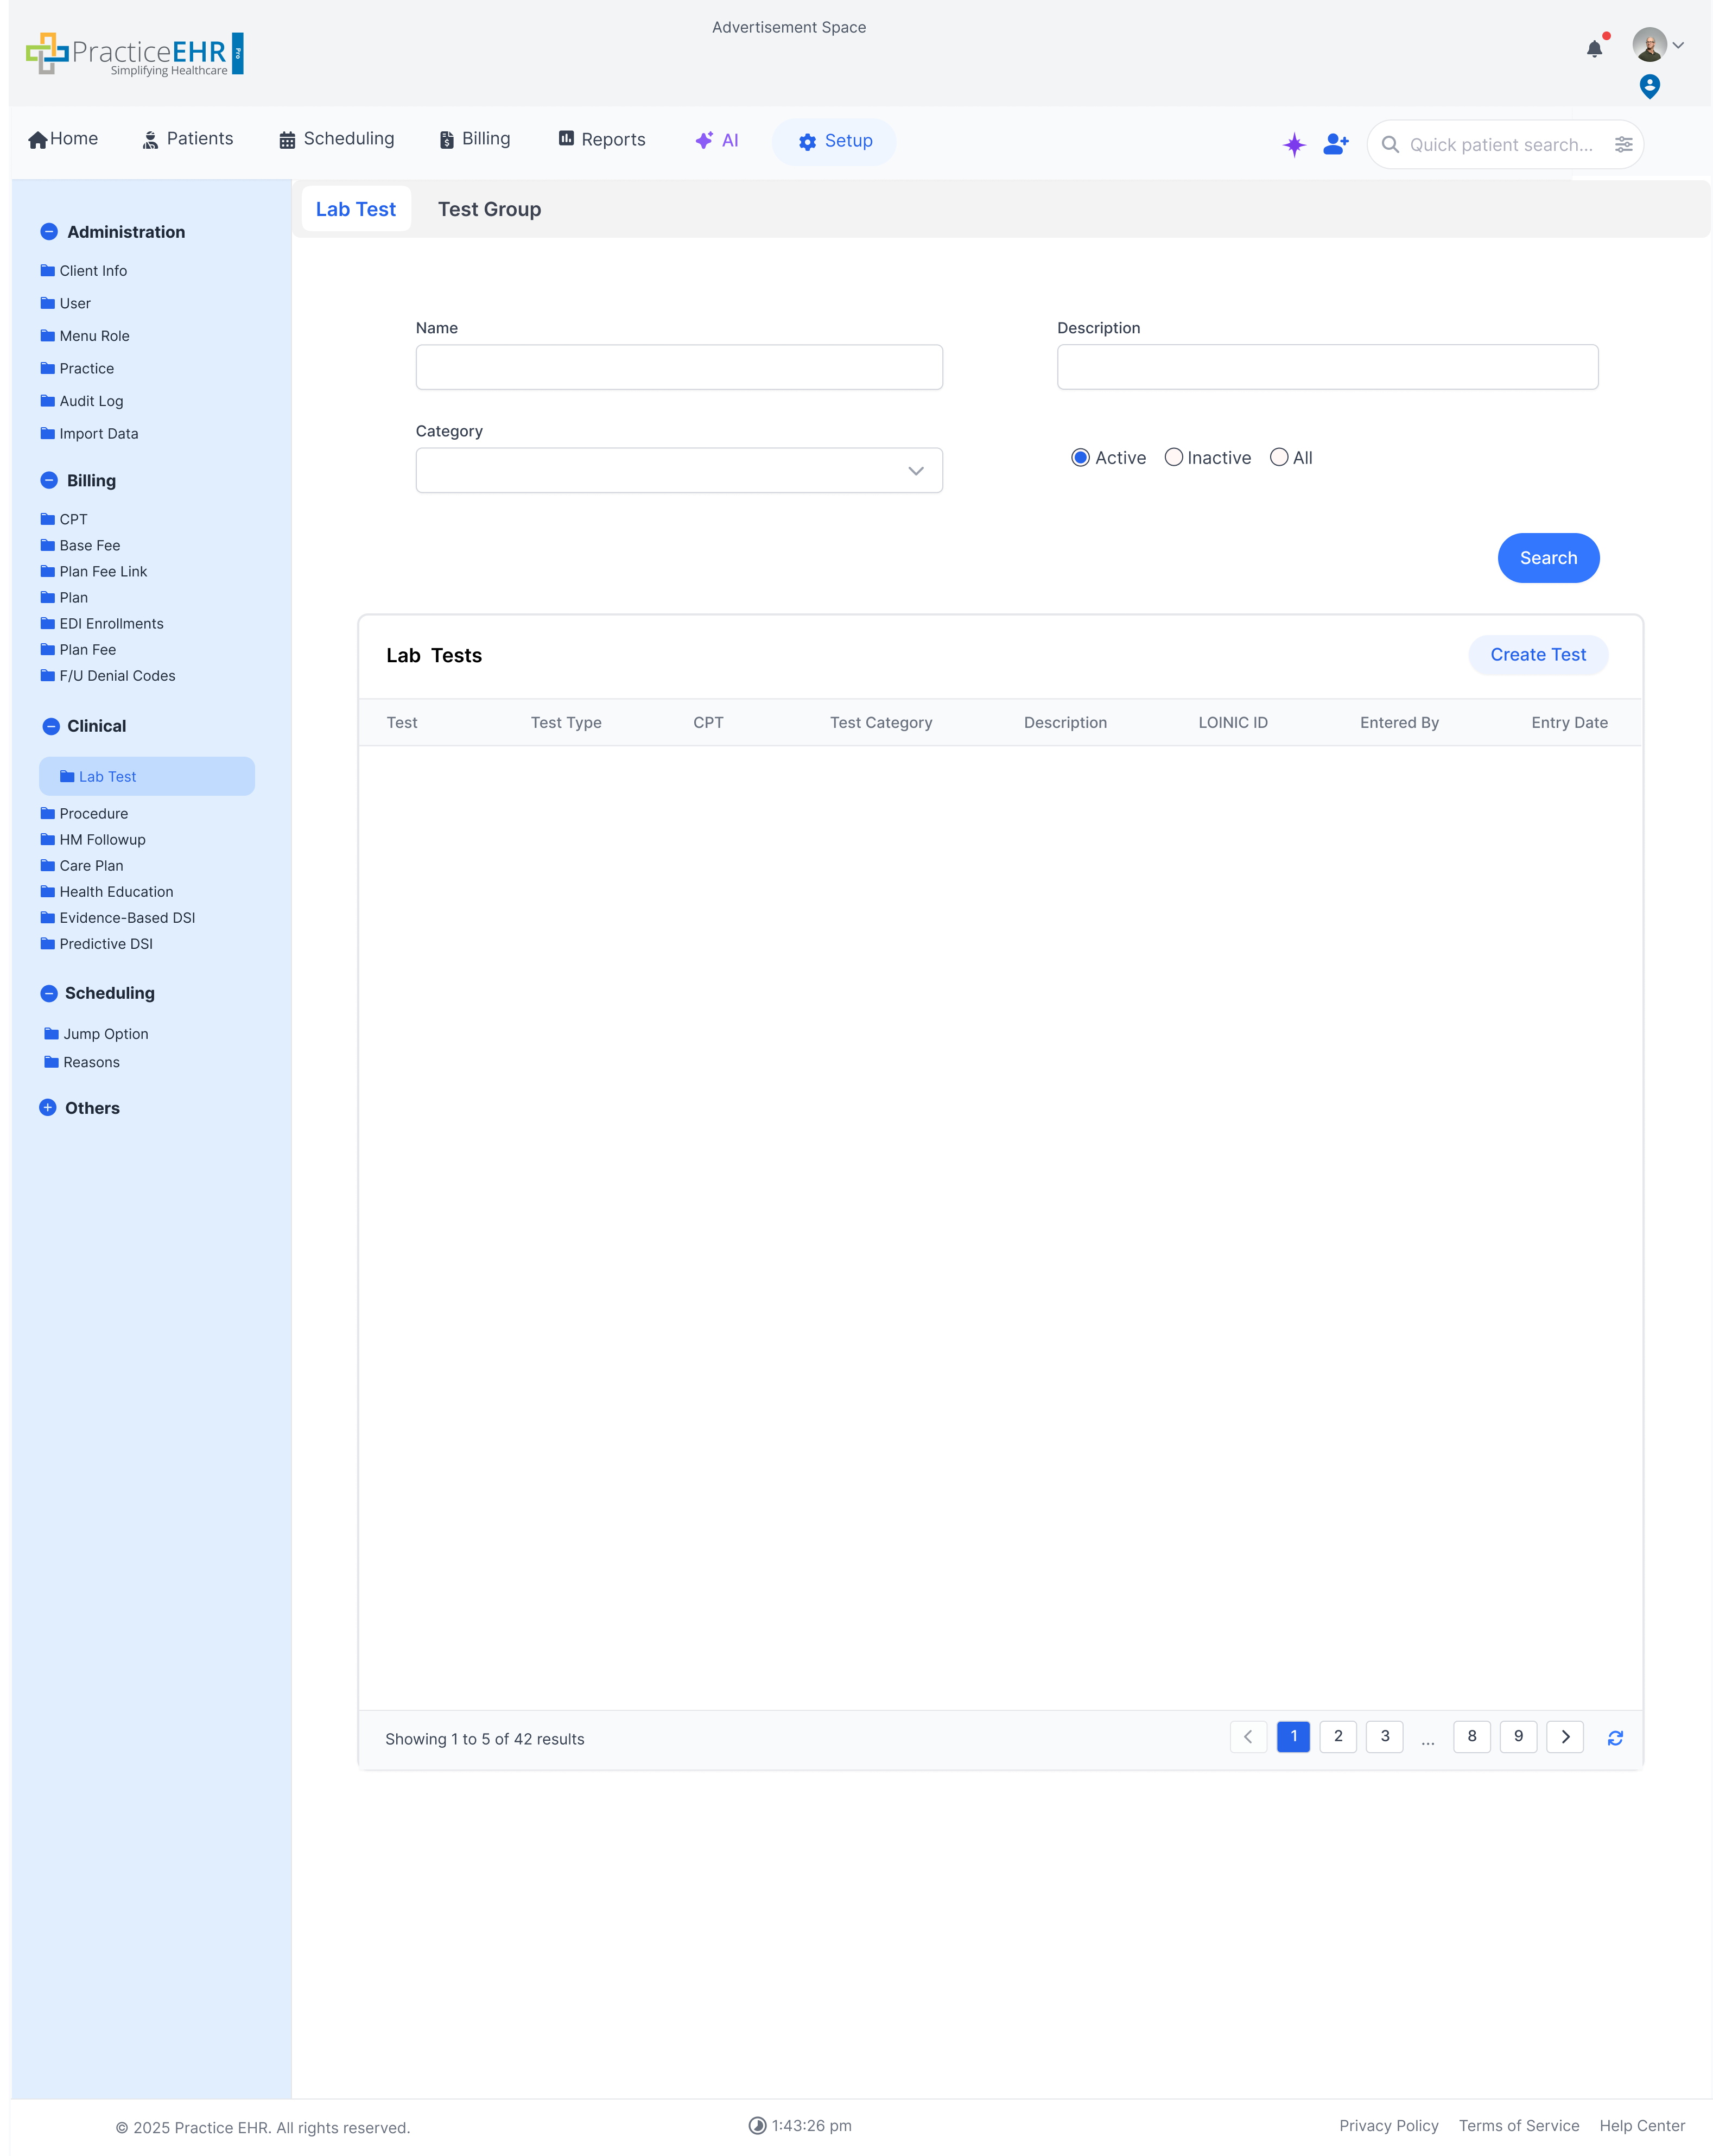
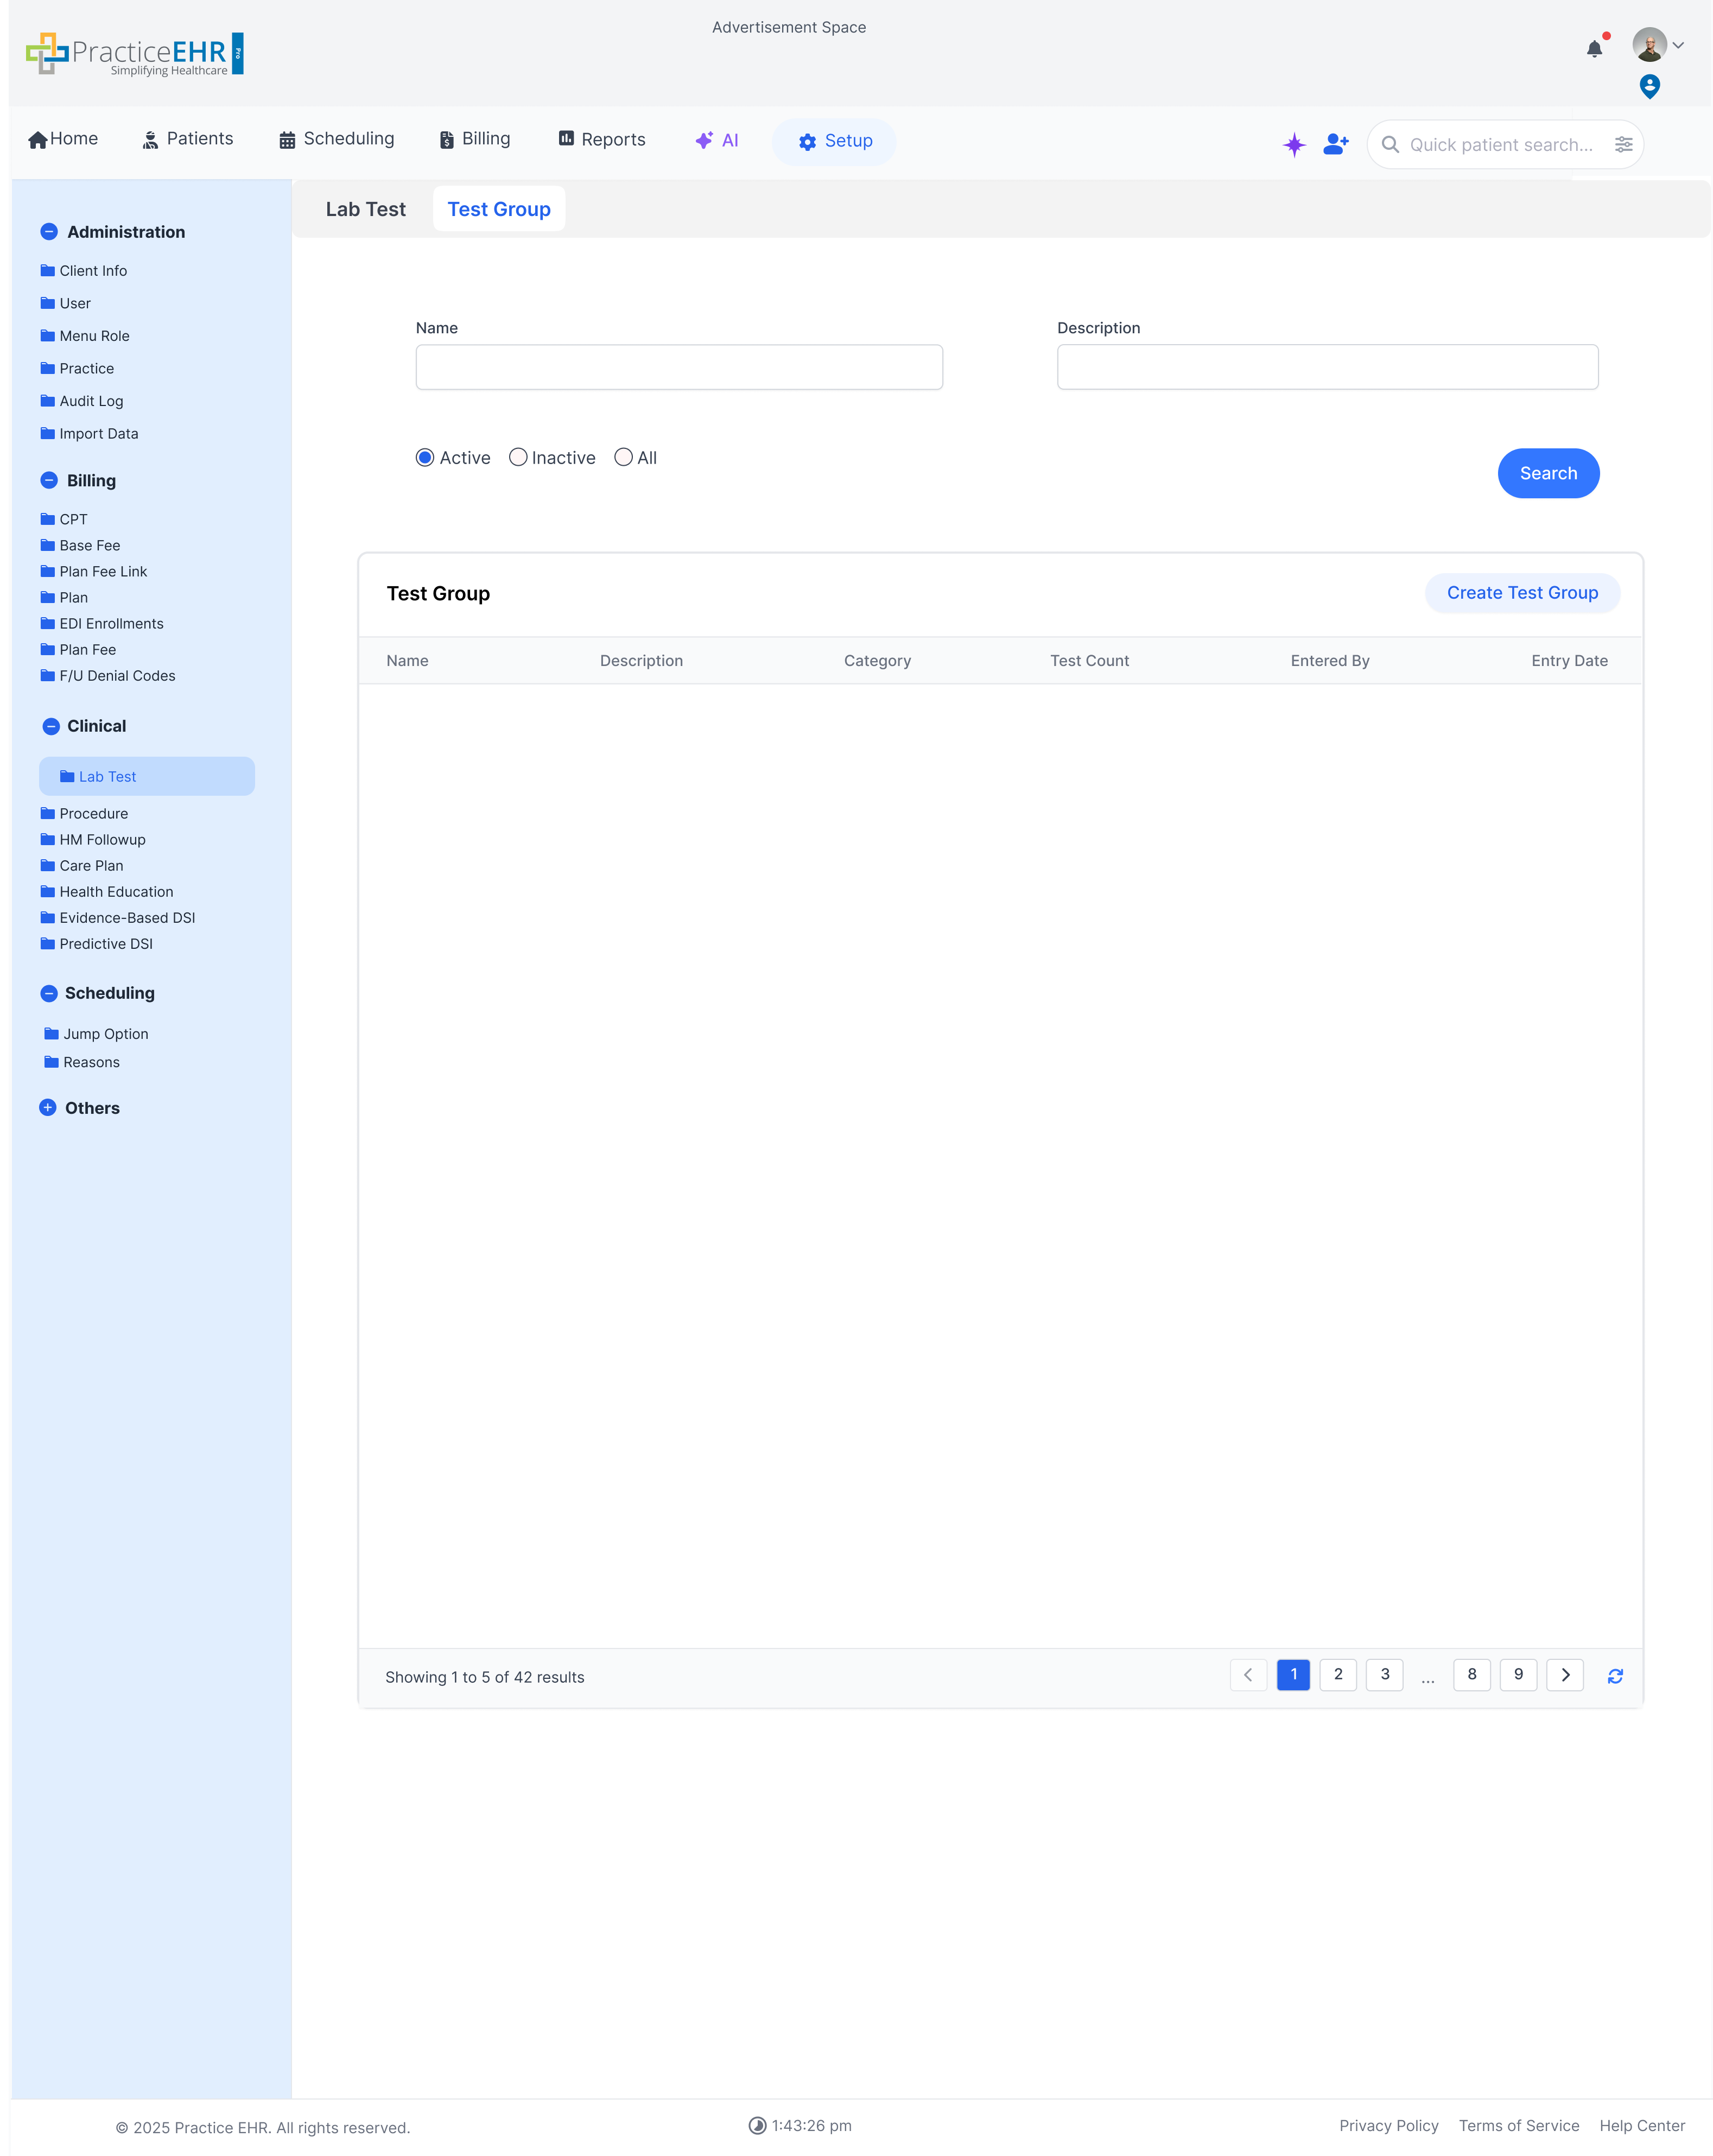
Lab Test
Setup / Clinical
Manage and configure lab tests and test groups. This screen allows you to
define tests, link them to CPT codes, and categorize them.
Lab Test Configuration
Features "Lab Test" and "Test Group" tabs.
Search for tests by Name, Category, or Description.
Filter by status (Active, Inactive, All).
The grid displays test details, including CPT, LOINC ID, and more.
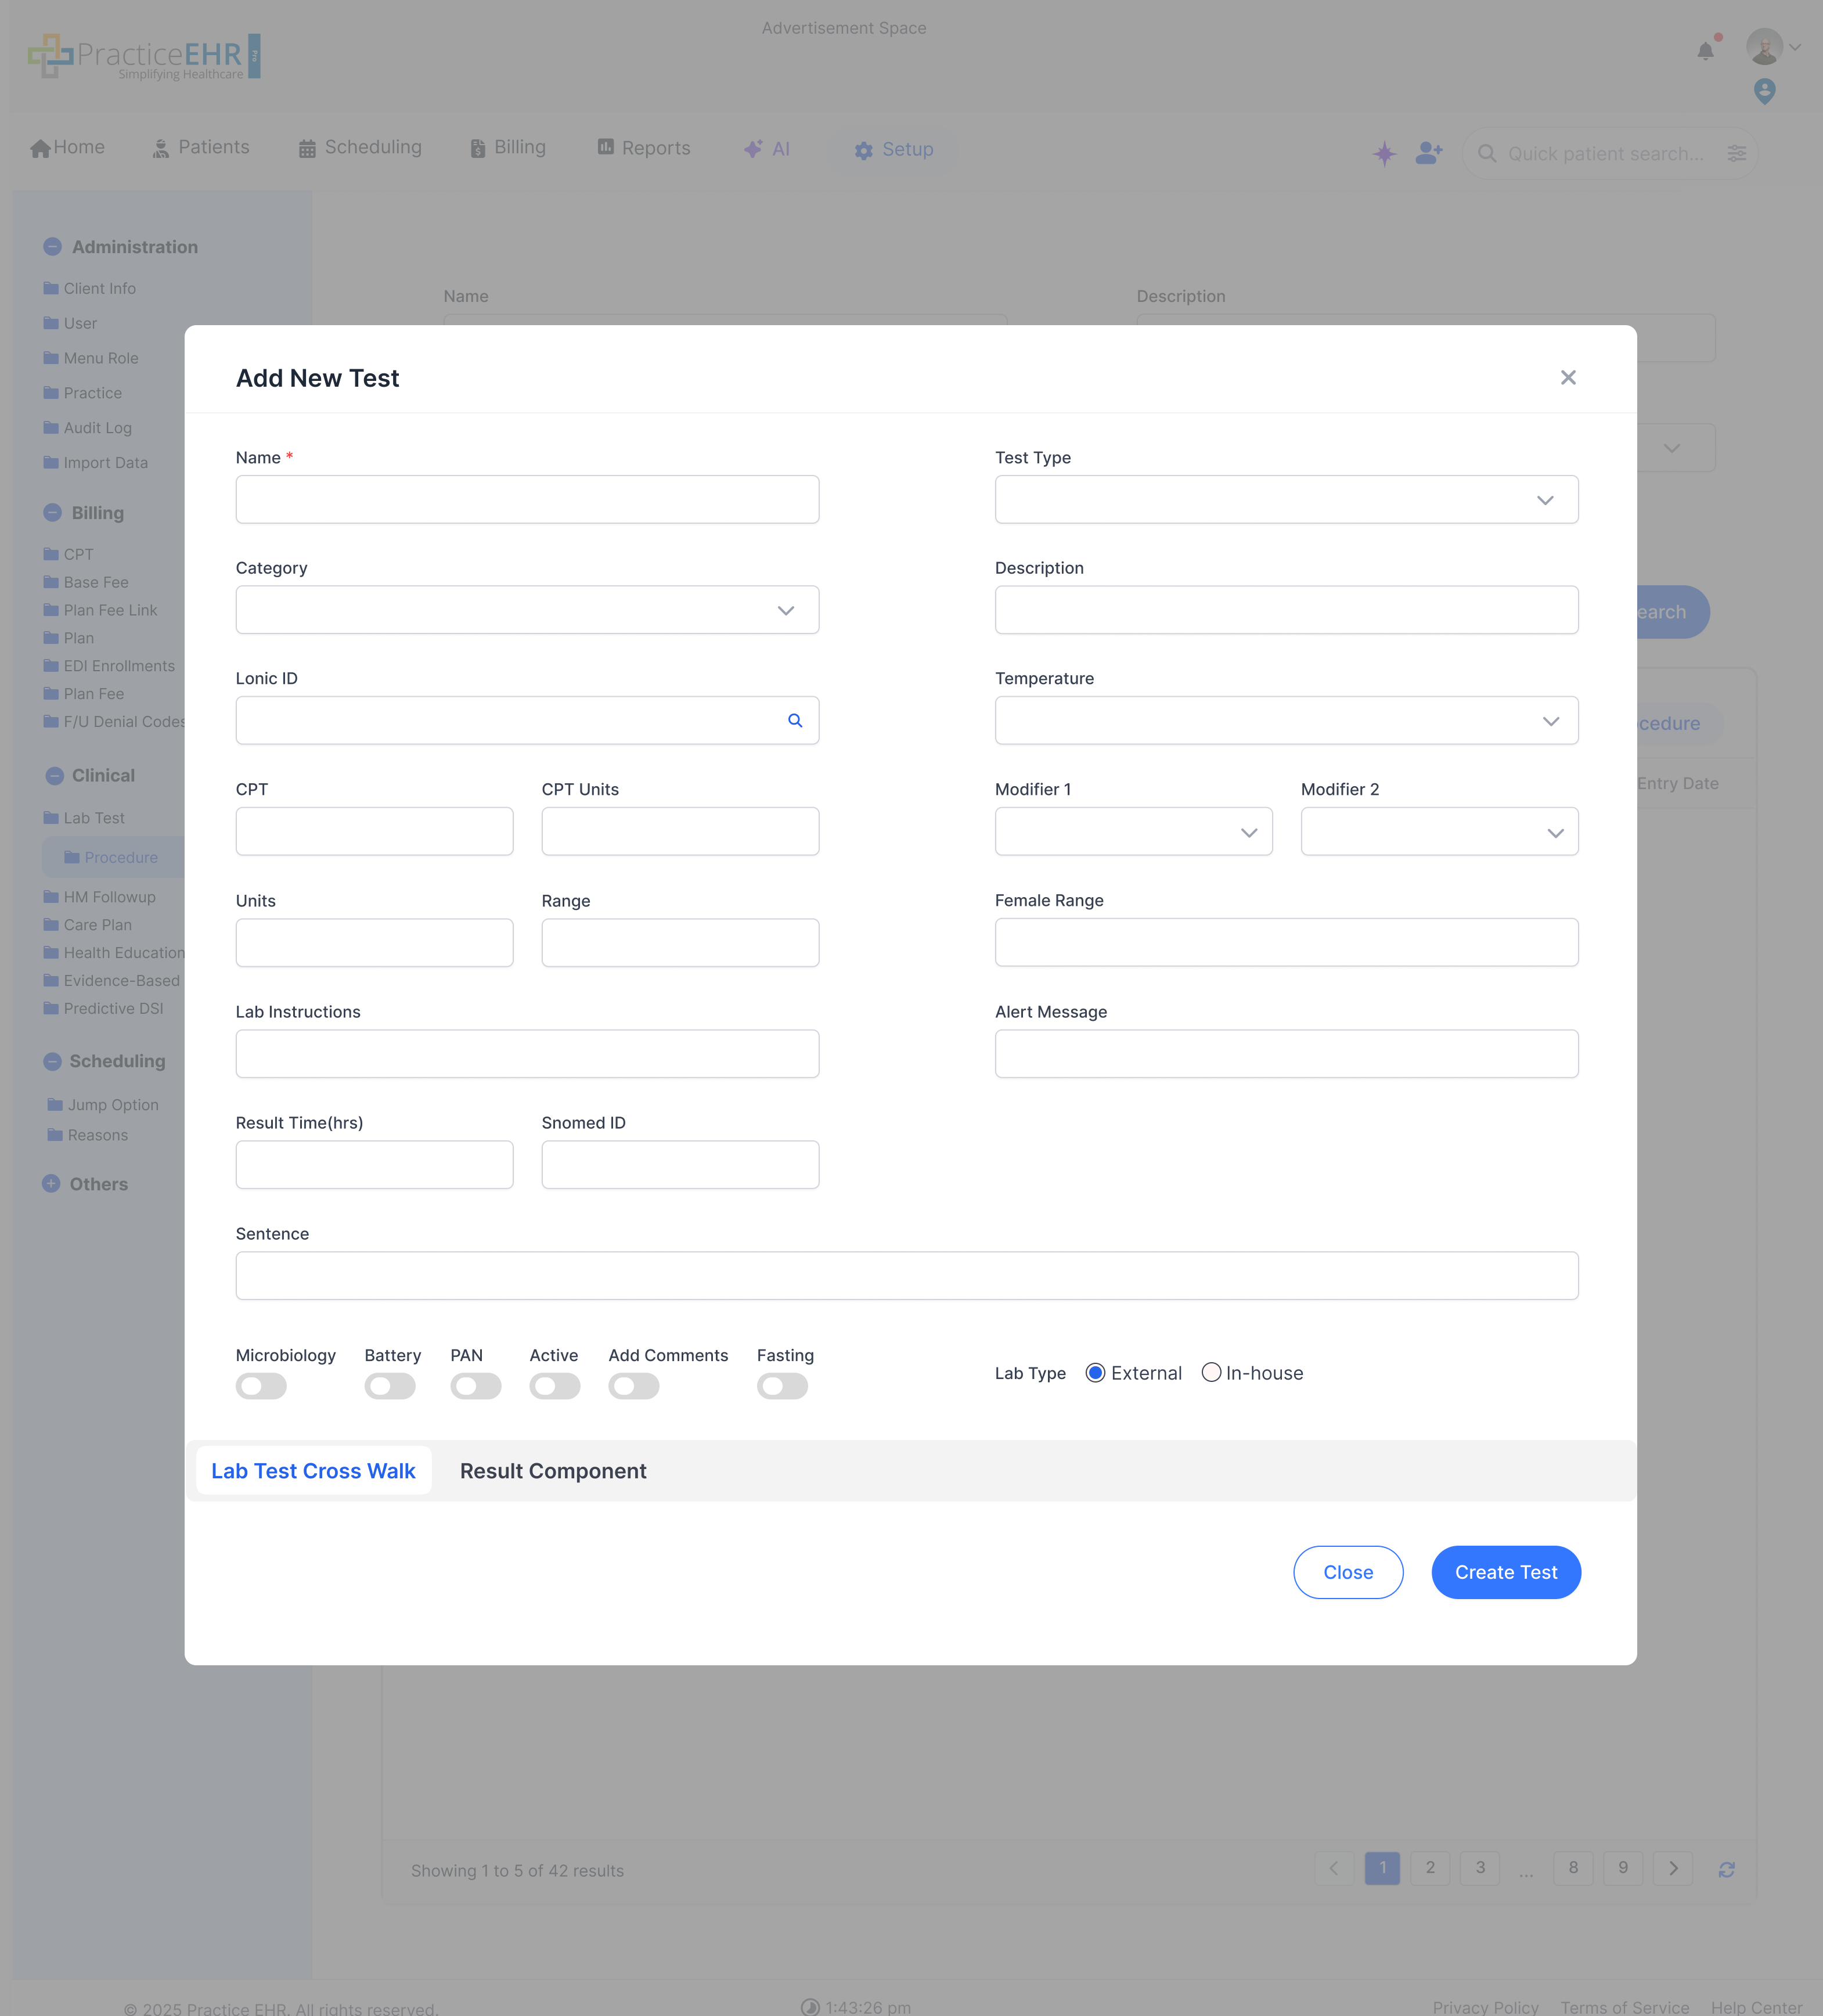
Use "Create Lab Test" to add a new test definition from the main grid.
Test Group
The Test Group tab organizes related tests into reusable groupings that can be
managed from one place.
This makes it easier to keep panels and grouped ordering options consistent.
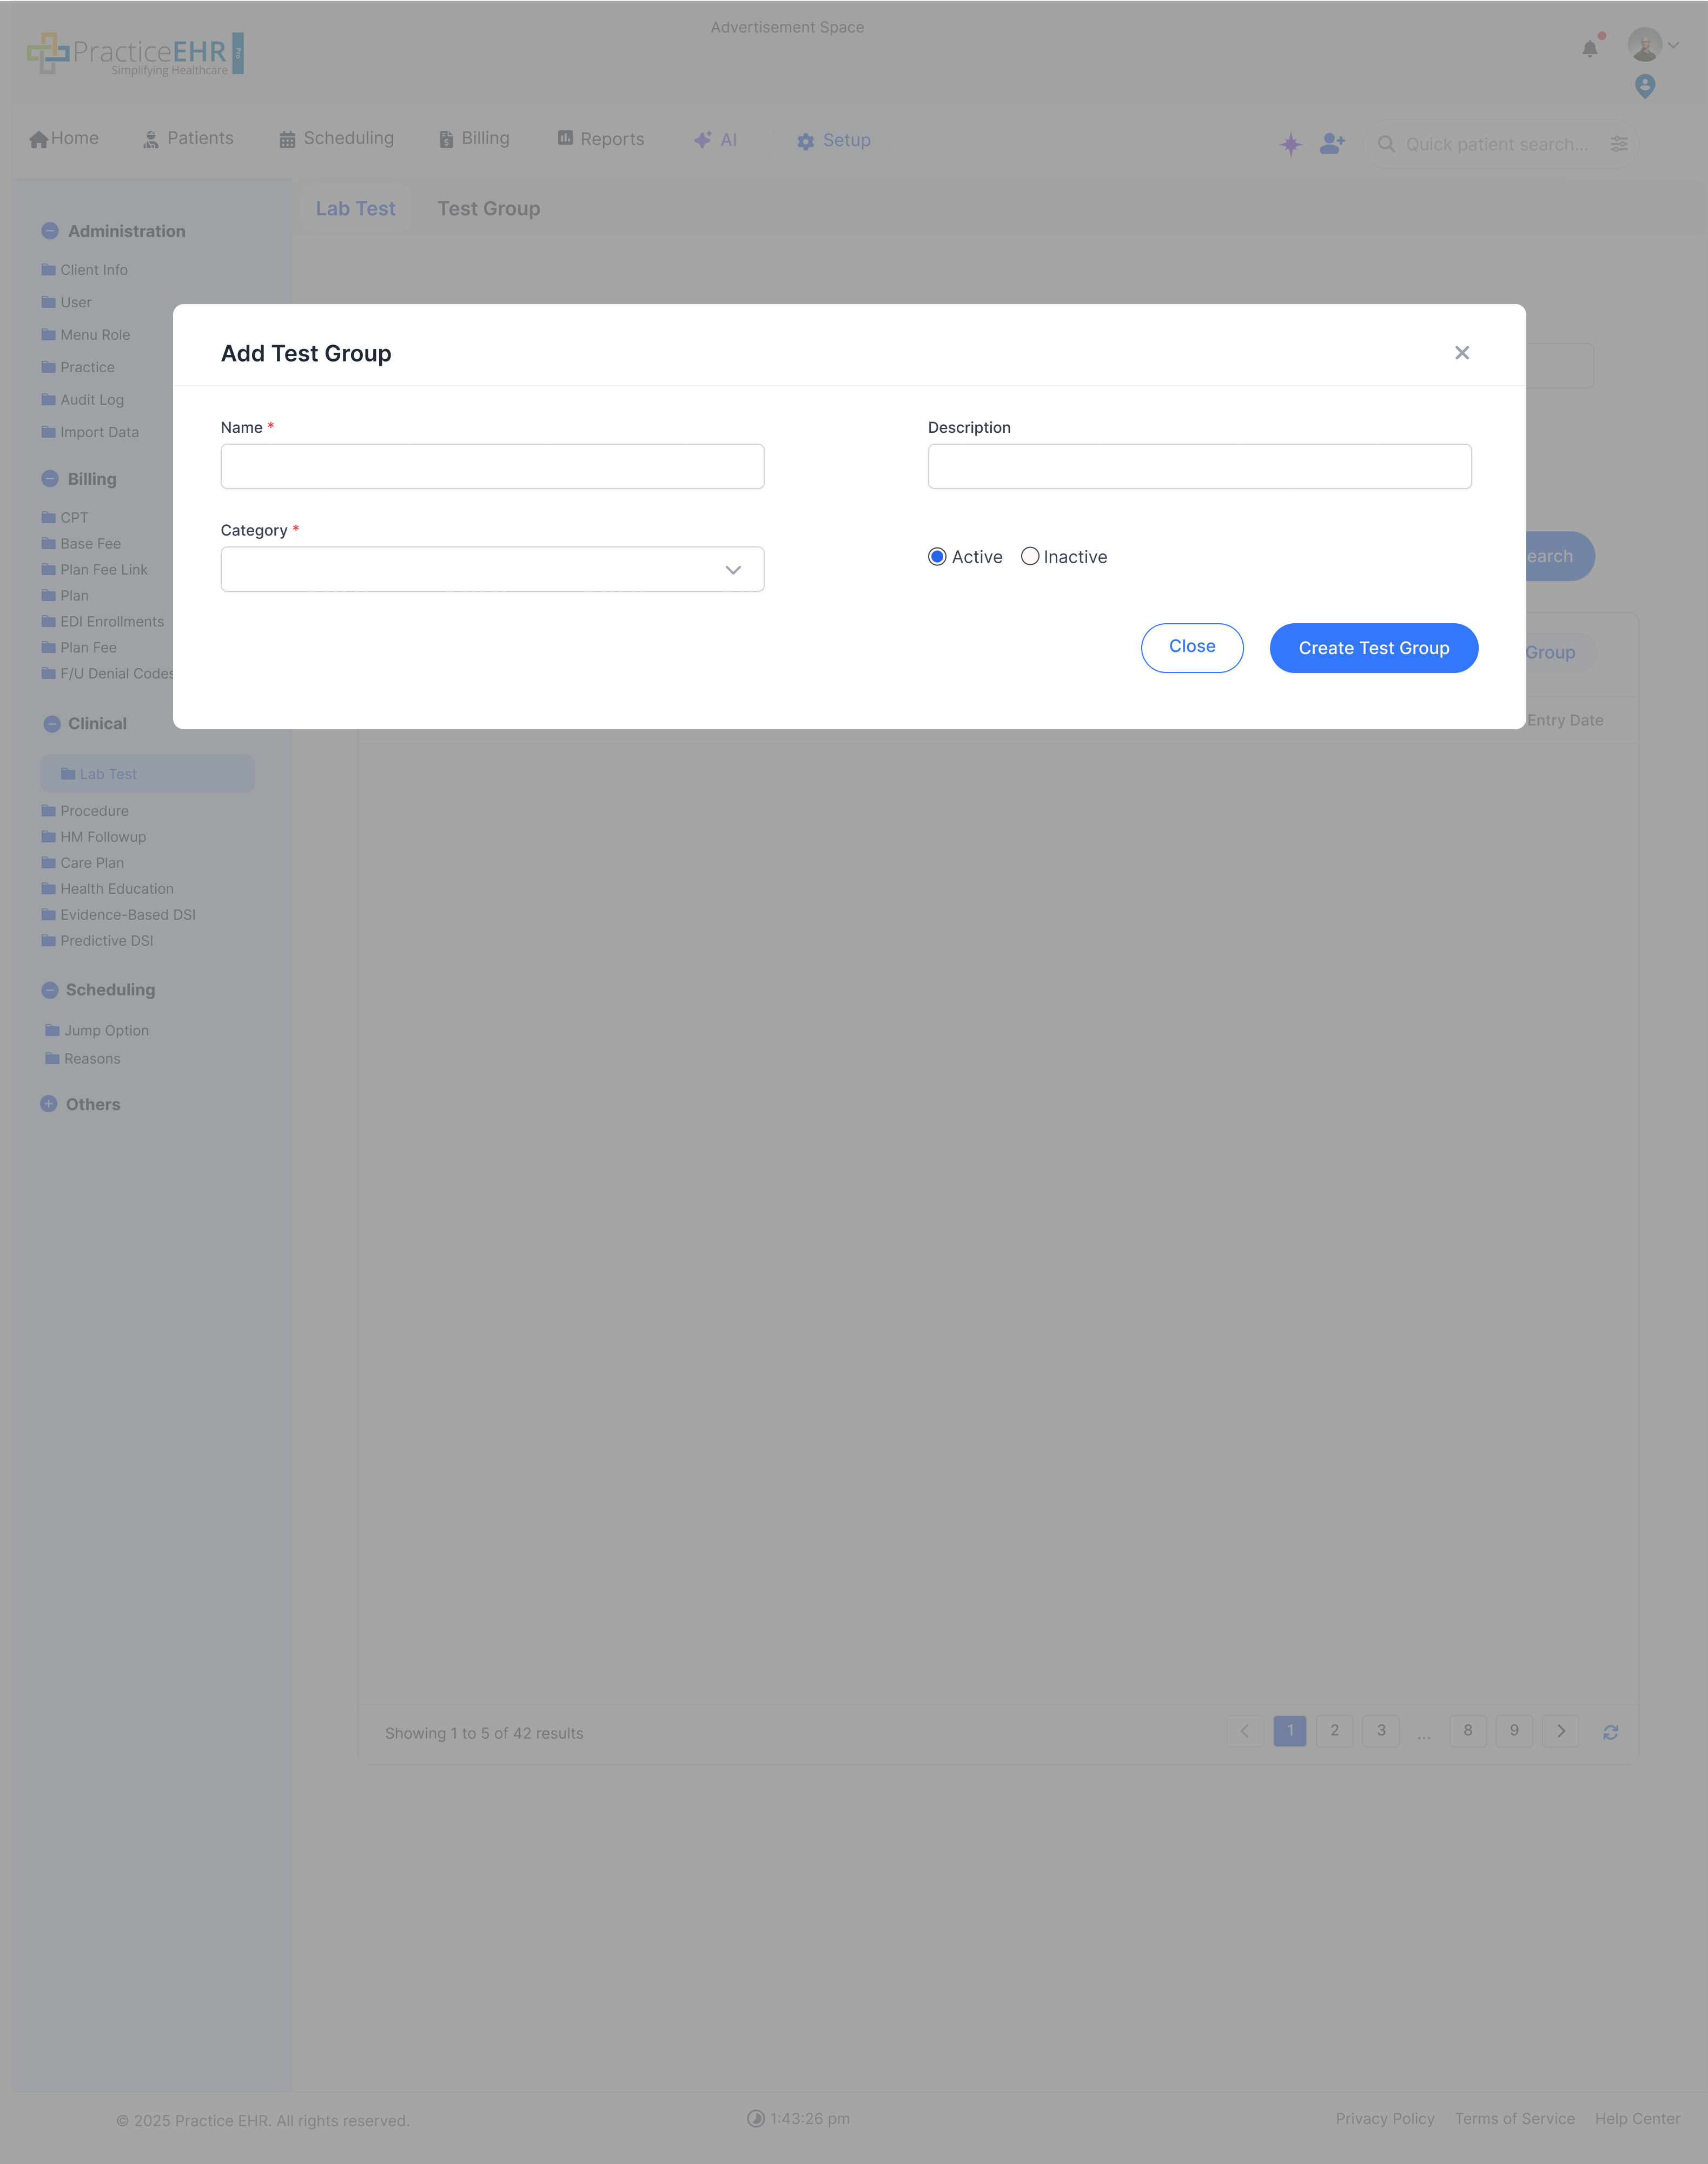
Create Test Group
The add form is used to name the group and define the tests that belong together.
It is the action-level screen behind the "Create Test Group" flow in Lab Test
setup.
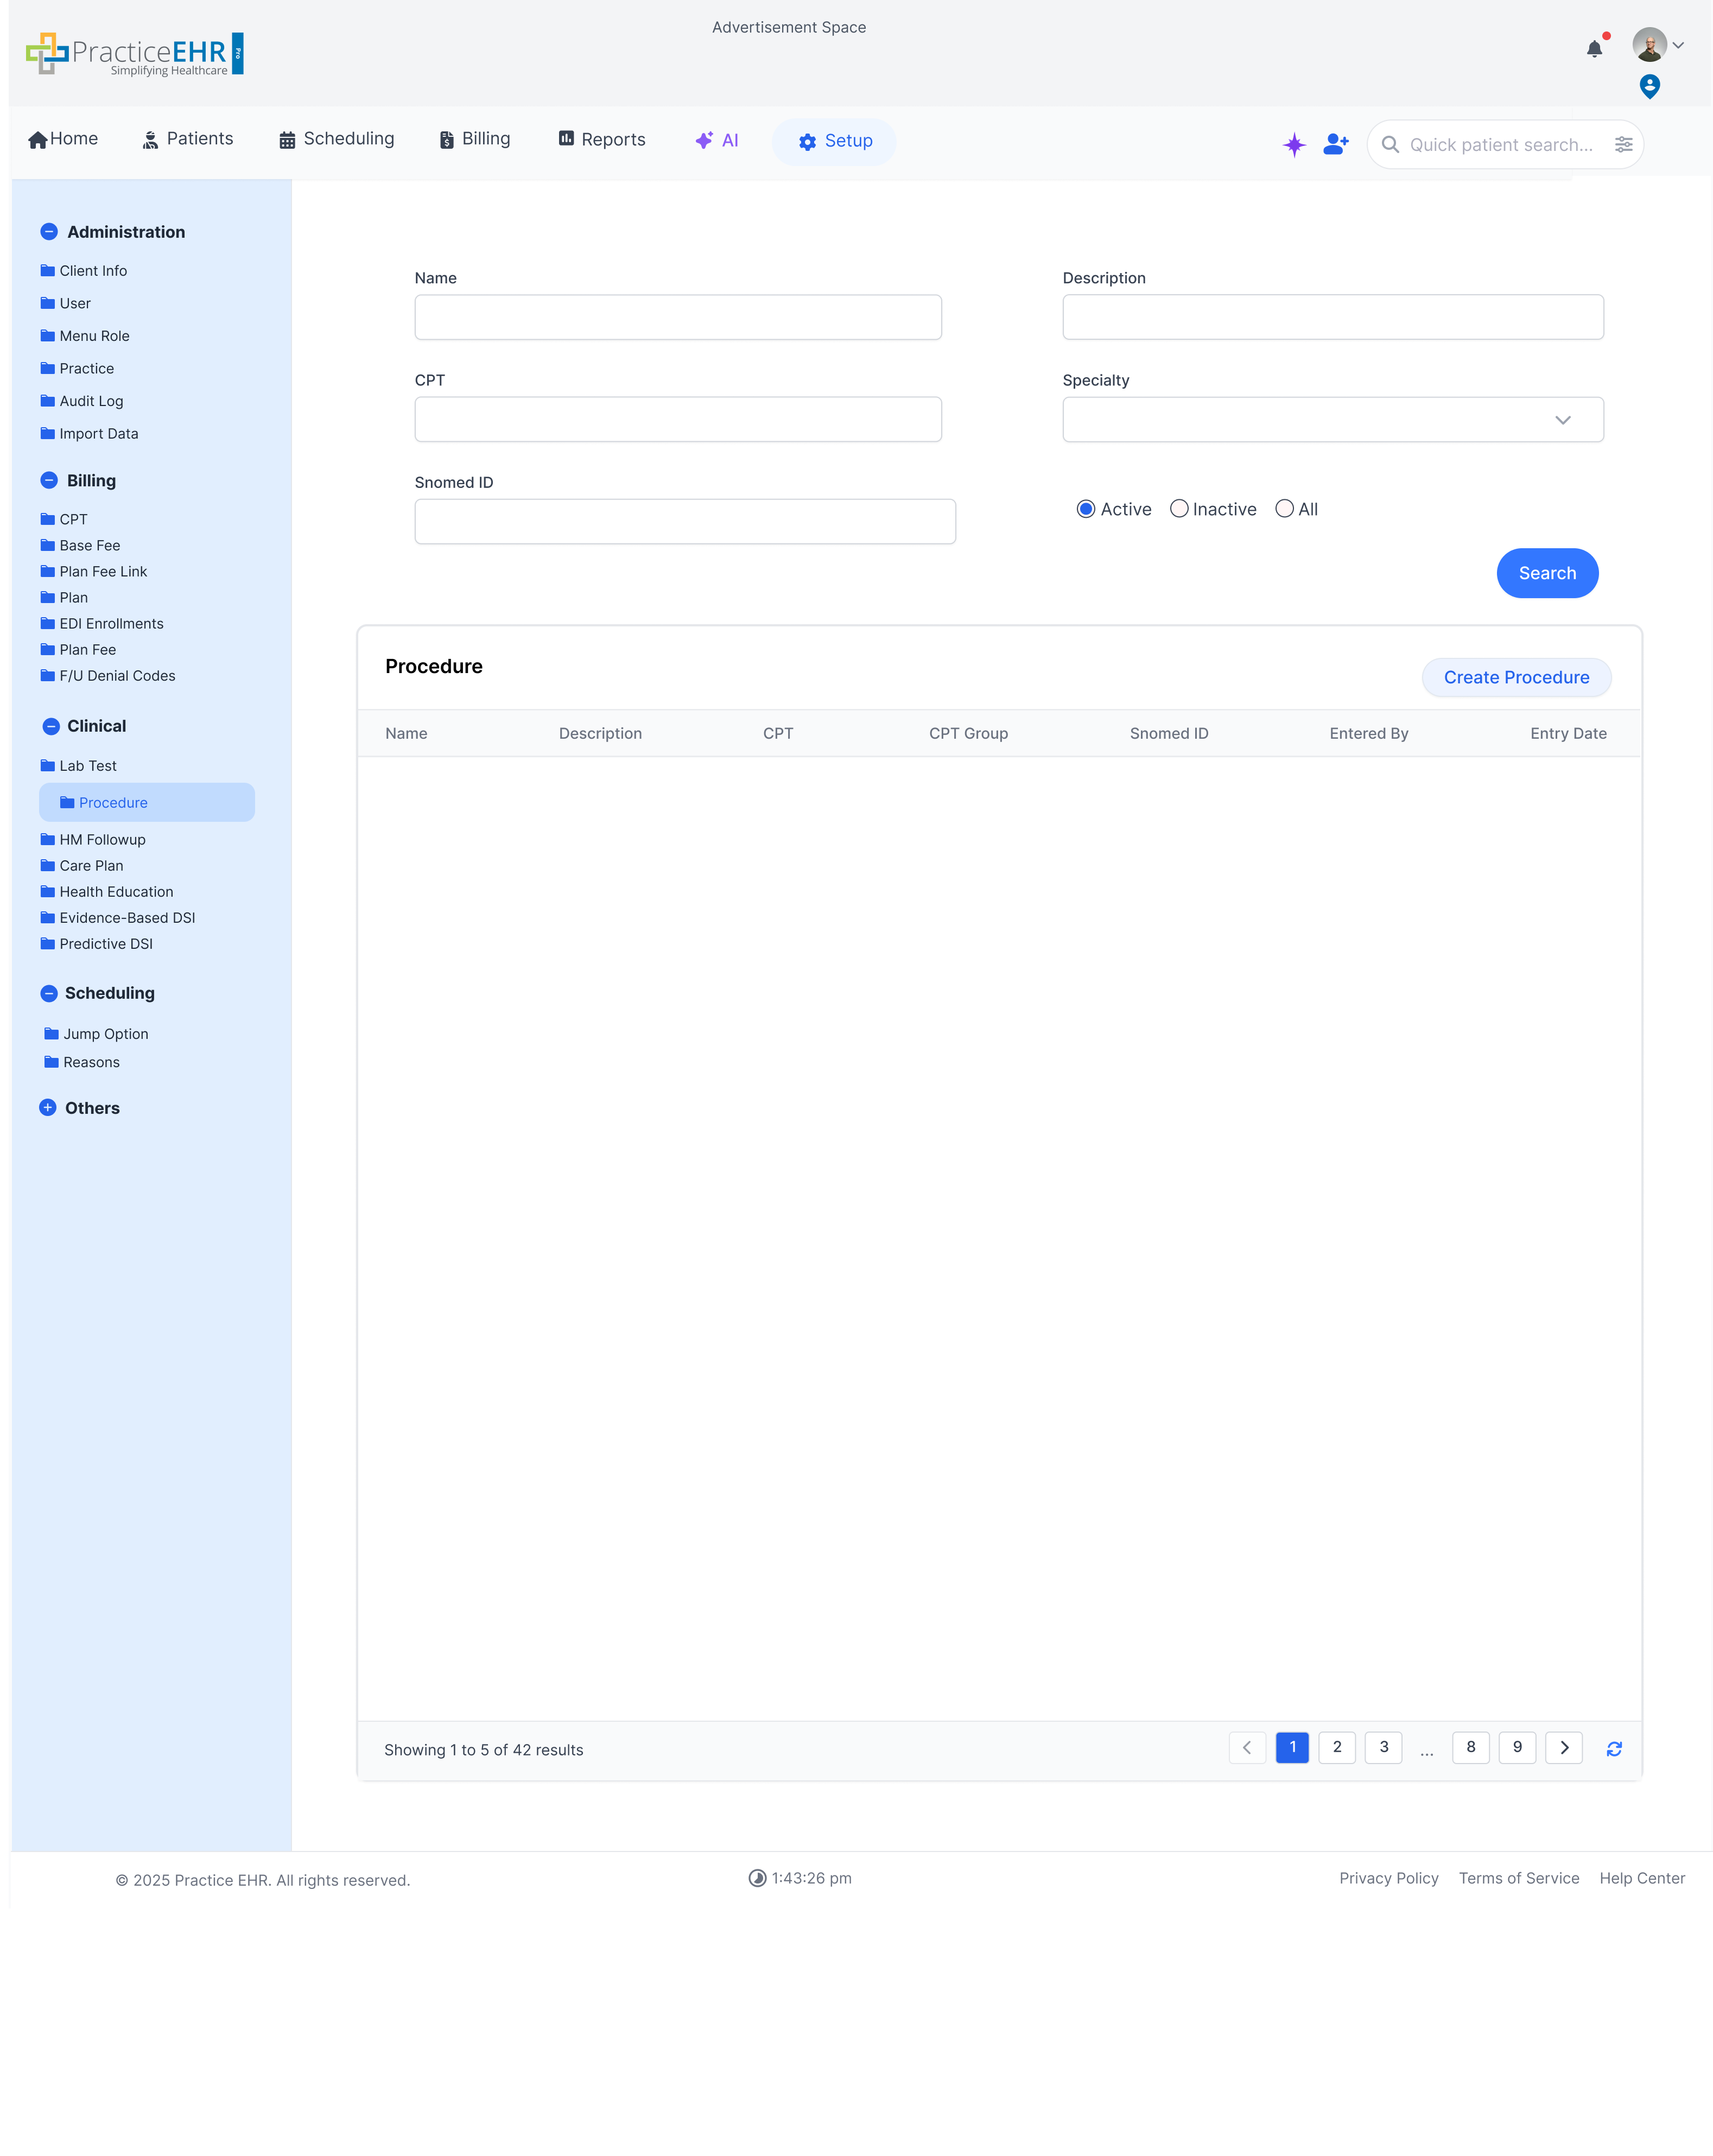
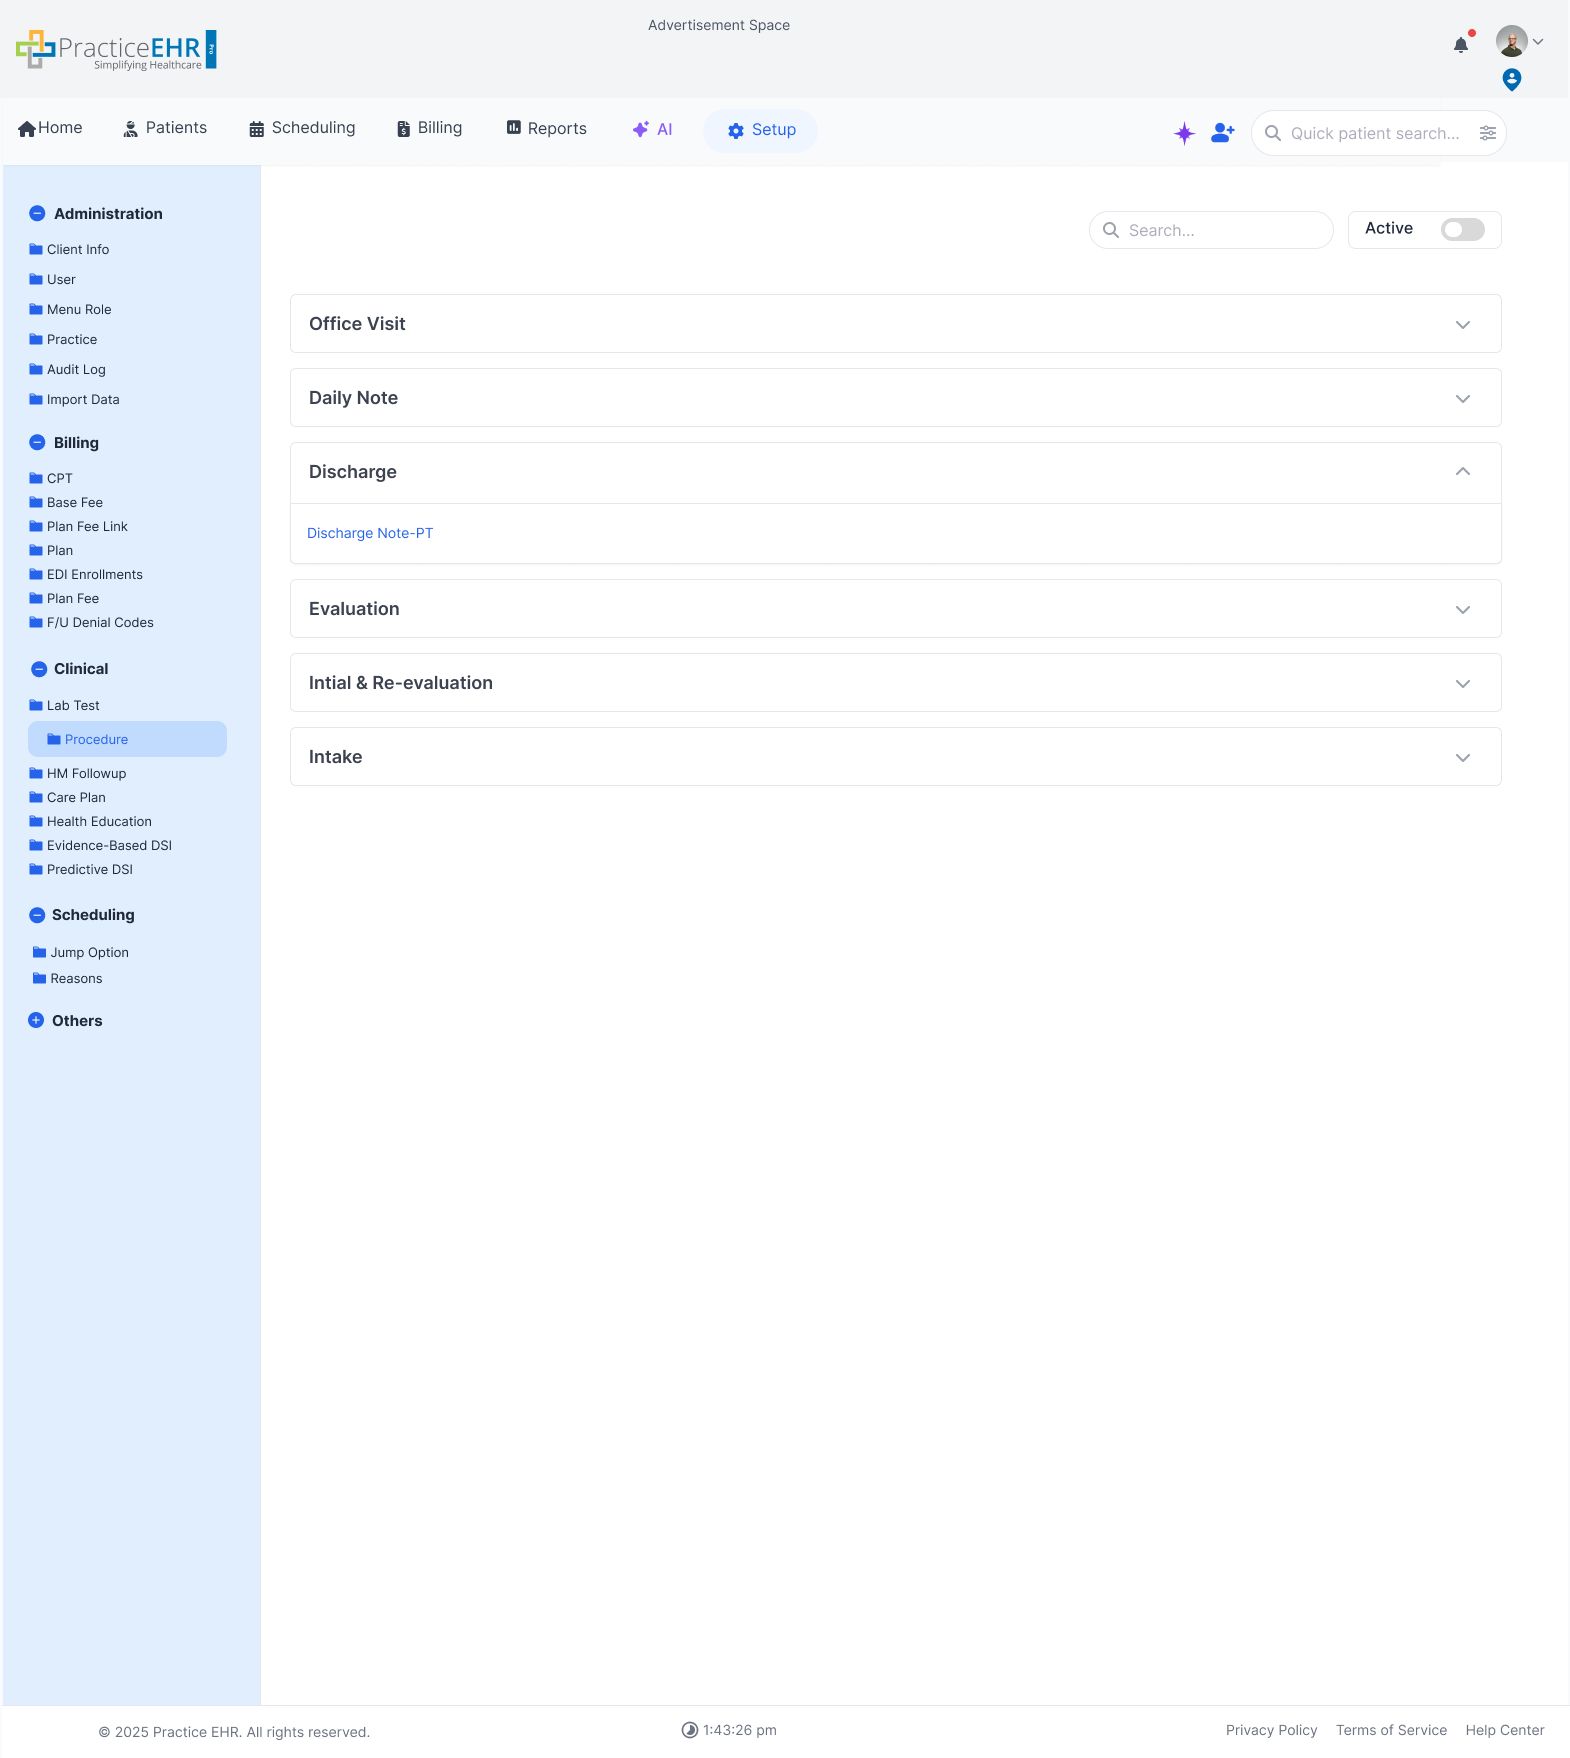
Procedure
Setup / Clinical
Configure clinical procedures, linking them to CPT codes, Snomed IDs, and
specialties.
Procedure Configuration
Search for procedures by Name, CPT, Snomed ID, Description, or Specialty.
Filter by status (Active, Inactive, All).
The grid displays all configured procedures and their associated codes.
Click "Create Procedure" to add a new clinical procedure.
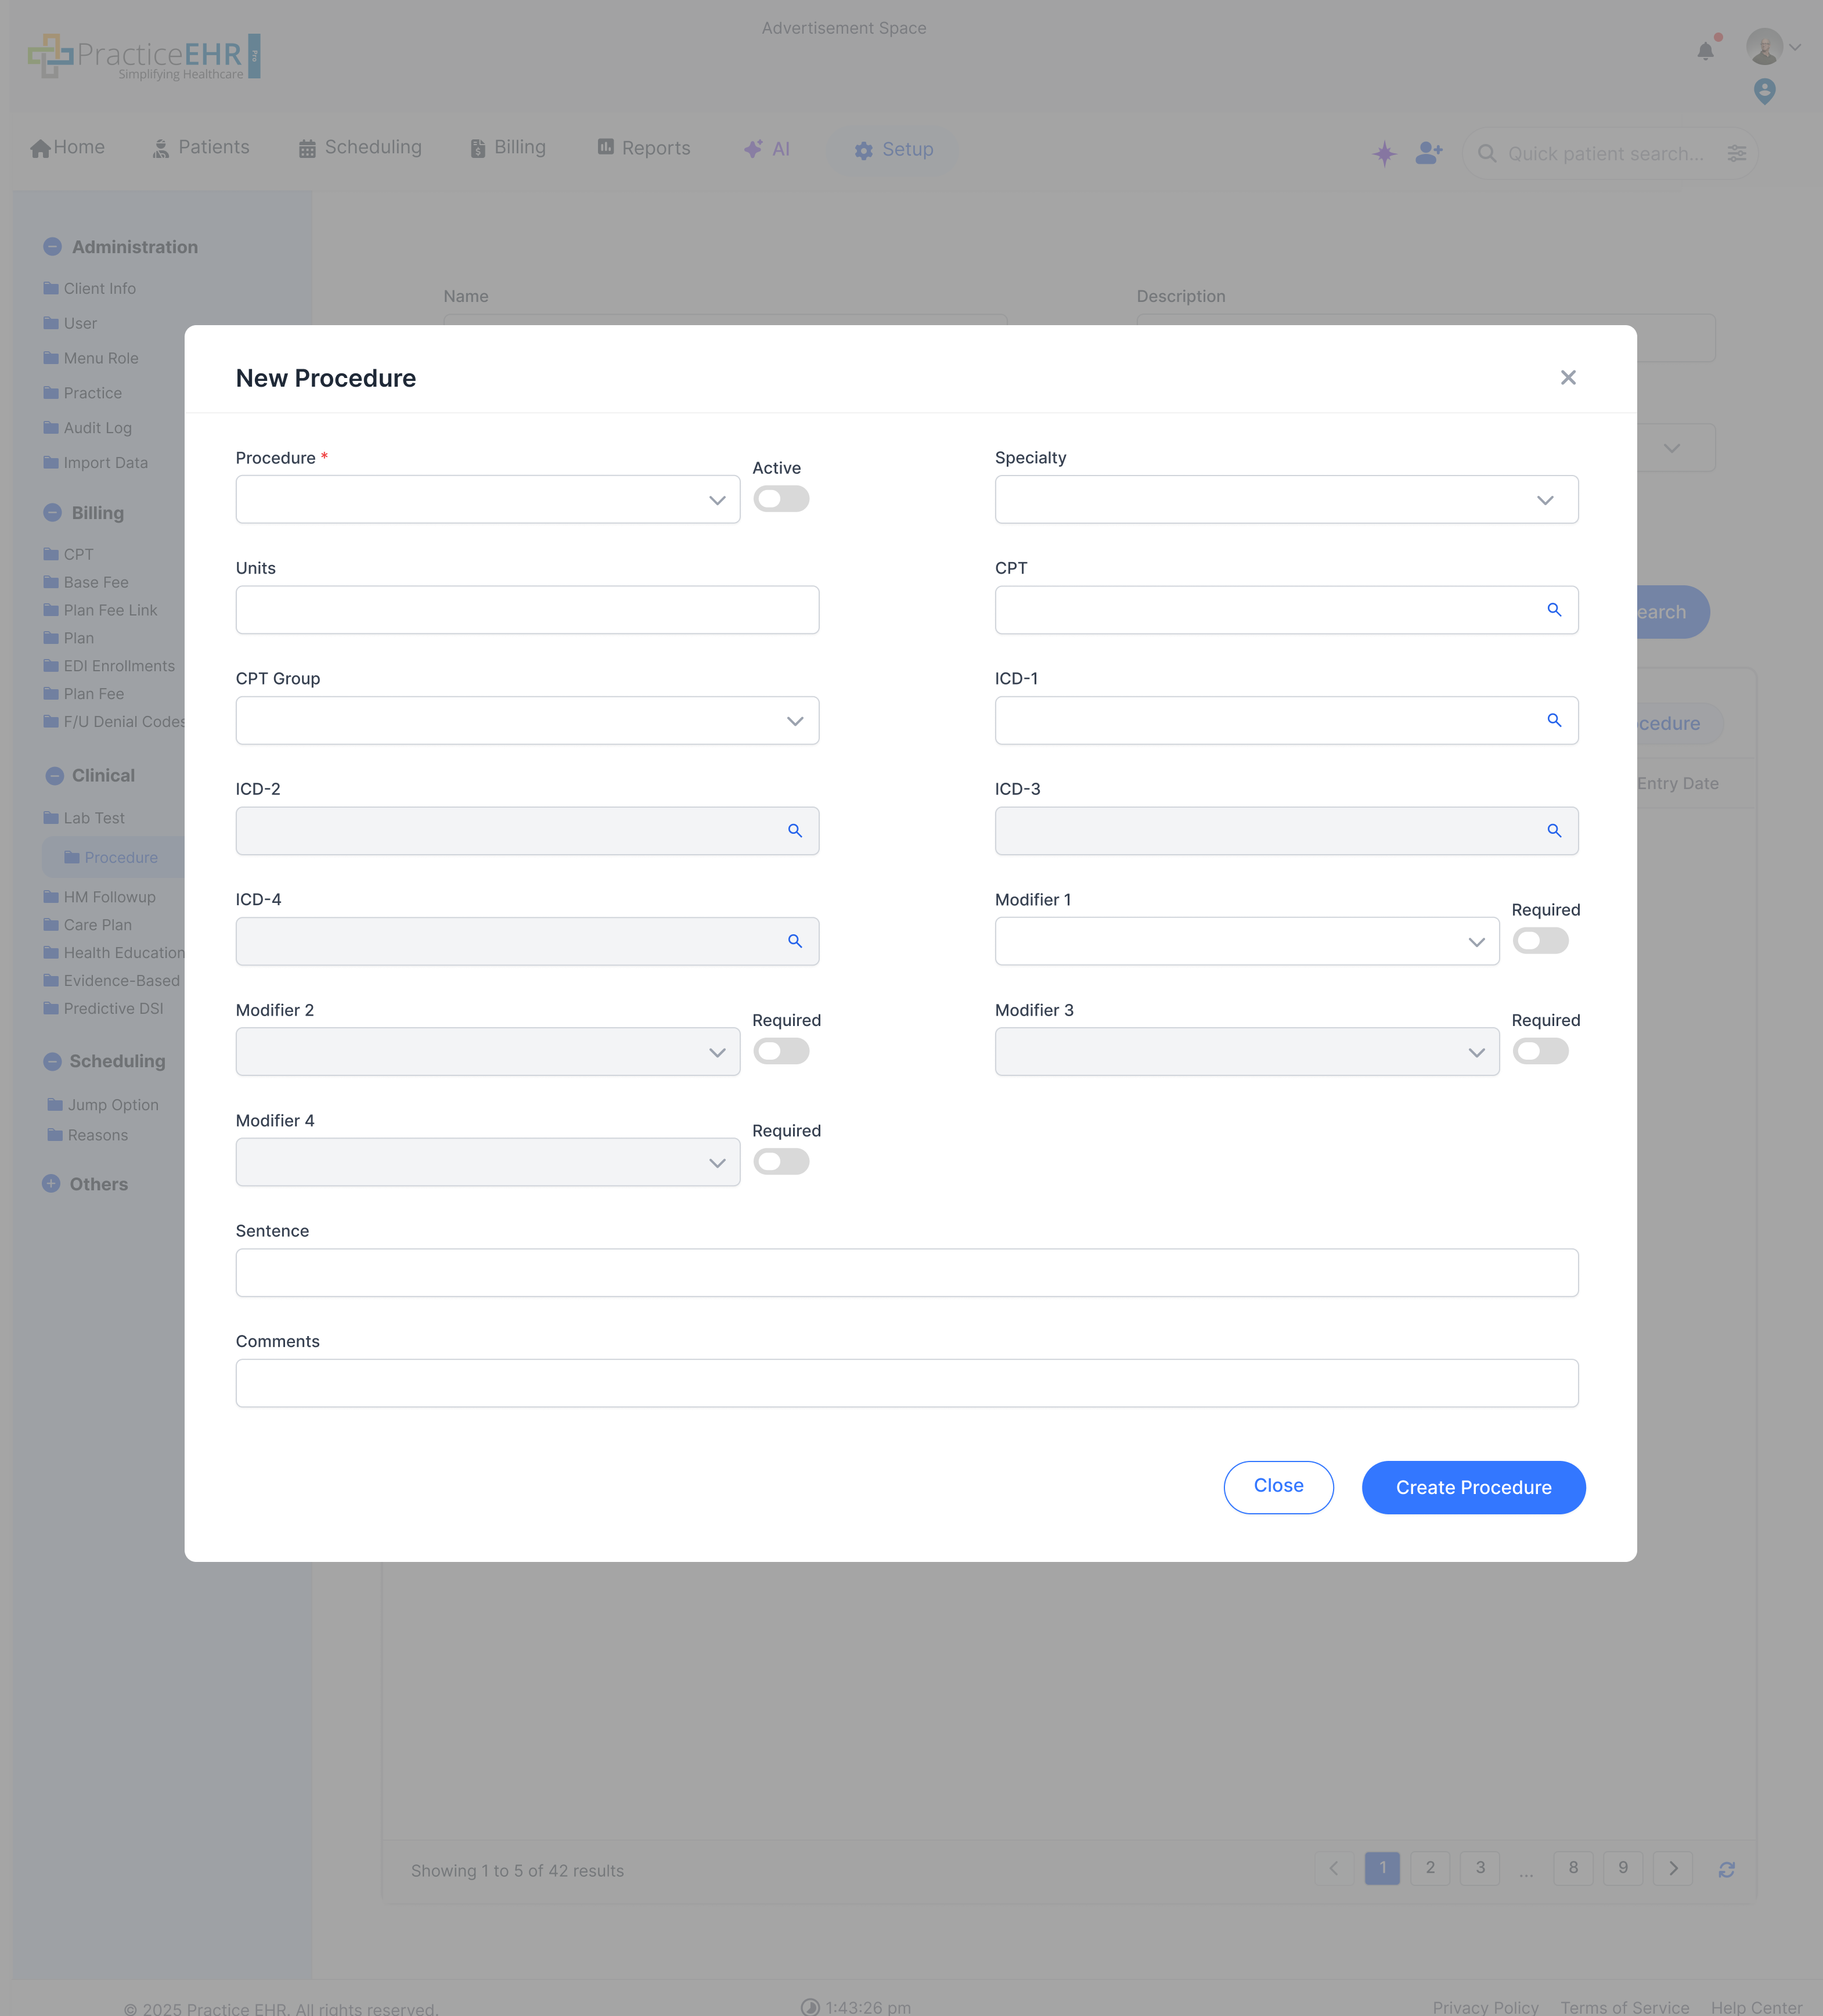
Create Procedure
The create form captures the procedure name, coding details, and supporting
clinical metadata in one place.
It is the focused workflow used when a new procedure needs to be added rather than
only searched from the grid.
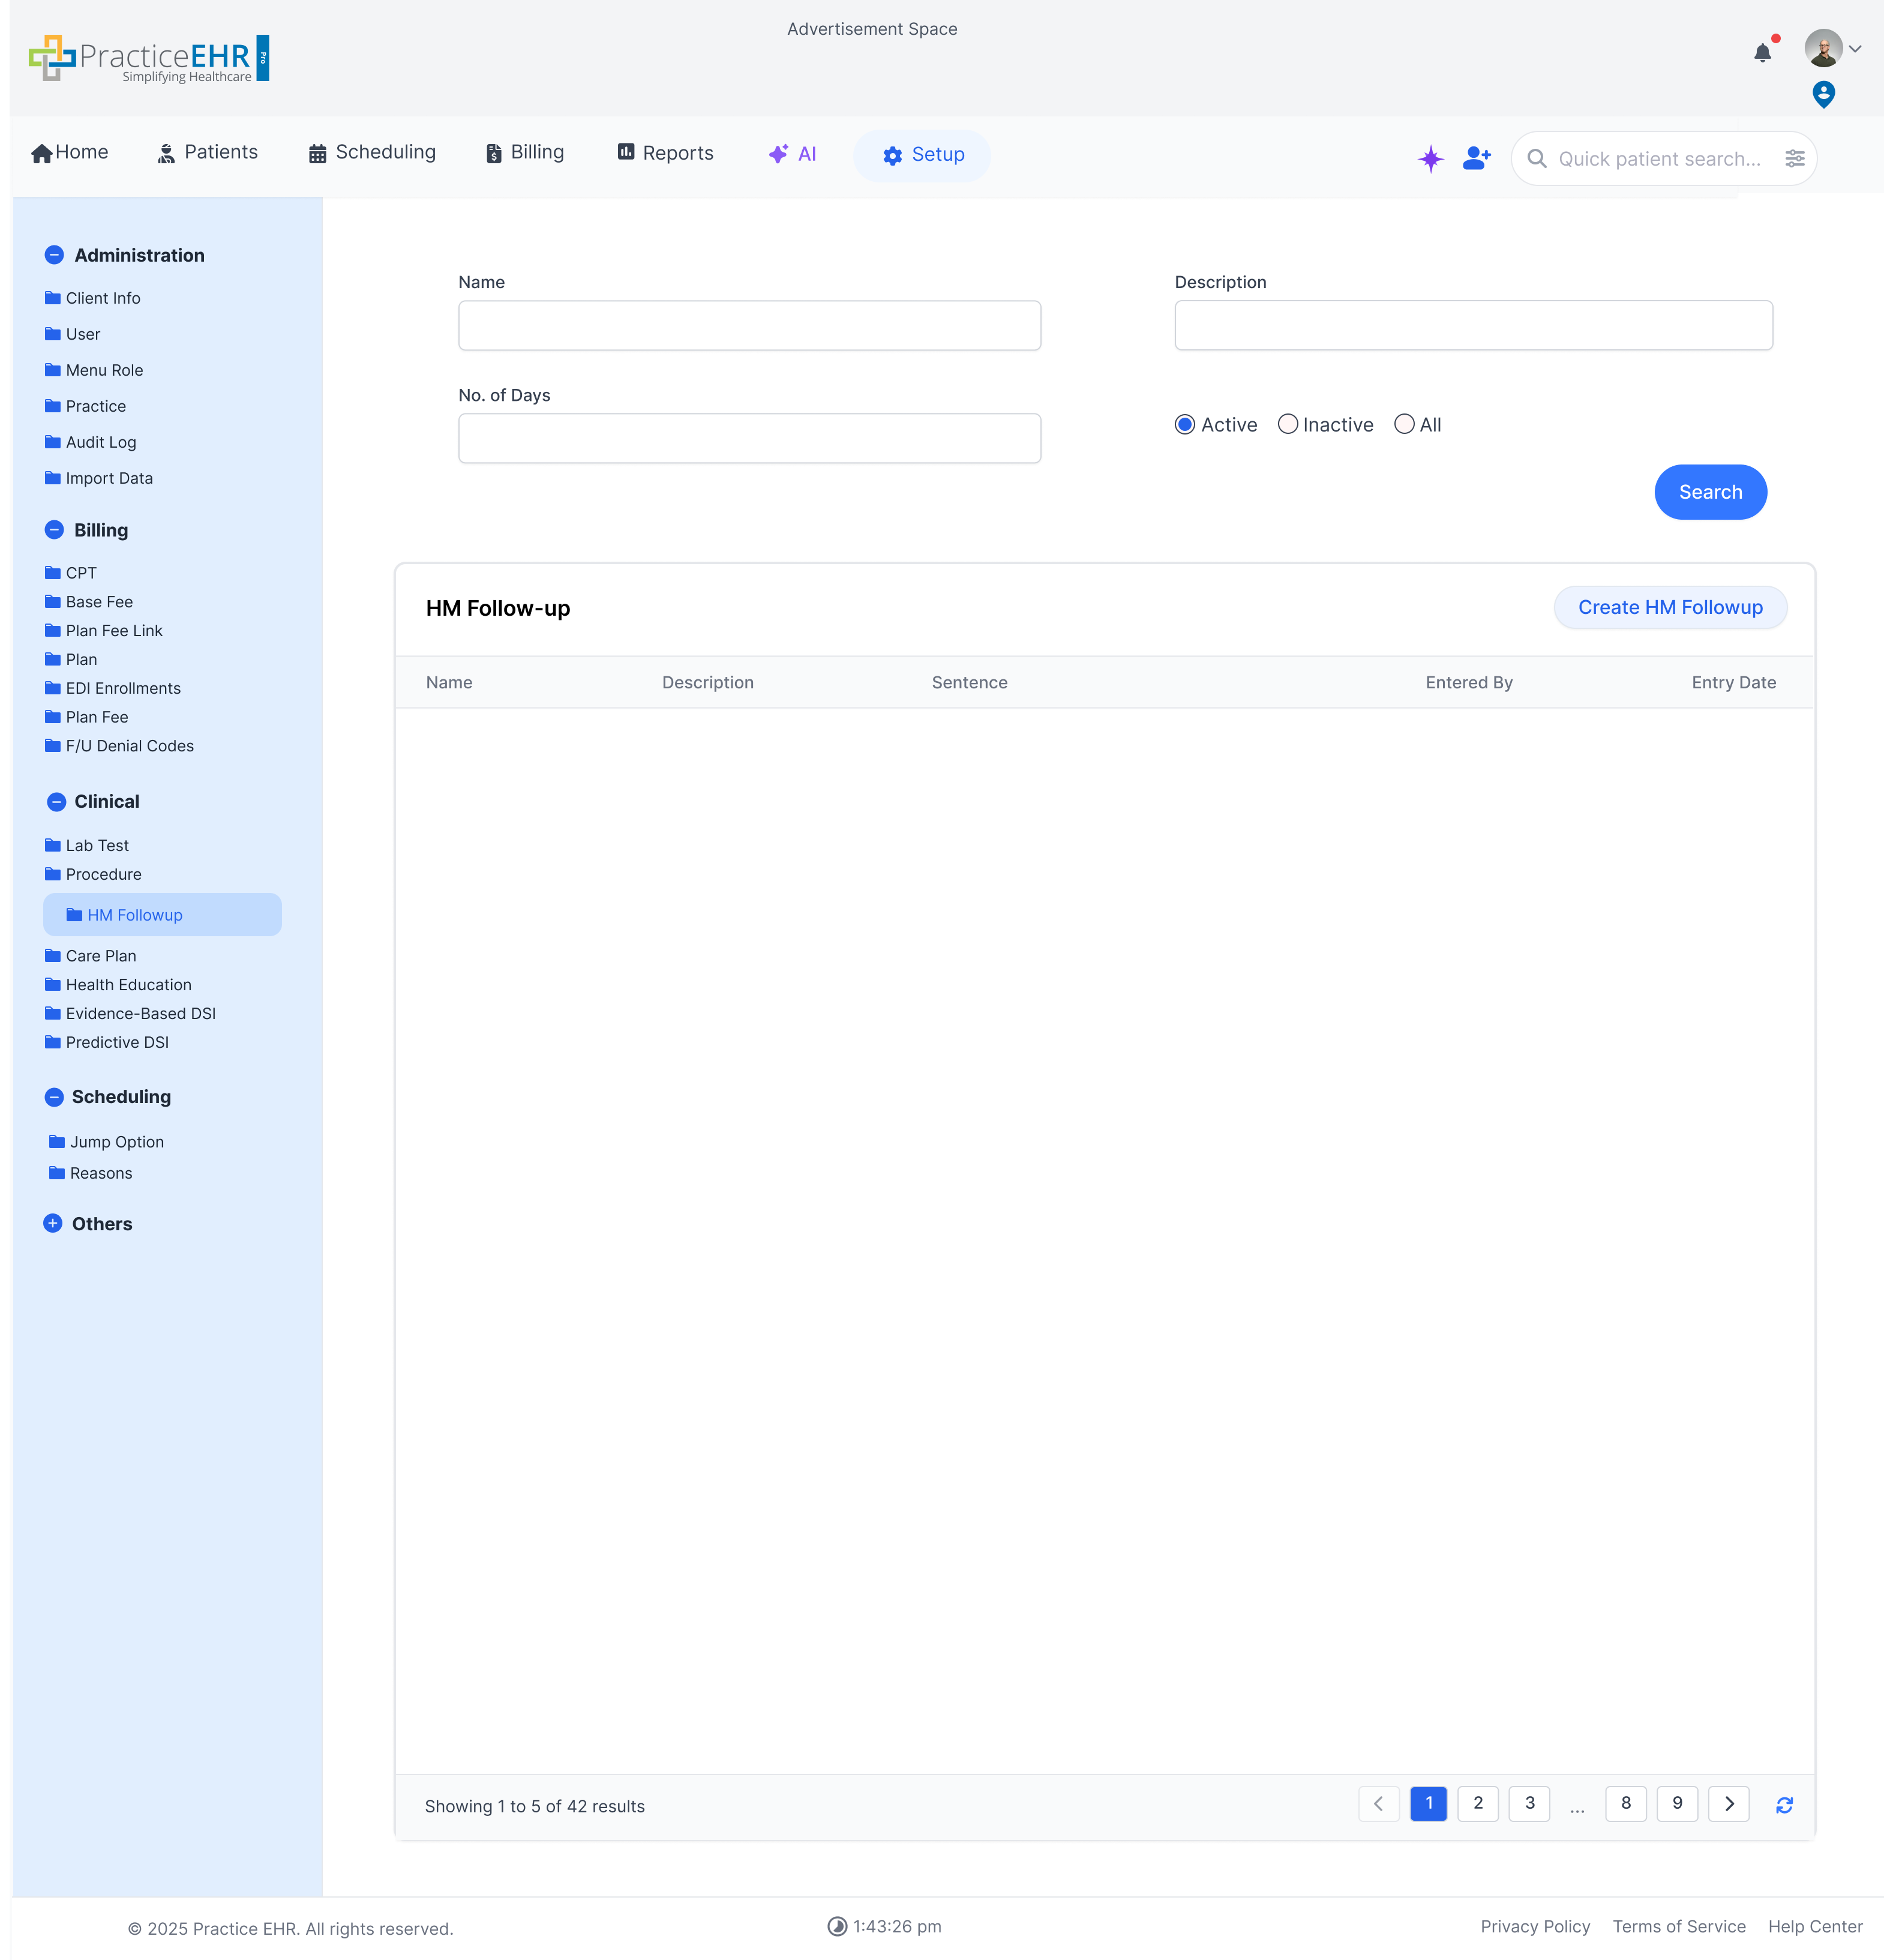
HM Followup
Setup / Clinical
Configure Health Maintenance (HM) follow-up reminders and schedules.
HM Followup Management
Search for follow-up items by Name, Description, or Number of Days.
Filter by status (Active, Inactive, All).
The grid lists configured follow-ups, including associated sentences and entry
details.
Click "Create HM Followup" to add a new reminder schedule.
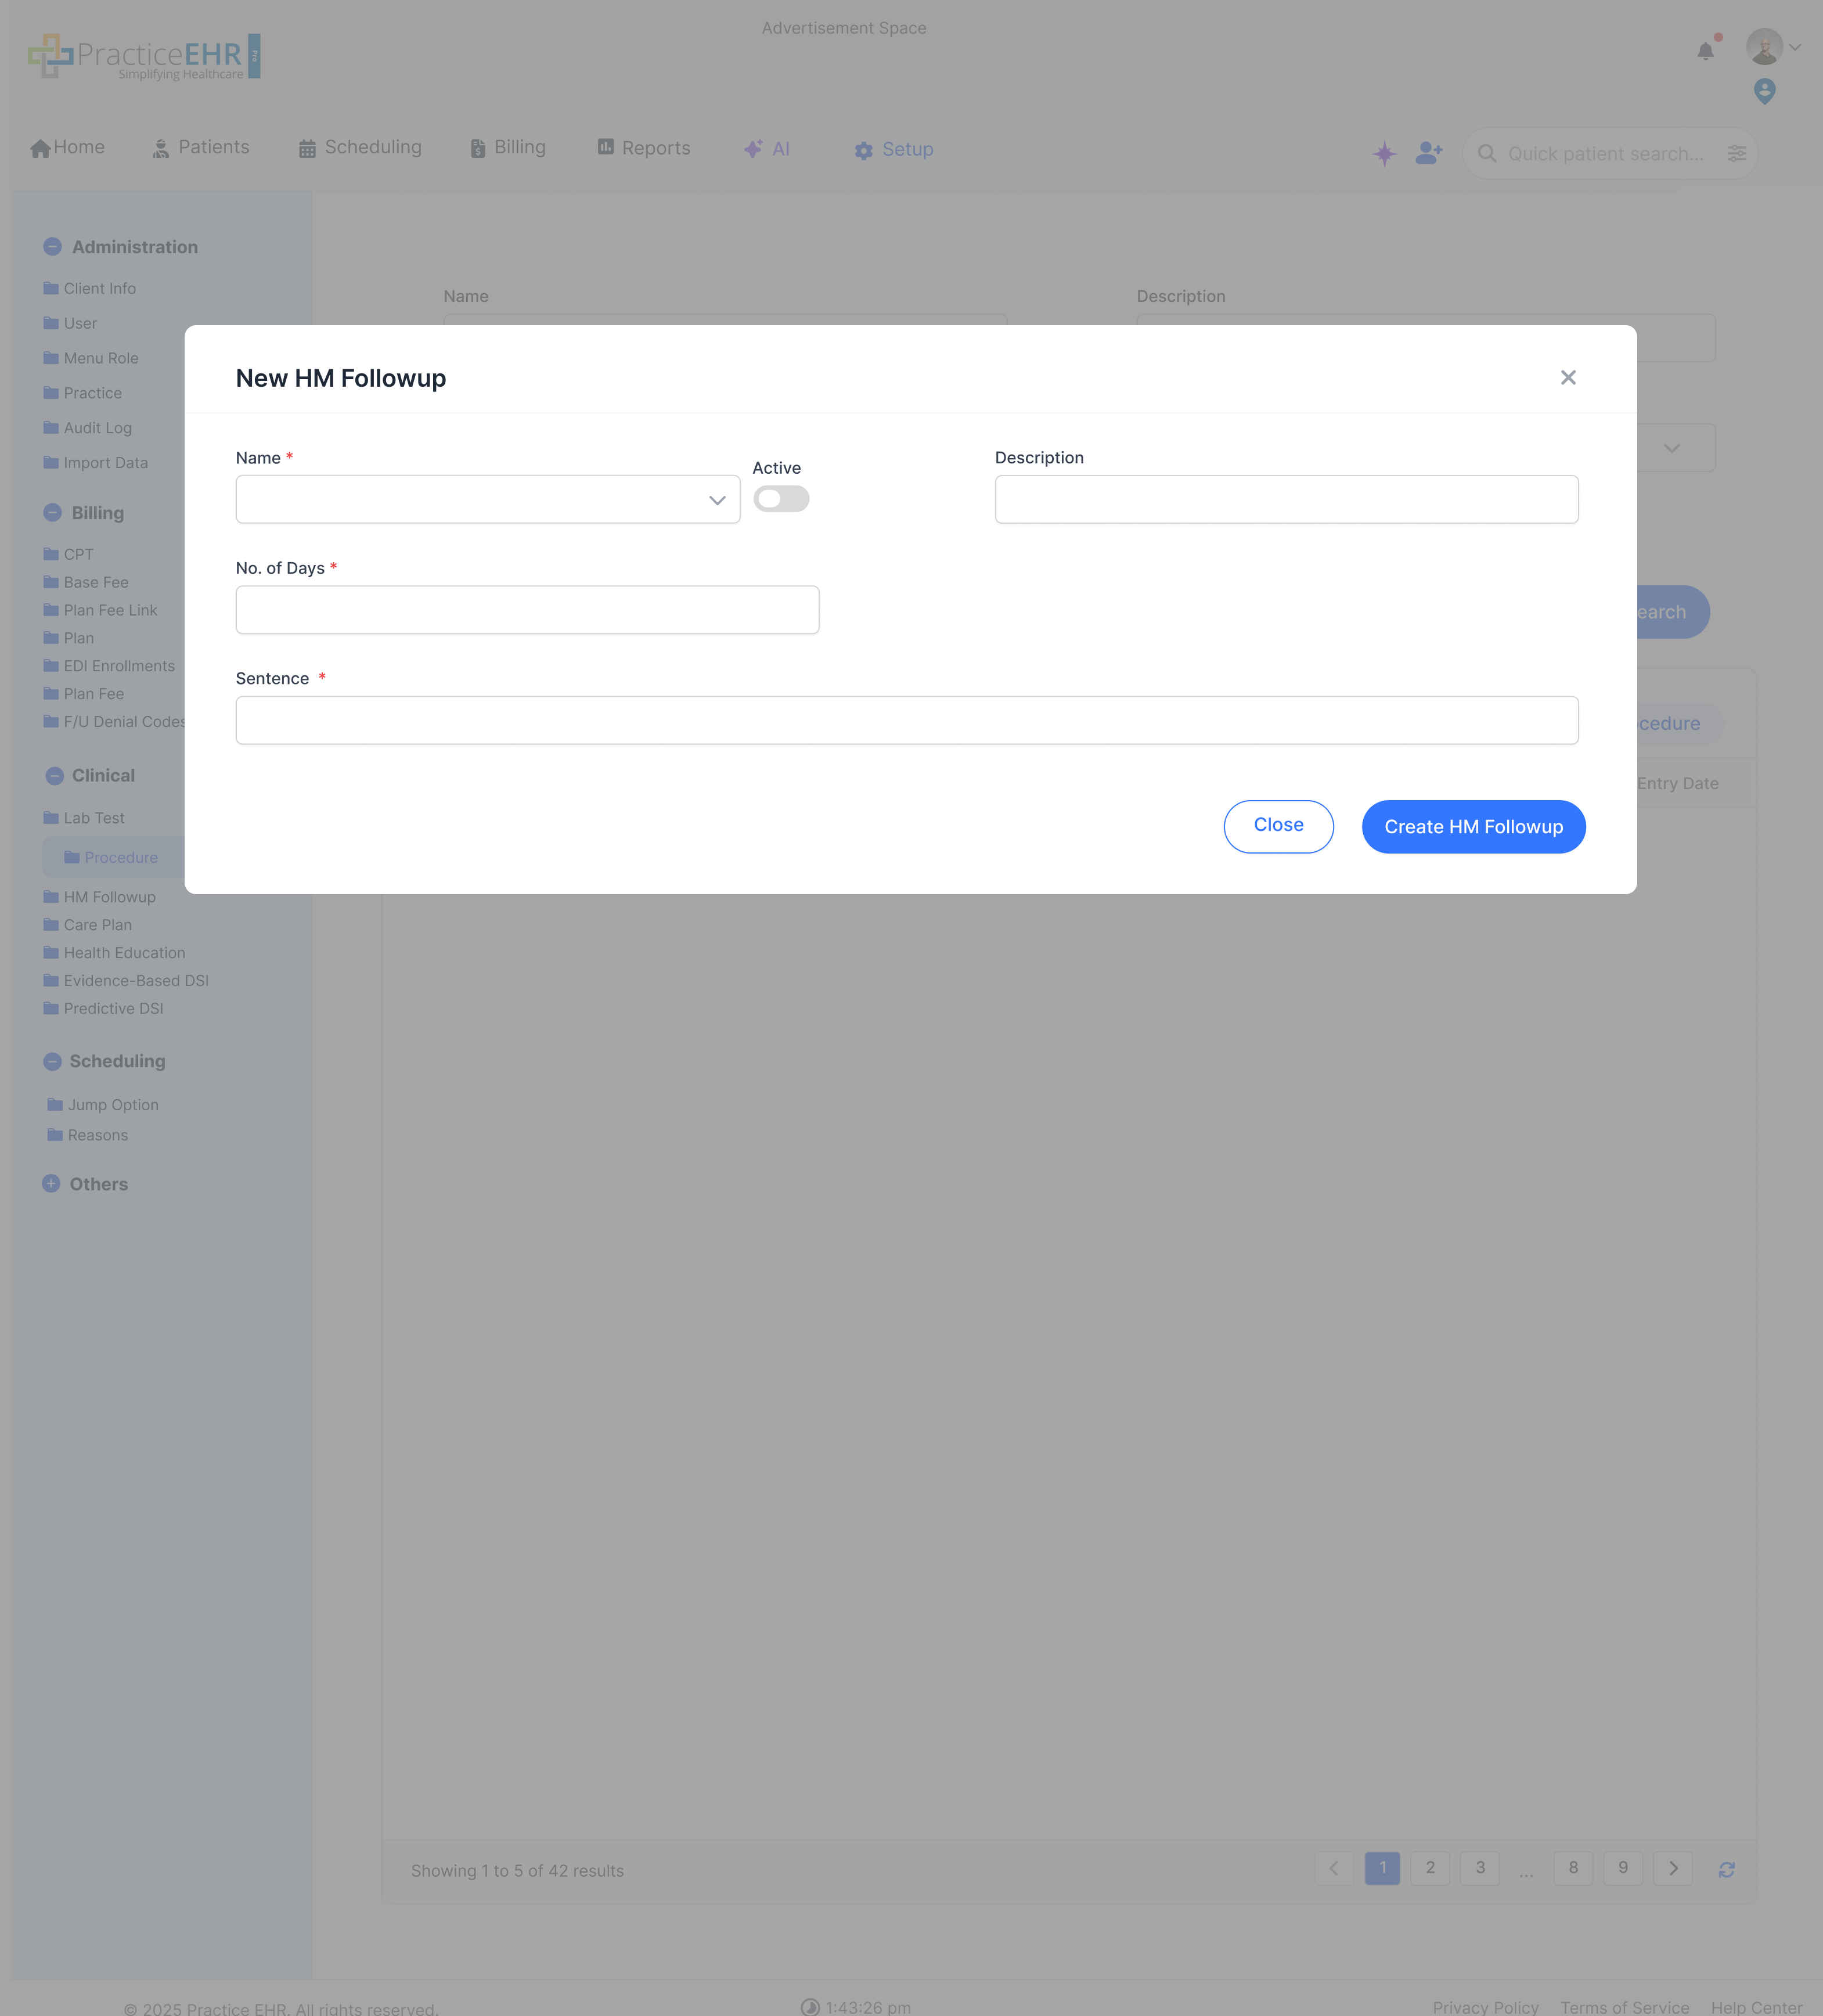
Create HM Followup
The create screen focuses on defining the follow-up rule, timing, and reminder
text used by the clinical team.
It is the quickest path when a new HM reminder needs to be added instead of edited
from the existing list.
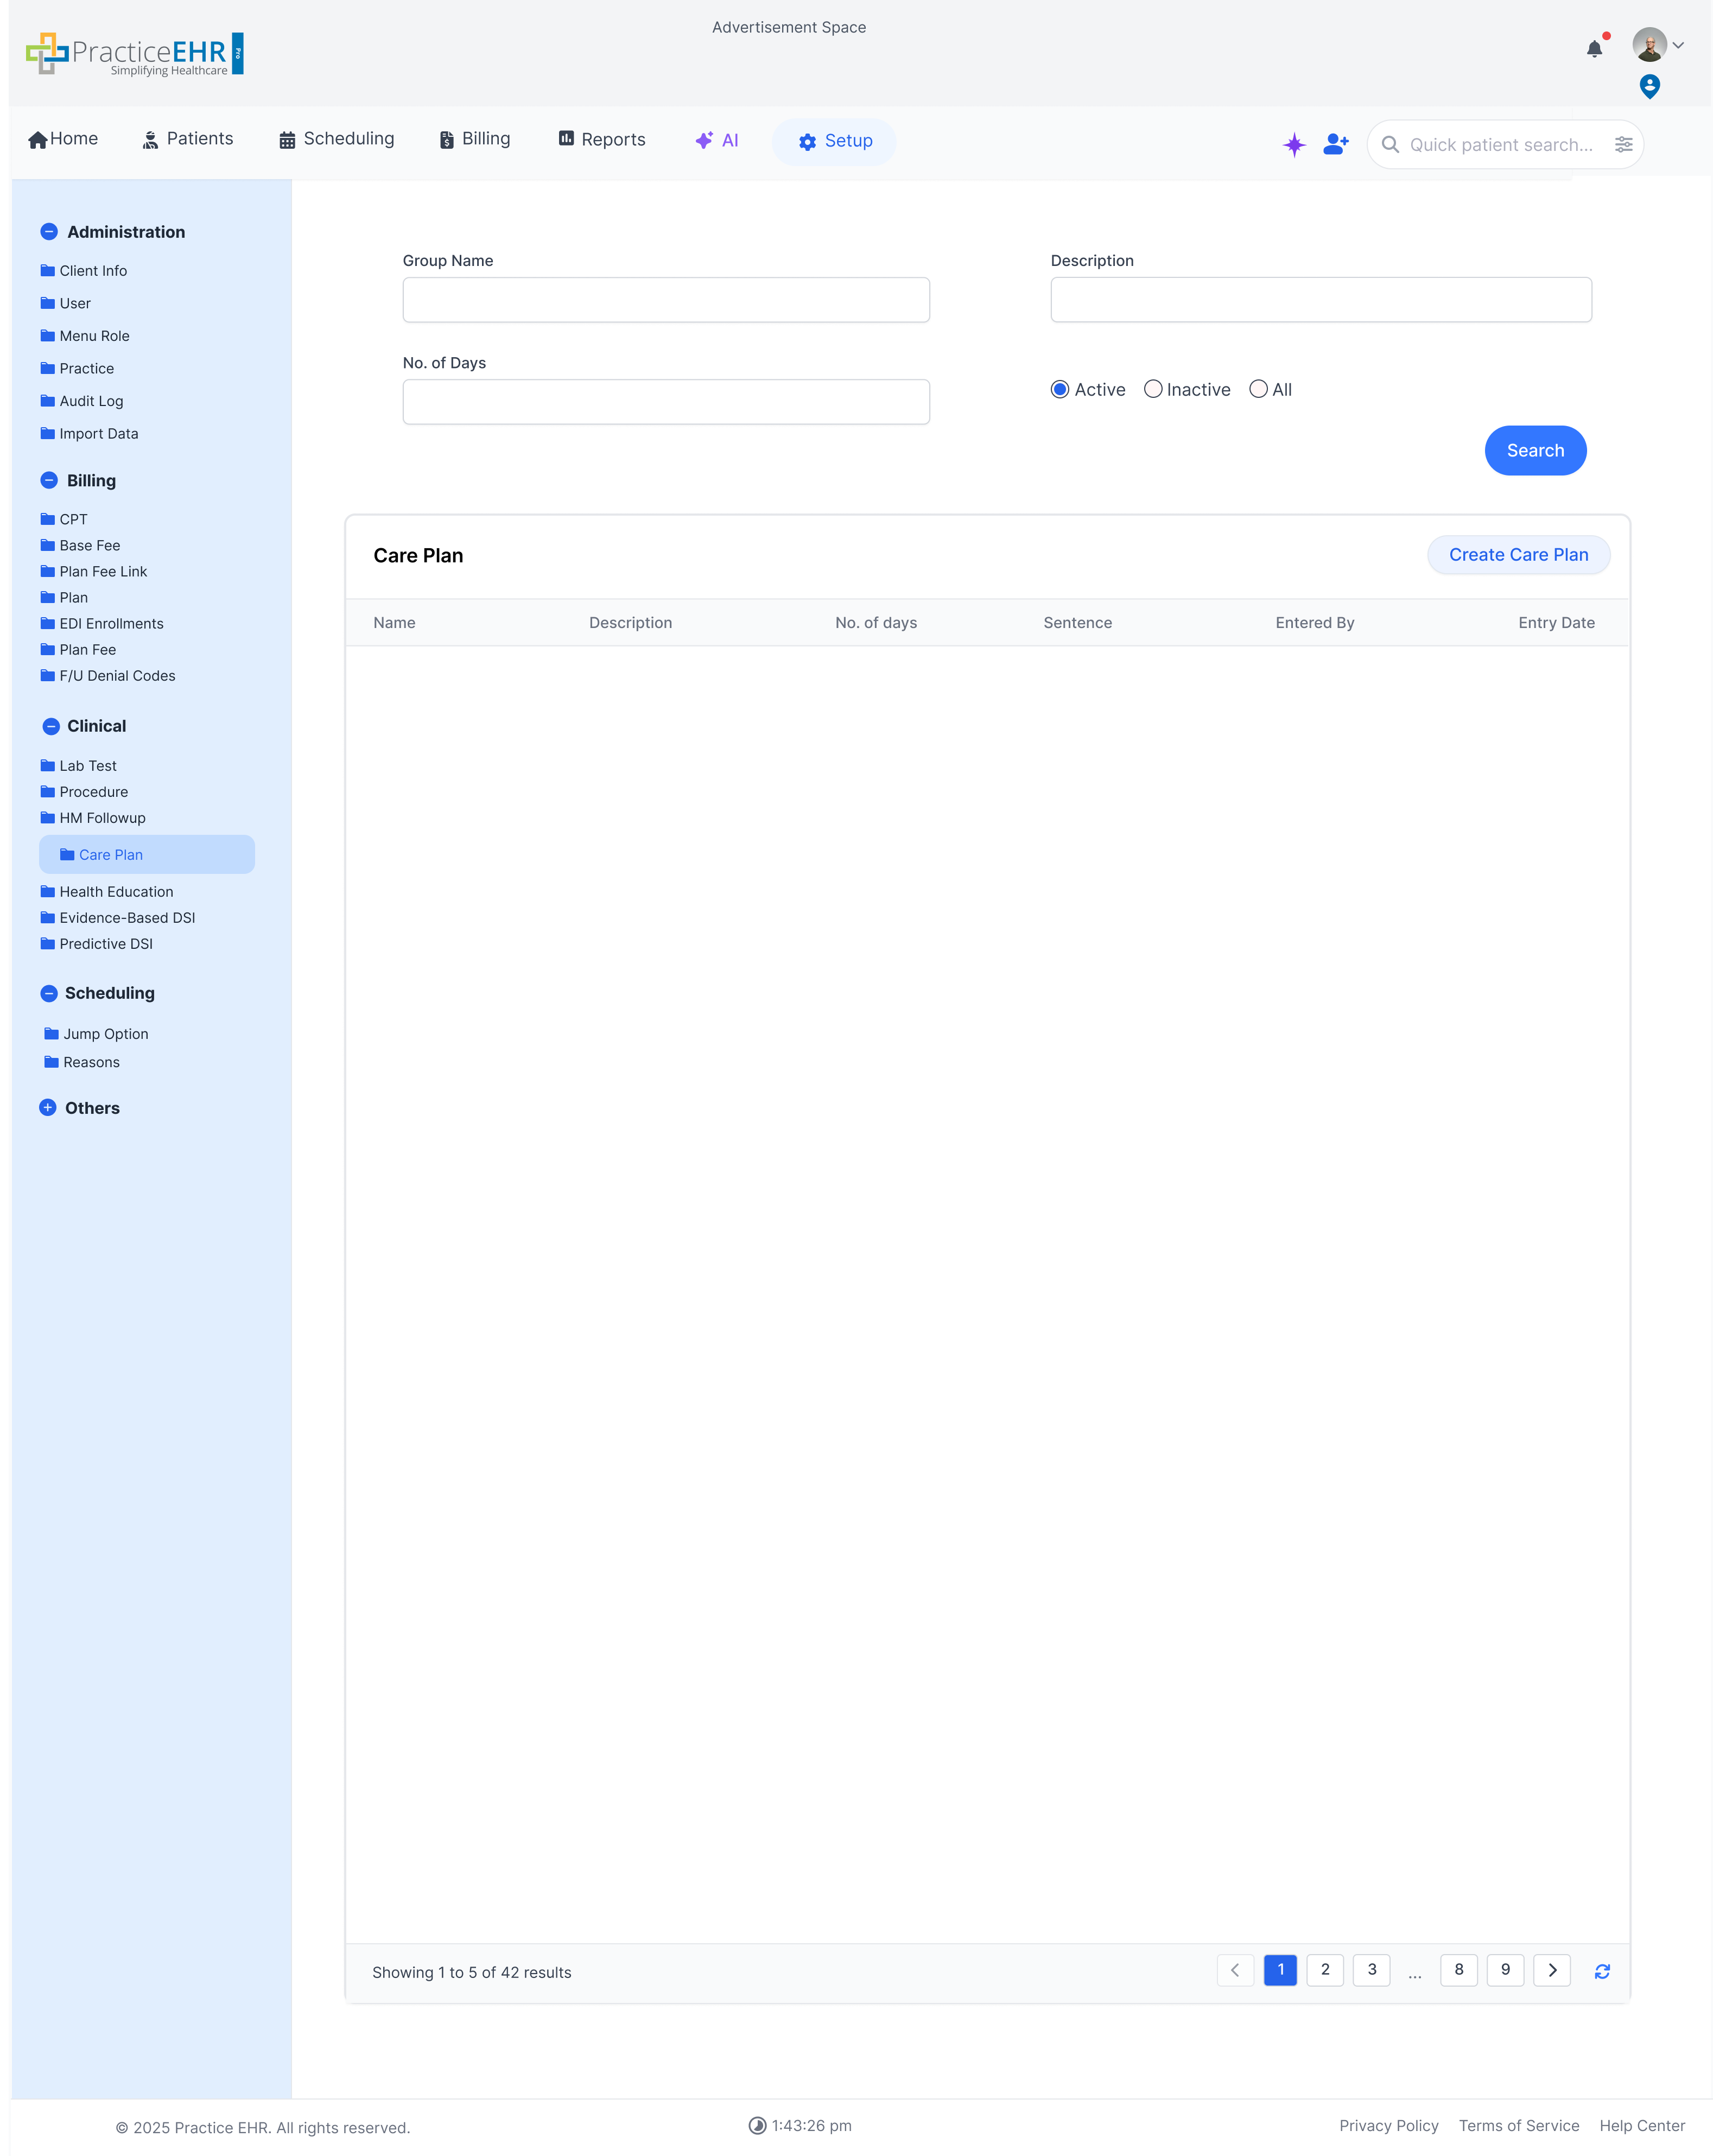
Care Plan
Setup / Clinical
Define and manage care plan templates and groups used in patient
charts.
Care Plan Configuration
Search for care plans by Group Name, Description, or Number of Days.
Filter by status (Active, Inactive, All).
The grid shows care plan names, descriptions, associated sentences, and entry
details.
Click "Create Care Plan" to build a new care plan template.
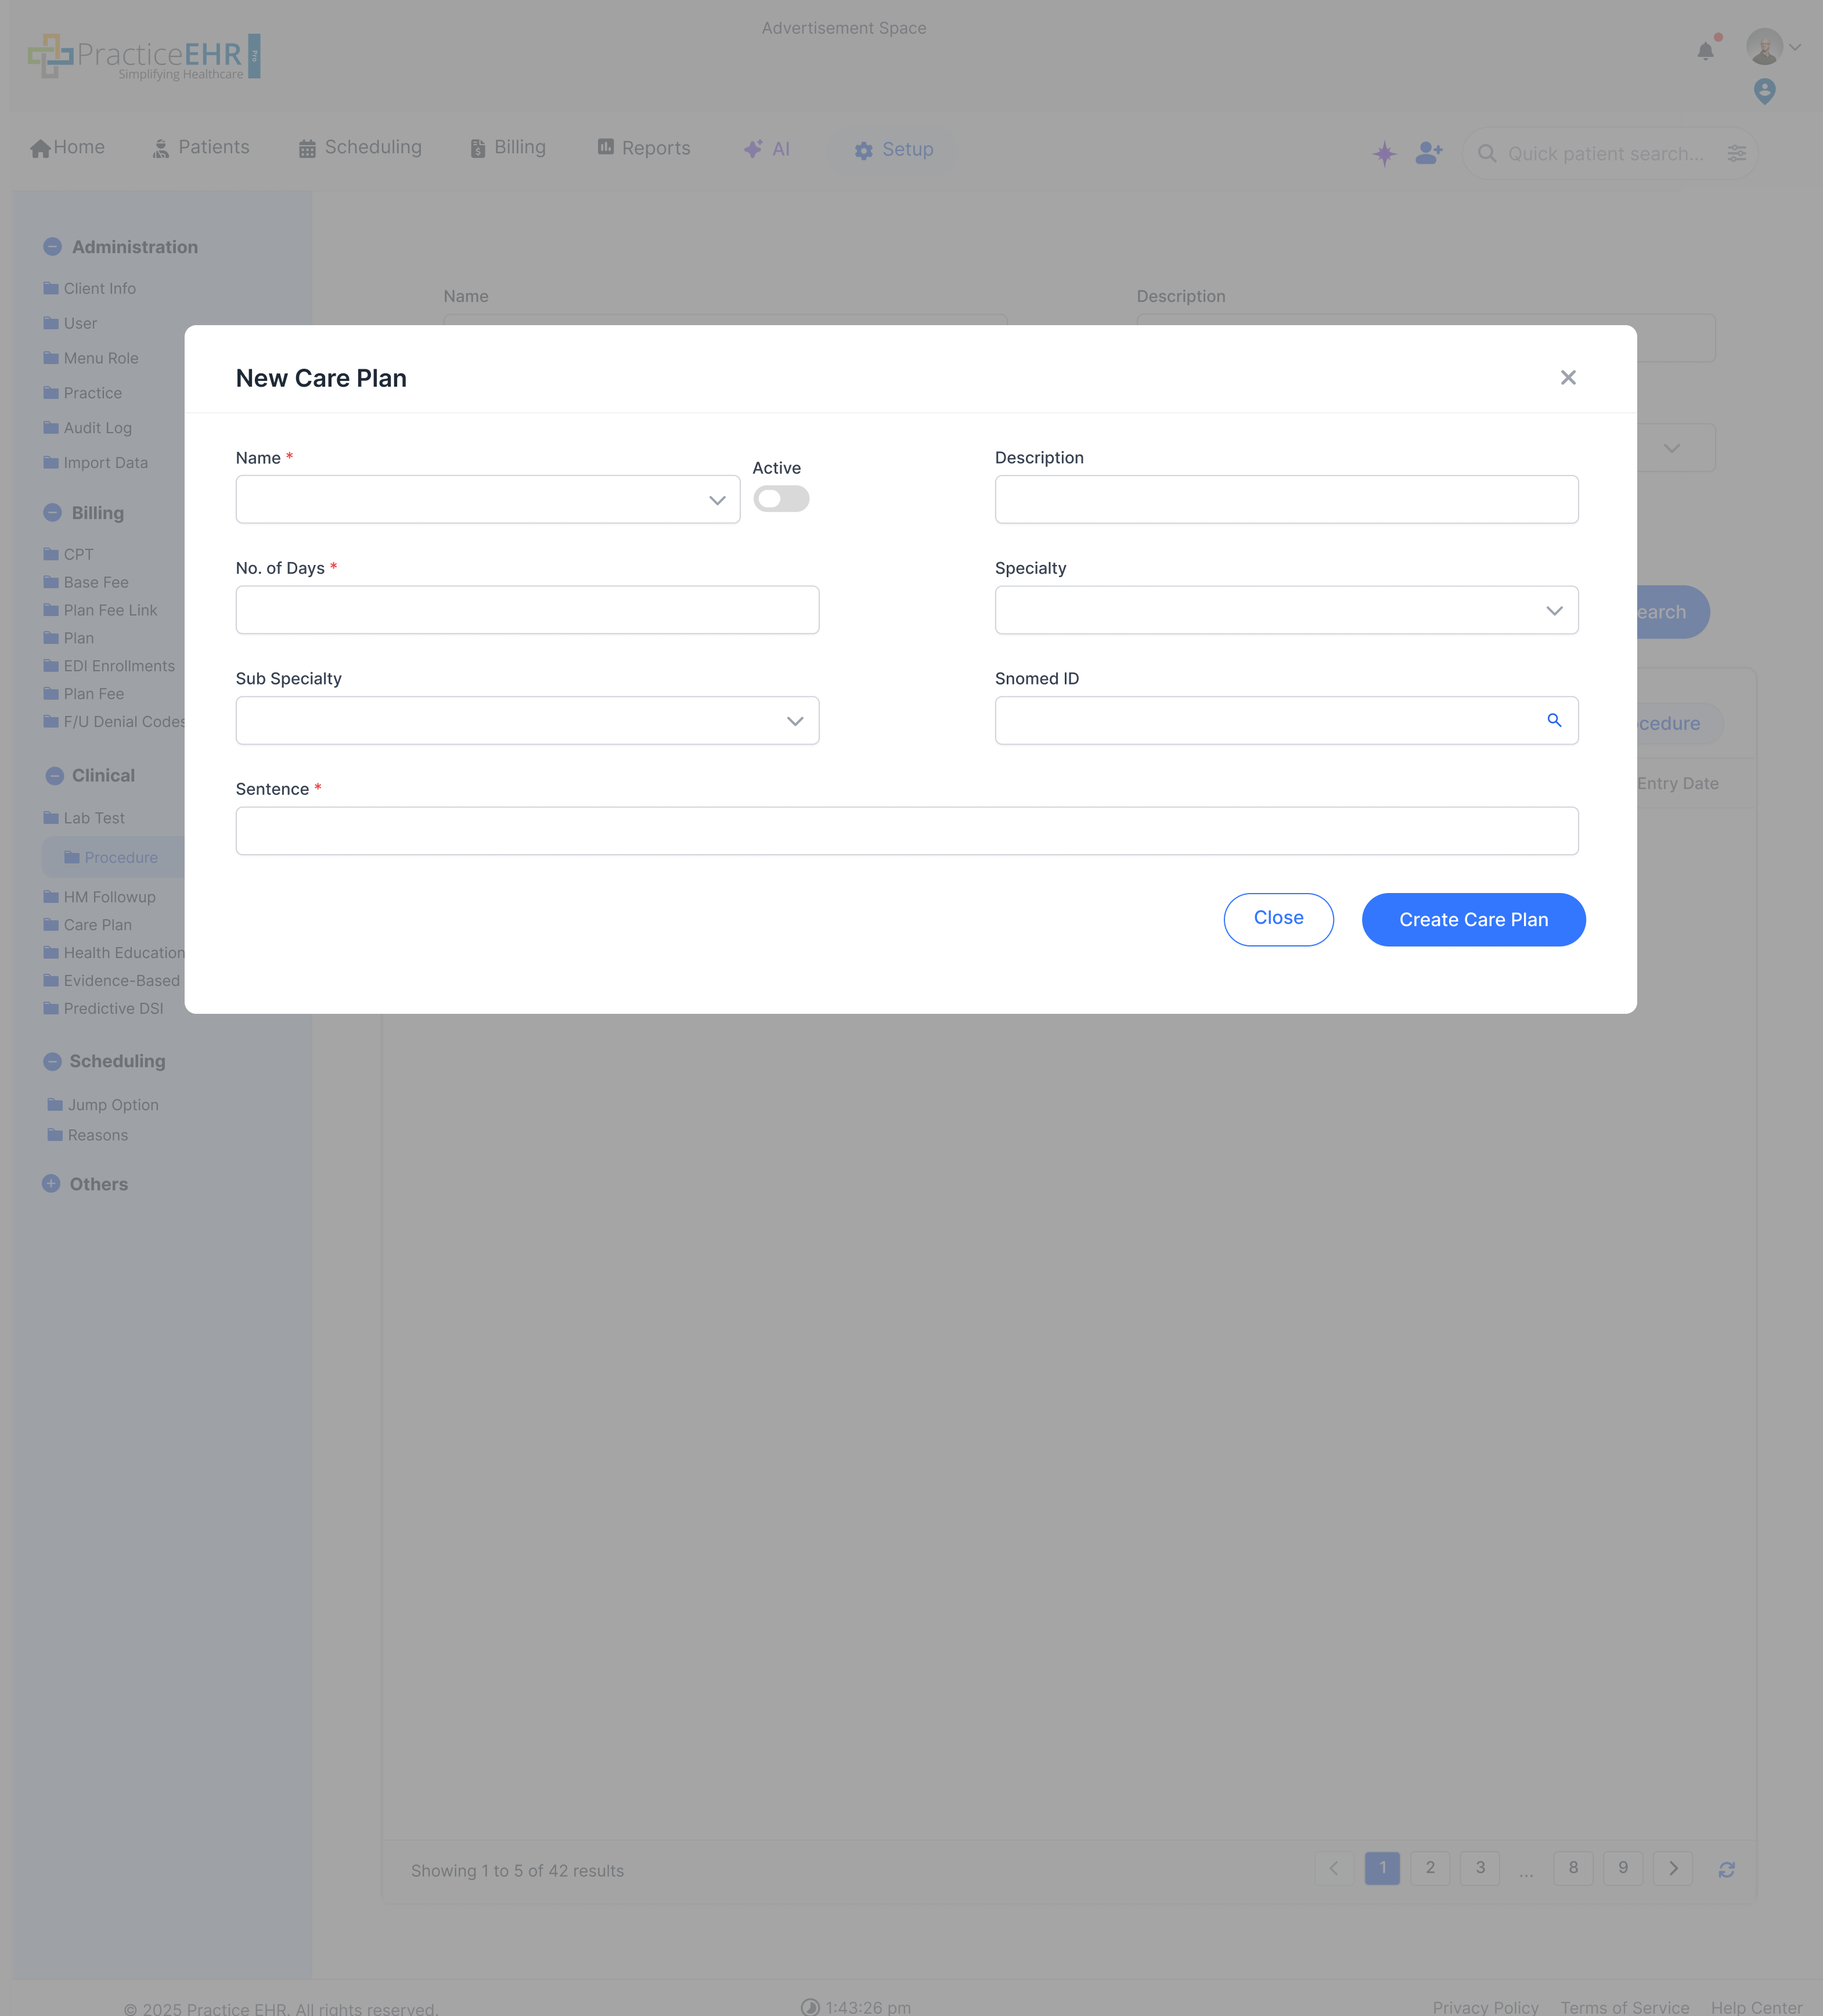
Create Care Plan
The create form is used to define the care plan title, content, and supporting
setup values before it is saved to the library.
It gives teams a focused entry flow when adding a brand-new plan instead of only
browsing existing records.
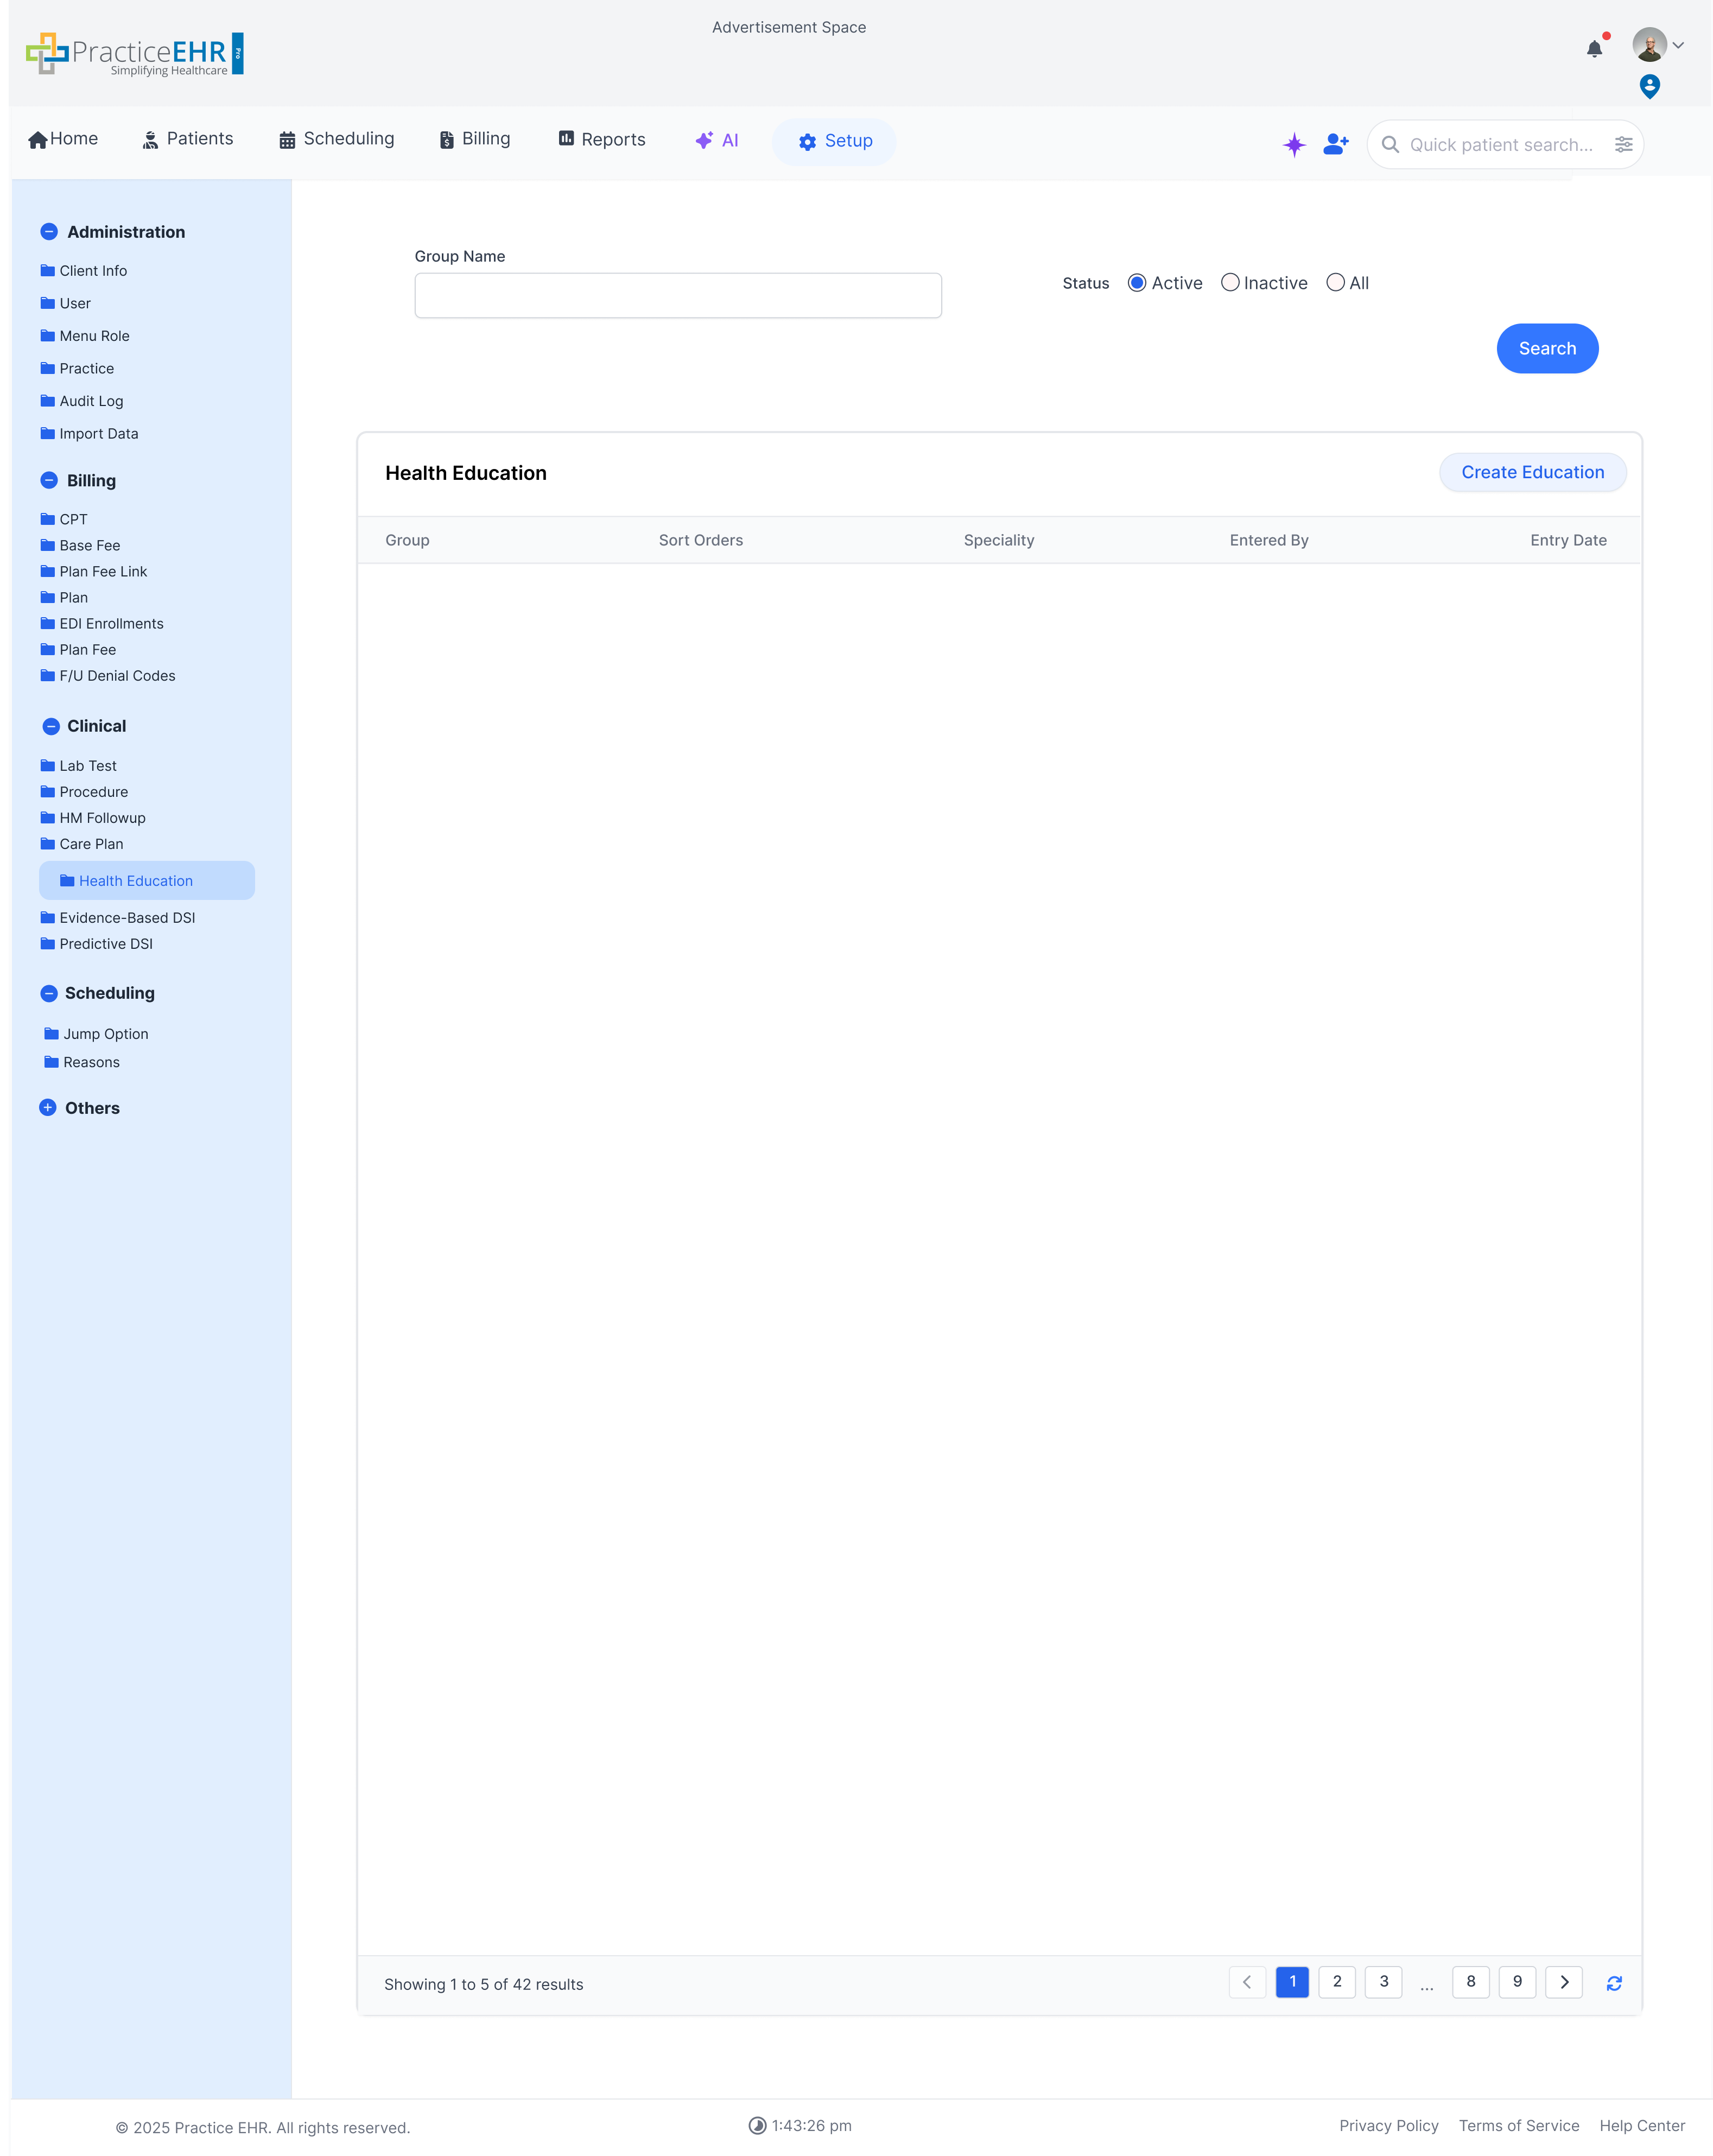
Health Education
Setup / Clinical
Manage health education materials and groups available to assign to
patients.
Health Education Management
Search for education materials by Group Name.
Filter by status (Active, Inactive, All).
The grid lists education groups, sort order, specialty, and entry details.
Click "Create Education" to add new educational materials or groups.
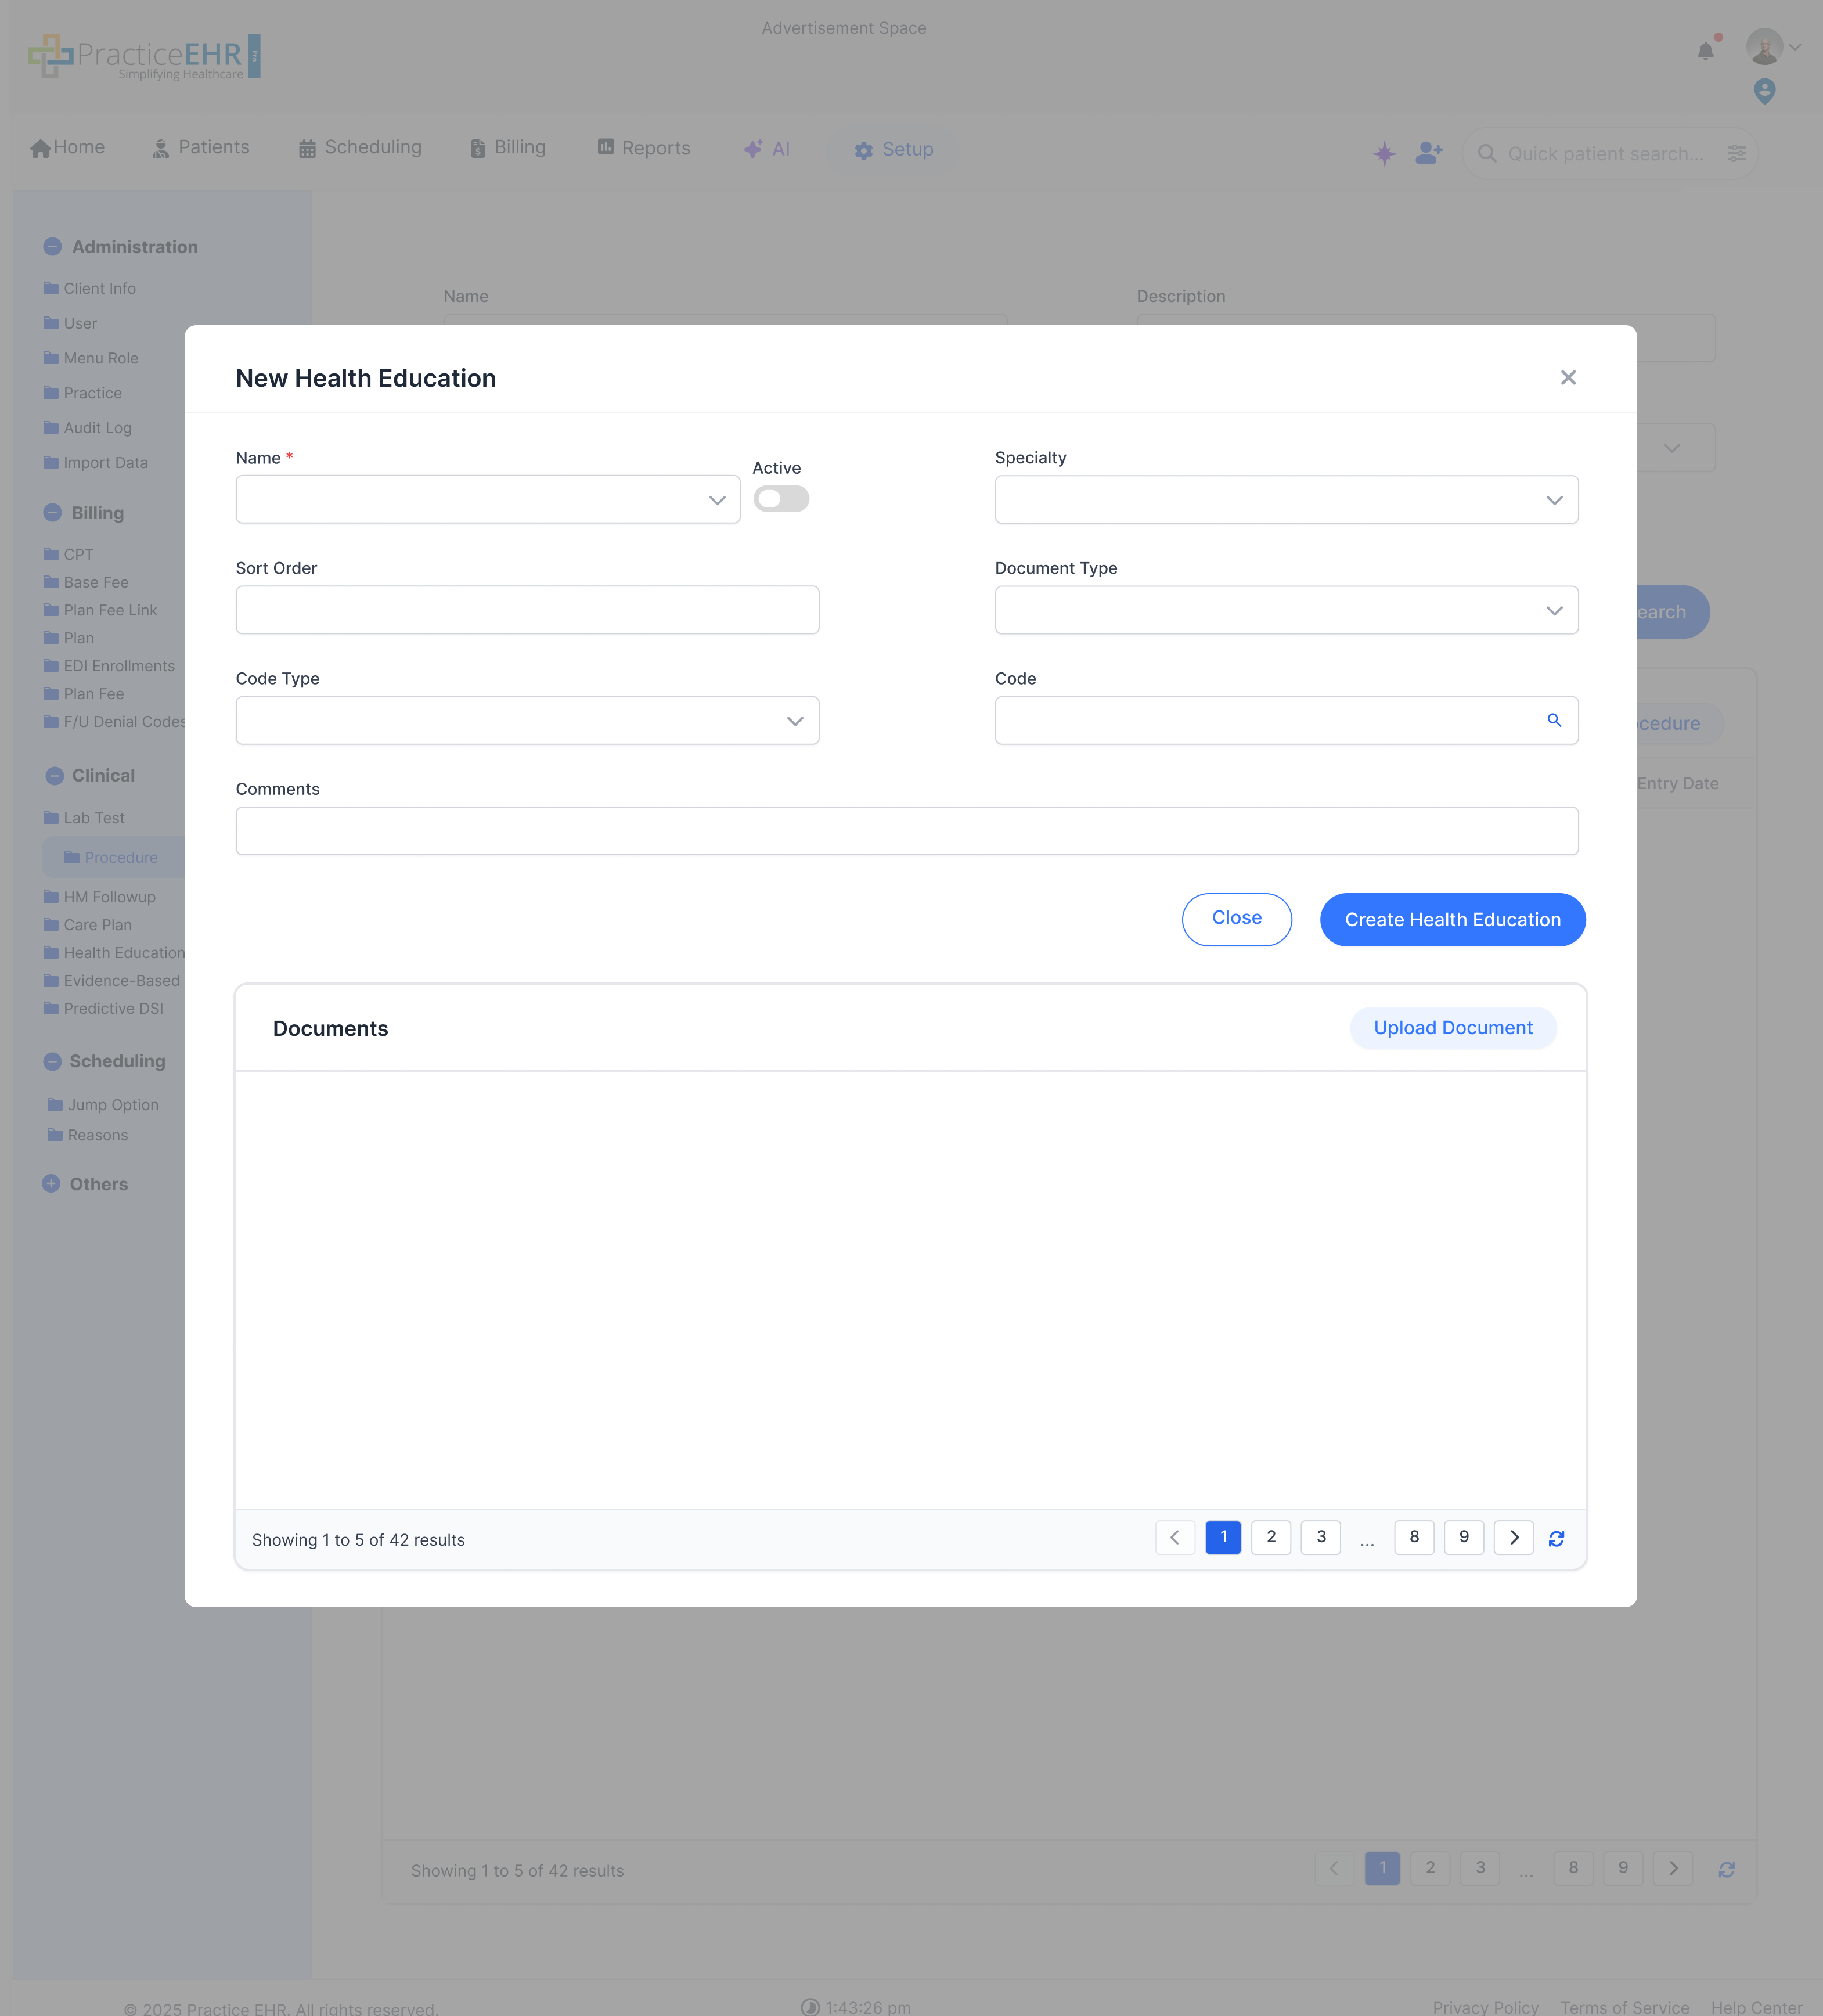
Create Education
The new education form captures the title, grouping, and other setup details used
to organize education content.
It is the screen teams use when adding fresh patient education content to the
library.
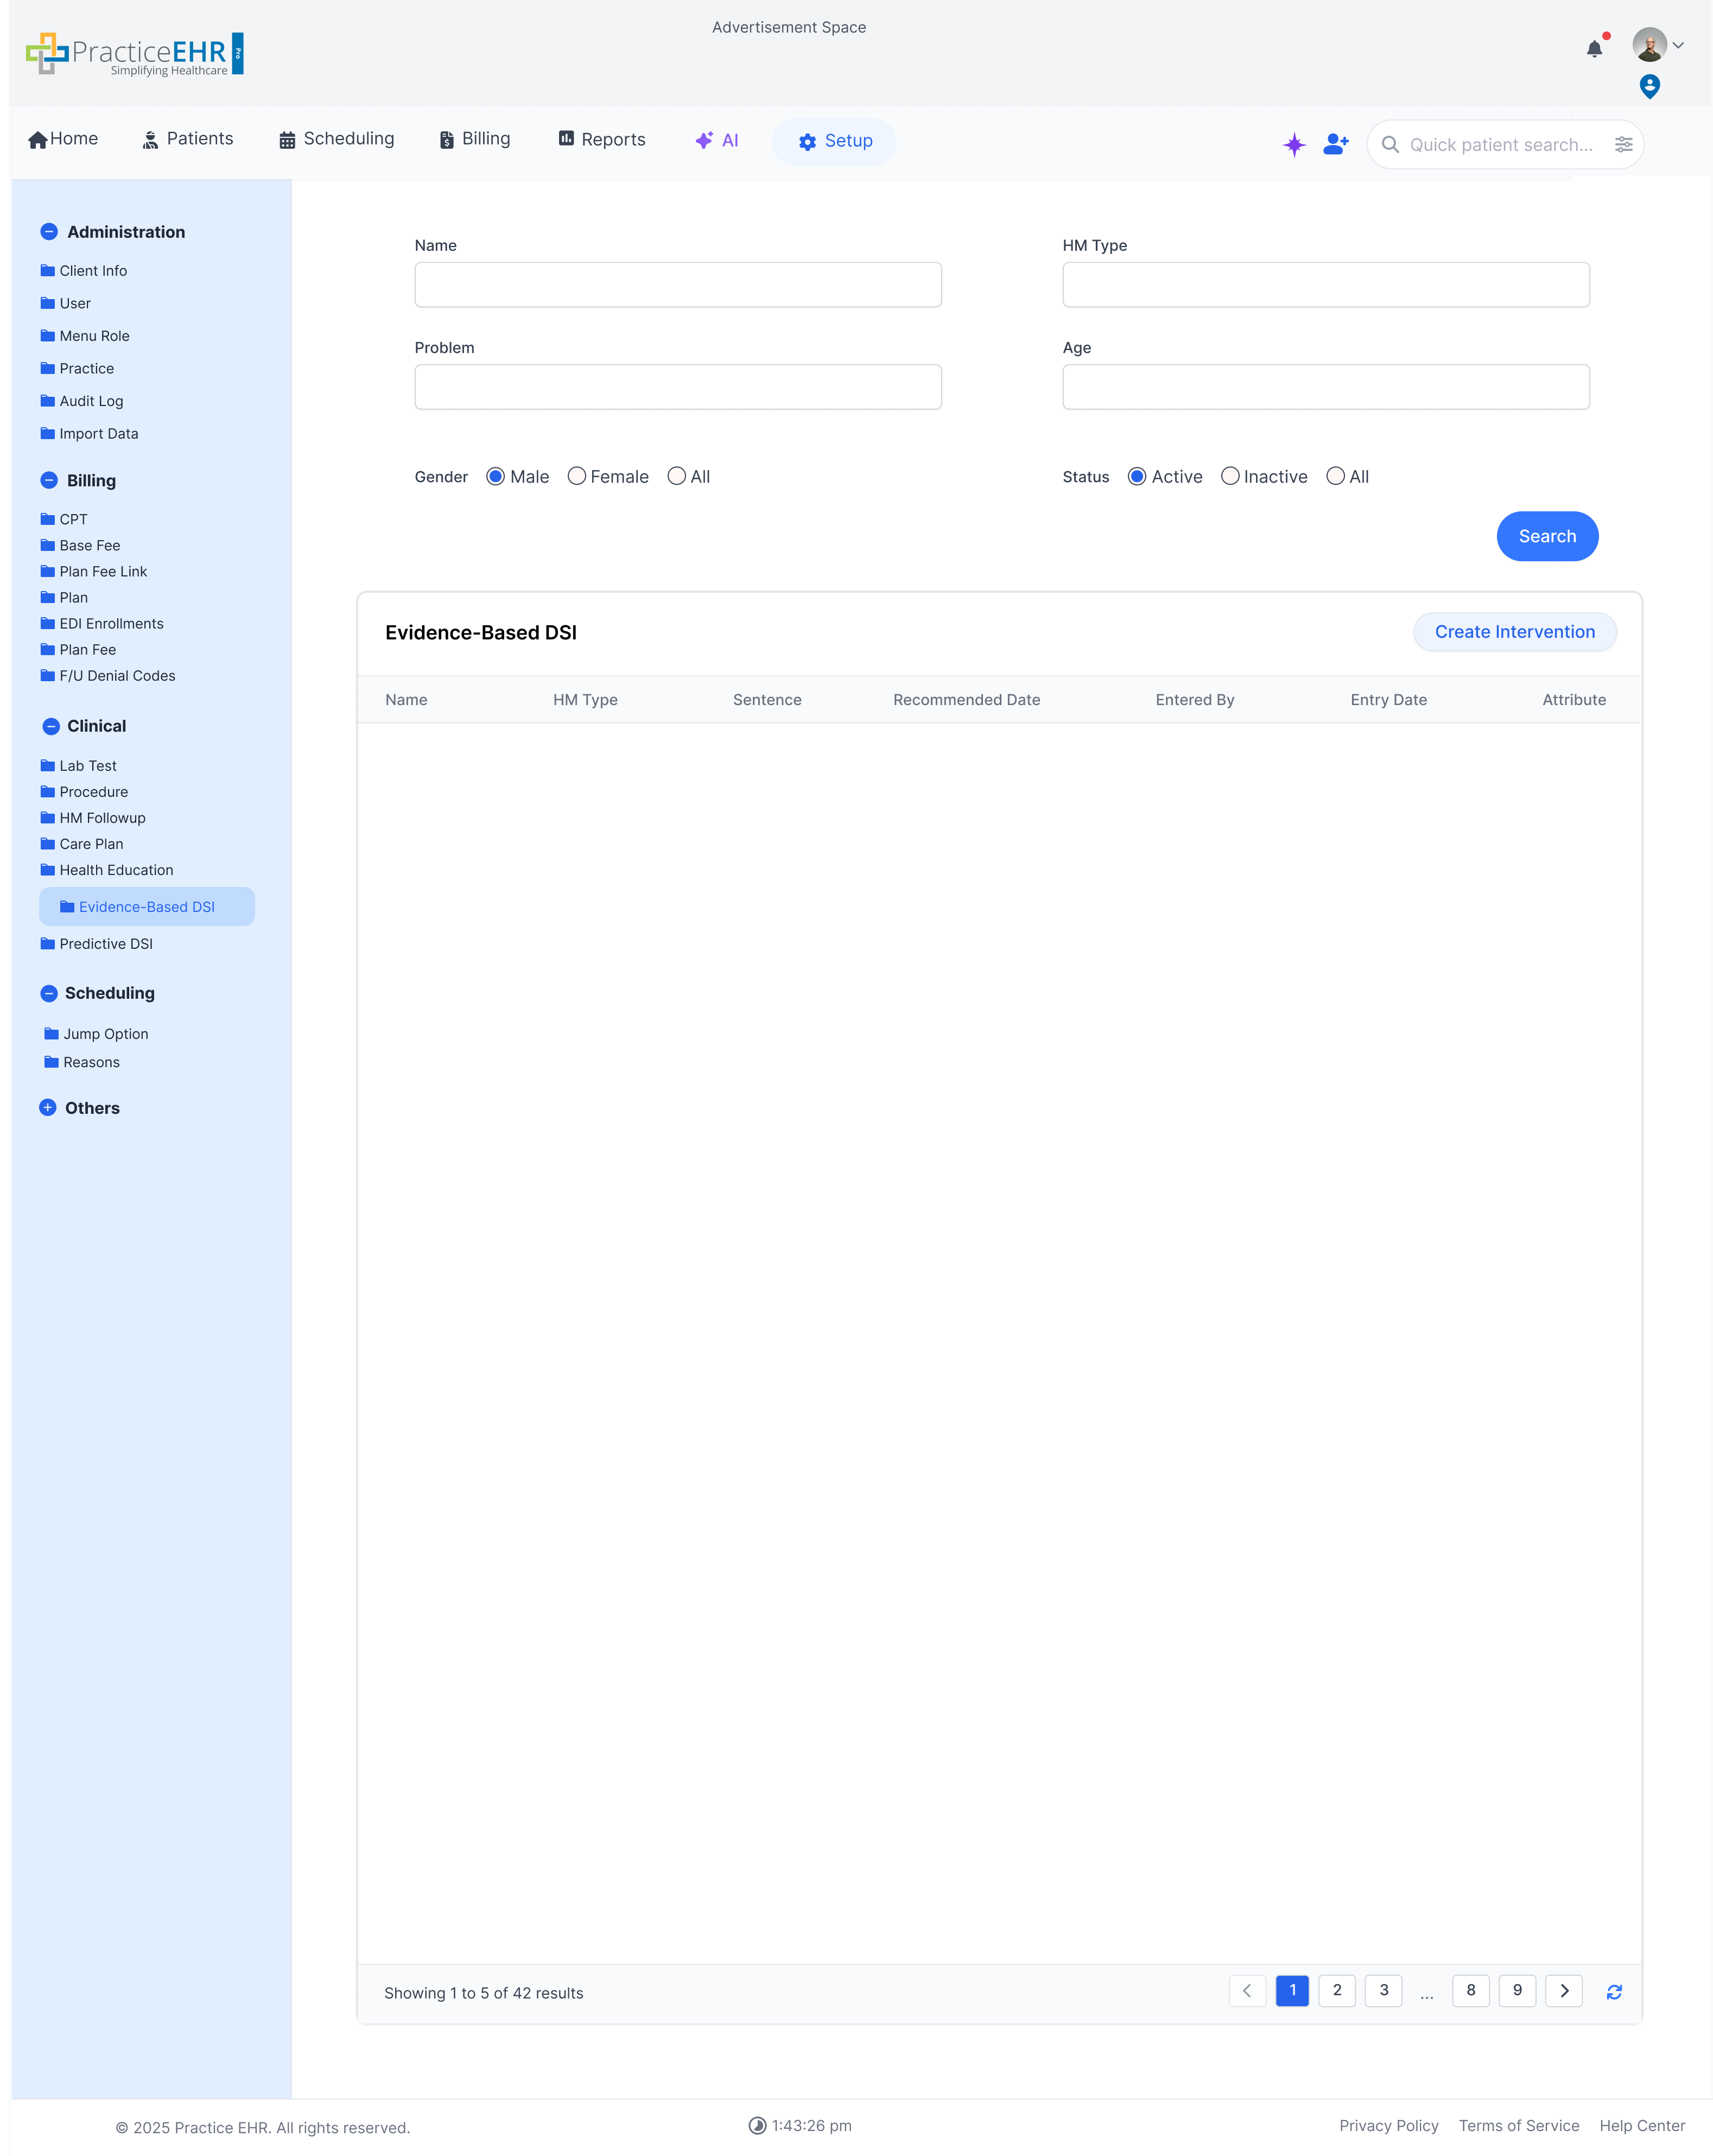
Evidence-Based DSI
Setup / Clinical
Configure evidence-based decision support interventions (DSI) and
predictive models.
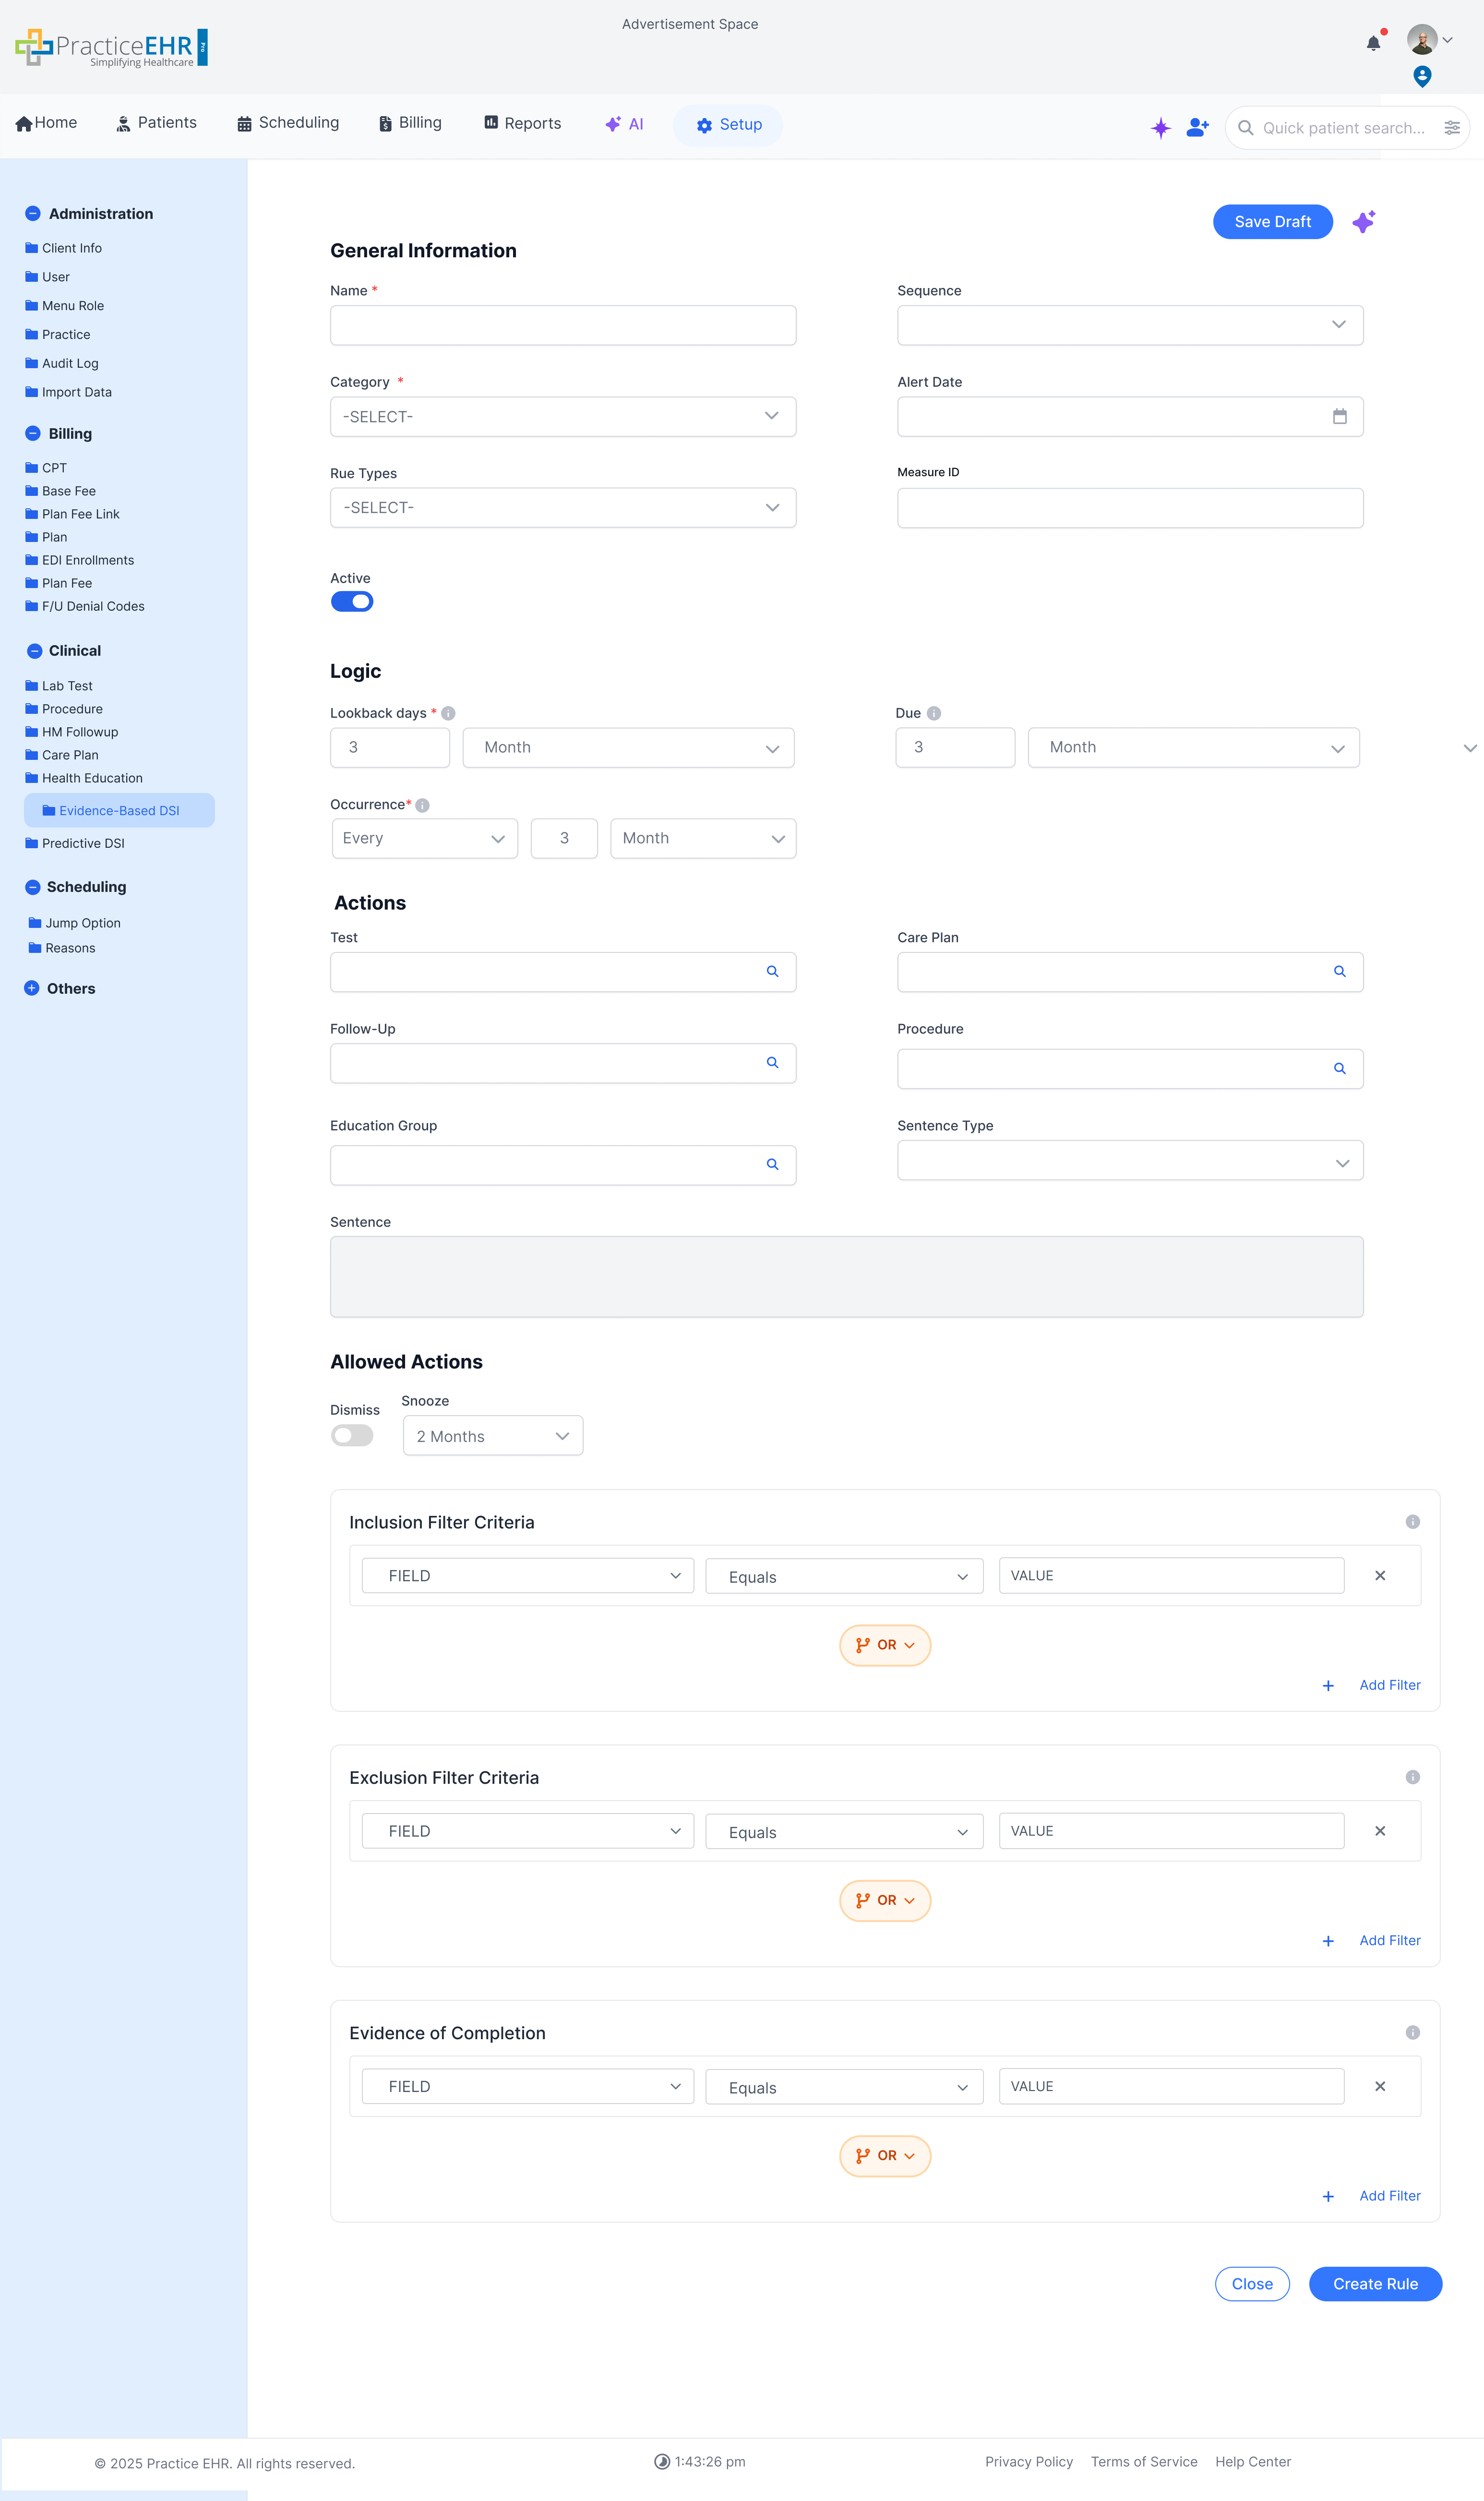
Create Intervention
The Evidence-Based DSI tab lets users search interventions by clinical context and
open the create flow directly from the setup grid.
Use "Create Intervention" to add a new rules-based intervention with its
recommended timing and attributes.
Predictive DSI Tab
The companion predictive tab surfaces model-level settings such as scope, entry
dates, and Smart FHIR credentials.
It provides the broader predictive overview, while the dedicated Predictive DSI
section below covers the create screen itself.
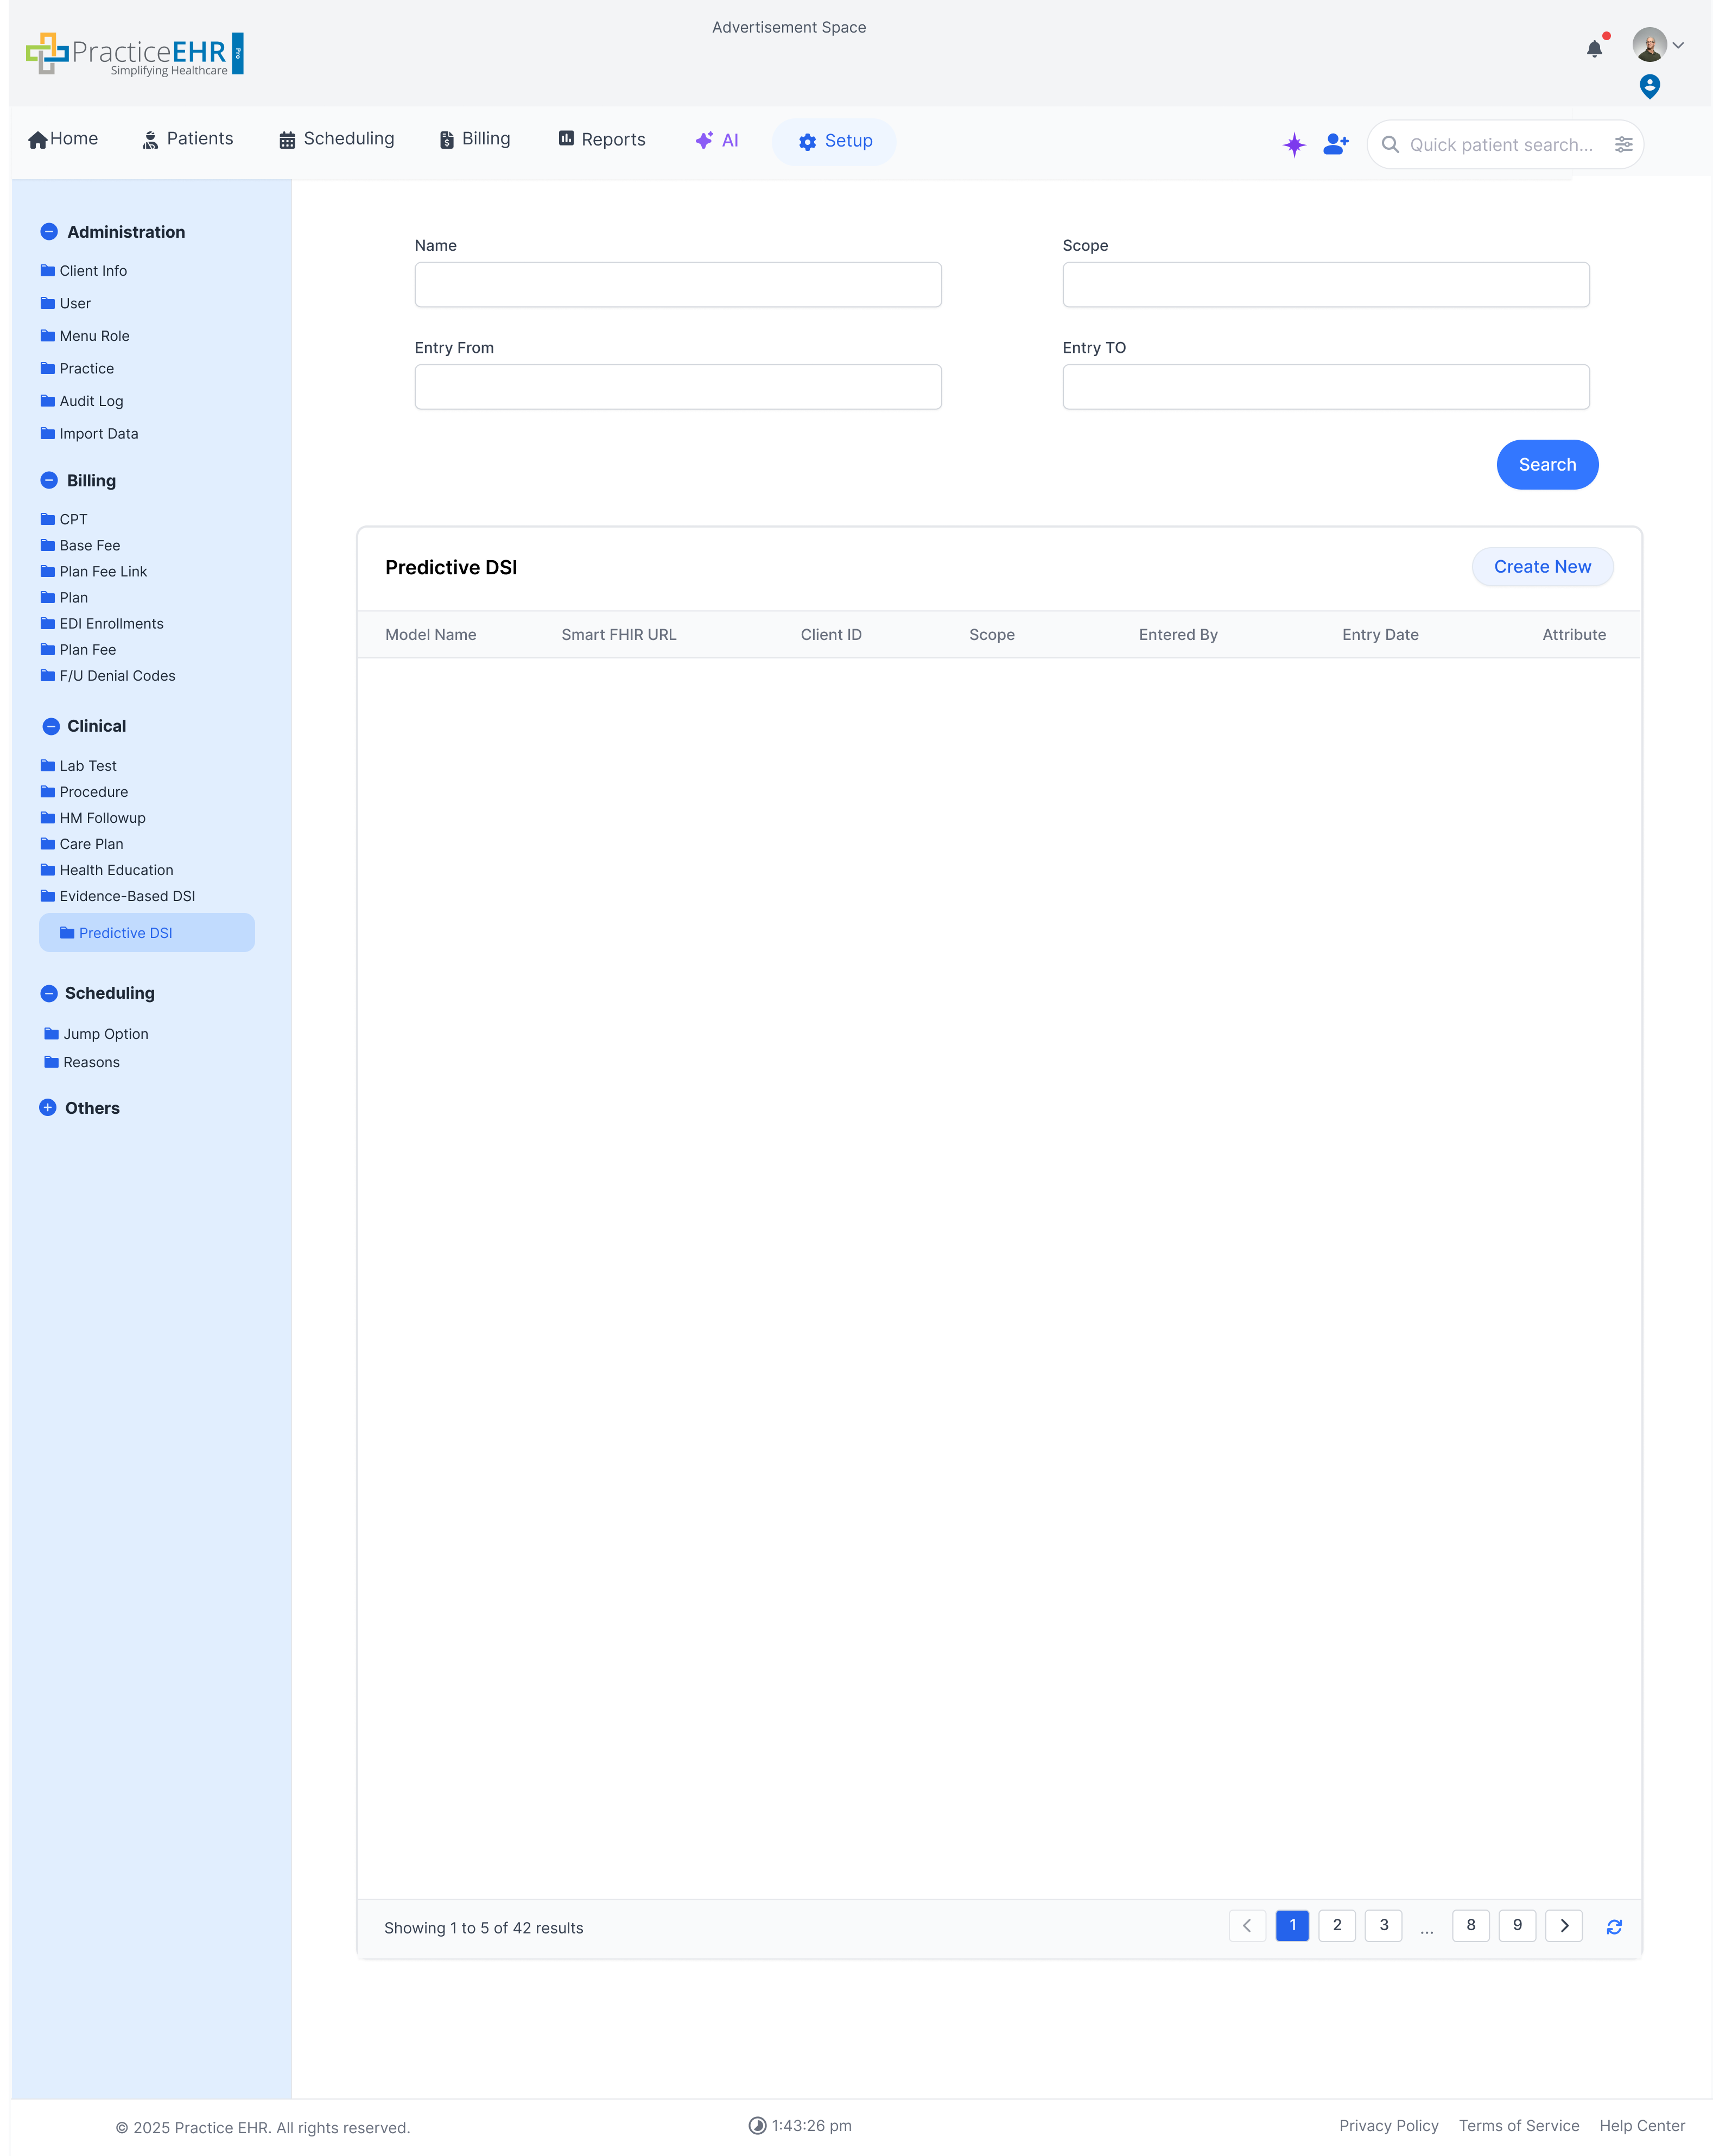
Practice DSI / Predictive DSI
Setup / Clinical
Manage practice-specific or predictive Decision Support Interventions
(DSI).
Predictive DSI Management
Search for DSI models by Name, Scope, or Entry date range.
The grid lists the Model Name, Smart FHIR URL, Client ID, Scope, and other
details.
Click "Create New" to configure a new predictive DSI model.
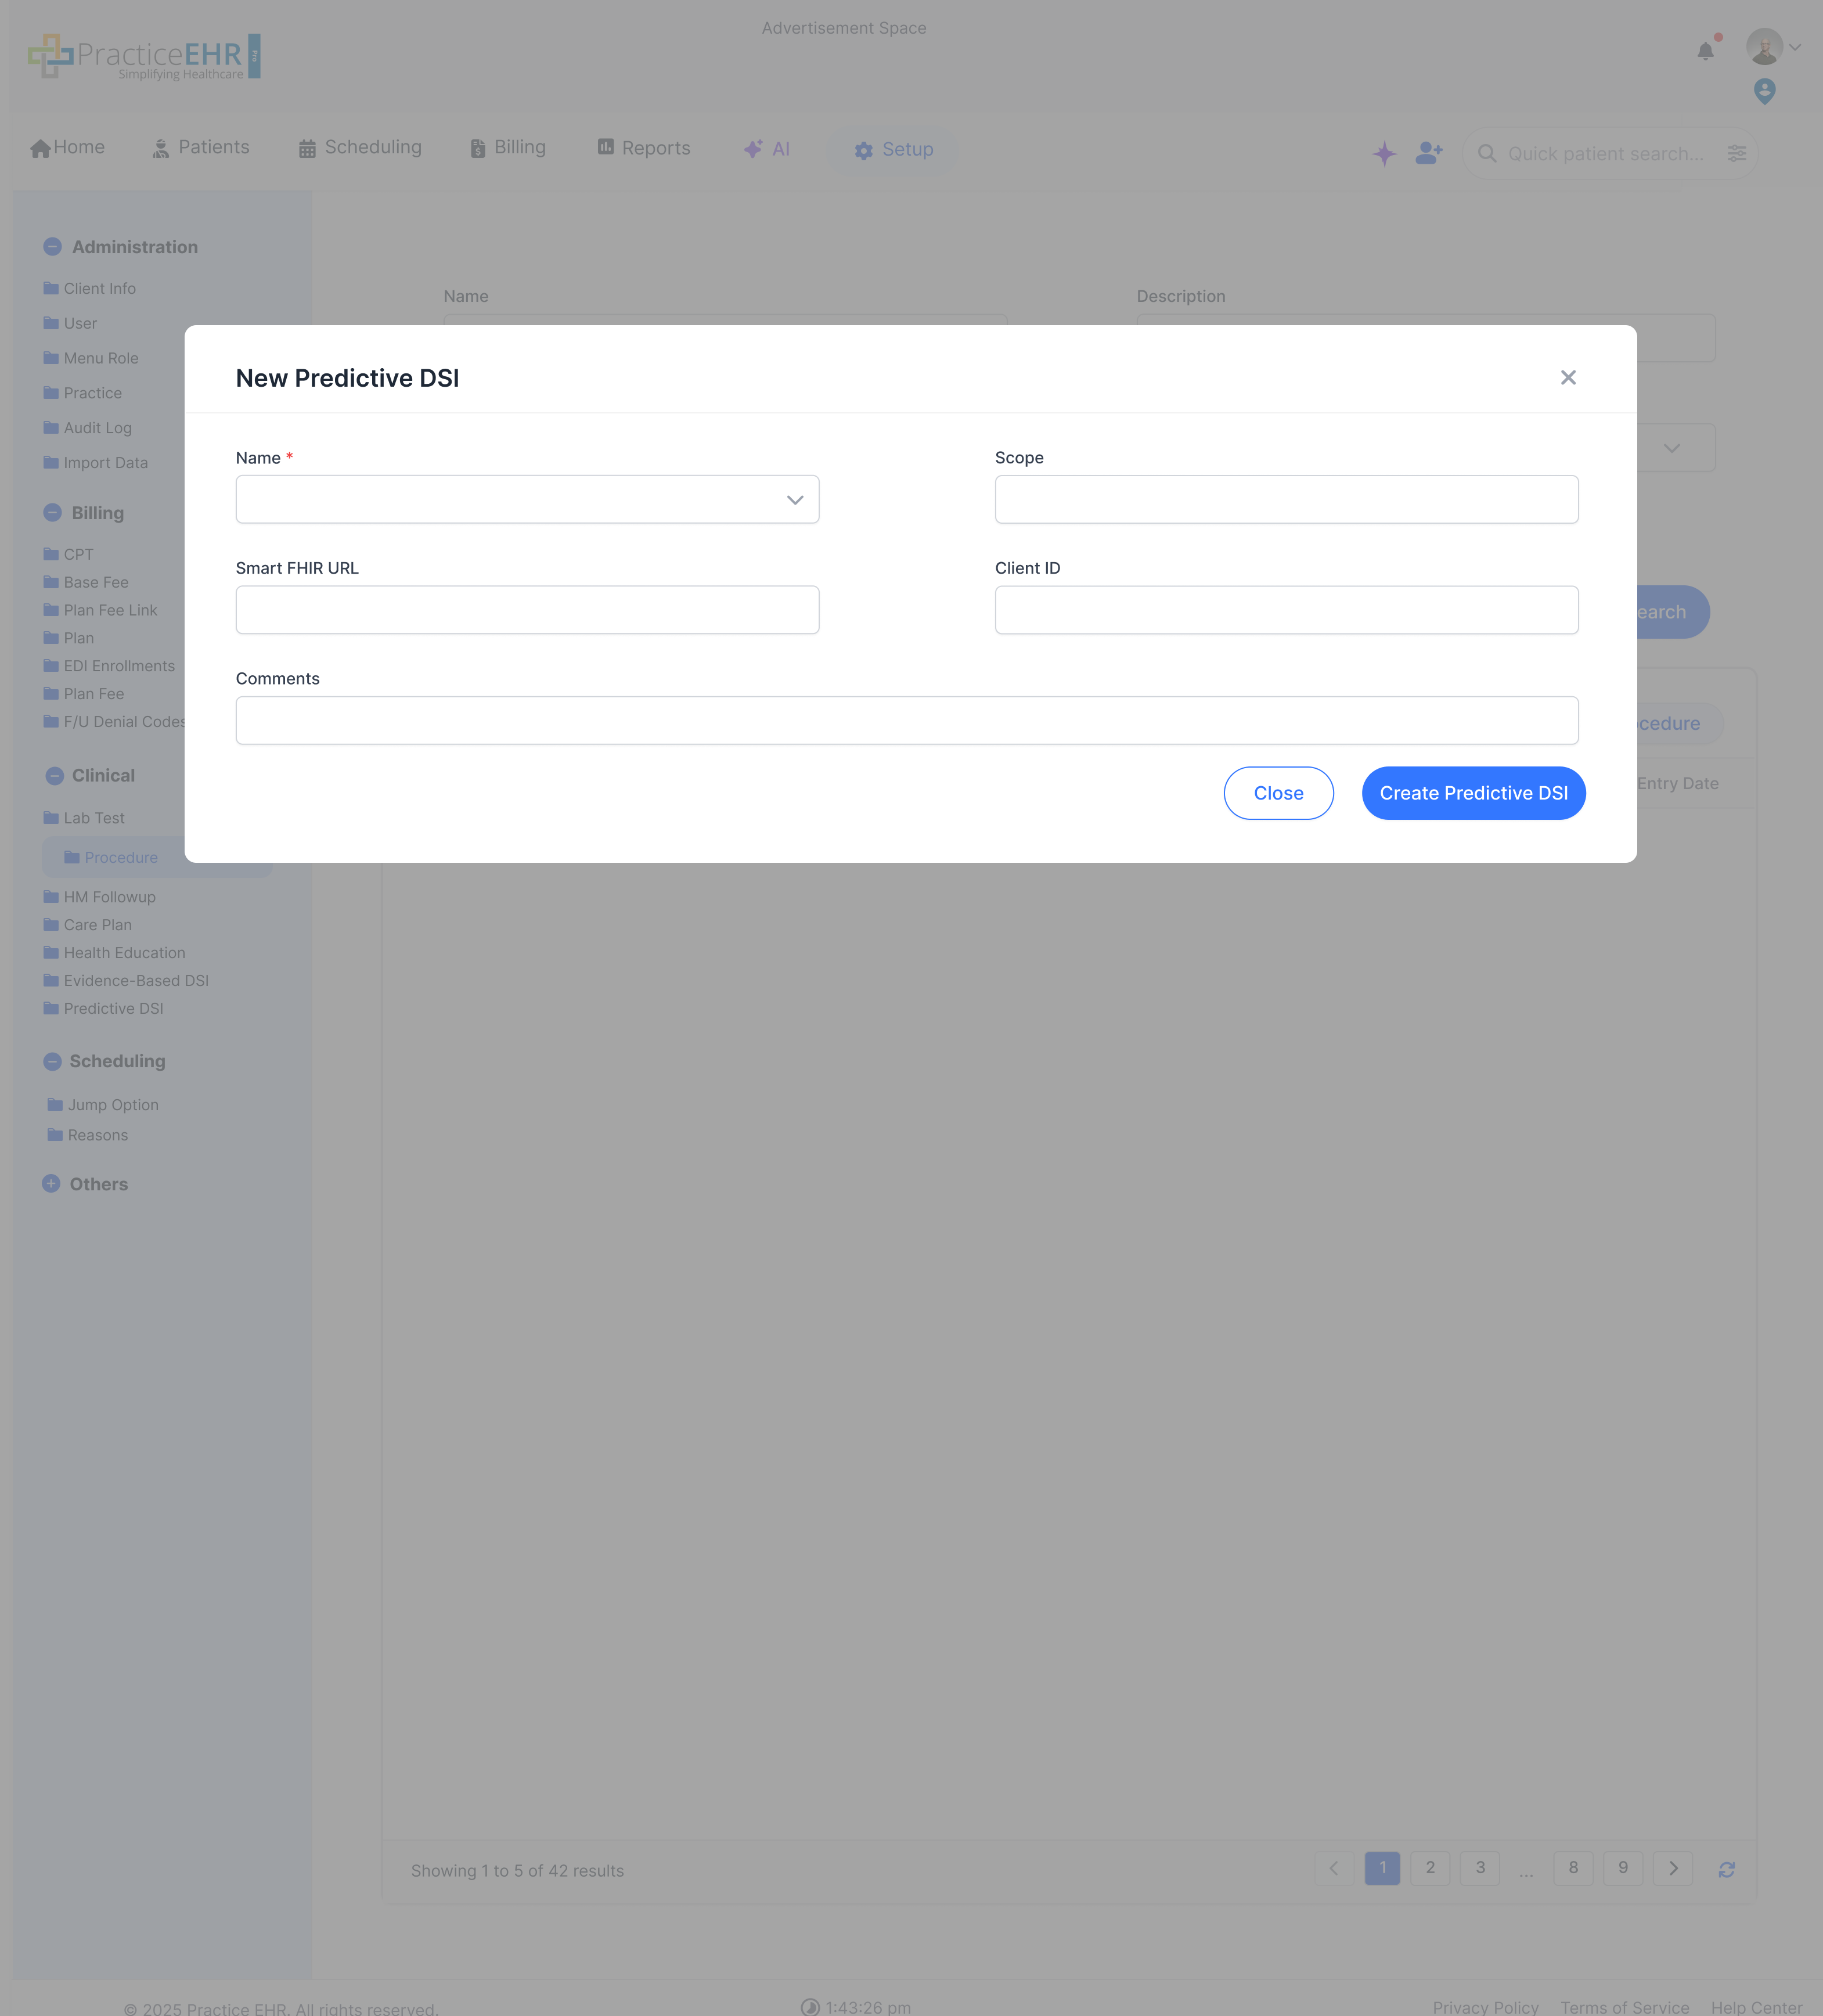
Create New
The create form captures the predictive model setup fields that are needed before
the DSI can be activated for practice use.
It is the action-focused screen behind the "Create New" flow in Clinical Predictive
DSI.
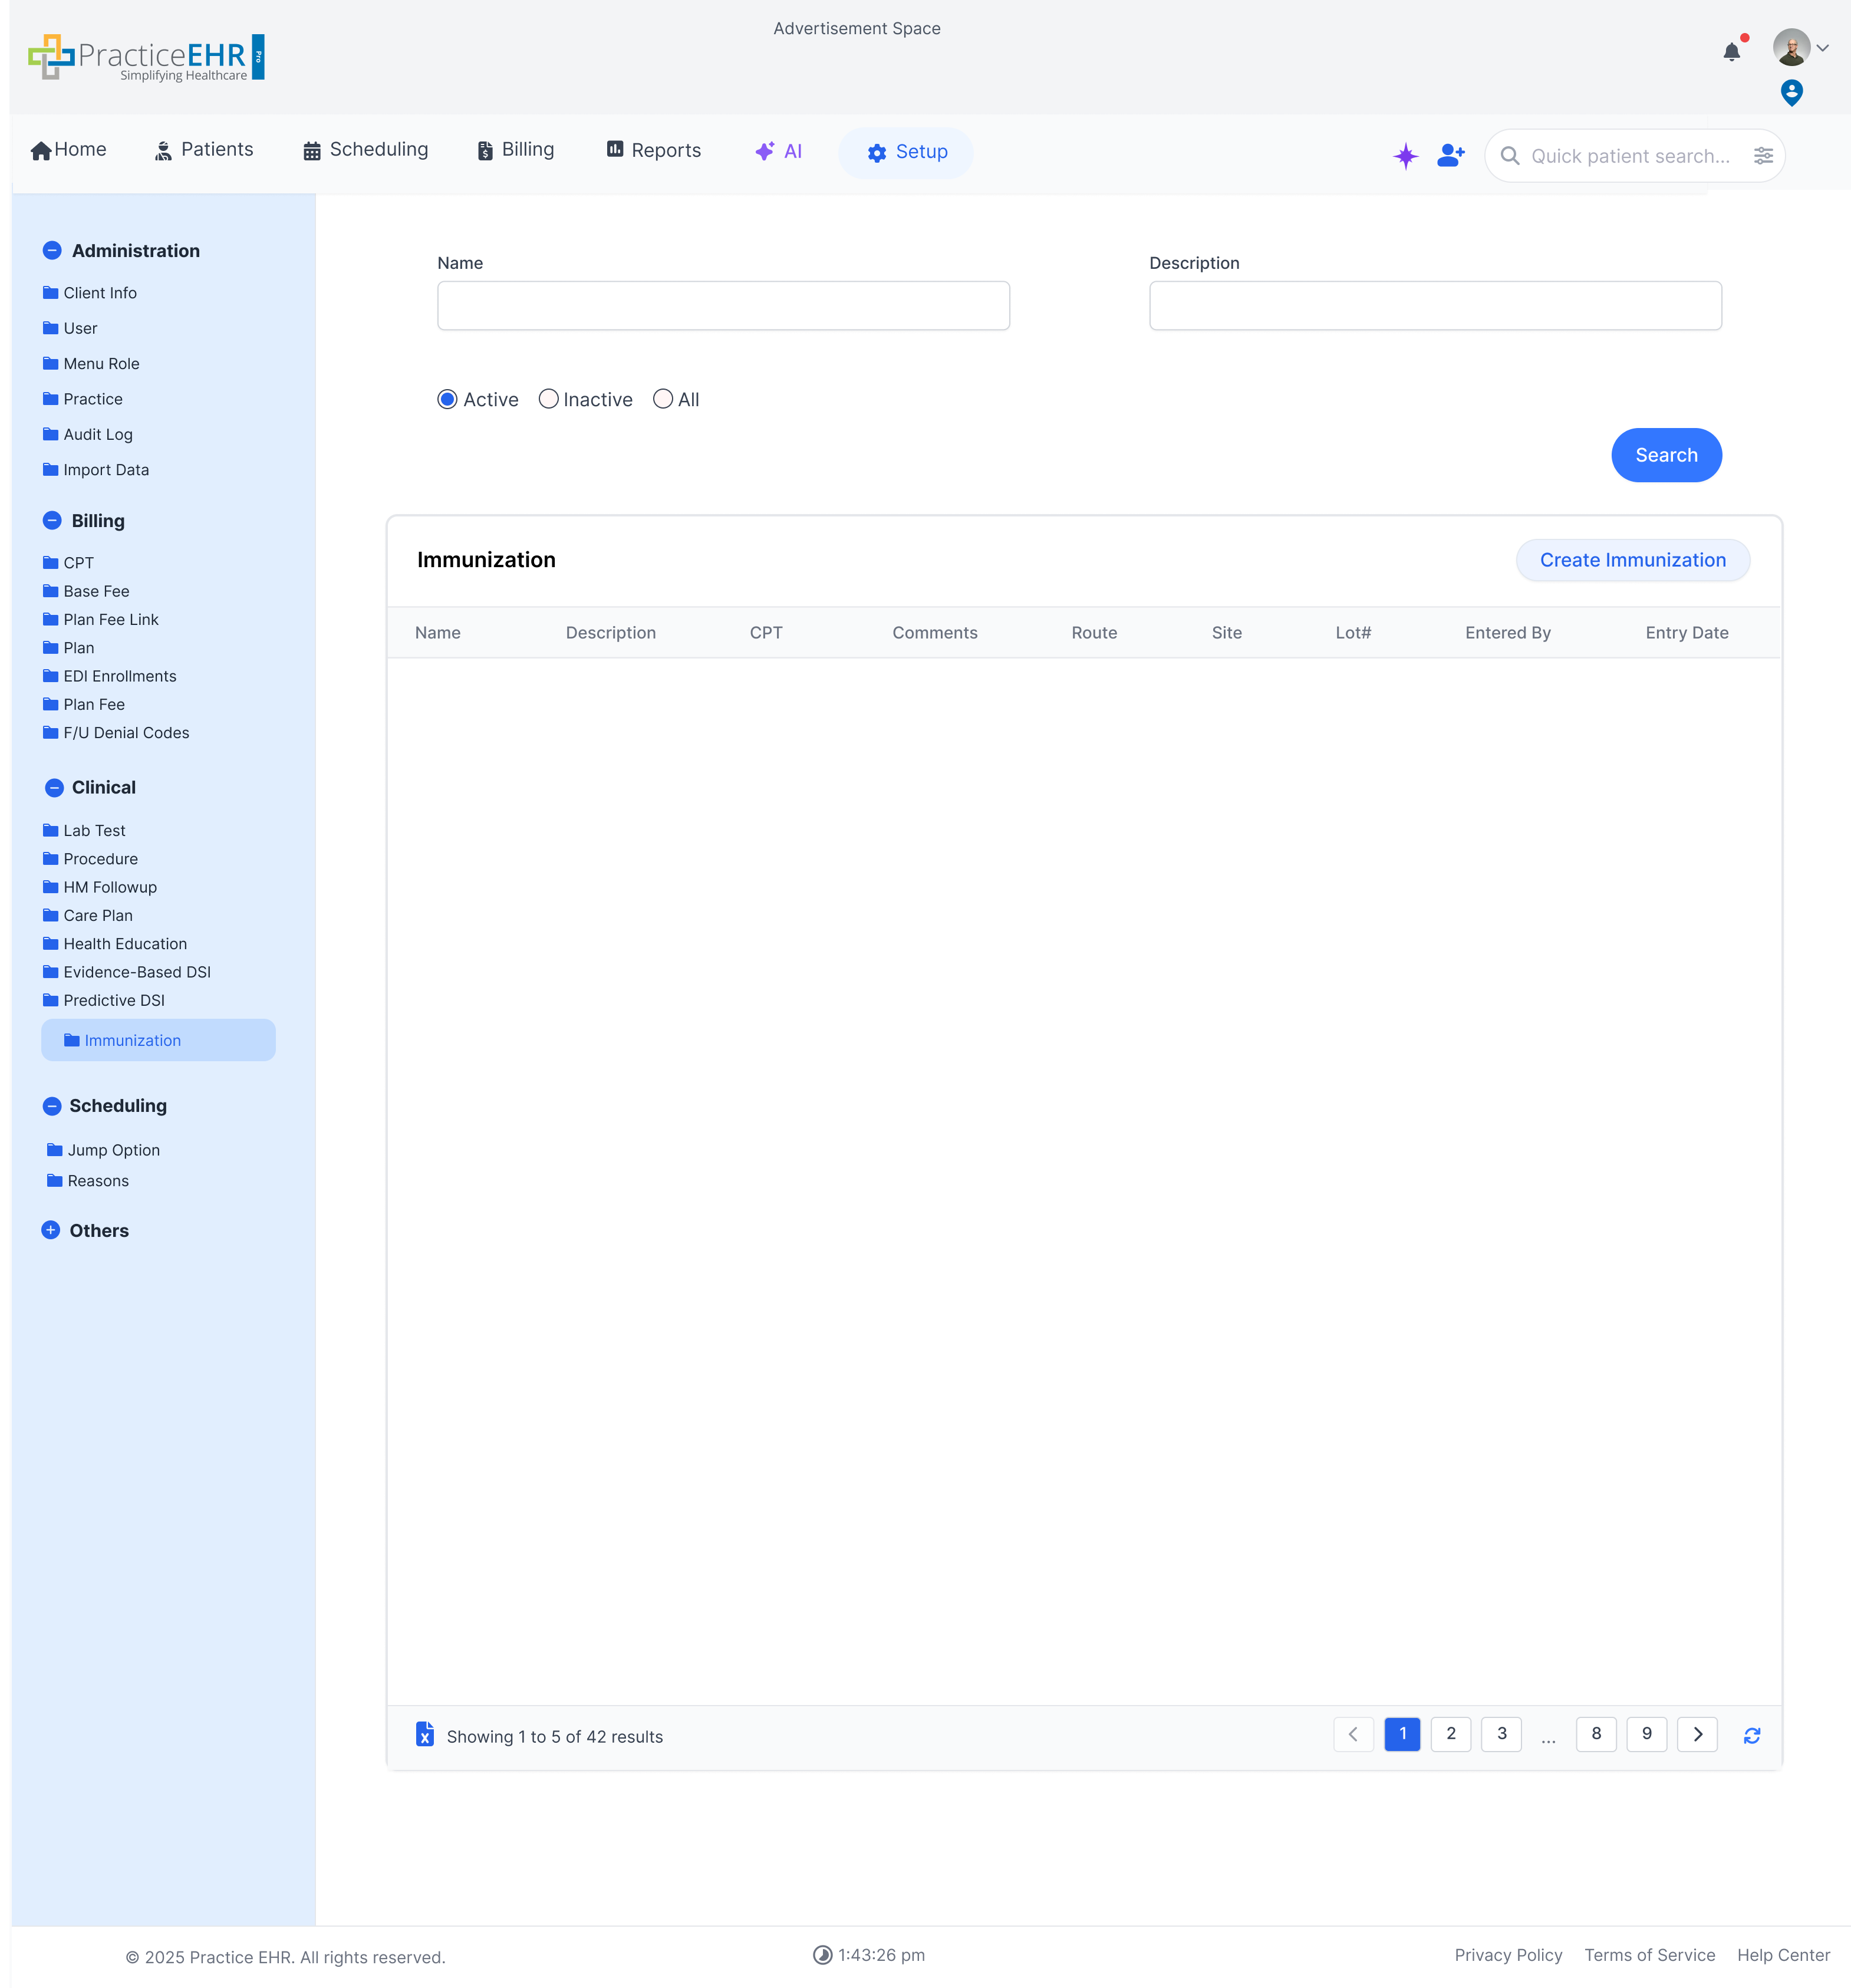
Immunization
Setup / Clinical
Immunization setup manages the vaccine library and the detail forms used
when a new immunization option needs to be configured.
Immunization Library
The overview grid gives teams a searchable place to review configured immunization
entries and their setup status.
It helps confirm existing vaccine records before a new one is added or updated.
Immunization Details
The detail view surfaces the field-level information for an immunization record so
teams can review configuration before editing.
This is useful when validating the exact vaccine setup tied to the list view.
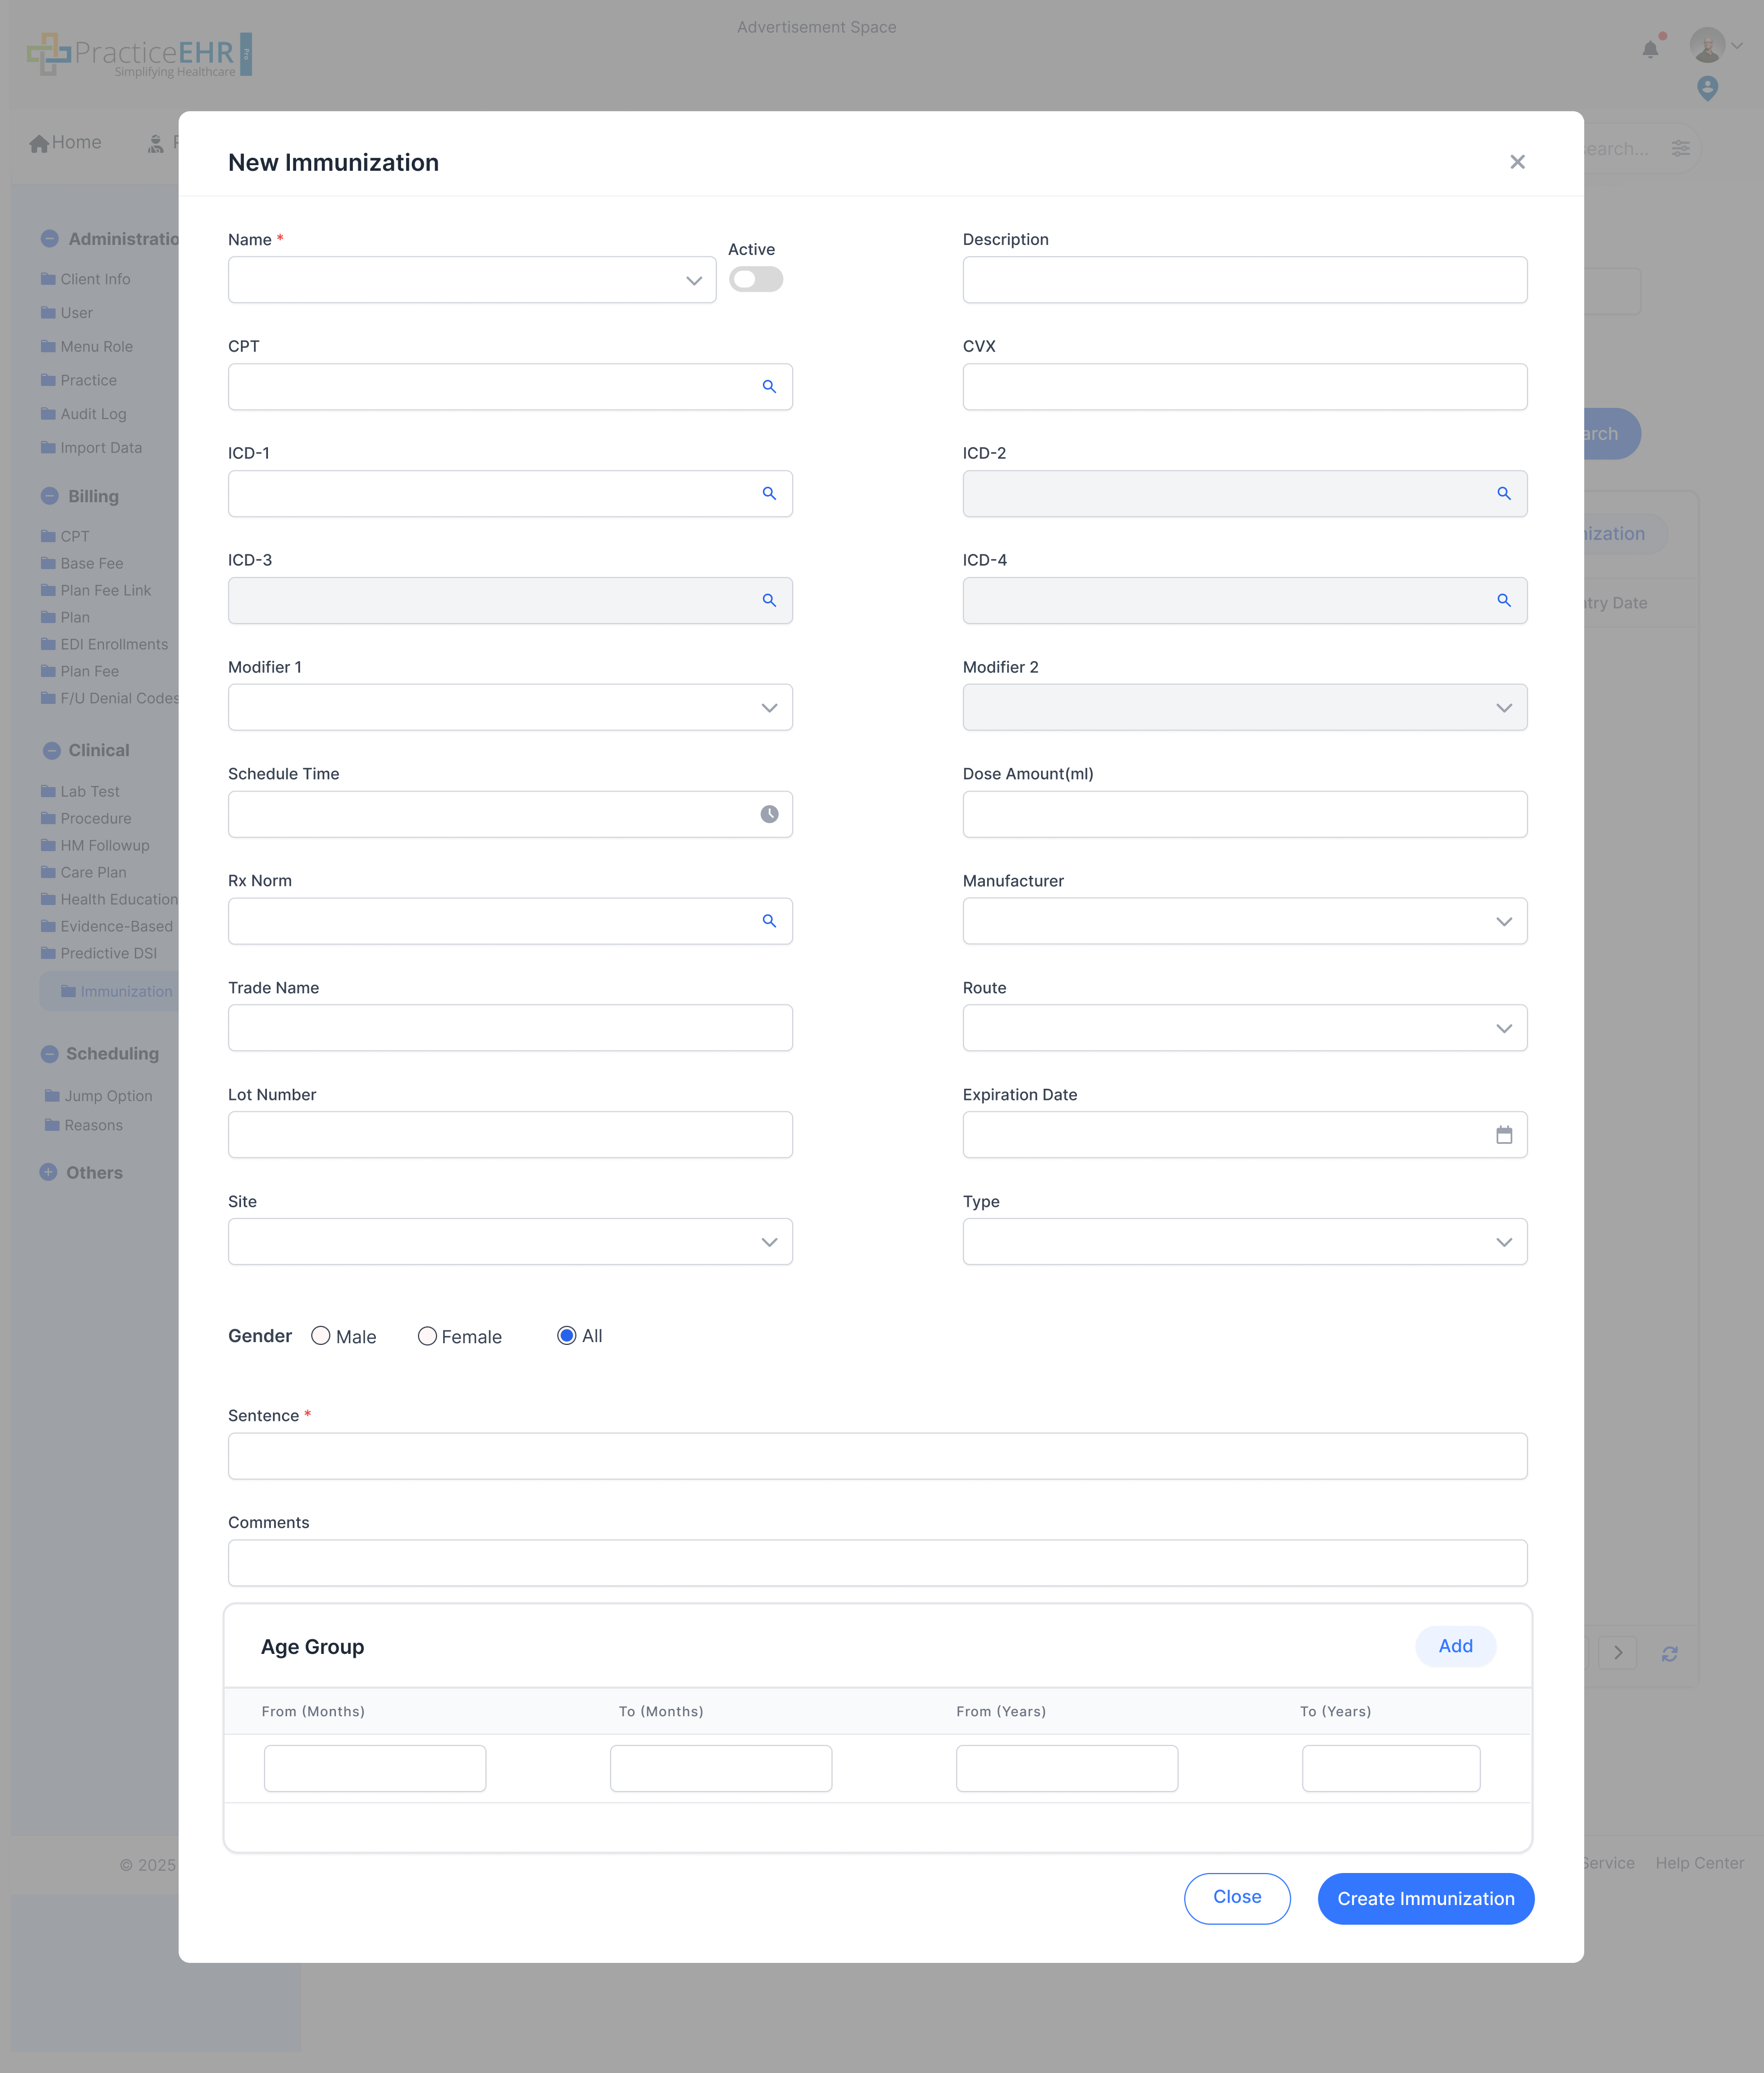
Create Immunization
The create form is used to add a new immunization record with the required clinical
and administrative fields.
It is the action-level screen behind the "Create Immunization" flow in Clinical
setup.
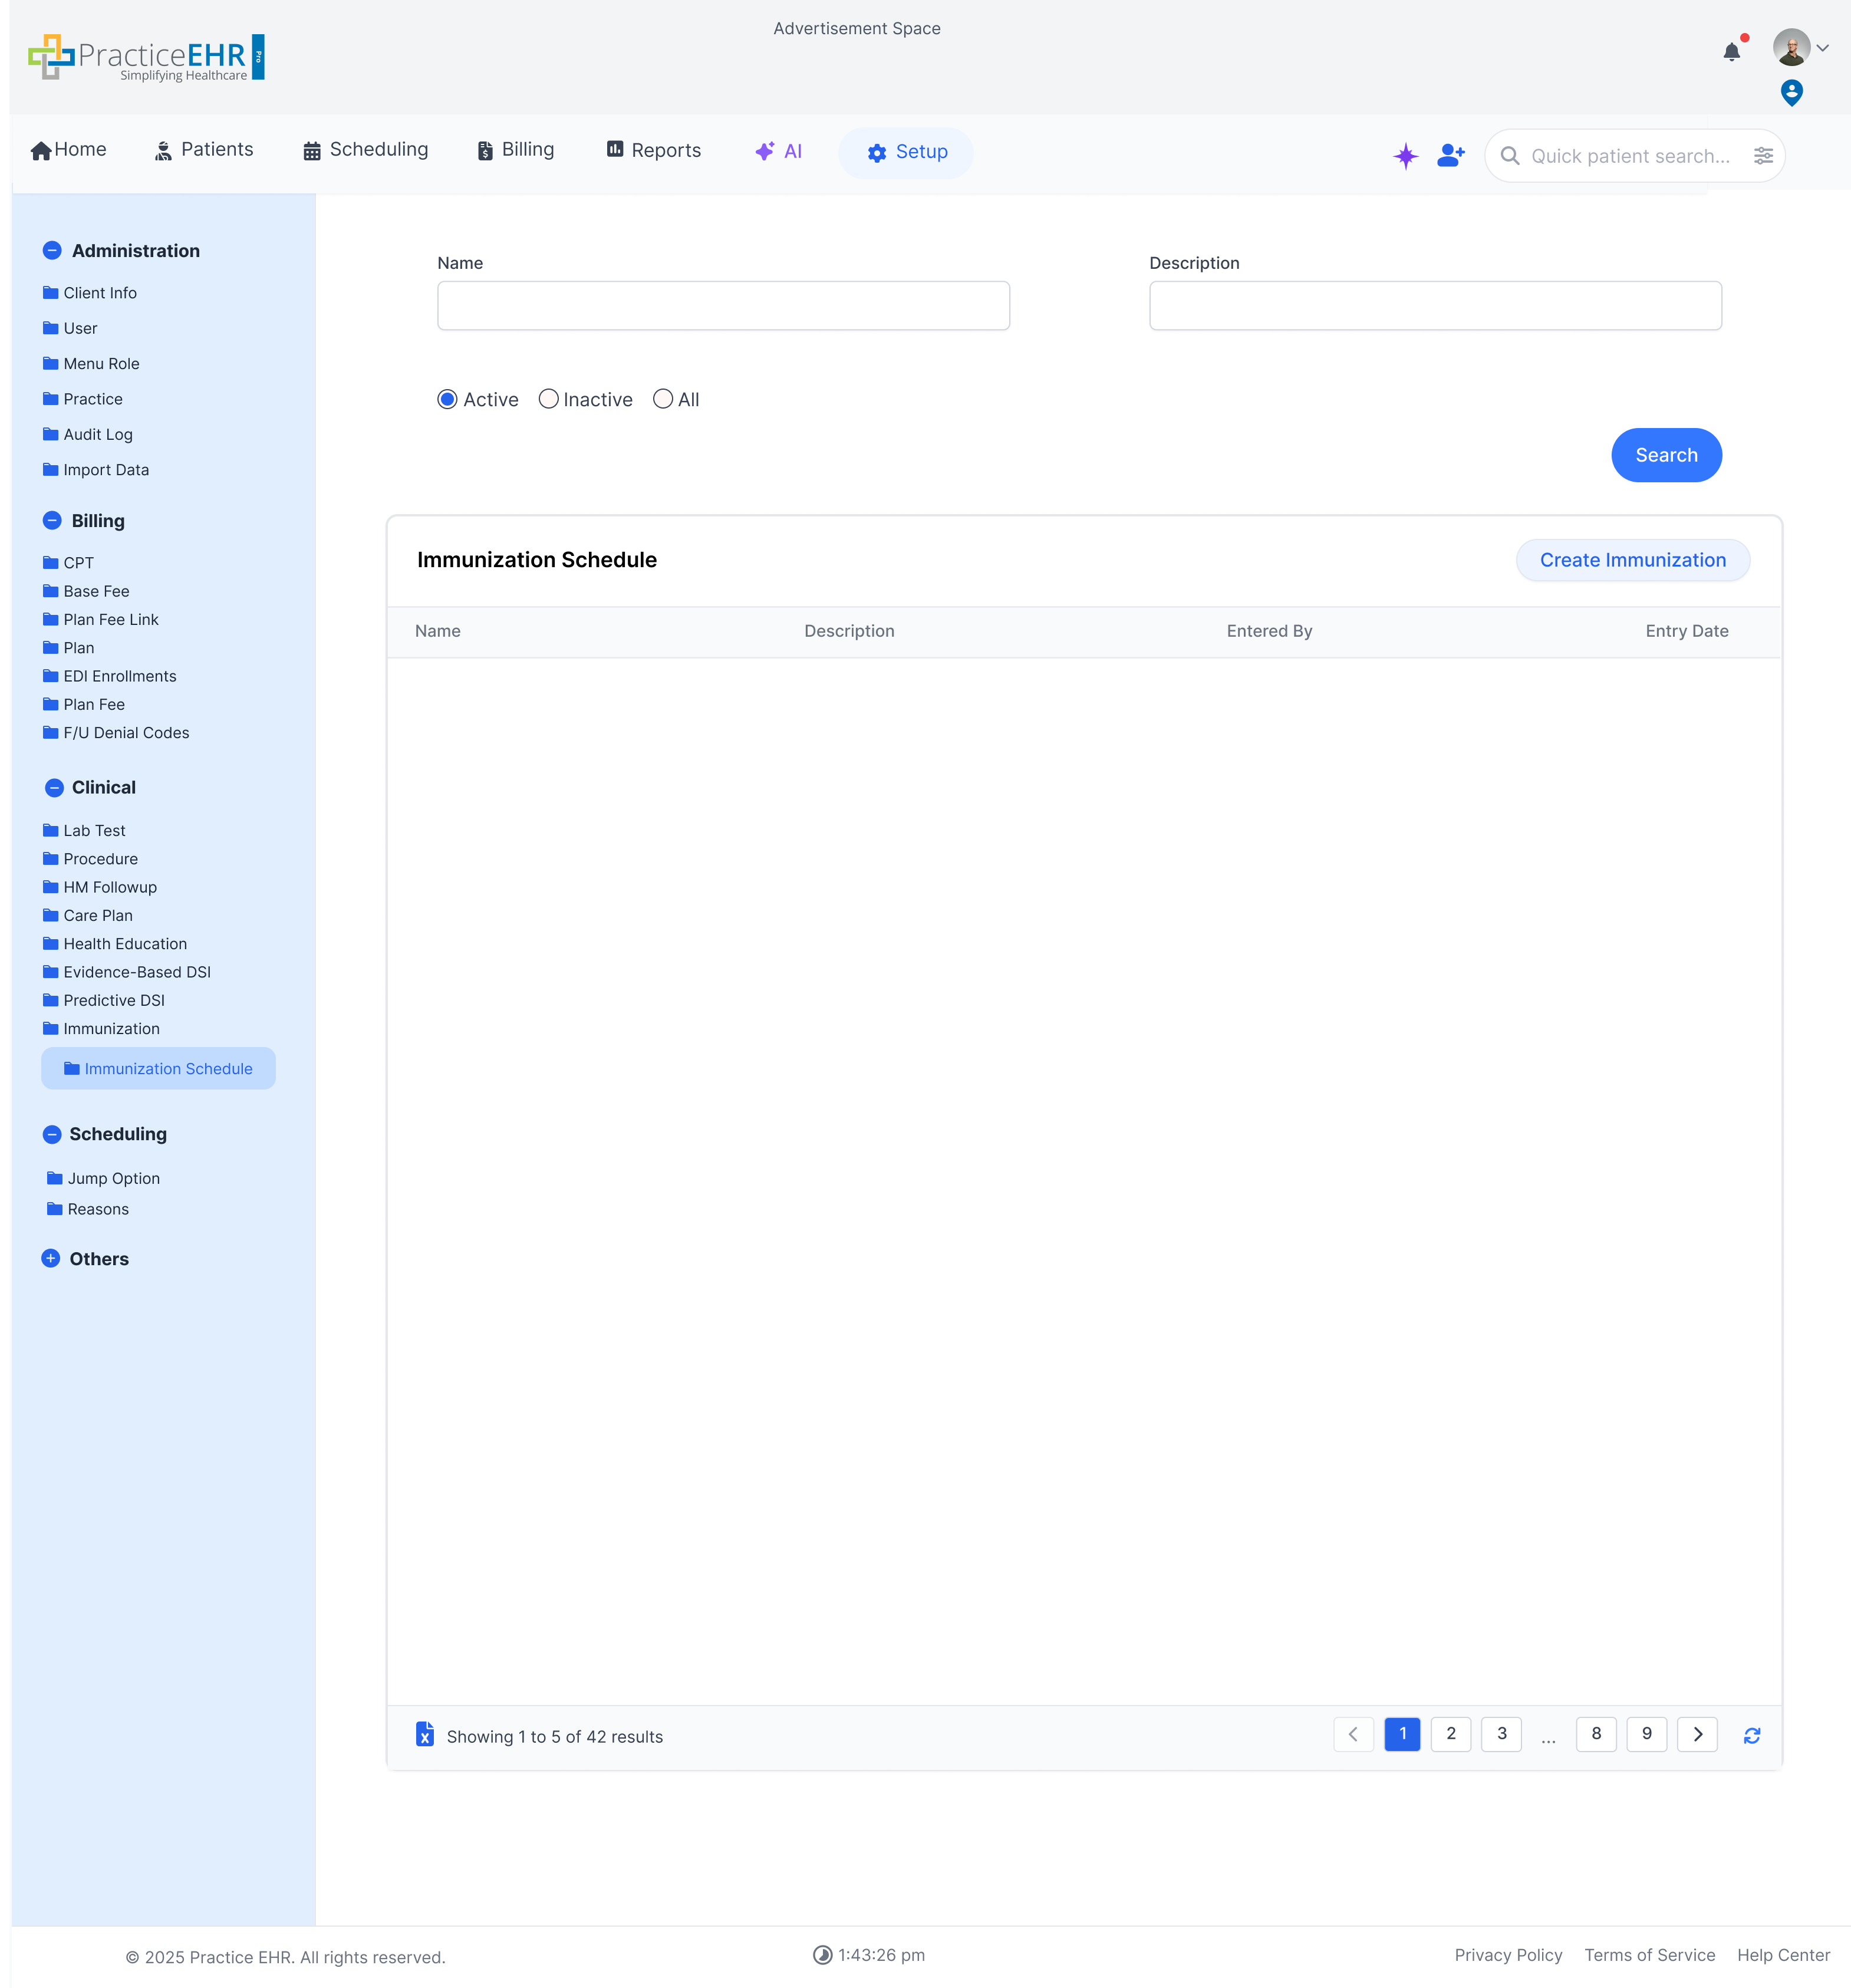
Immunization Schedule
Setup / Clinical
Immunization Schedule setup defines the timing and structure used for
vaccine schedule configuration.
Create Immunization Schedule
The create form is where teams define a new schedule record and the fields that
drive timing or sequence behavior.
It gives clinical admins a focused screen for adding schedule rules instead of only
reviewing the existing list.
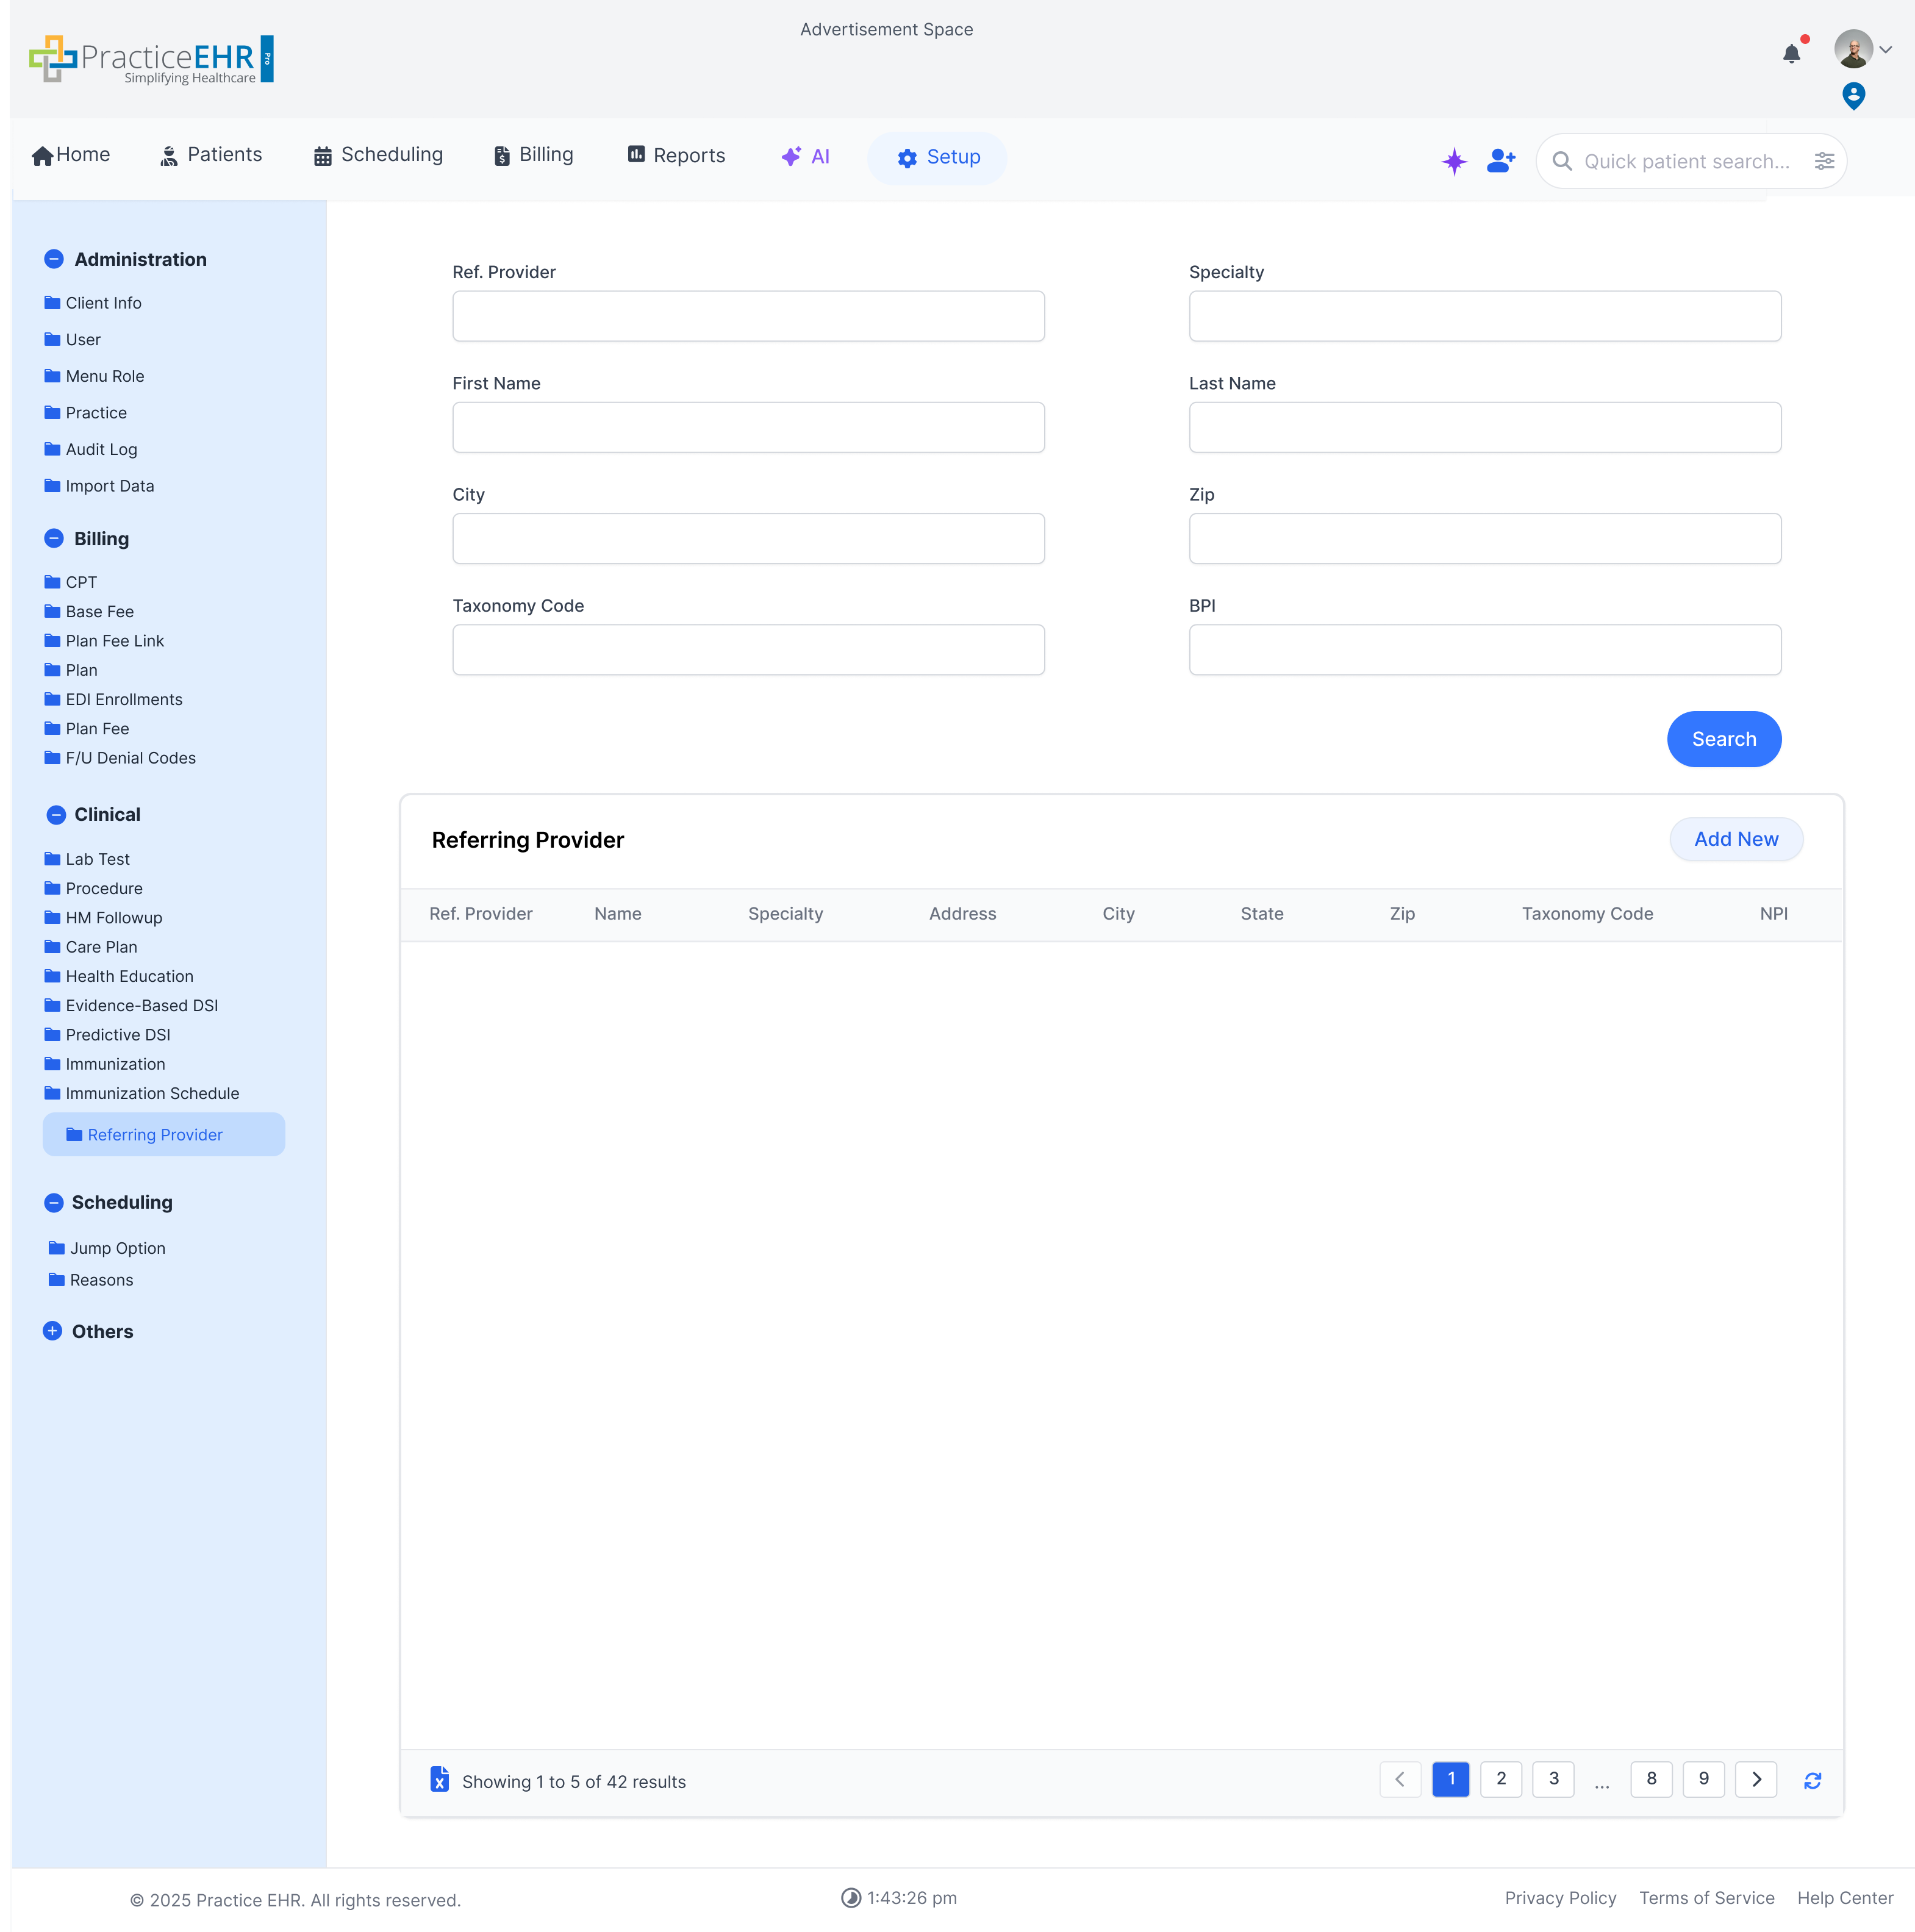
Referring Provider
Setup / Clinical
Referring Provider setup manages the searchable provider list and the form
used to add a new provider record to the system.
Referring Provider List
The overview screen gives staff a central place to review existing referring
providers before opening a record.
This helps prevent duplicate entries when the provider may already exist in the
library.
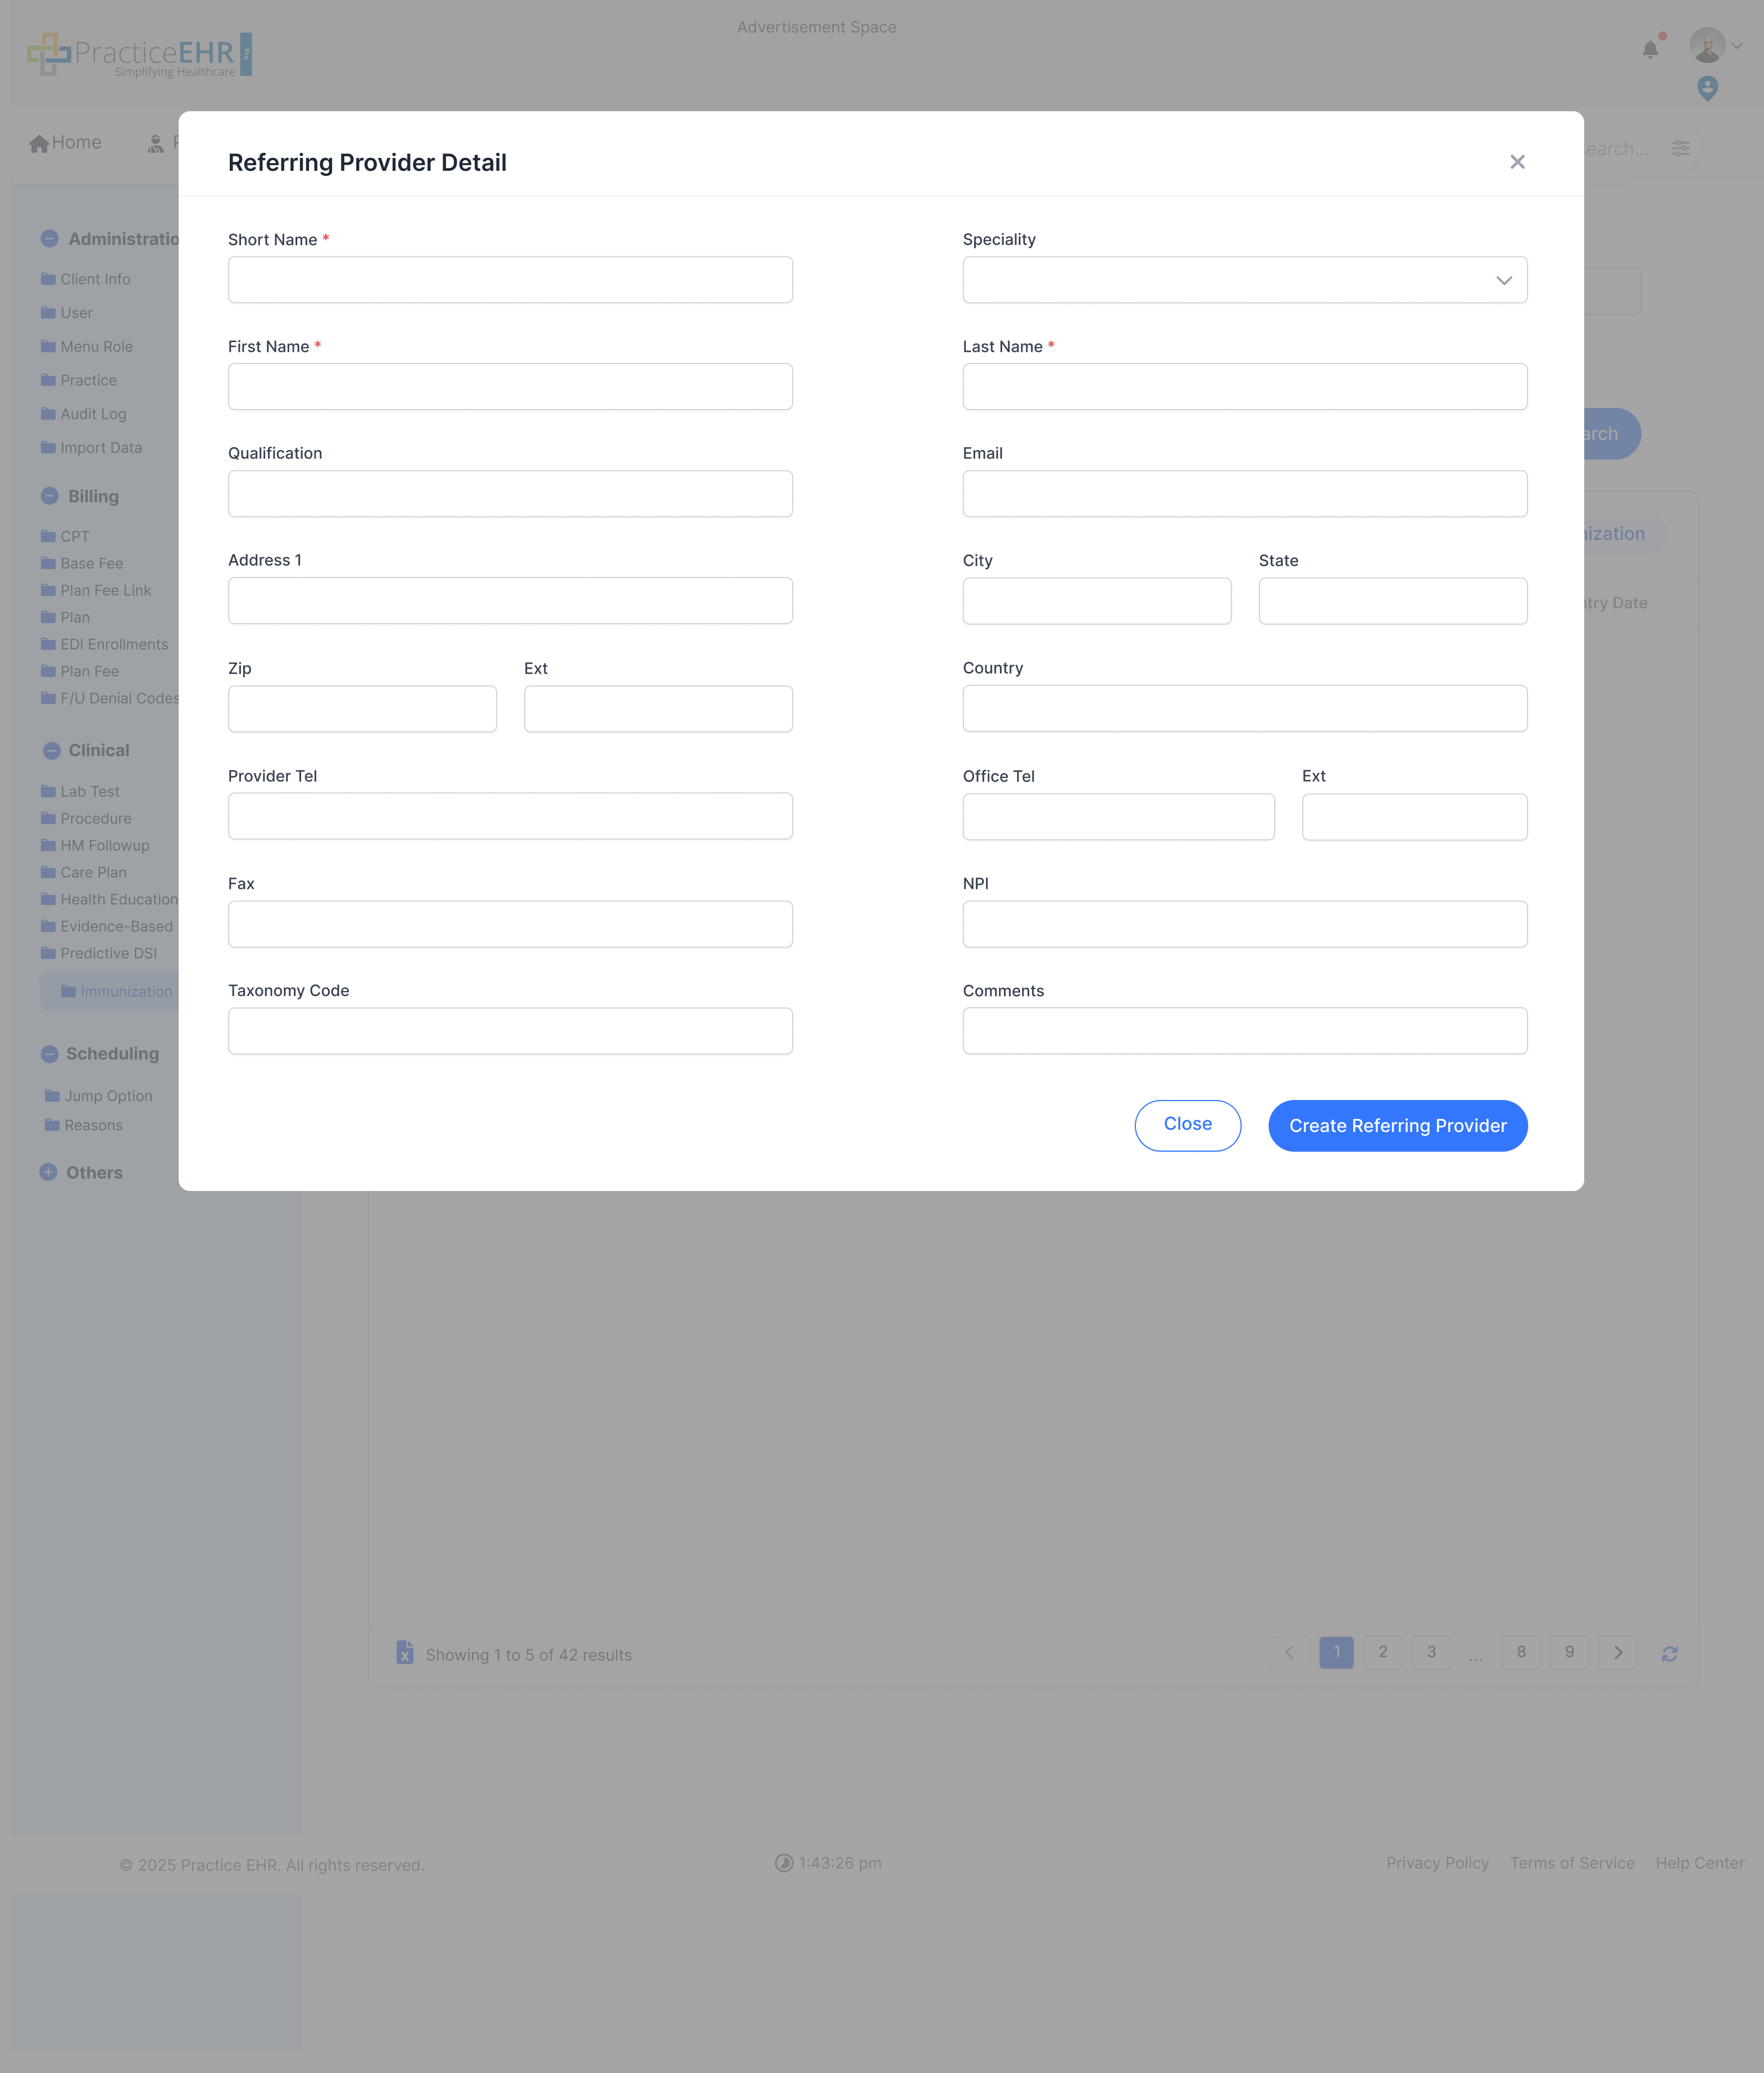
Add New
The detail form is used to capture a new referring provider's information and save
it directly into setup.
It is the screen behind the "Add New" action for Referring Provider.
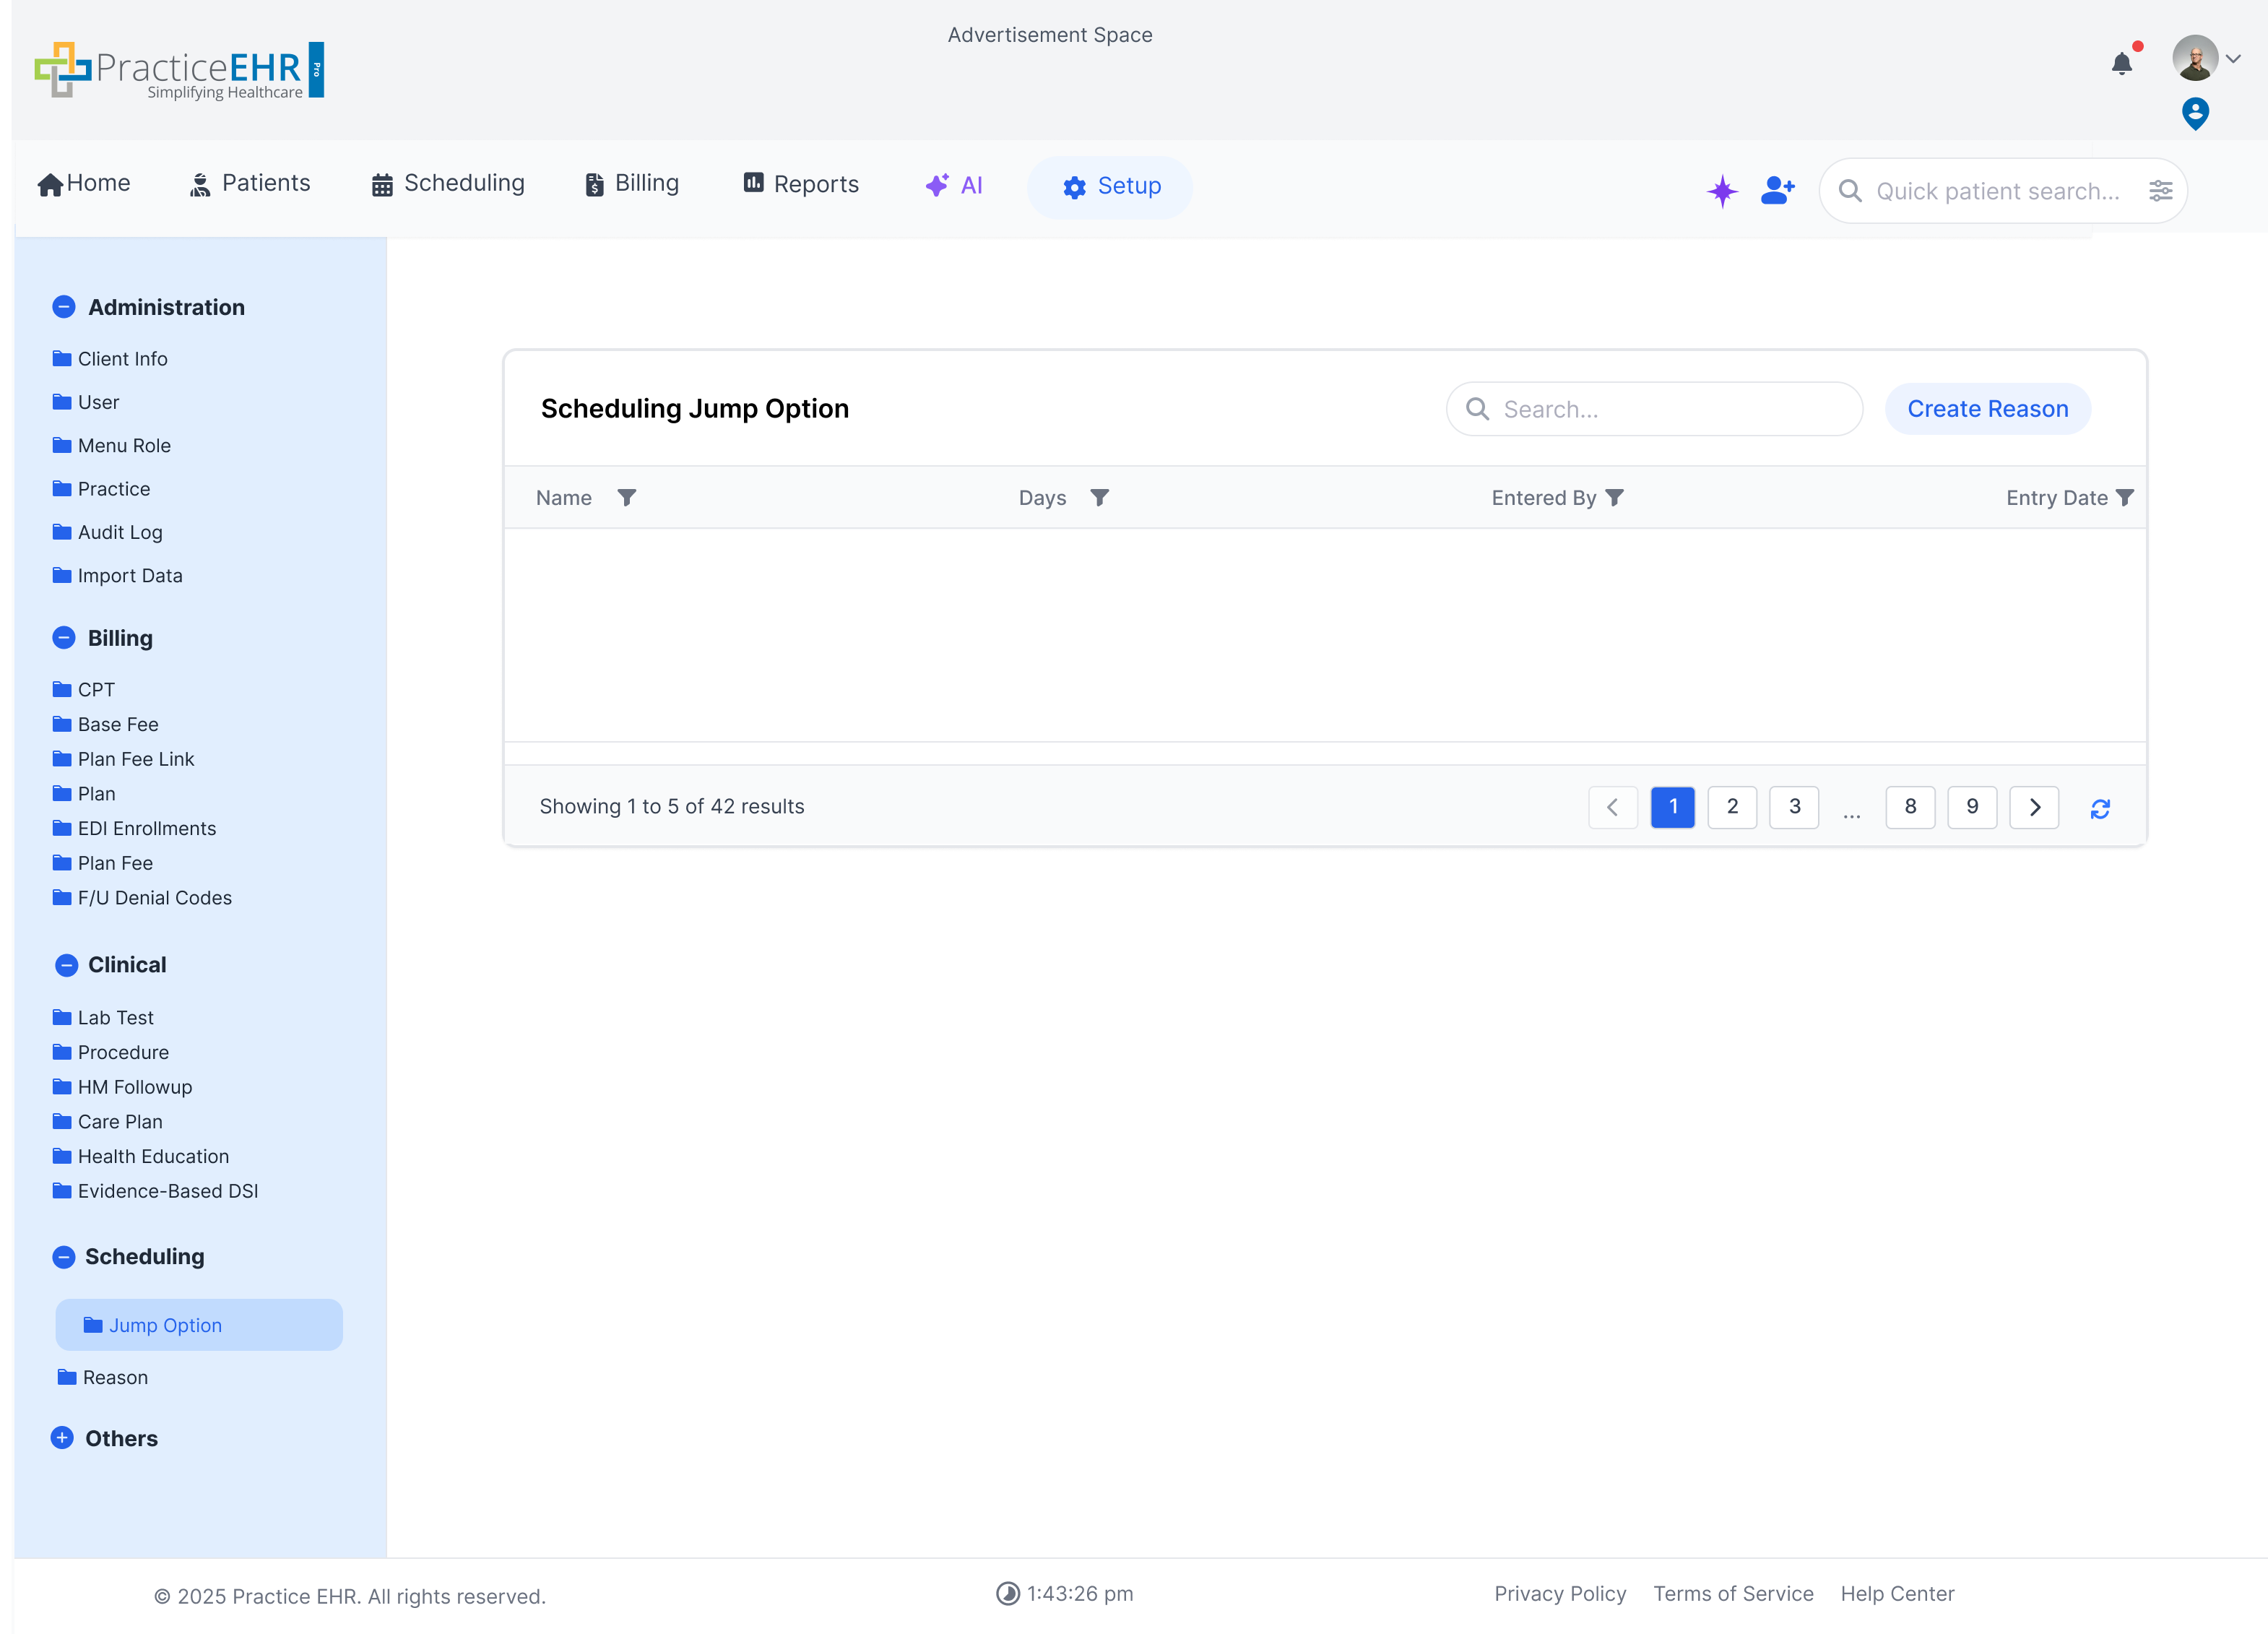
Scheduling Jump Option
Setup / Scheduling
Configure jump options for scheduling, allowing quick navigation or
specific time blocking.
Jump Option Configuration
Displays a grid of configured jump options, including Name, Days, Entered By, and
Entry Date.
Includes column filters and a general search bar.
Click "Create Jump Option" to add a new jump configuration from the scheduling
setup grid.
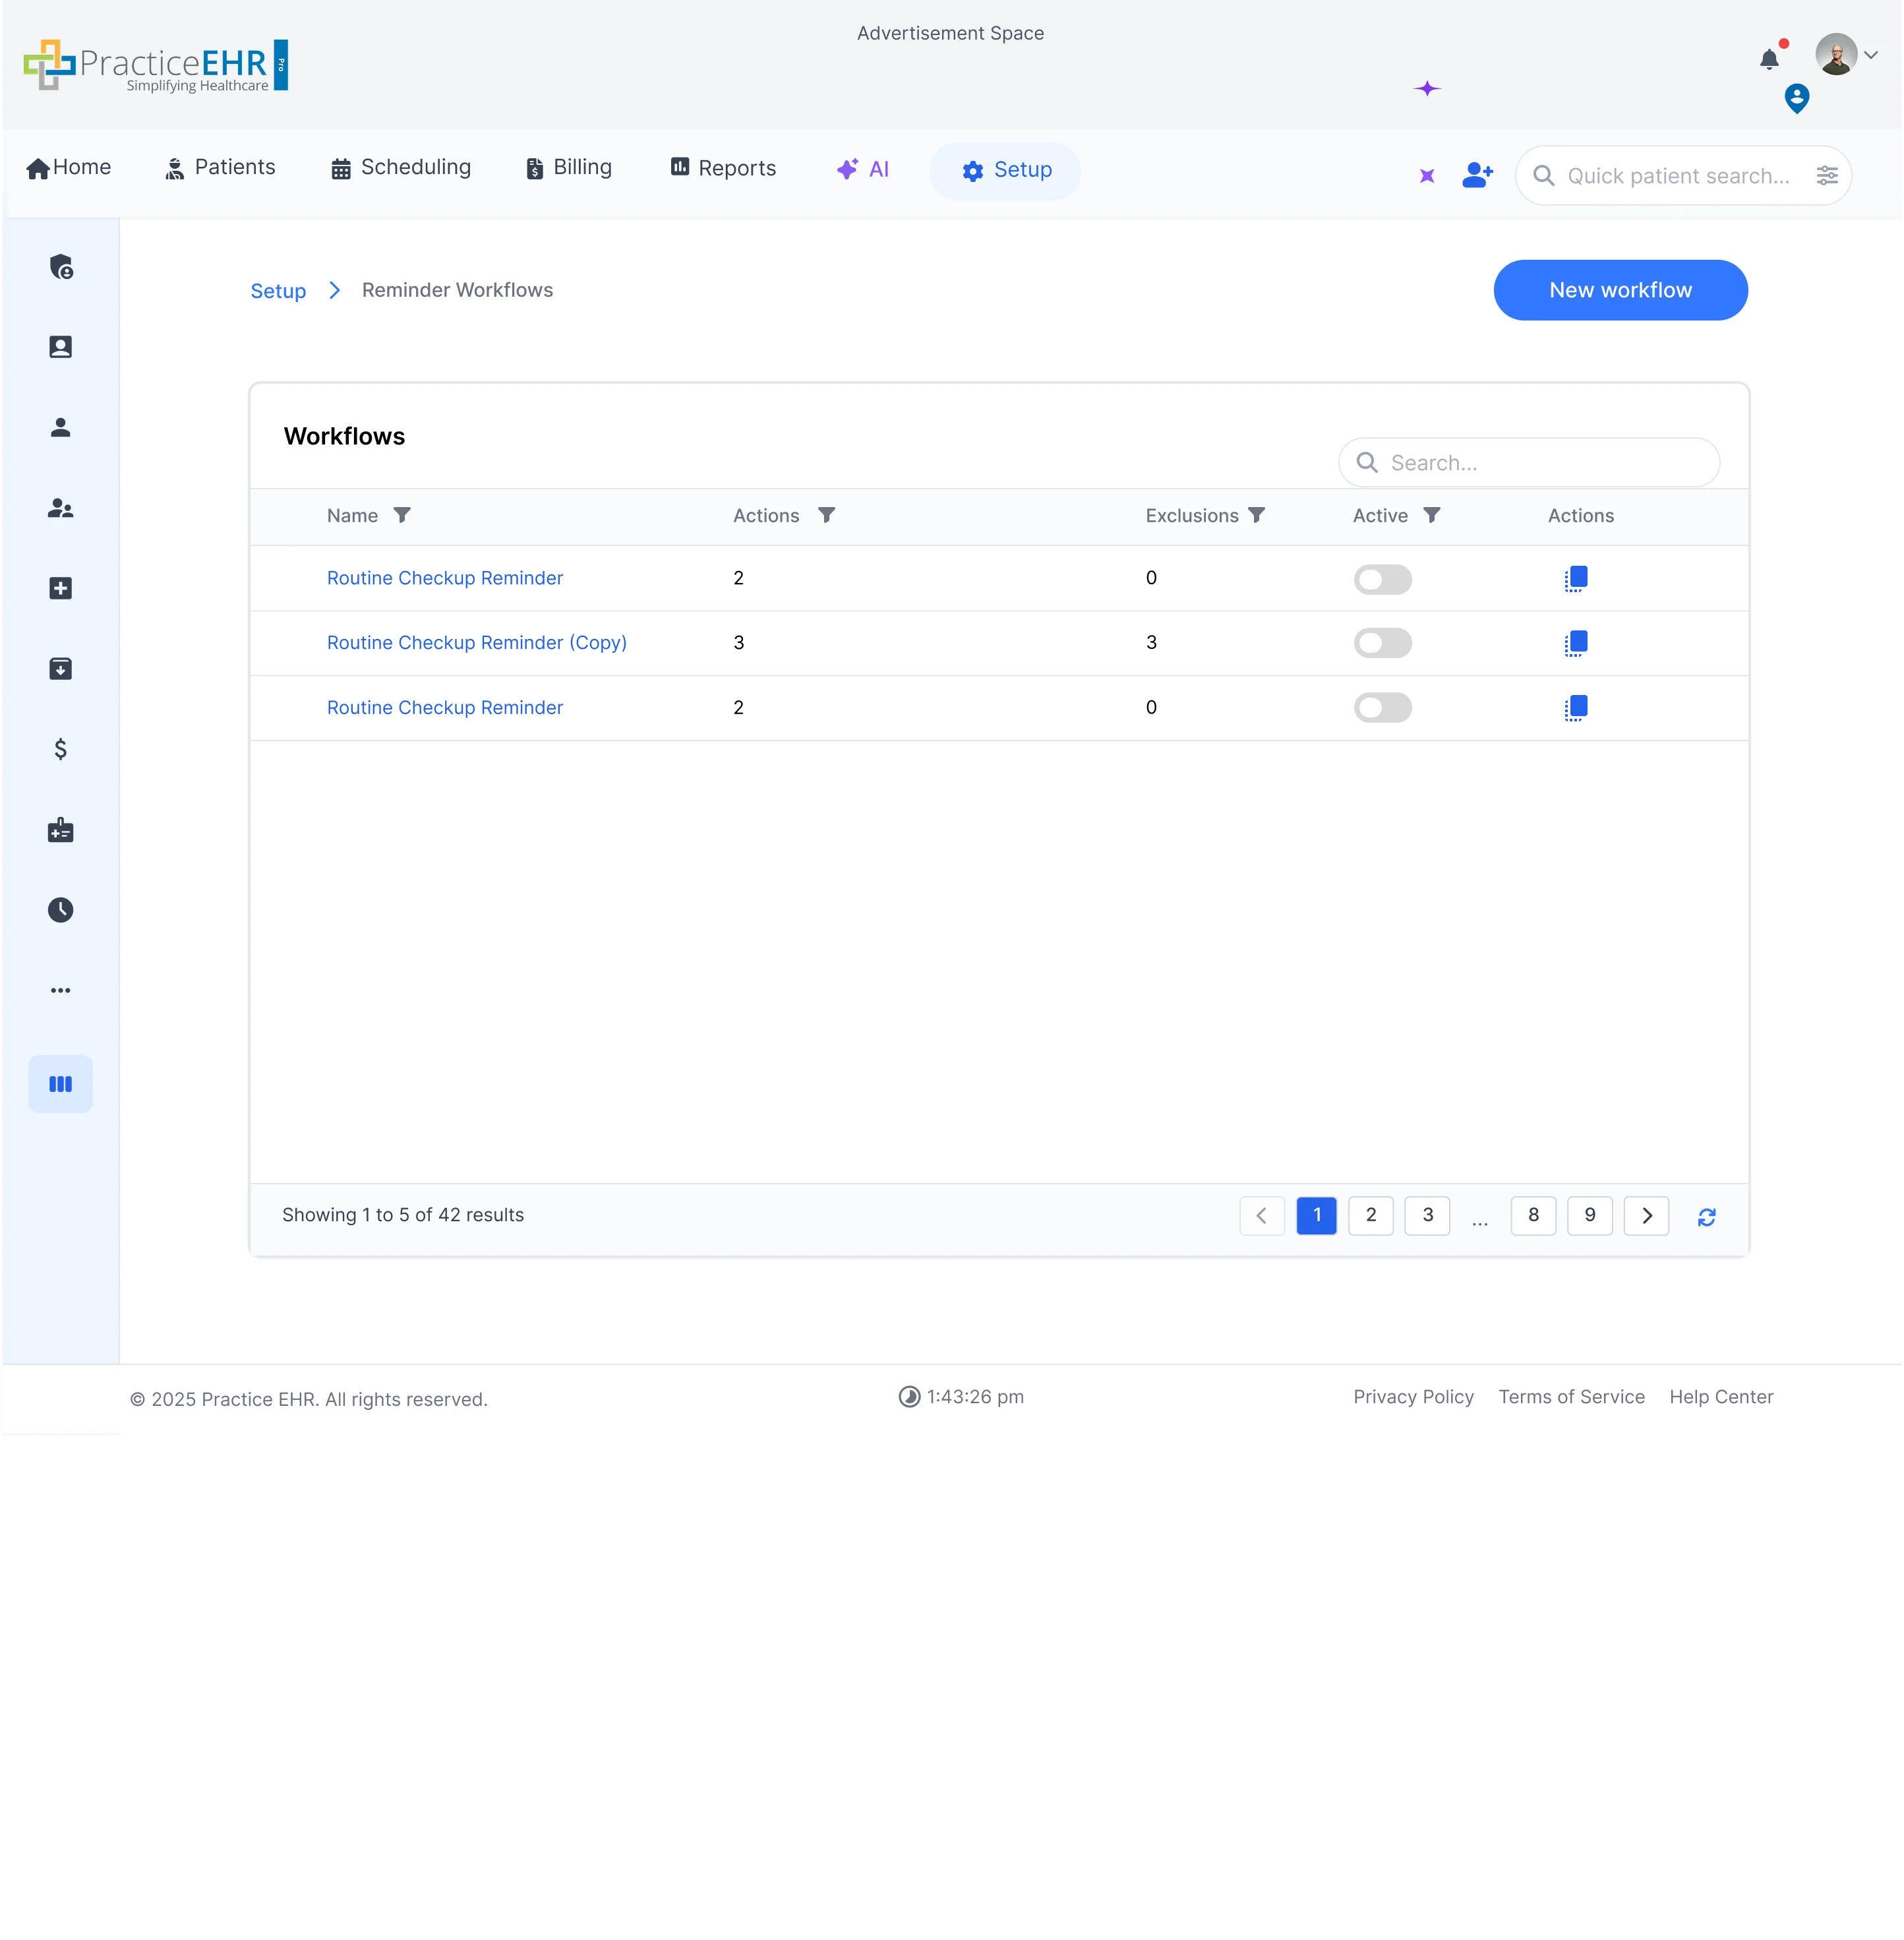
Reminder Workflows
Setup / Others
Reminder Workflows
This window manages reminder workflows (e.g., Televisit Reminders).
The grid has been converted into an home grid (filters added to each column and
search brought inside the grid header).
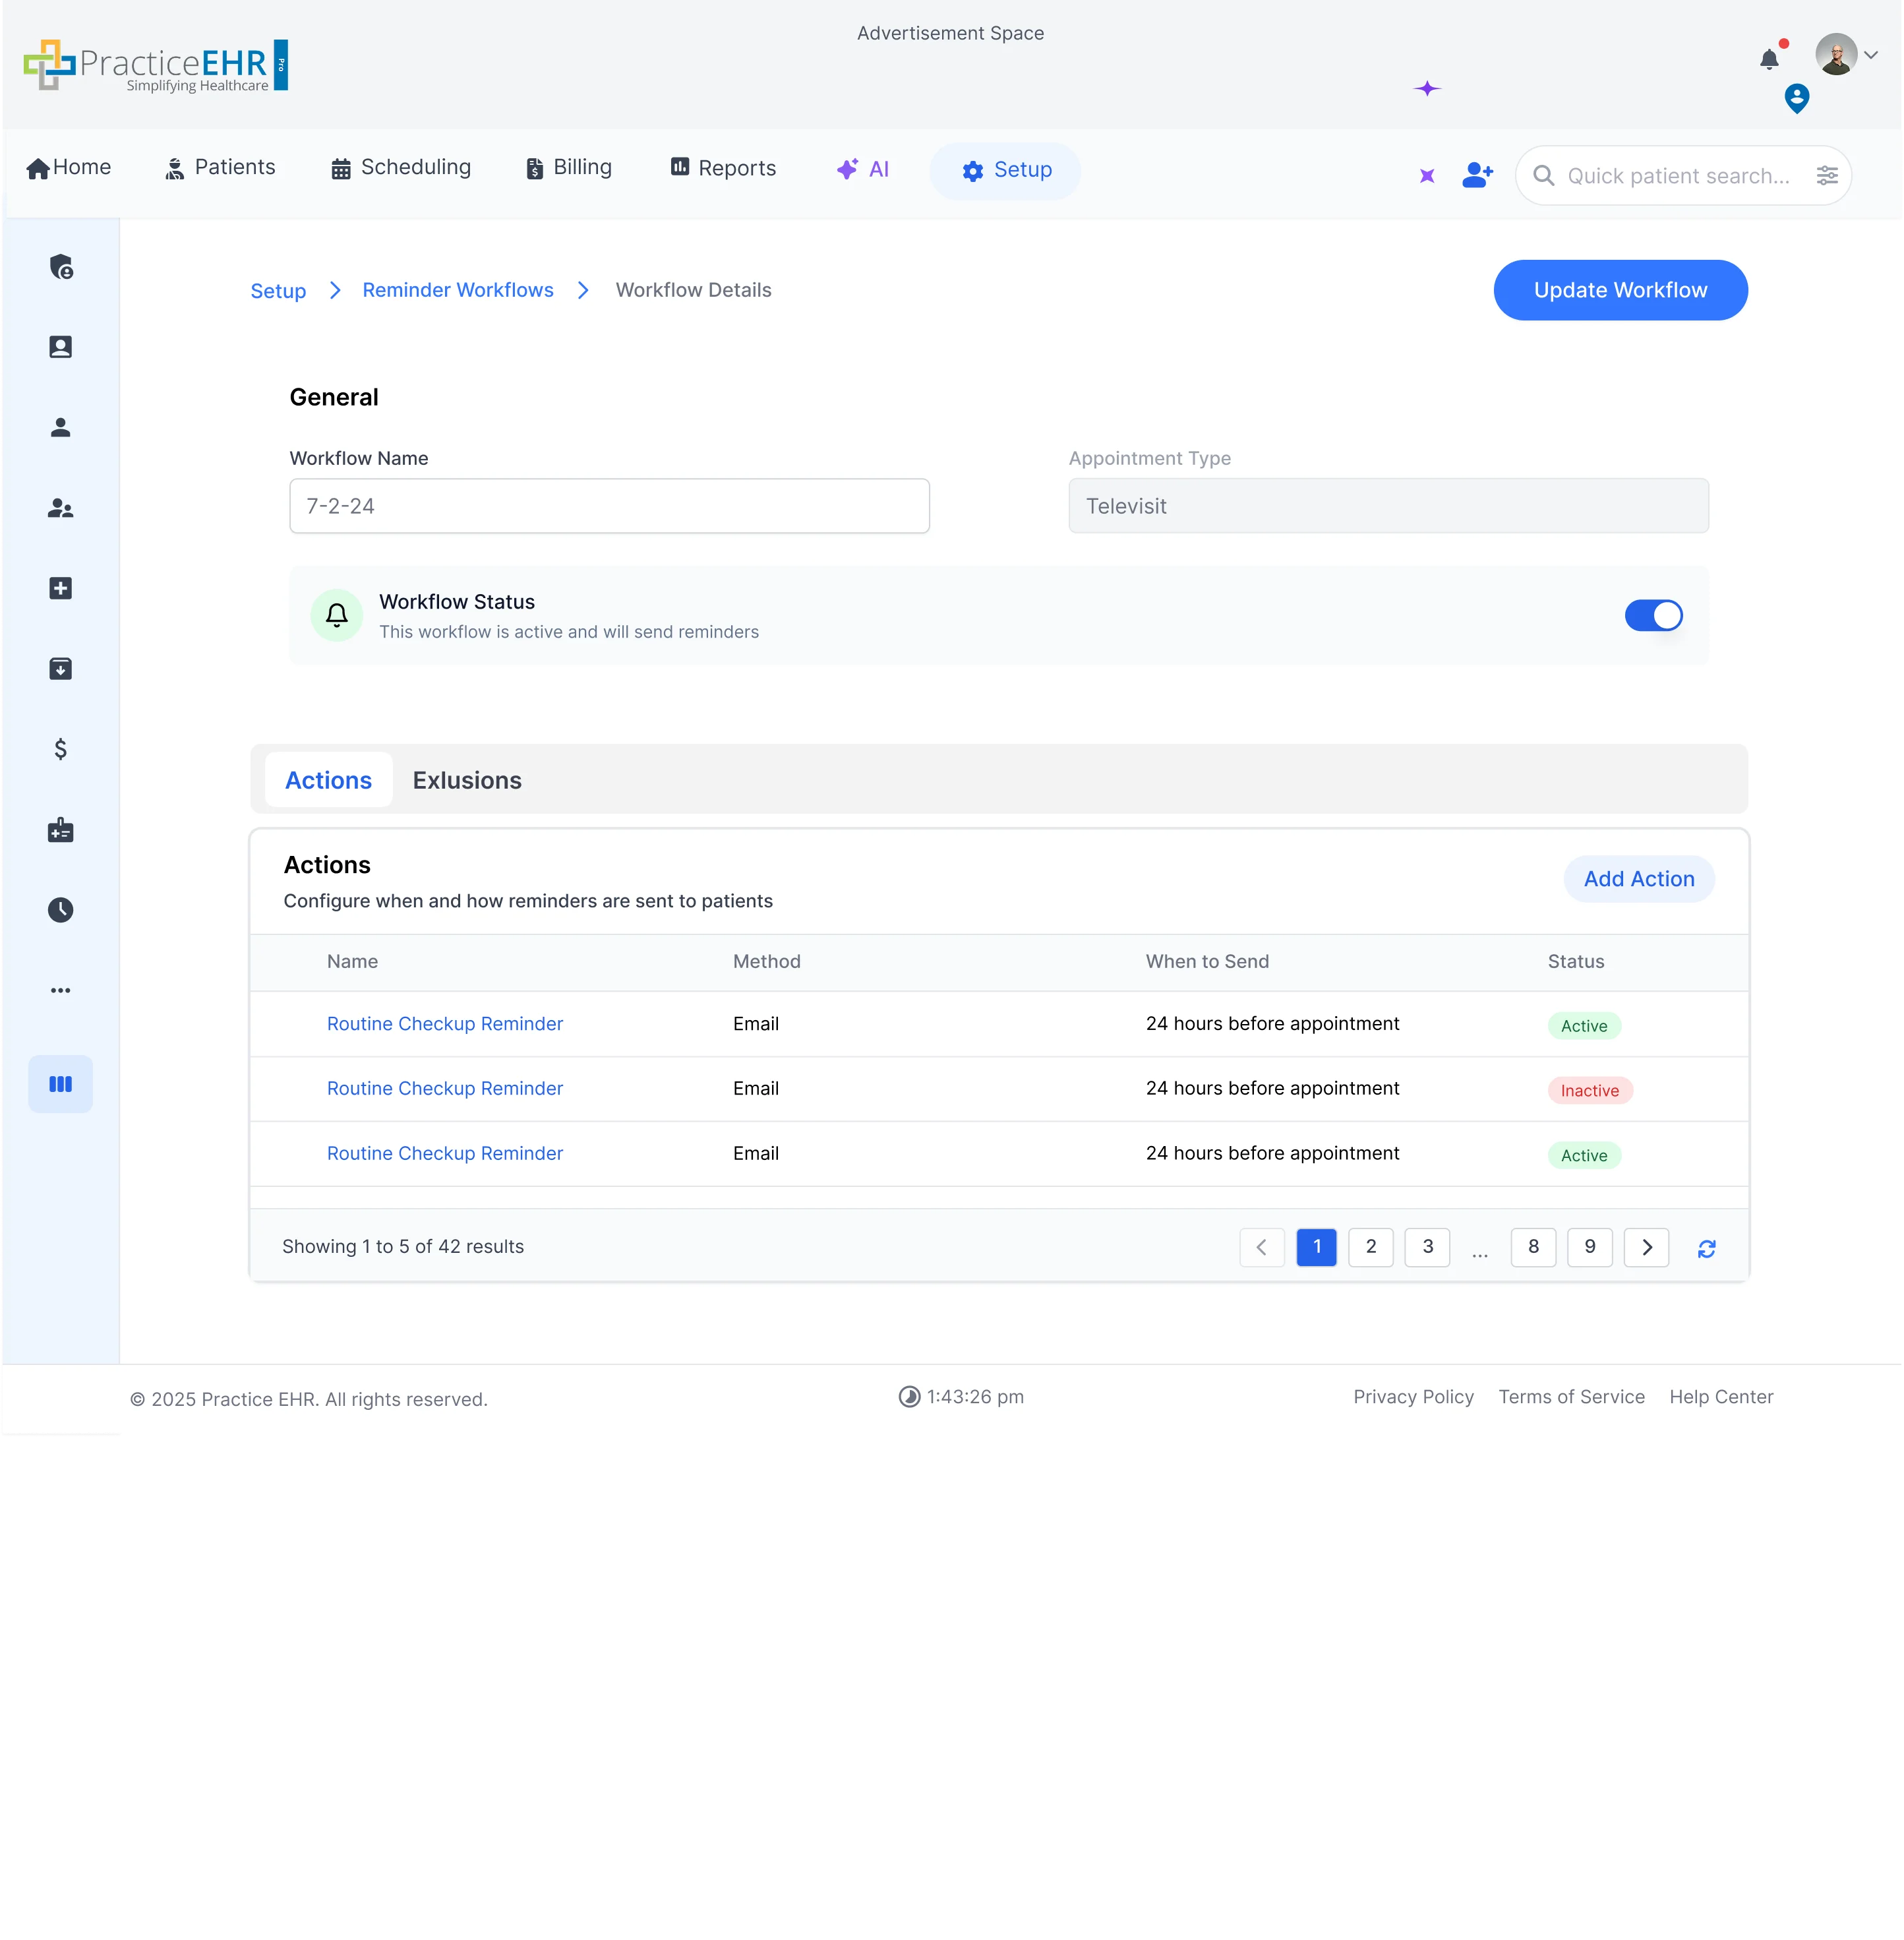
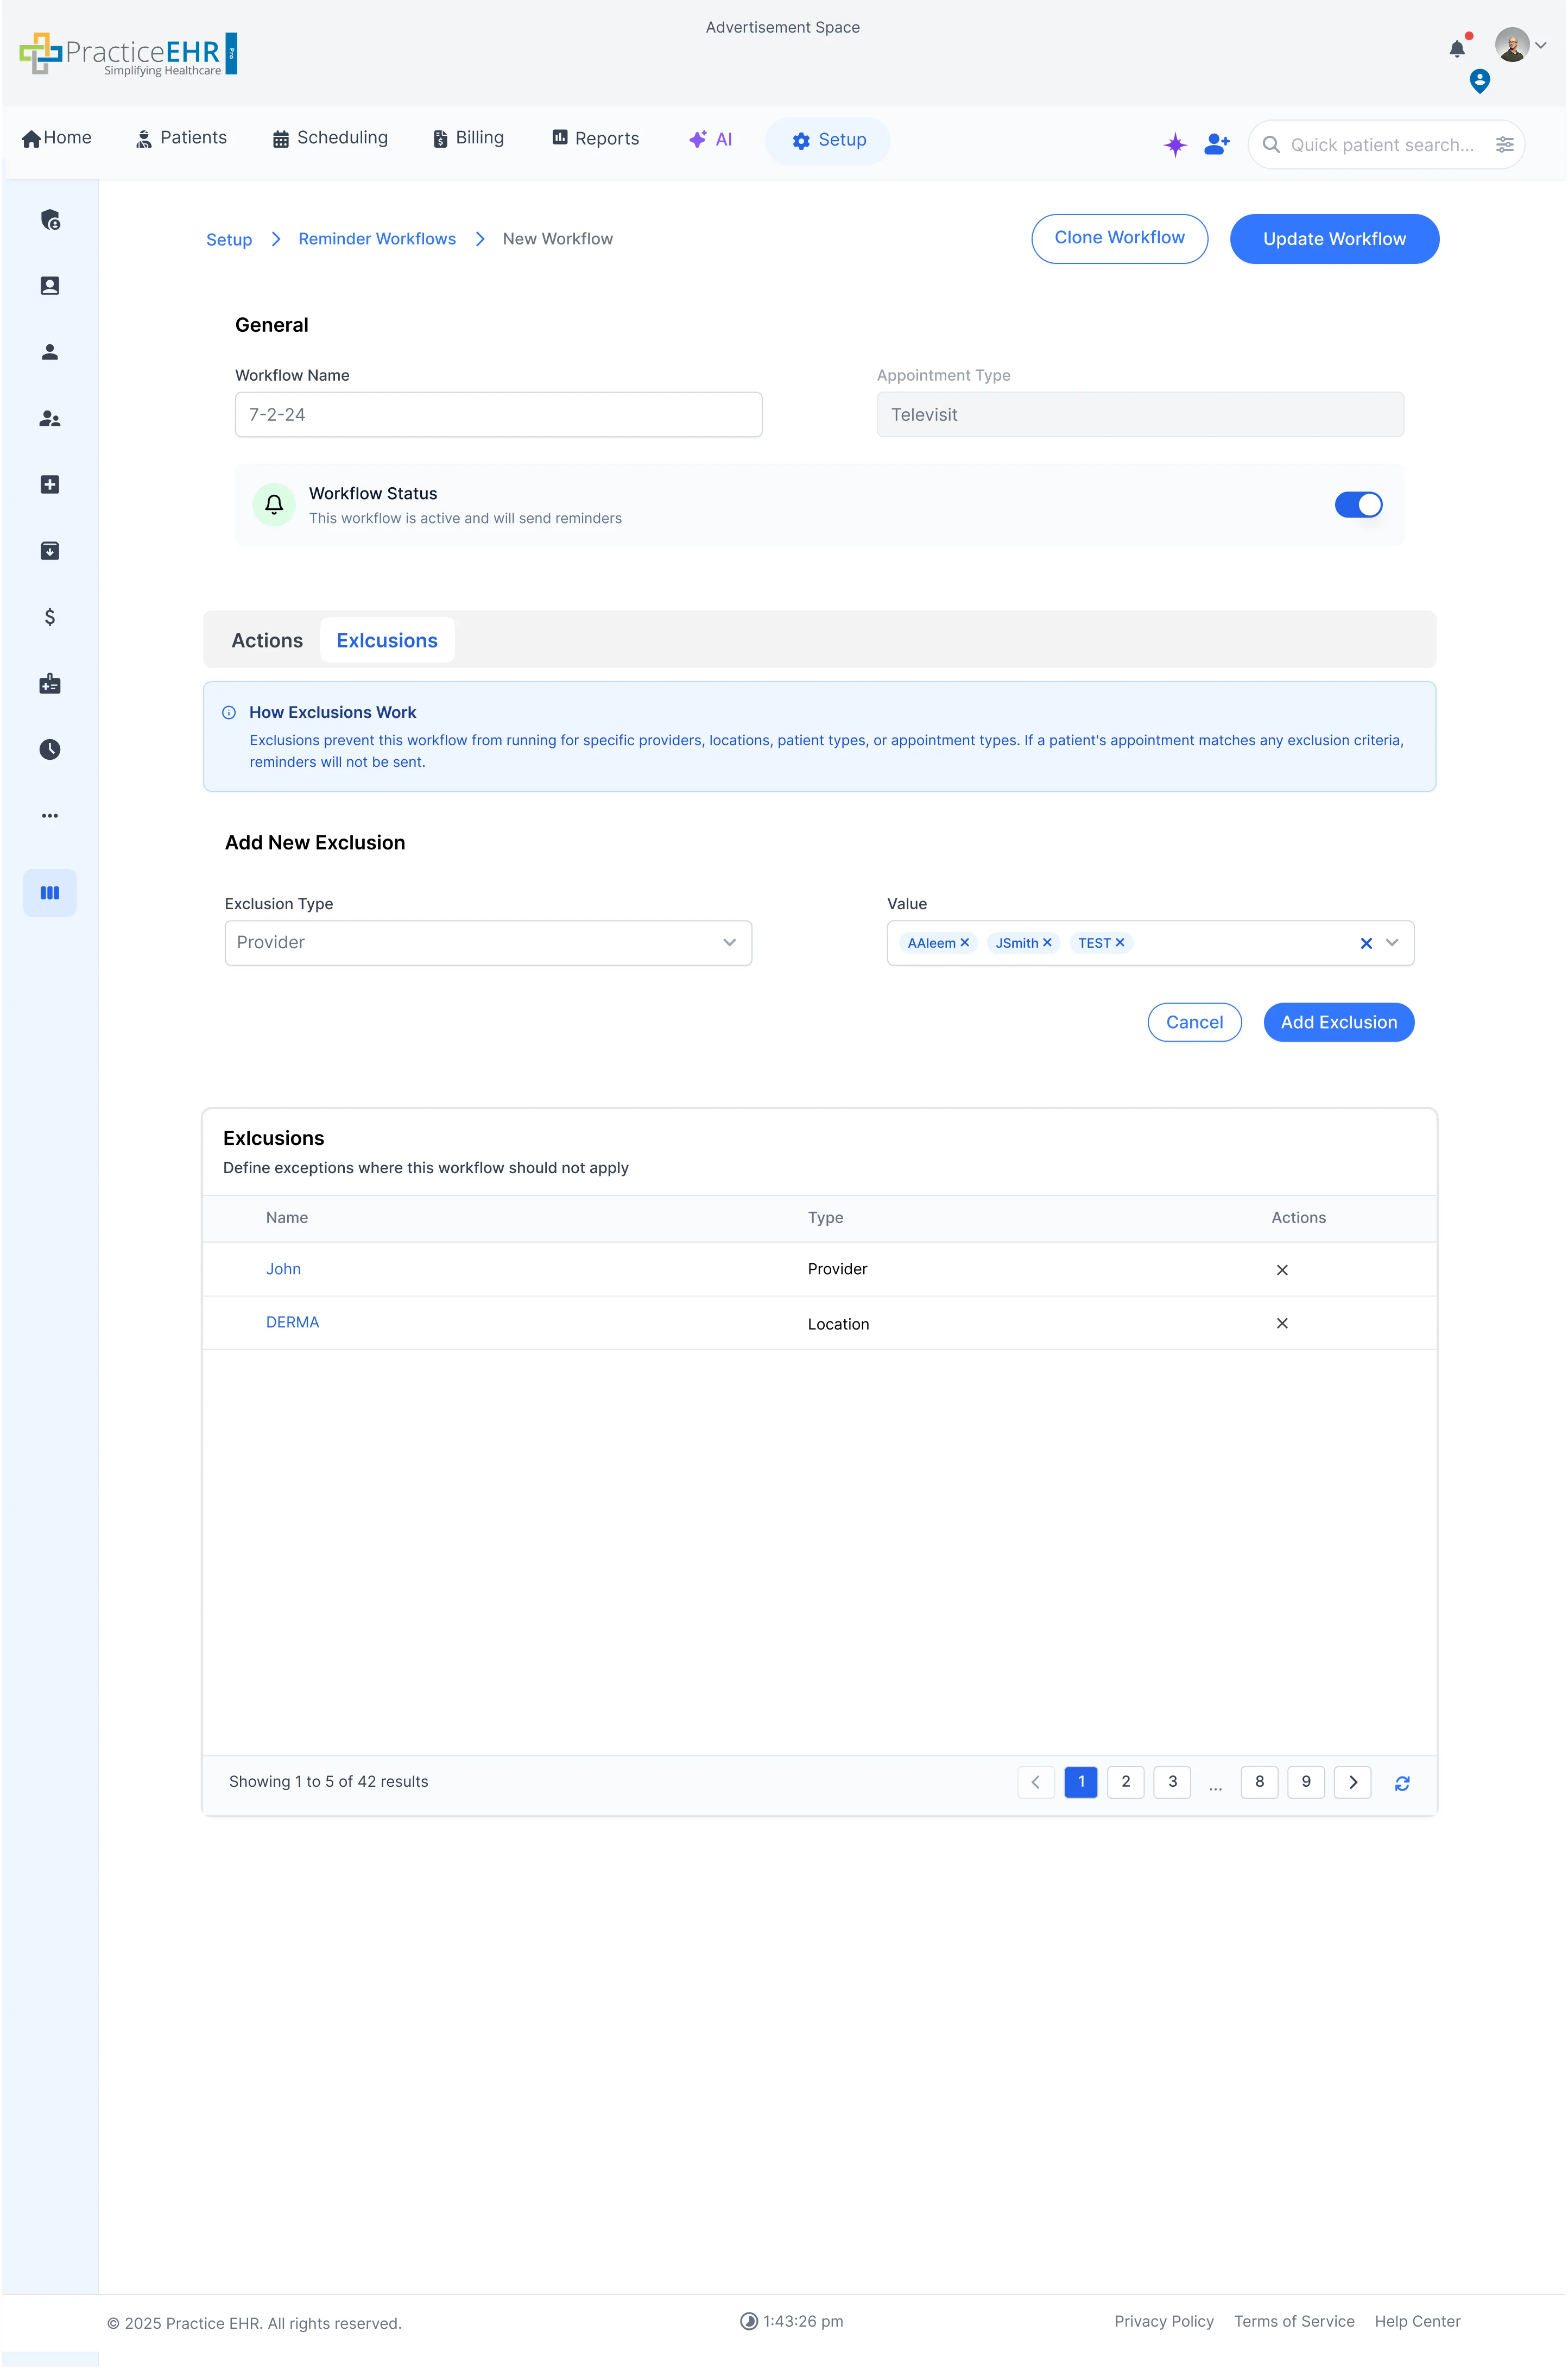
Workflow Details
Workflow Details
When the user clicks on the workflow name hyperlink from the workflow grid.
A workflow Status Toggle has been added allowing the user to set the workflow as
active or inactive.
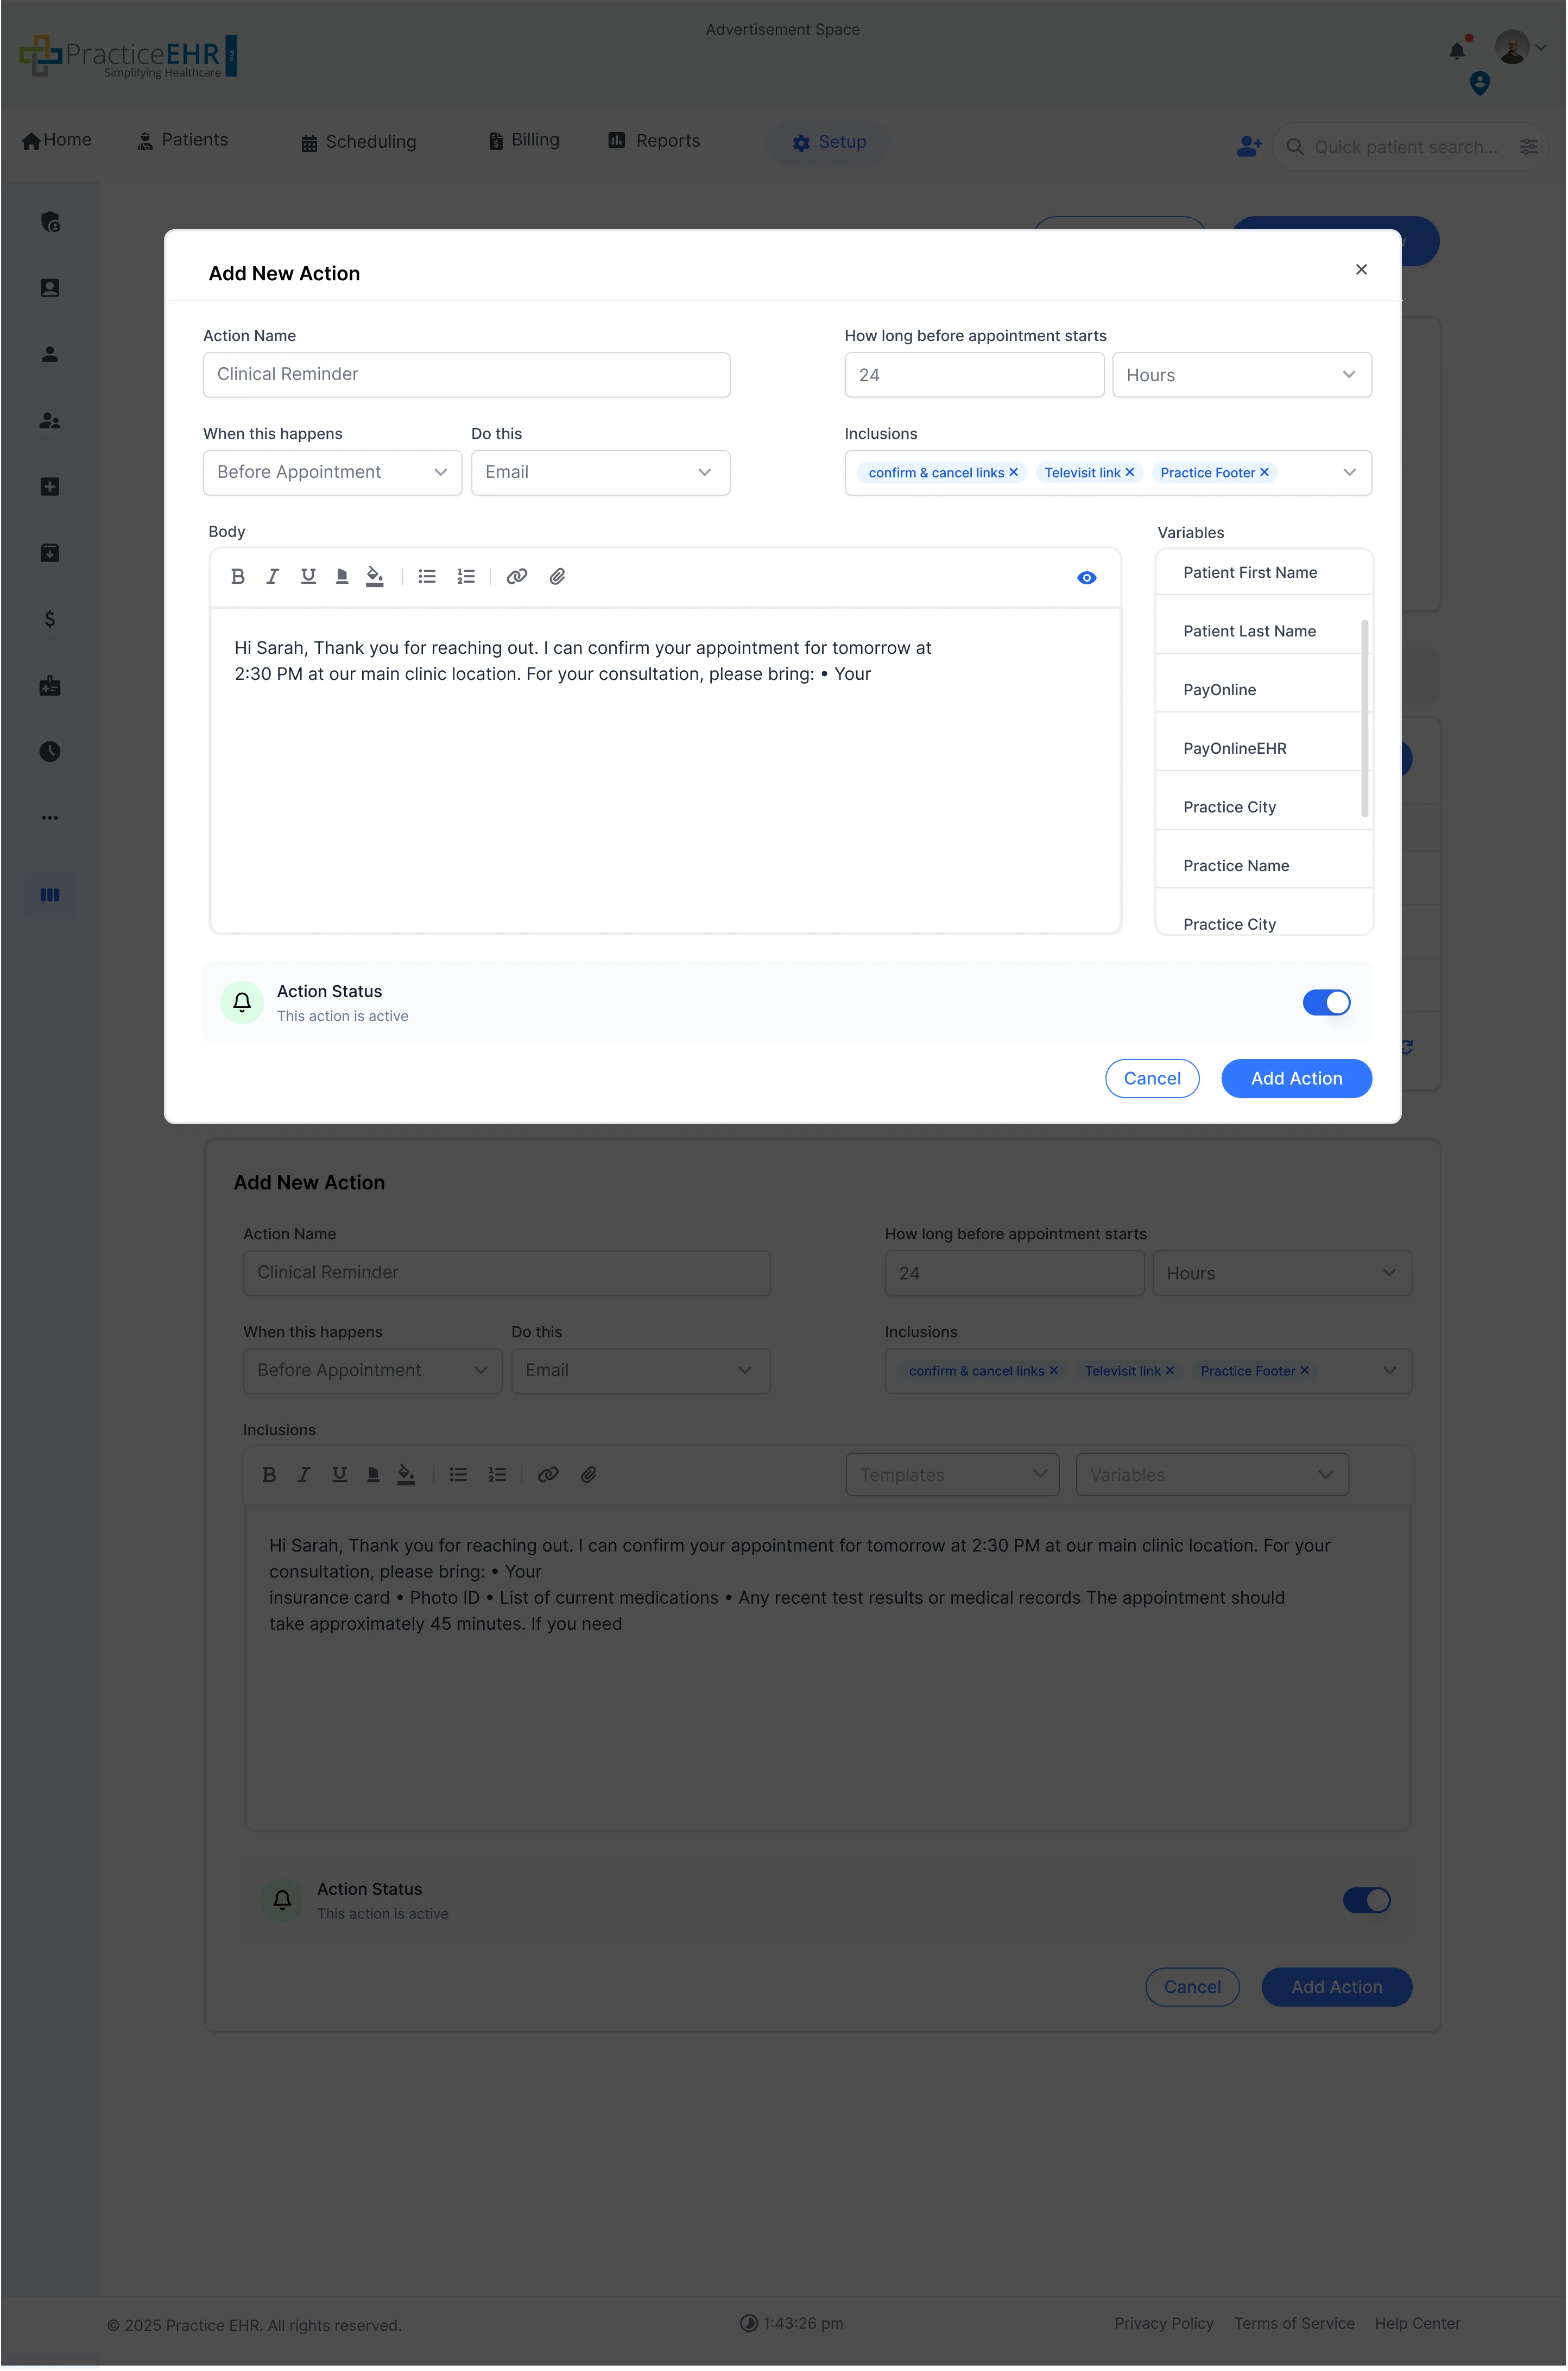
The user can view the actions of the workflow and add new actions by clicking on the
add action button.
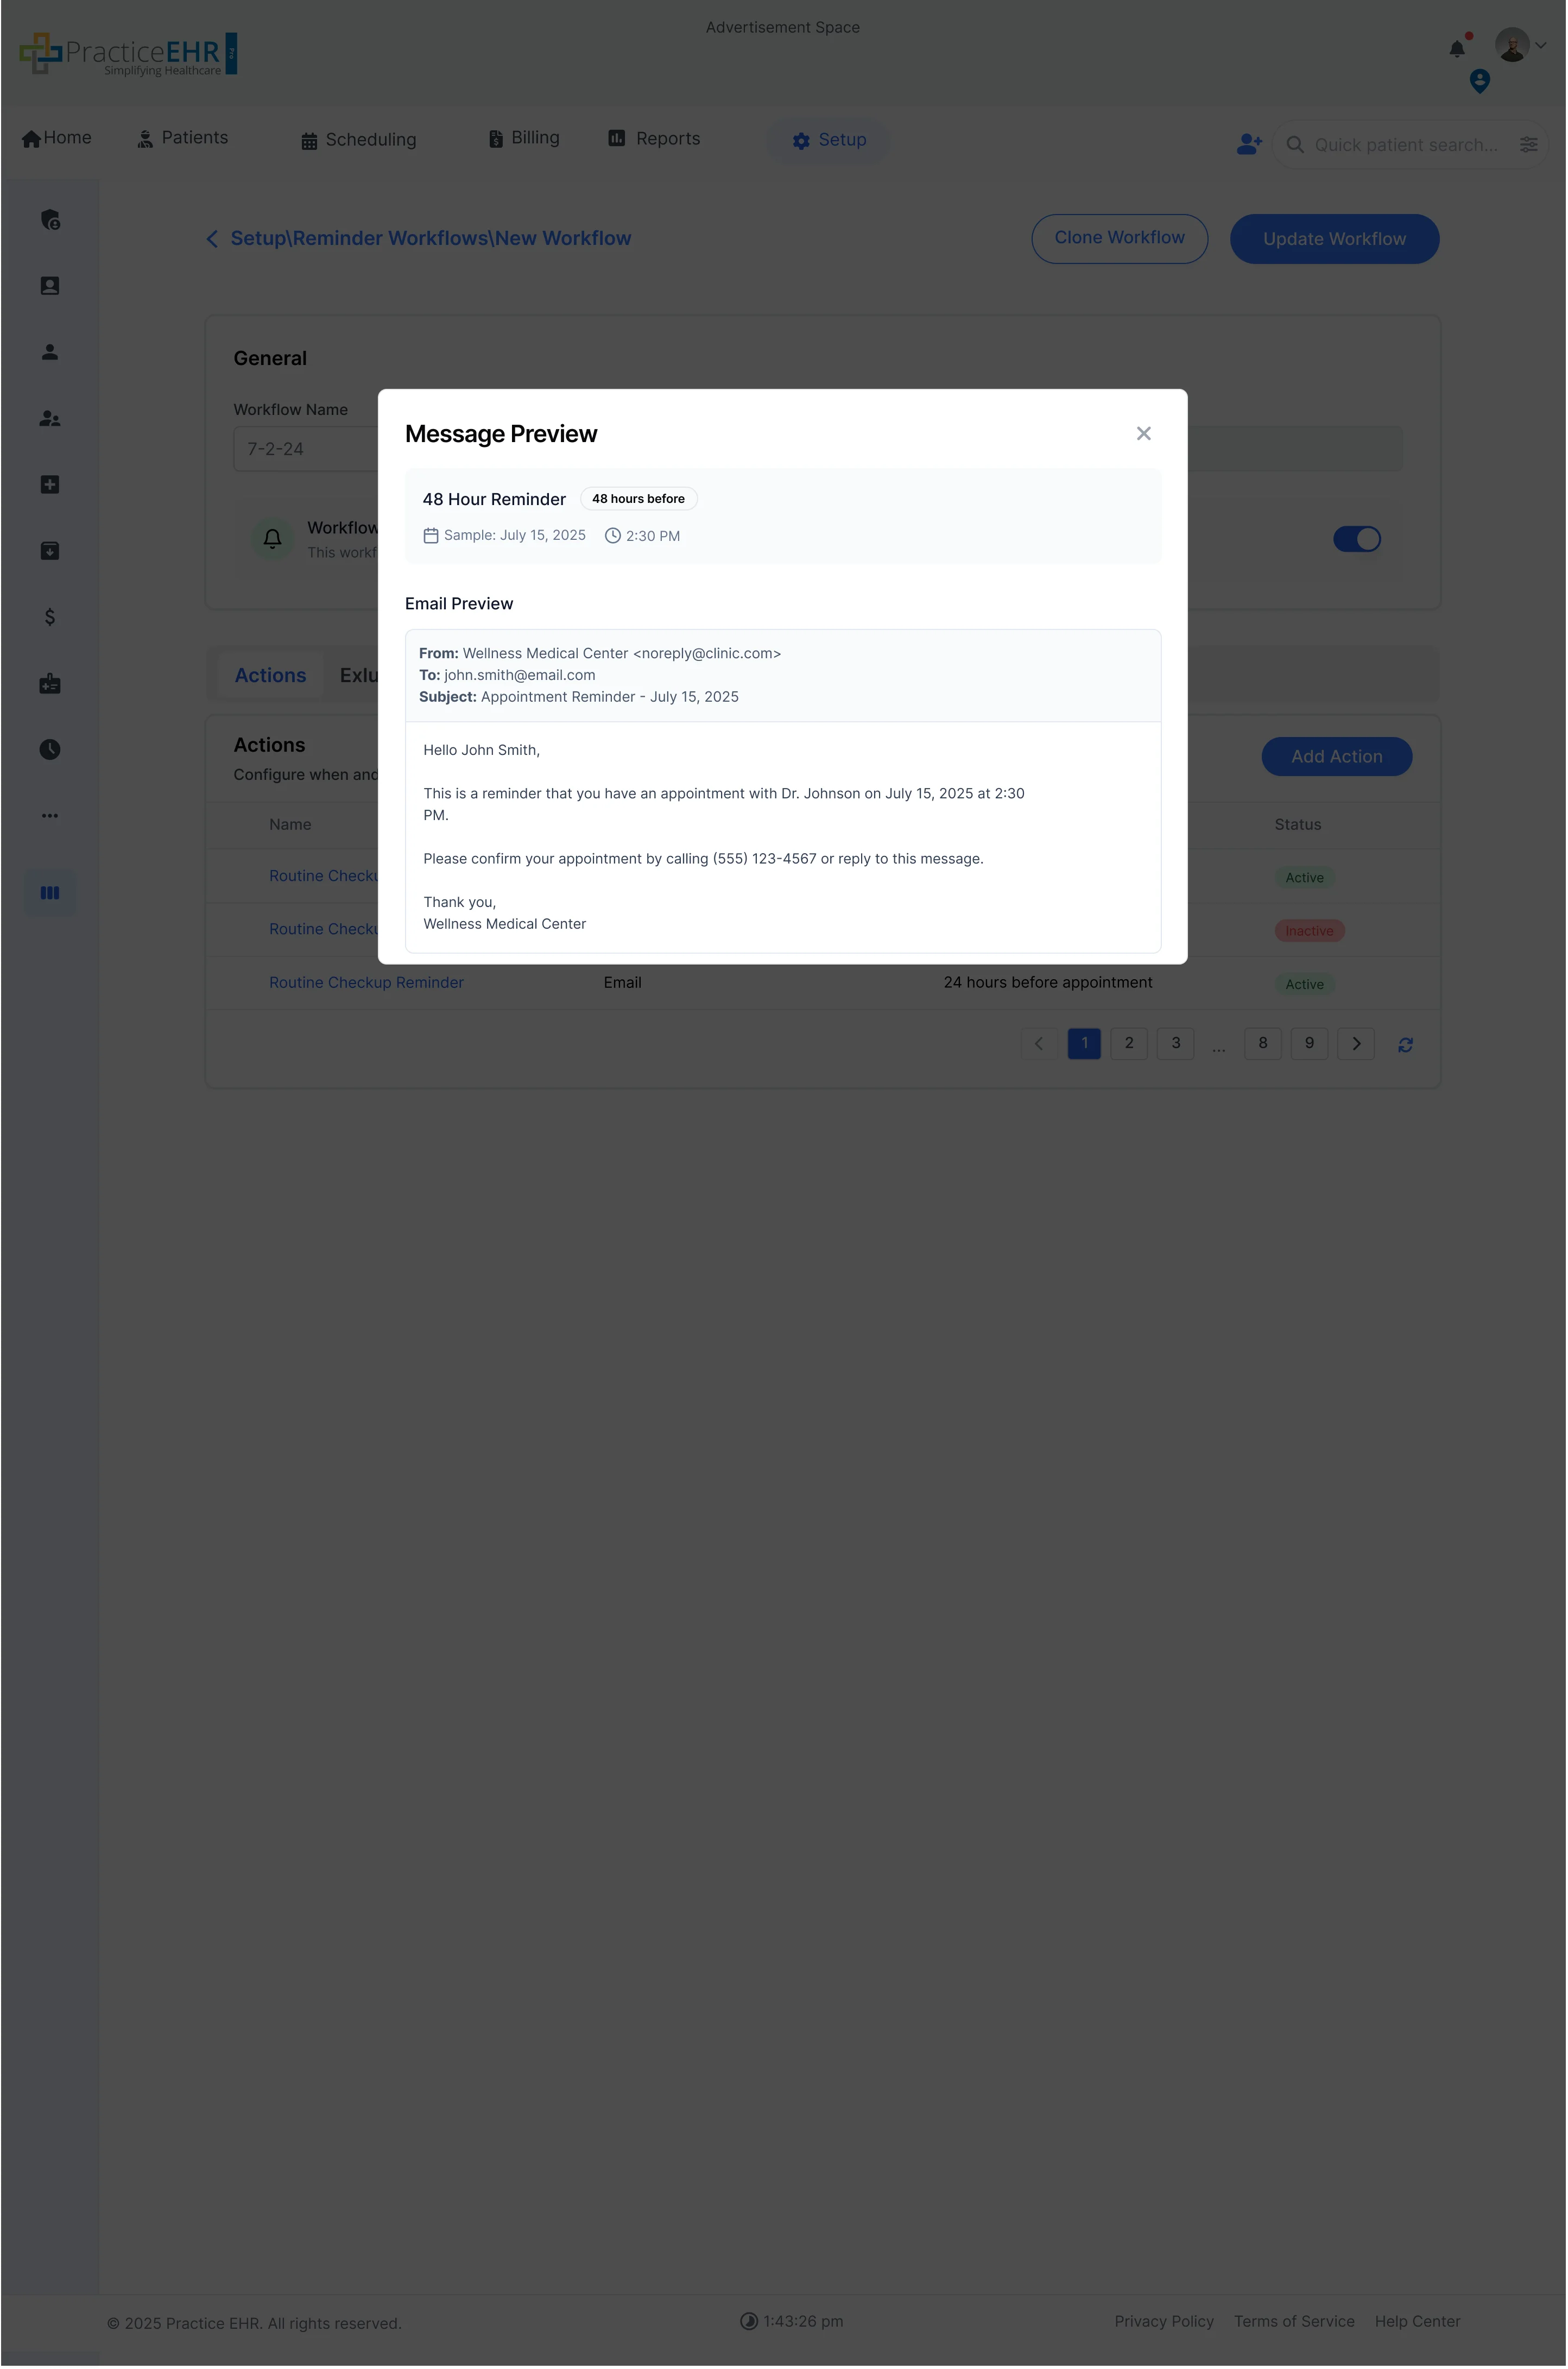
The User can also preview the message he creates by clicking on the preview icon.
Exclusions
Exclusions
The layout of exclusions has been changed.
Instead of two grids the exclusions tab now has two fields exlusion type and
value.
The user can select the exclusion type e.g. provider, location.
The user can then set the values in the multi selection value field e.g., Aaleem.
When the user clicks on add exclusion the exclusion is added to the exclusions grid
beneath the input fields.
Scheduling Reasons
Setup / Scheduling
Scheduling Reasons
When the user clicks on reasons from the scheduling folder present in the sidebar
tree
The grid has been updated into an auto search grid
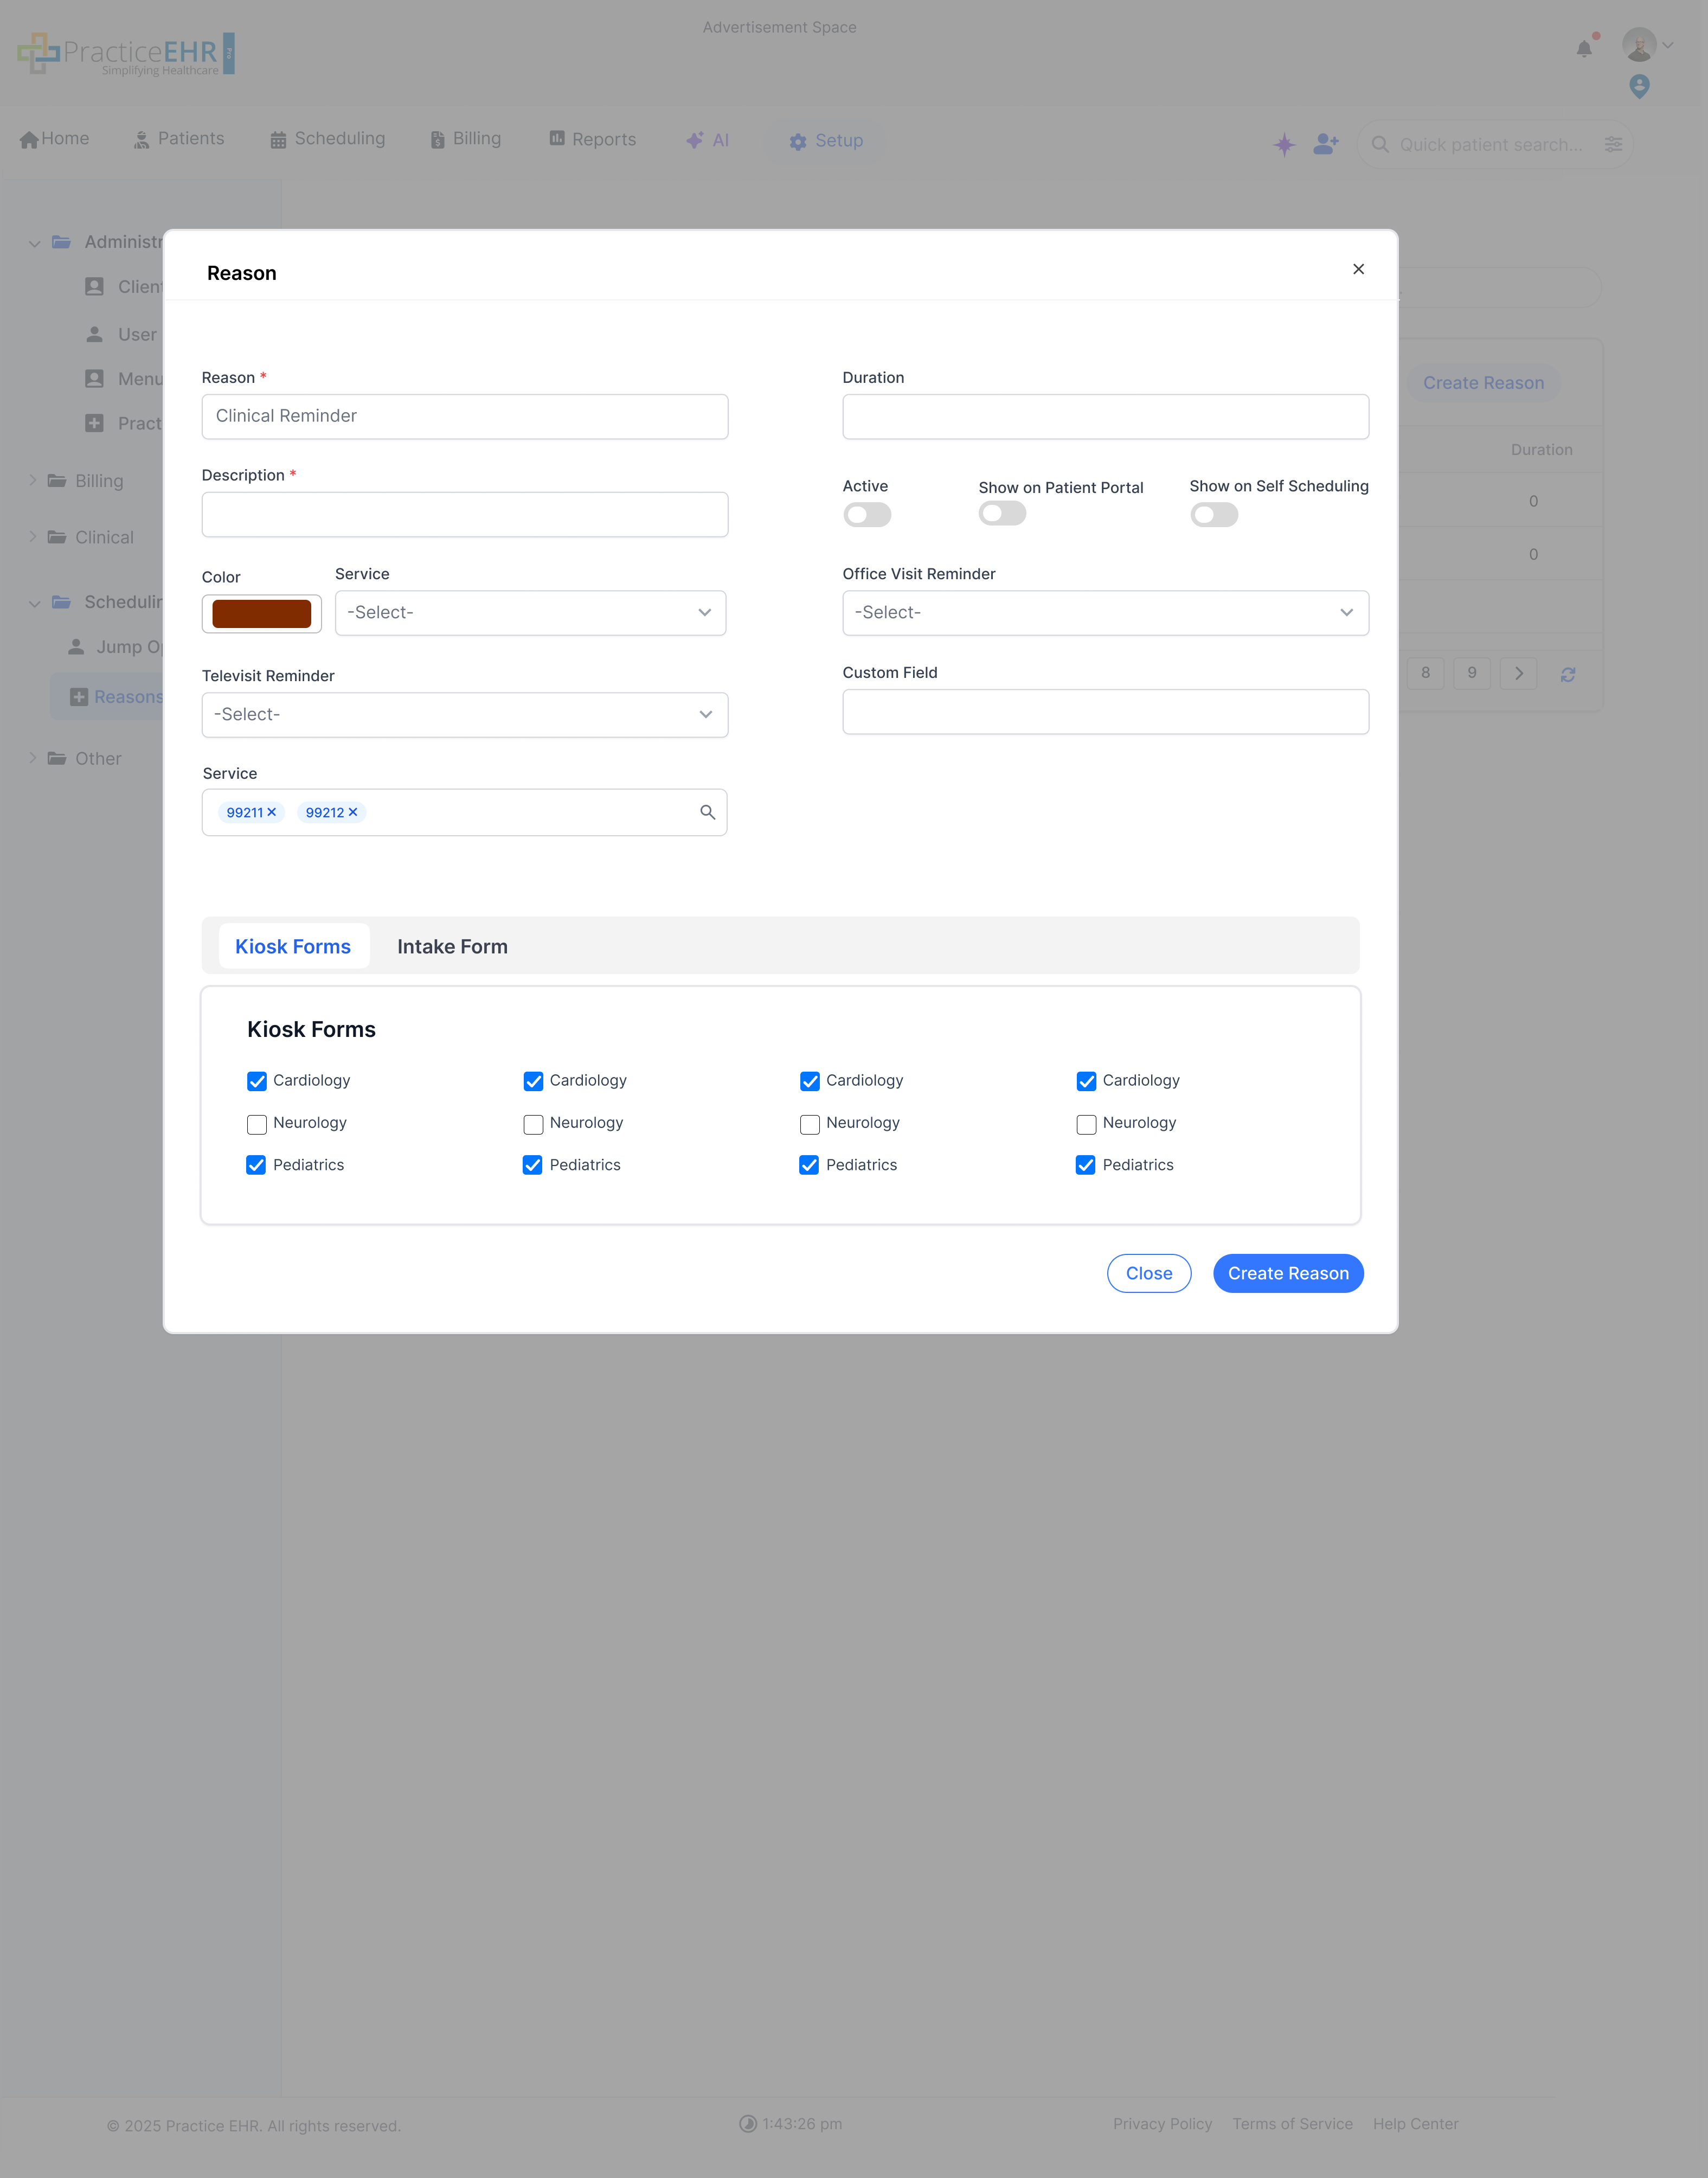
Create Reason
When the user clicks on the create reason button present in the grid of the previous
screen
Kiosk Forms and Intake forms have been added to the modal allowing users to link
forms with specific reasons.
Smart Lists
Setup / Others
Configure and manage Smart Lists used for dynamic patient grouping and
workflows.
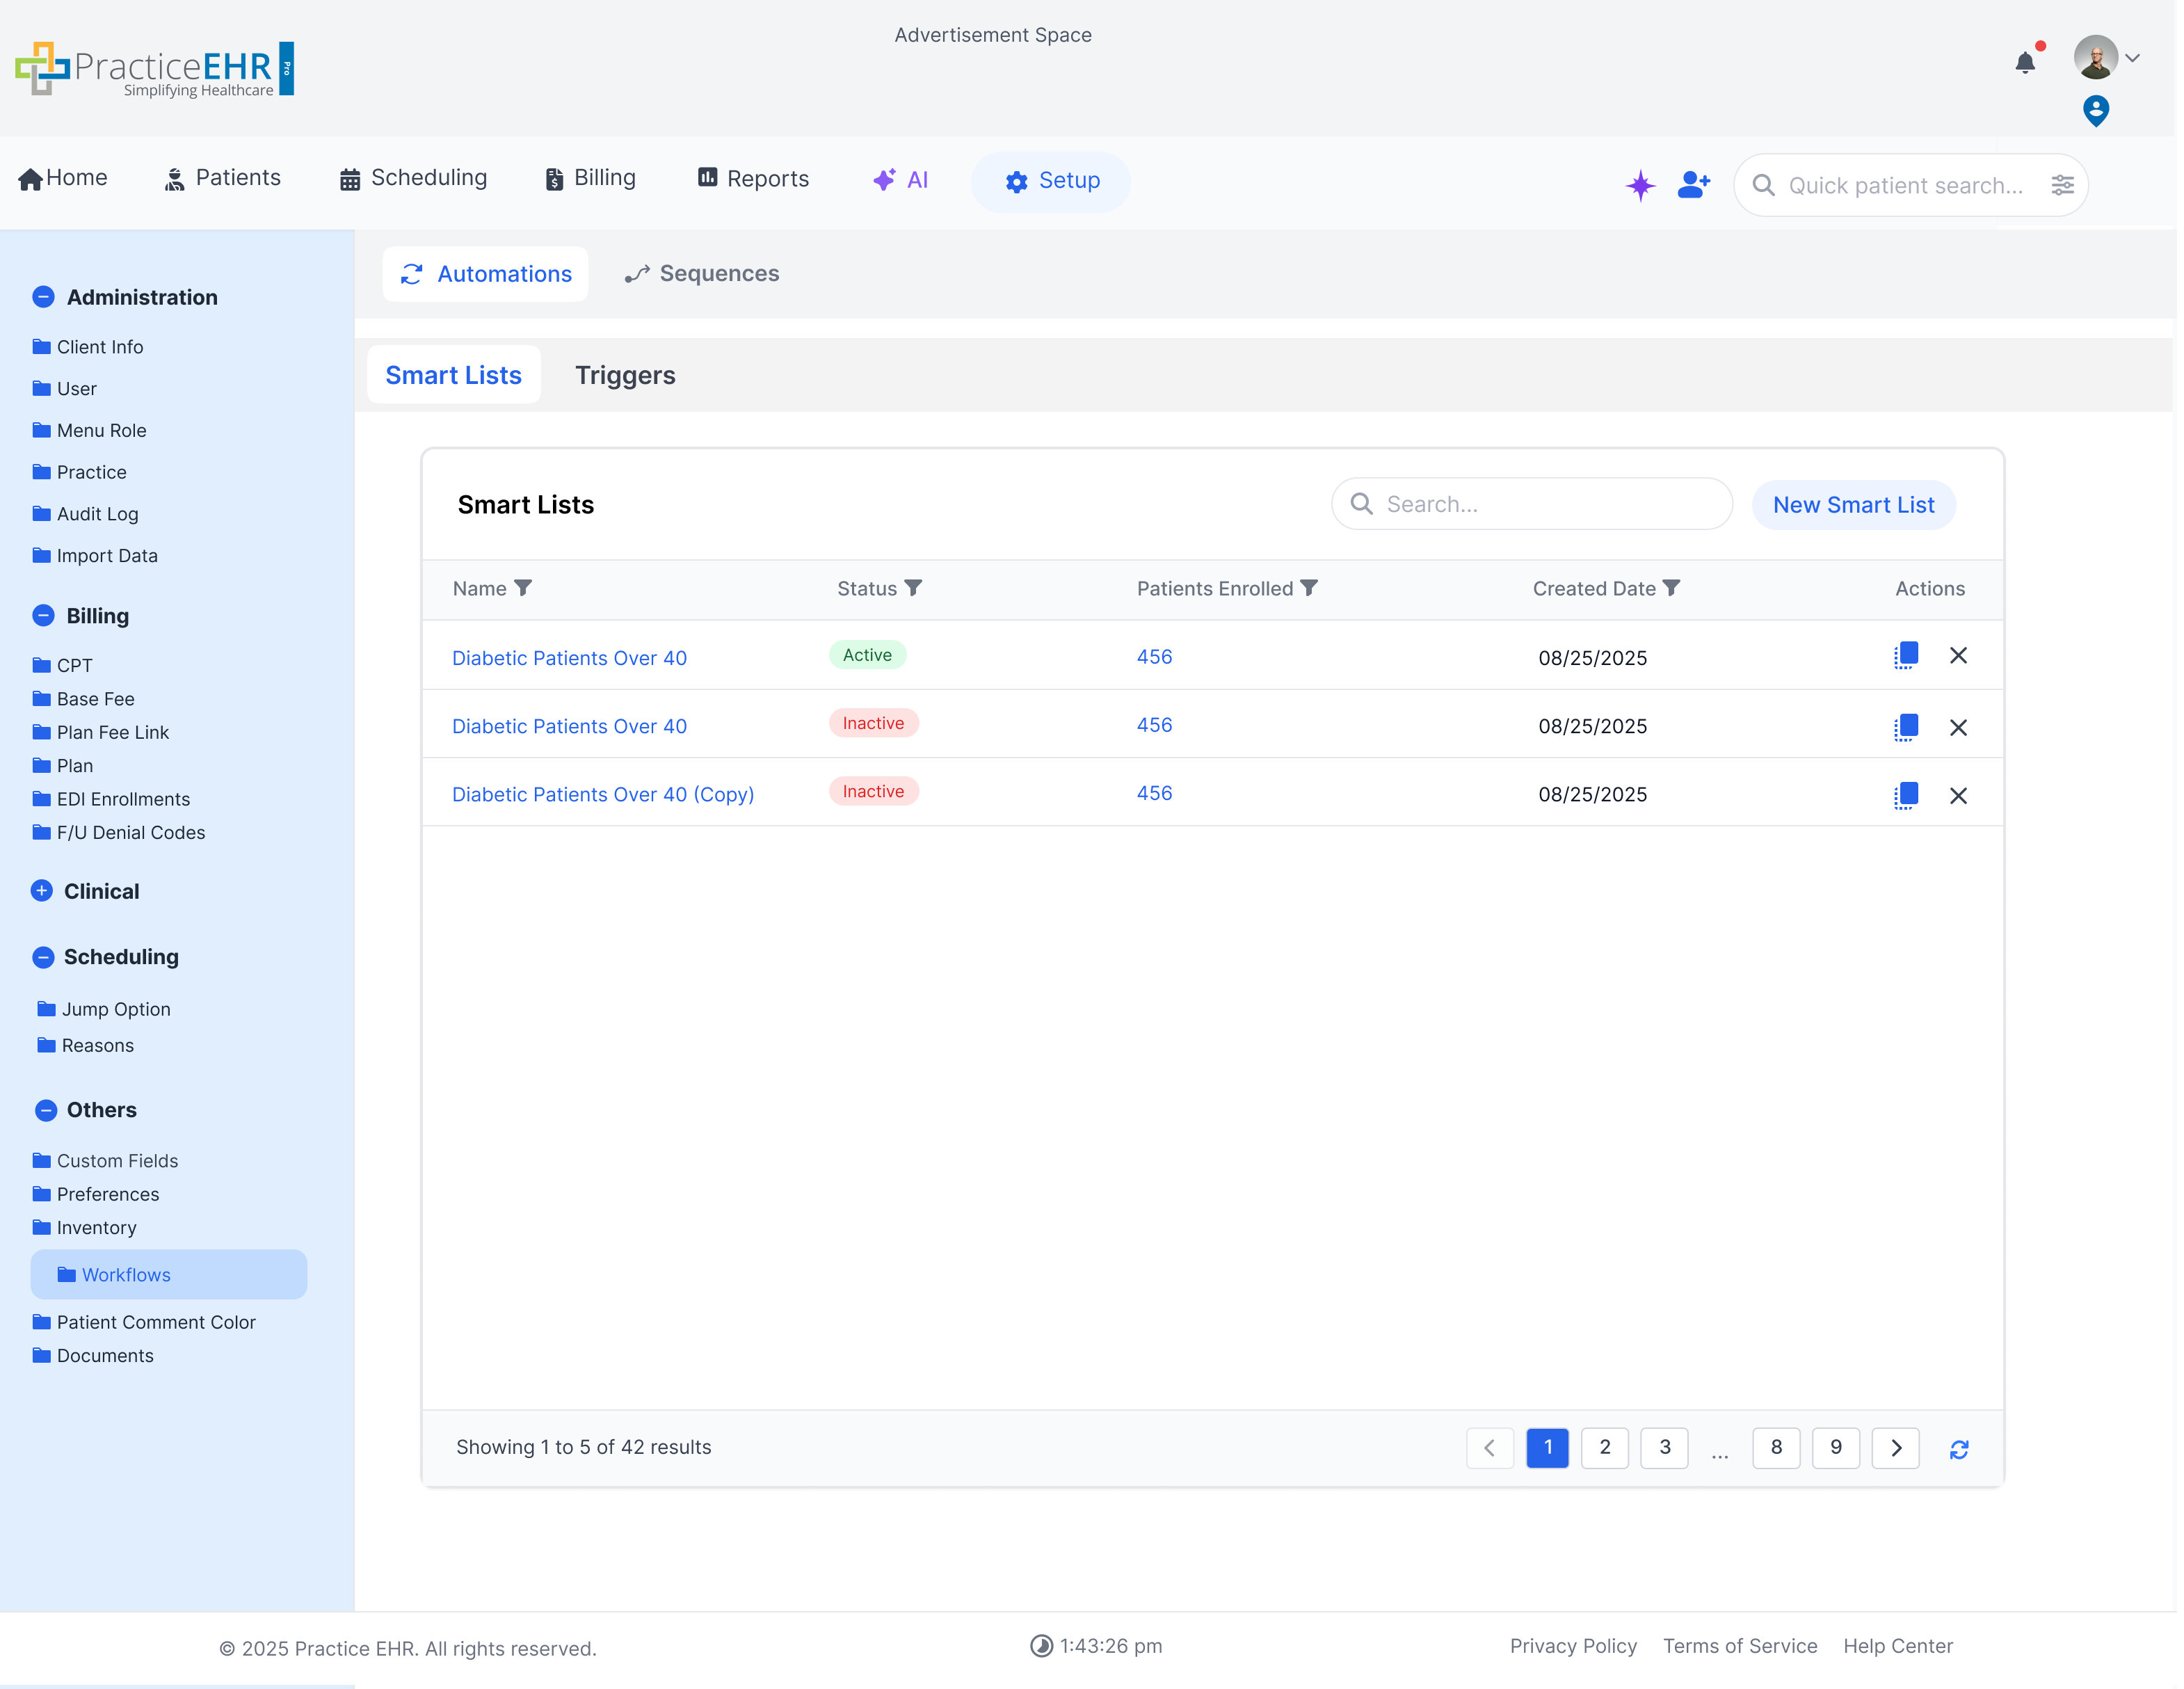
Smart List Management
This grid displays all available Smart Lists.
Users can search for lists by name.
Click "Create List" to define a new Smart List with its own rules and criteria.
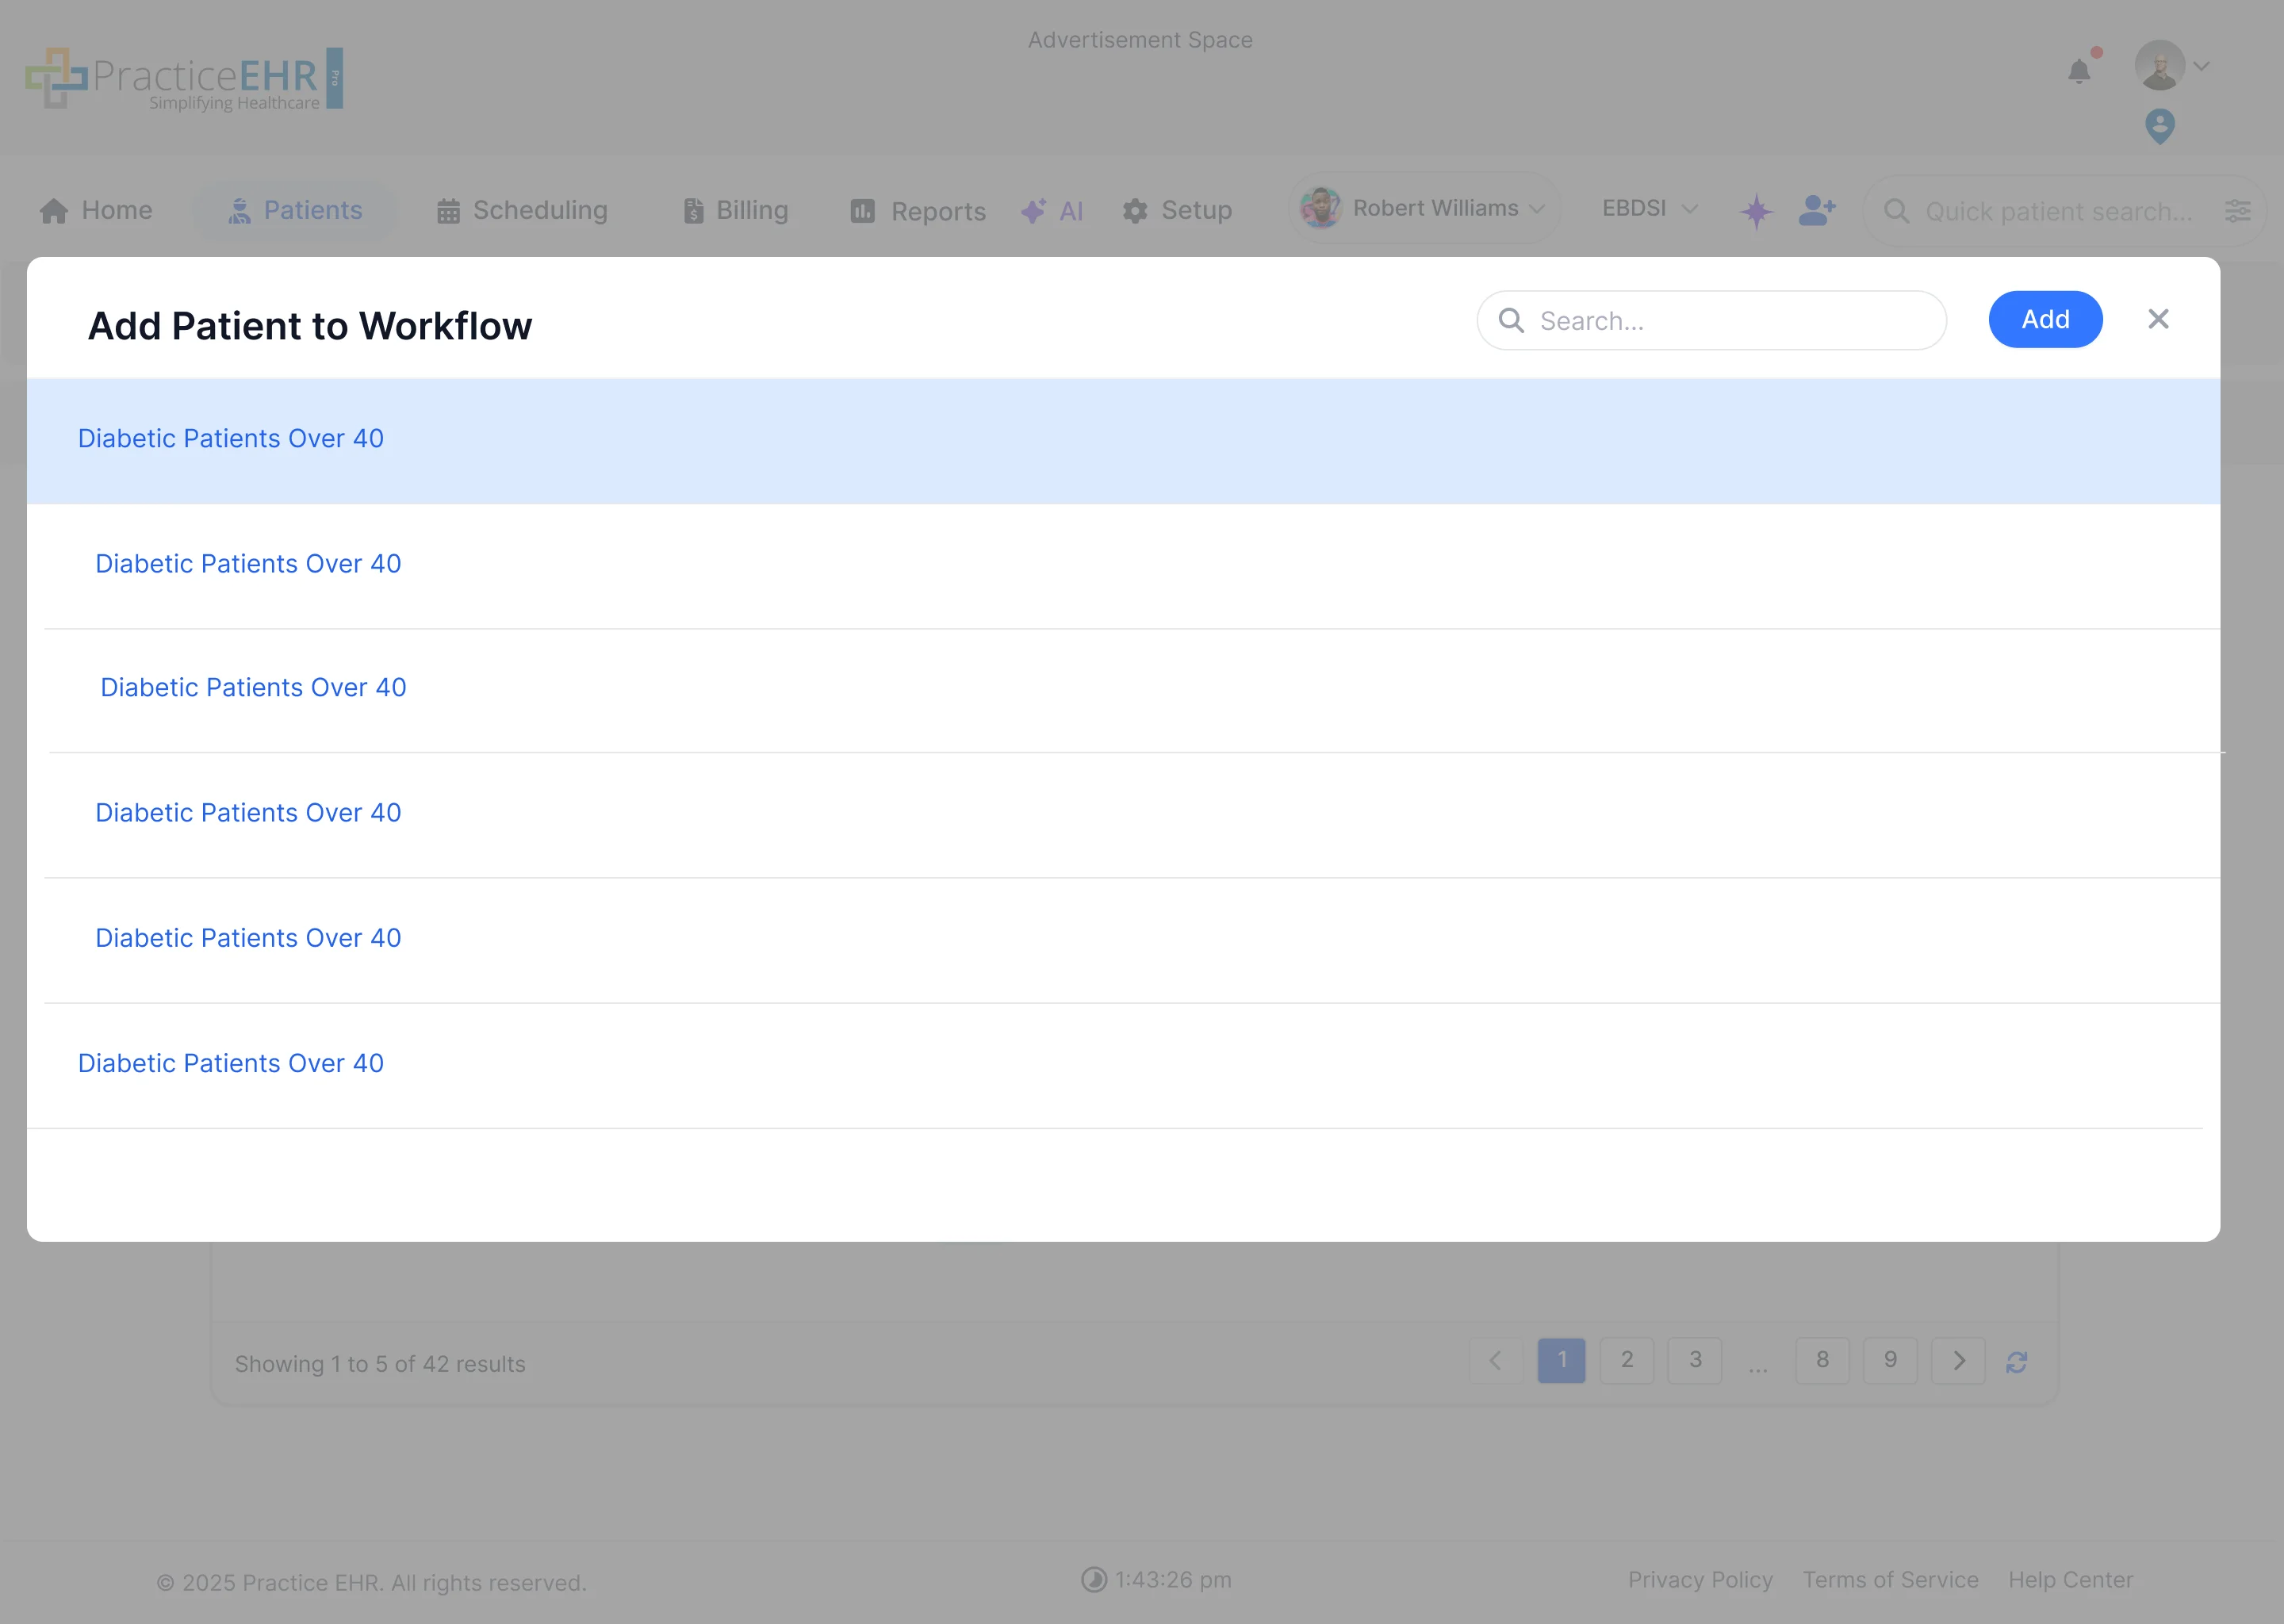
Patient Workflows
Setup / Others
Manage automated patient workflows and enroll patients into them.
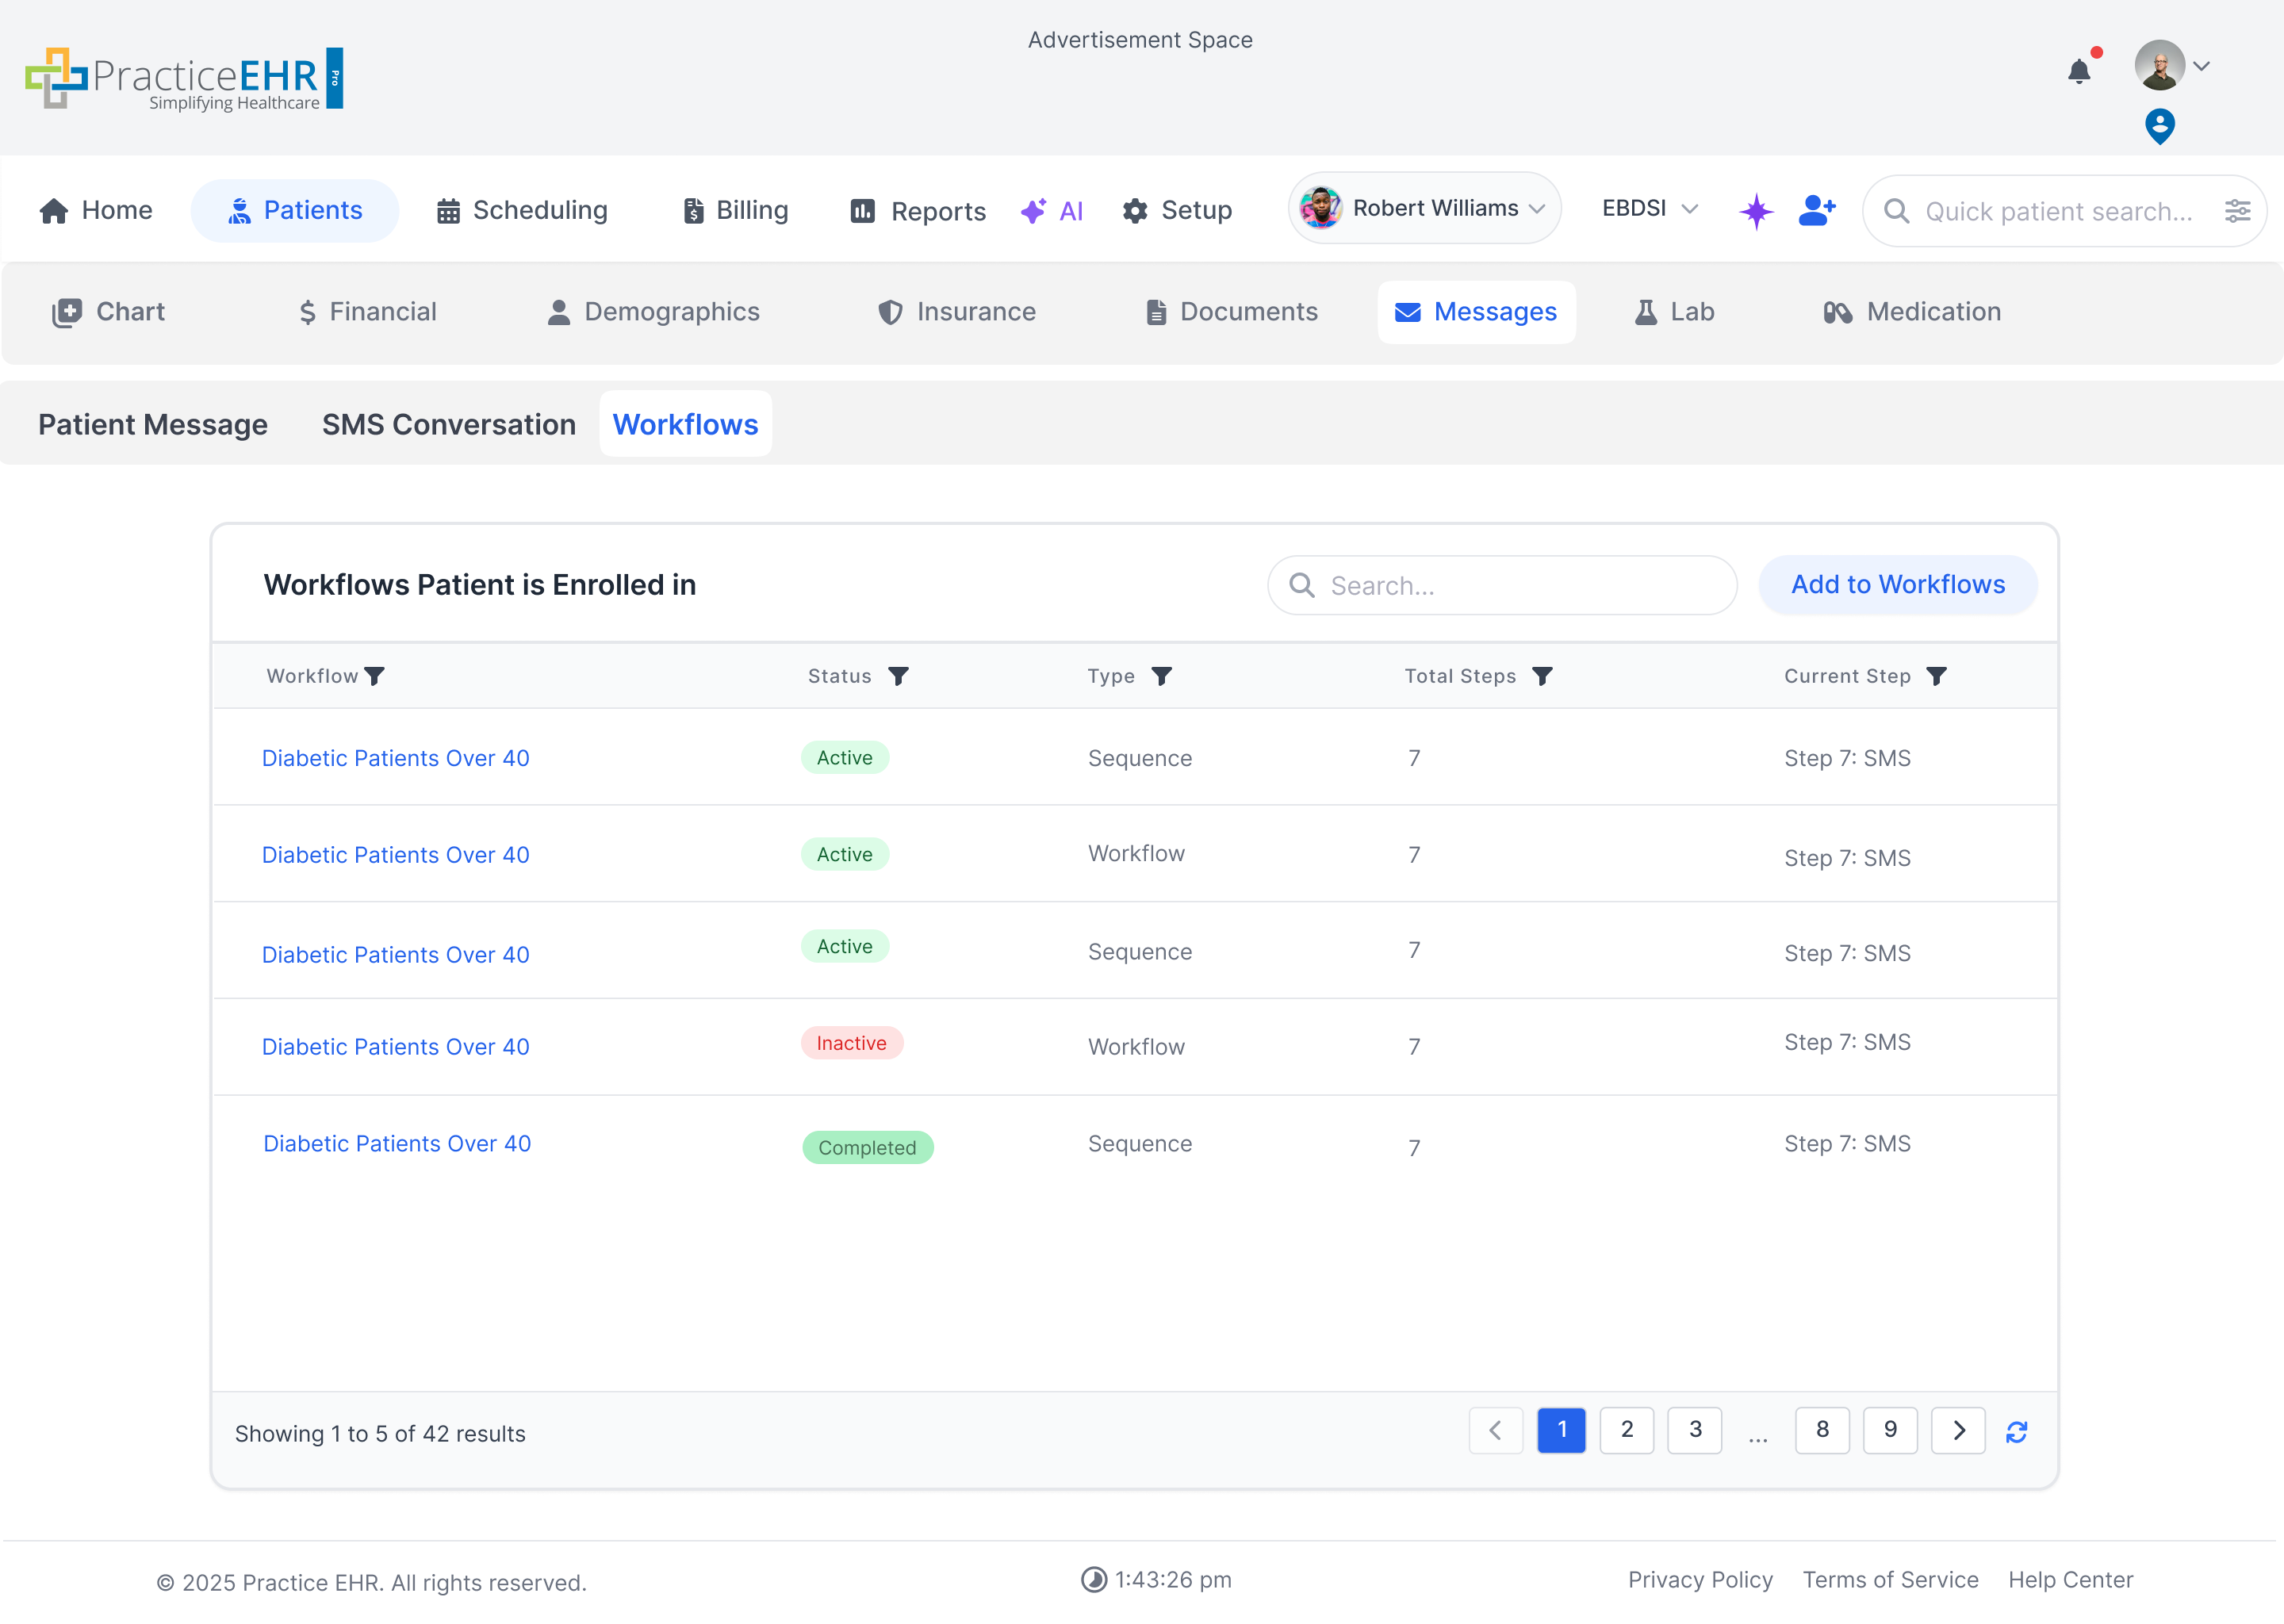
Patient Workflow Management
This screen lists patients currently enrolled in workflows.
The "Add to Workflow" button opens a modal allowing users to select a workflow and
enroll the patient.
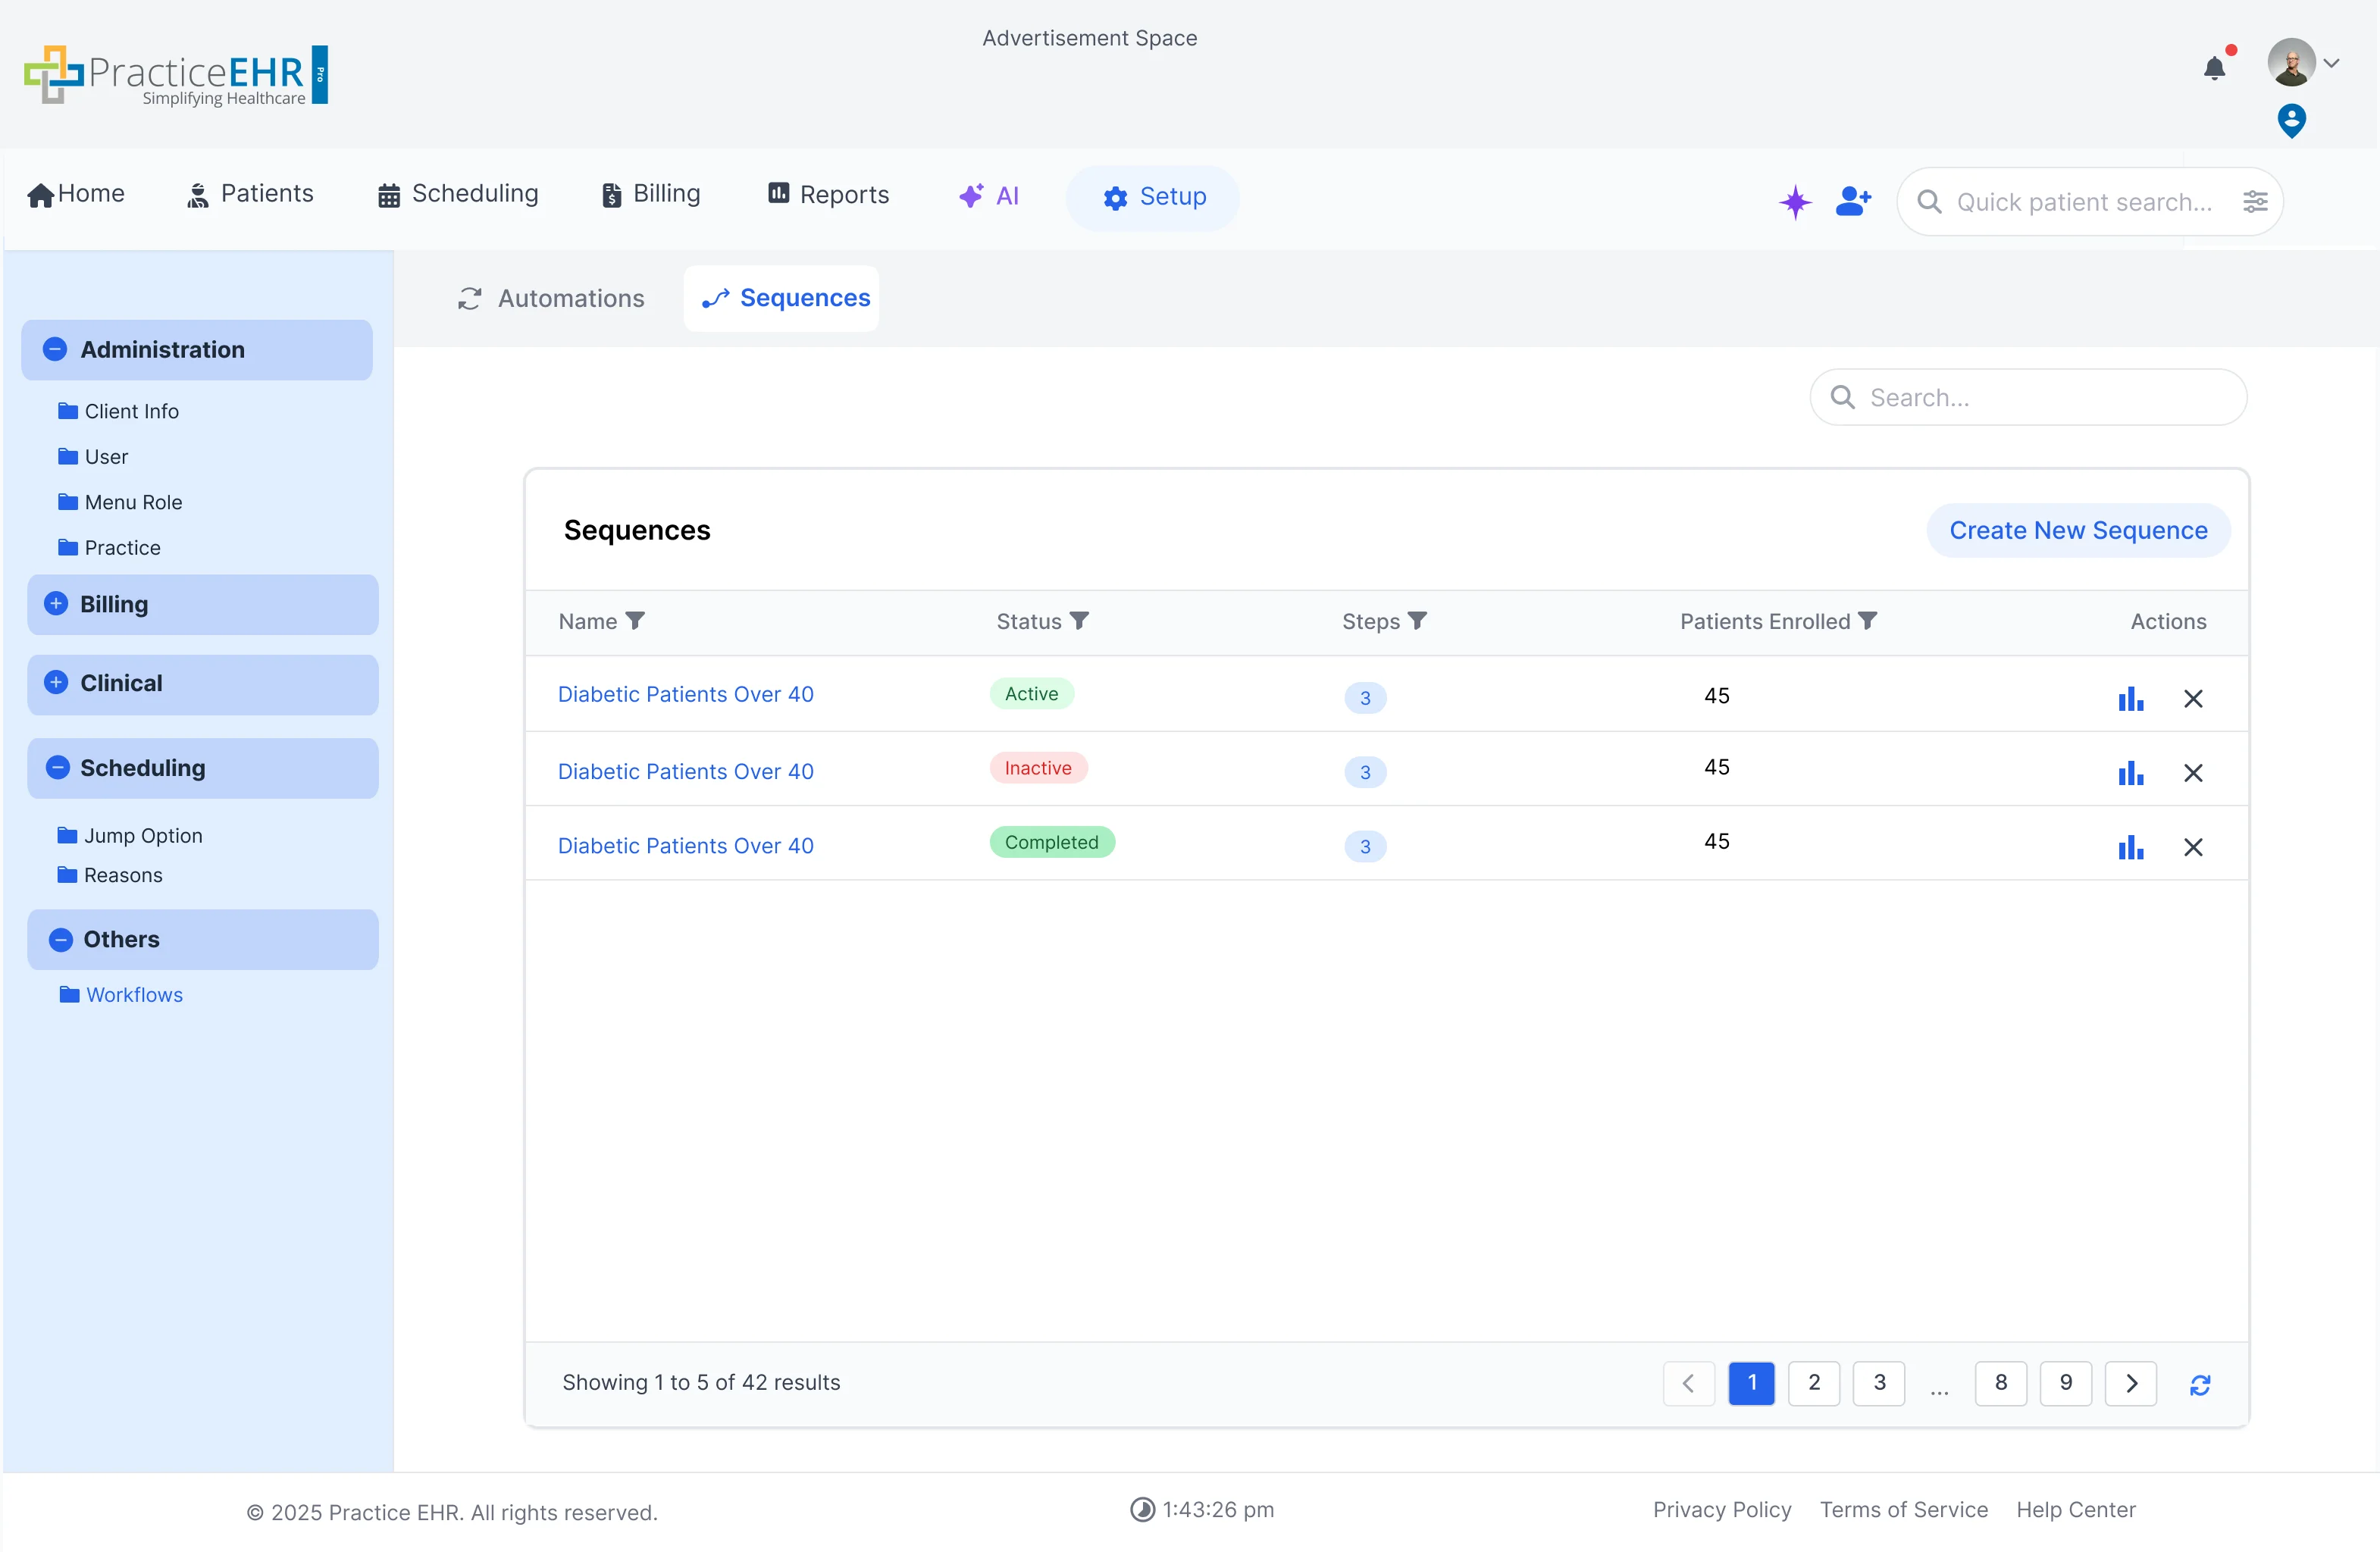
Sequences
Setup / Others
Configure sequences for automated actions or reminders.
Sequence Management
Displays a grid of all configured sequences.
Search for sequences by name.
Click "Create Sequence" to build a new multi-step sequence.
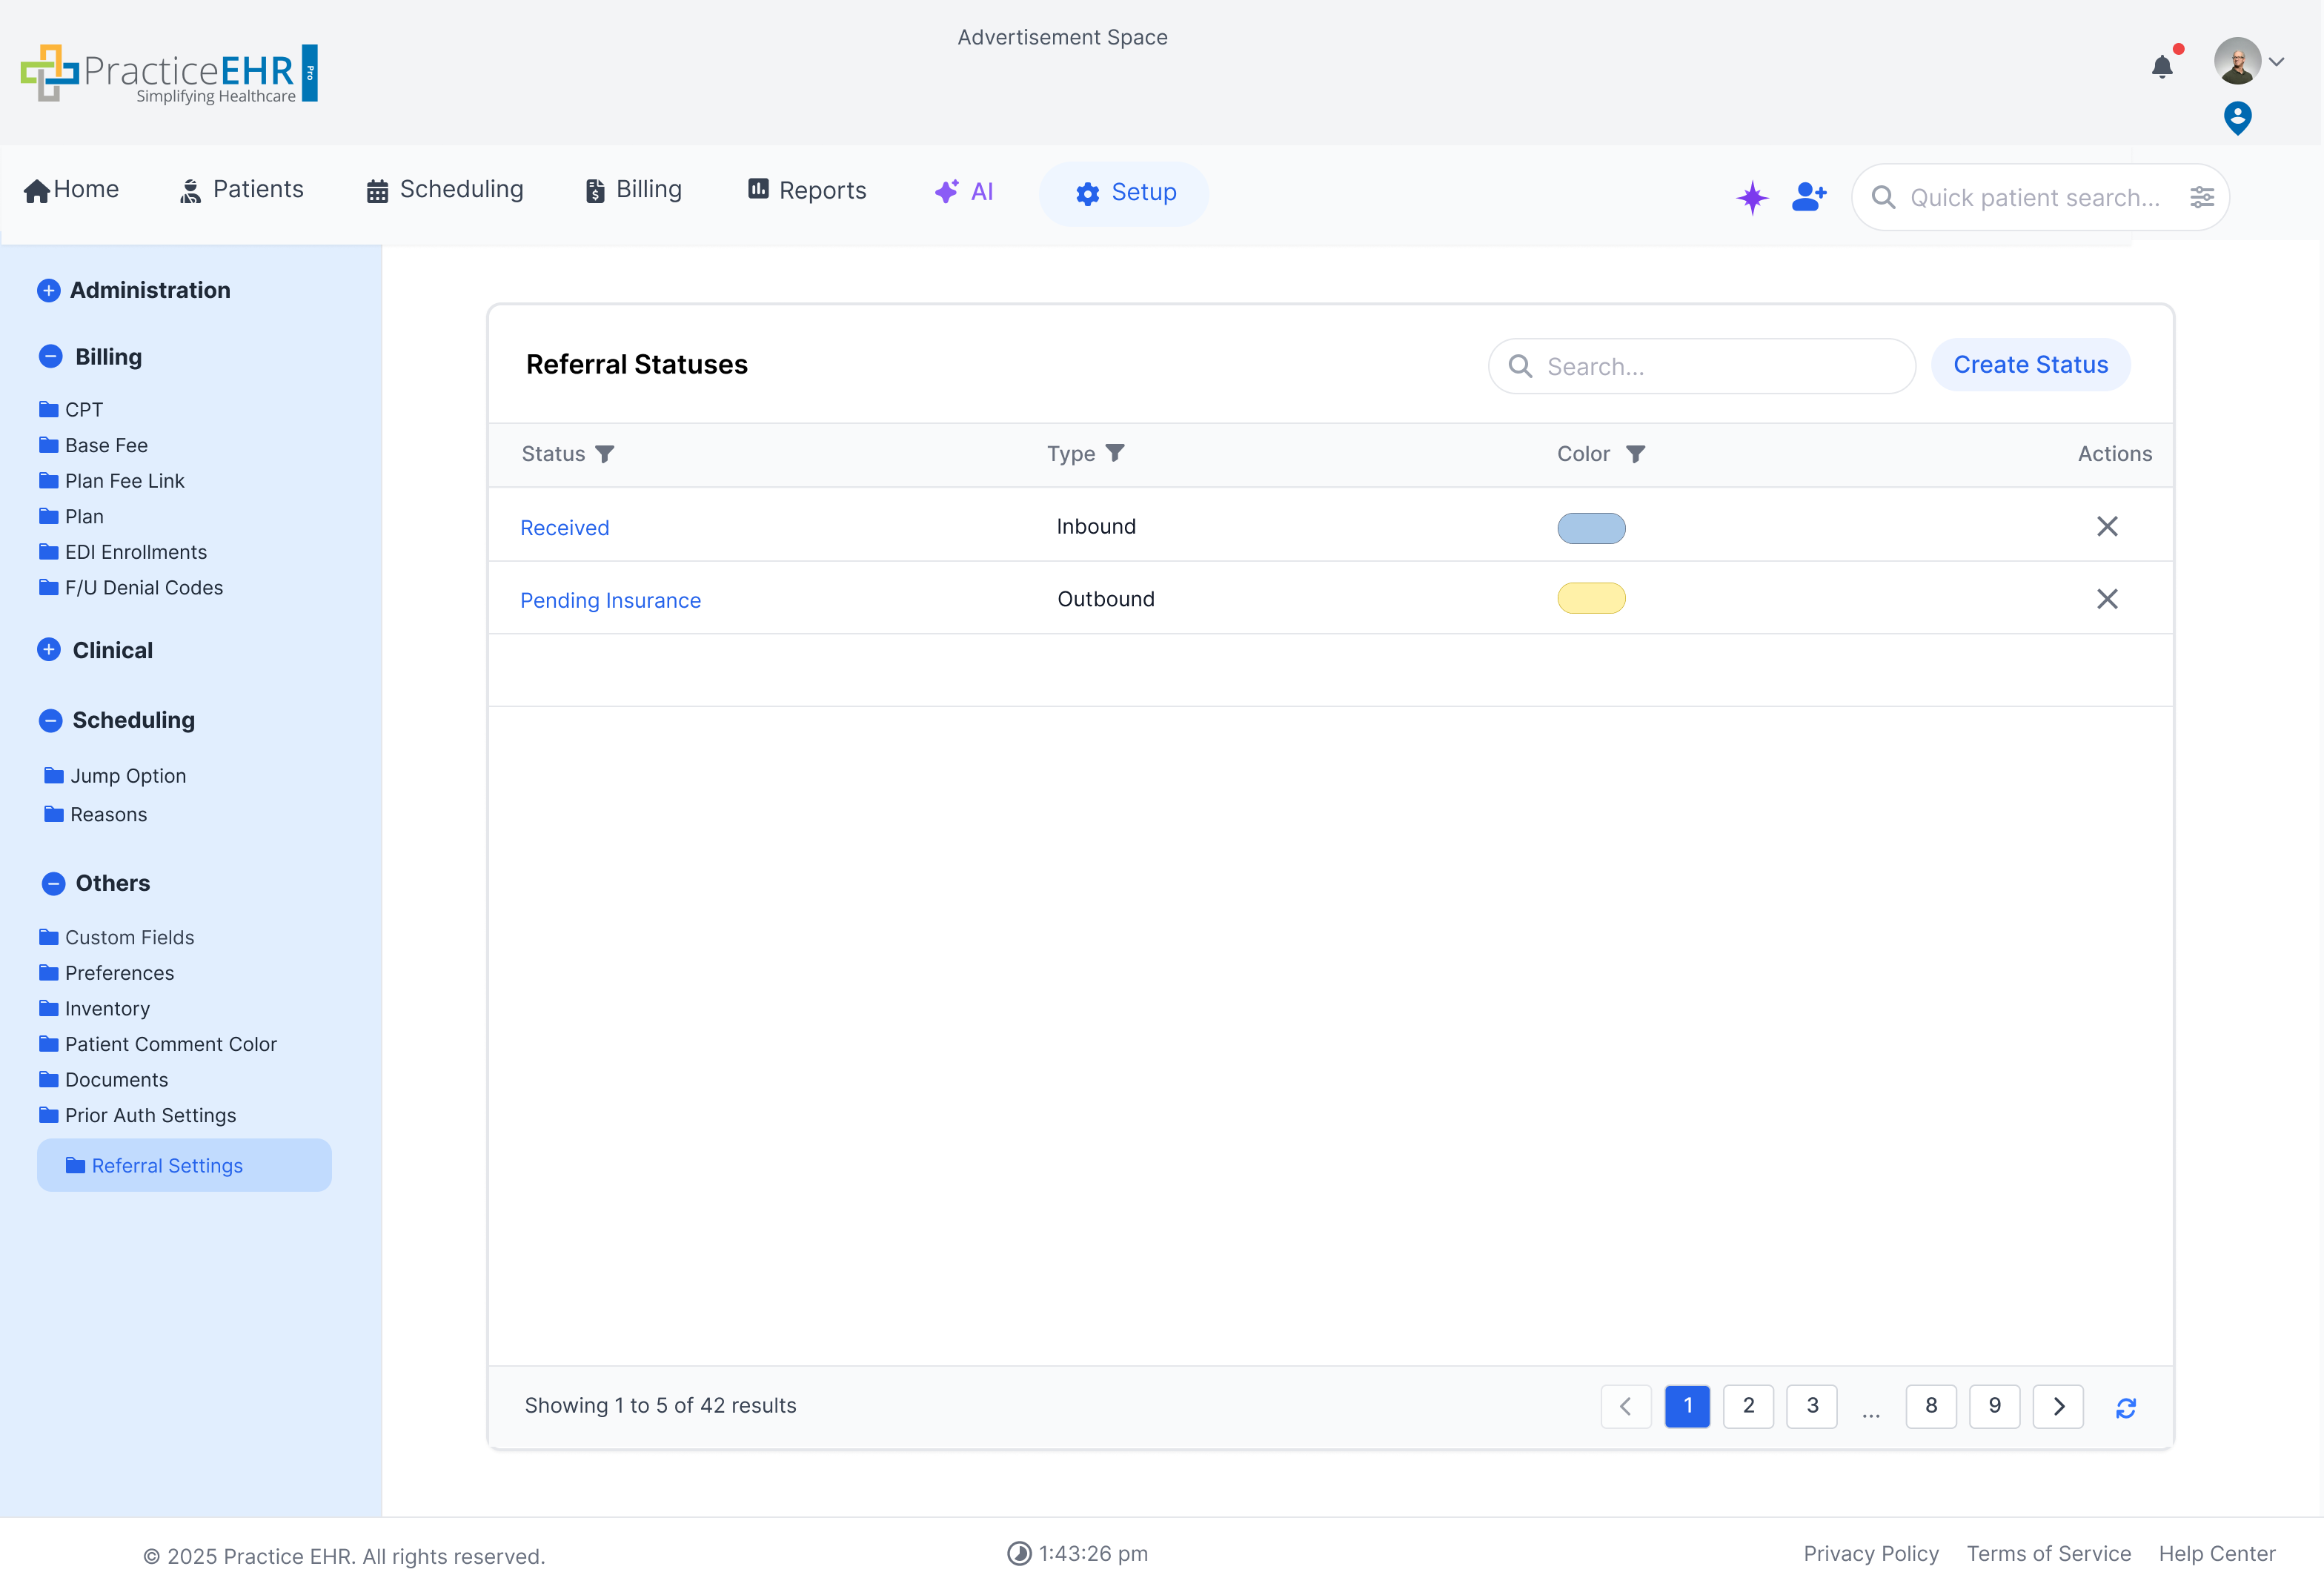
This section is part of the "Prior Auth & Referral Settings". It allows
users to manage custom statuses for Referrals. For the full workflow, see
Referral Management
and
Prior Auth.
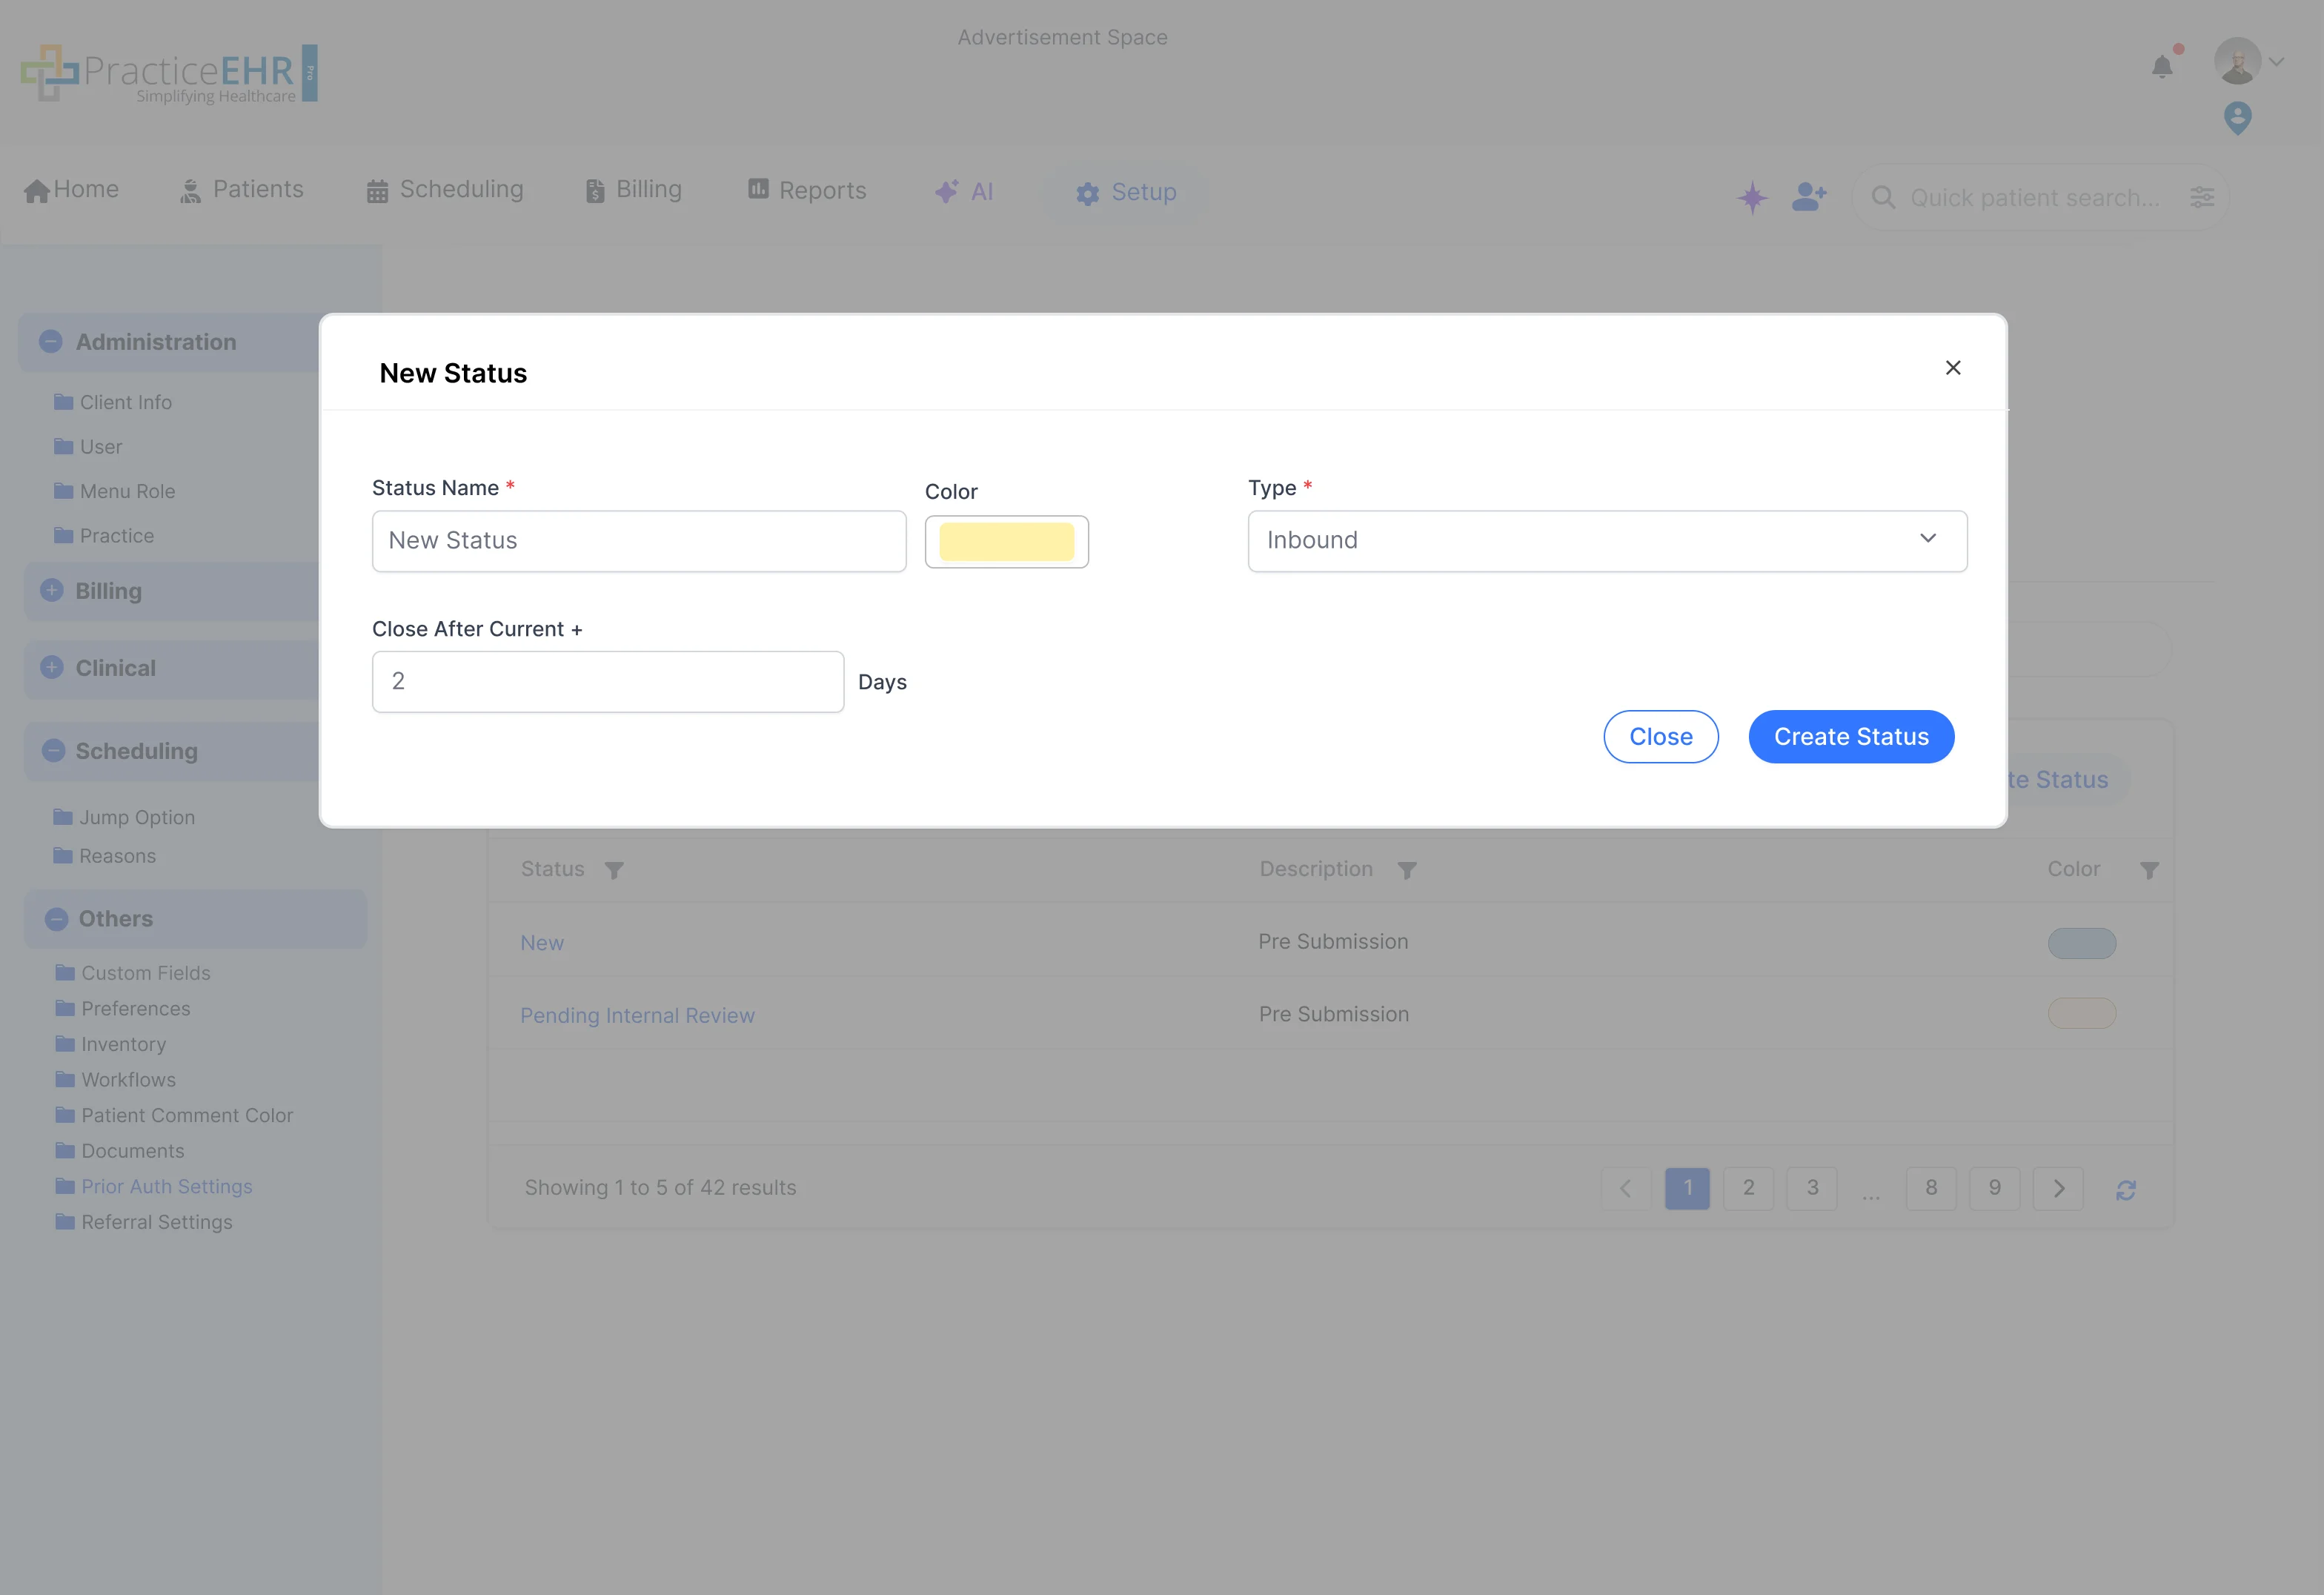
Referral Status Management
Users can create custom statuses for Referrals by clicking the 'Create Status'
button.
Each status can be assigned a unique color for quick visual identification.
The creation modal allows users to define the status name, type, color, and
Closing + value.
Closing + automatically closes or dismisses the item after the selected
time if it is still in that status.
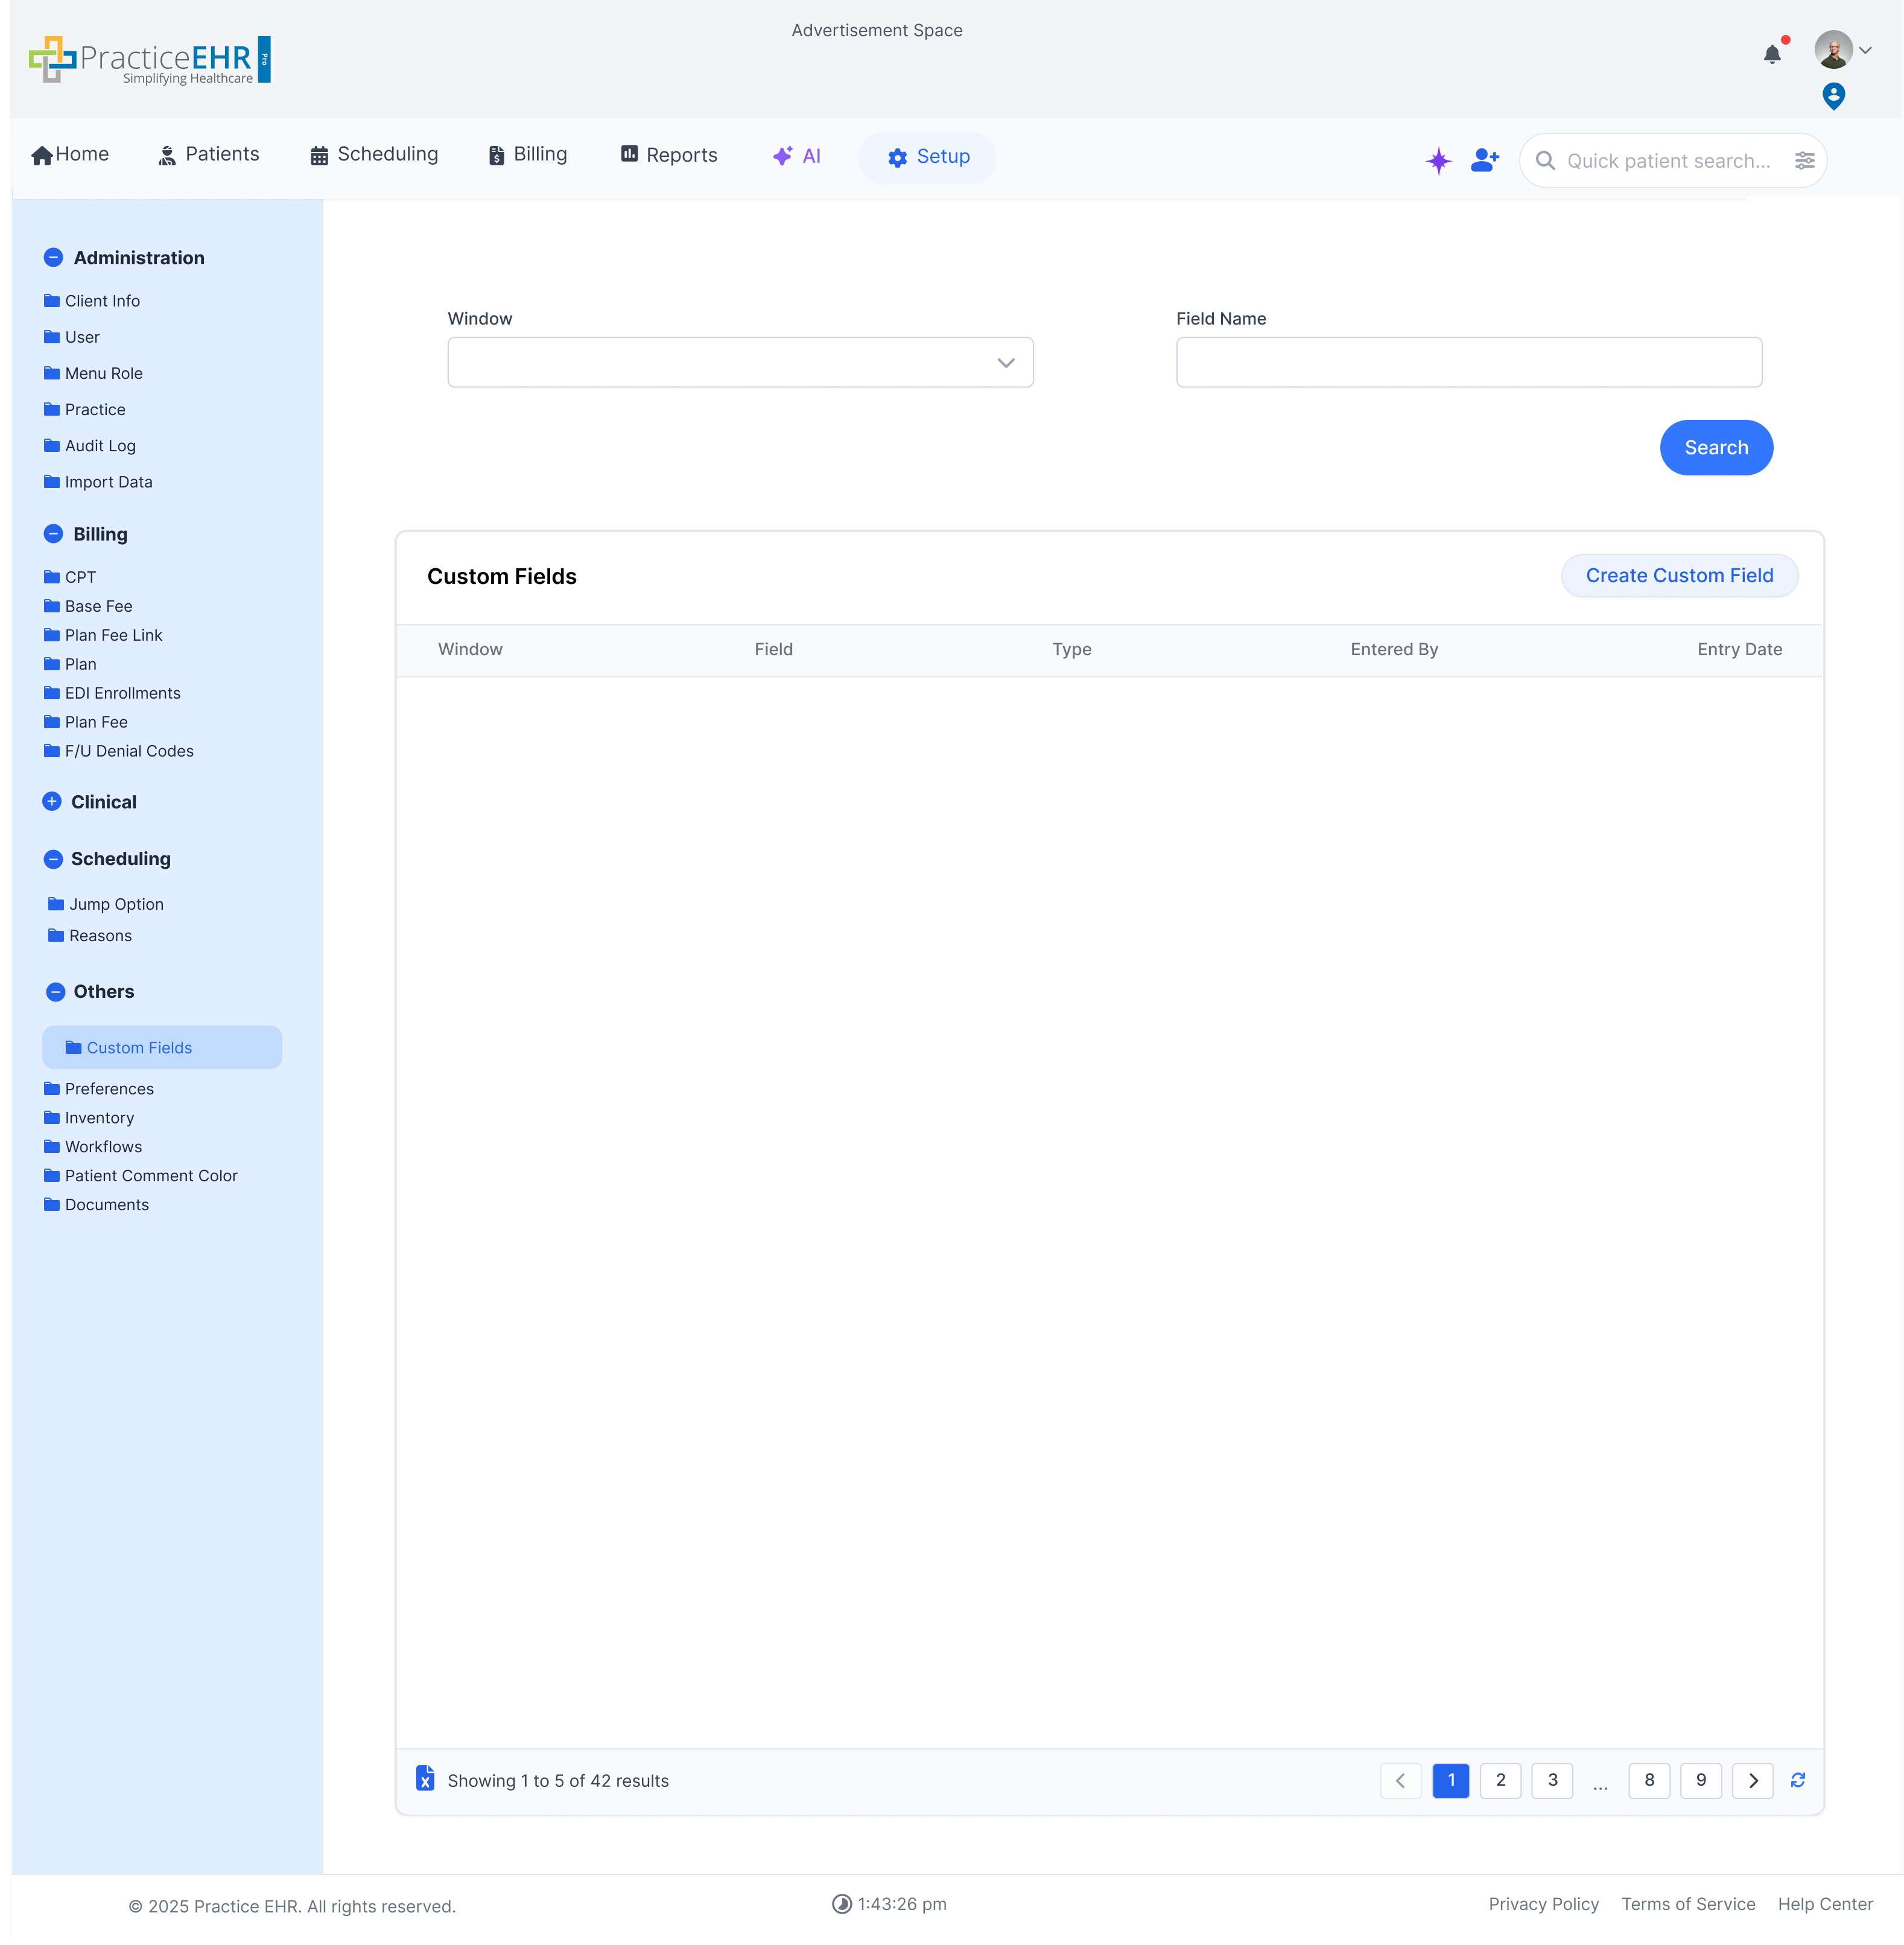
Custom Fields
Setup / Others
Create and manage custom data fields to capture information specific to
your practice's needs.
Custom Field Management
Search for custom fields by Window or Field Name.
The grid displays all created custom fields, including their type and who entered
them.
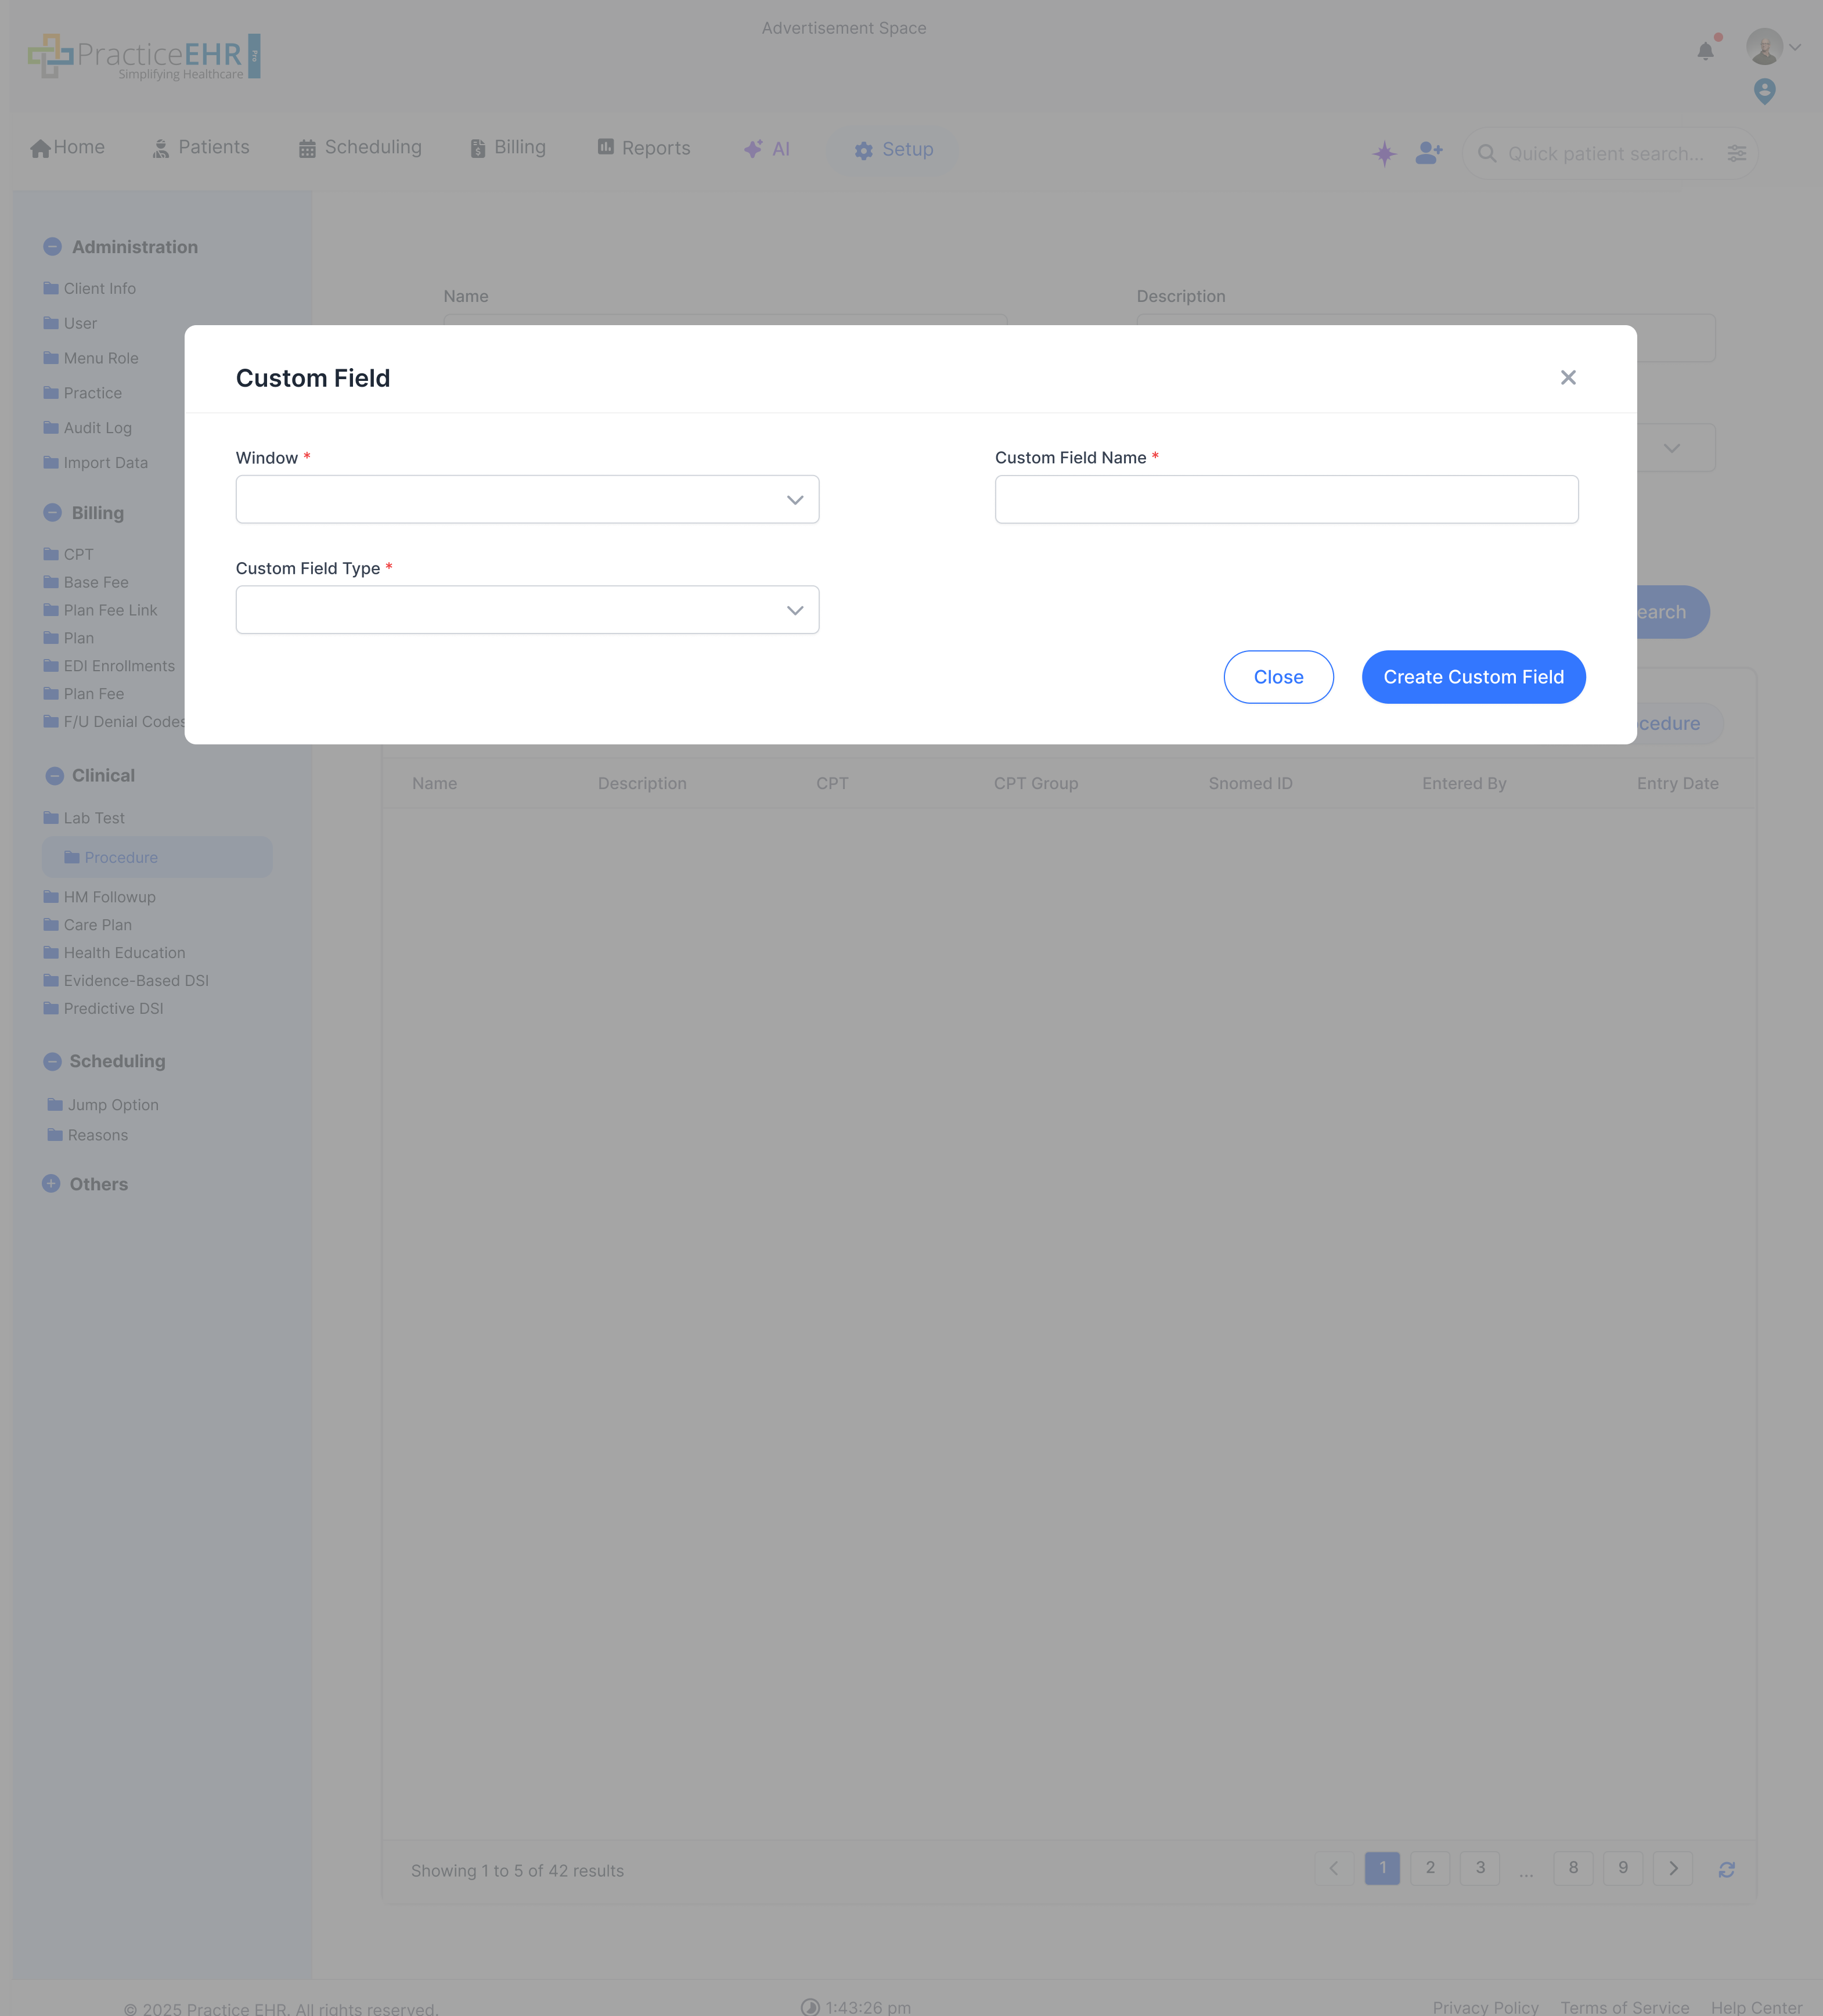
Click "Create Custom Field" to add a new field to a specific window in the
application.
Create Custom Field
The create screen focuses on the window, field type, and metadata needed to add a
new configurable field.
It is the screen behind the "Create Custom Field" action when a new data point is
needed in setup.
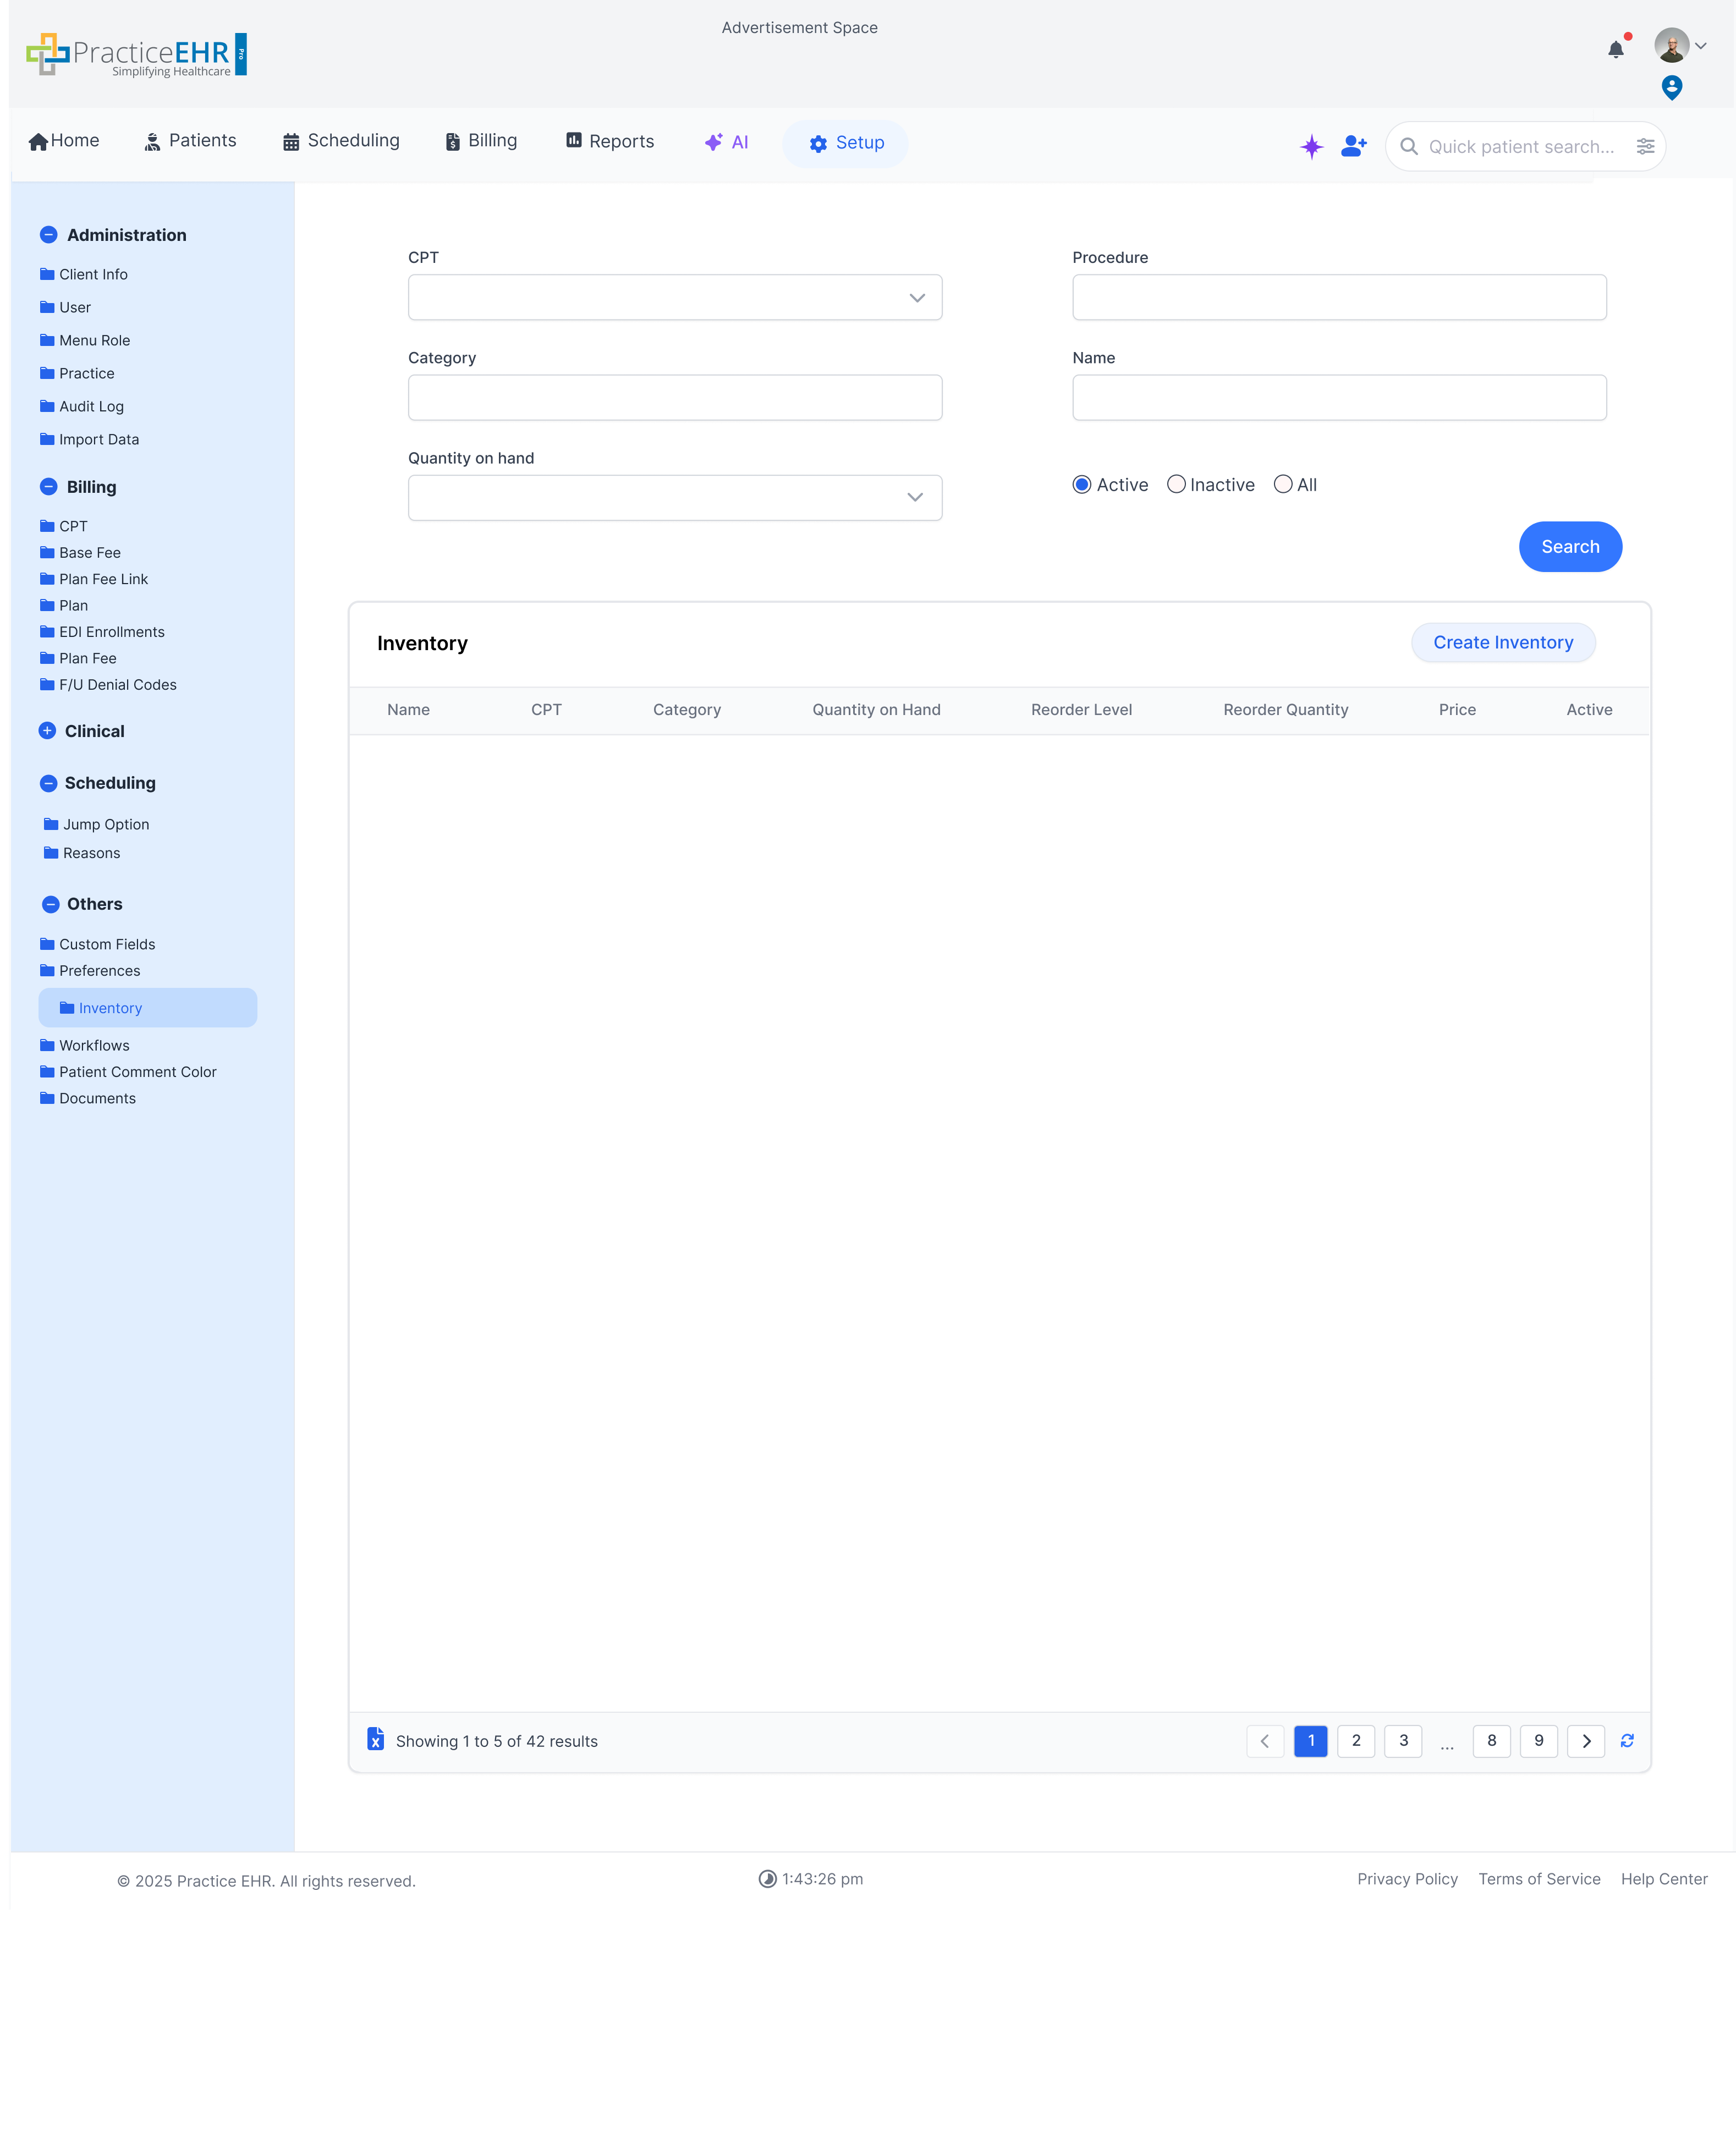
Inventory
Setup / Others
Manage practice inventory, including supplies and medications. Track stock
levels, reorder points, and more.
Inventory Management
Search for inventory items by CPT, Category, Procedure, or Name.
Filter by status (Active, Inactive, All).
The grid tracks Quantity on Hand, Reorder Level, and Reorder Quantity.
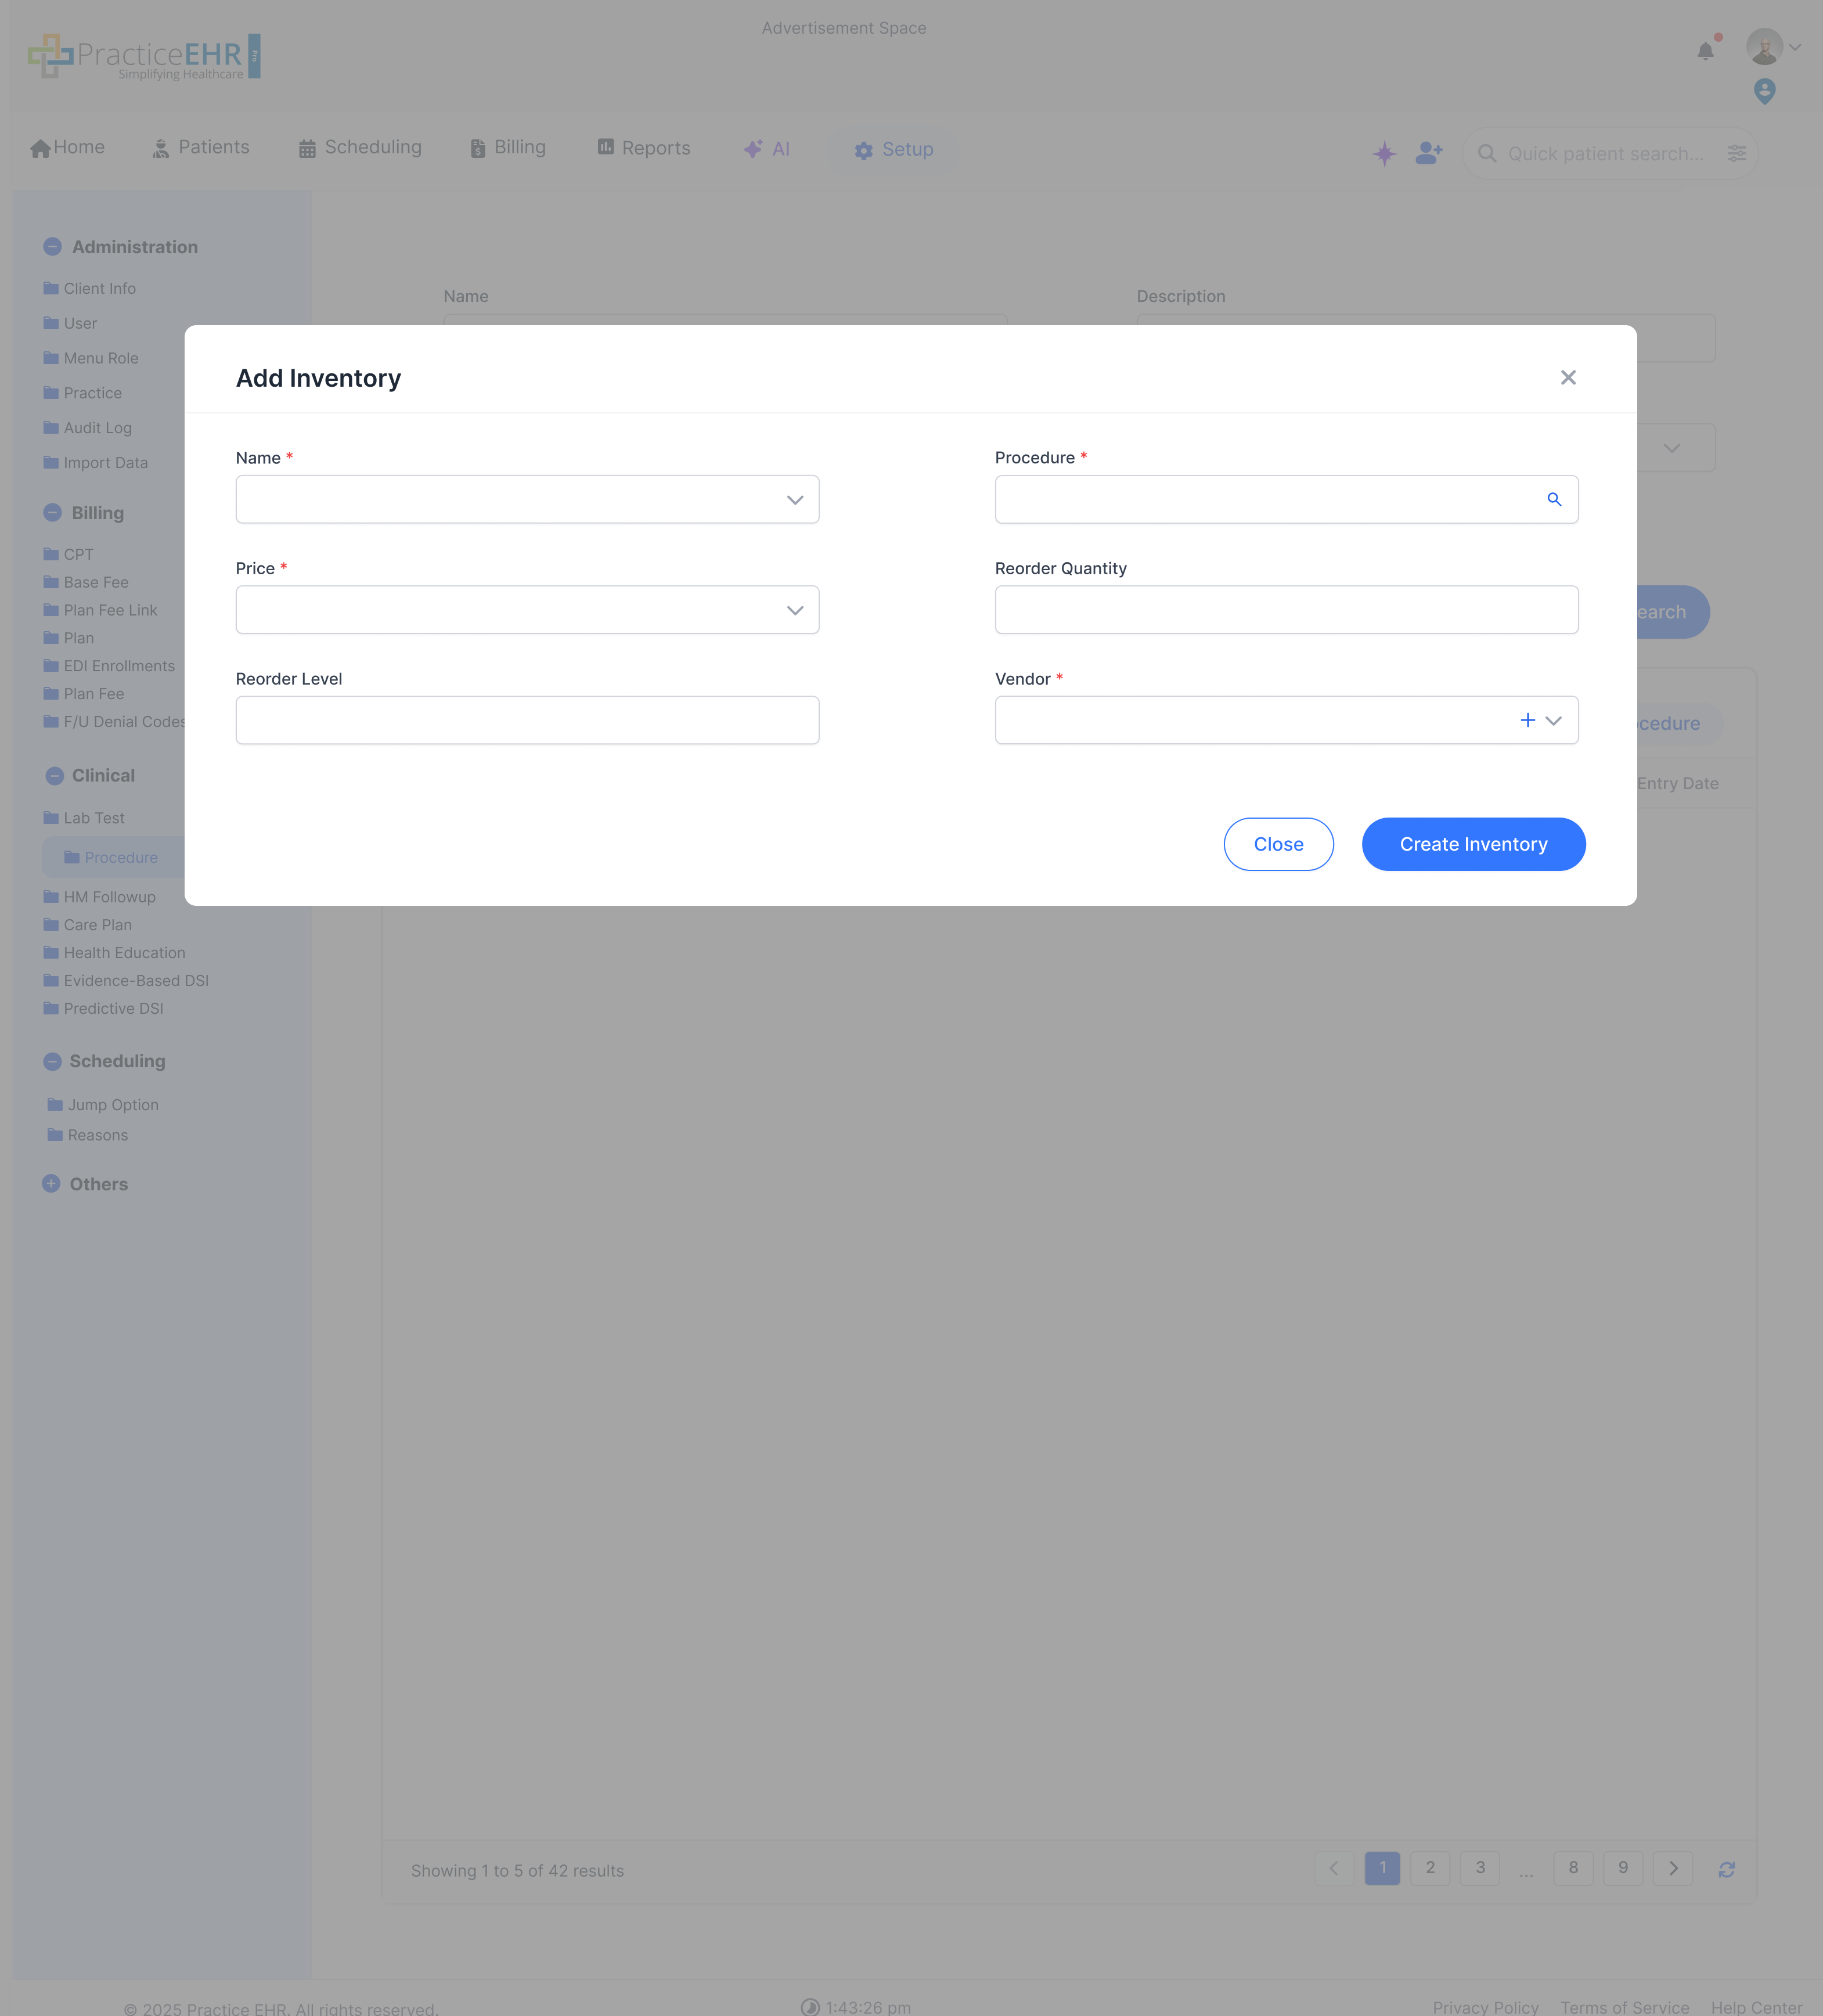
Click "Create Inventory" to add a new item to the inventory.
Create Inventory
The create form captures the item setup details needed for stock tracking and
ongoing inventory management.
It is the focused entry screen used when a brand-new inventory item needs to be
configured.
Add Vendor
This screen is used to add a vendor record for inventory-related purchasing and
supplier tracking.
Use it when a new supplier needs to be available while managing inventory items.
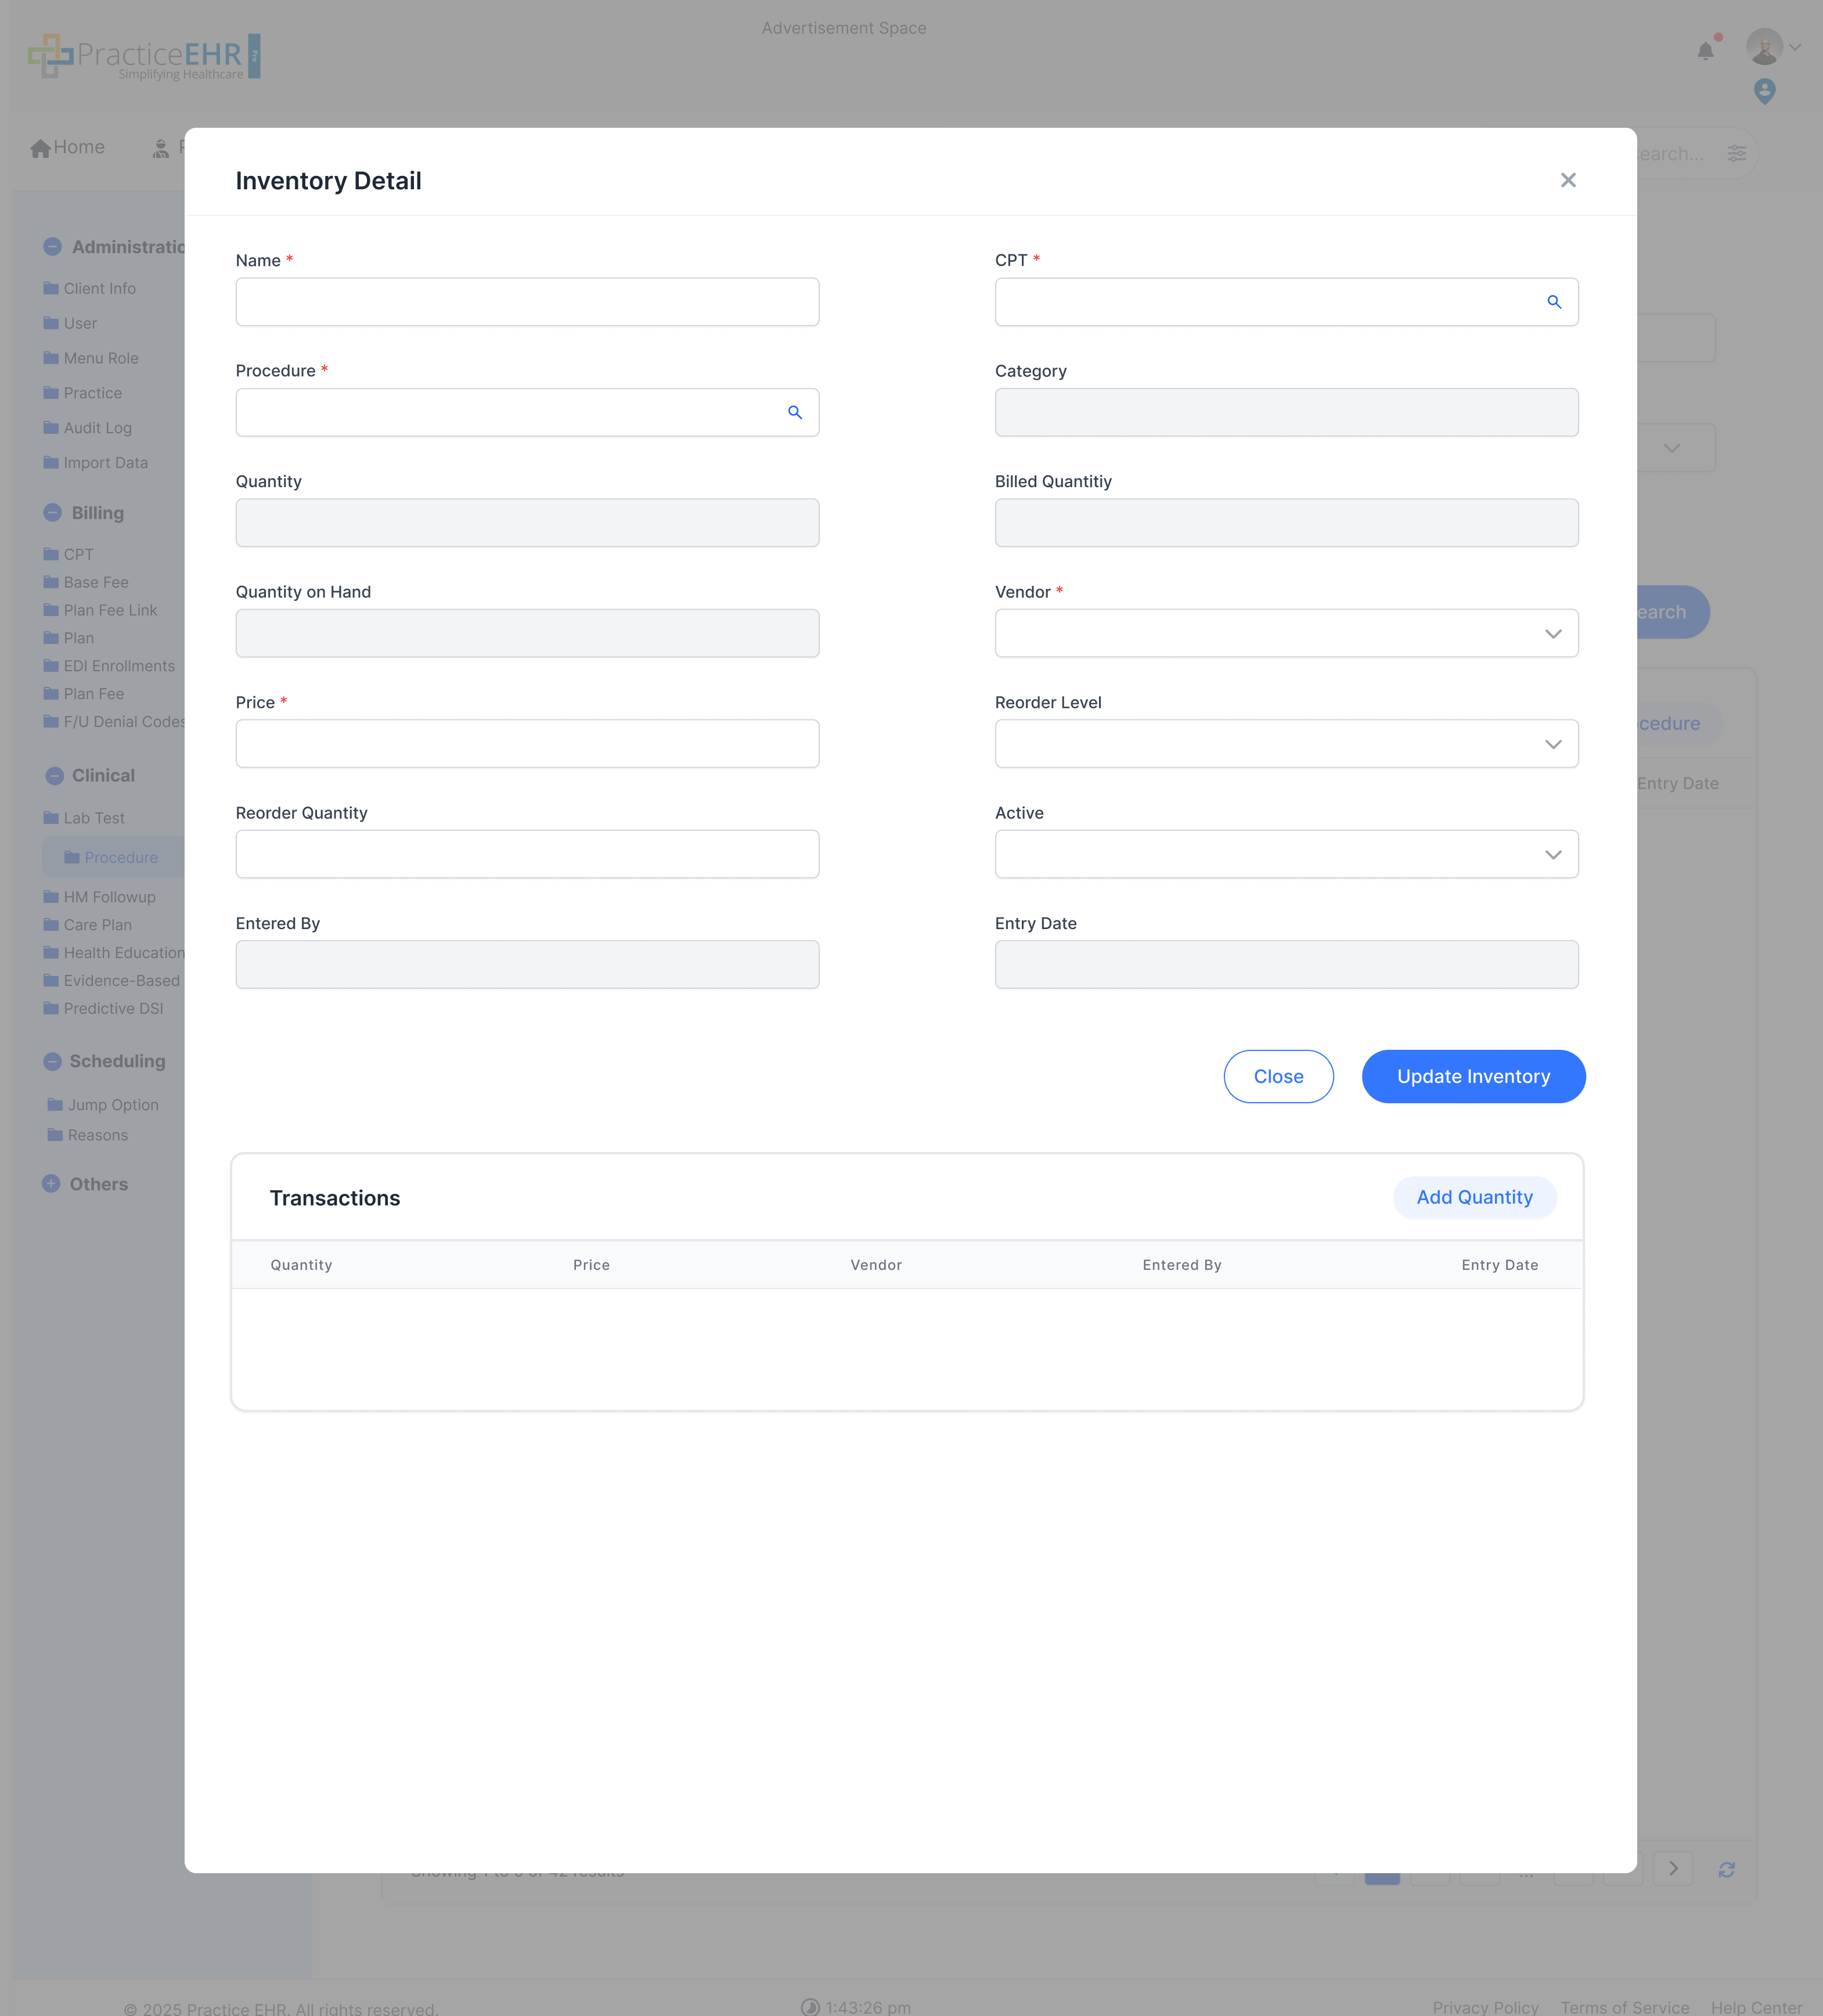
Inventory Details
This screen shows the detailed setup and tracking information for a selected
inventory item.
Use it to review or update item-specific information after the inventory record has
been created.
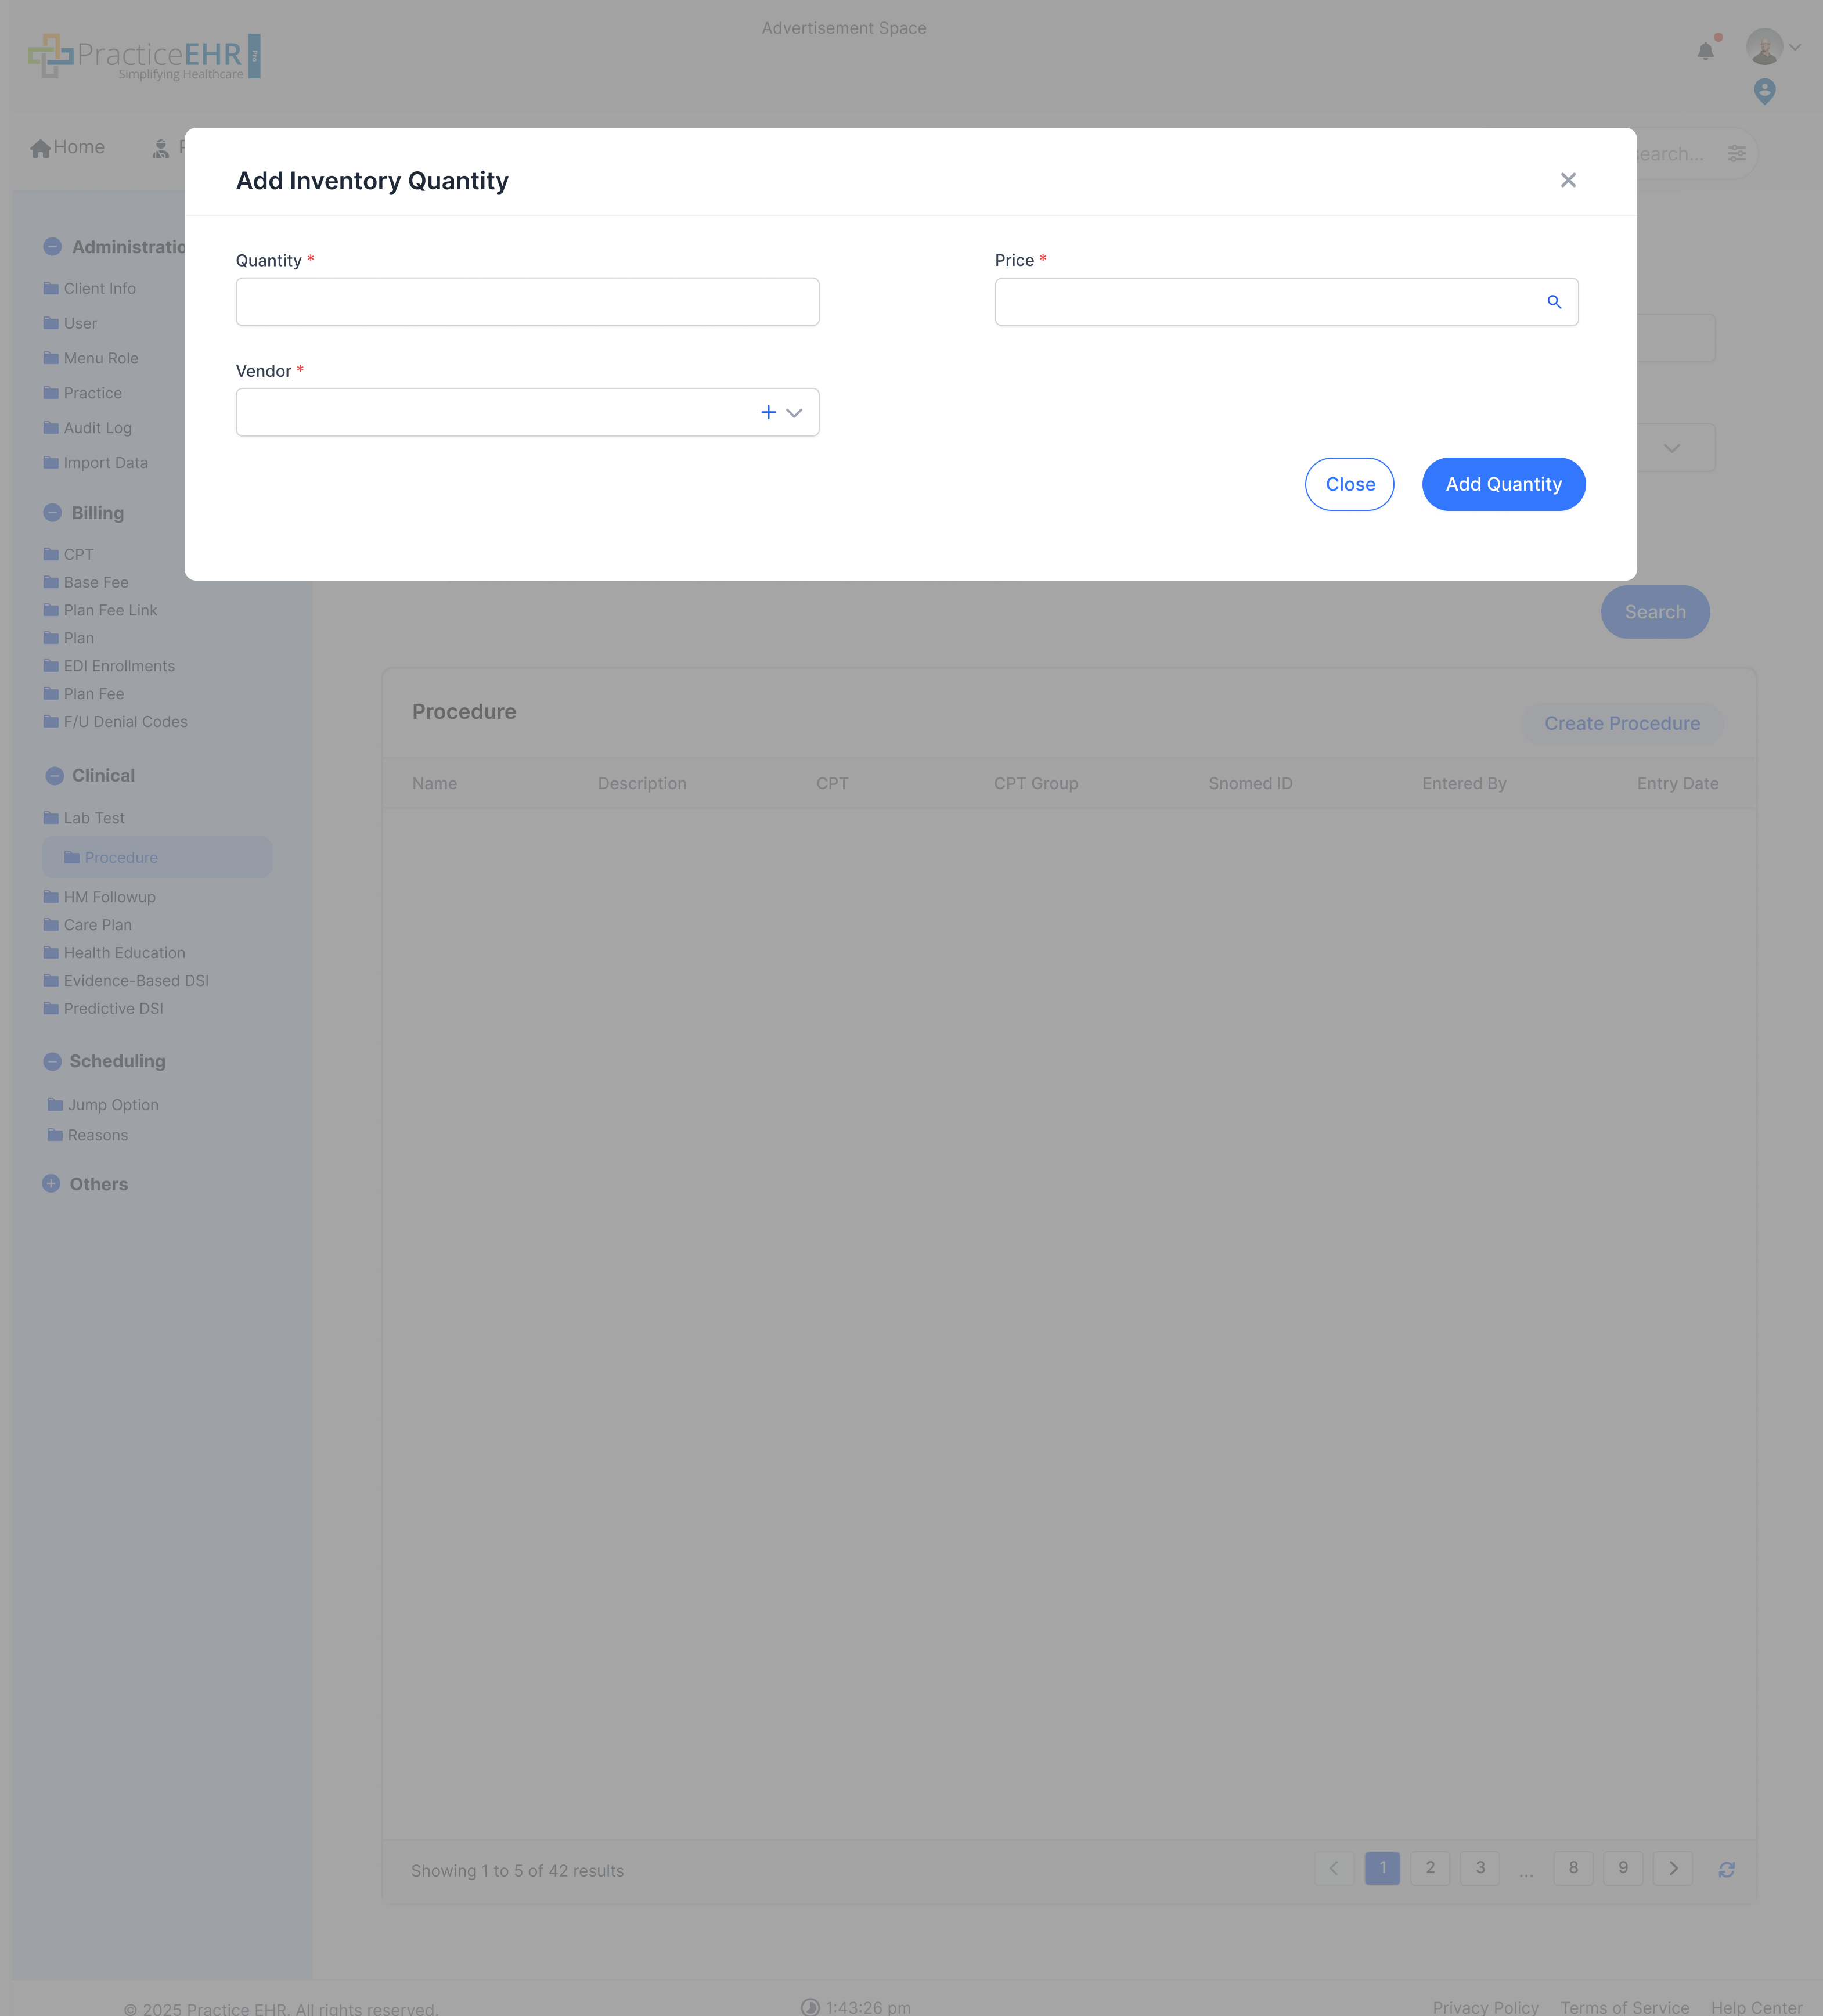
Add Quantity
This screen is used to increase stock for an inventory item by recording an added
quantity.
Use it when new stock is received and the on-hand quantity needs to be updated.
Prior Auth & Referral Settings
Setup / Others
This section allows users to manage the statuses for both Prior
Authorizations and Referrals, improving workflow visibility and control. For the full
workflows, see
Prior Auth
and
Referral Management.
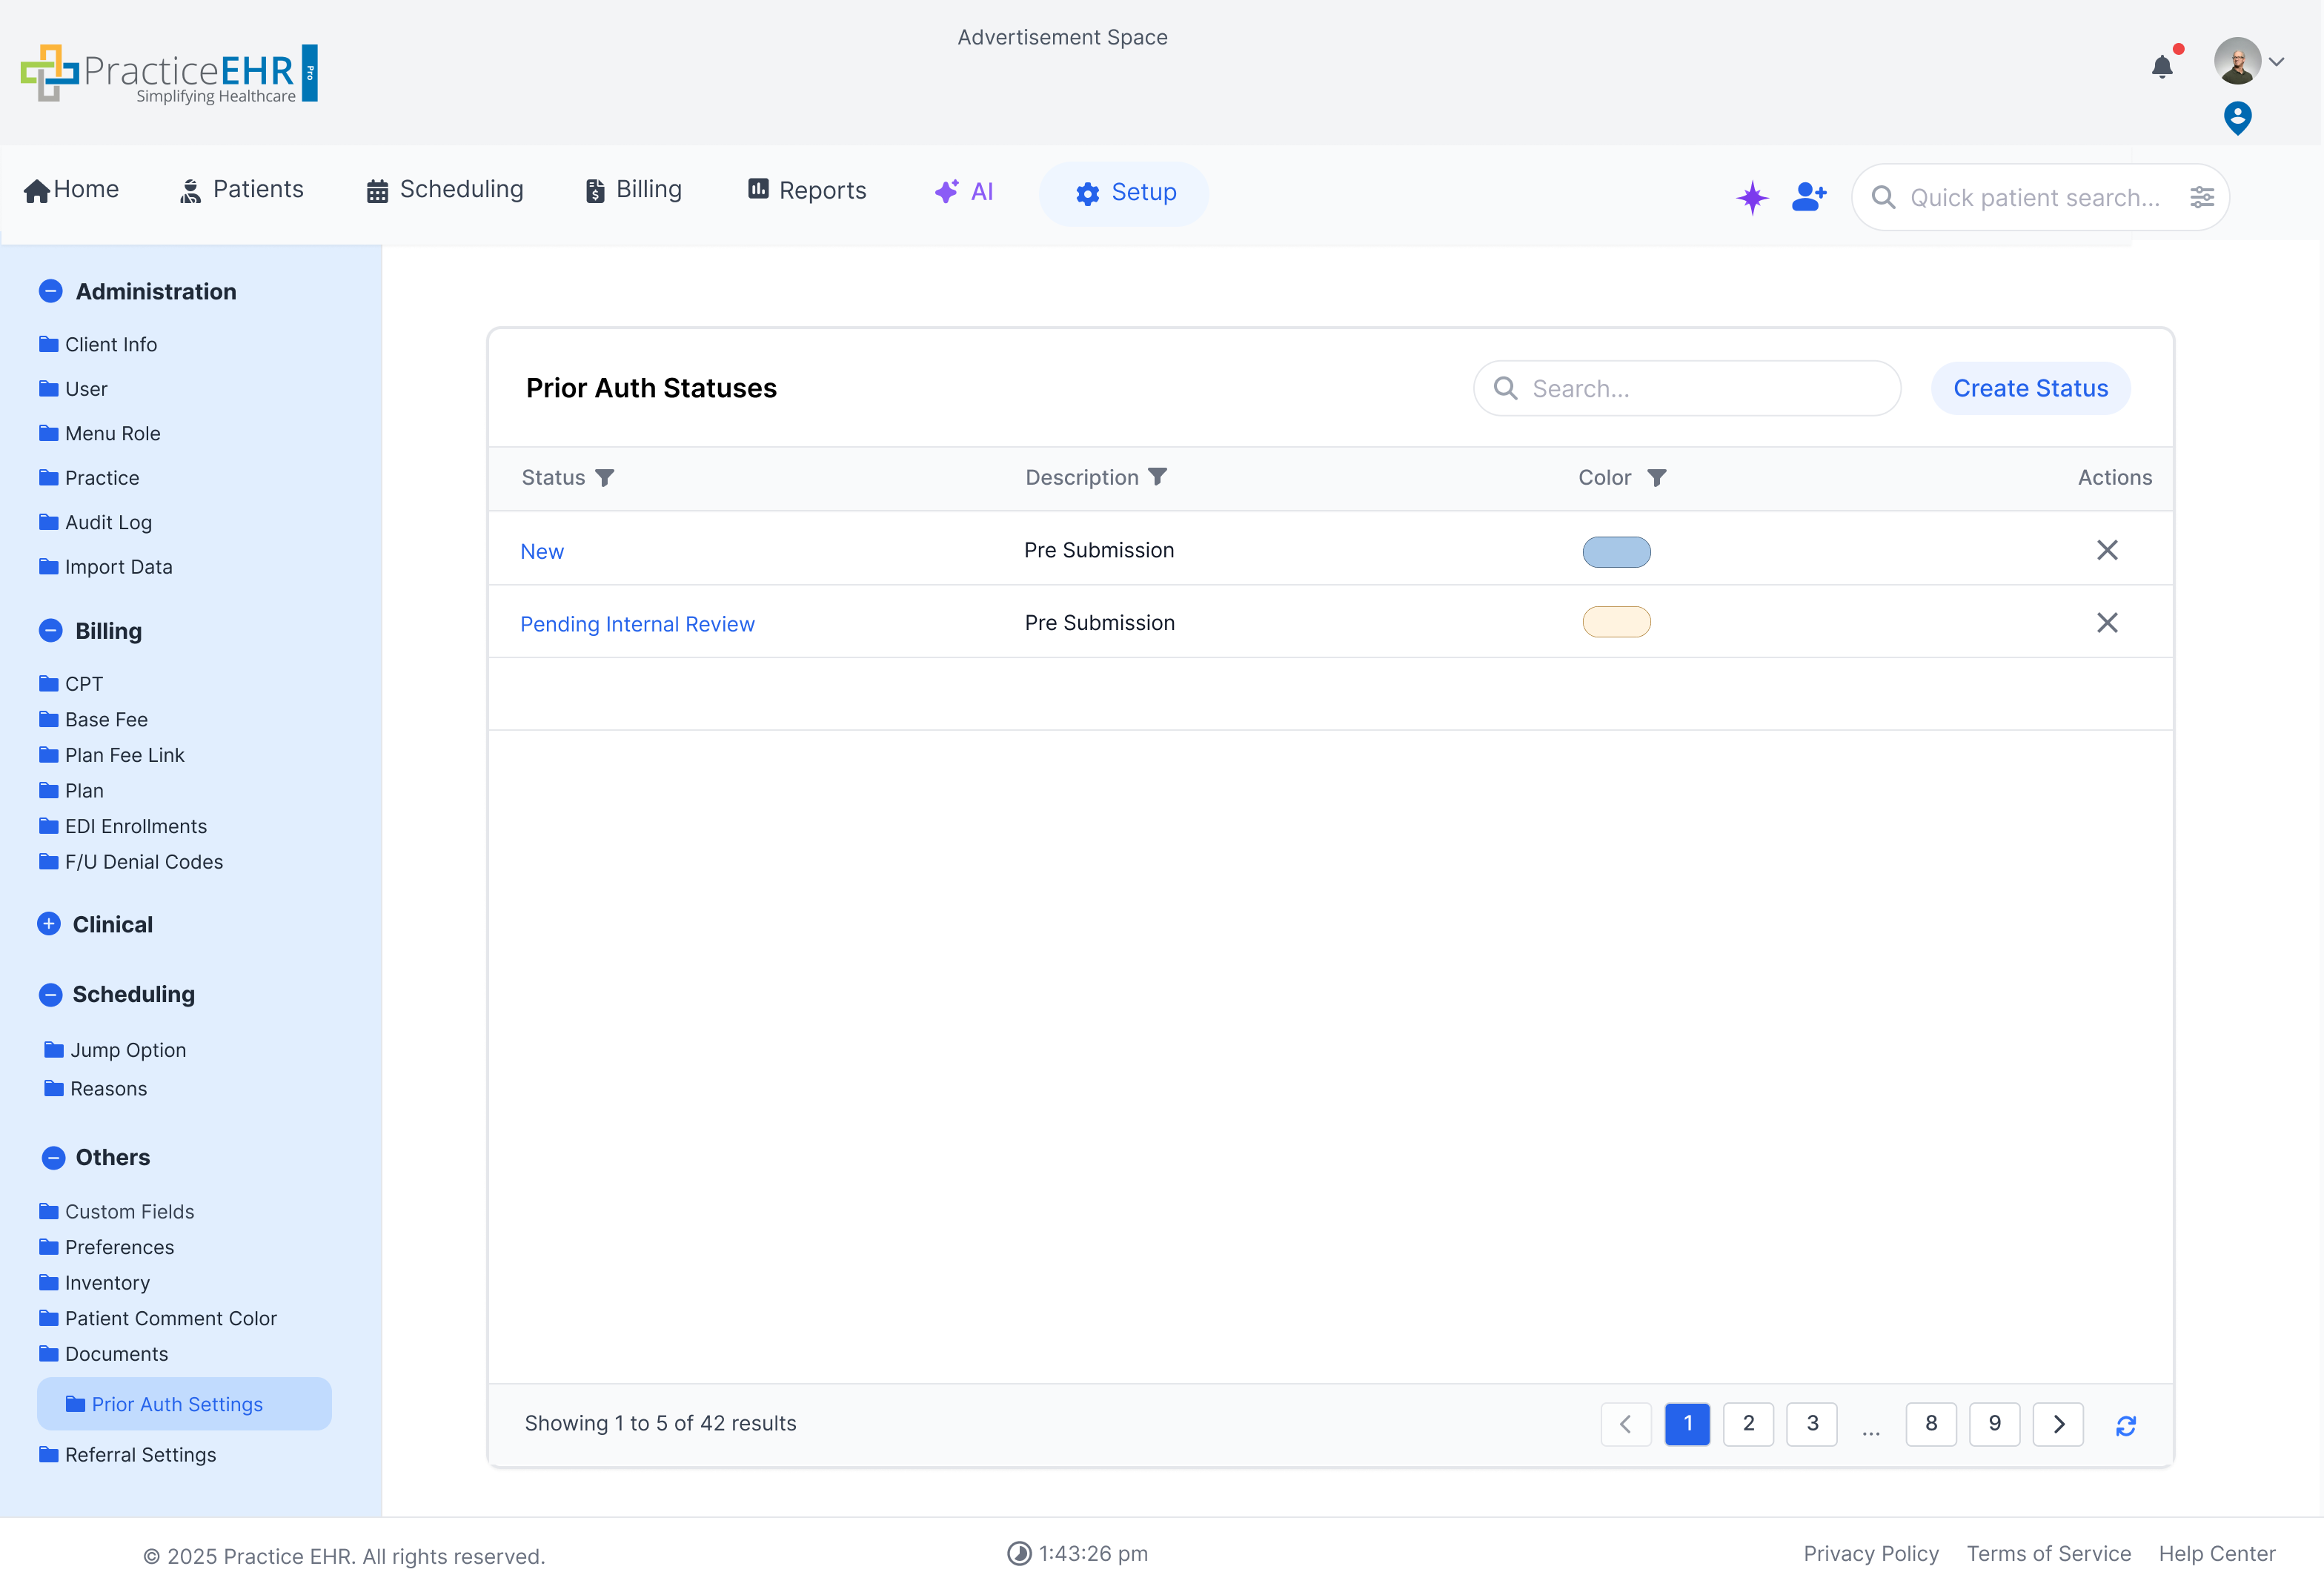
Status Management
Users can create custom statuses for Prior Authorizations and Referrals by clicking
the 'Create Status' button.
Each status can be assigned a unique color for quick visual
identification in grids and workflows.
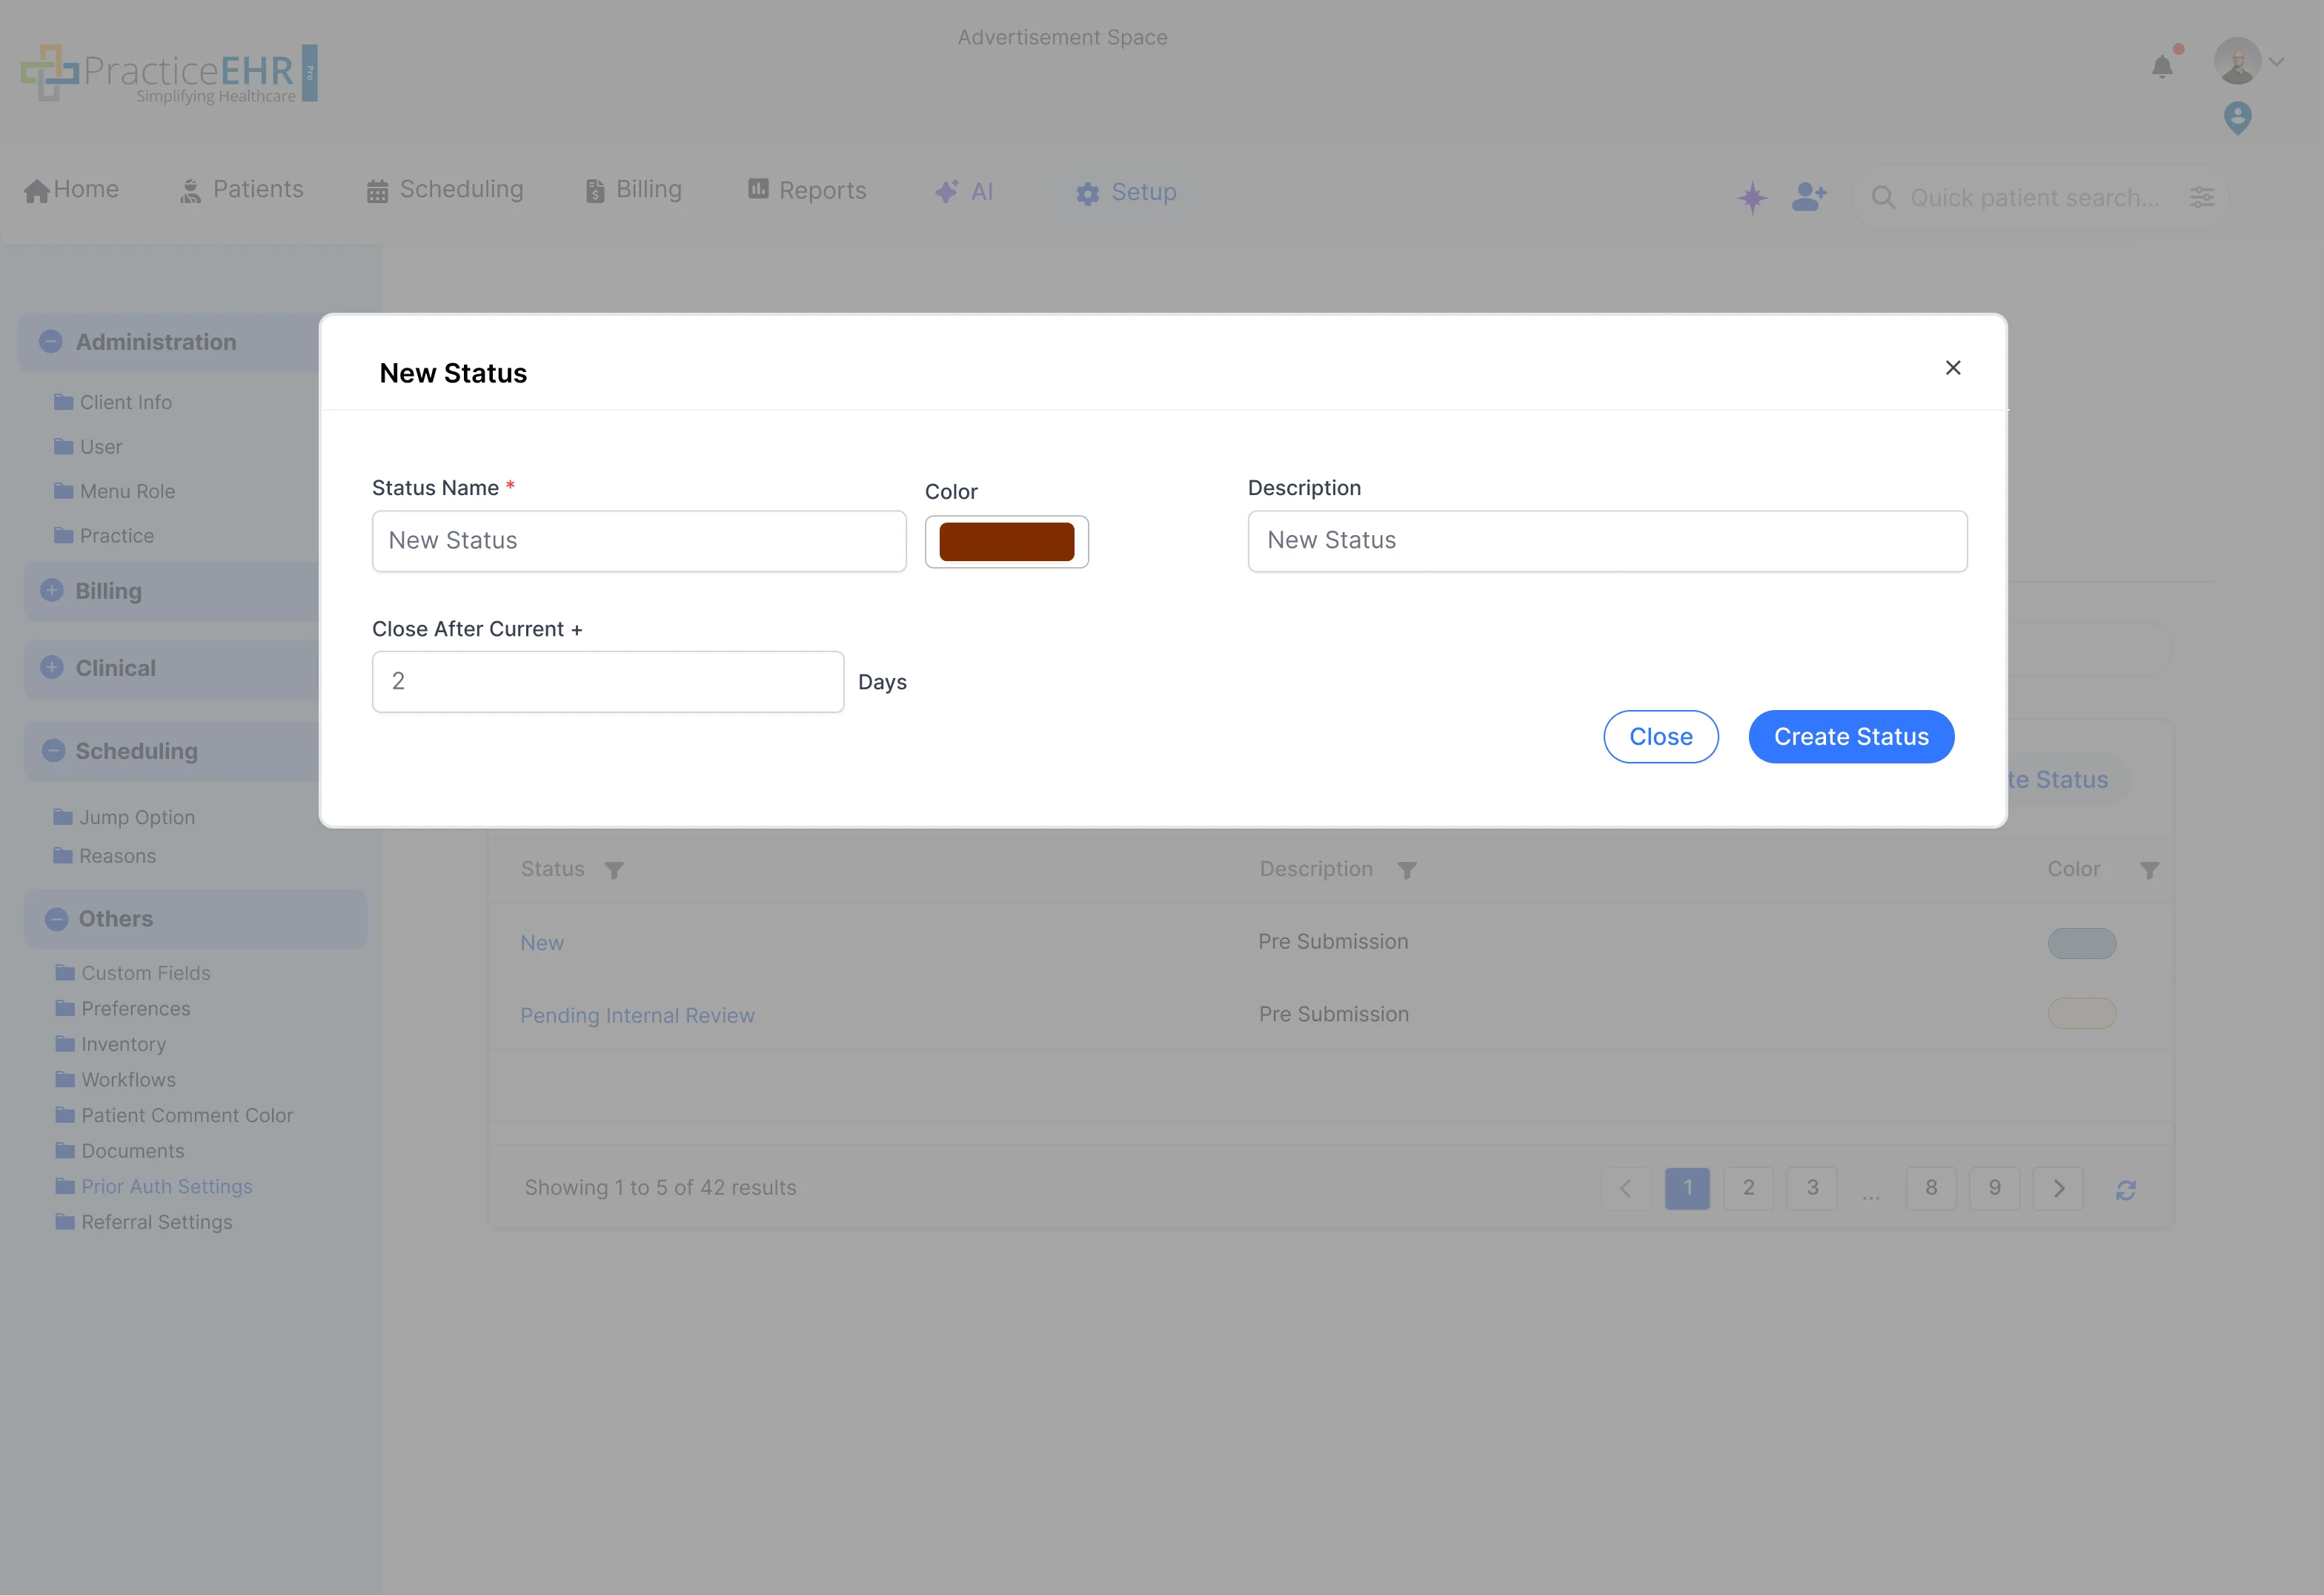
The creation modal allows users to define the status name, description (or type for
referrals), color, and Closing + value.
Closing + automatically closes or dismisses the item after the selected
time if it is still in that status.
Deletion Rules & System Integrity
To maintain system logic and data integrity, certain statuses are protected.
Statuses that are automatically generated by the AI system cannot
be deleted by users.
Additionally, statuses that signify the end of a process and terminate a
workflow loop are also locked and cannot be removed.
Medication
Setup / Clinical
This section is for managing Medication configurations. (Placeholder)
Placeholder
Detailed content and image for Medication setup will be added later.
Schedule Reason
Setup / Clinical
Manage reasons used for scheduling appointments. (Mapped from image titled
'Schedule Reason').
Schedule Reason Management
Displays a grid of schedule reasons, including Description, Color, and Duration.
Use the search bar at the top right to quickly find reasons.
Click "Create Reason" to add a new scheduling reason.
Color coding helps visually differentiate reasons in the schedule.
Workflows
Setup / Others
This section is for managing Workflows. (Placeholder)
Placeholder
Detailed content and image for Workflow setup will be added later.
Patient Comment Color
Setup / Others
This section is for managing Patient Comment Color configurations.
(Placeholder)
Placeholder
Detailed content and image for Patient Comment Color setup will be added later.
Documents
Setup / Others
This section is for managing Document configurations. (Placeholder)
Placeholder
Detailed content and image for Document setup will be added later.
.png)


.png)