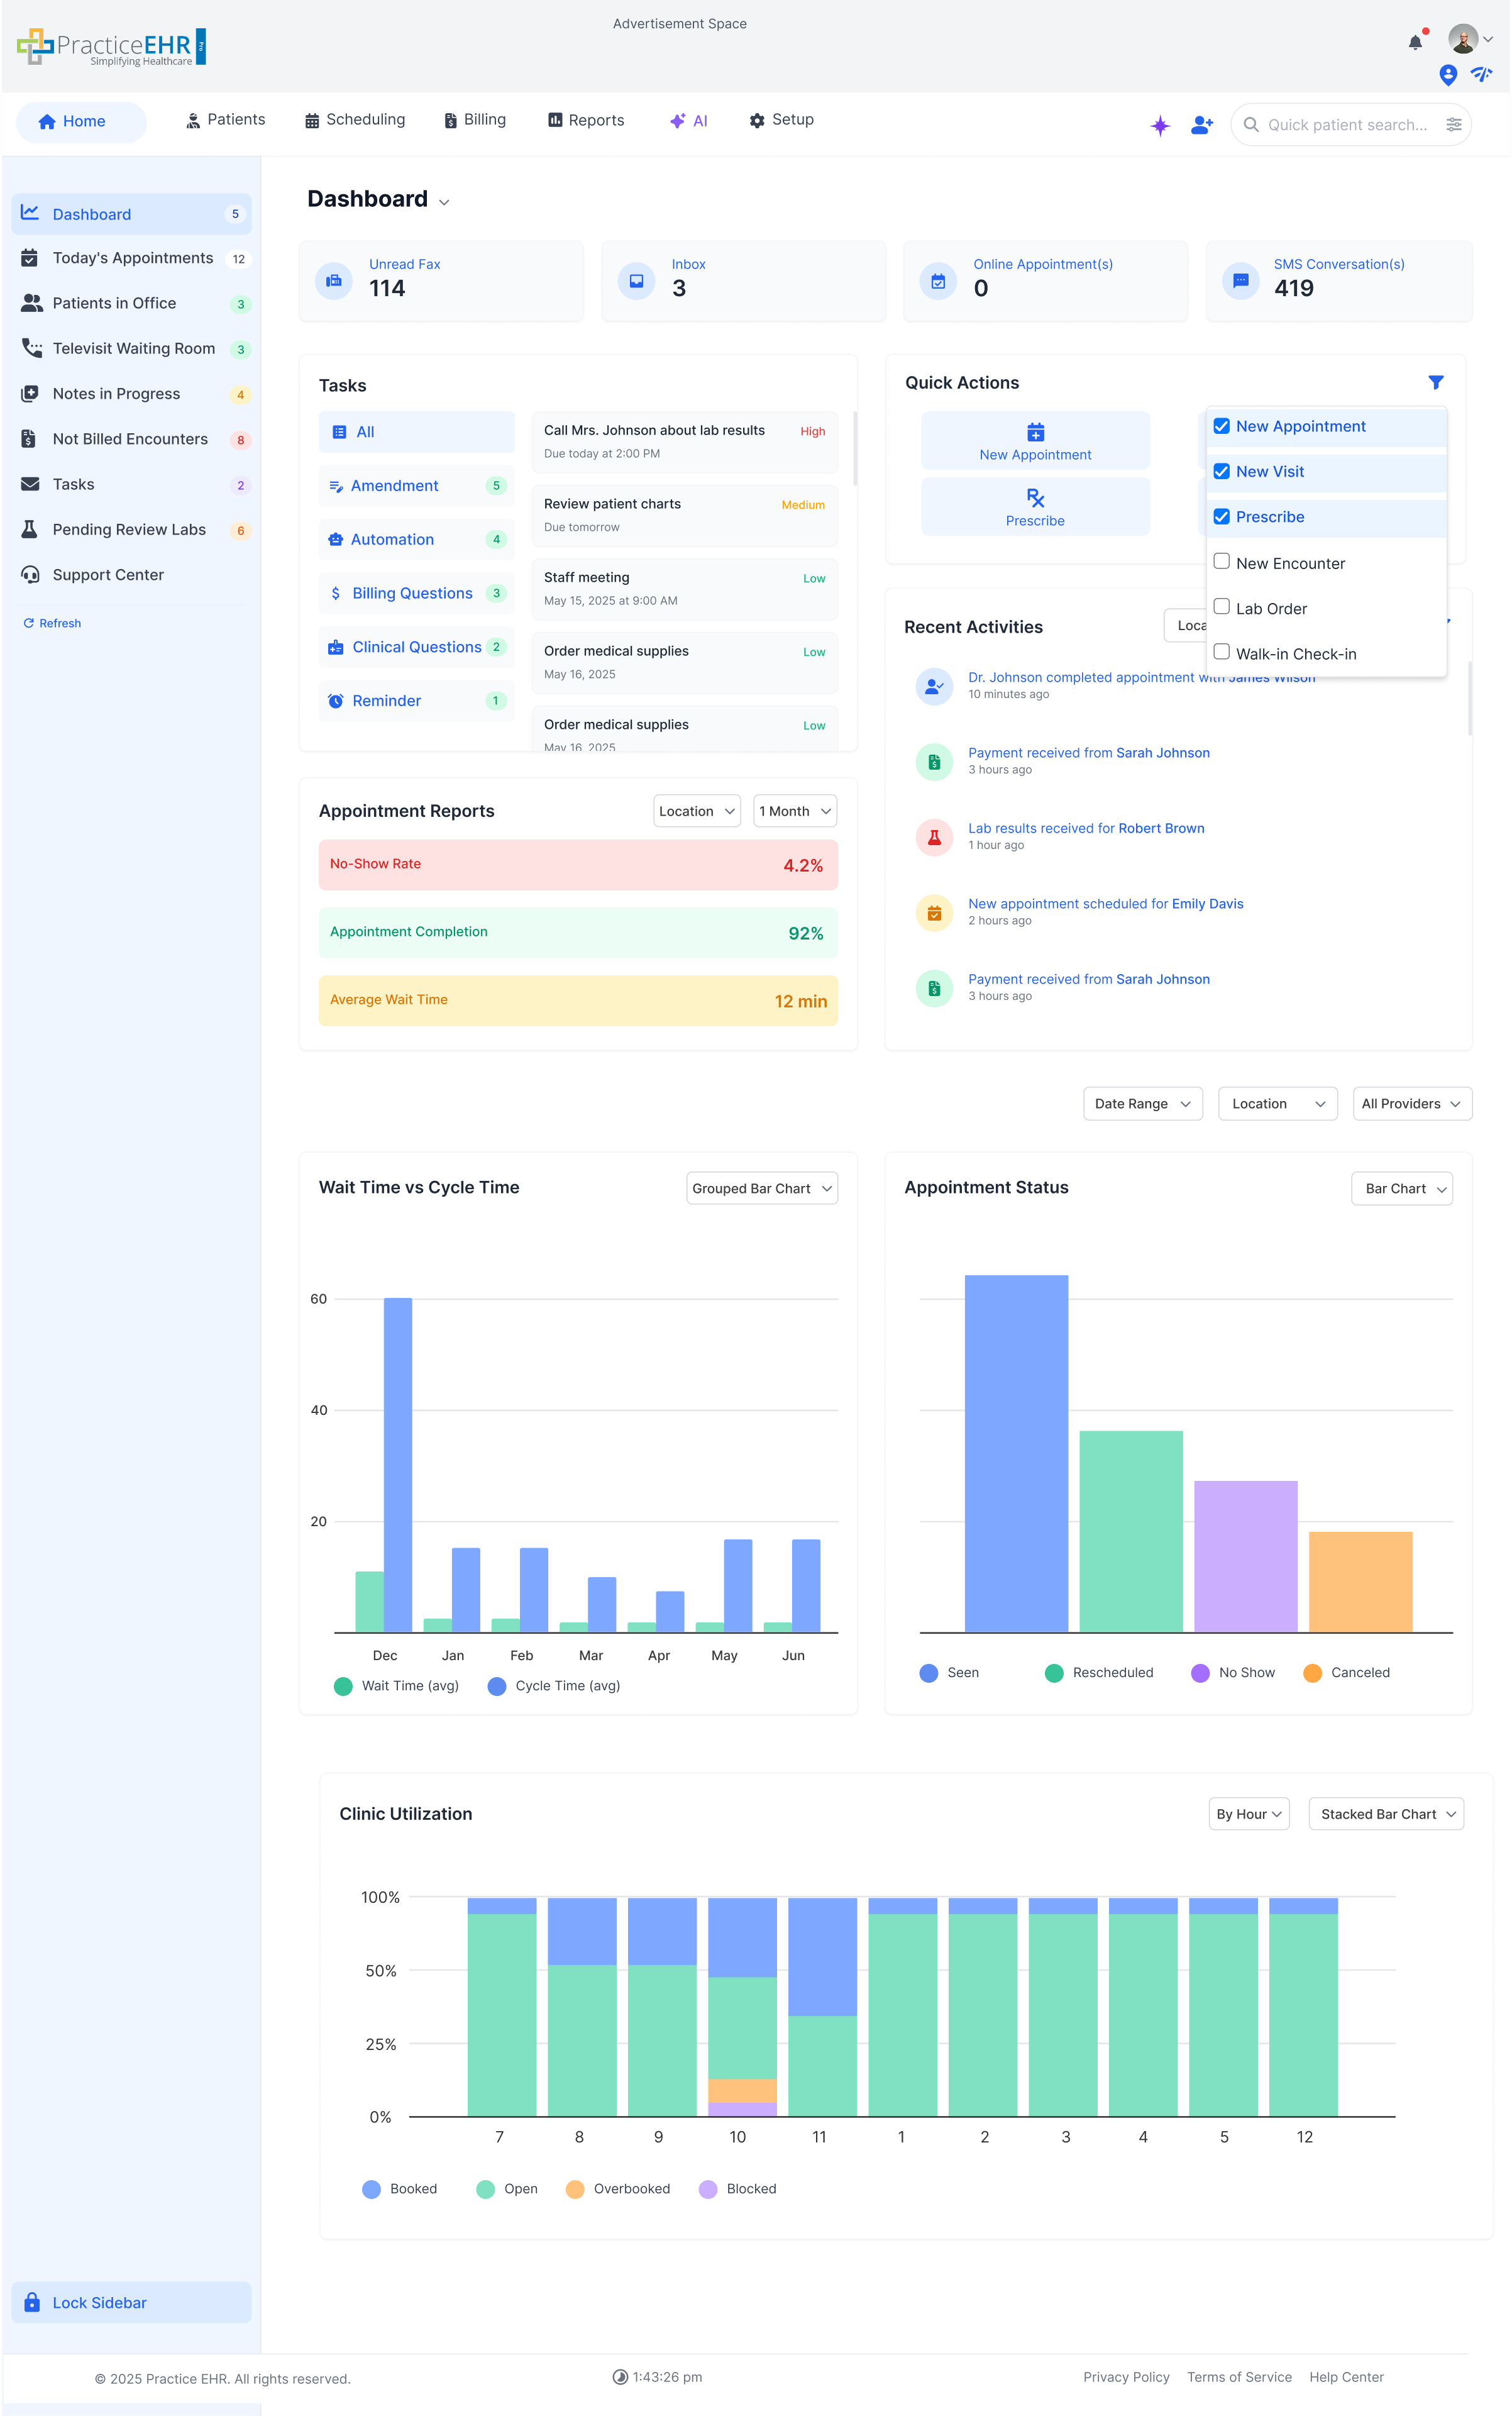
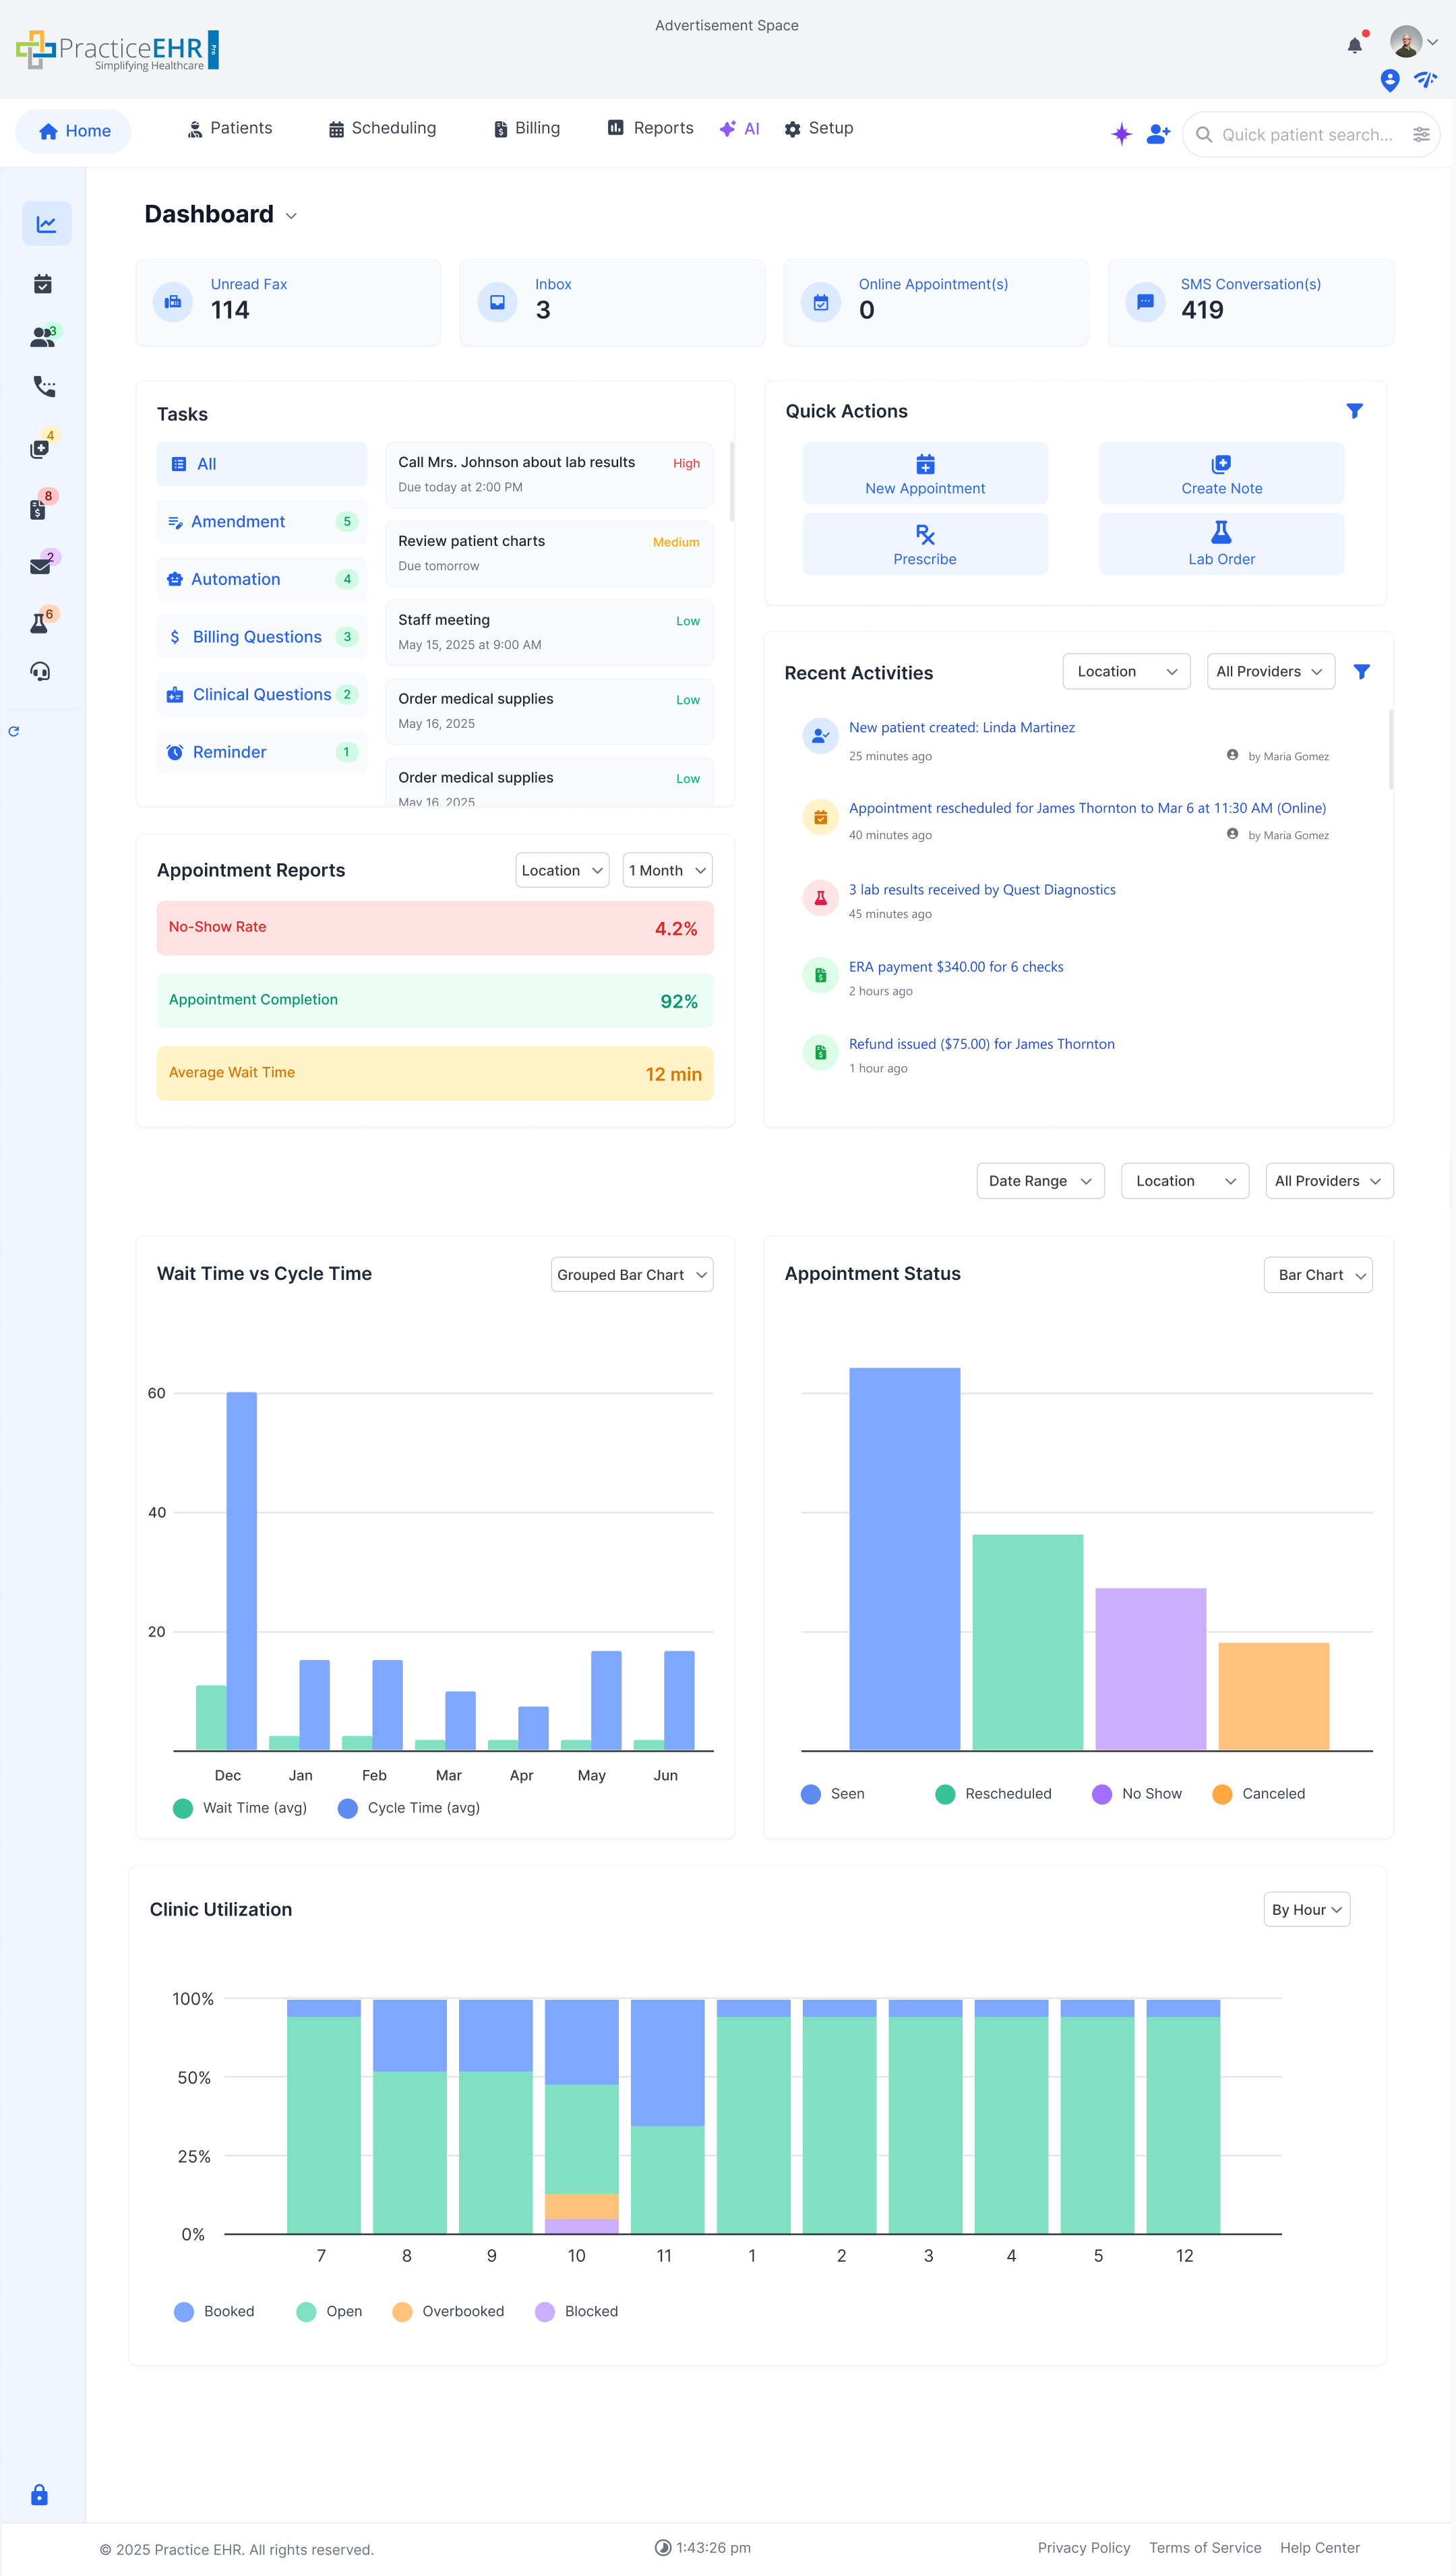
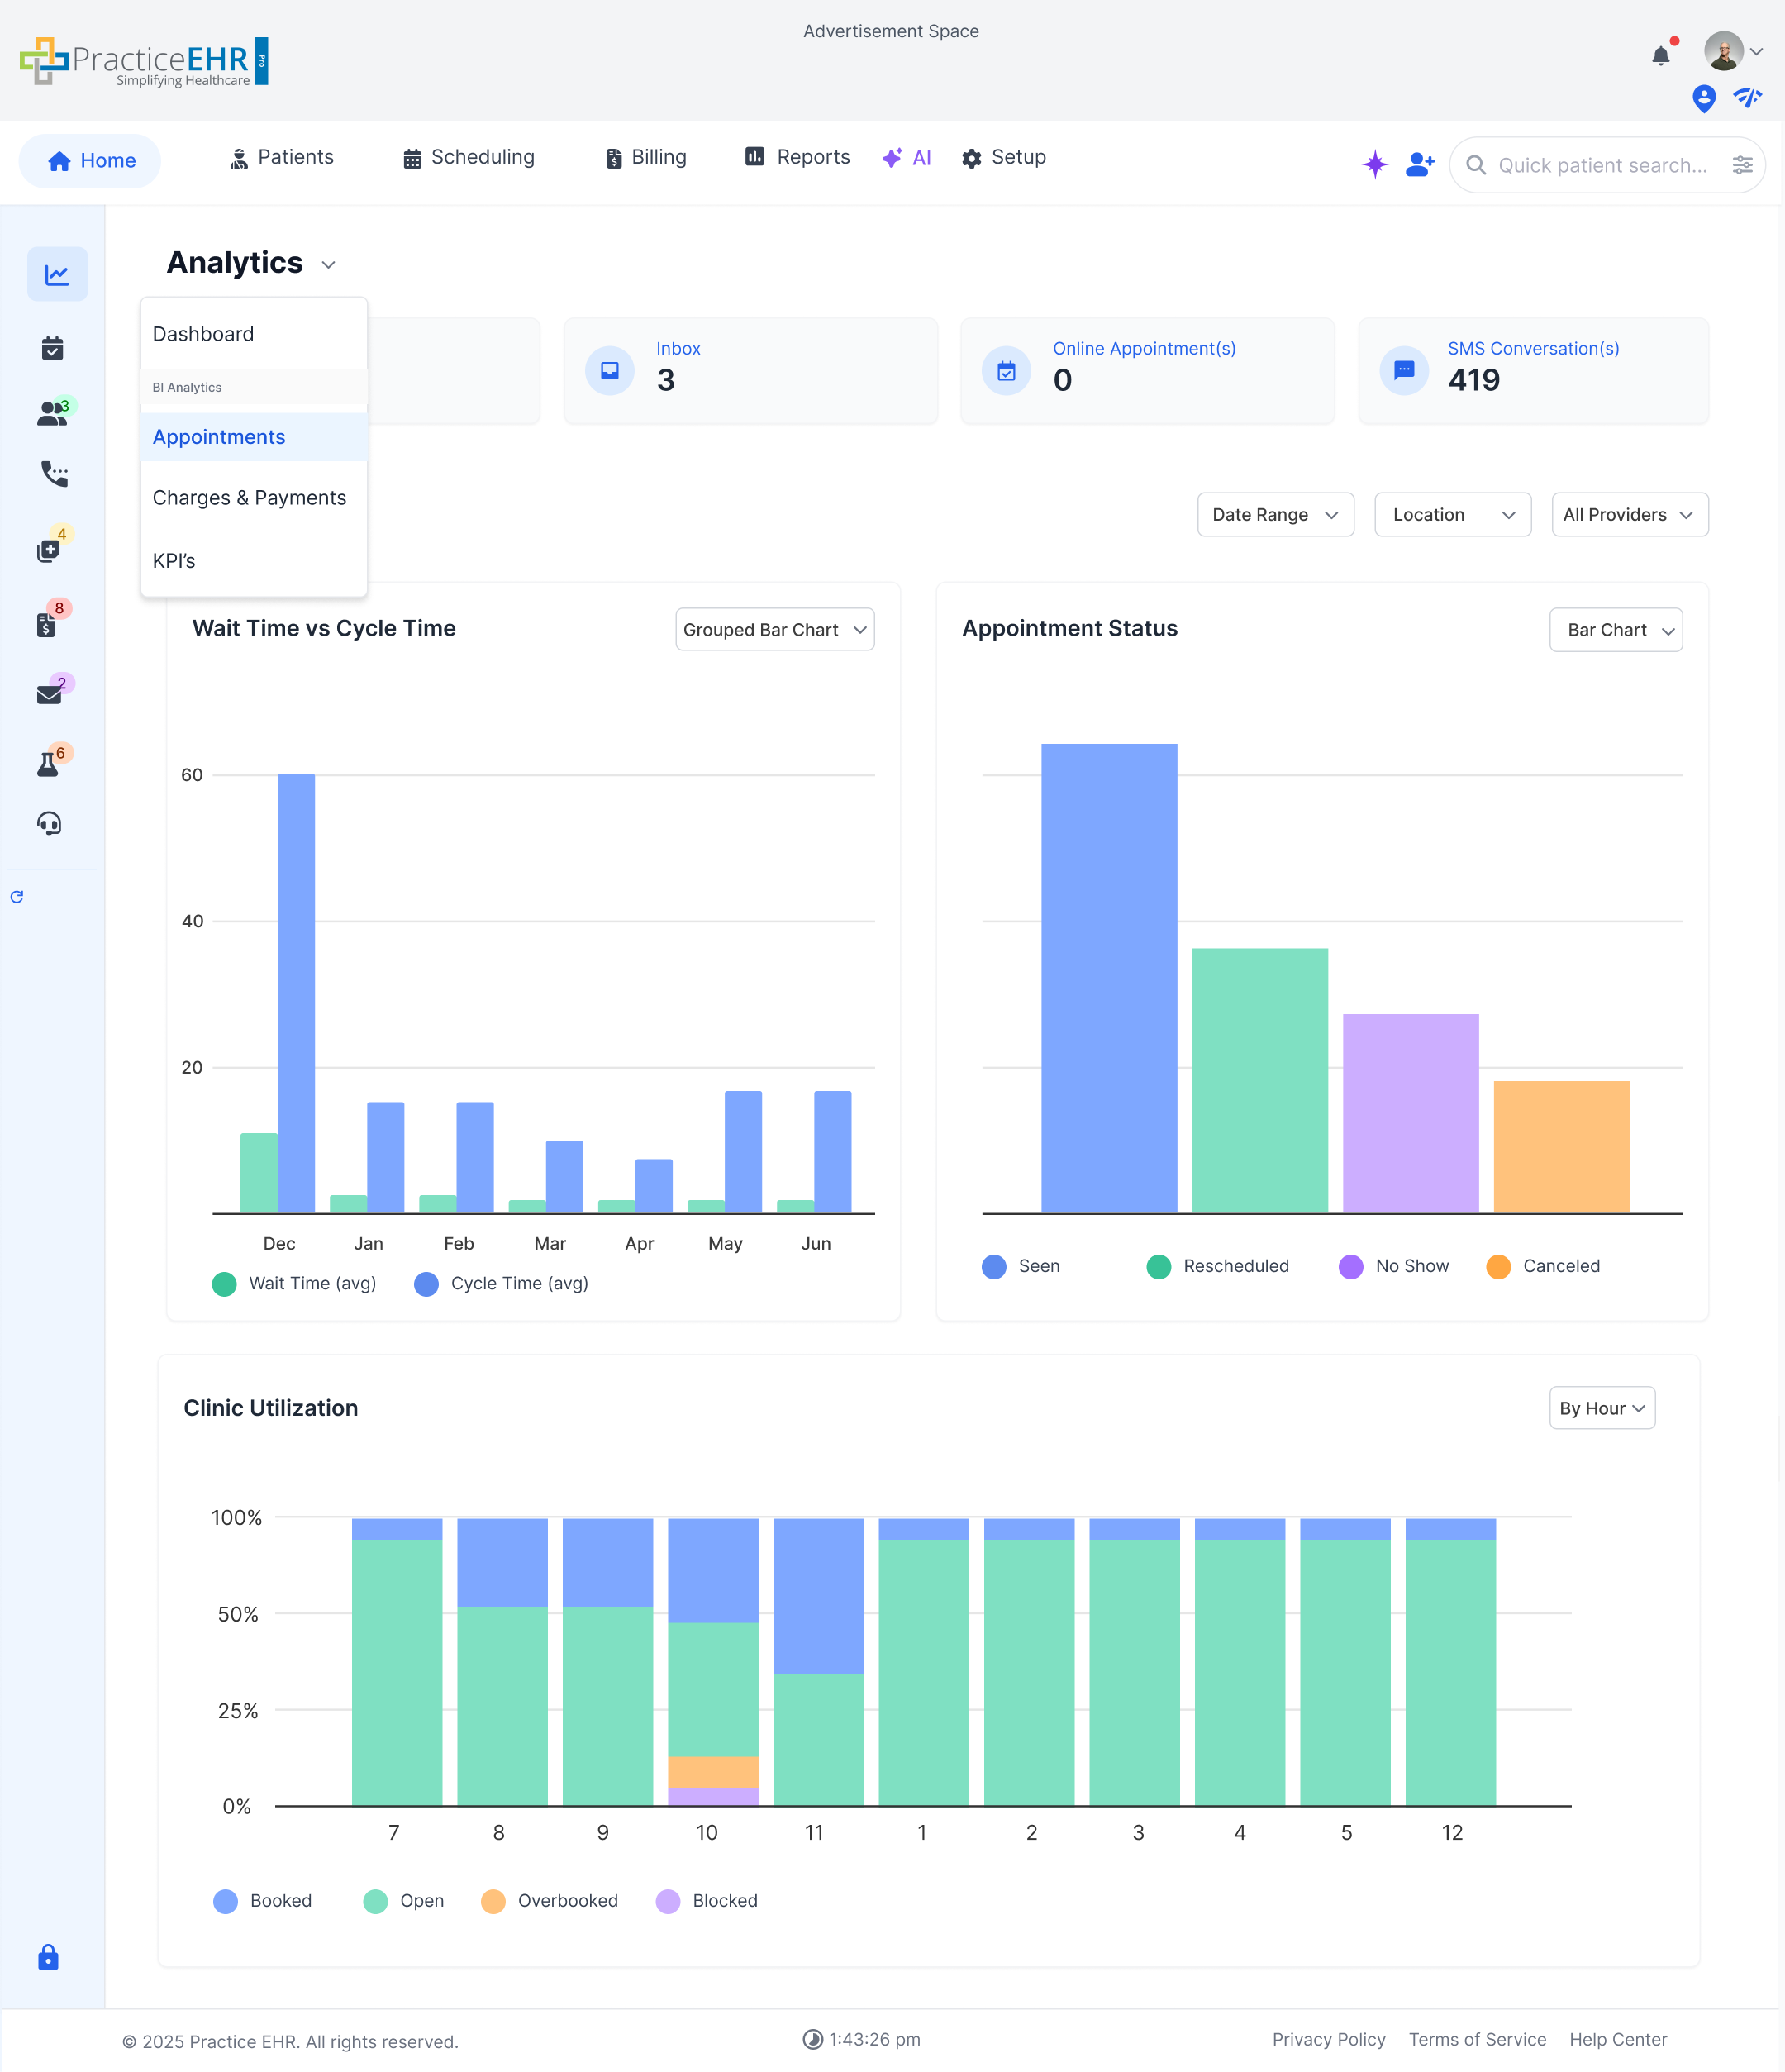
Home Dashboard Index
Click on any card to navigate to the corresponding documentation section.
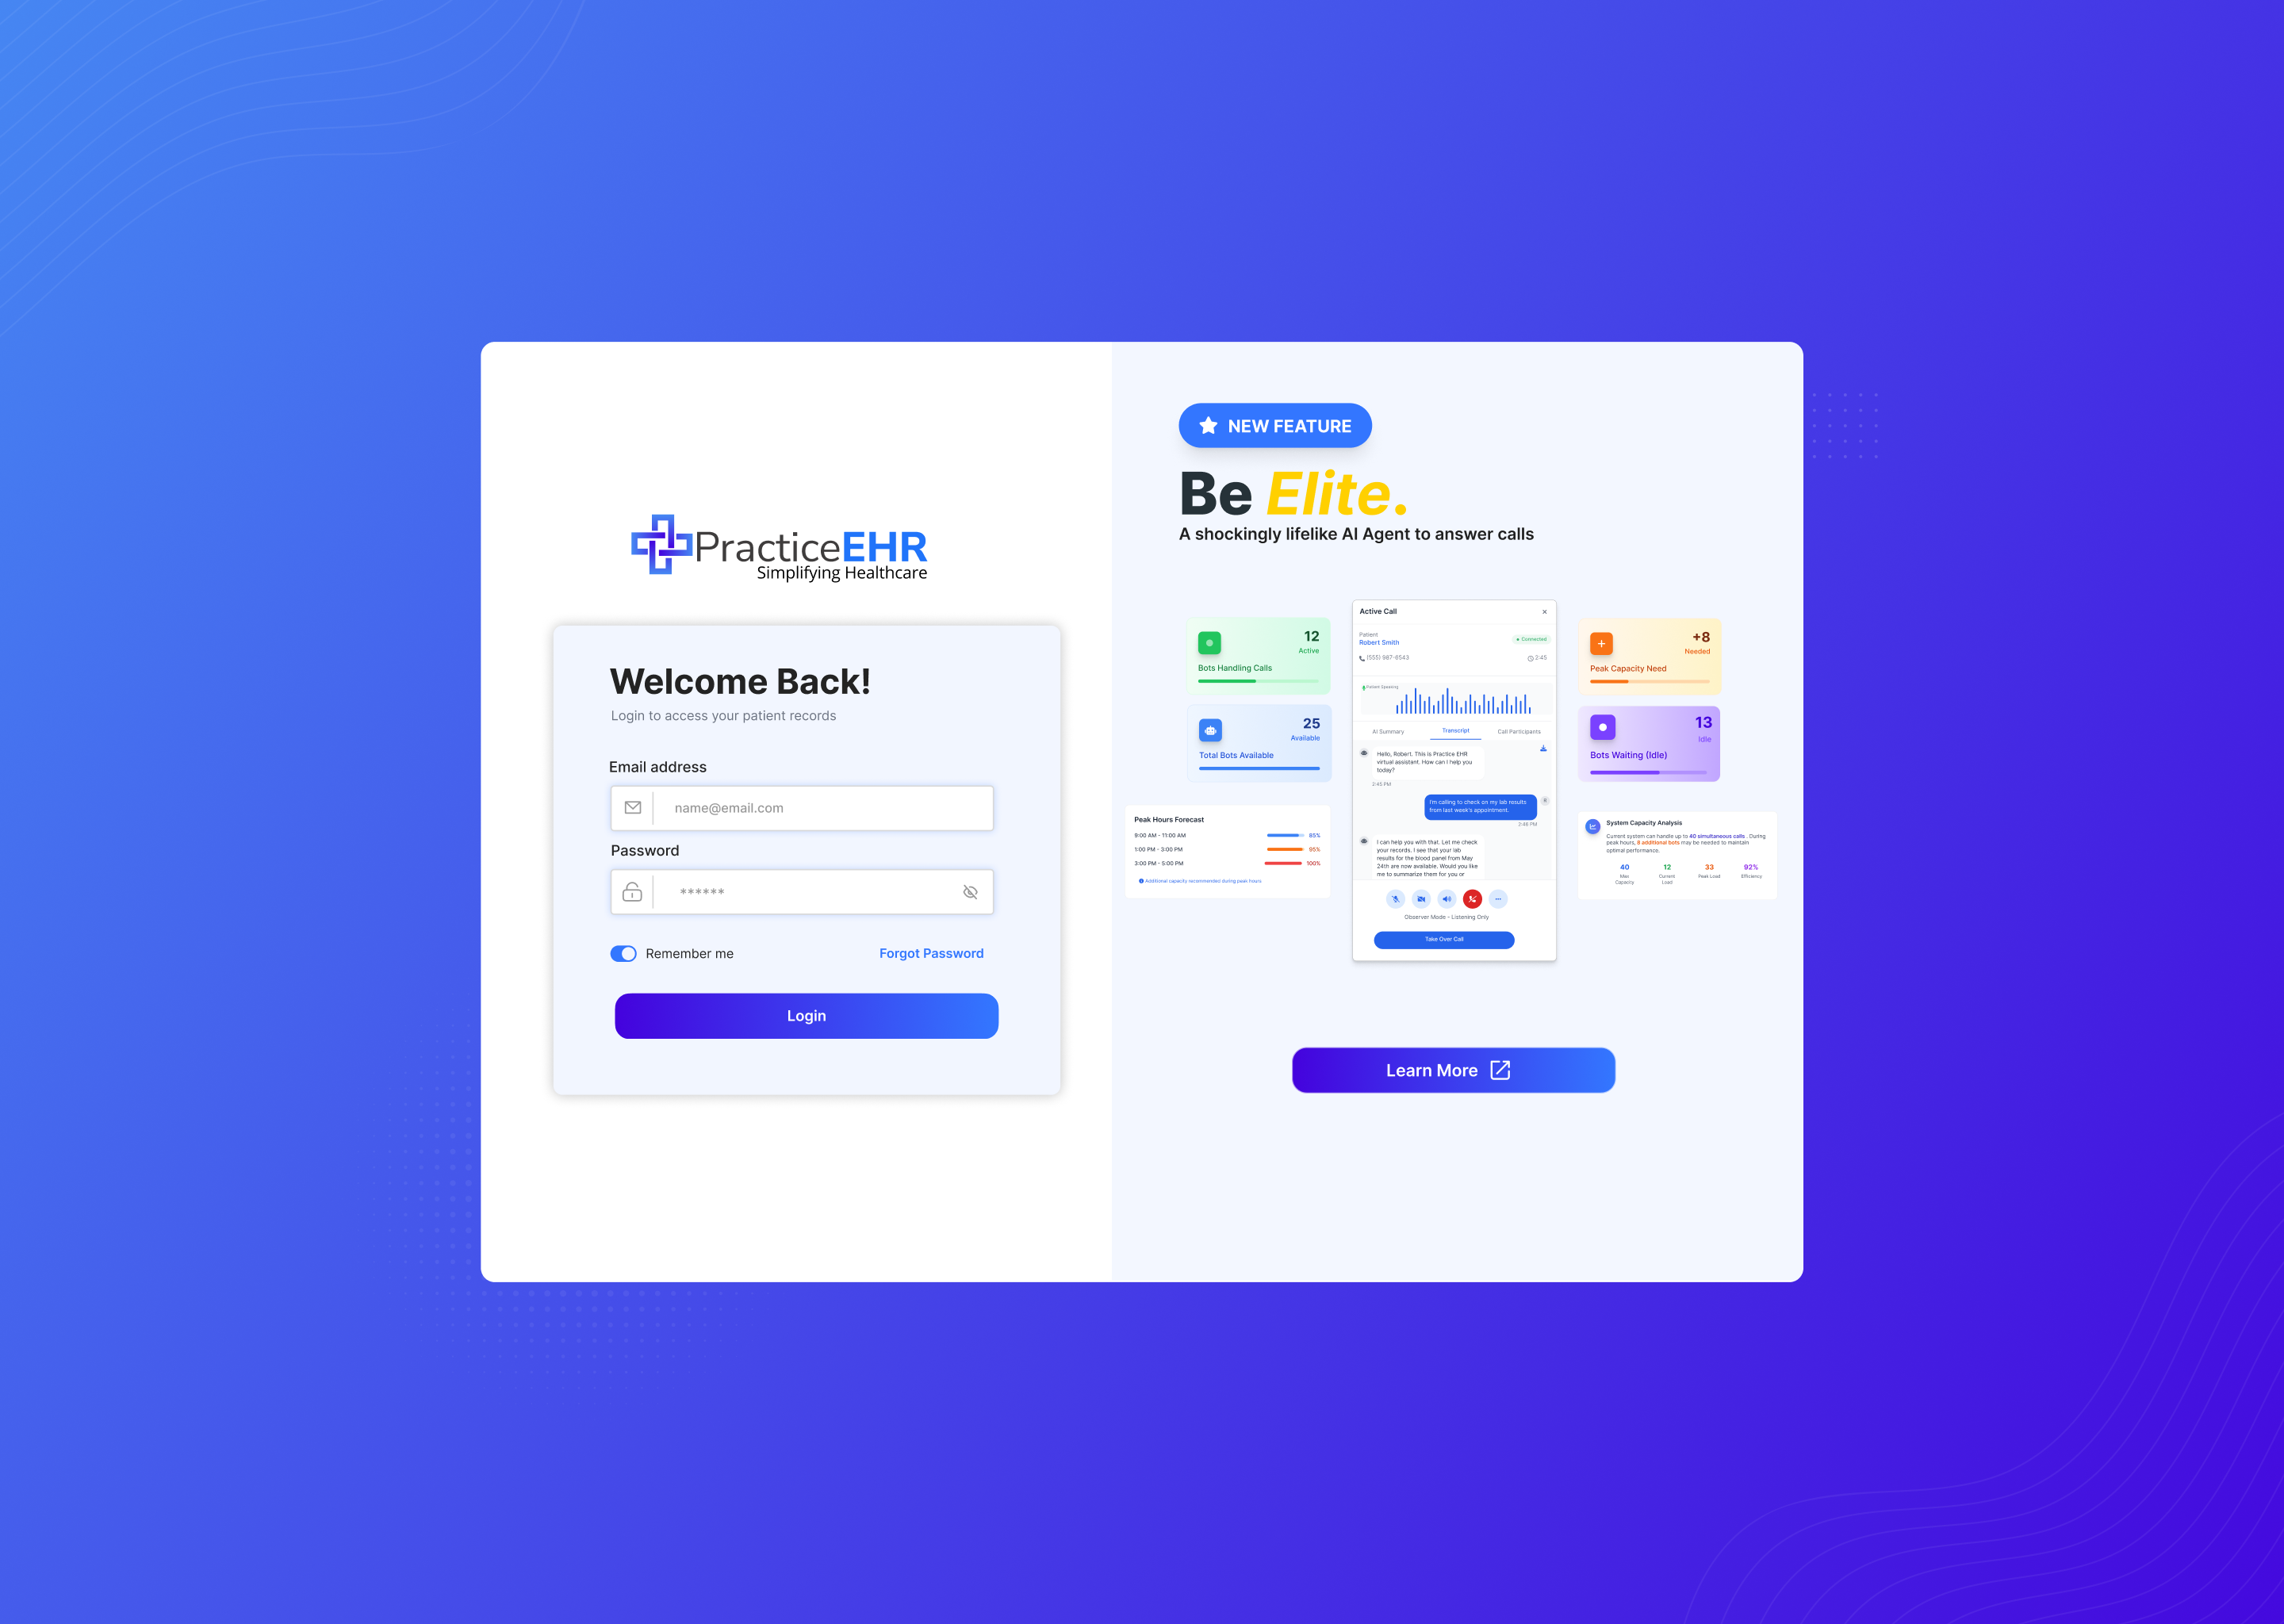
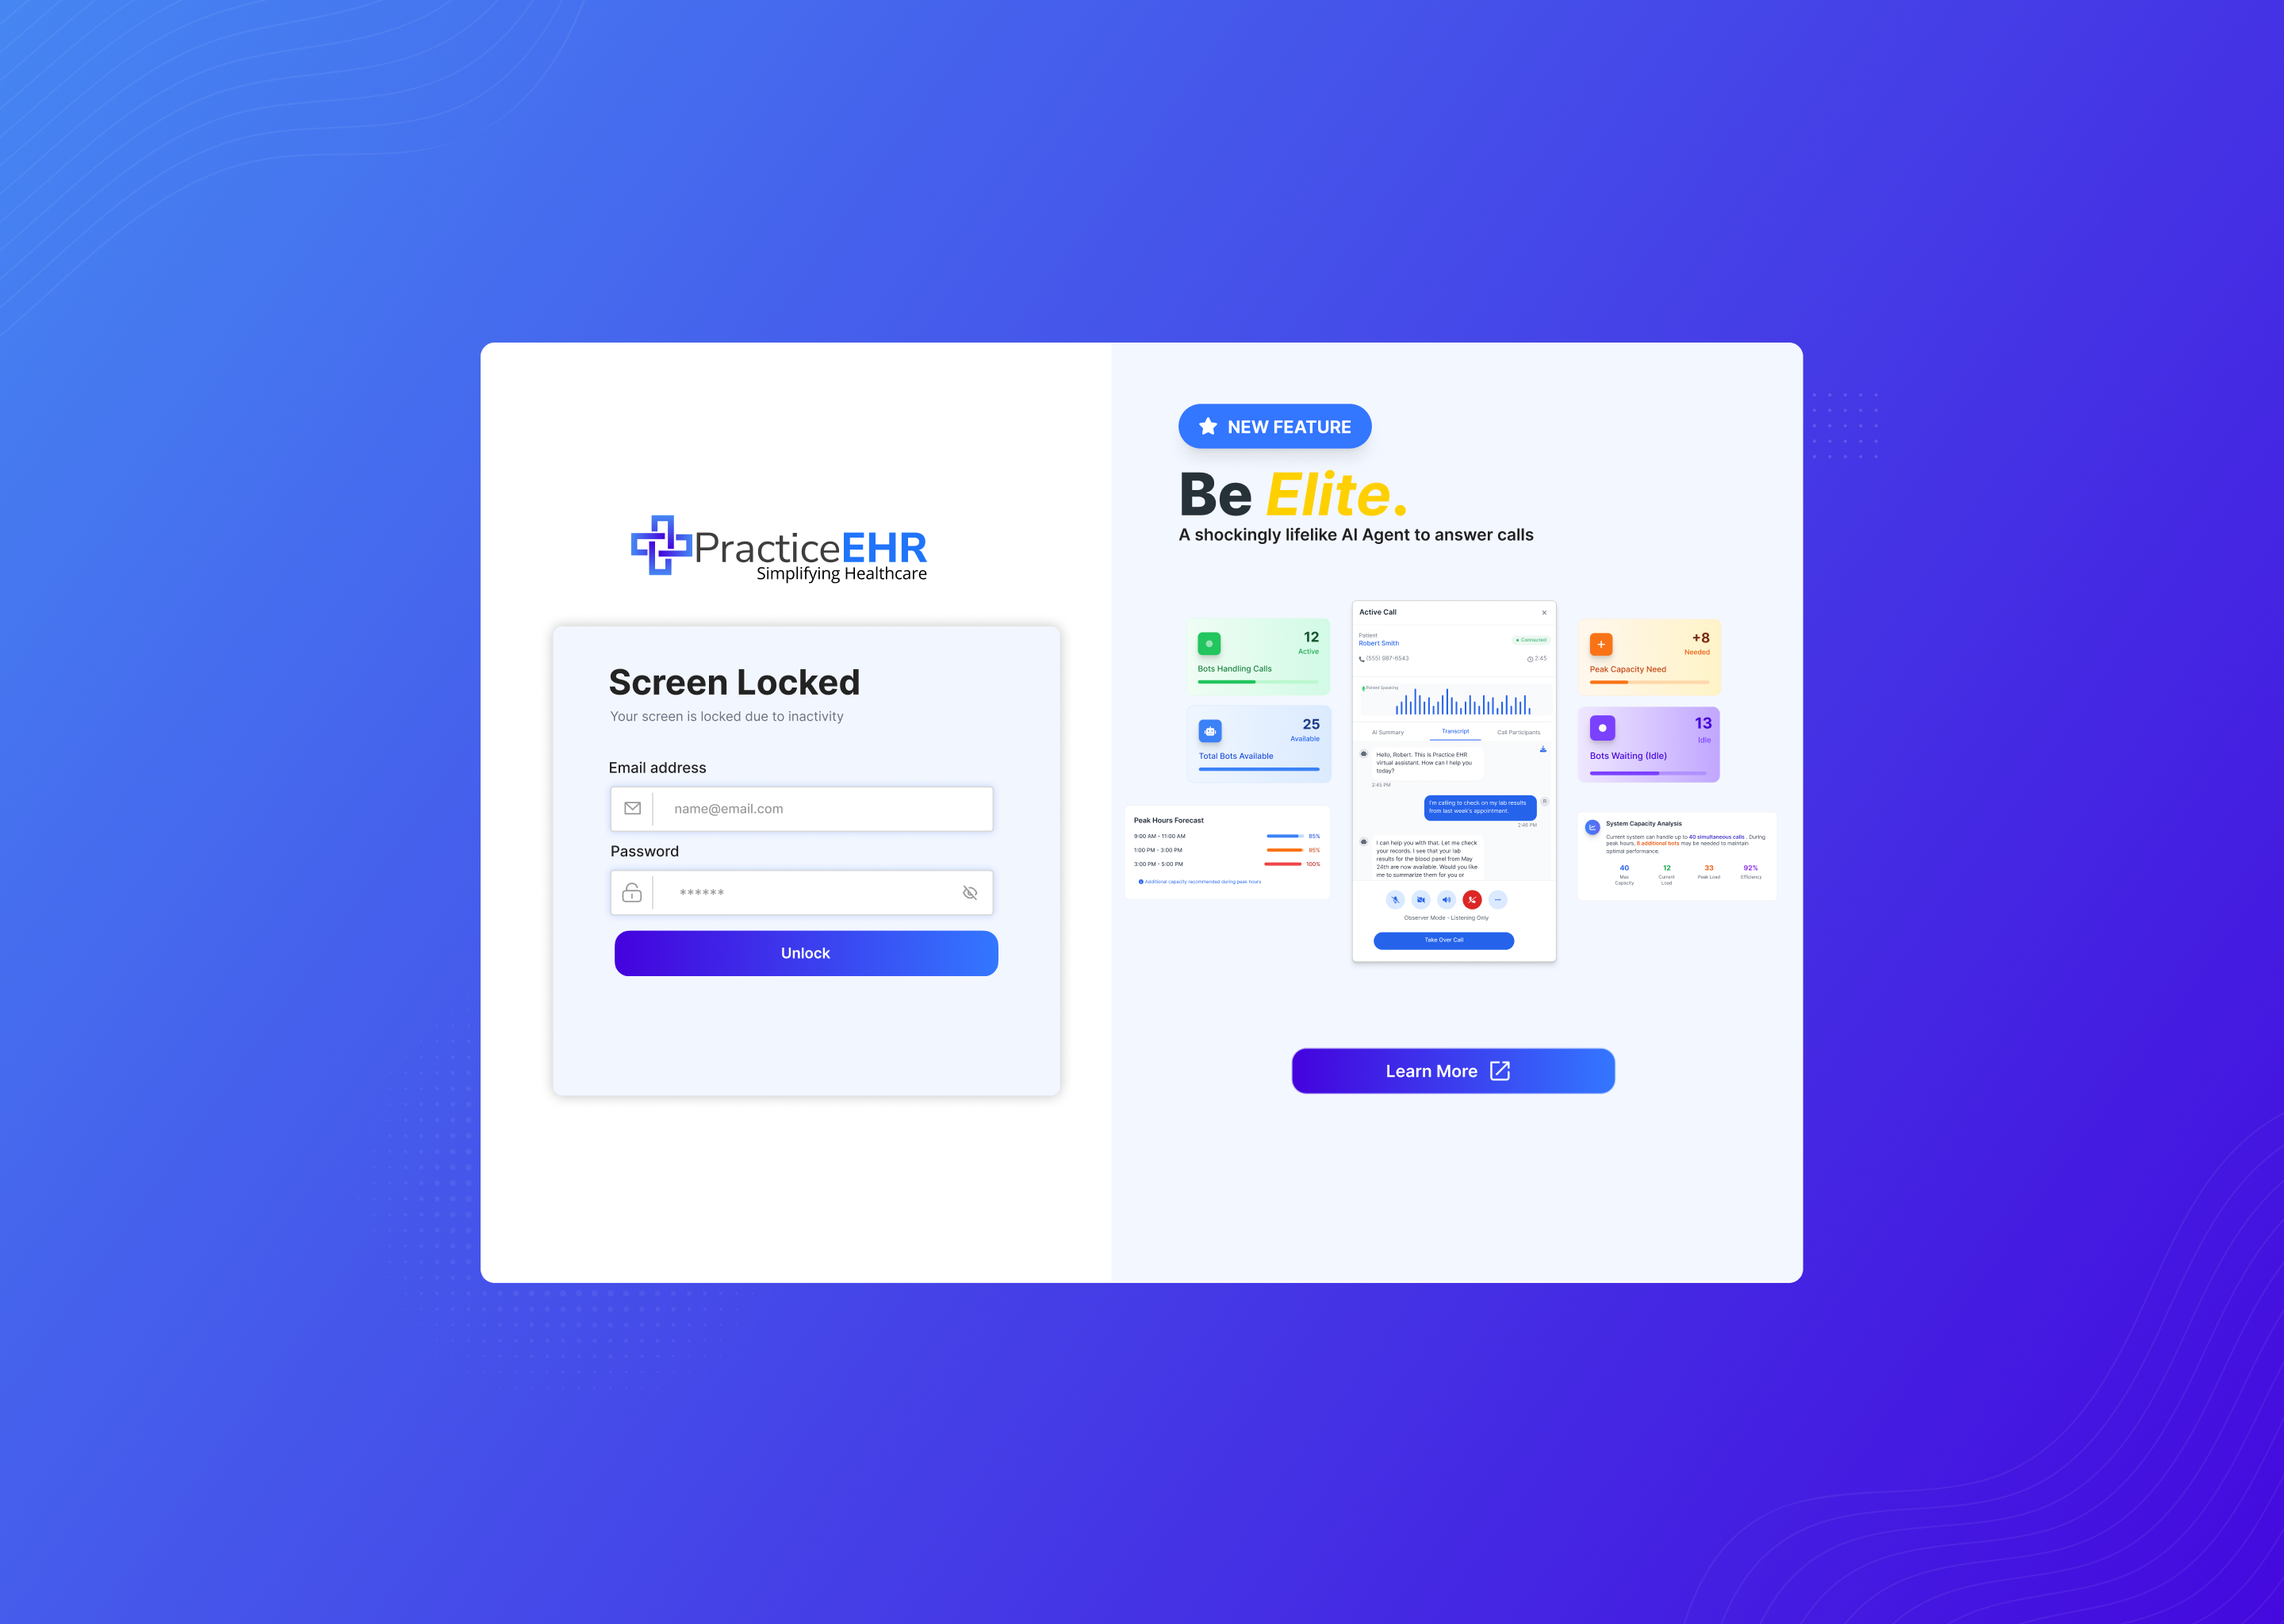
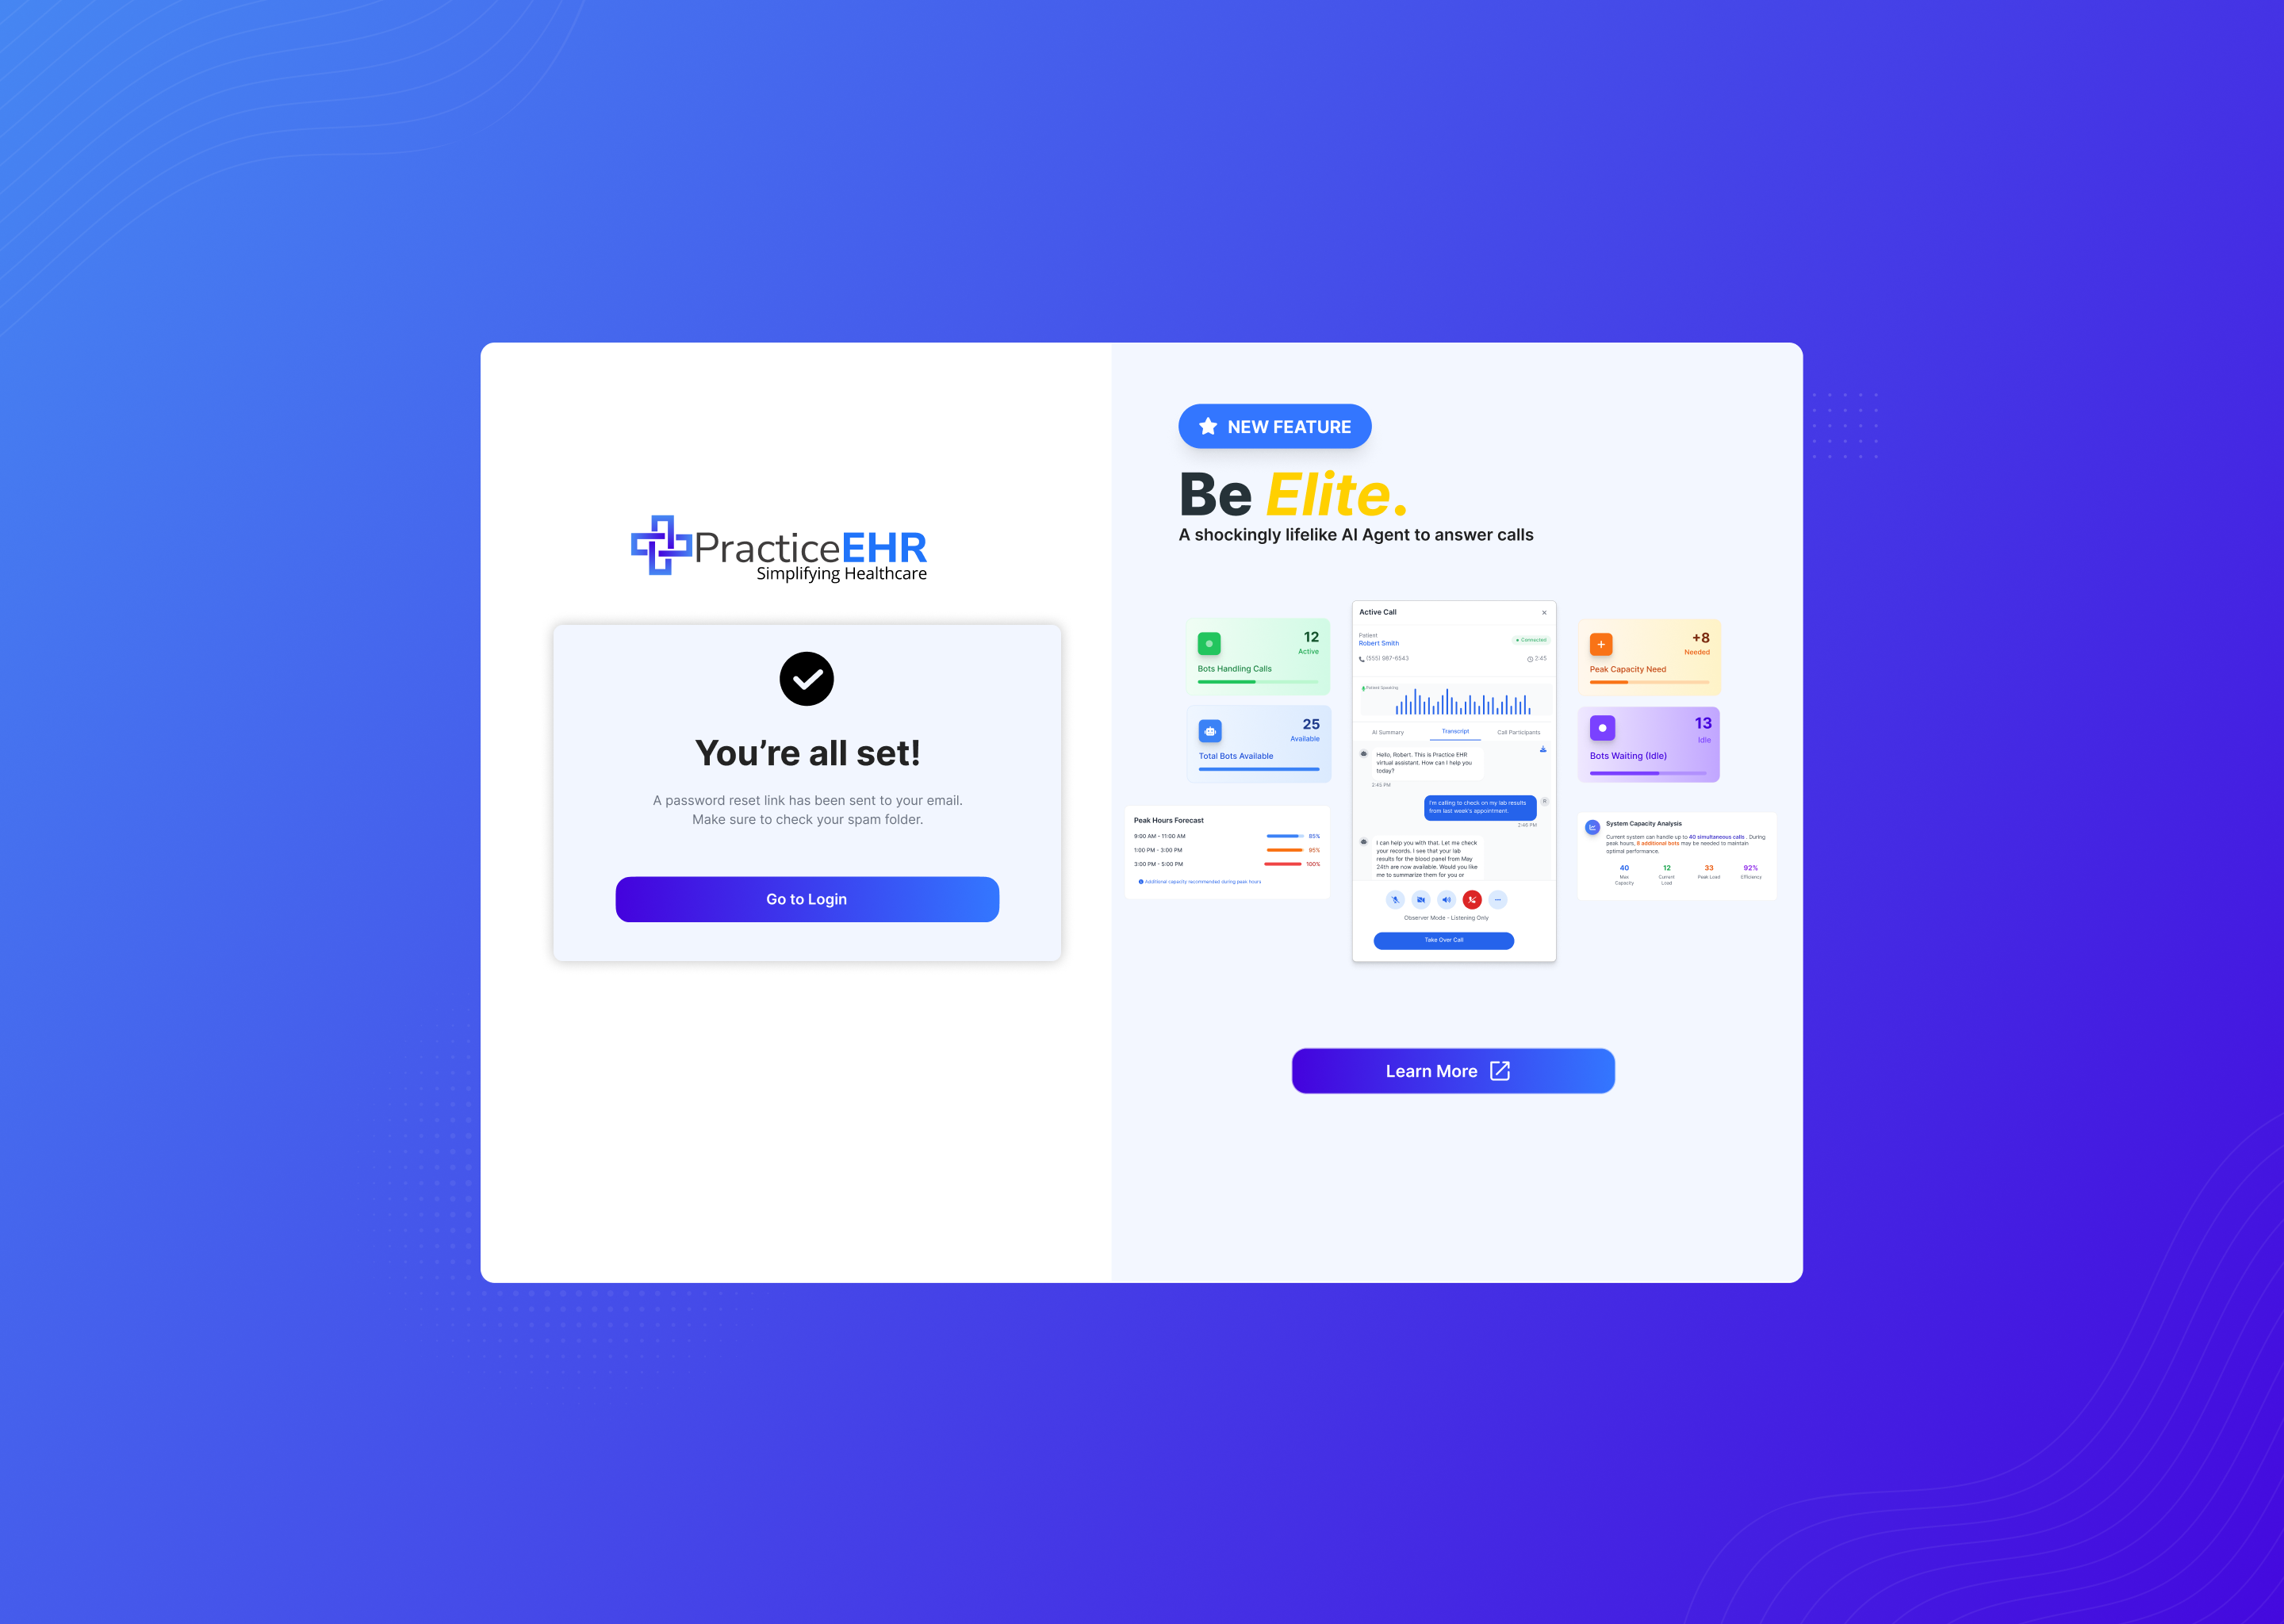
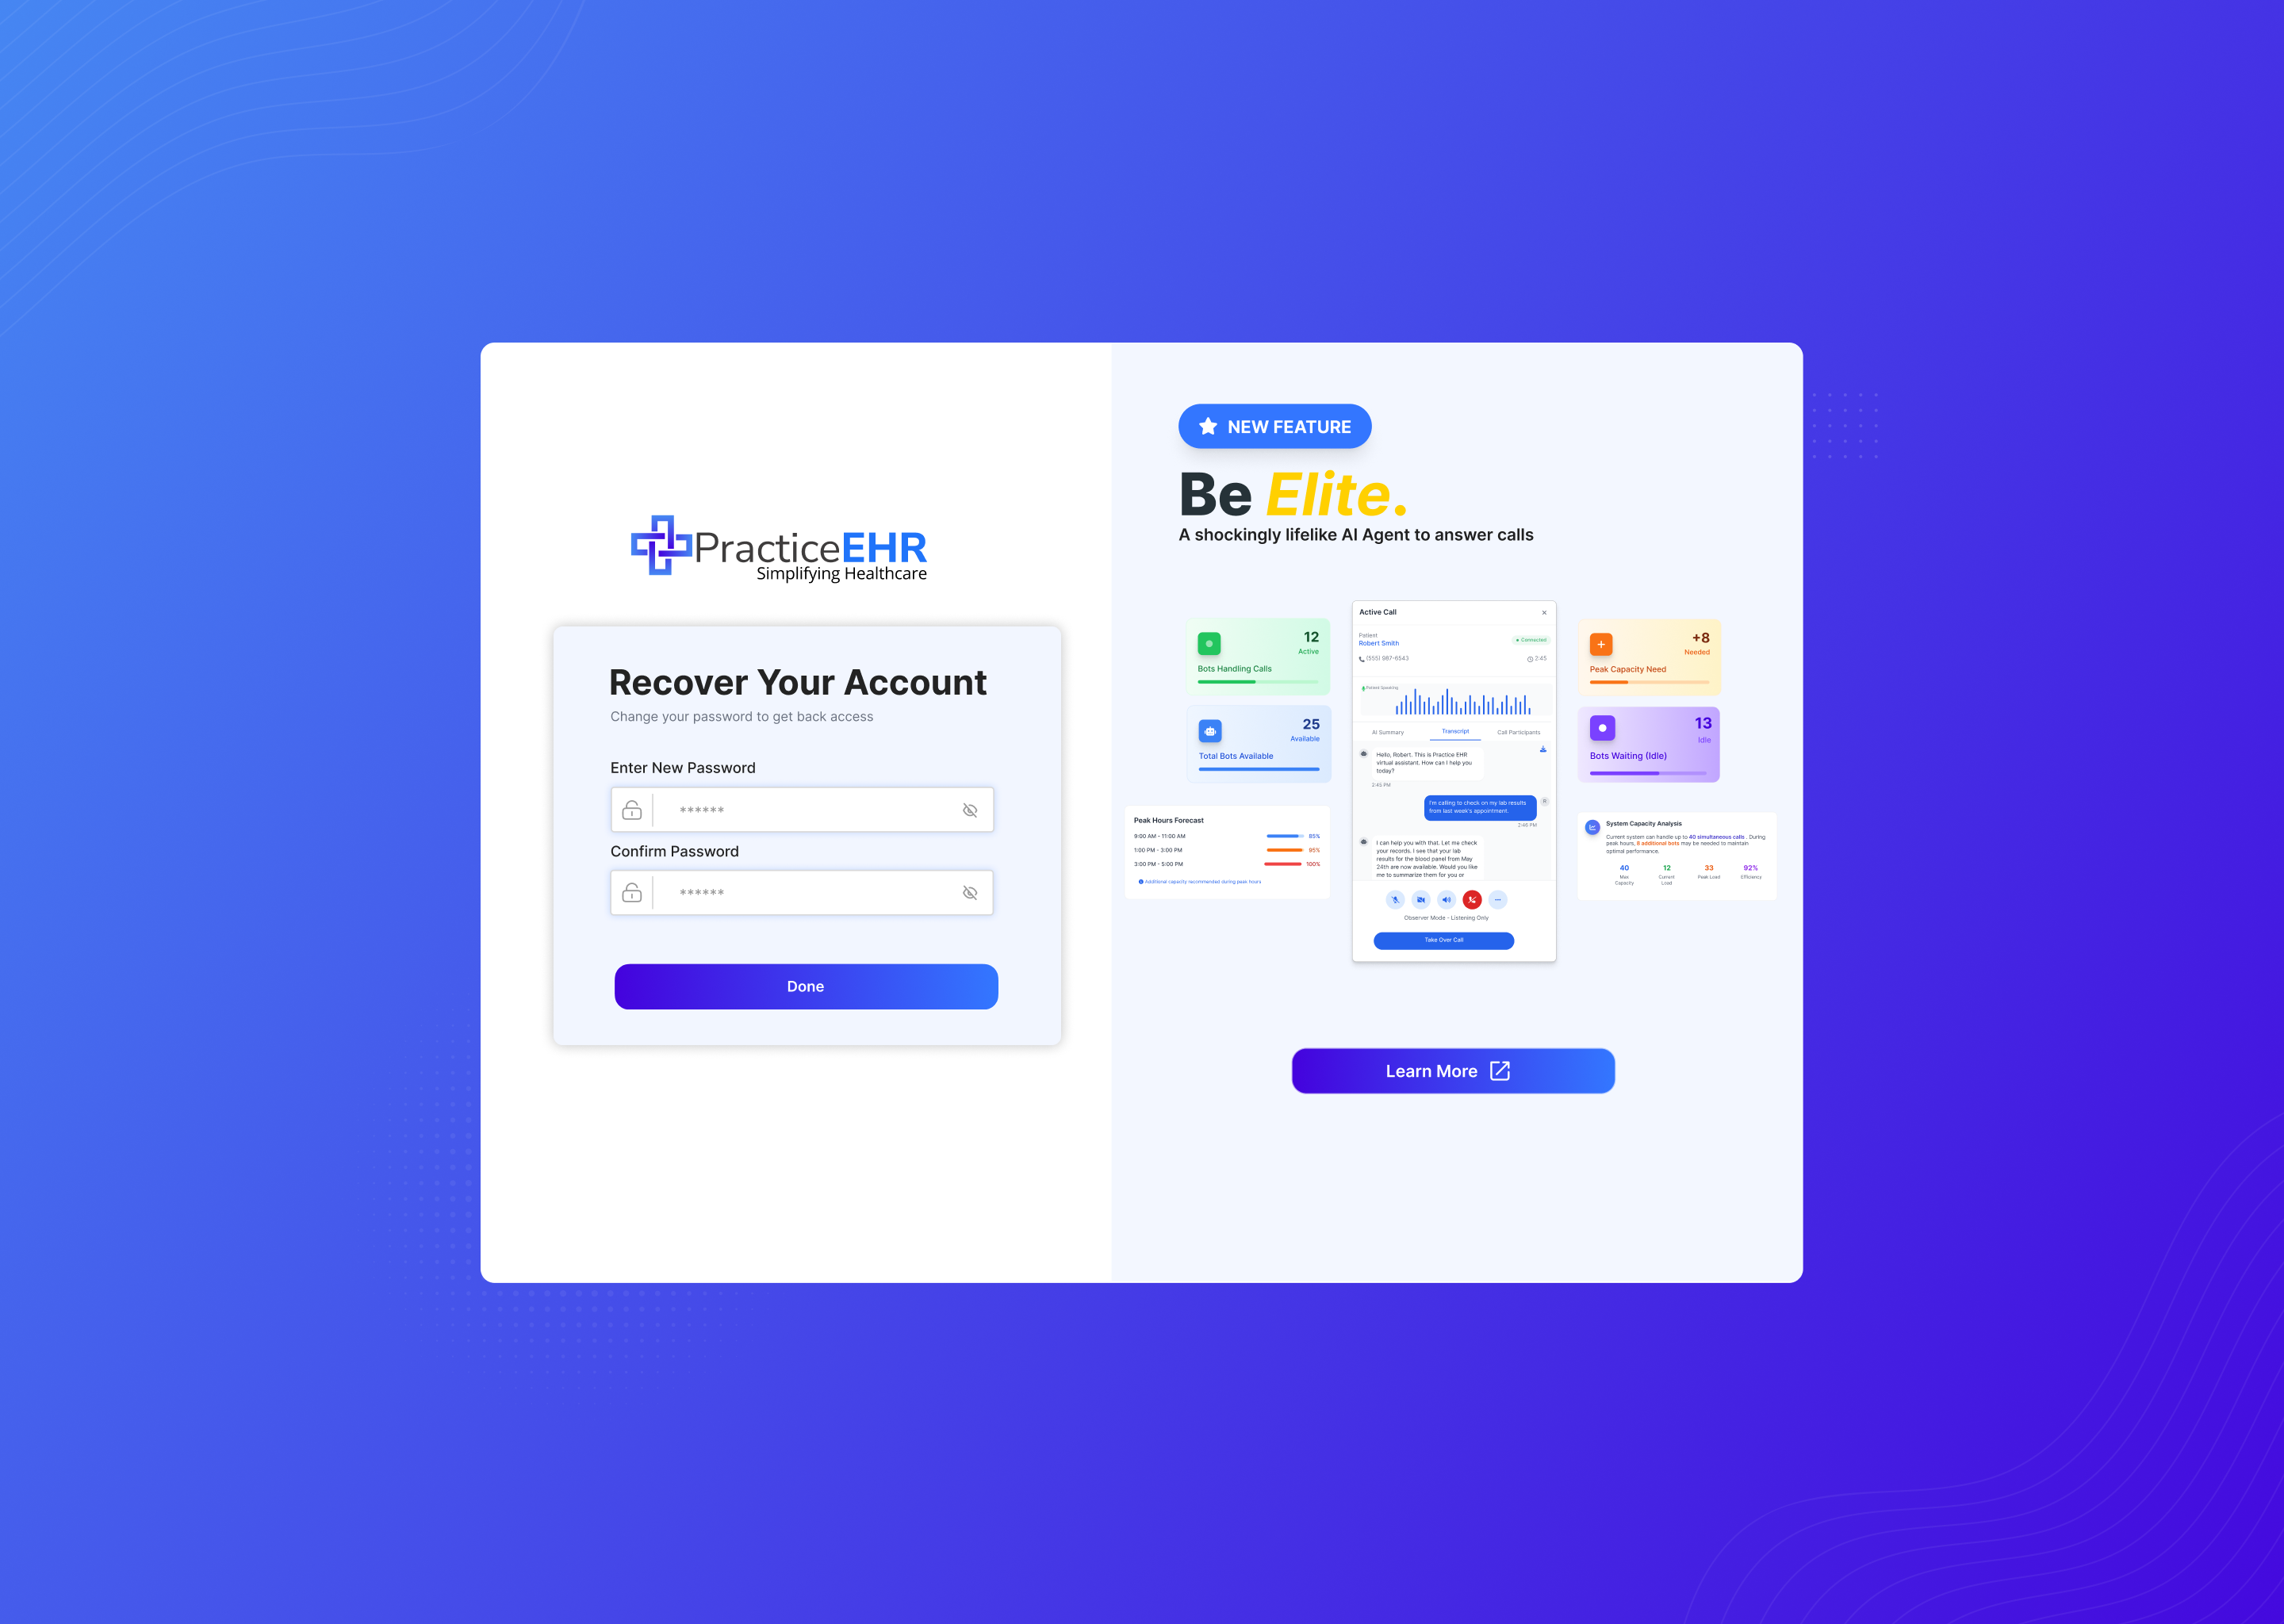
Login & Screen Lock
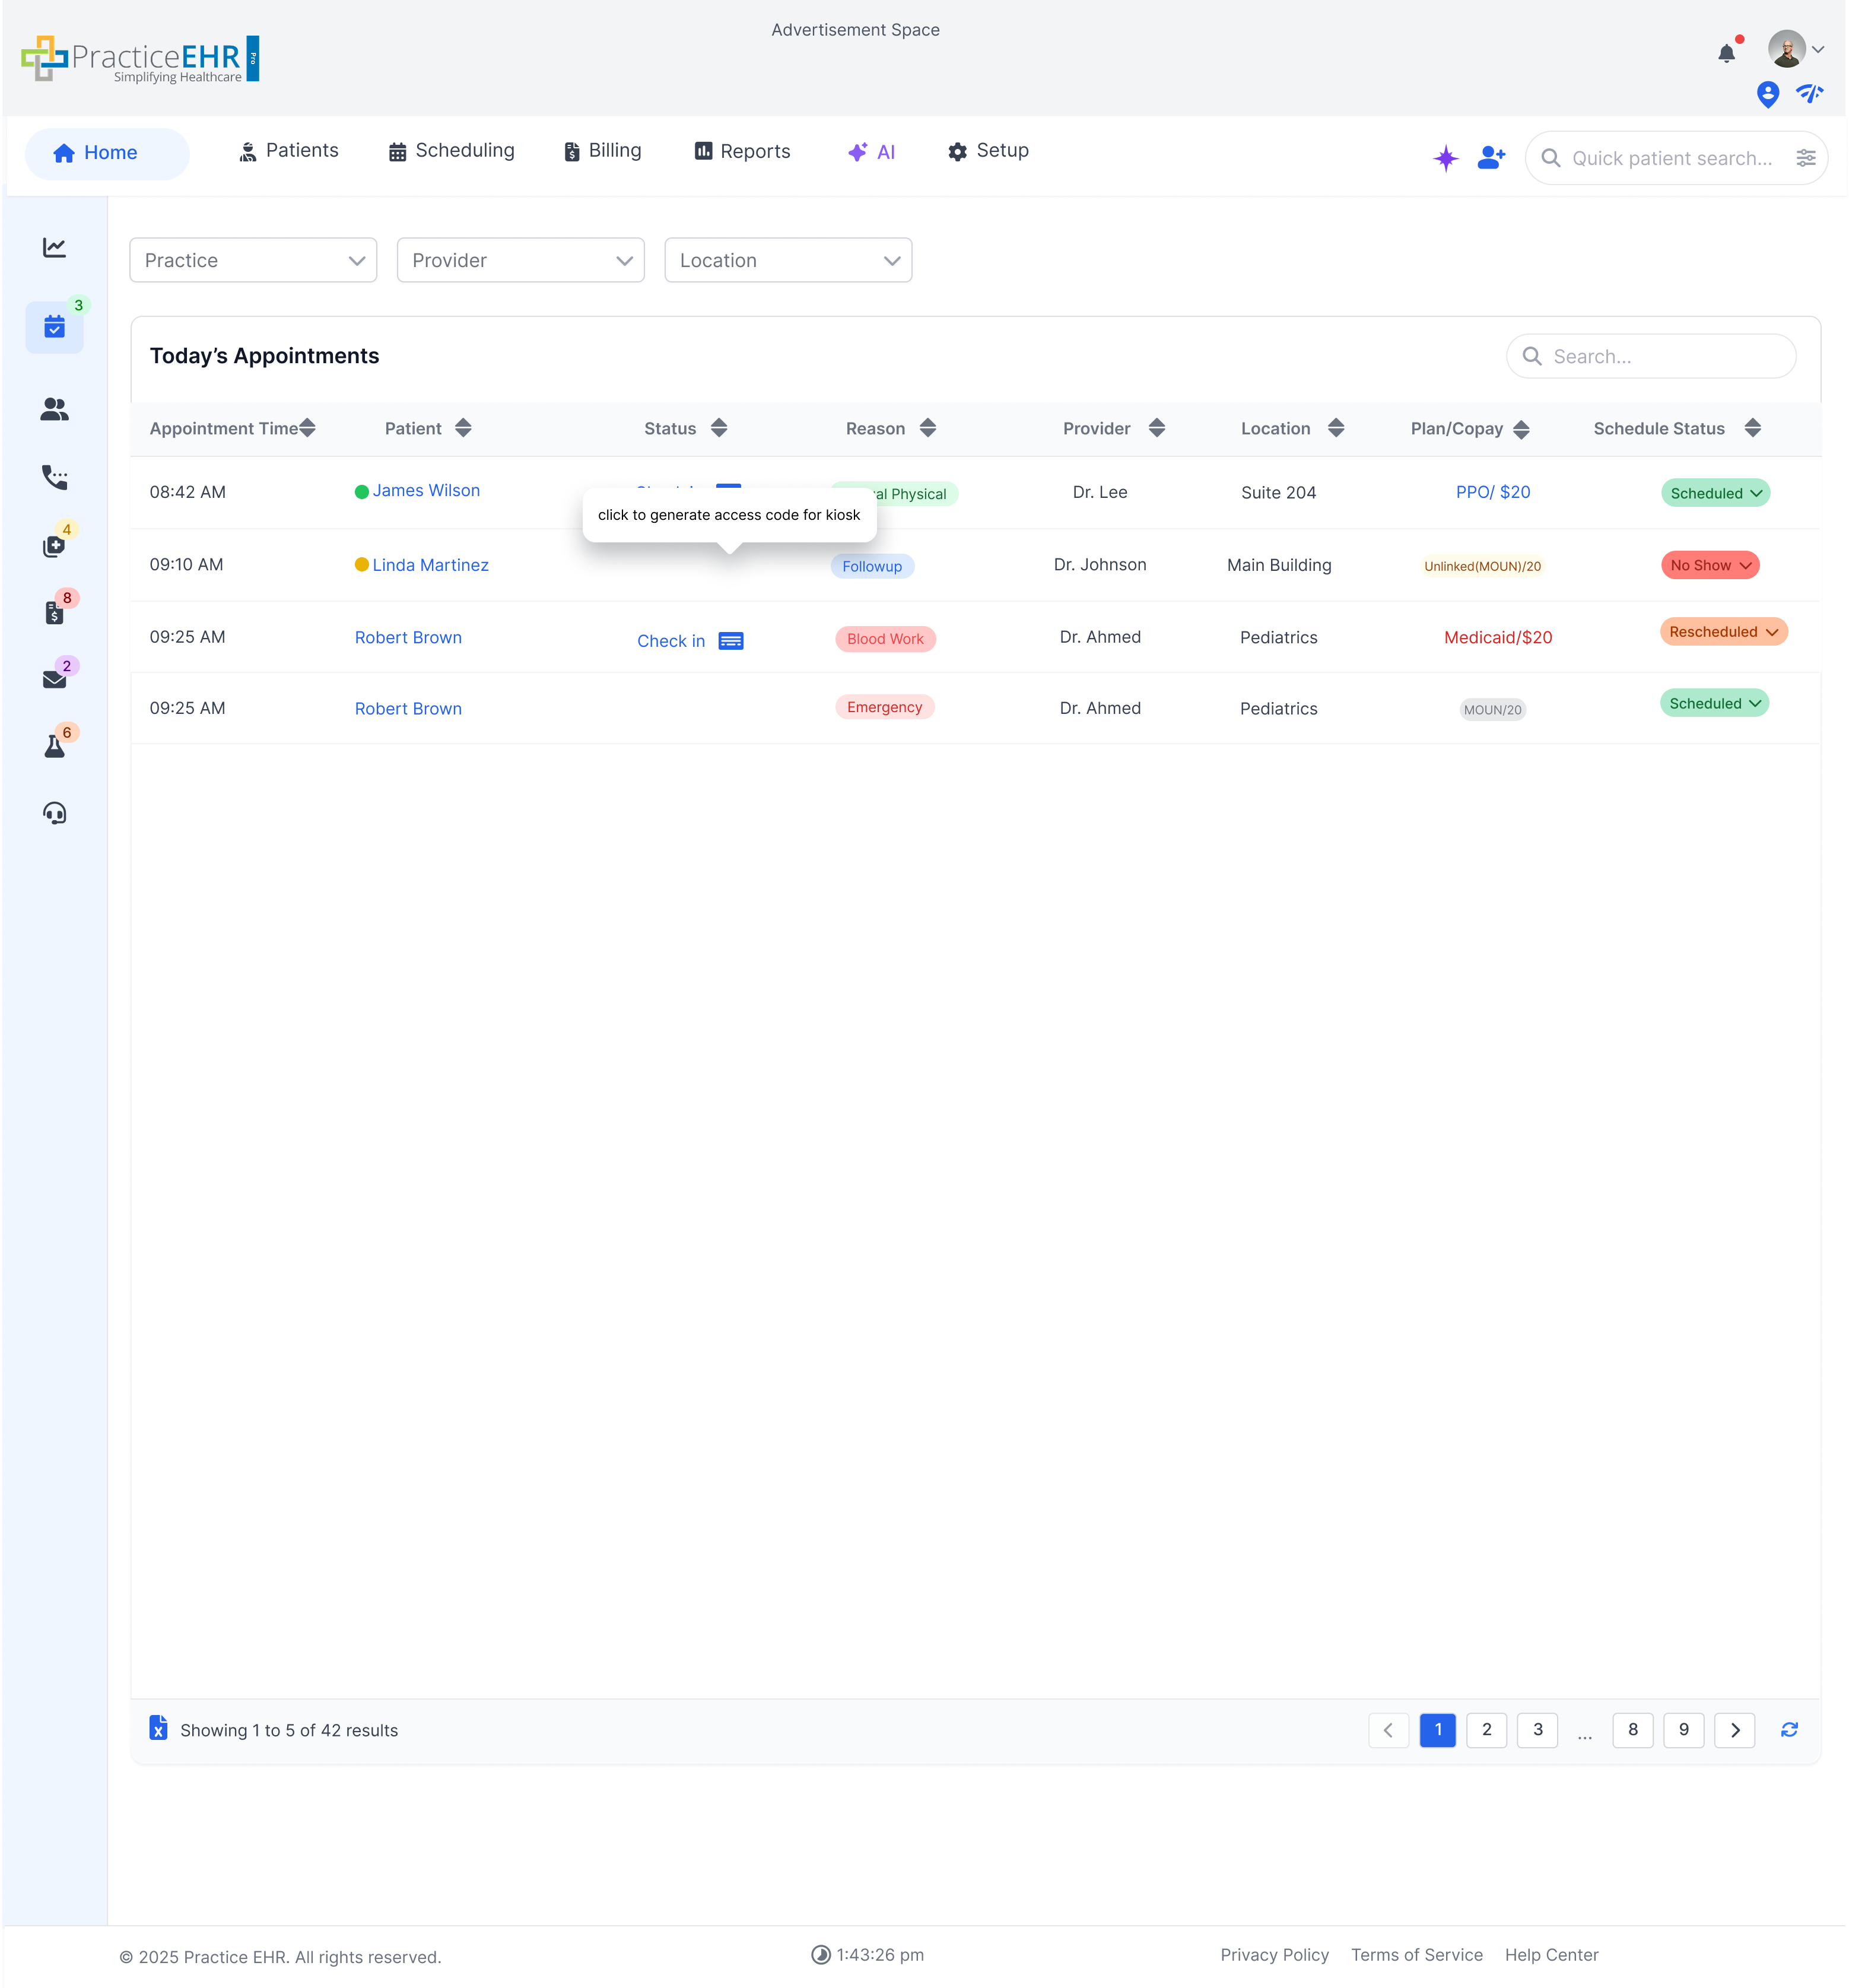
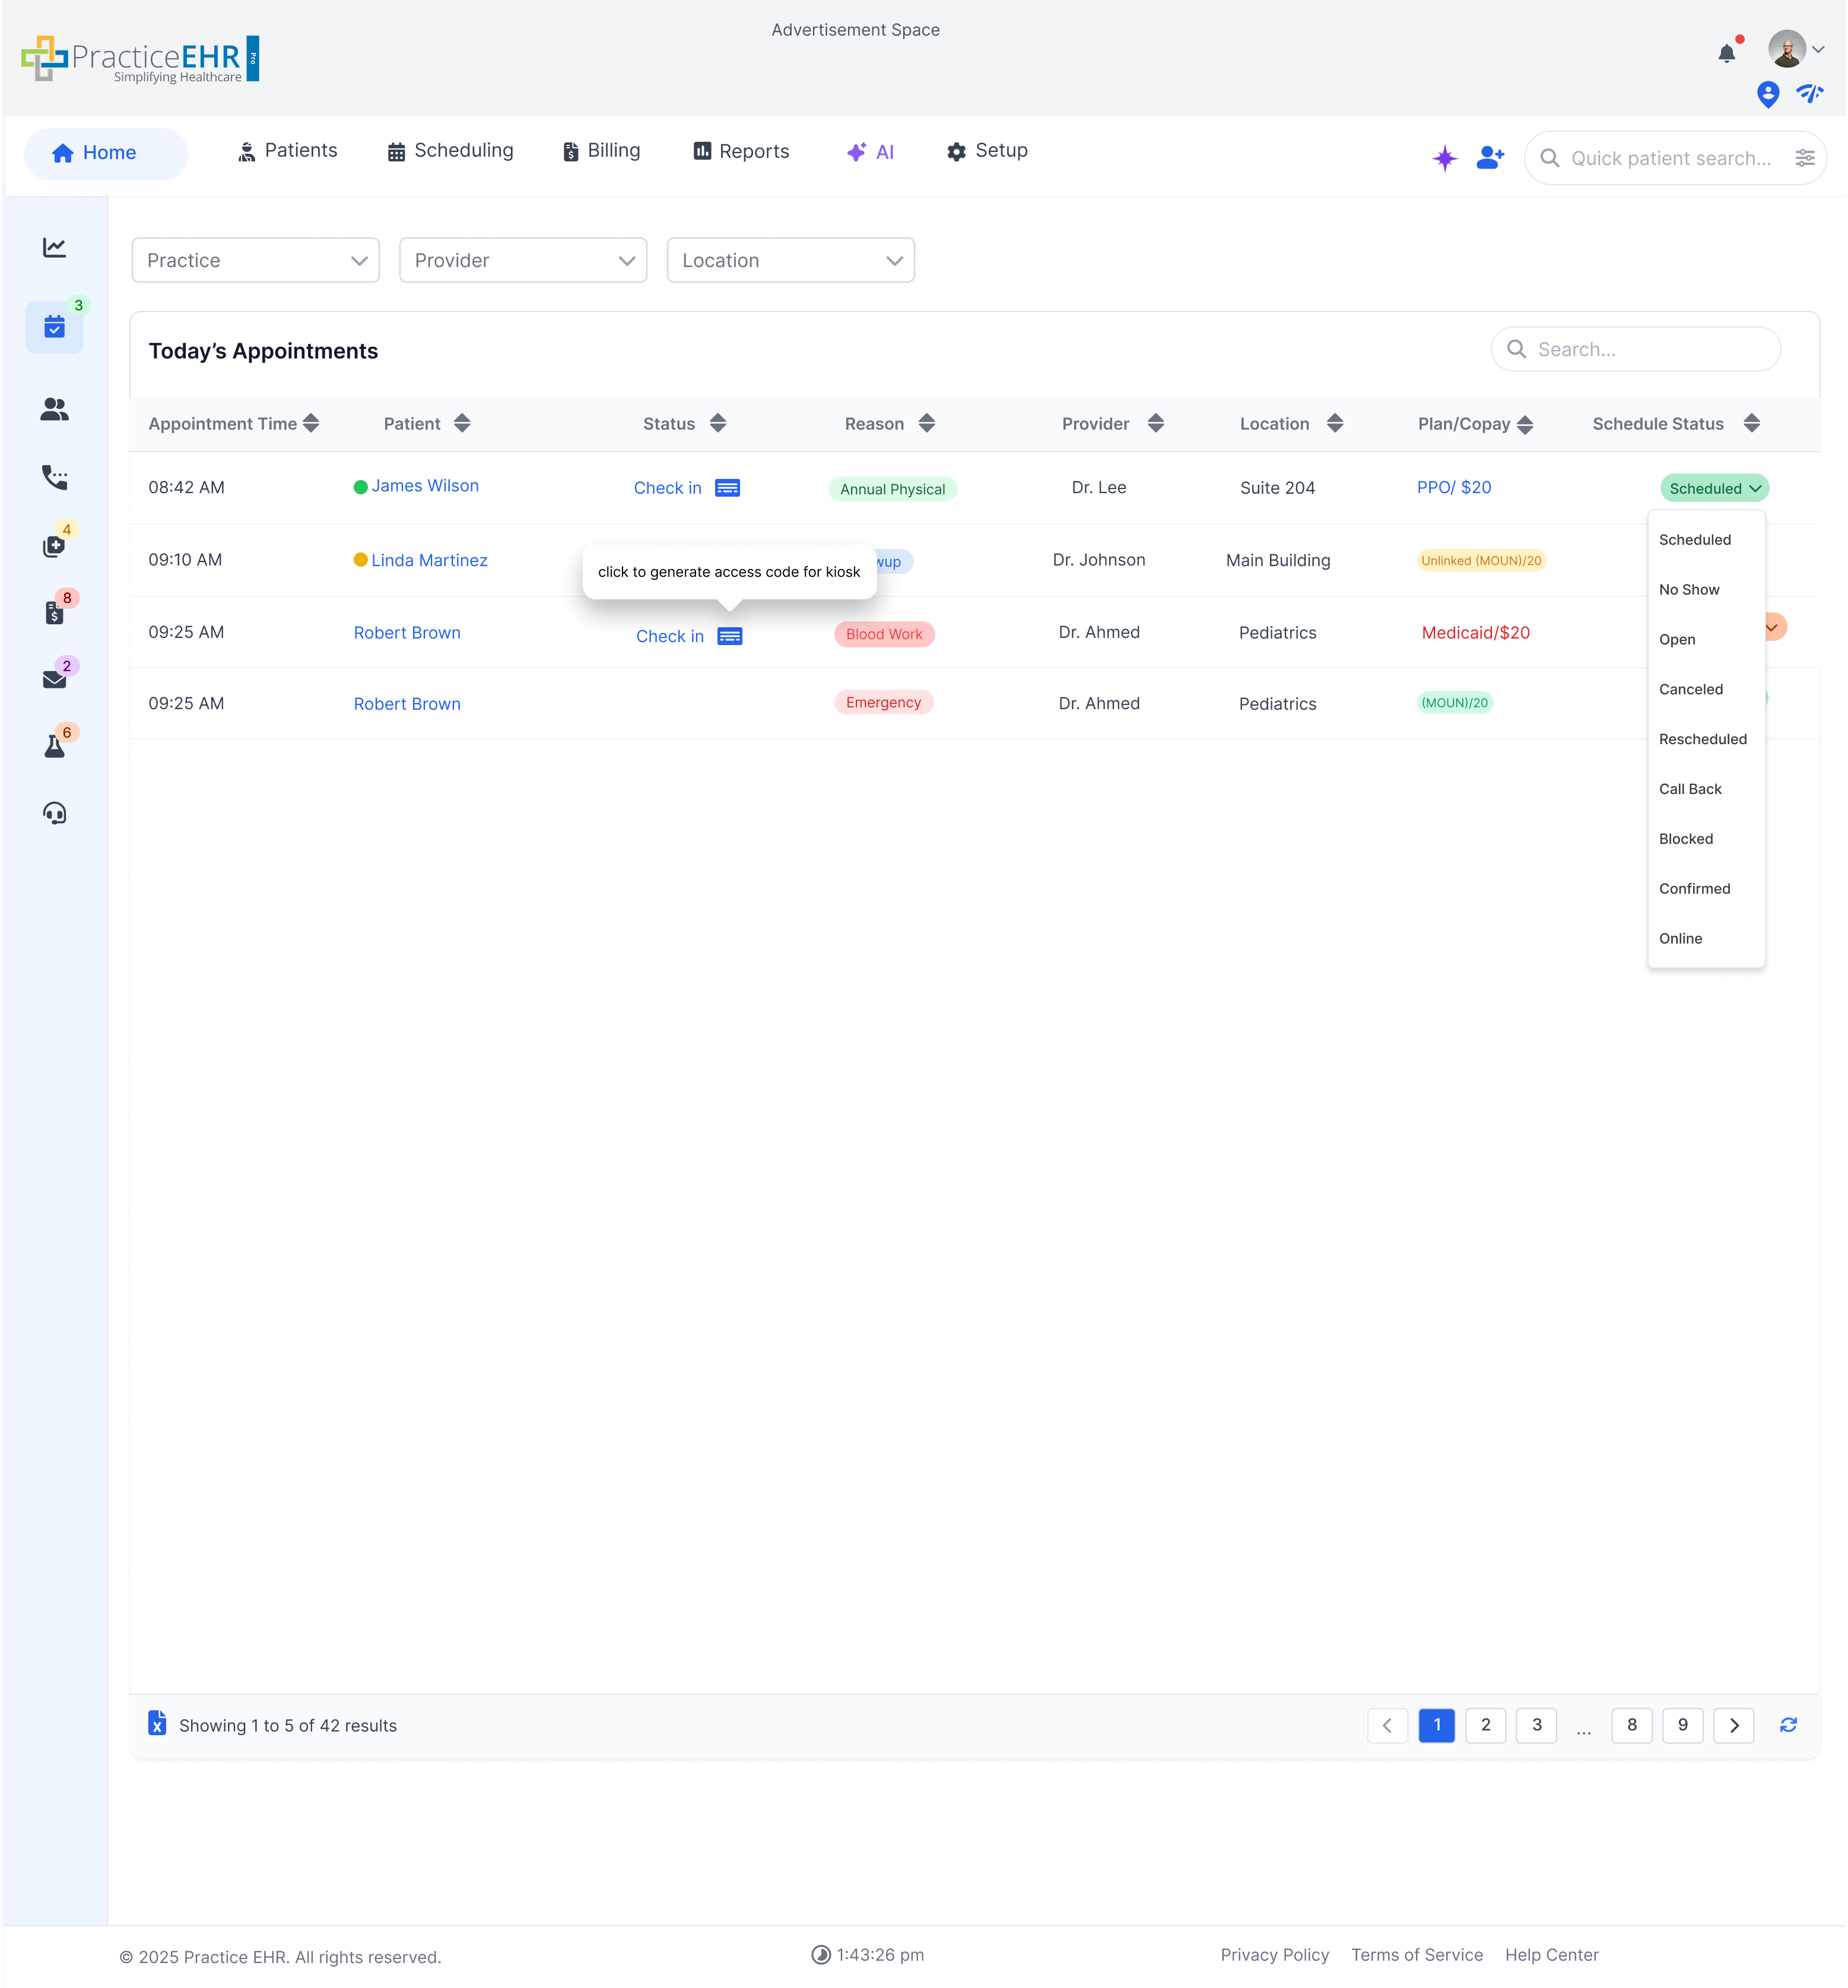
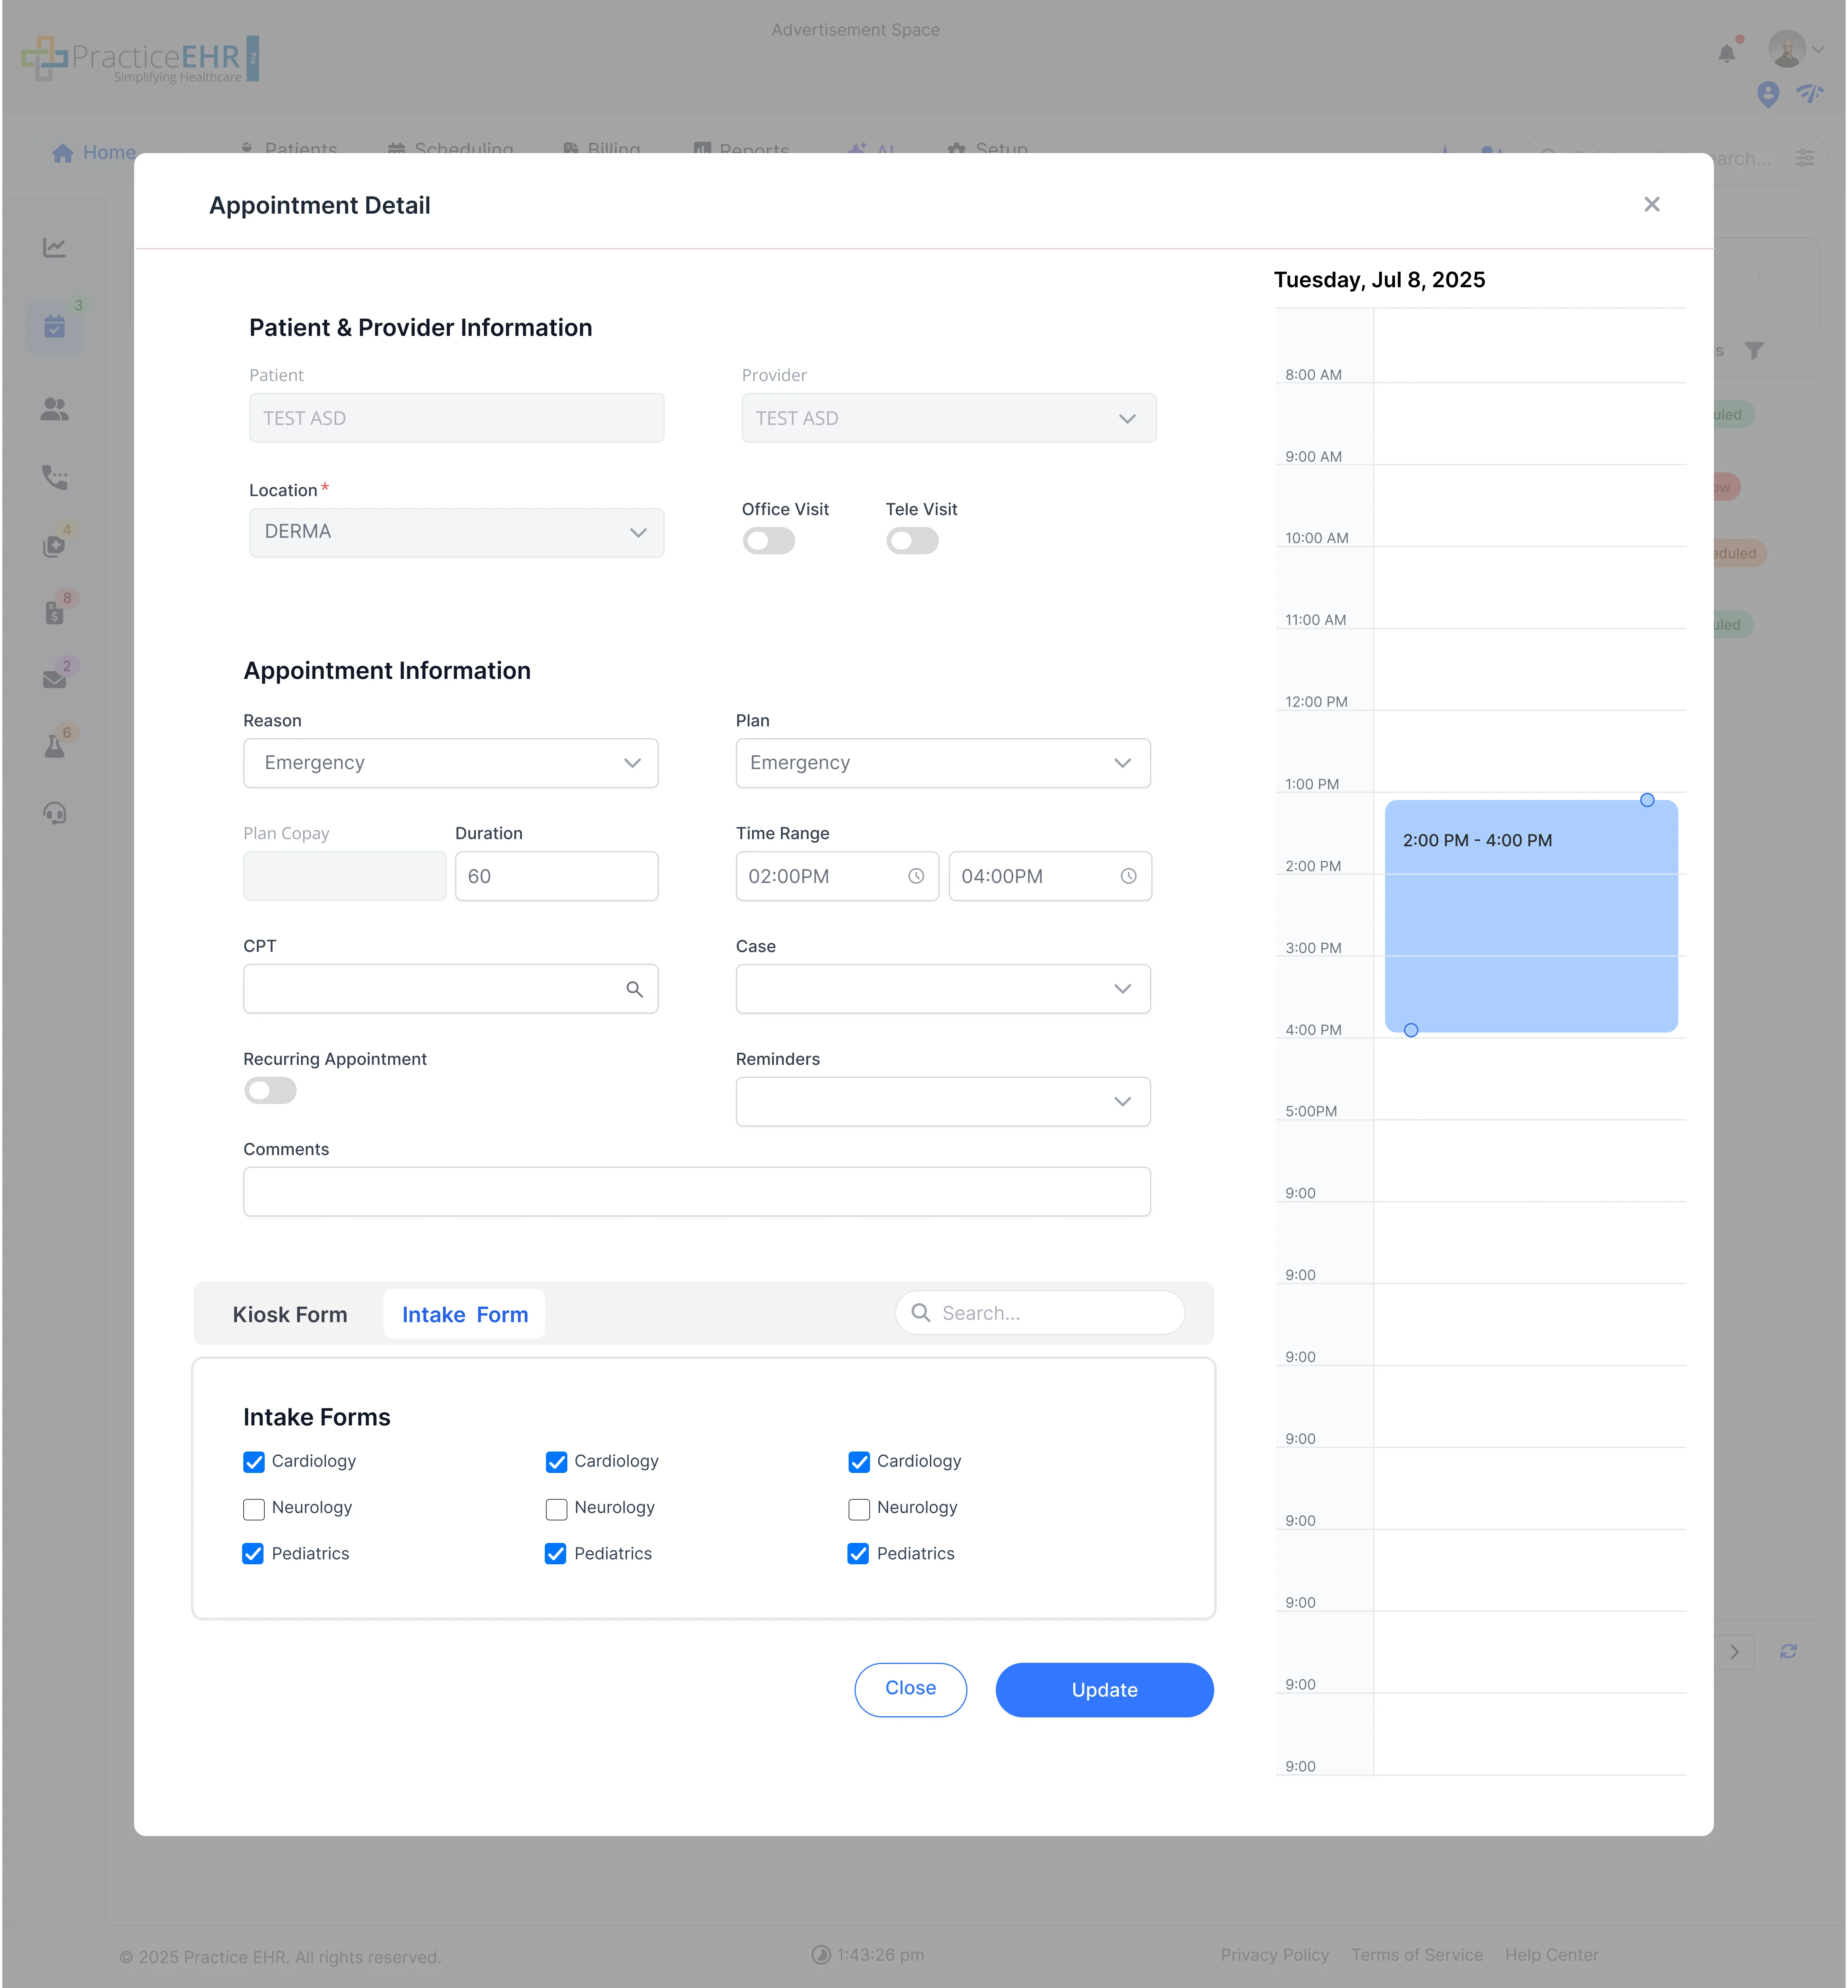
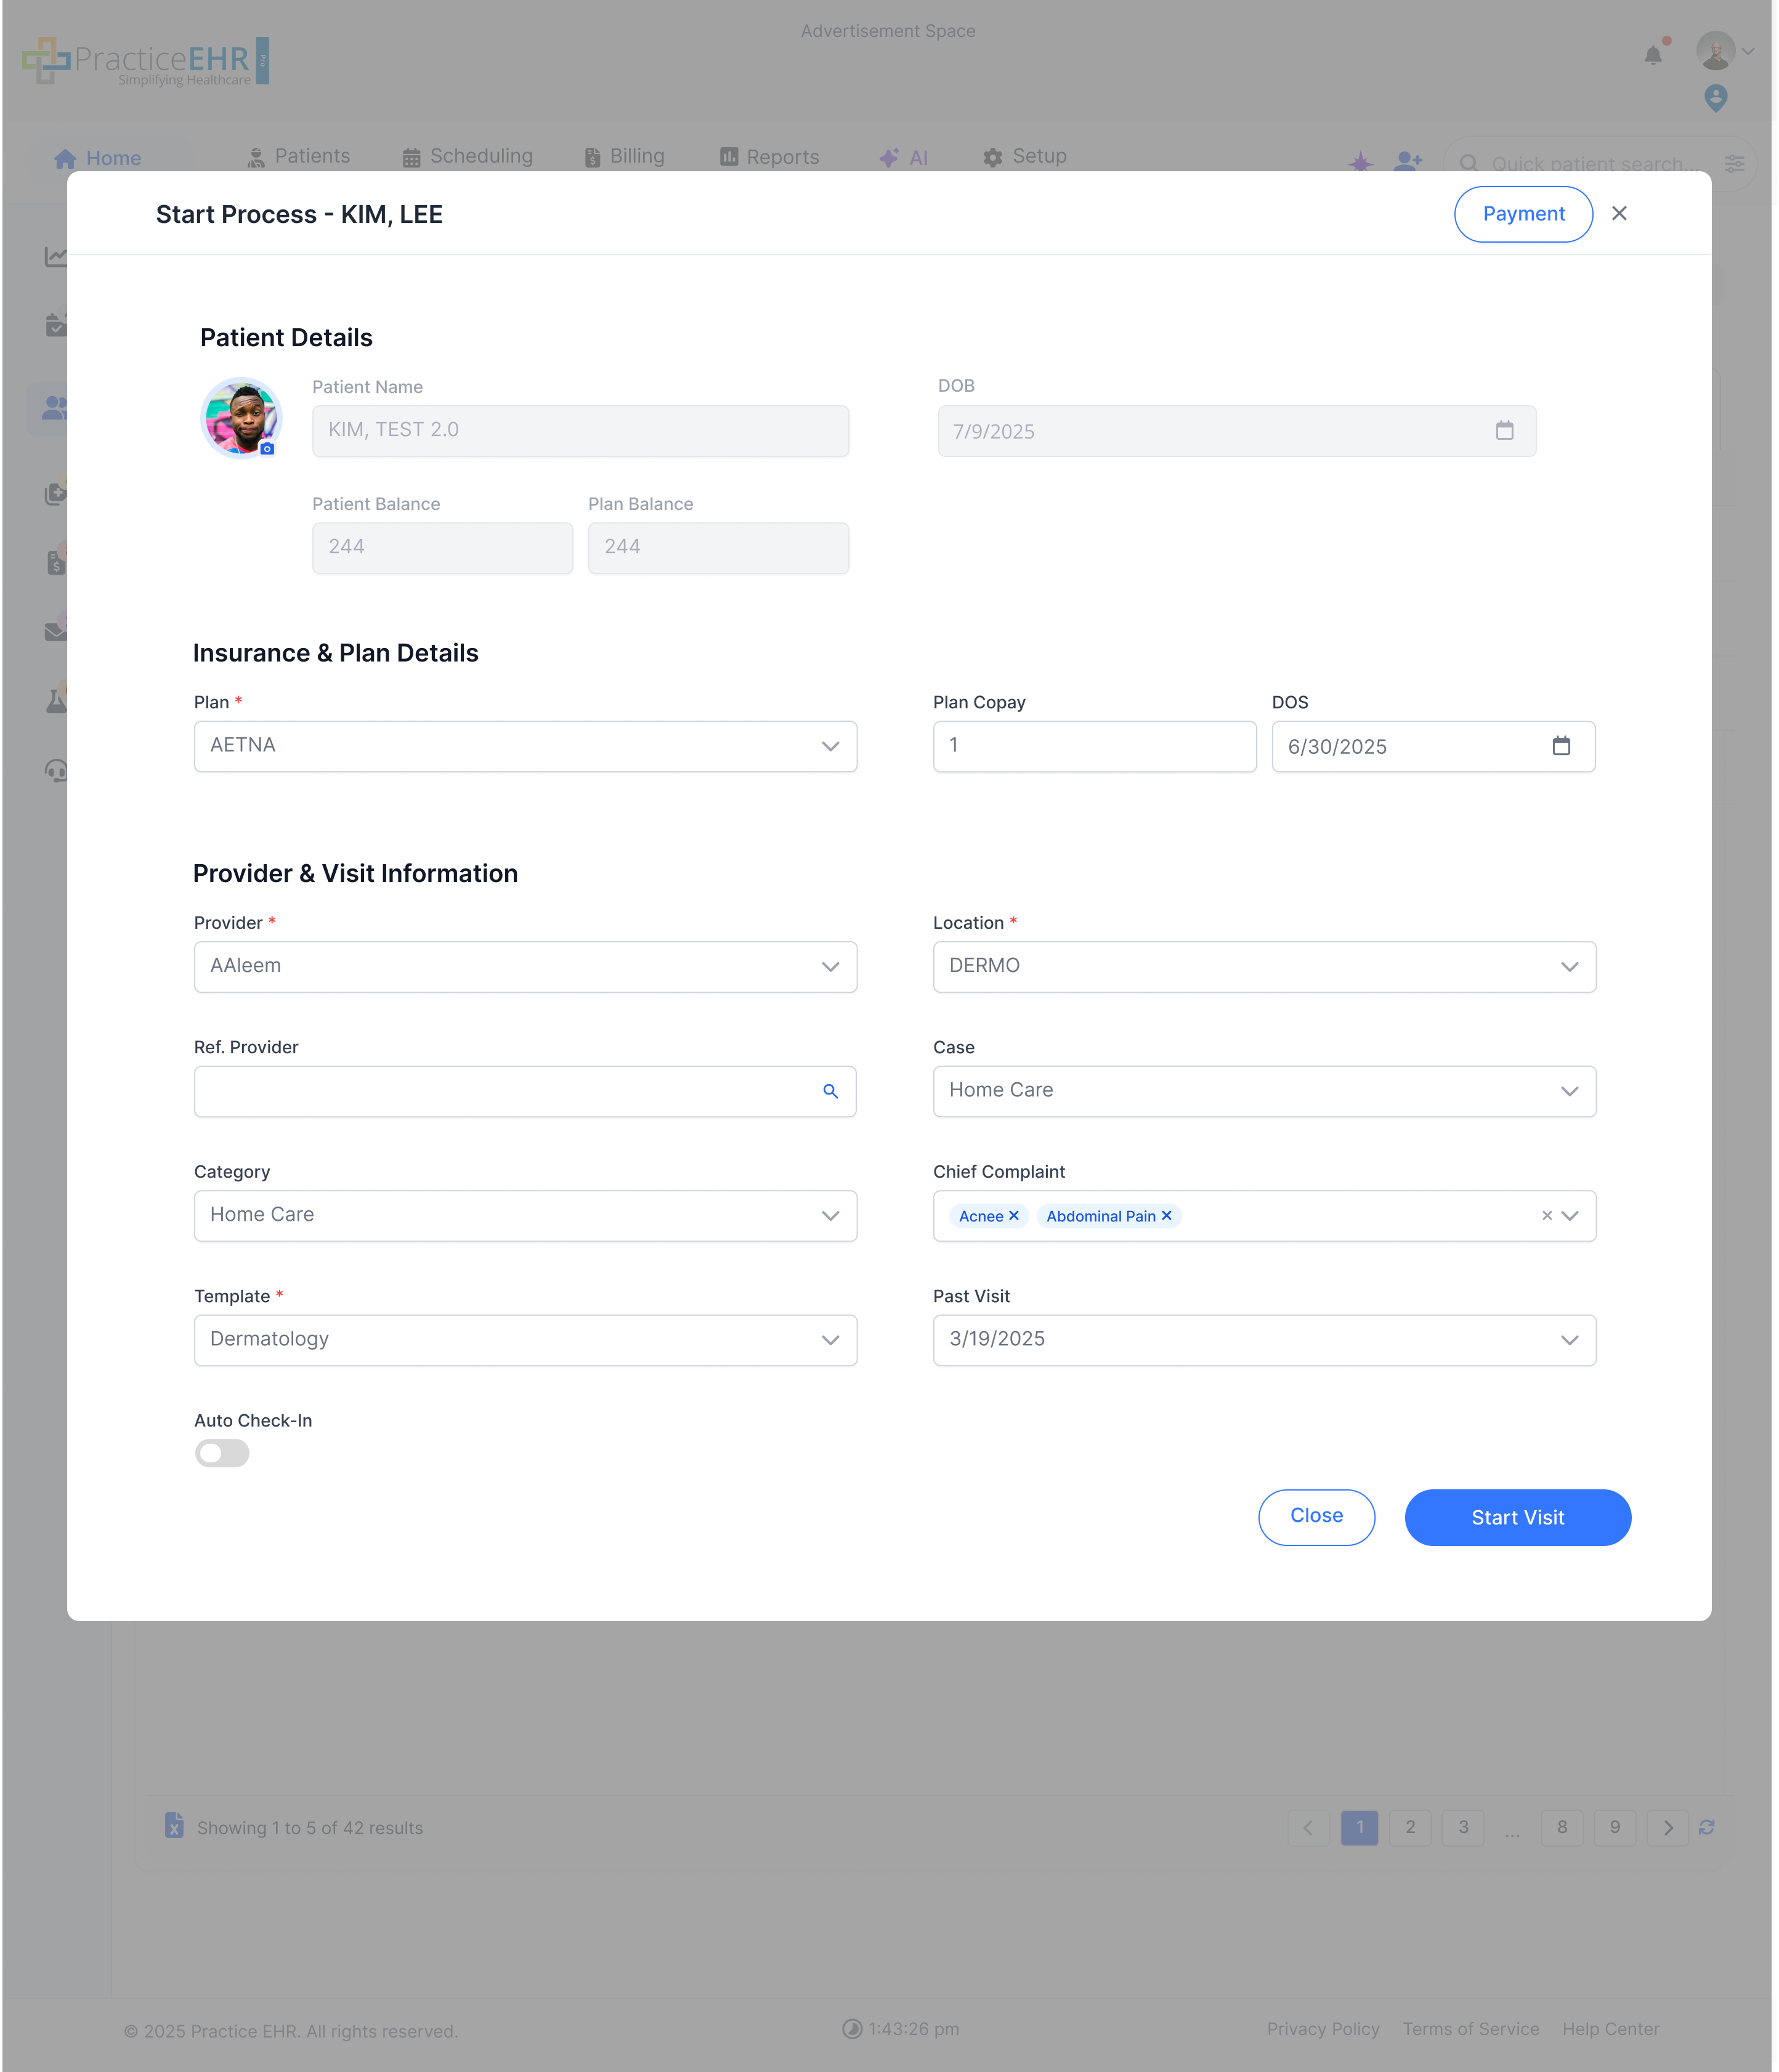
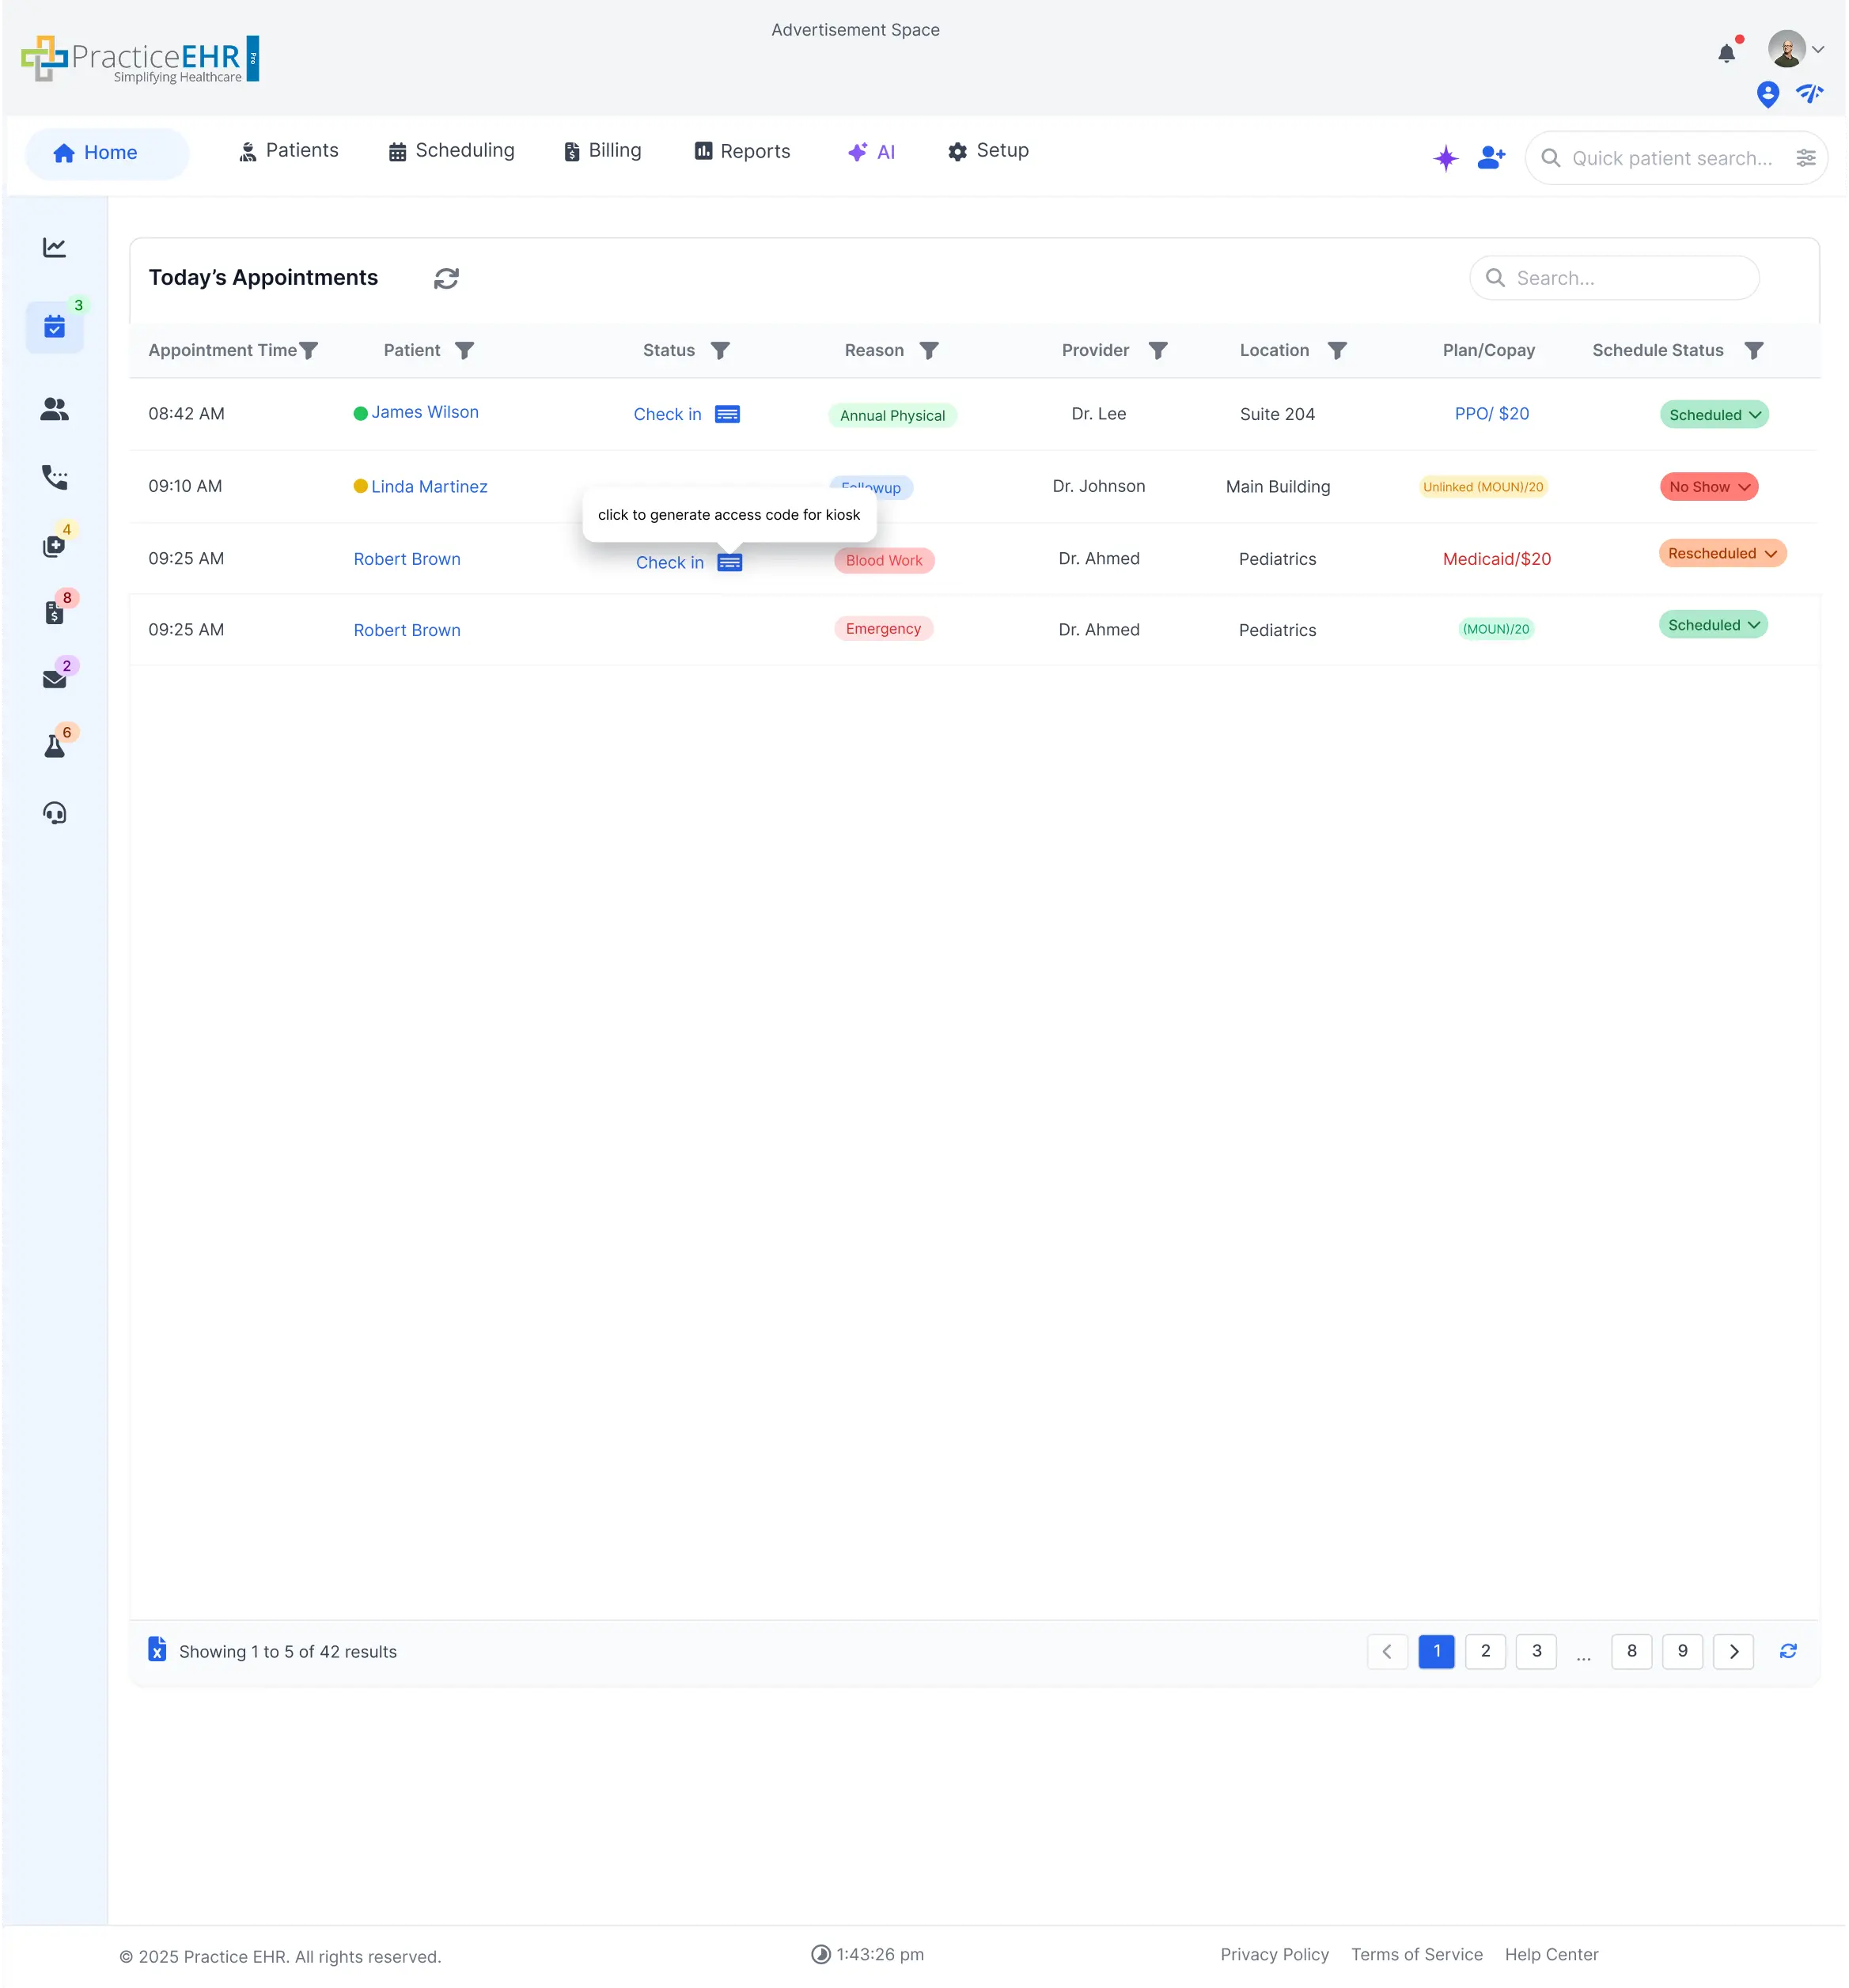
Today's Appointments
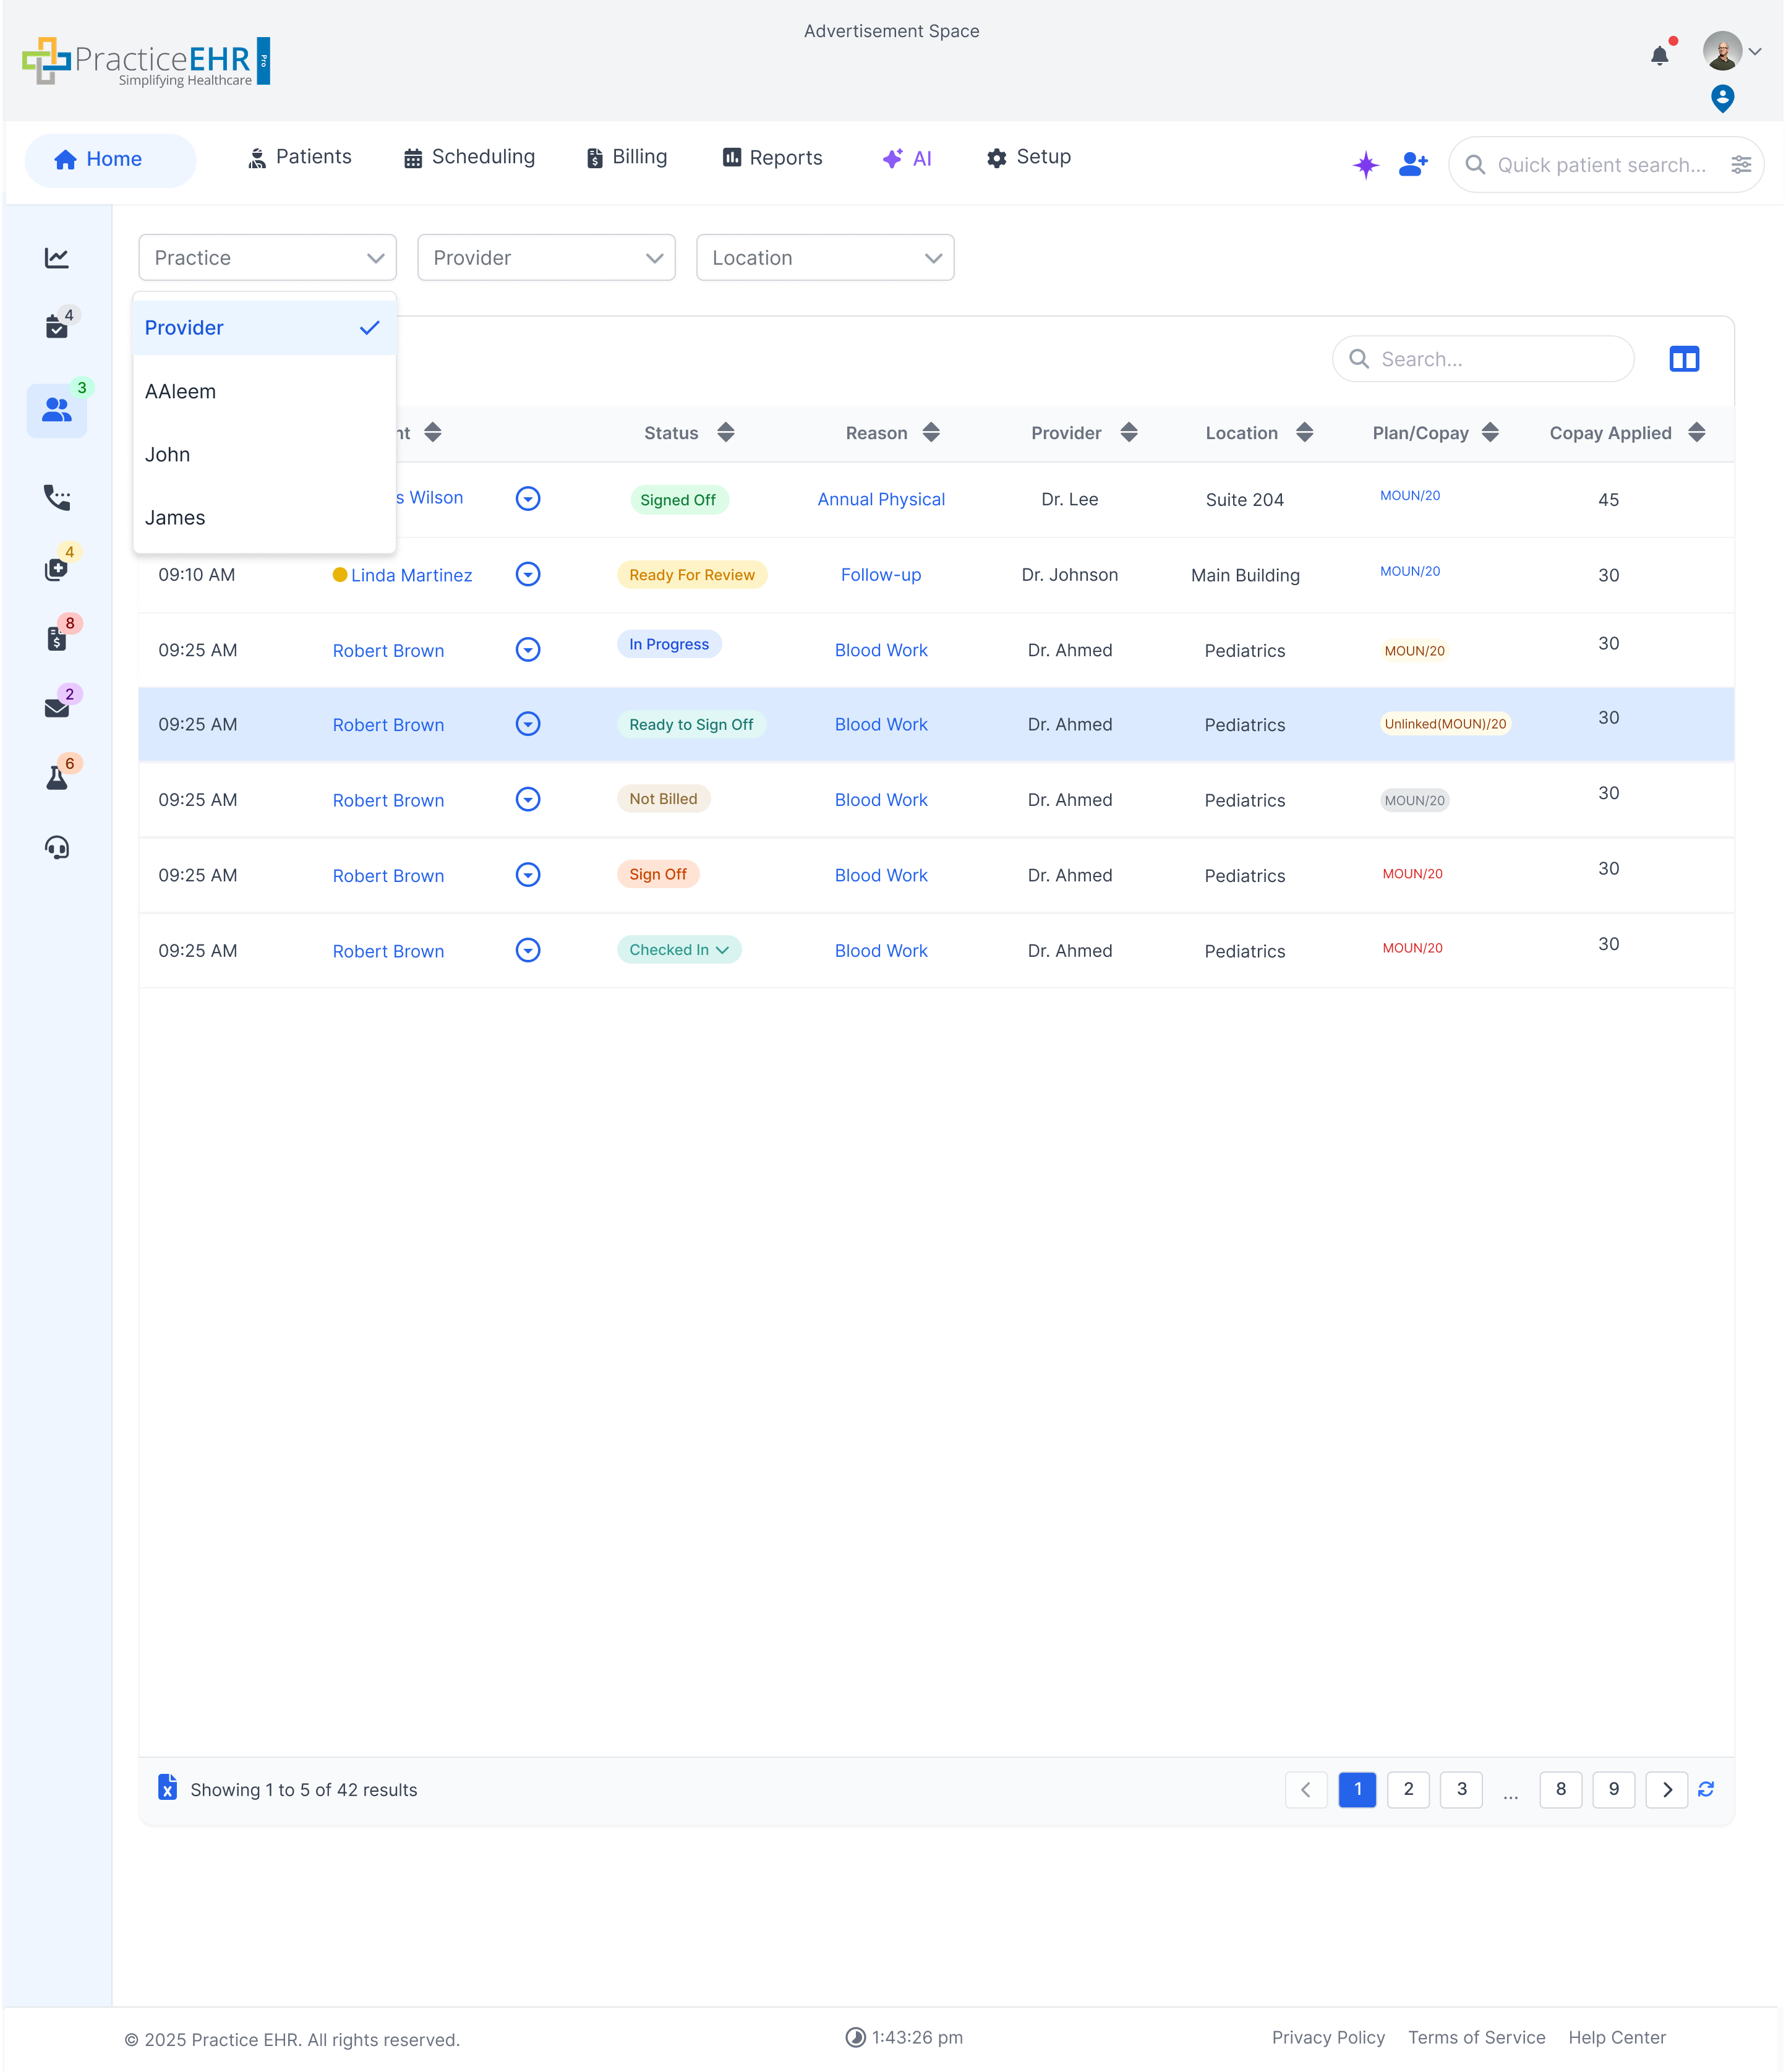
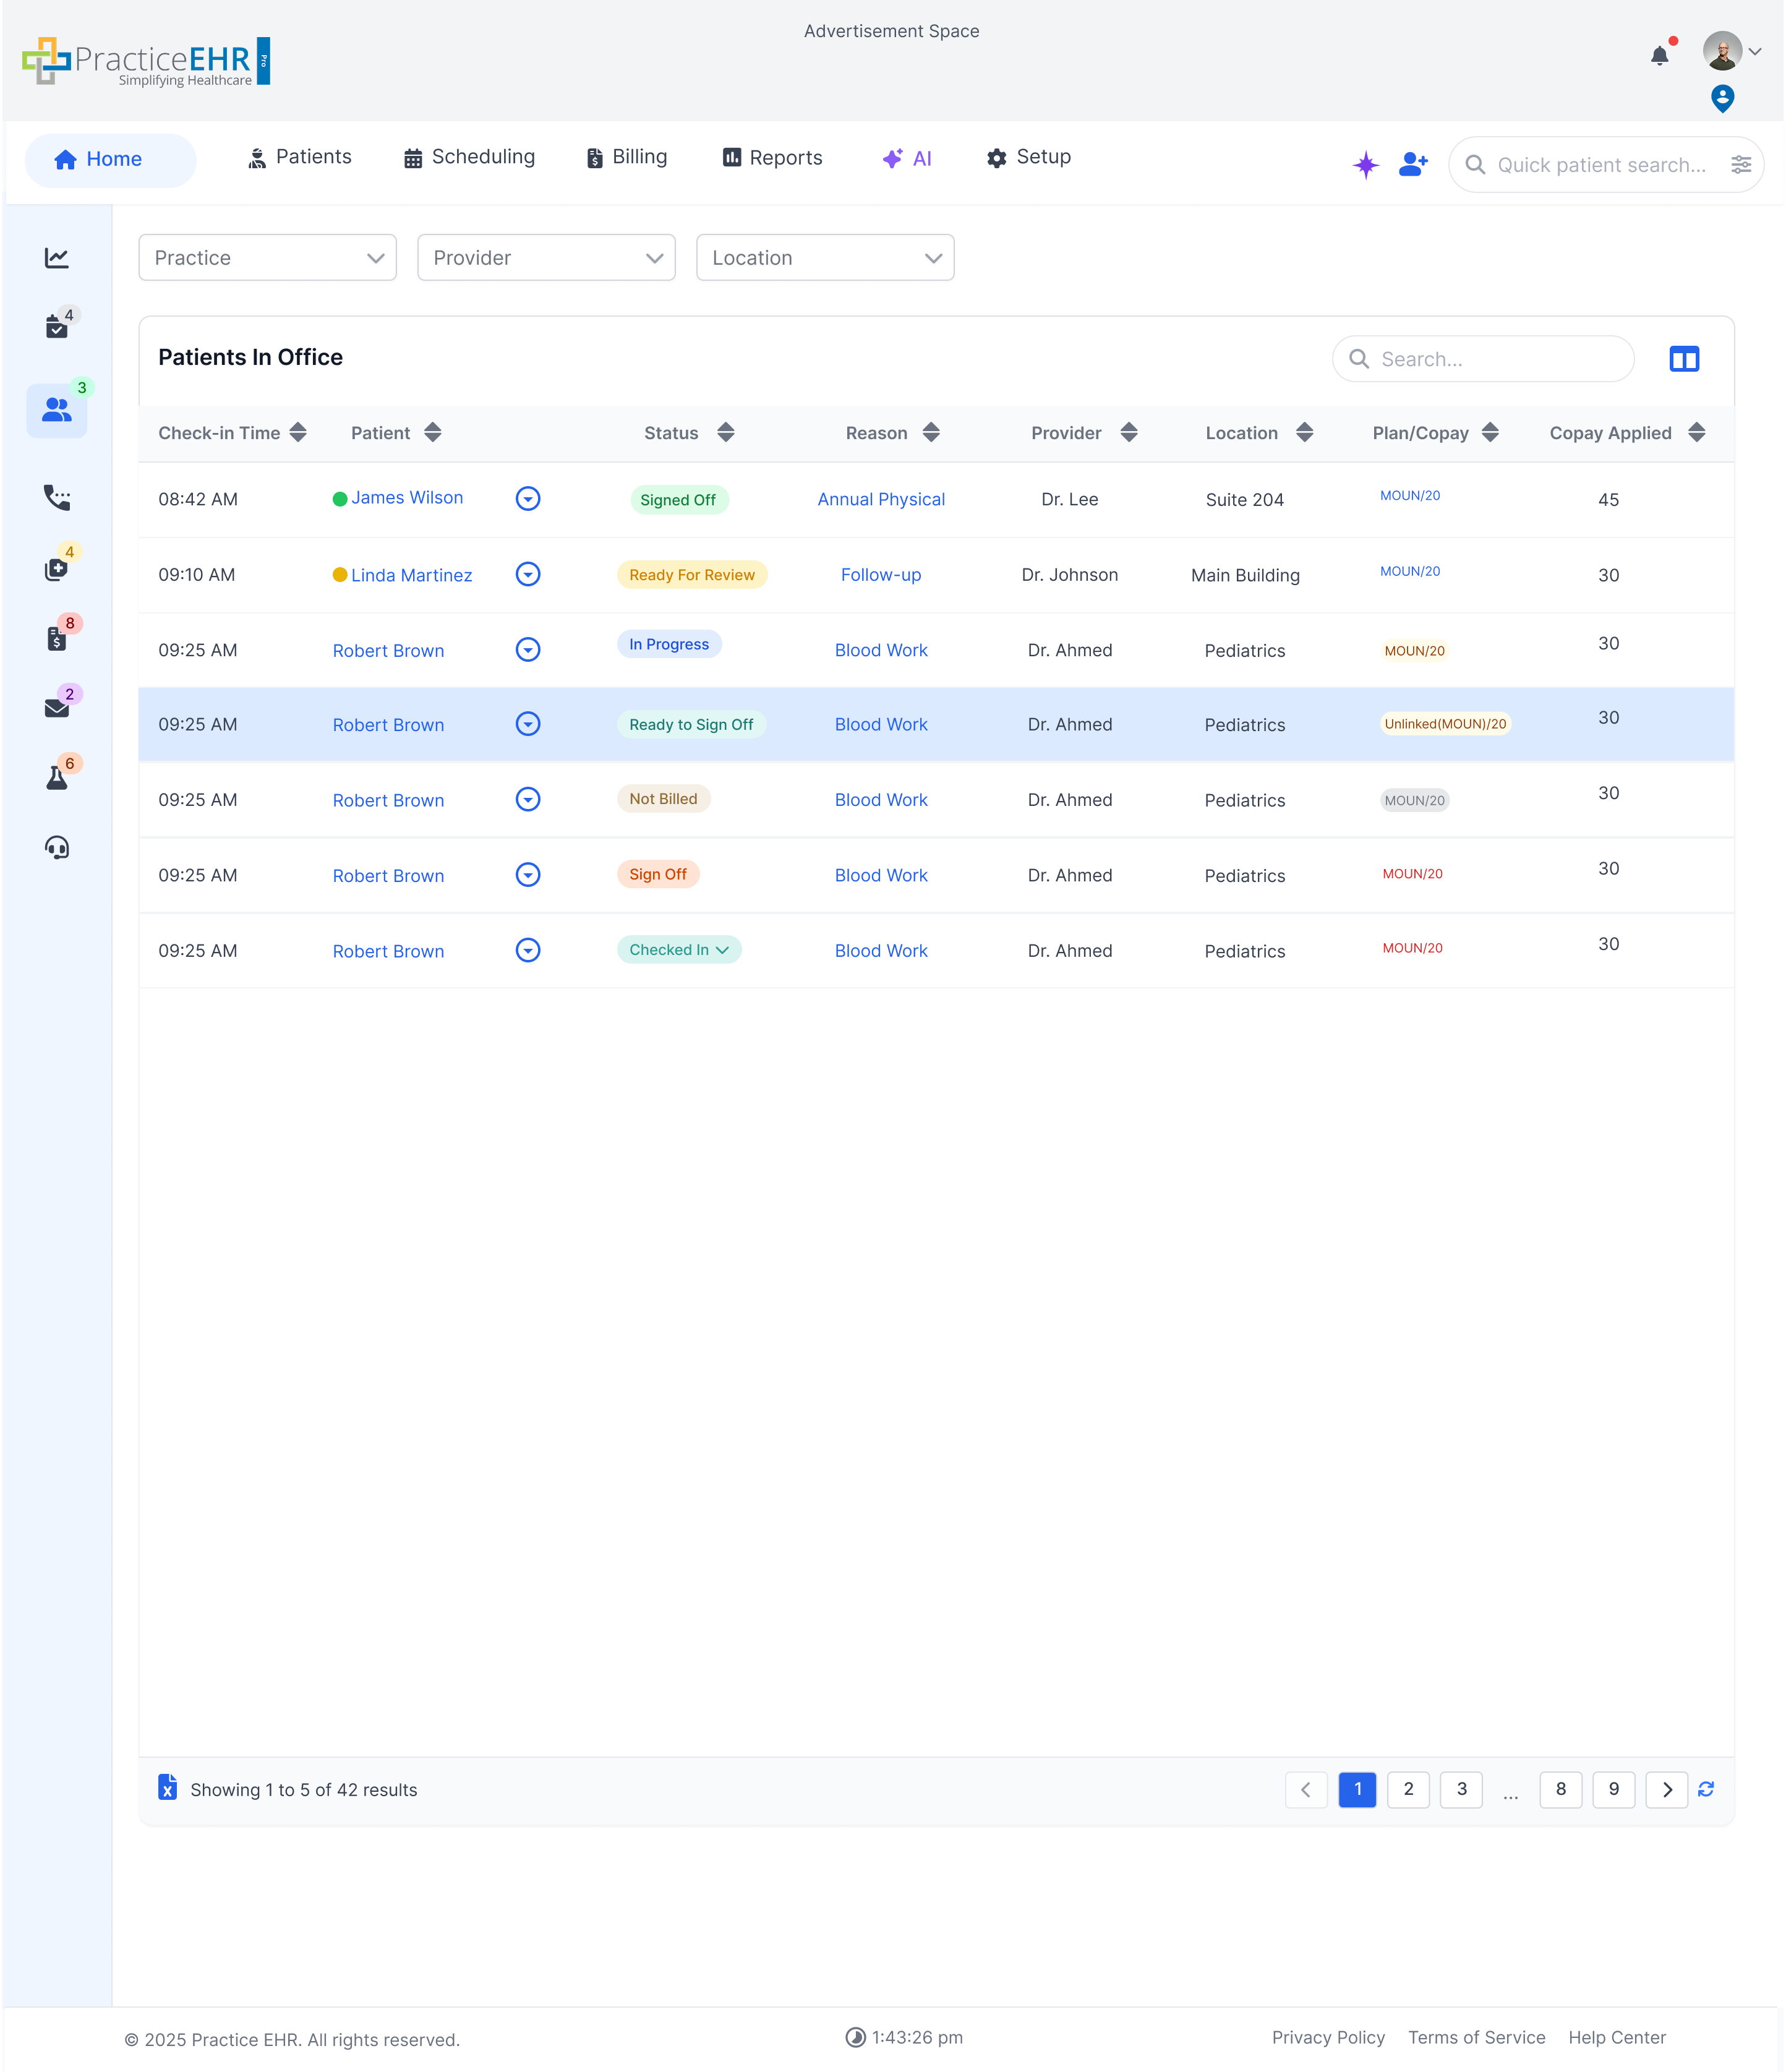
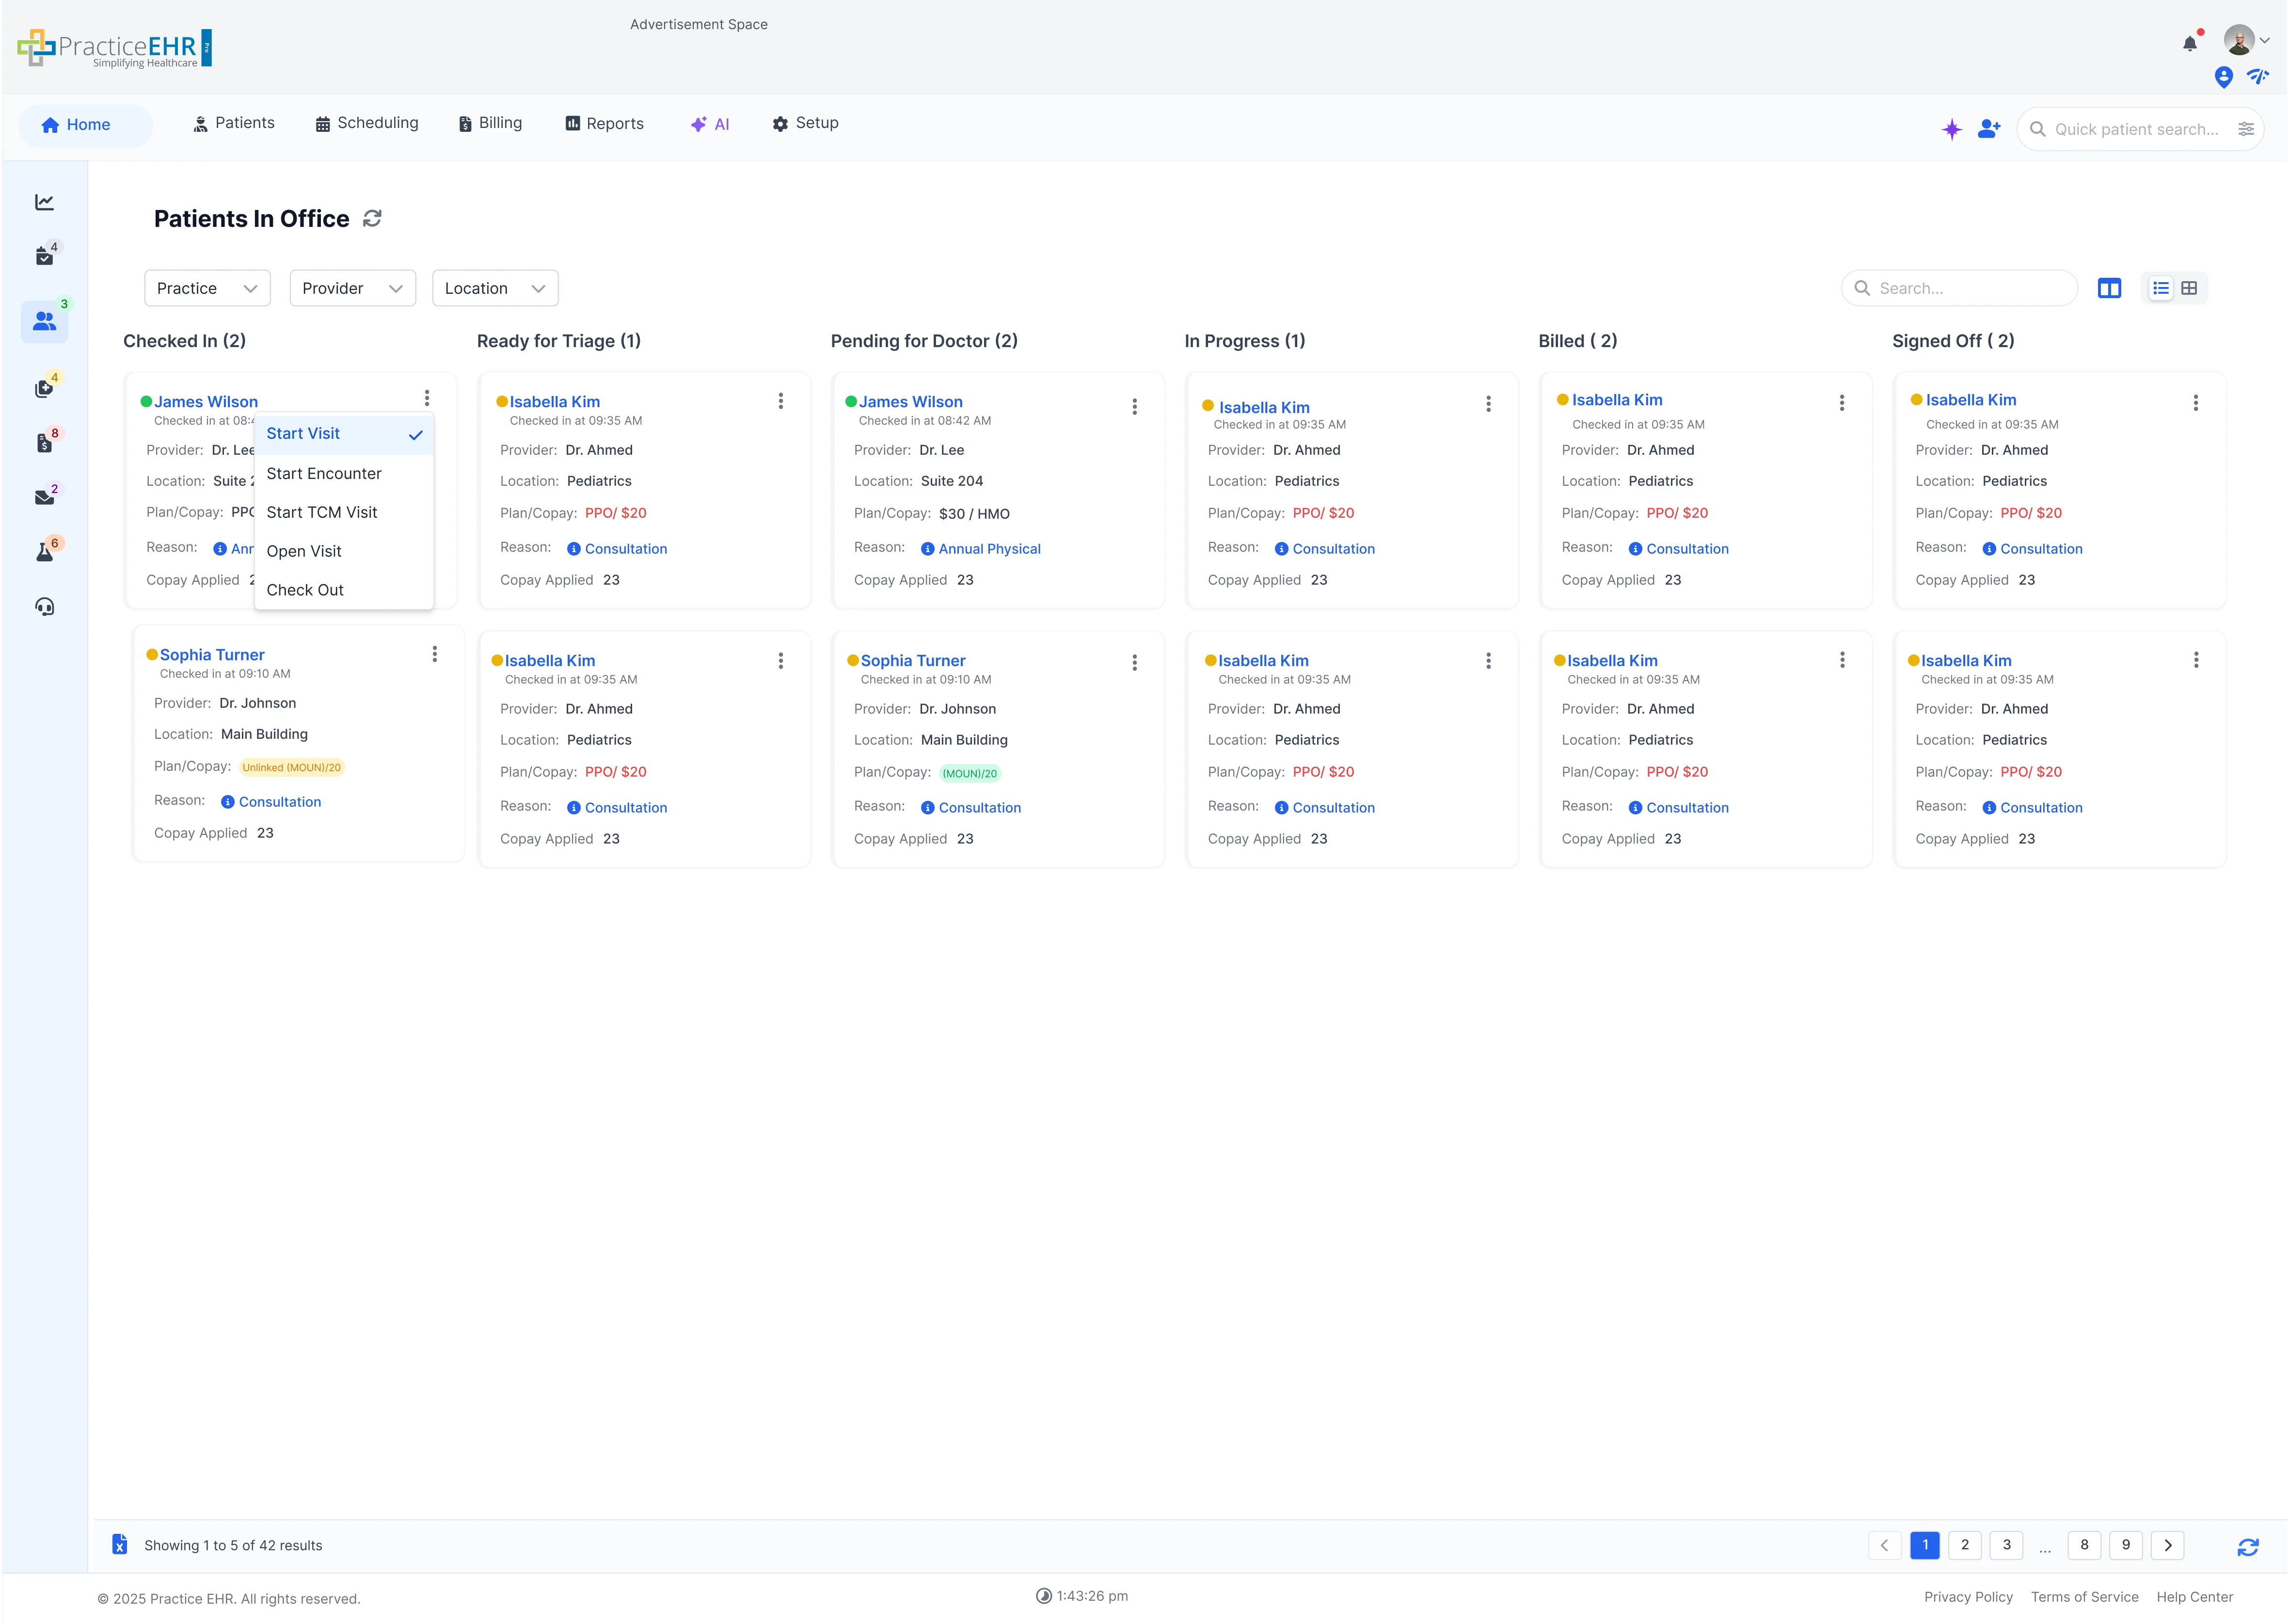
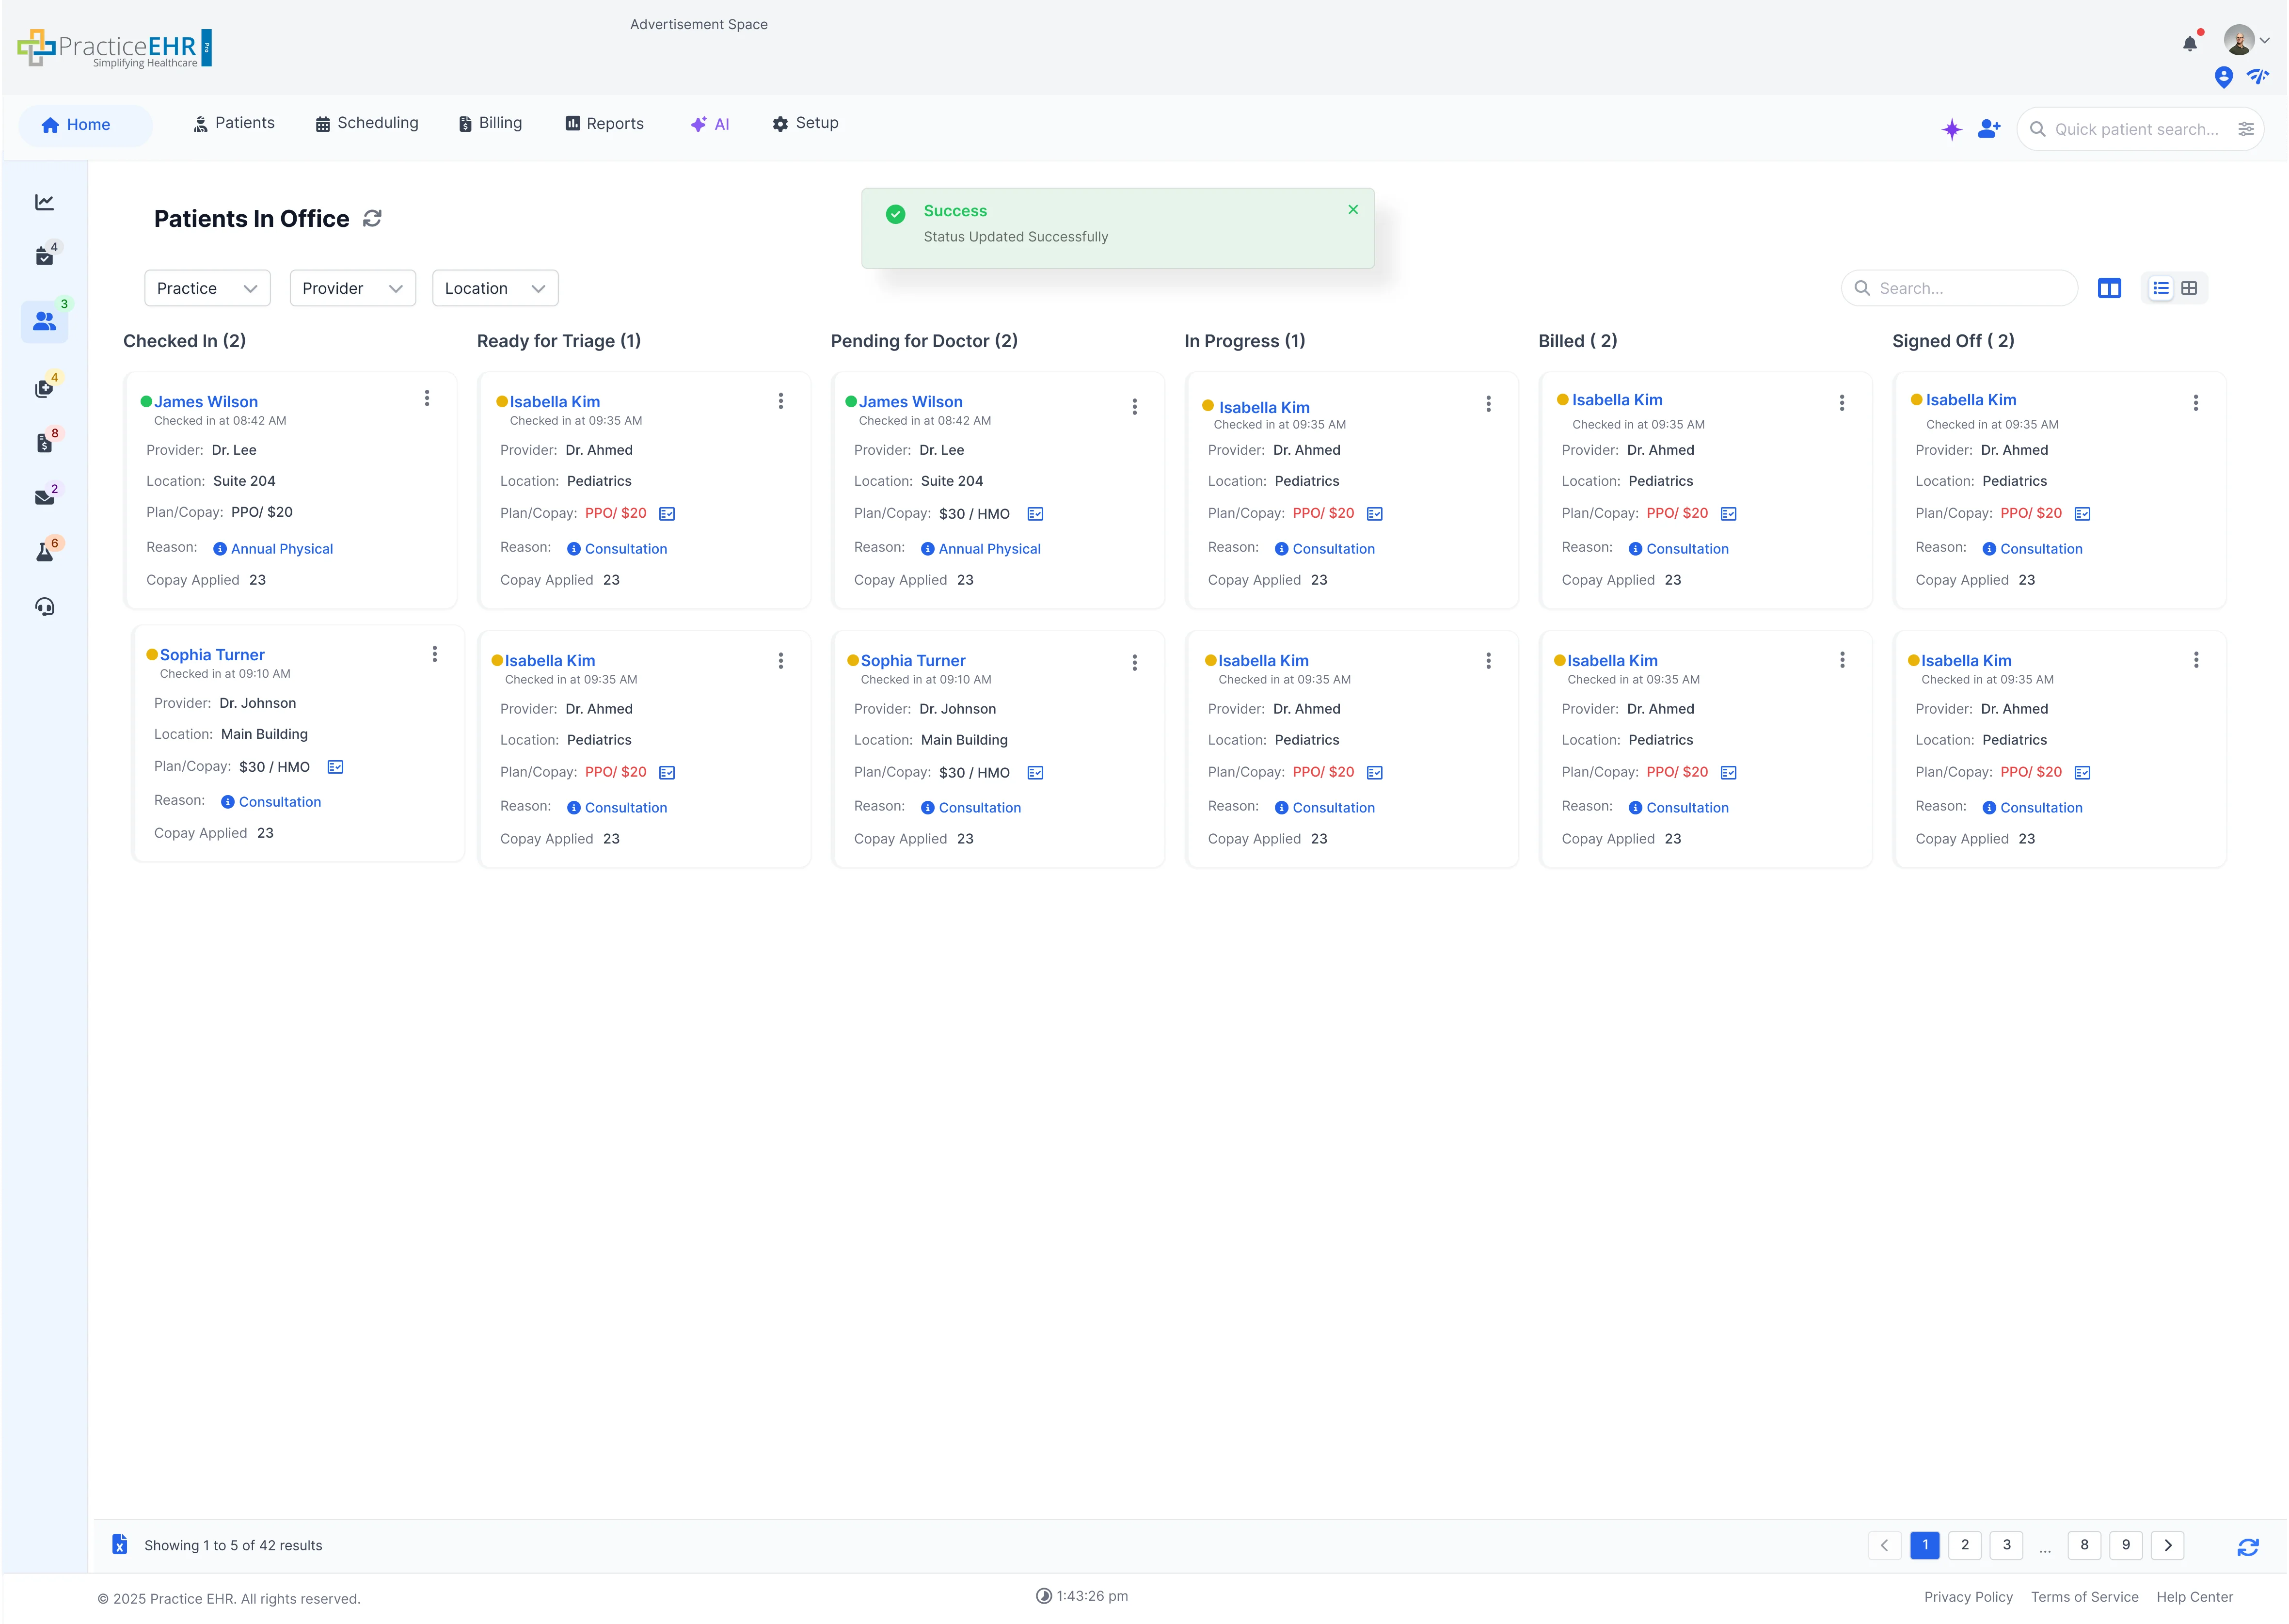
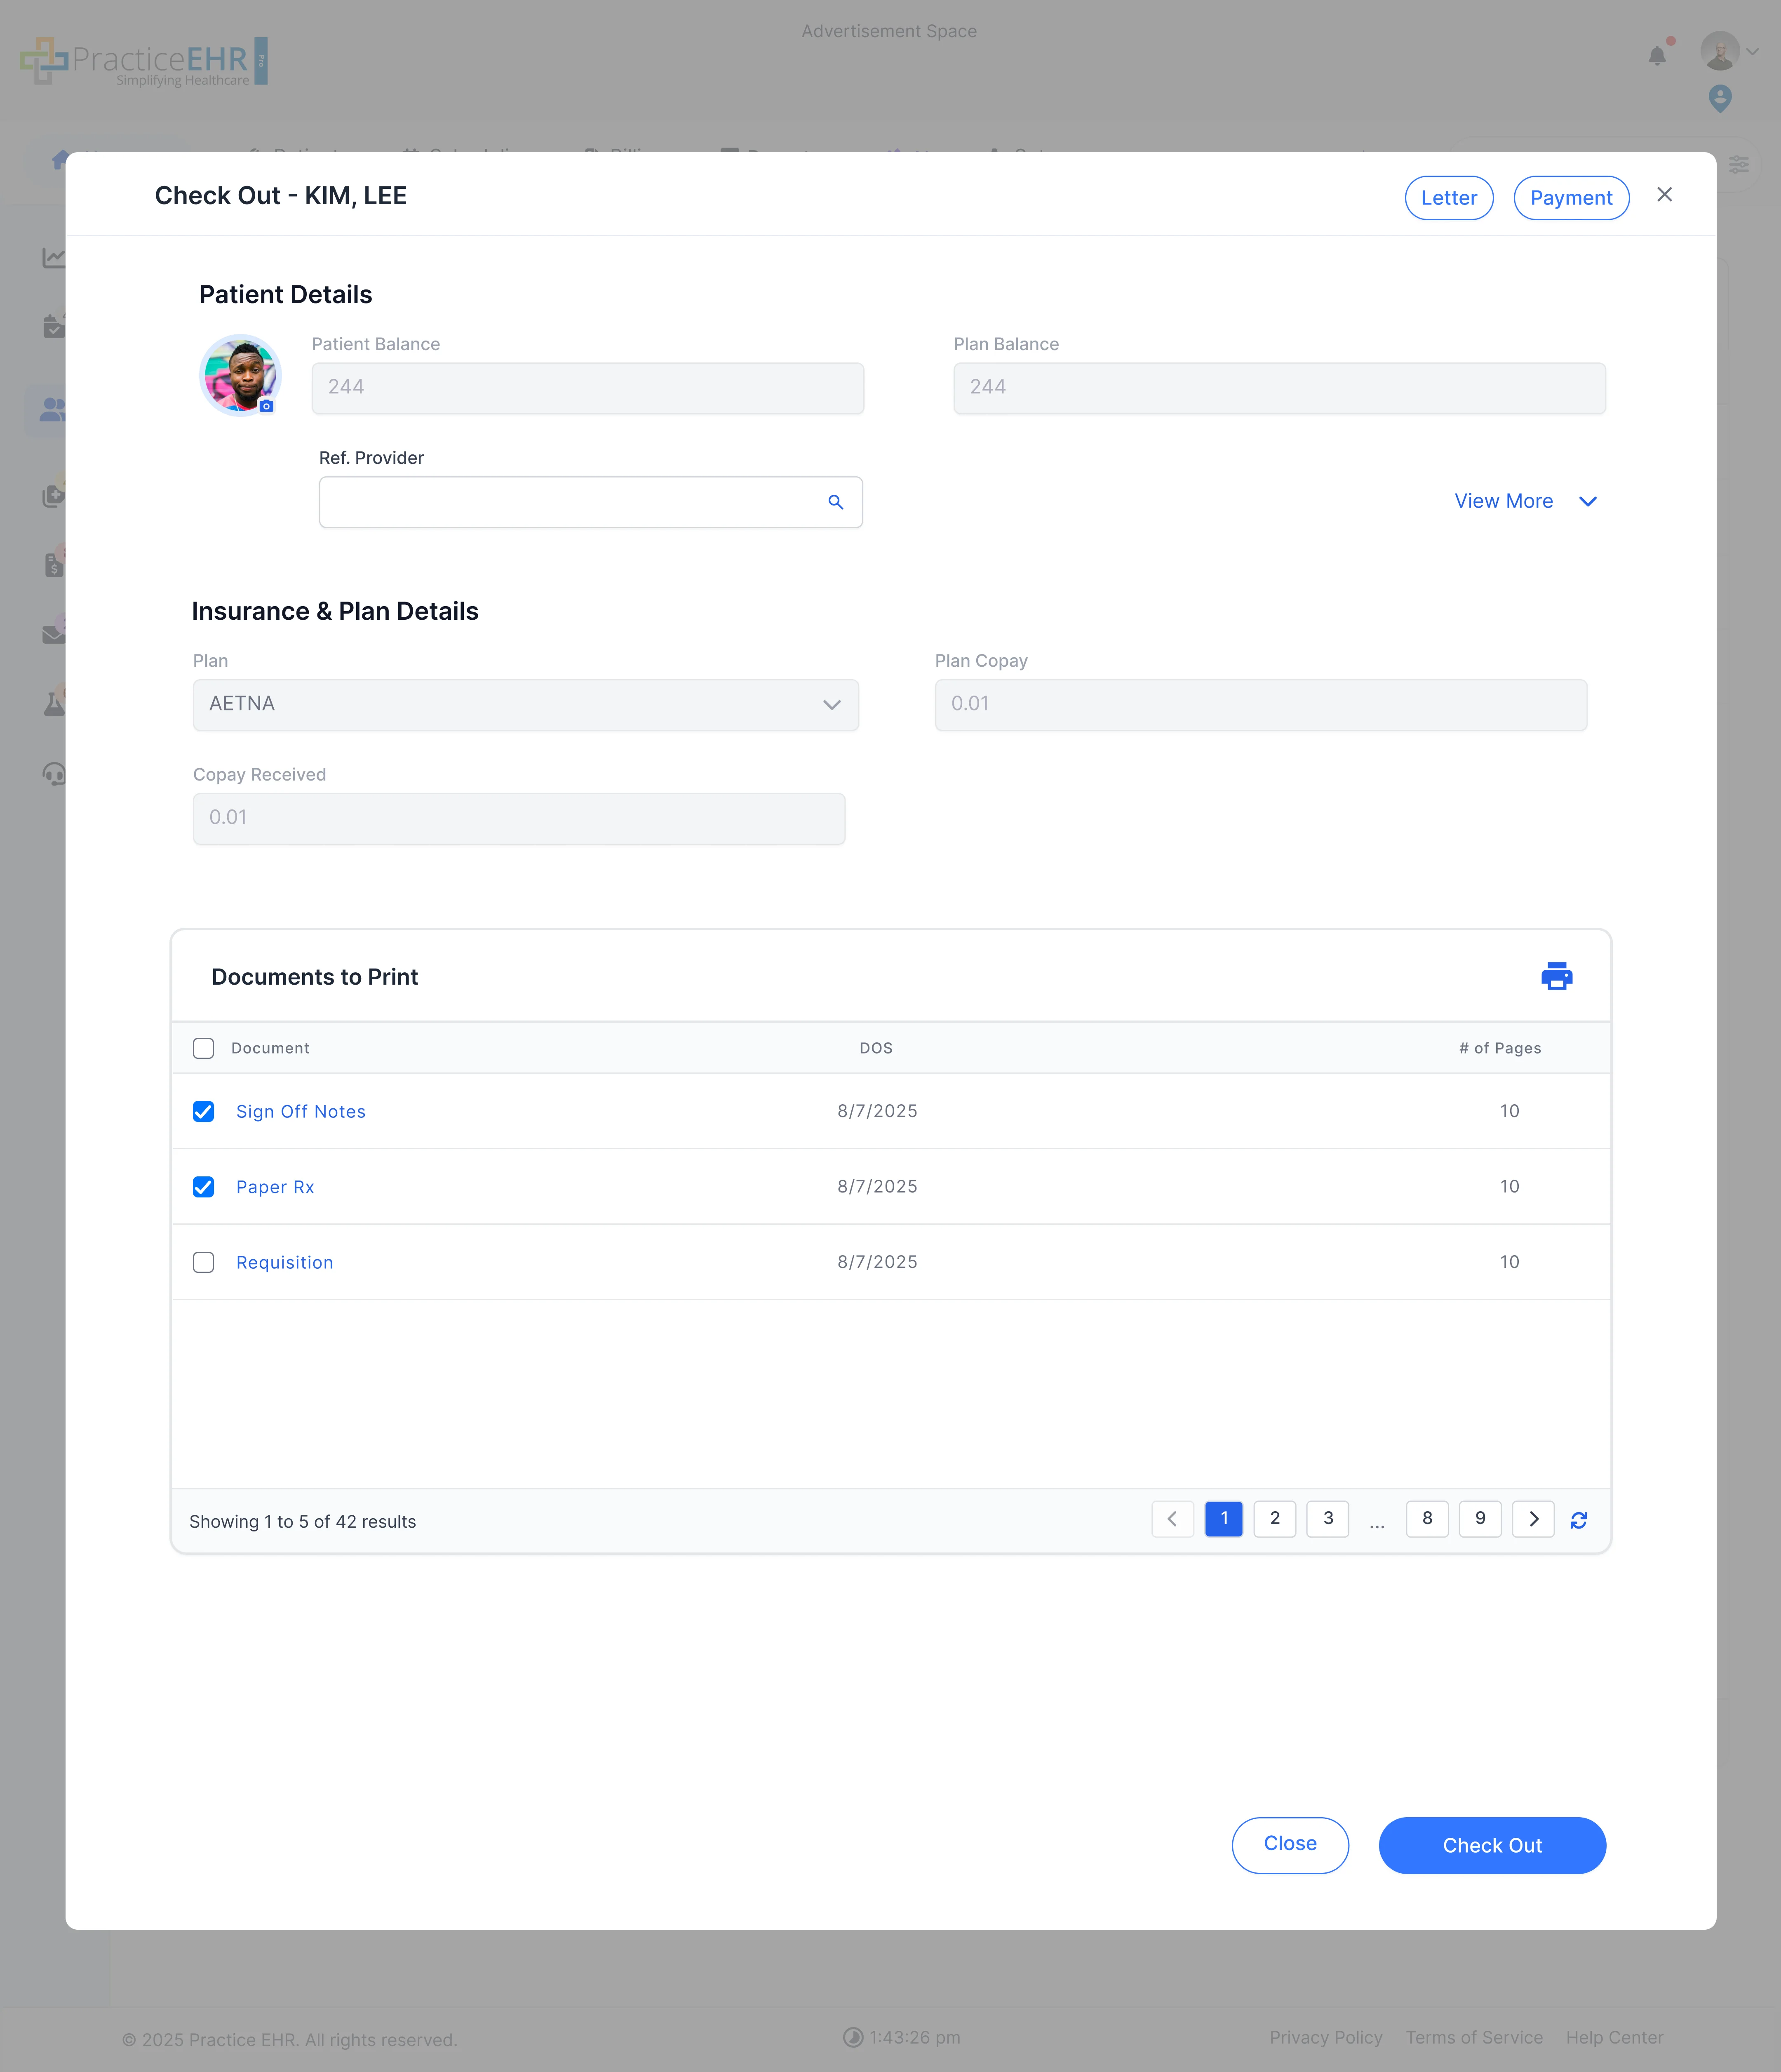
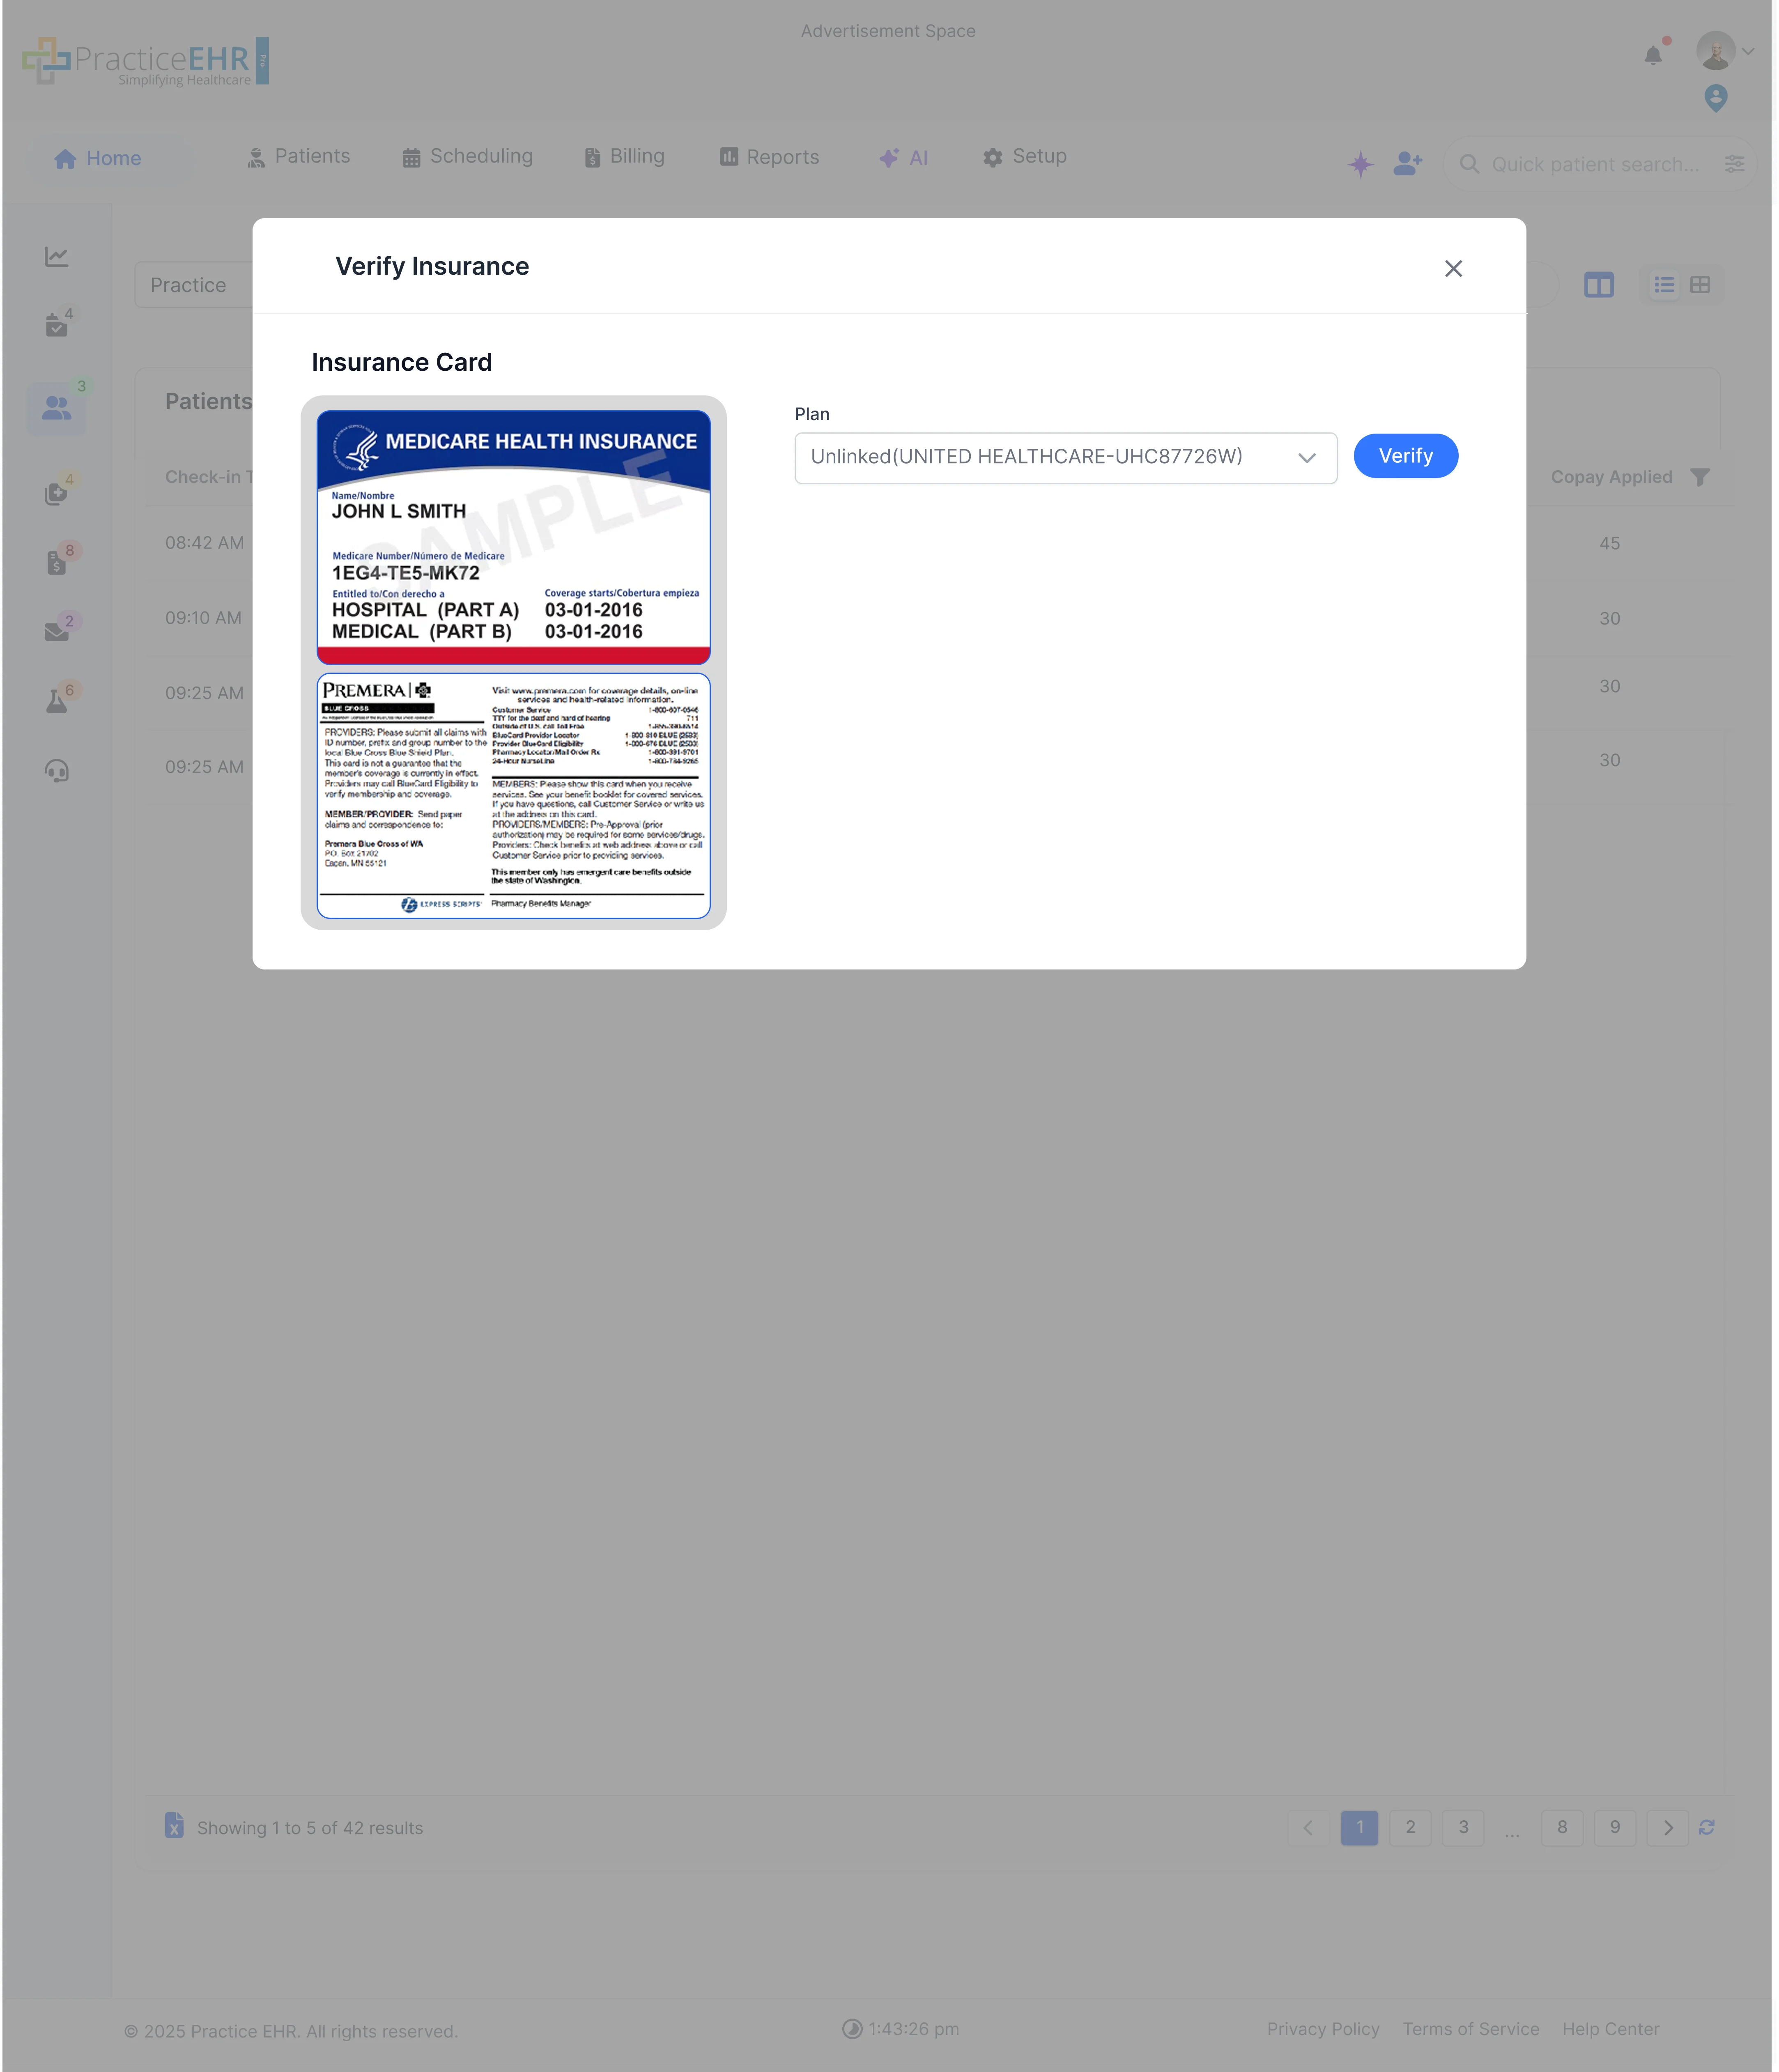
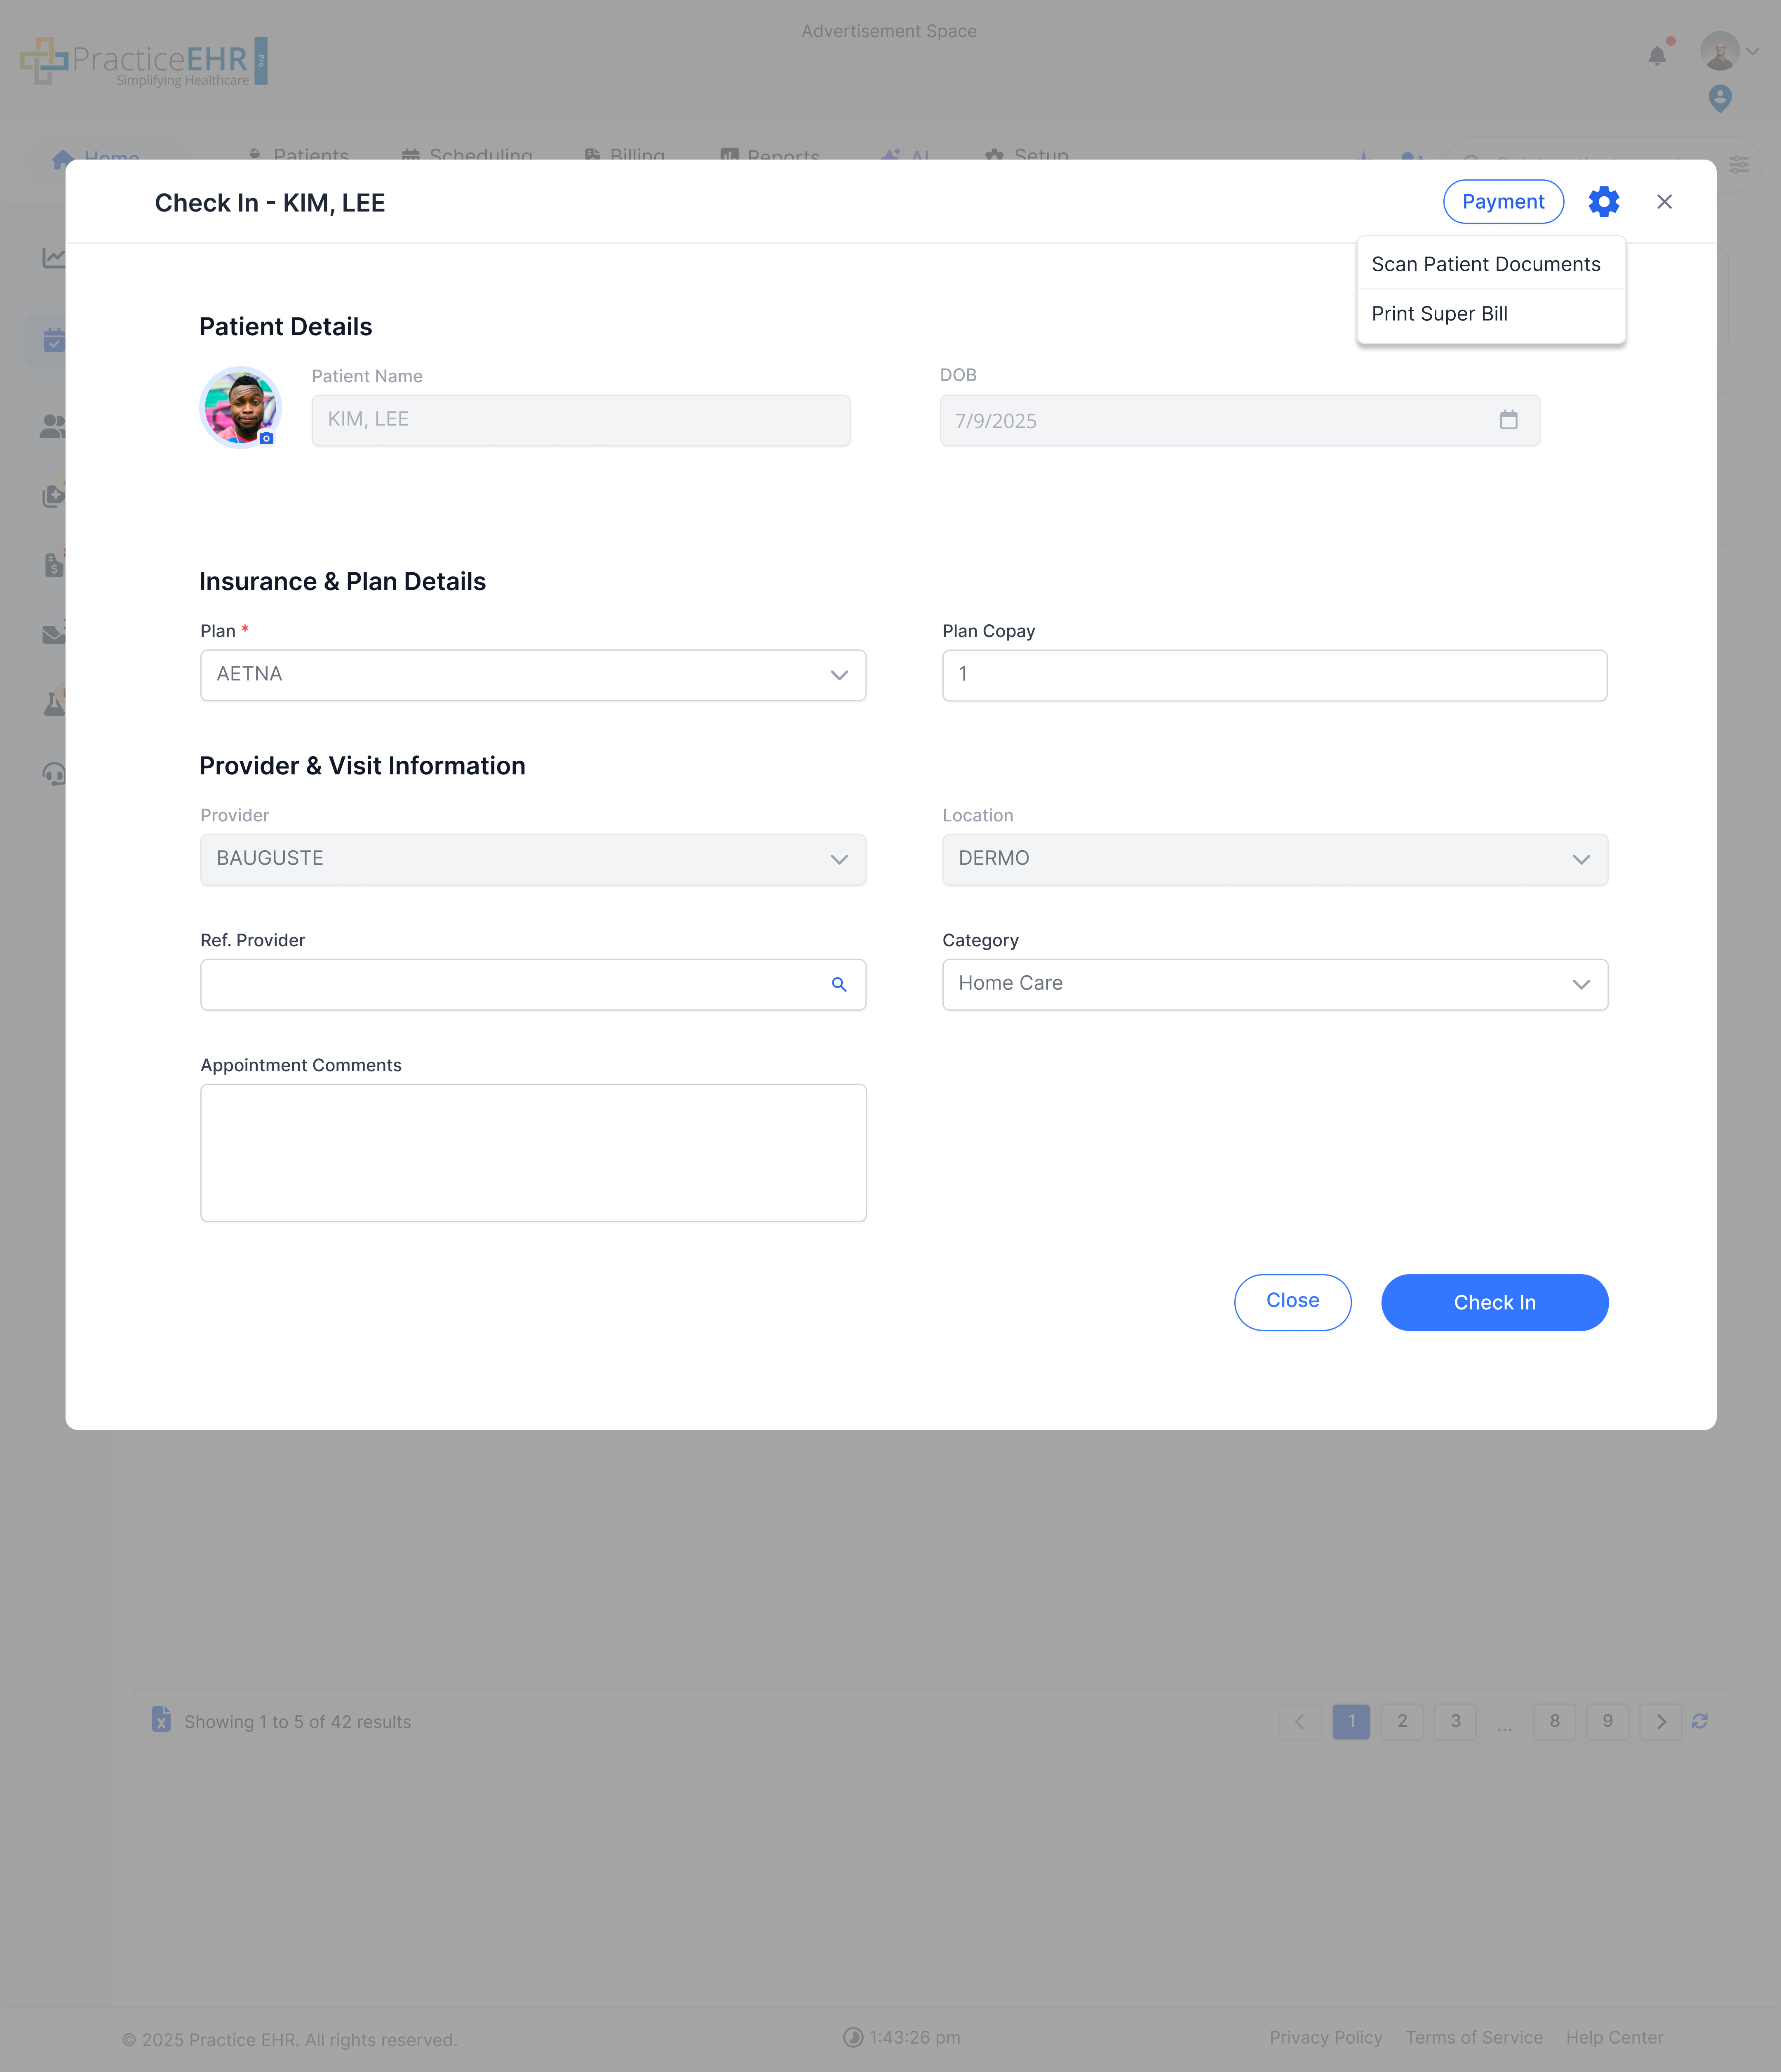
Patients In Office
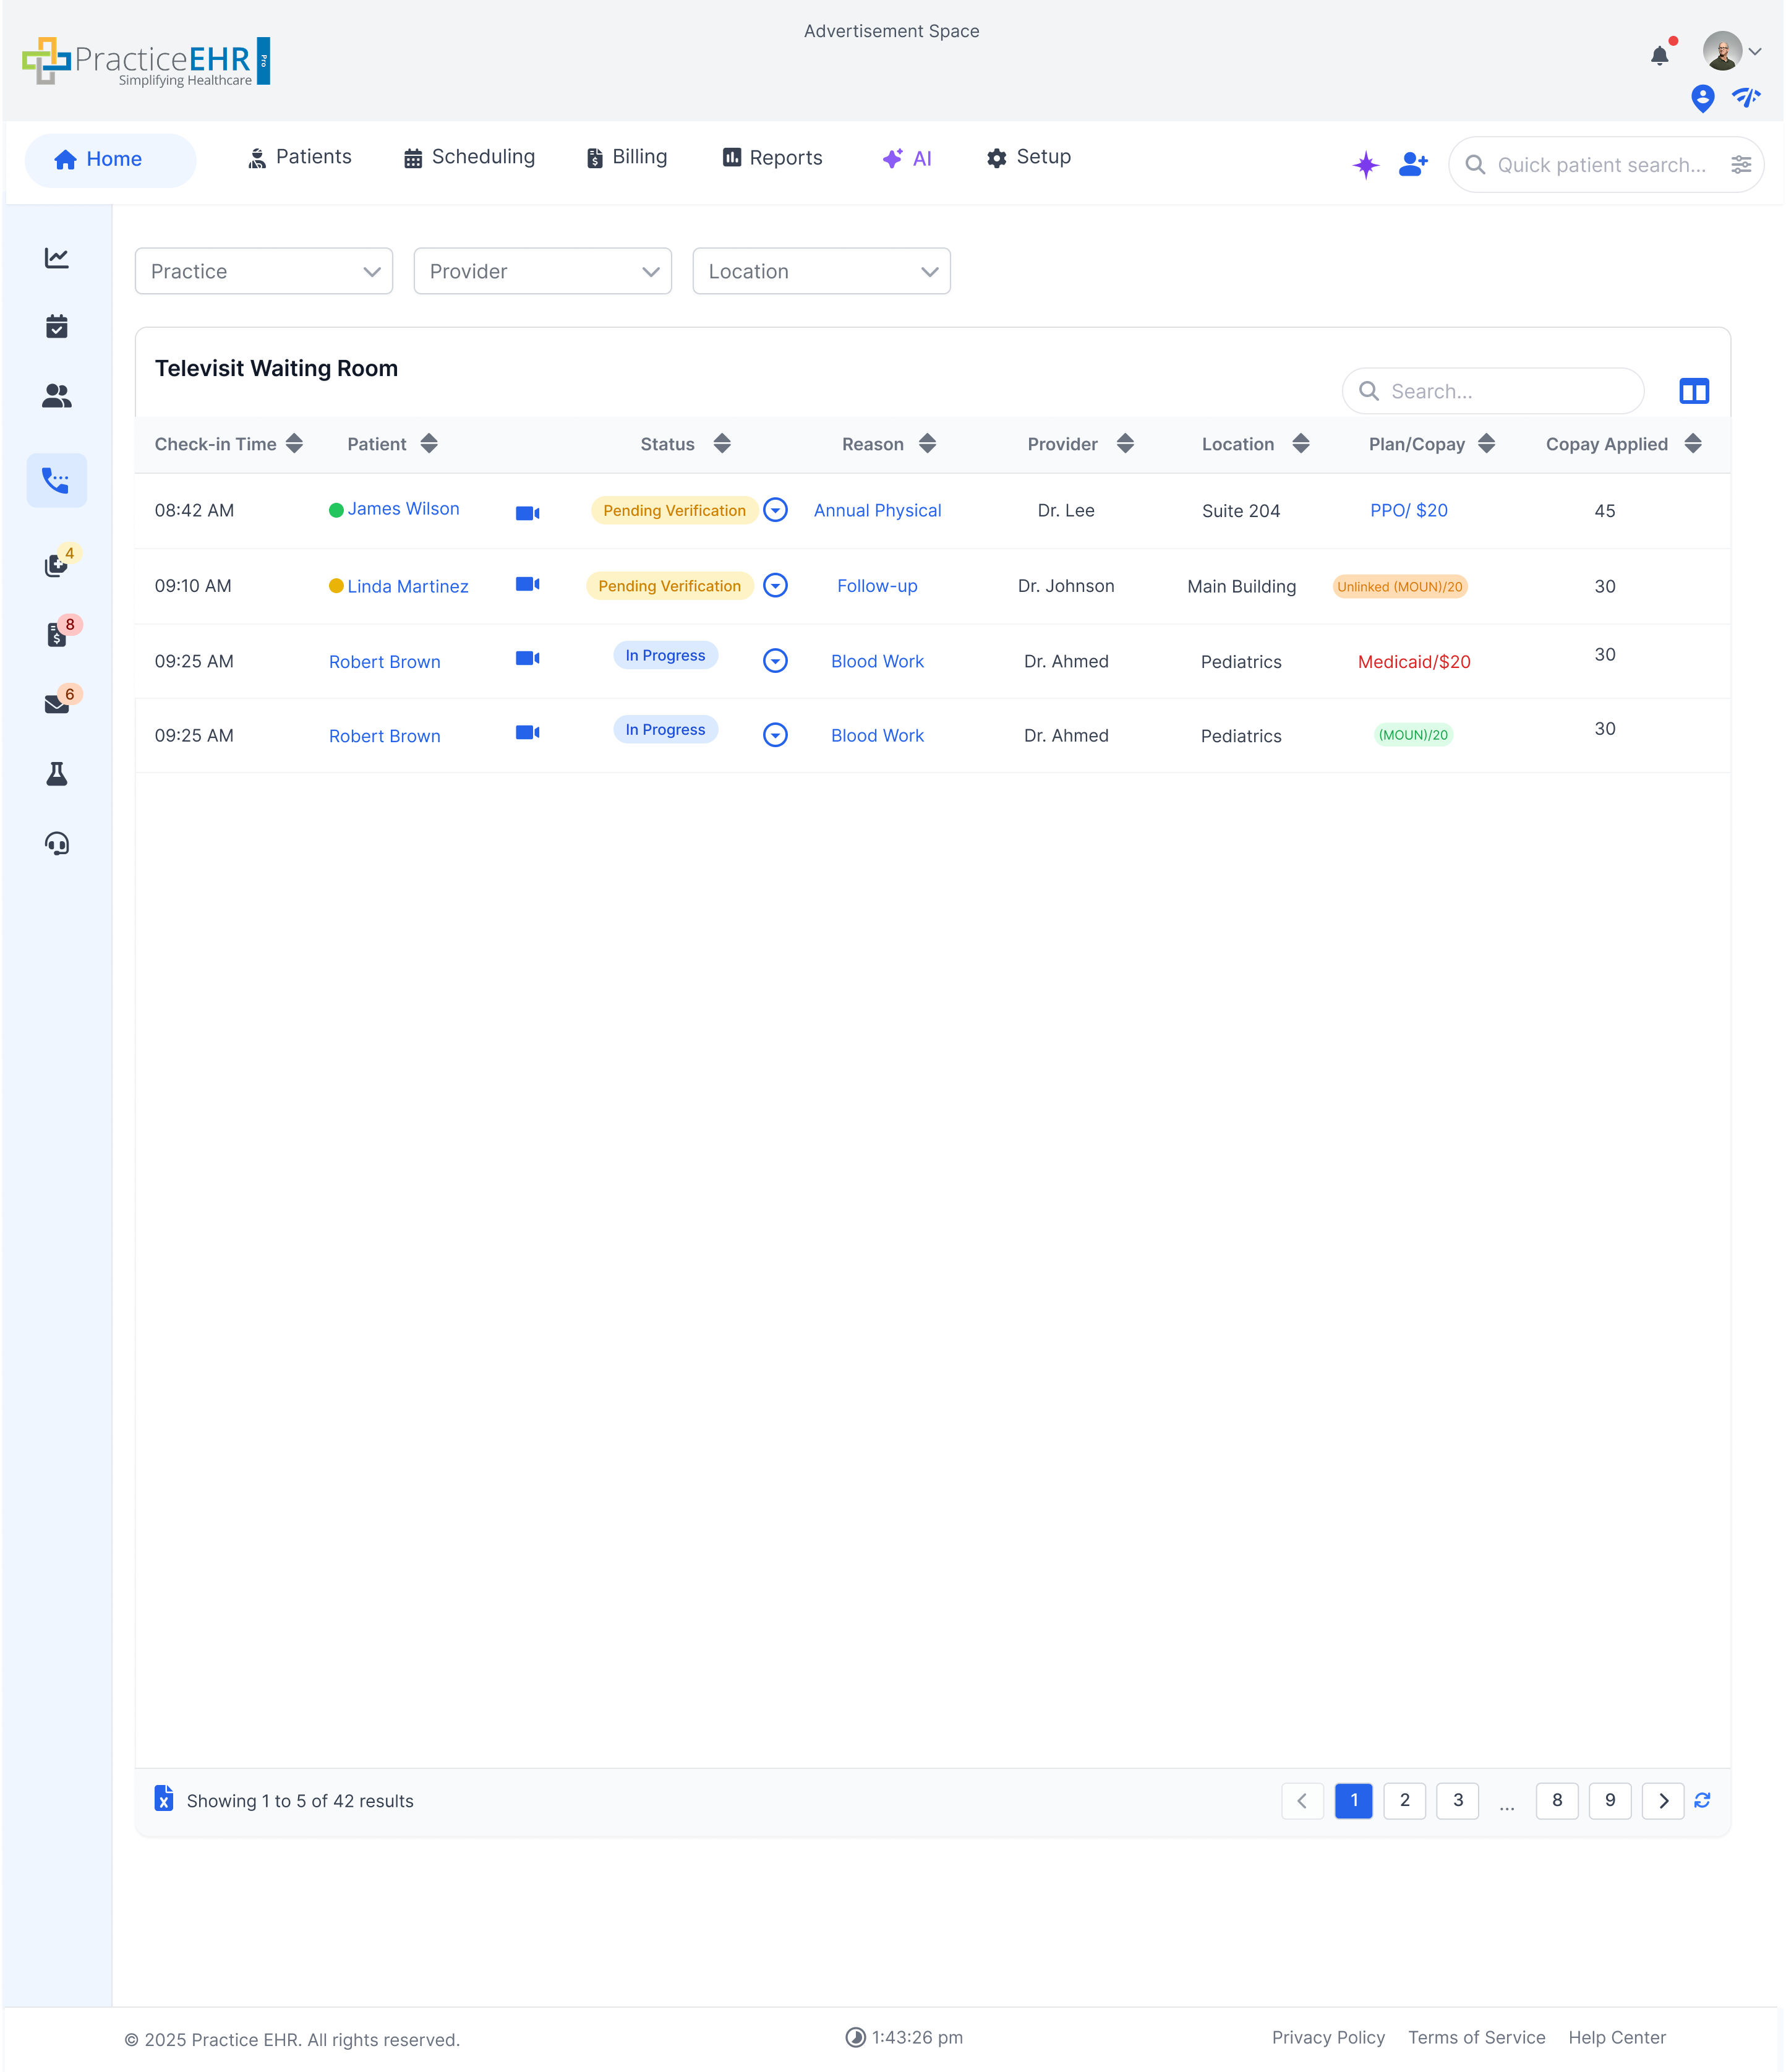
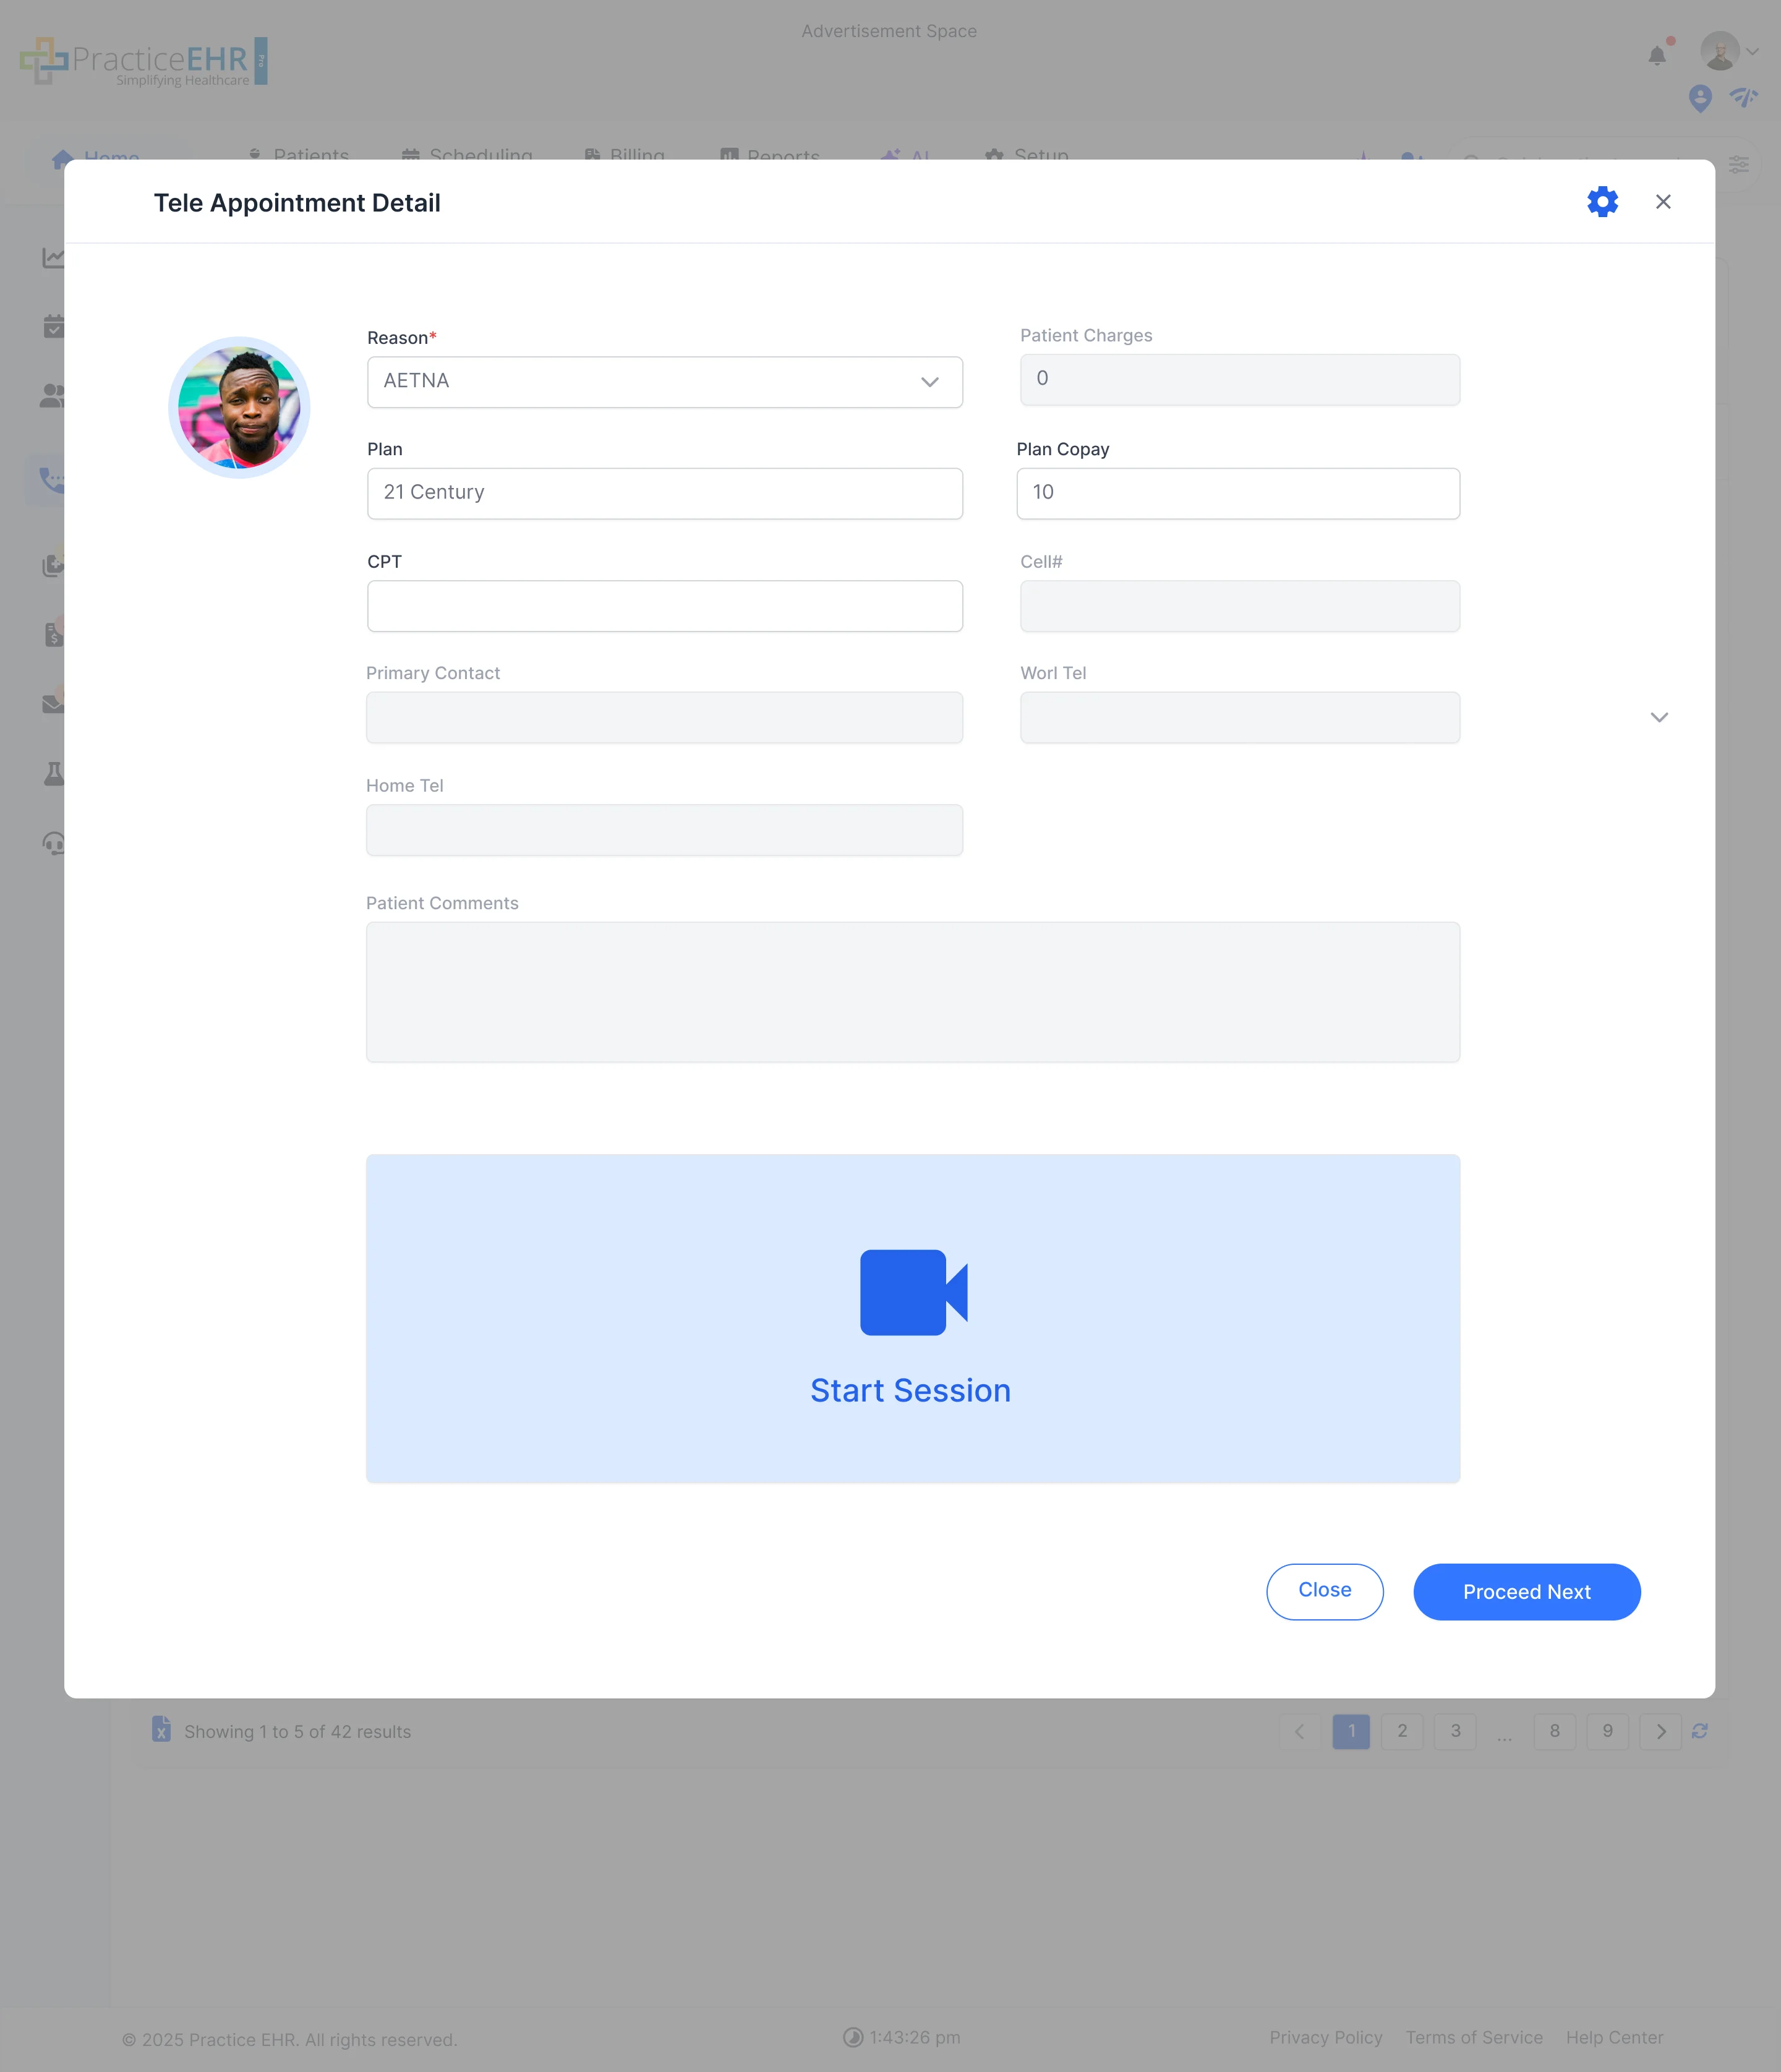
Televisit Waiting Room
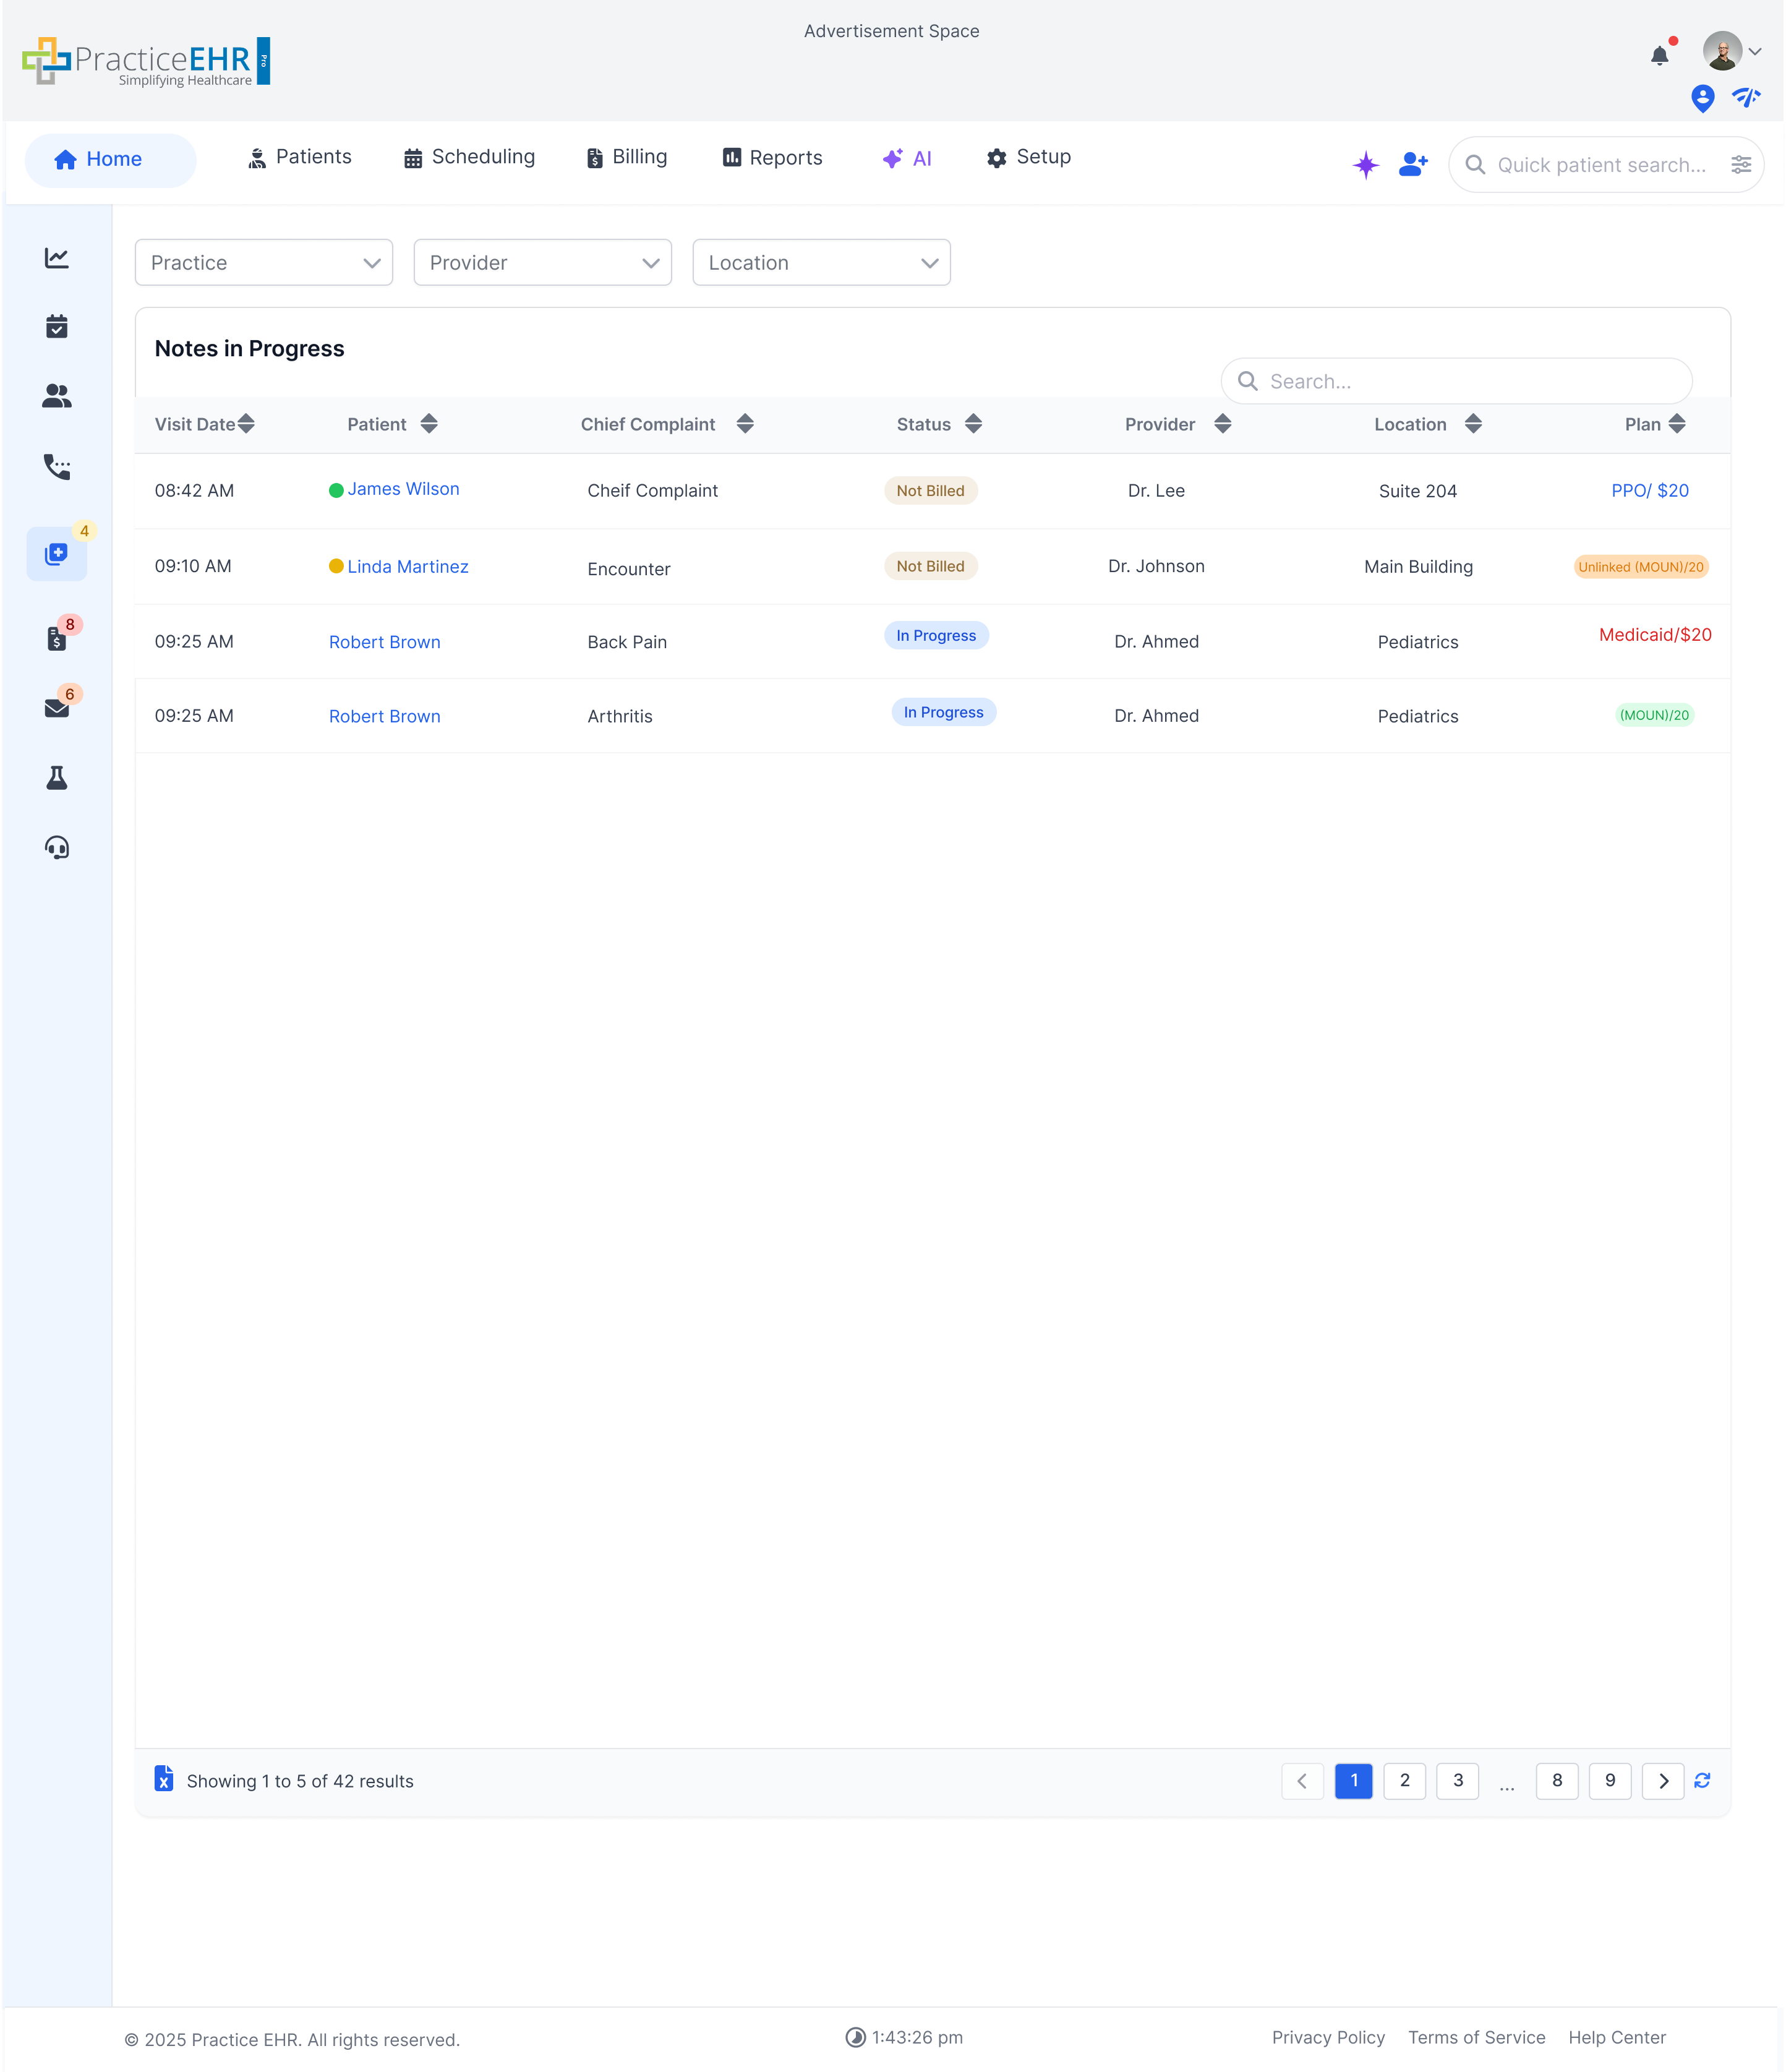
Notes In Progress
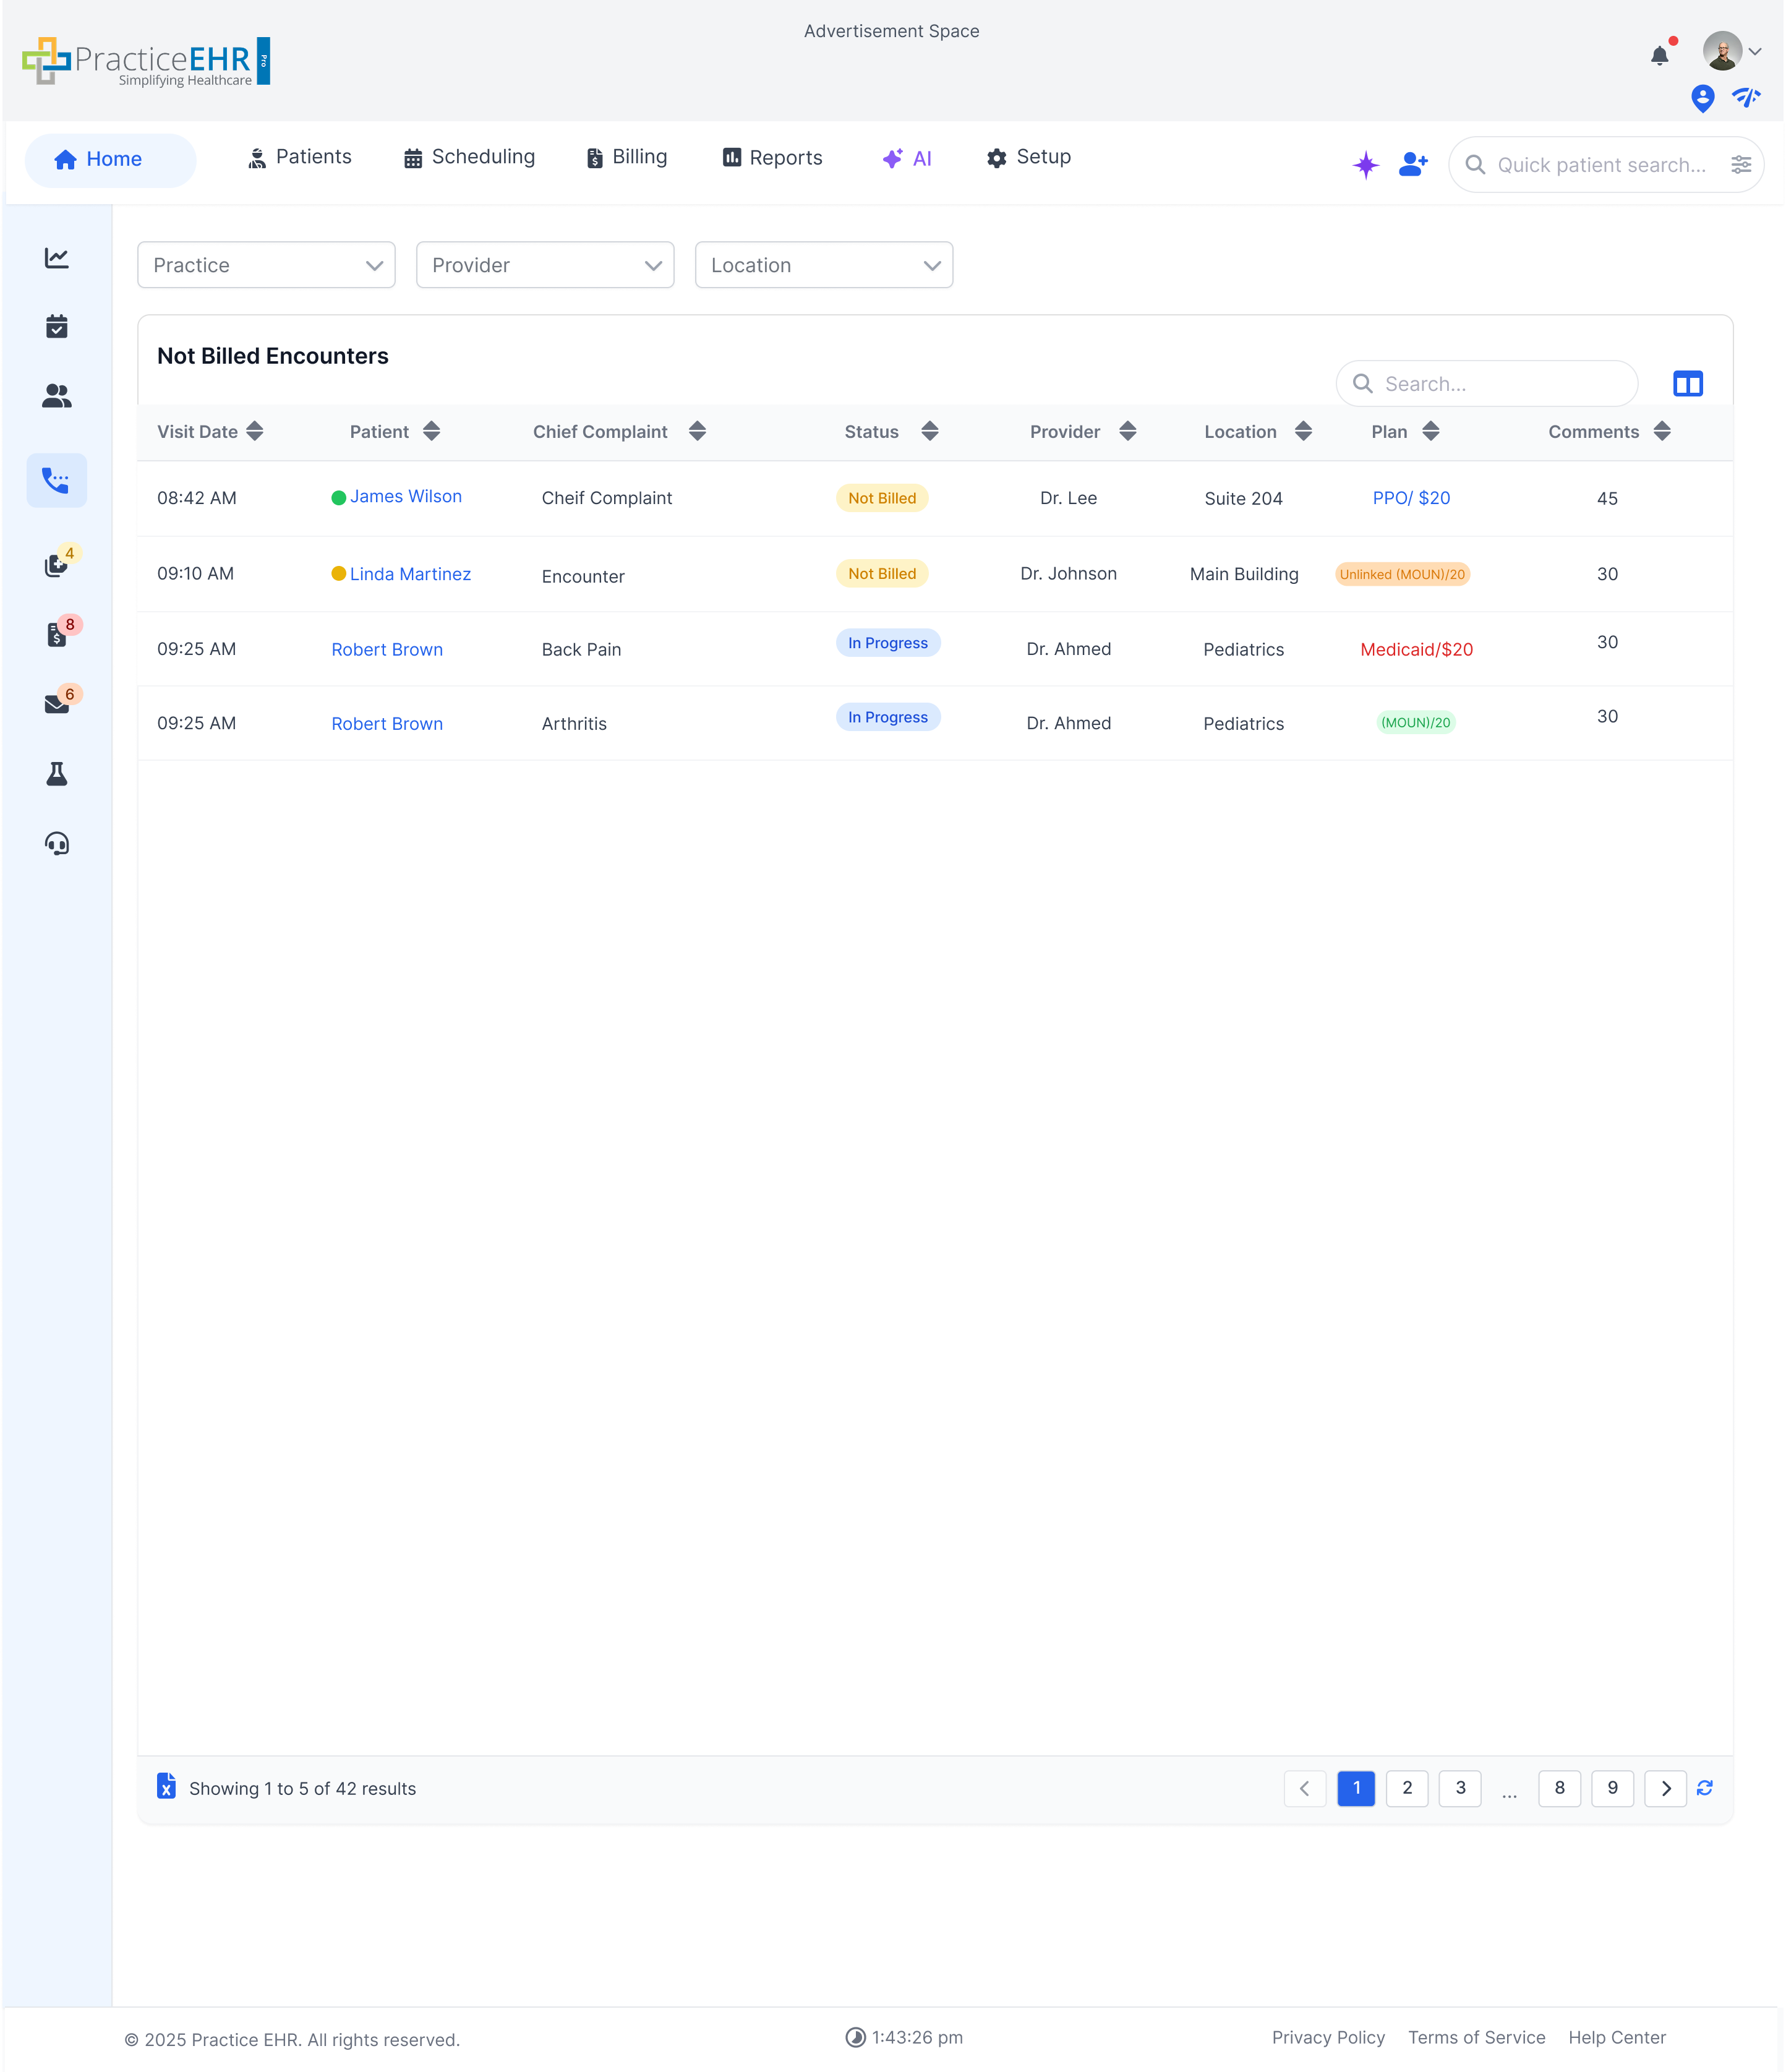
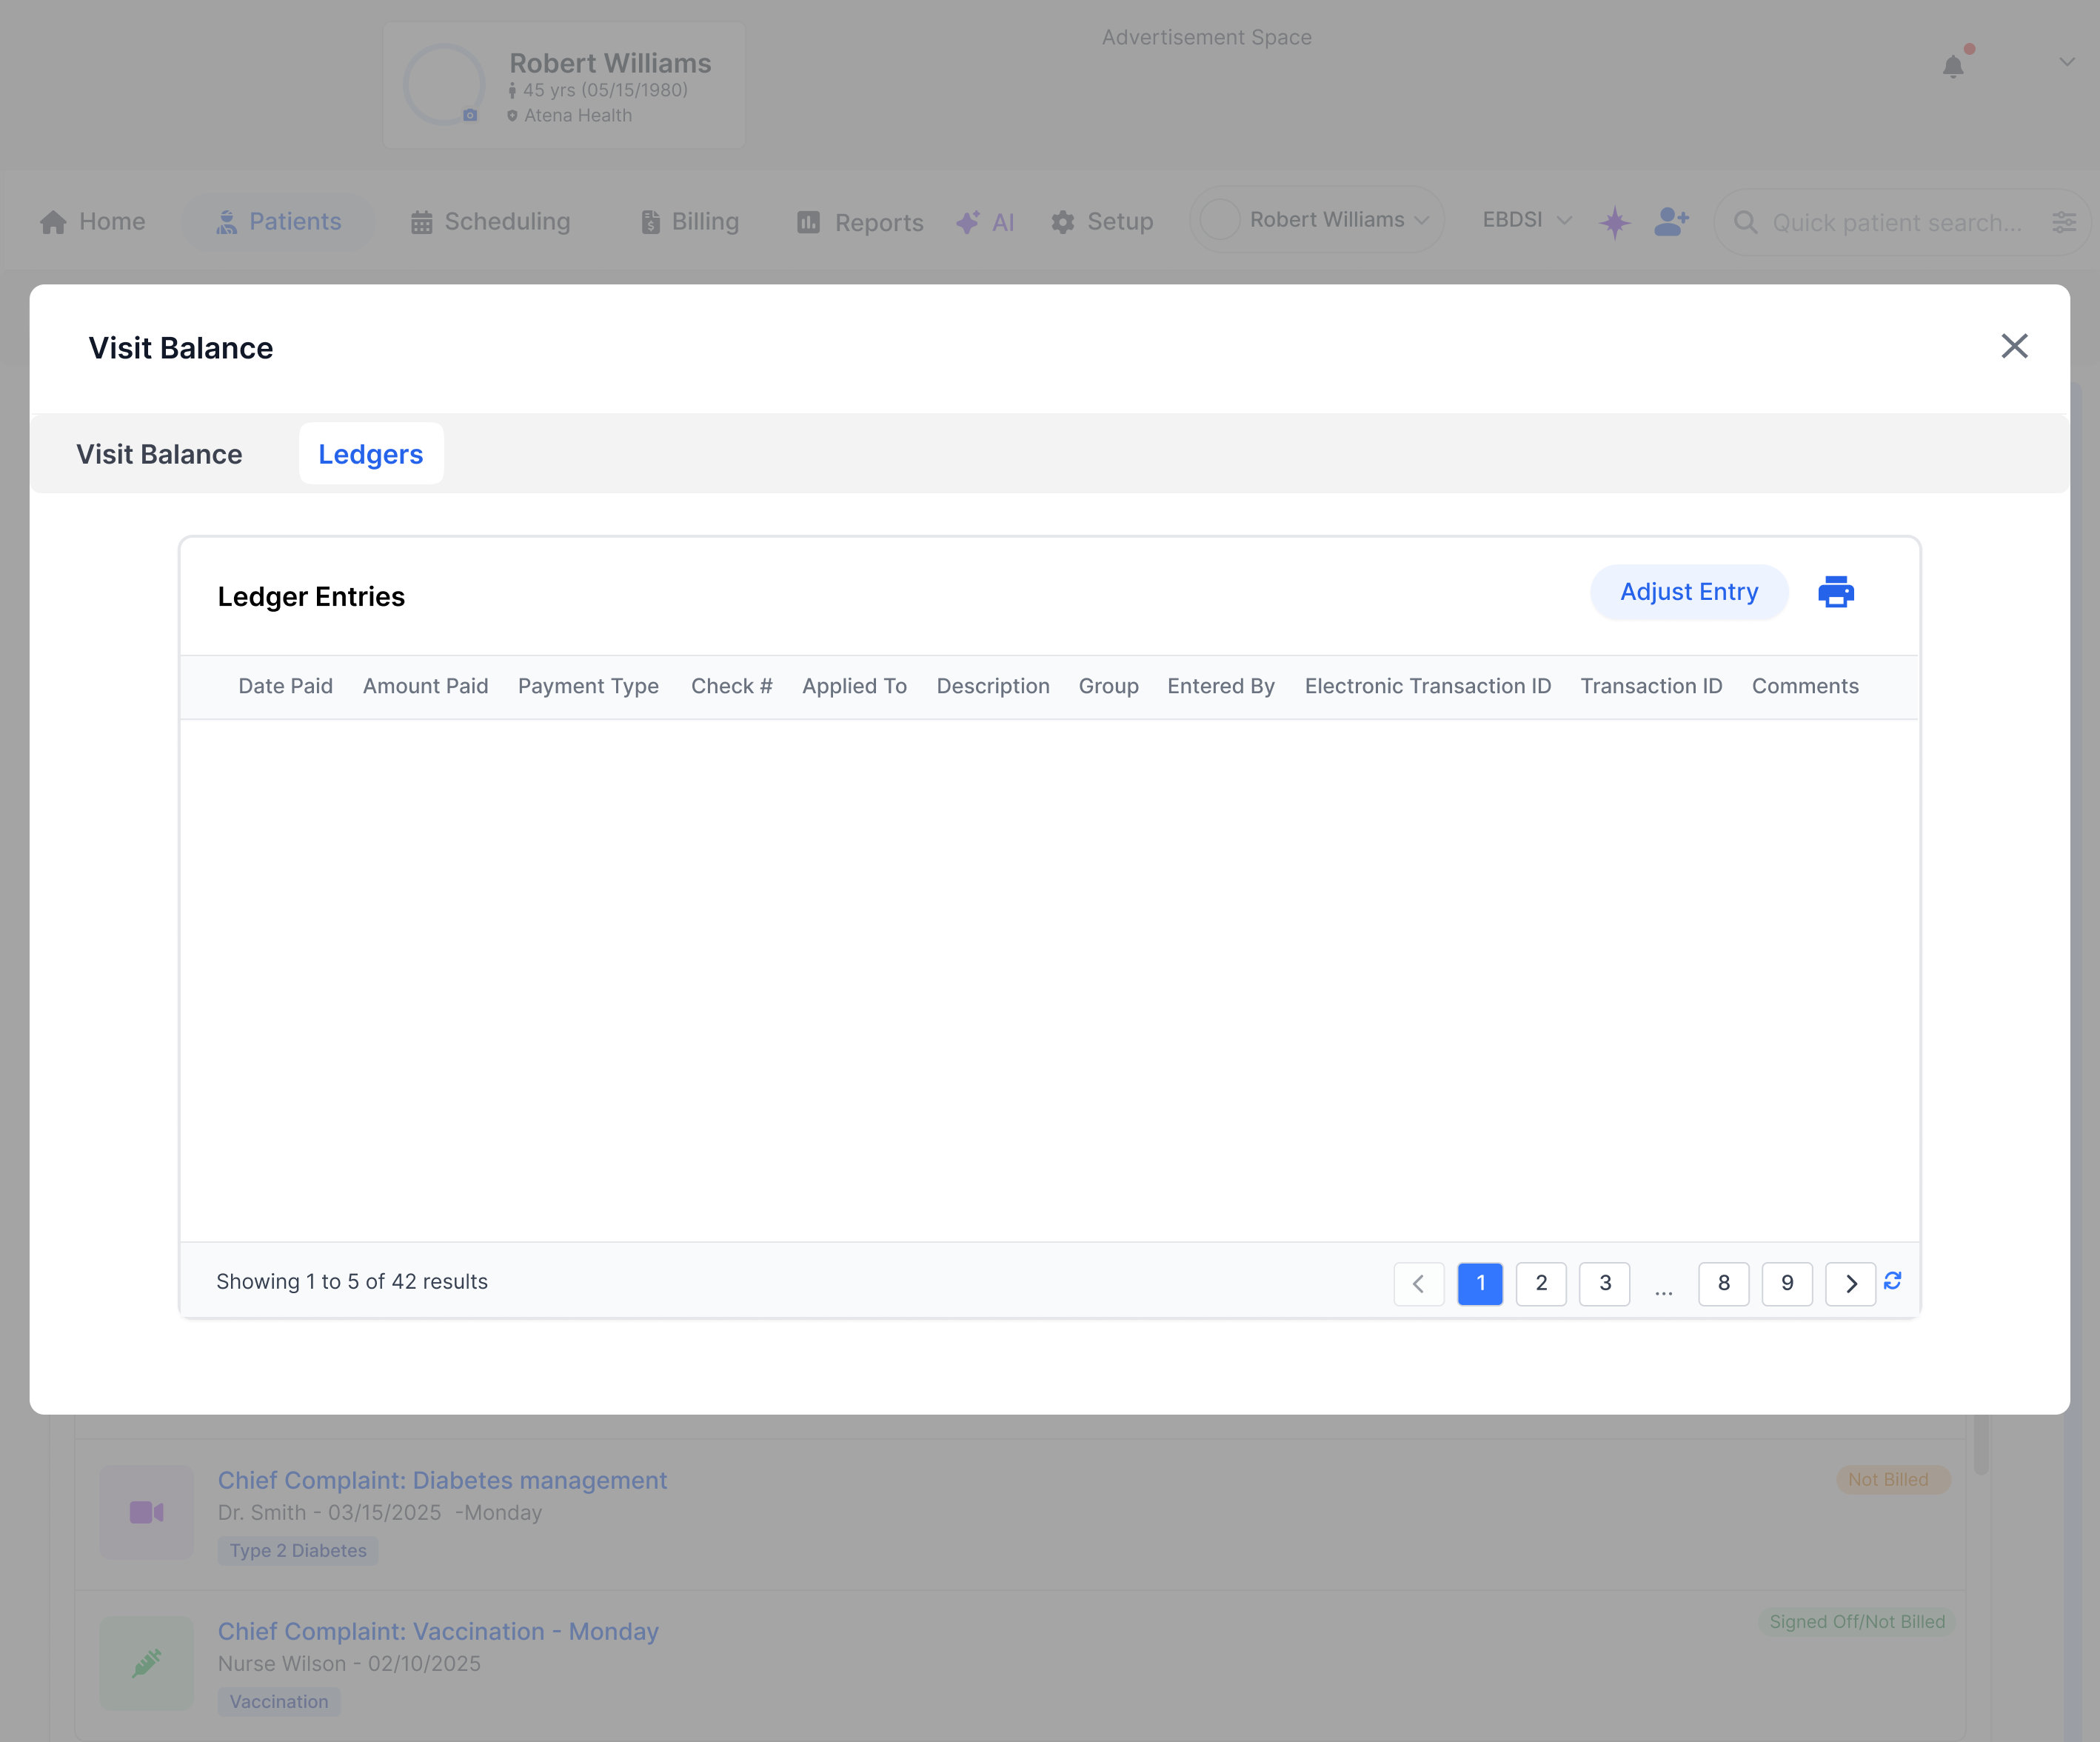
Not Billed Encounters
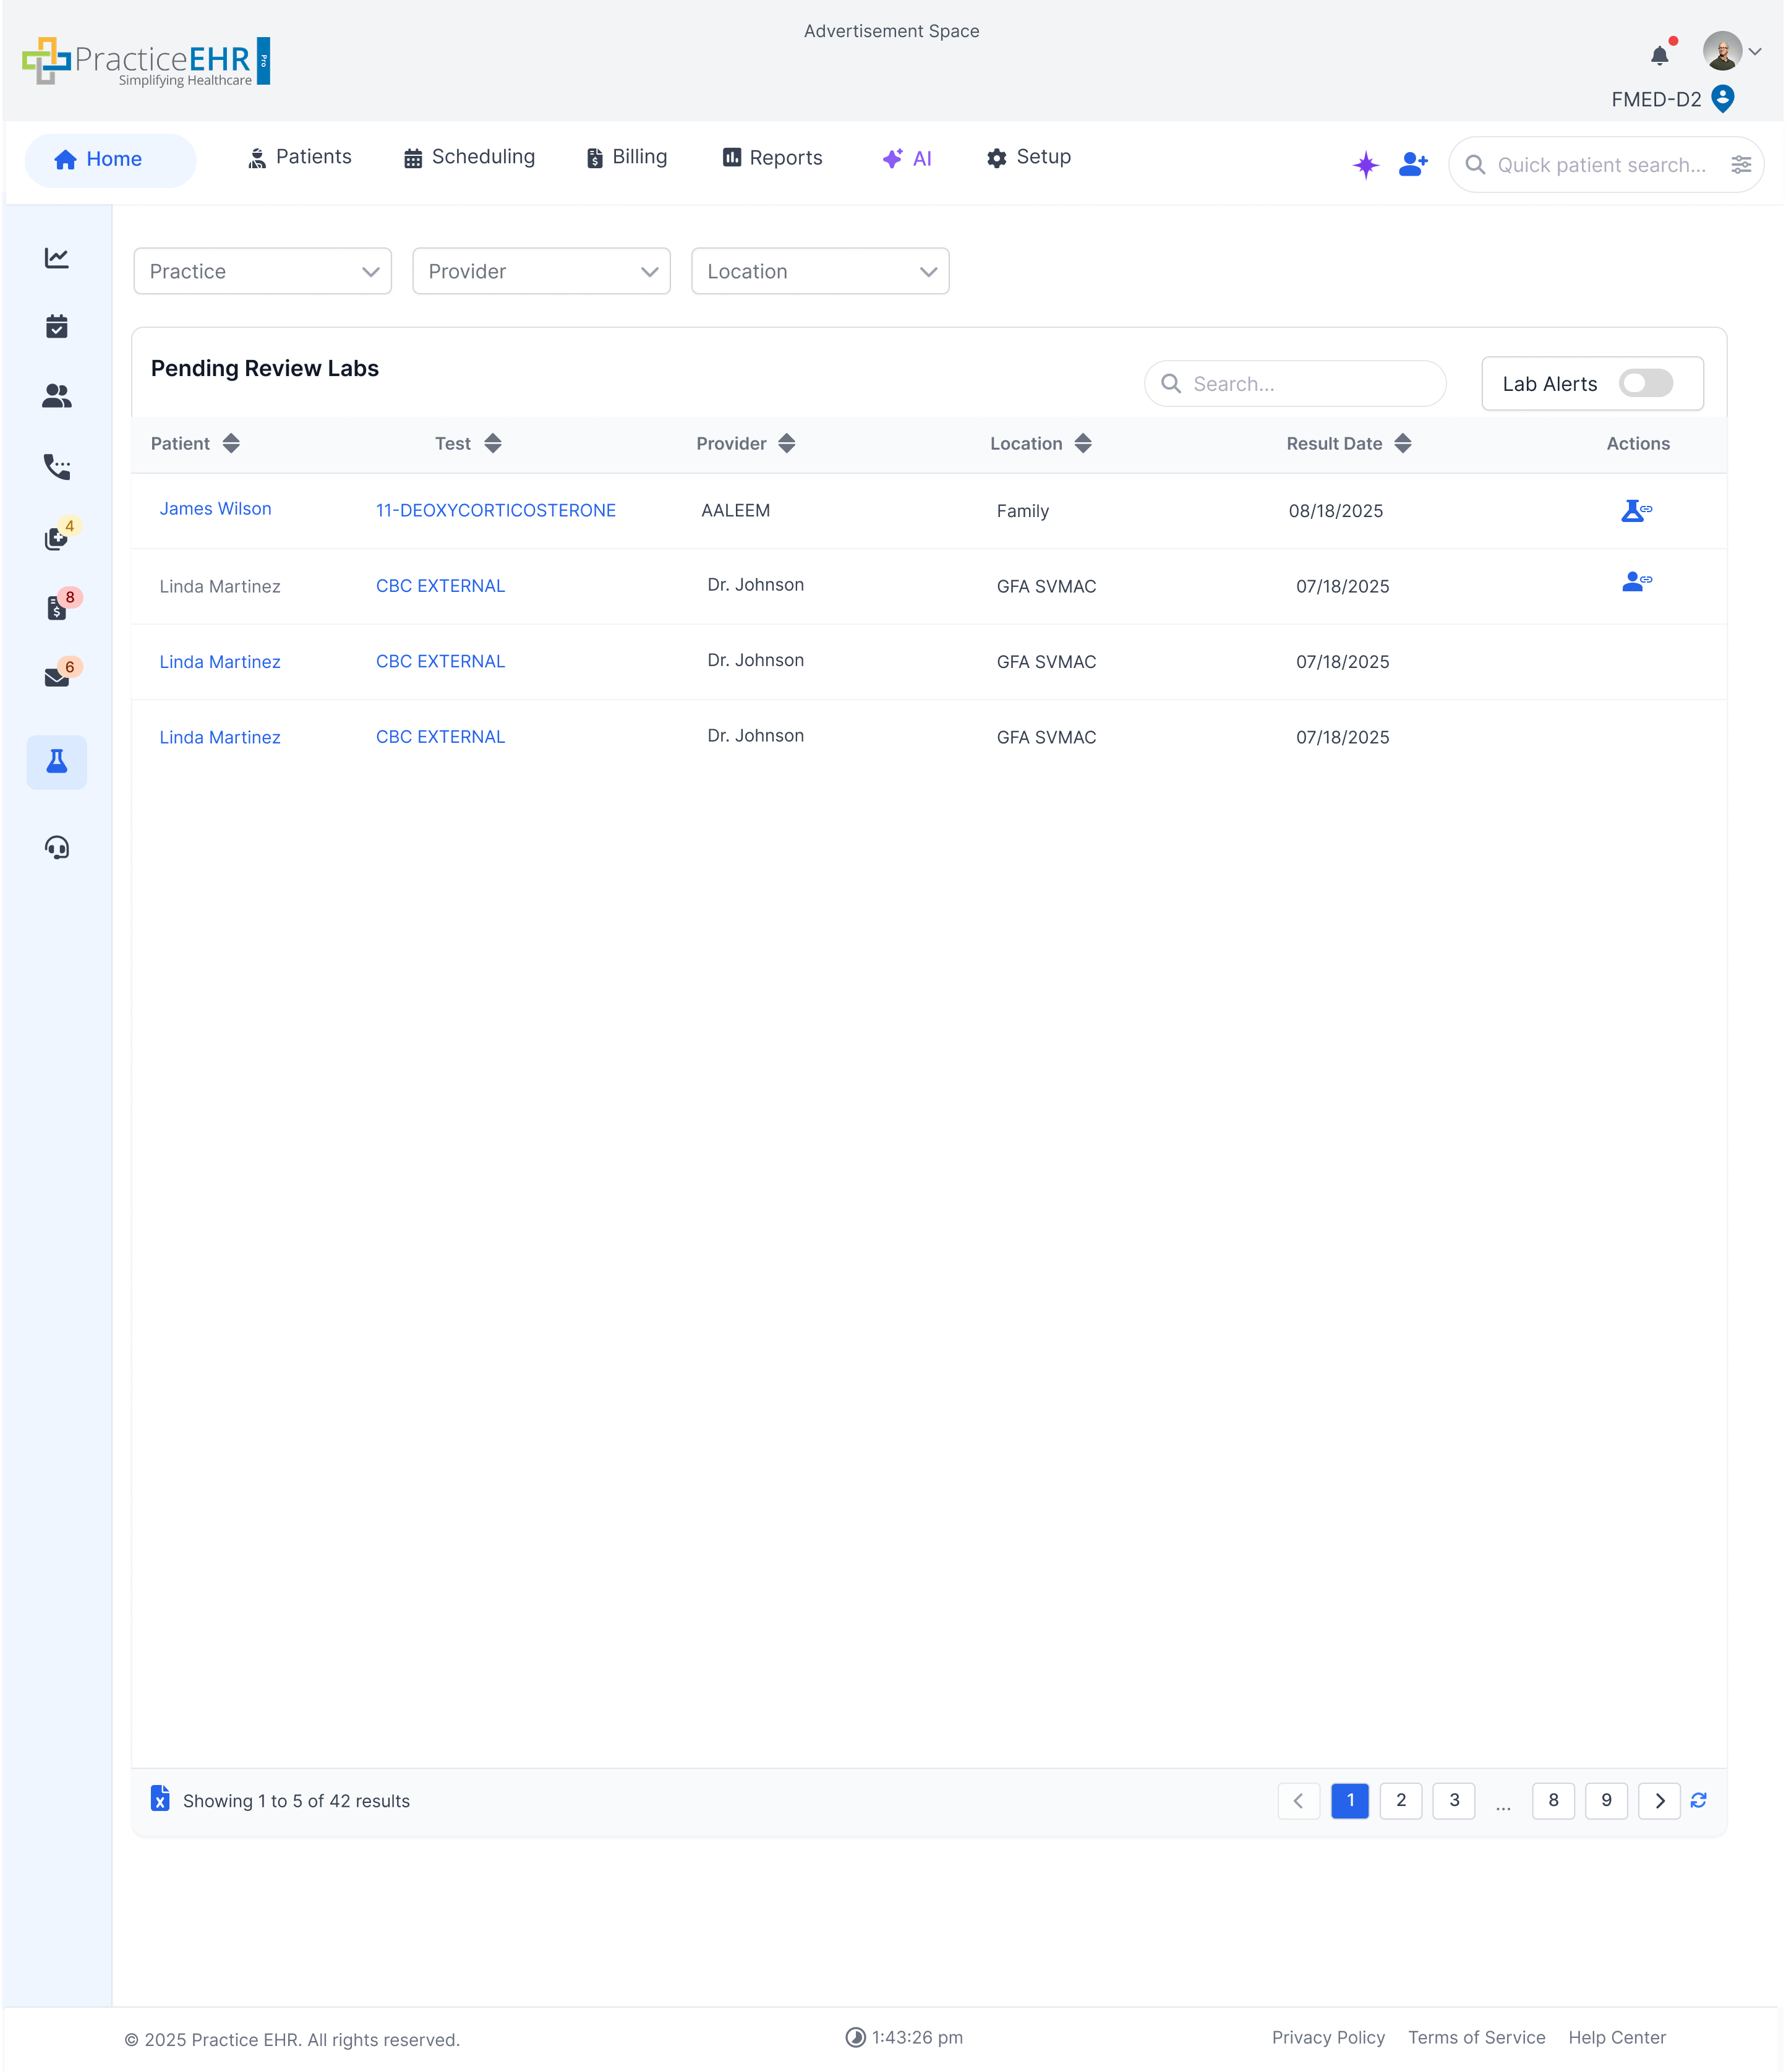
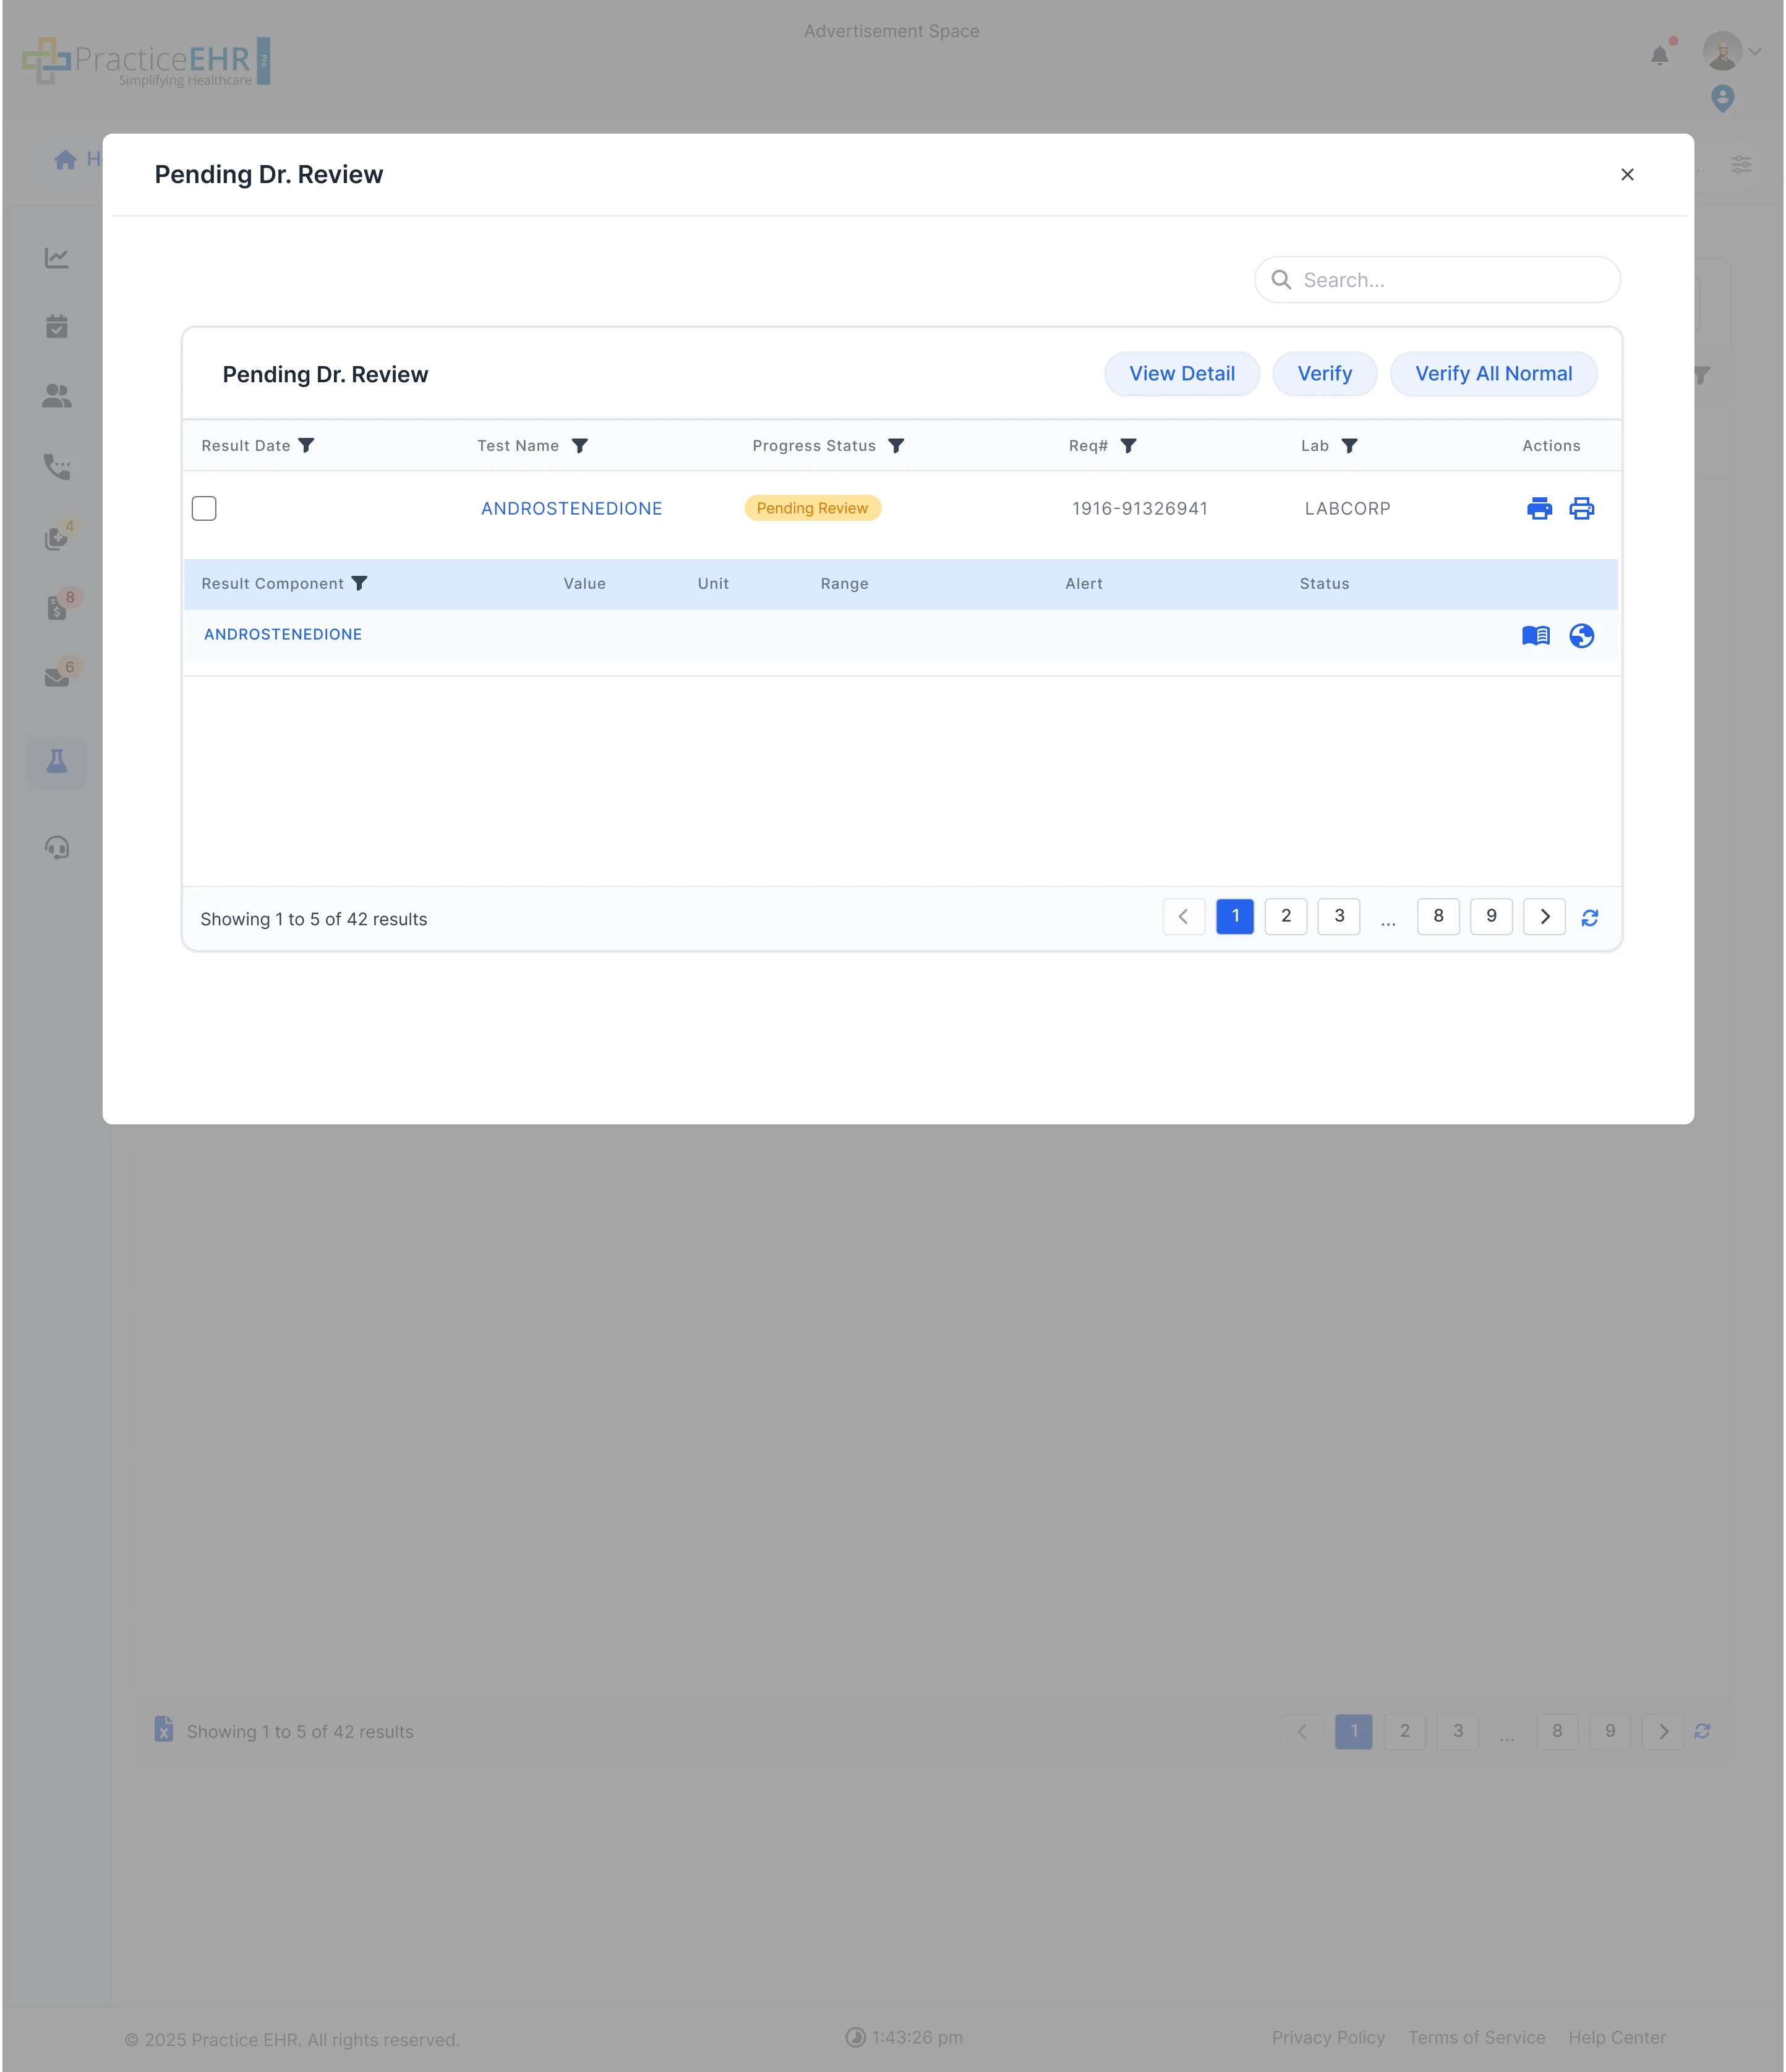
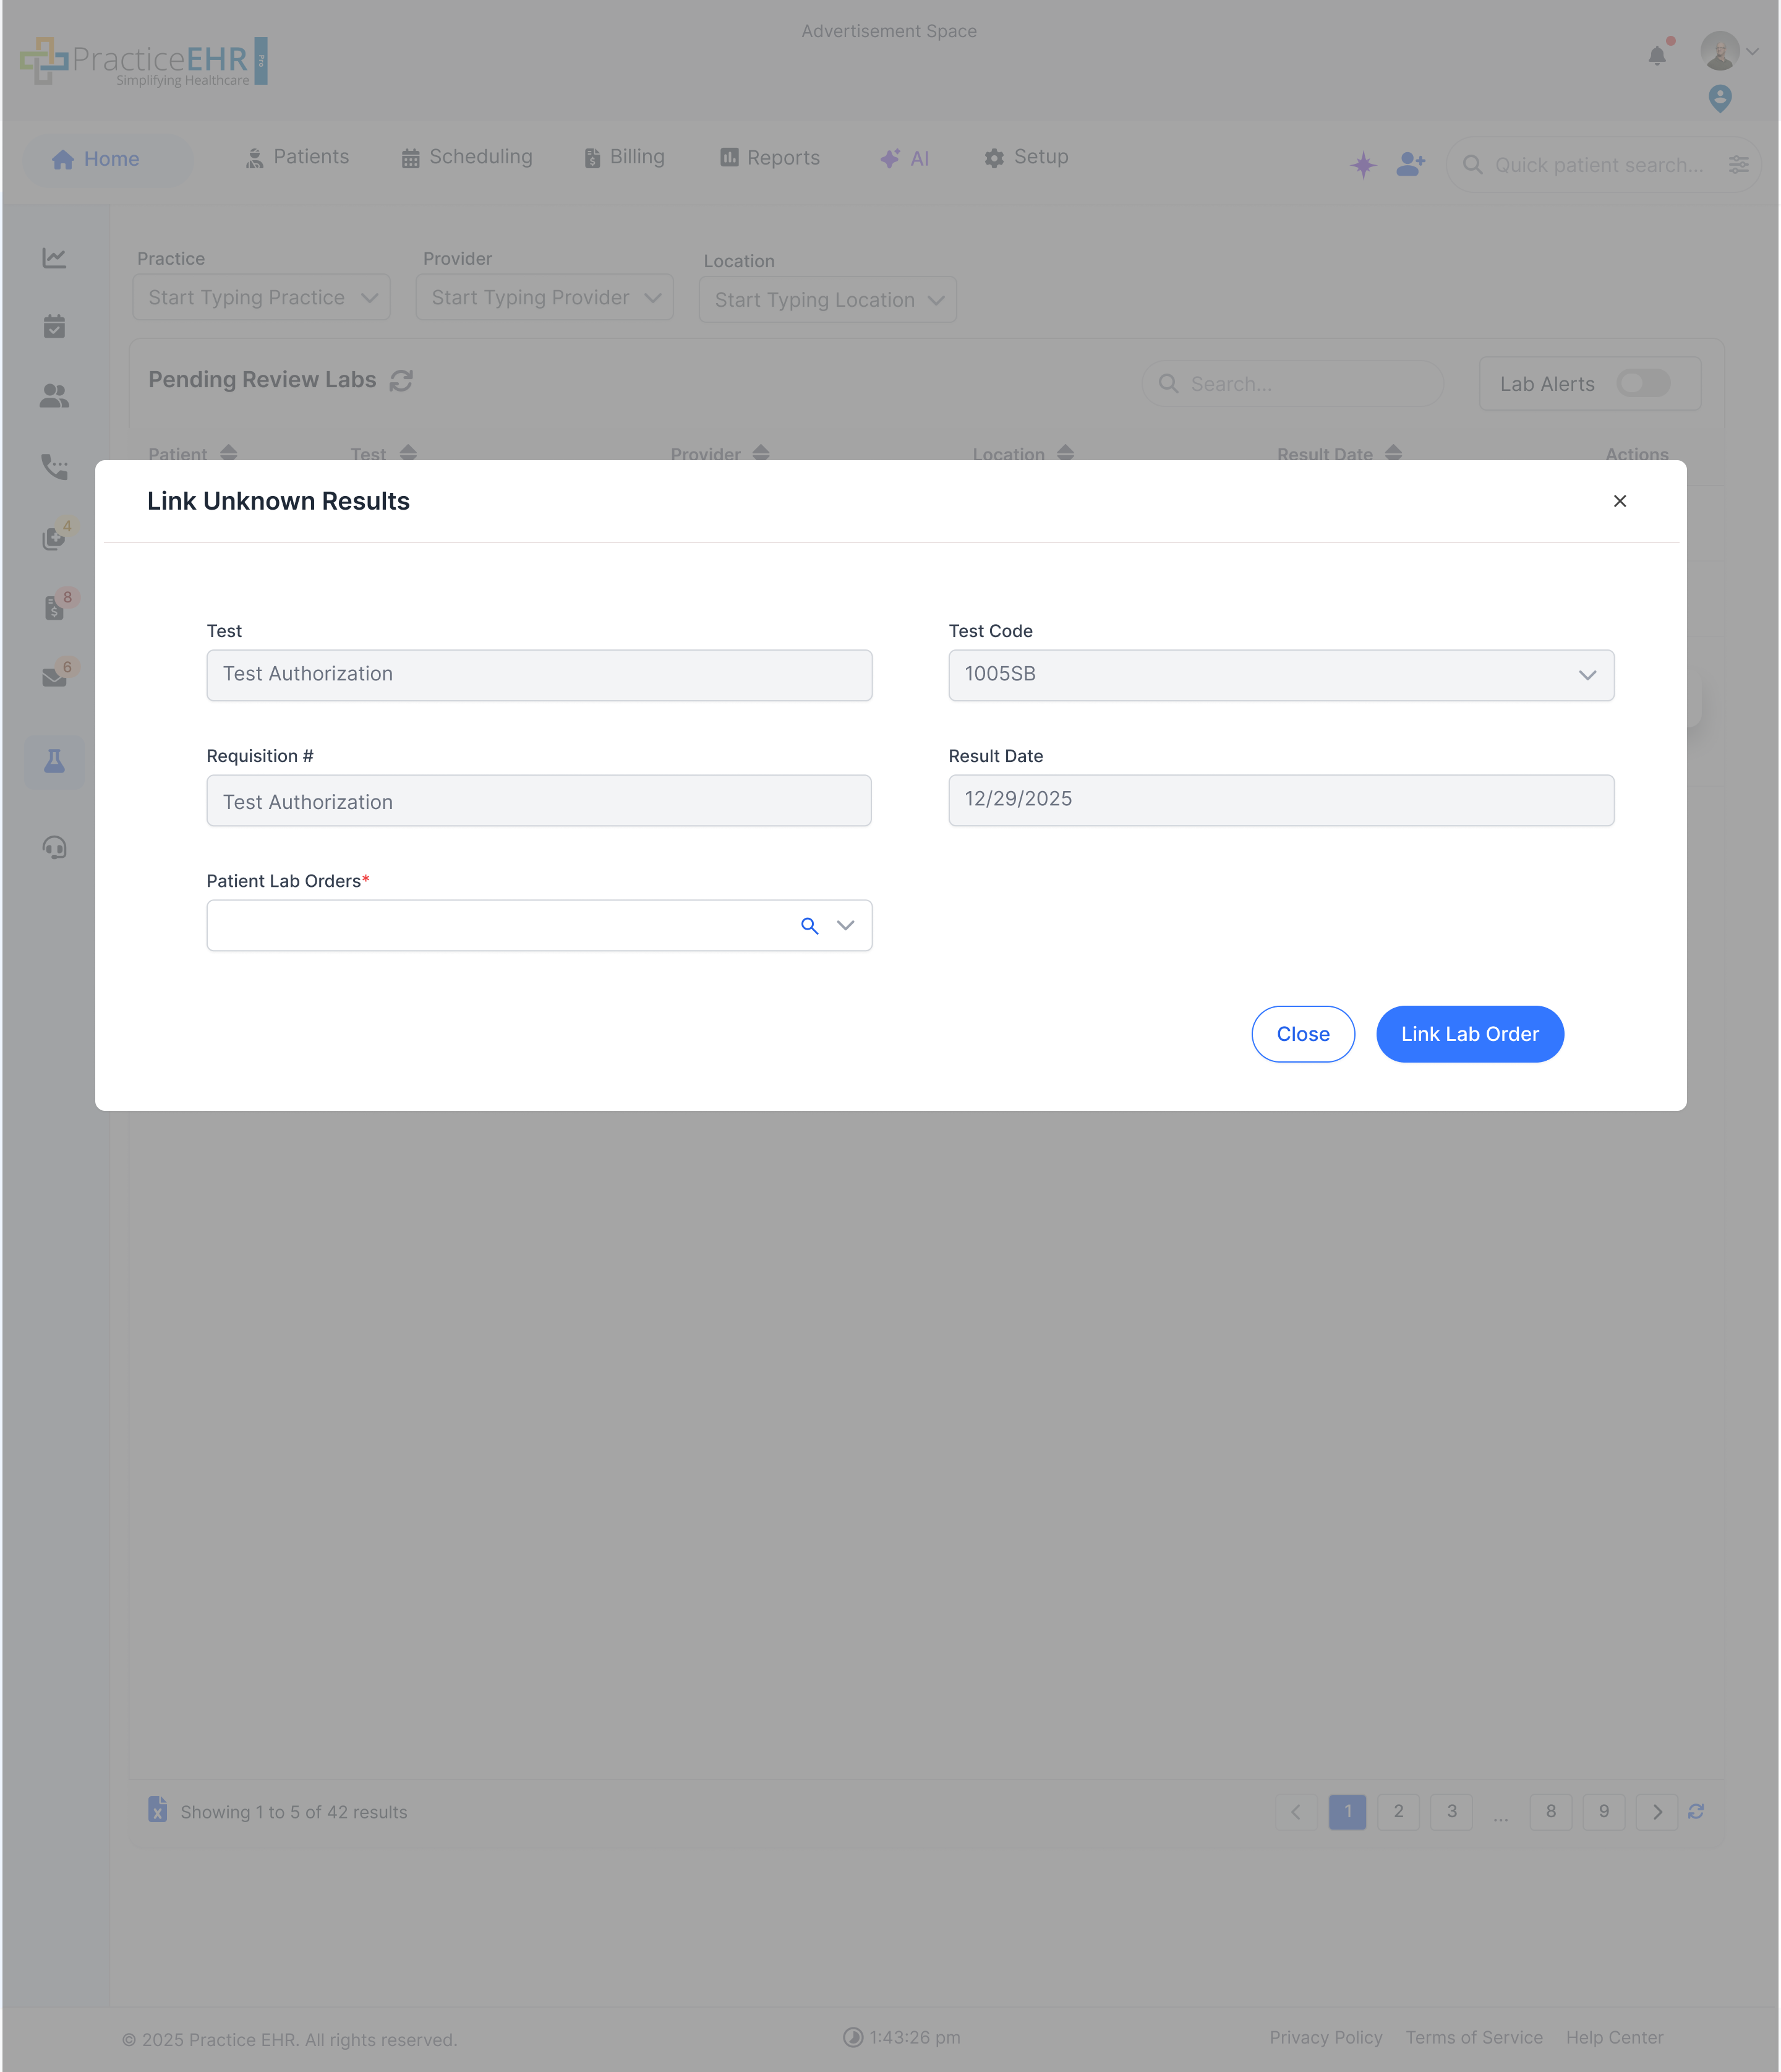
Pending Review Labs
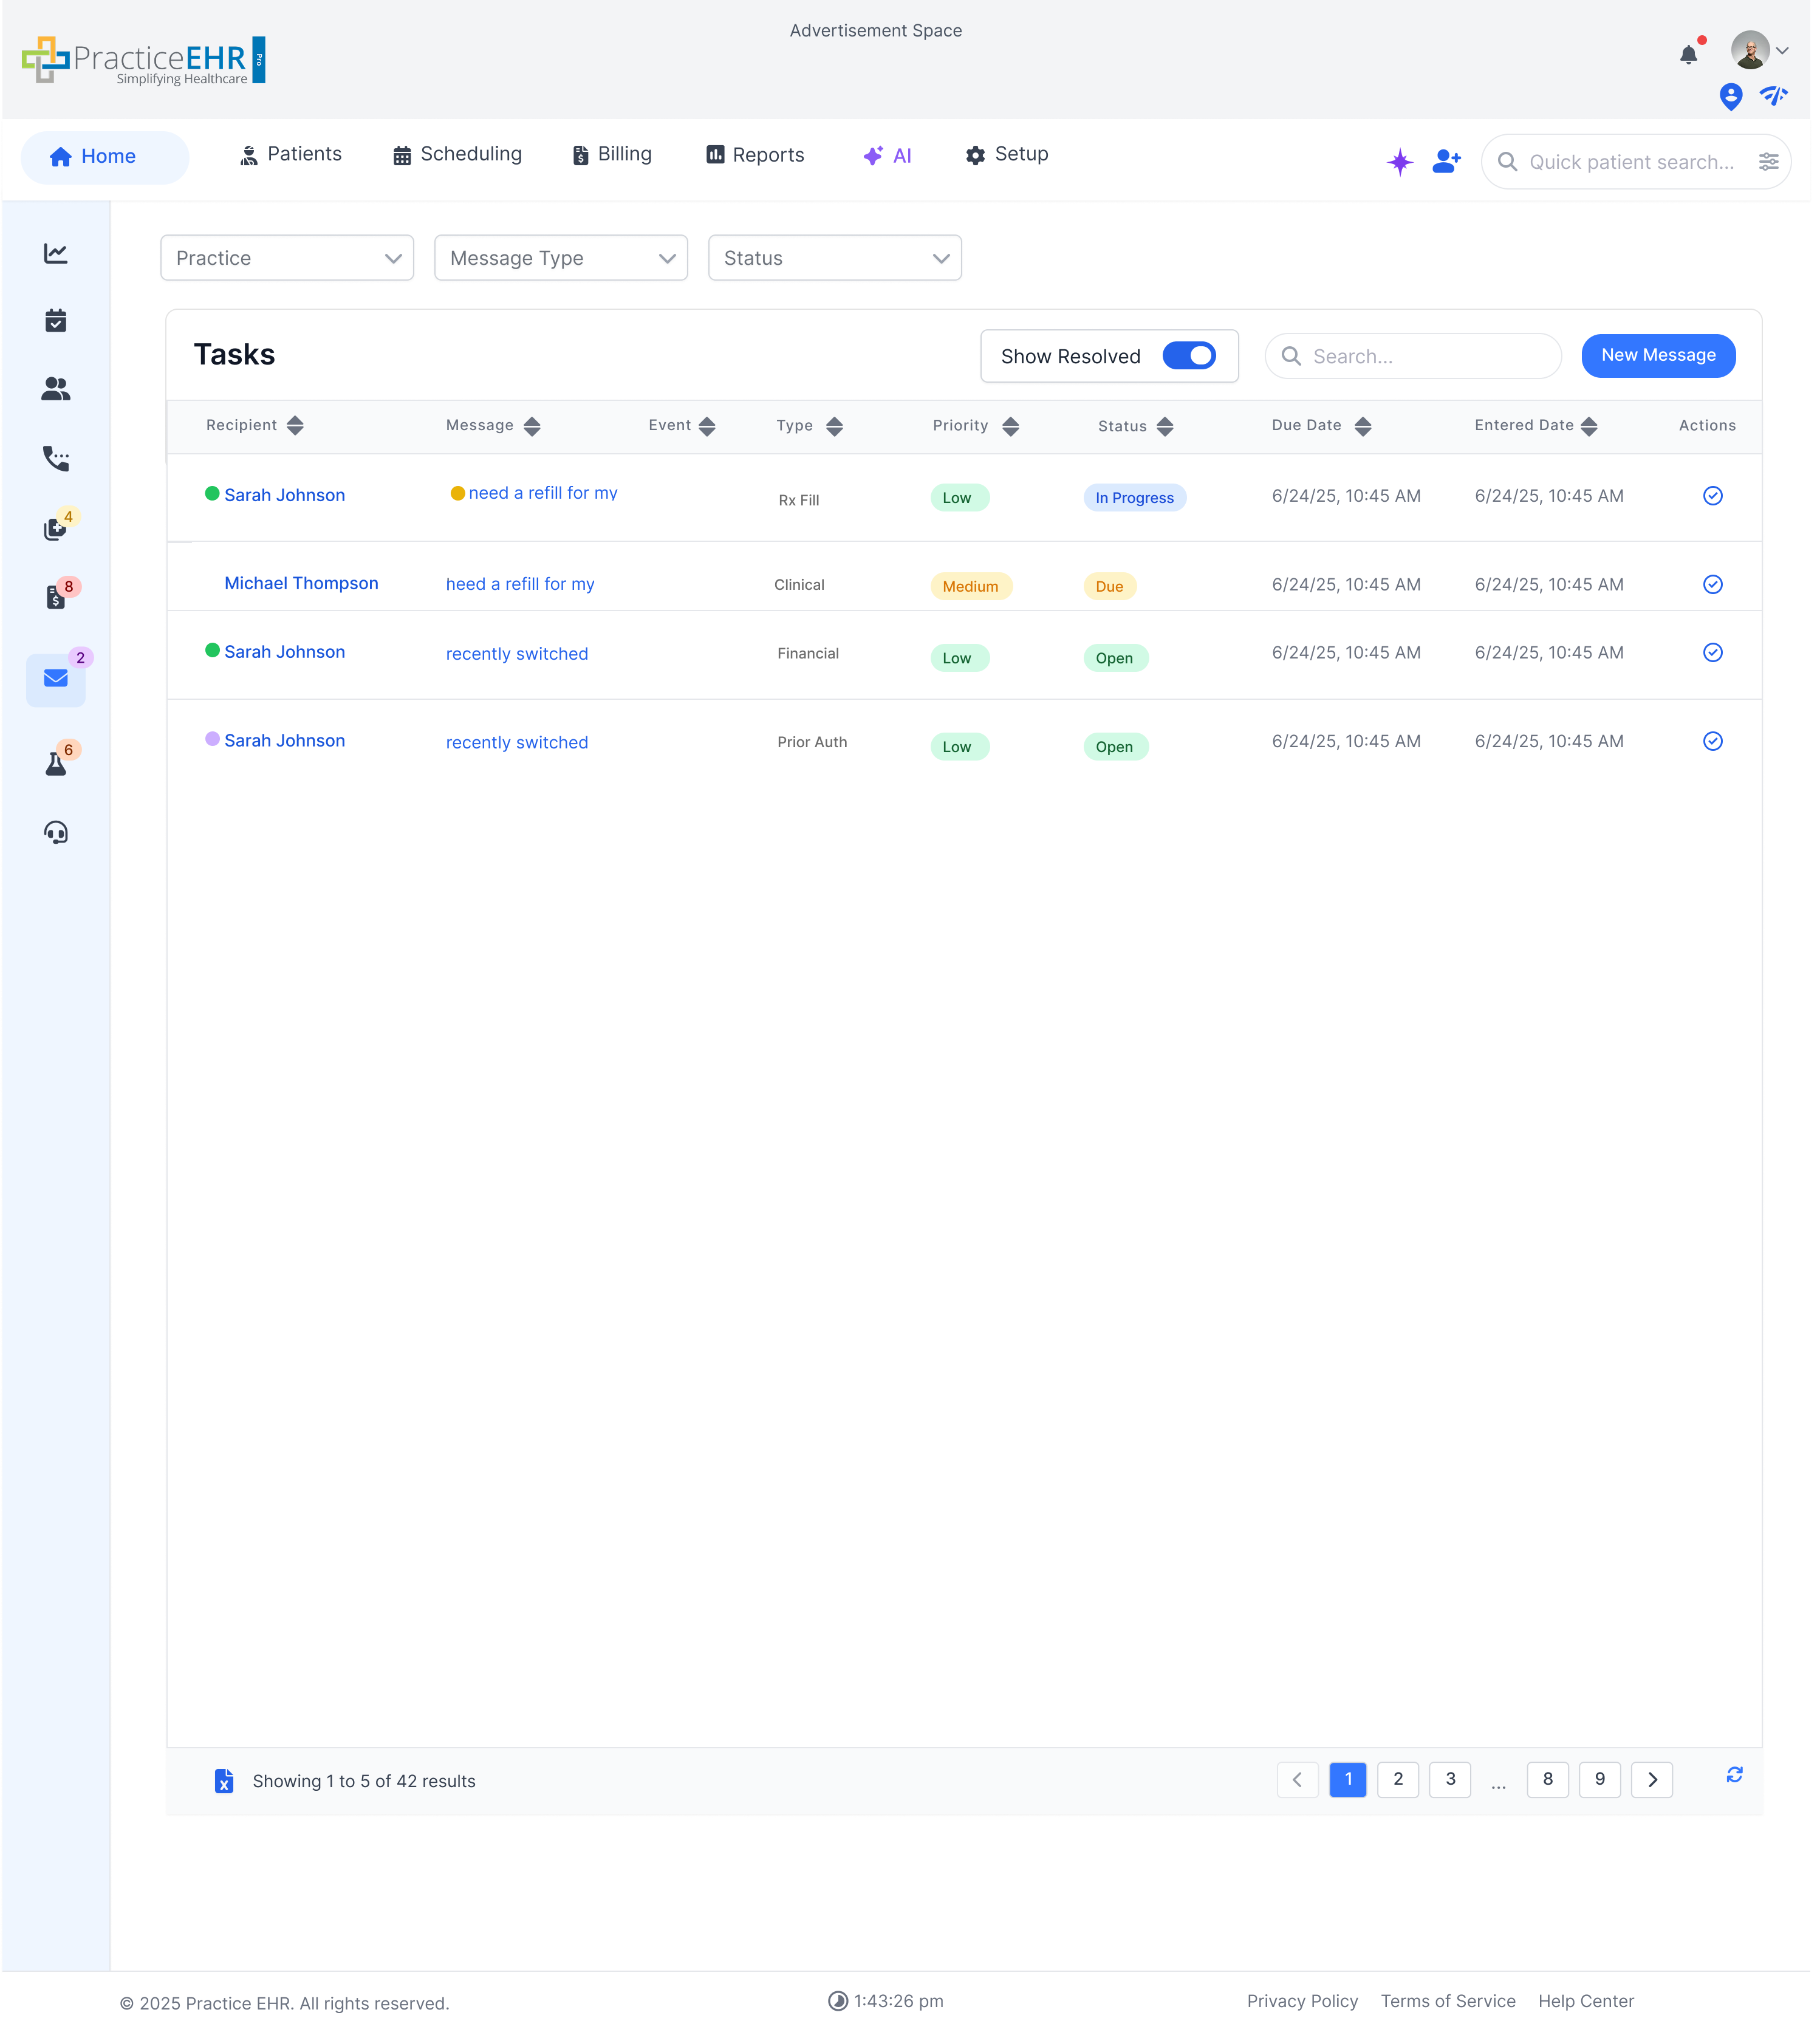
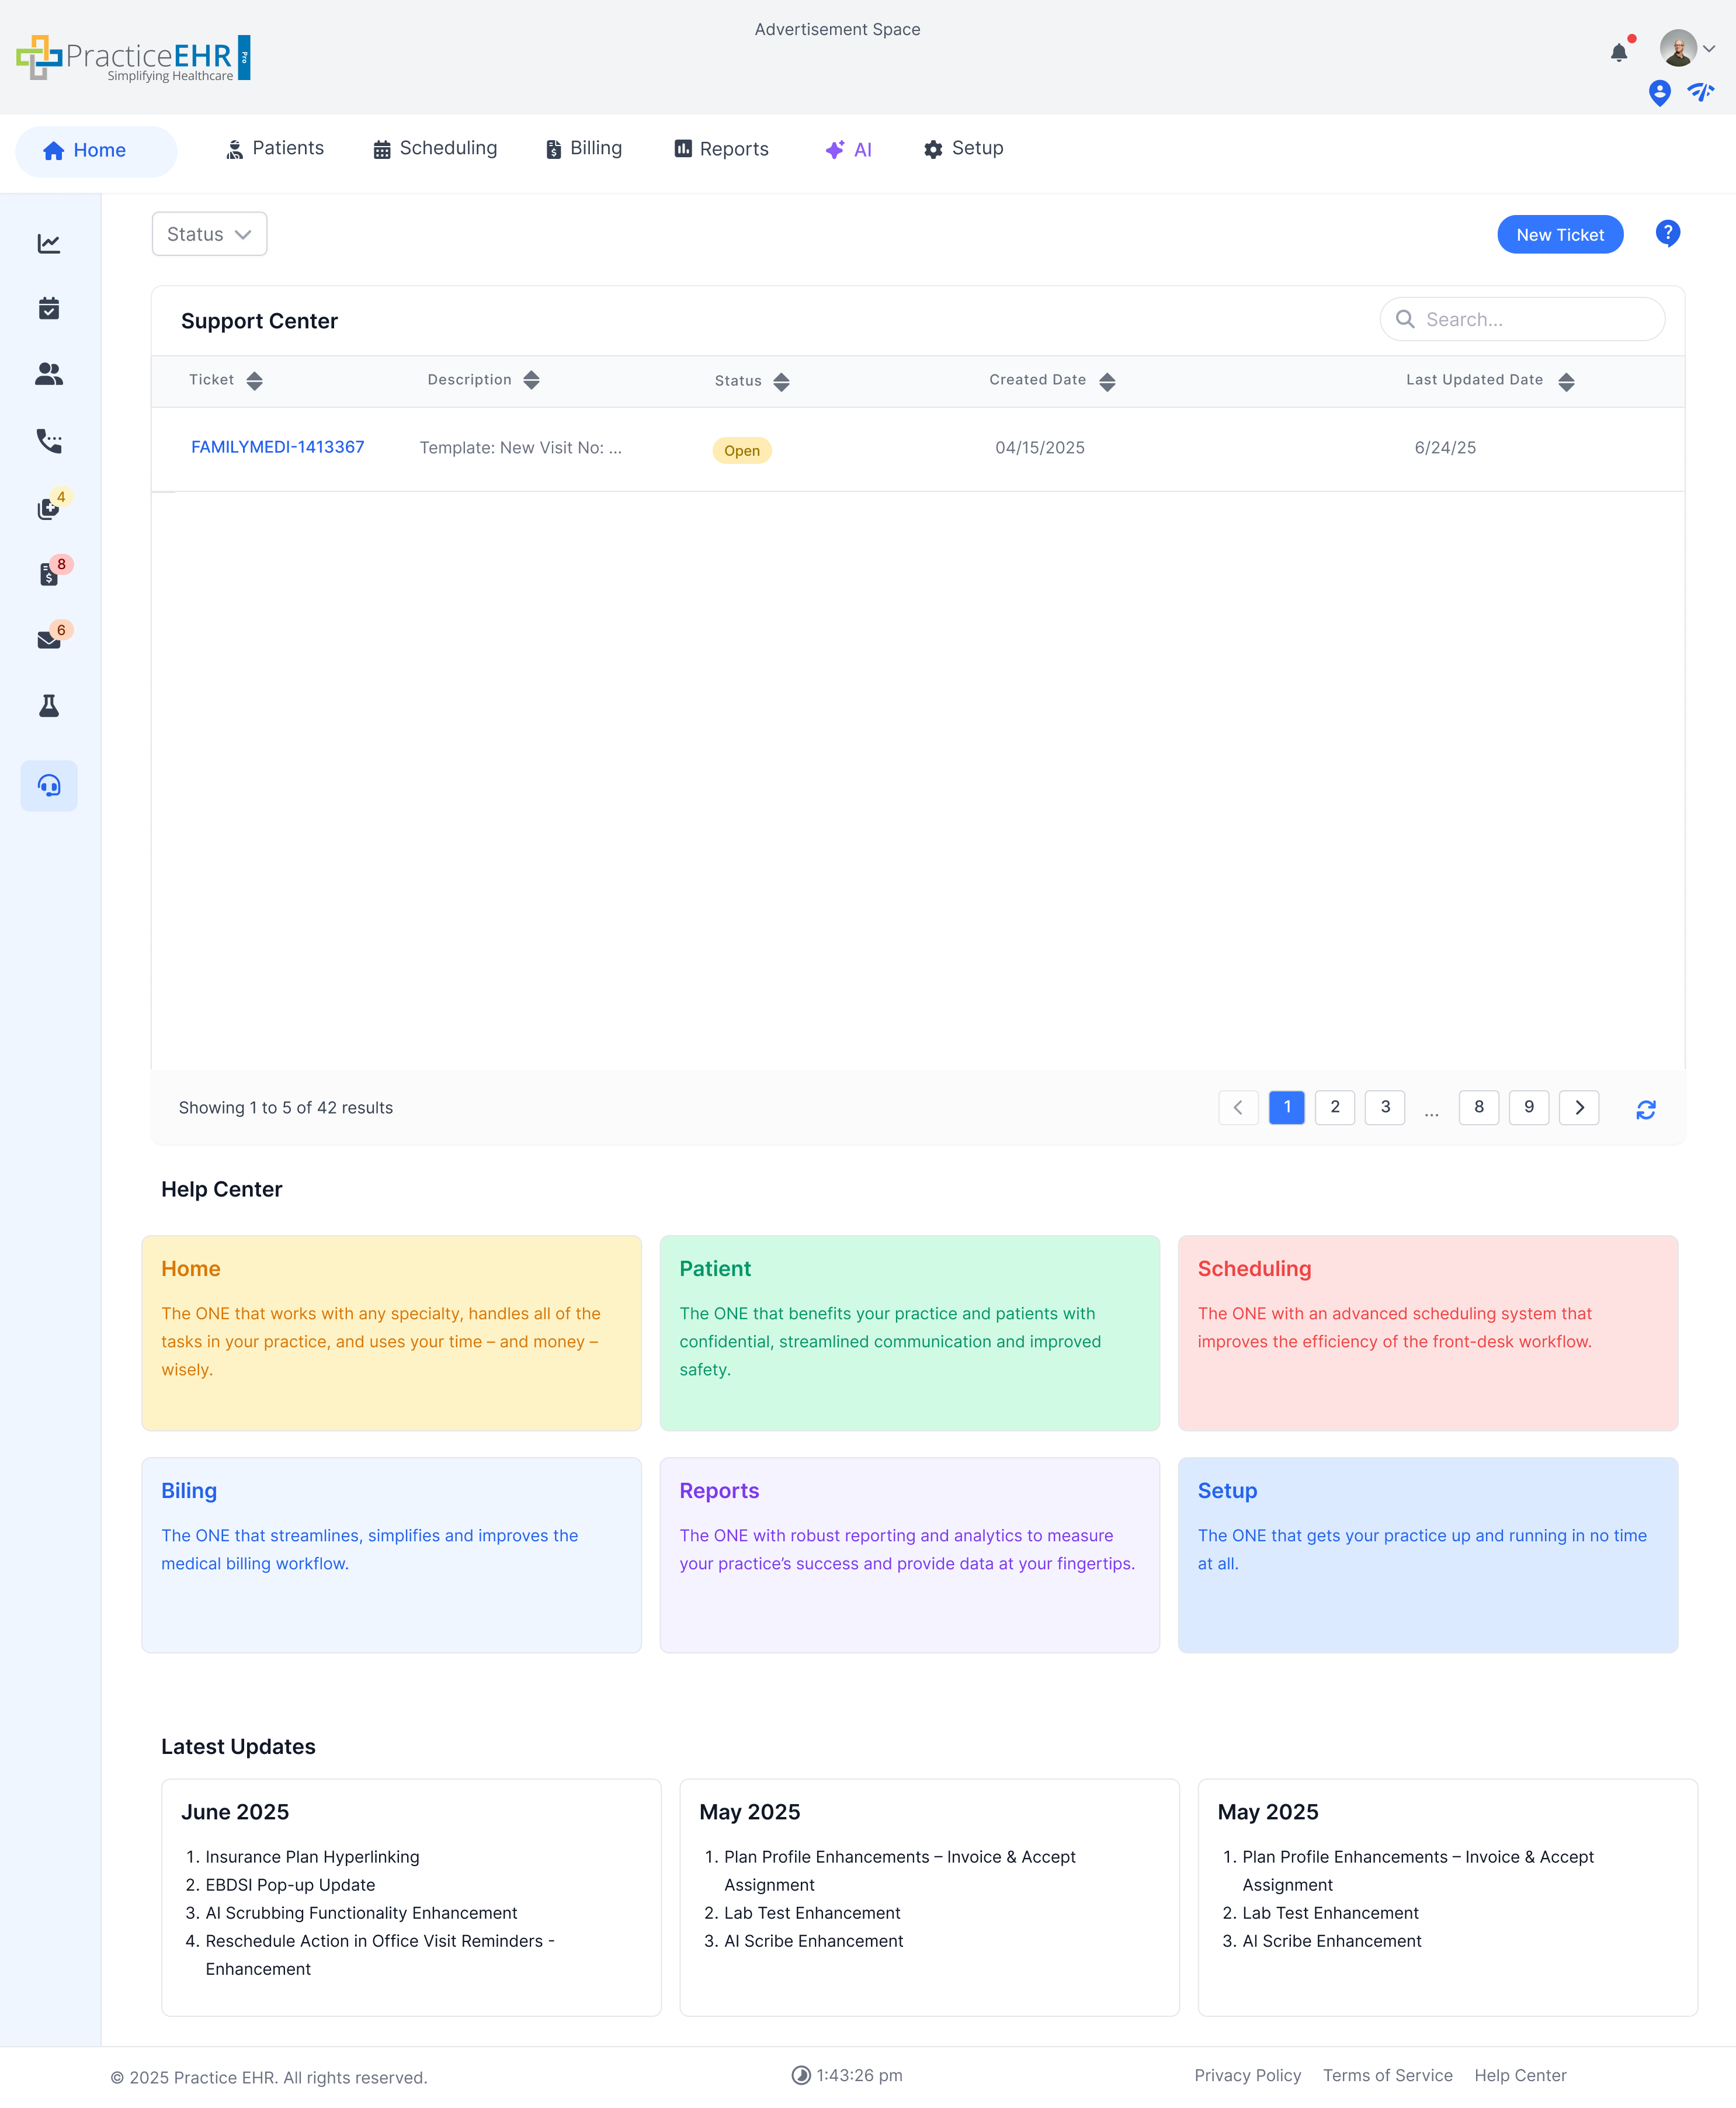
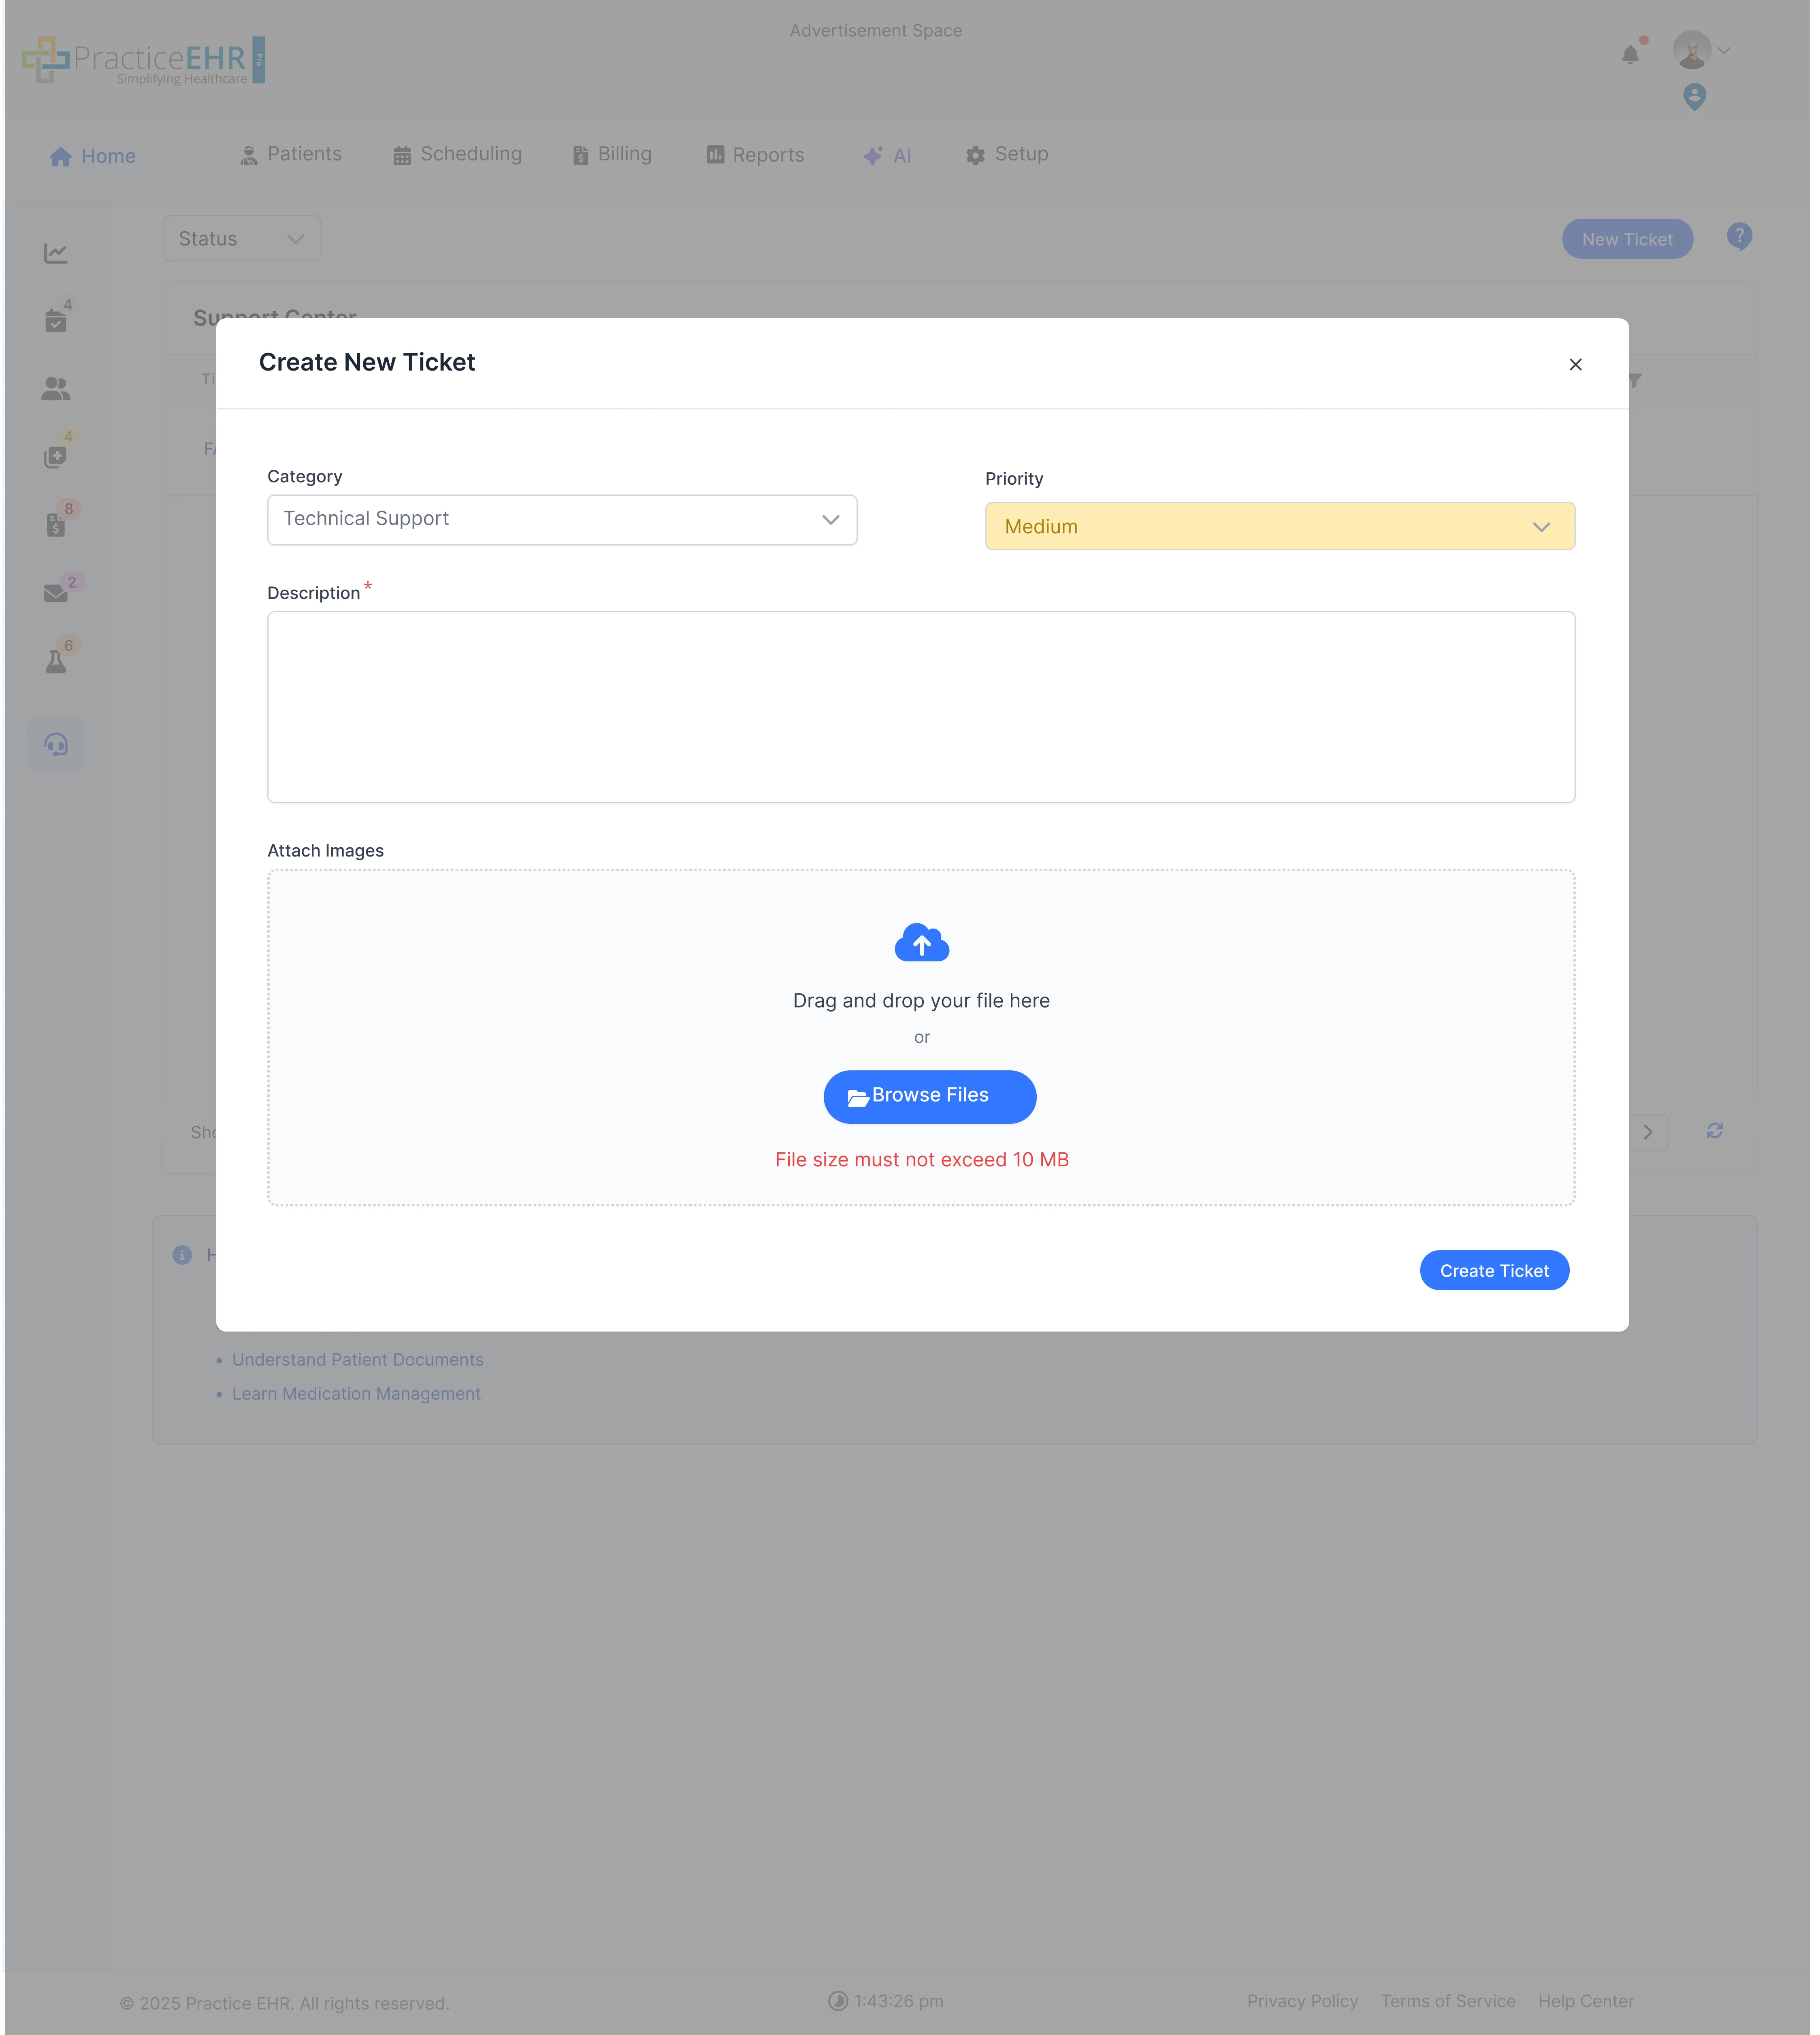
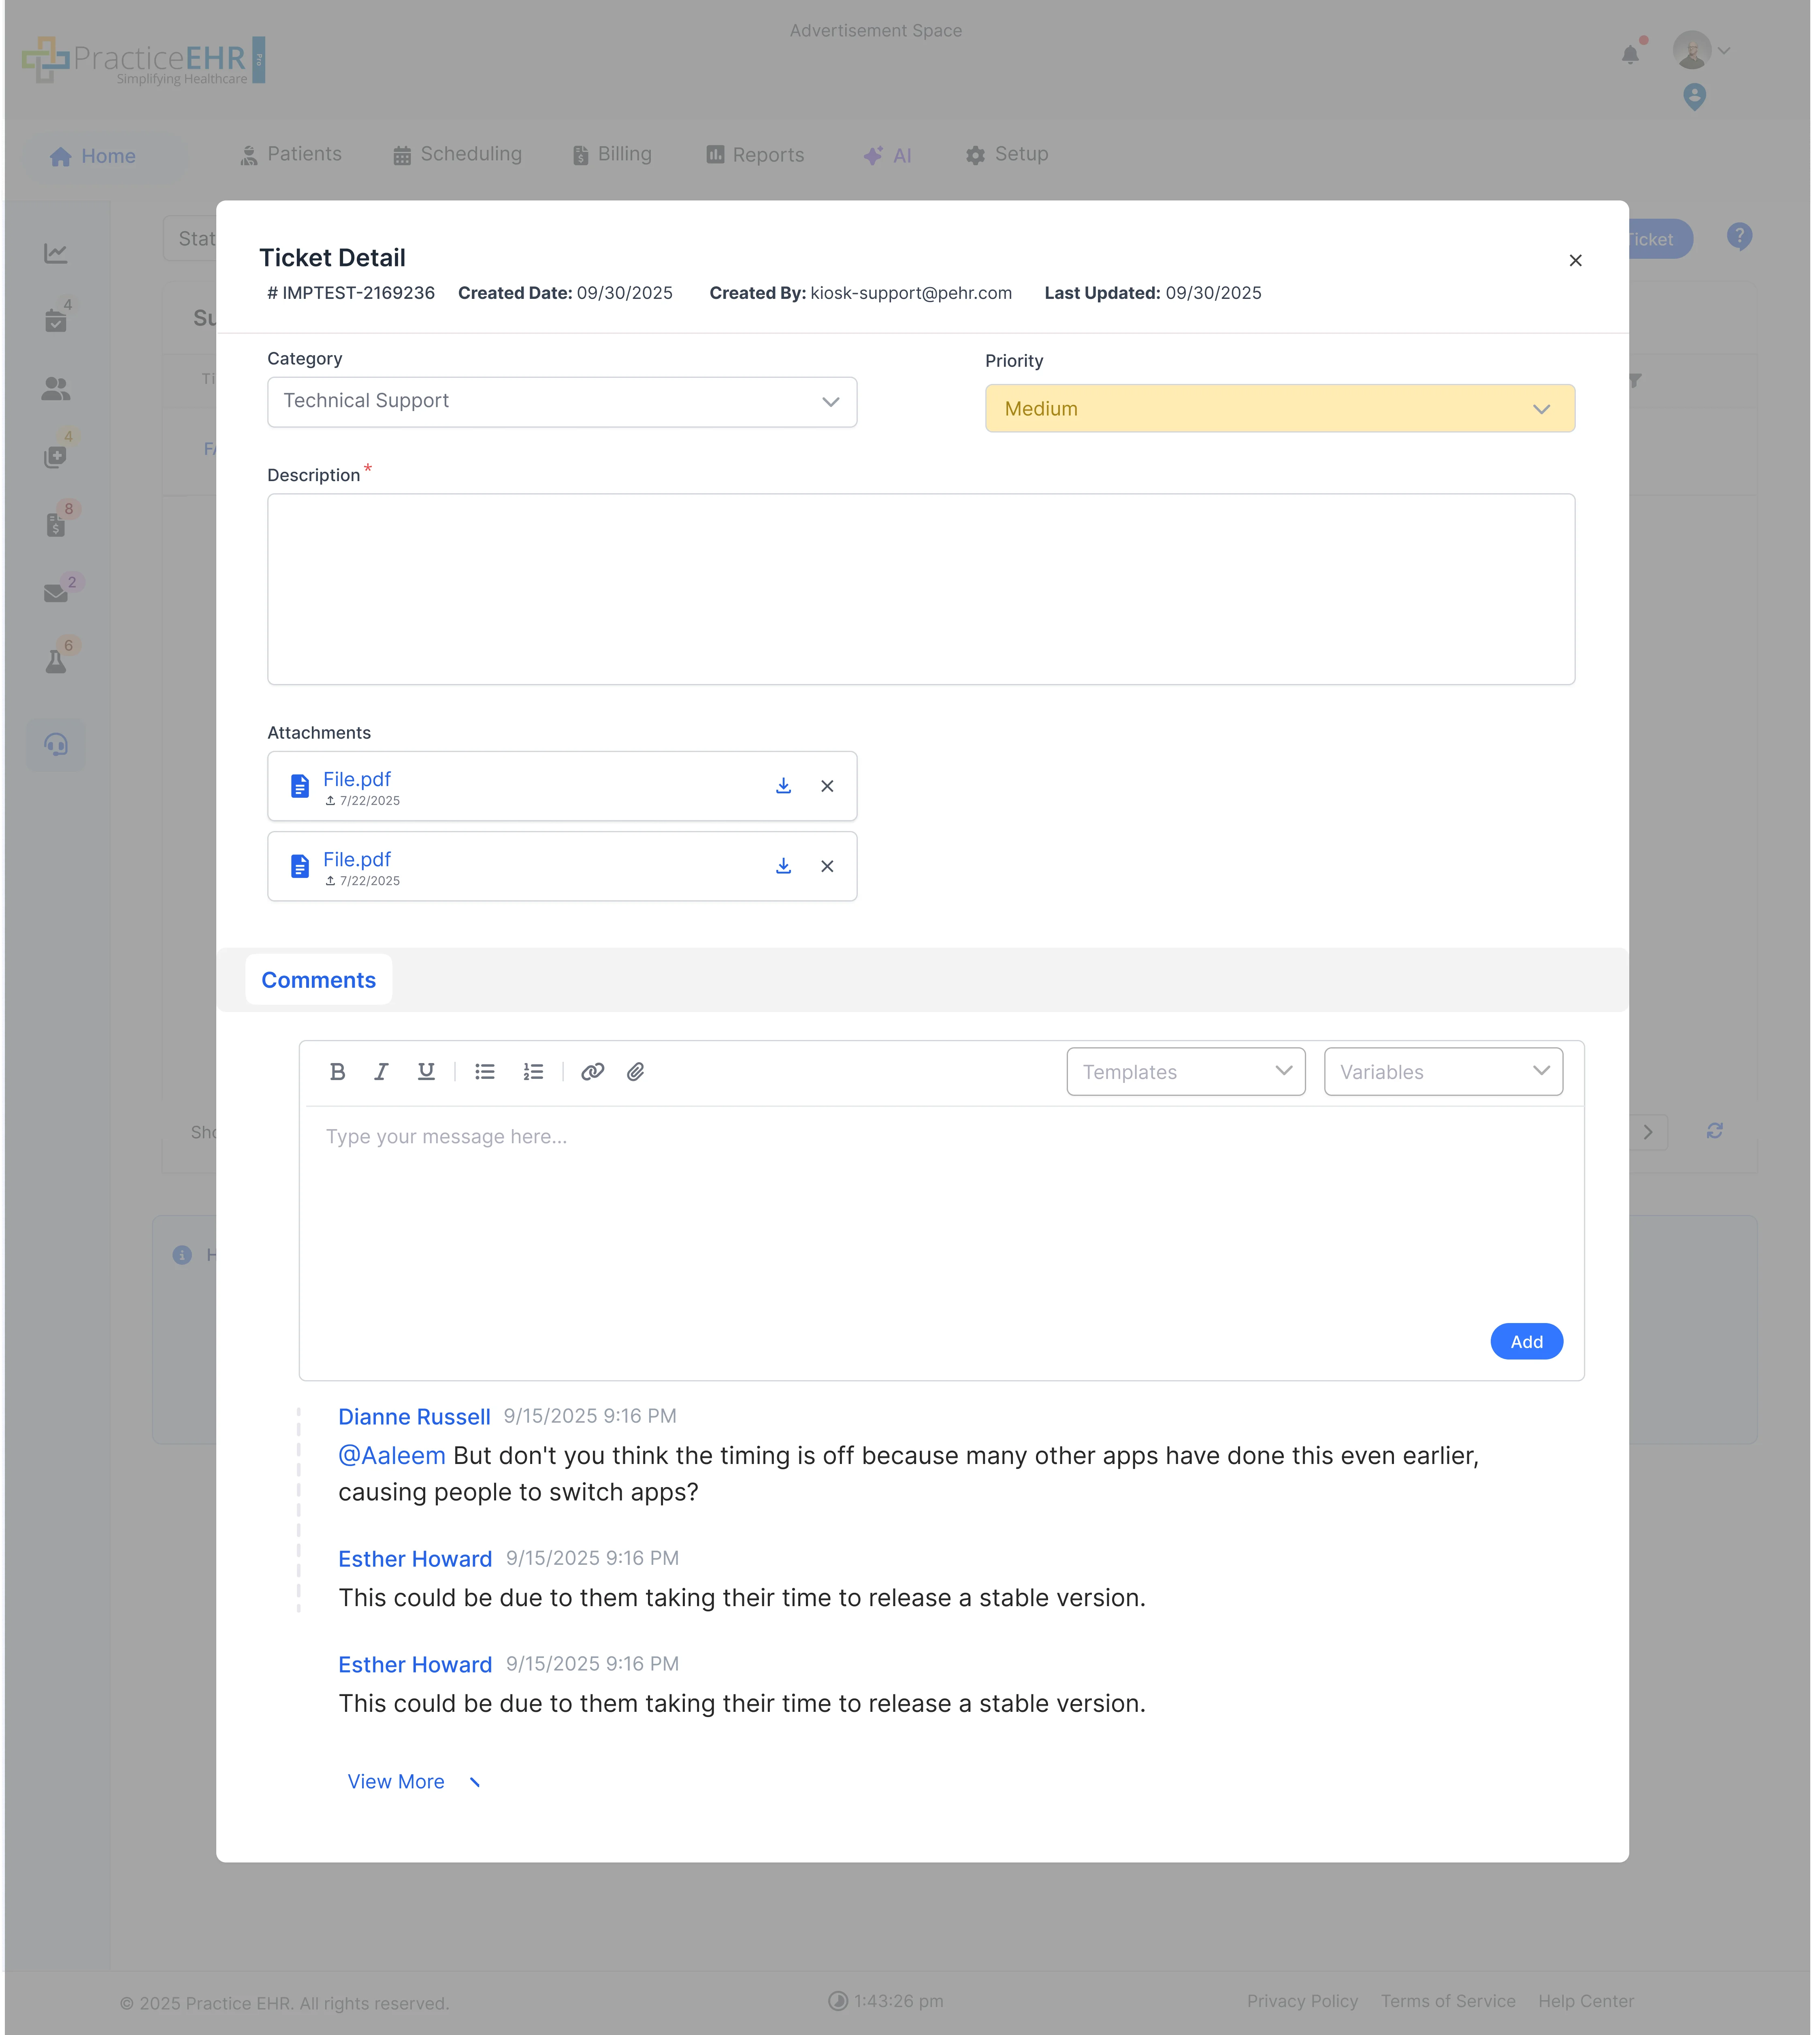
Support Center