Scheduling Module Index
Click on any link to navigate to the corresponding documentation.
- Daily
- ↪ Daily Current
- ↪ Unlinked Appointments
- ↪ Daily View Multi Provider
- ↪ Daily View Multi Location
- ↪ Block Schedule
- ↪ Unblock Schedule
- ↪ Daily Current (+ Selected)
- ↪ Schedule Detail on Hover
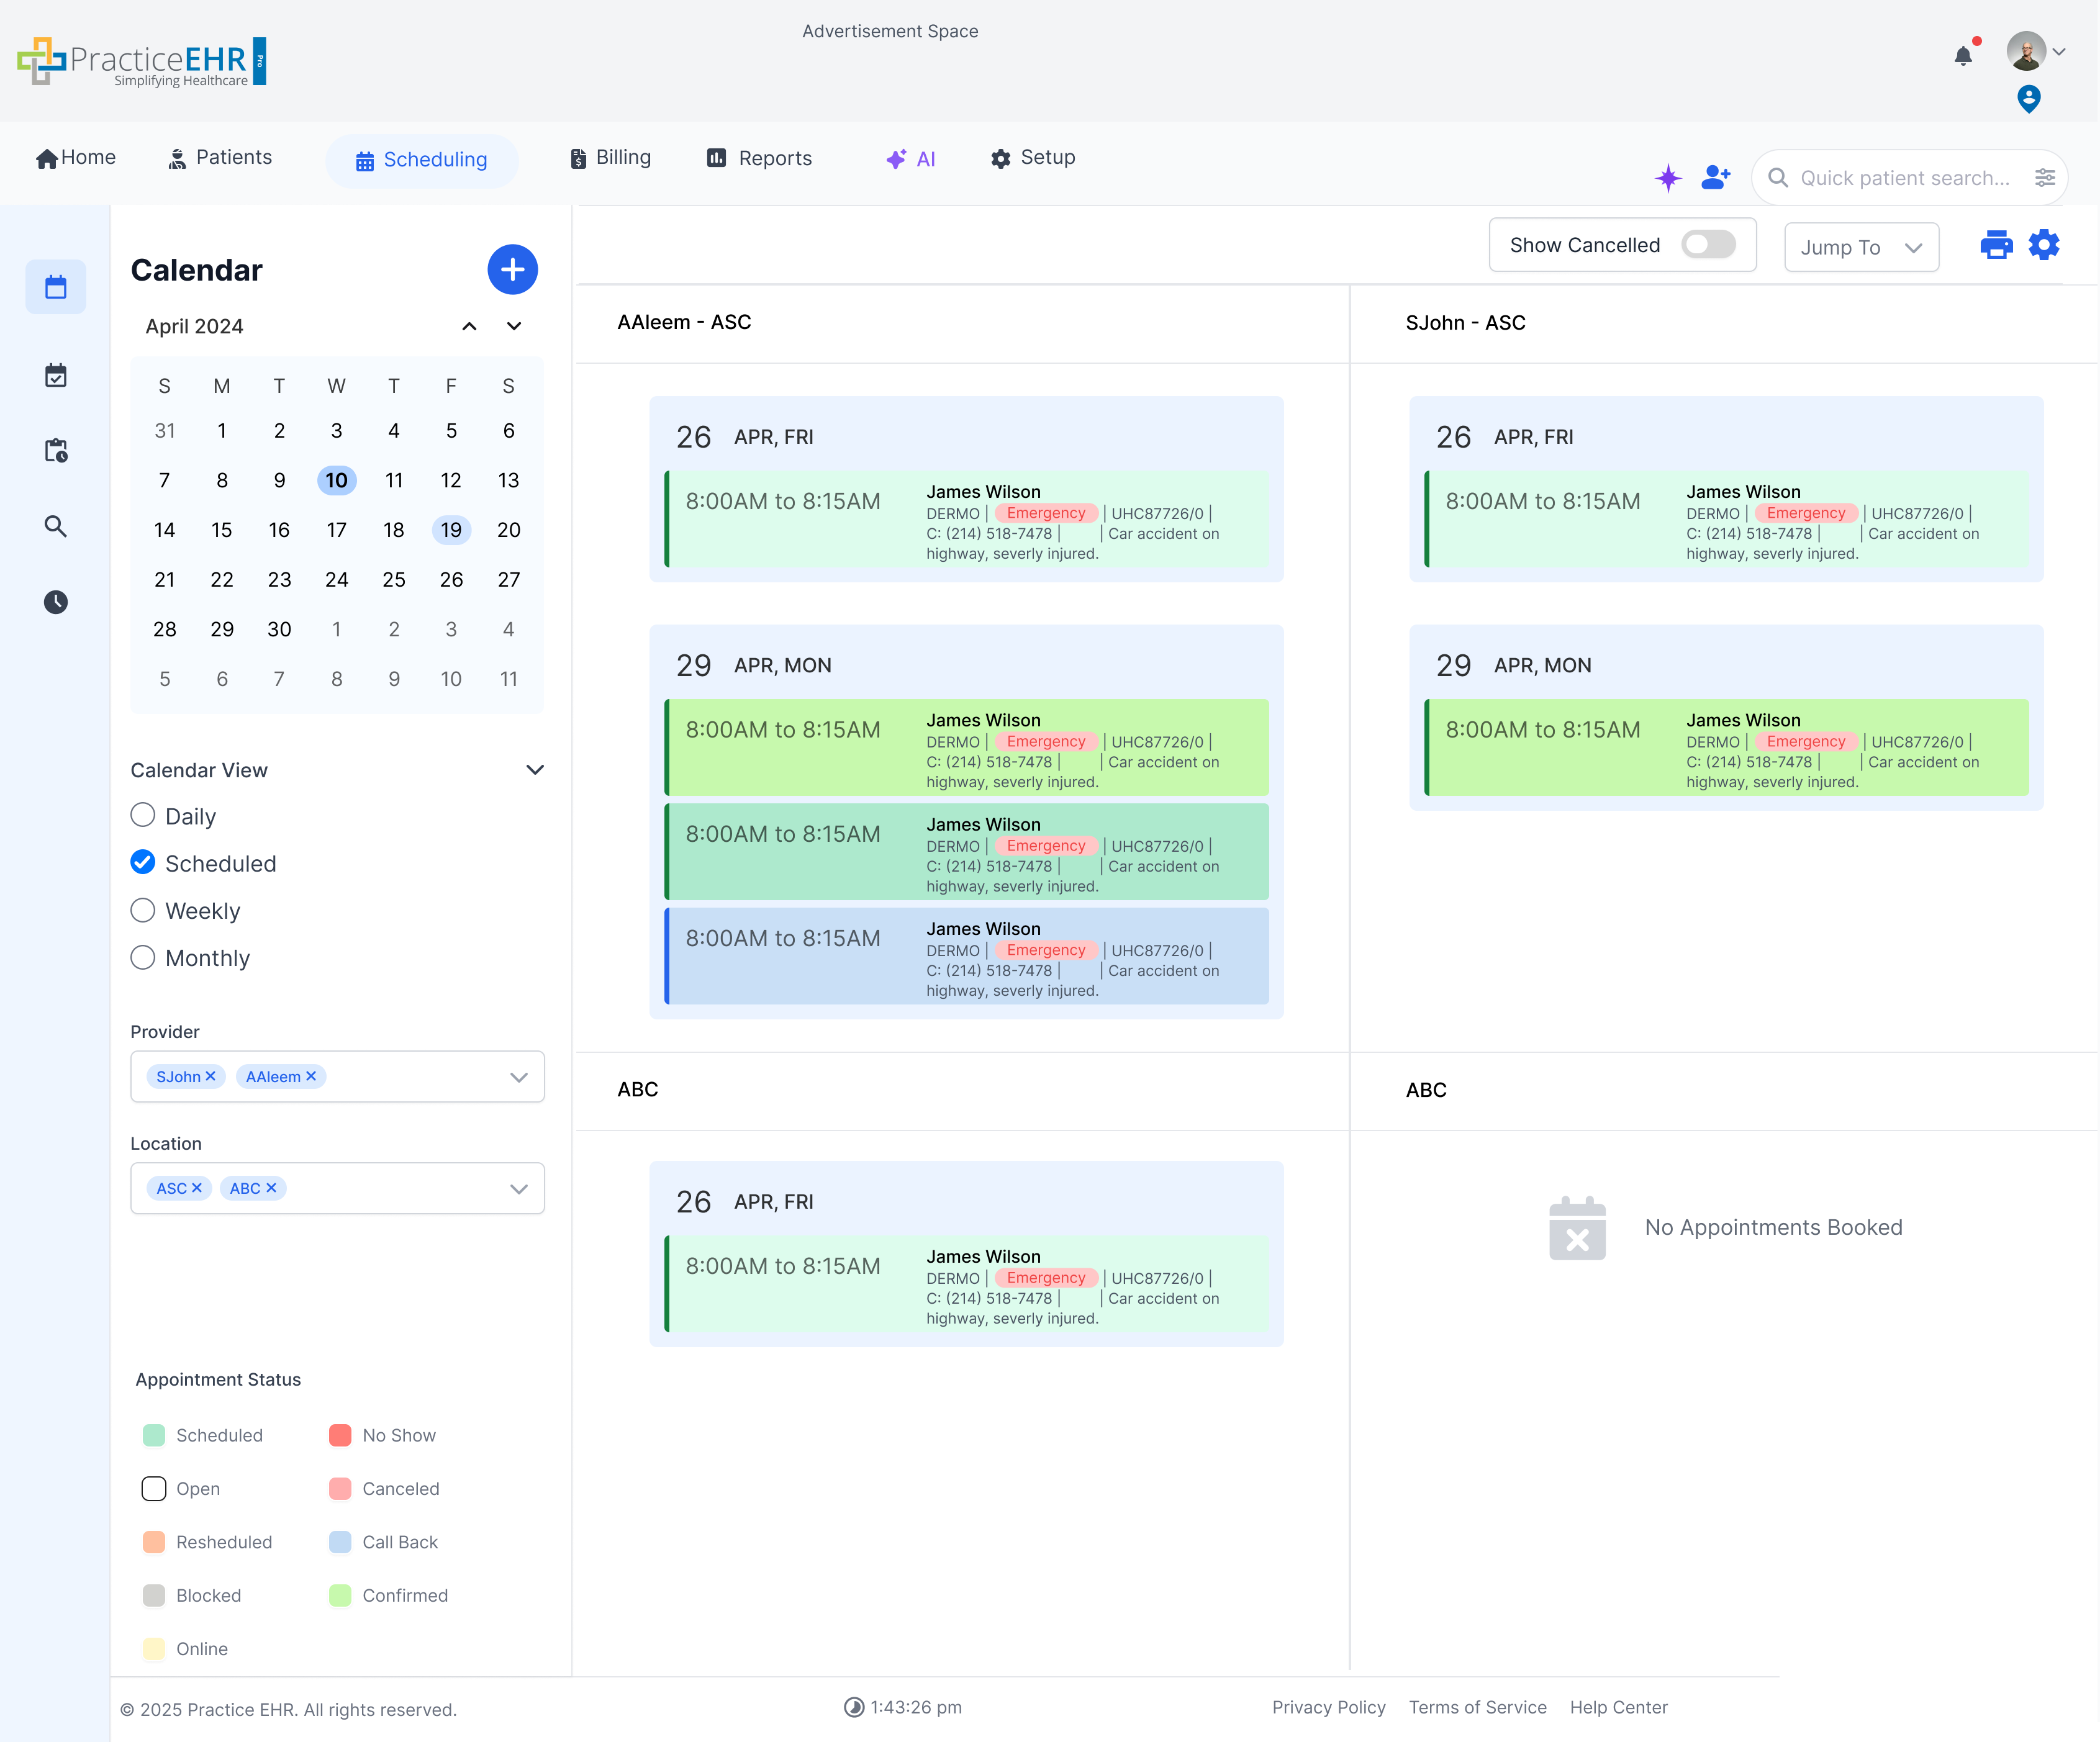
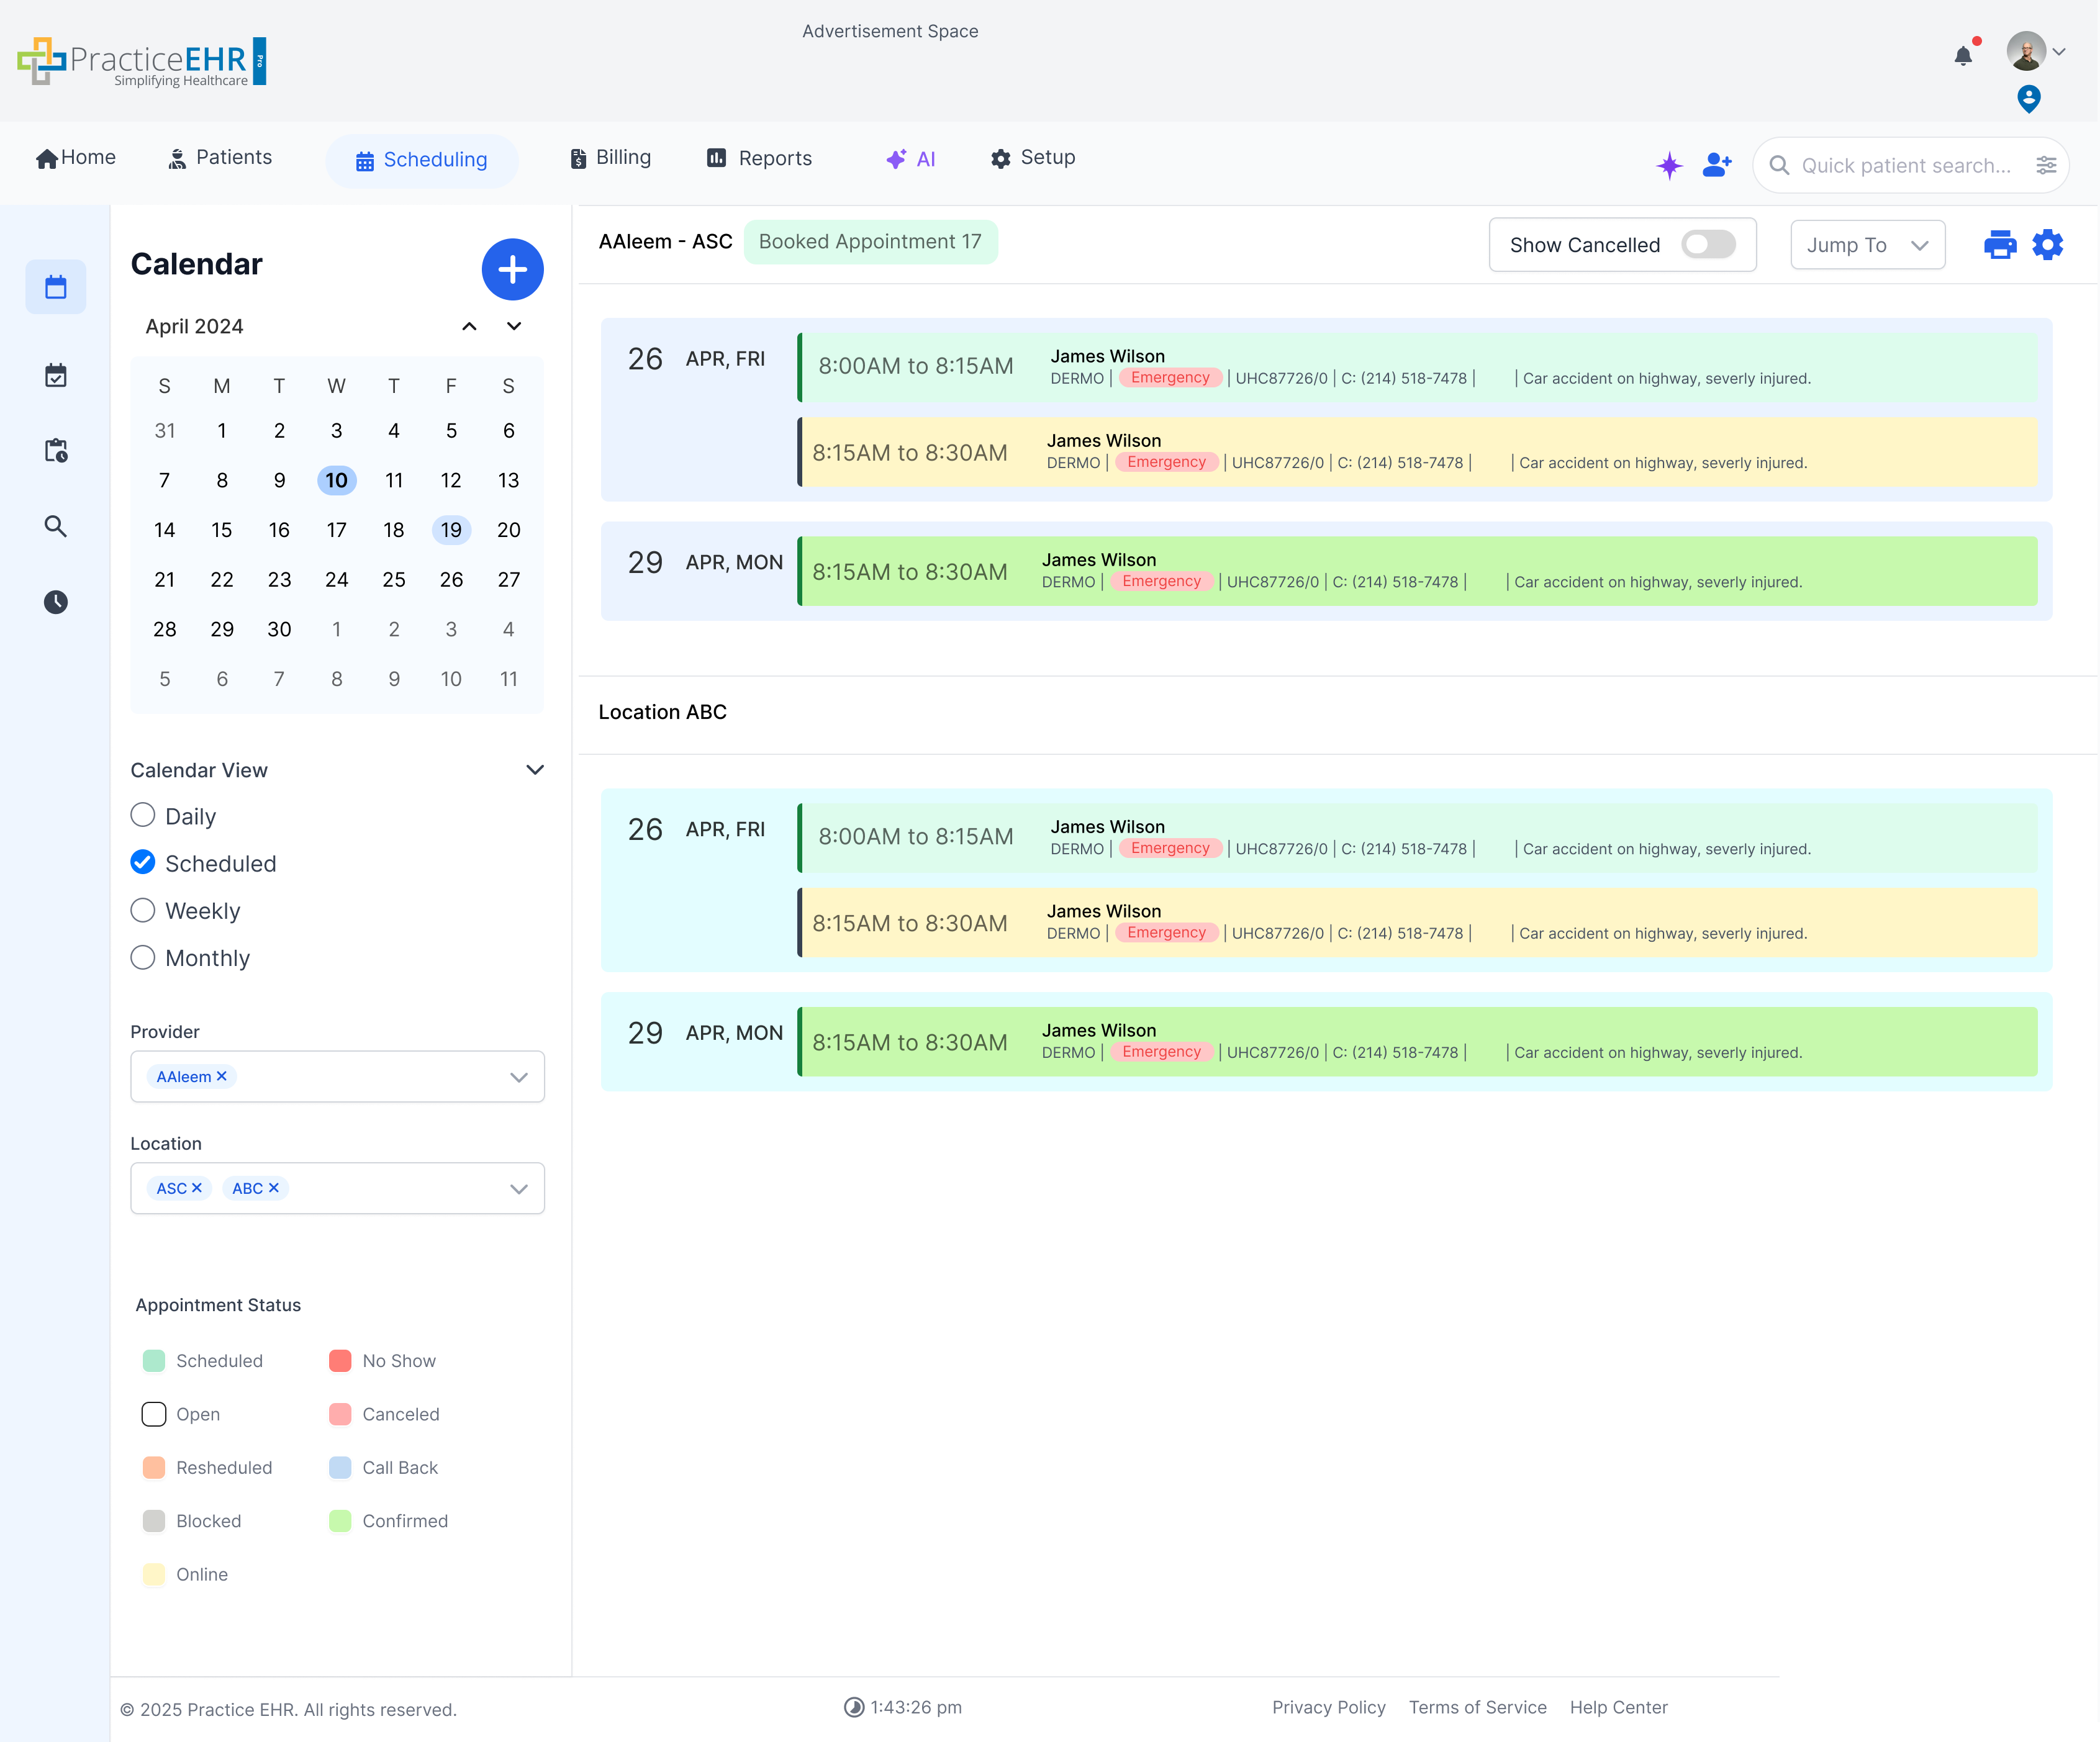
- Scheduled
- Calendar Scheduled View
- ↪ Calendar Scheduled View Multi Provider
- ↪ Scheduled View Multi Location
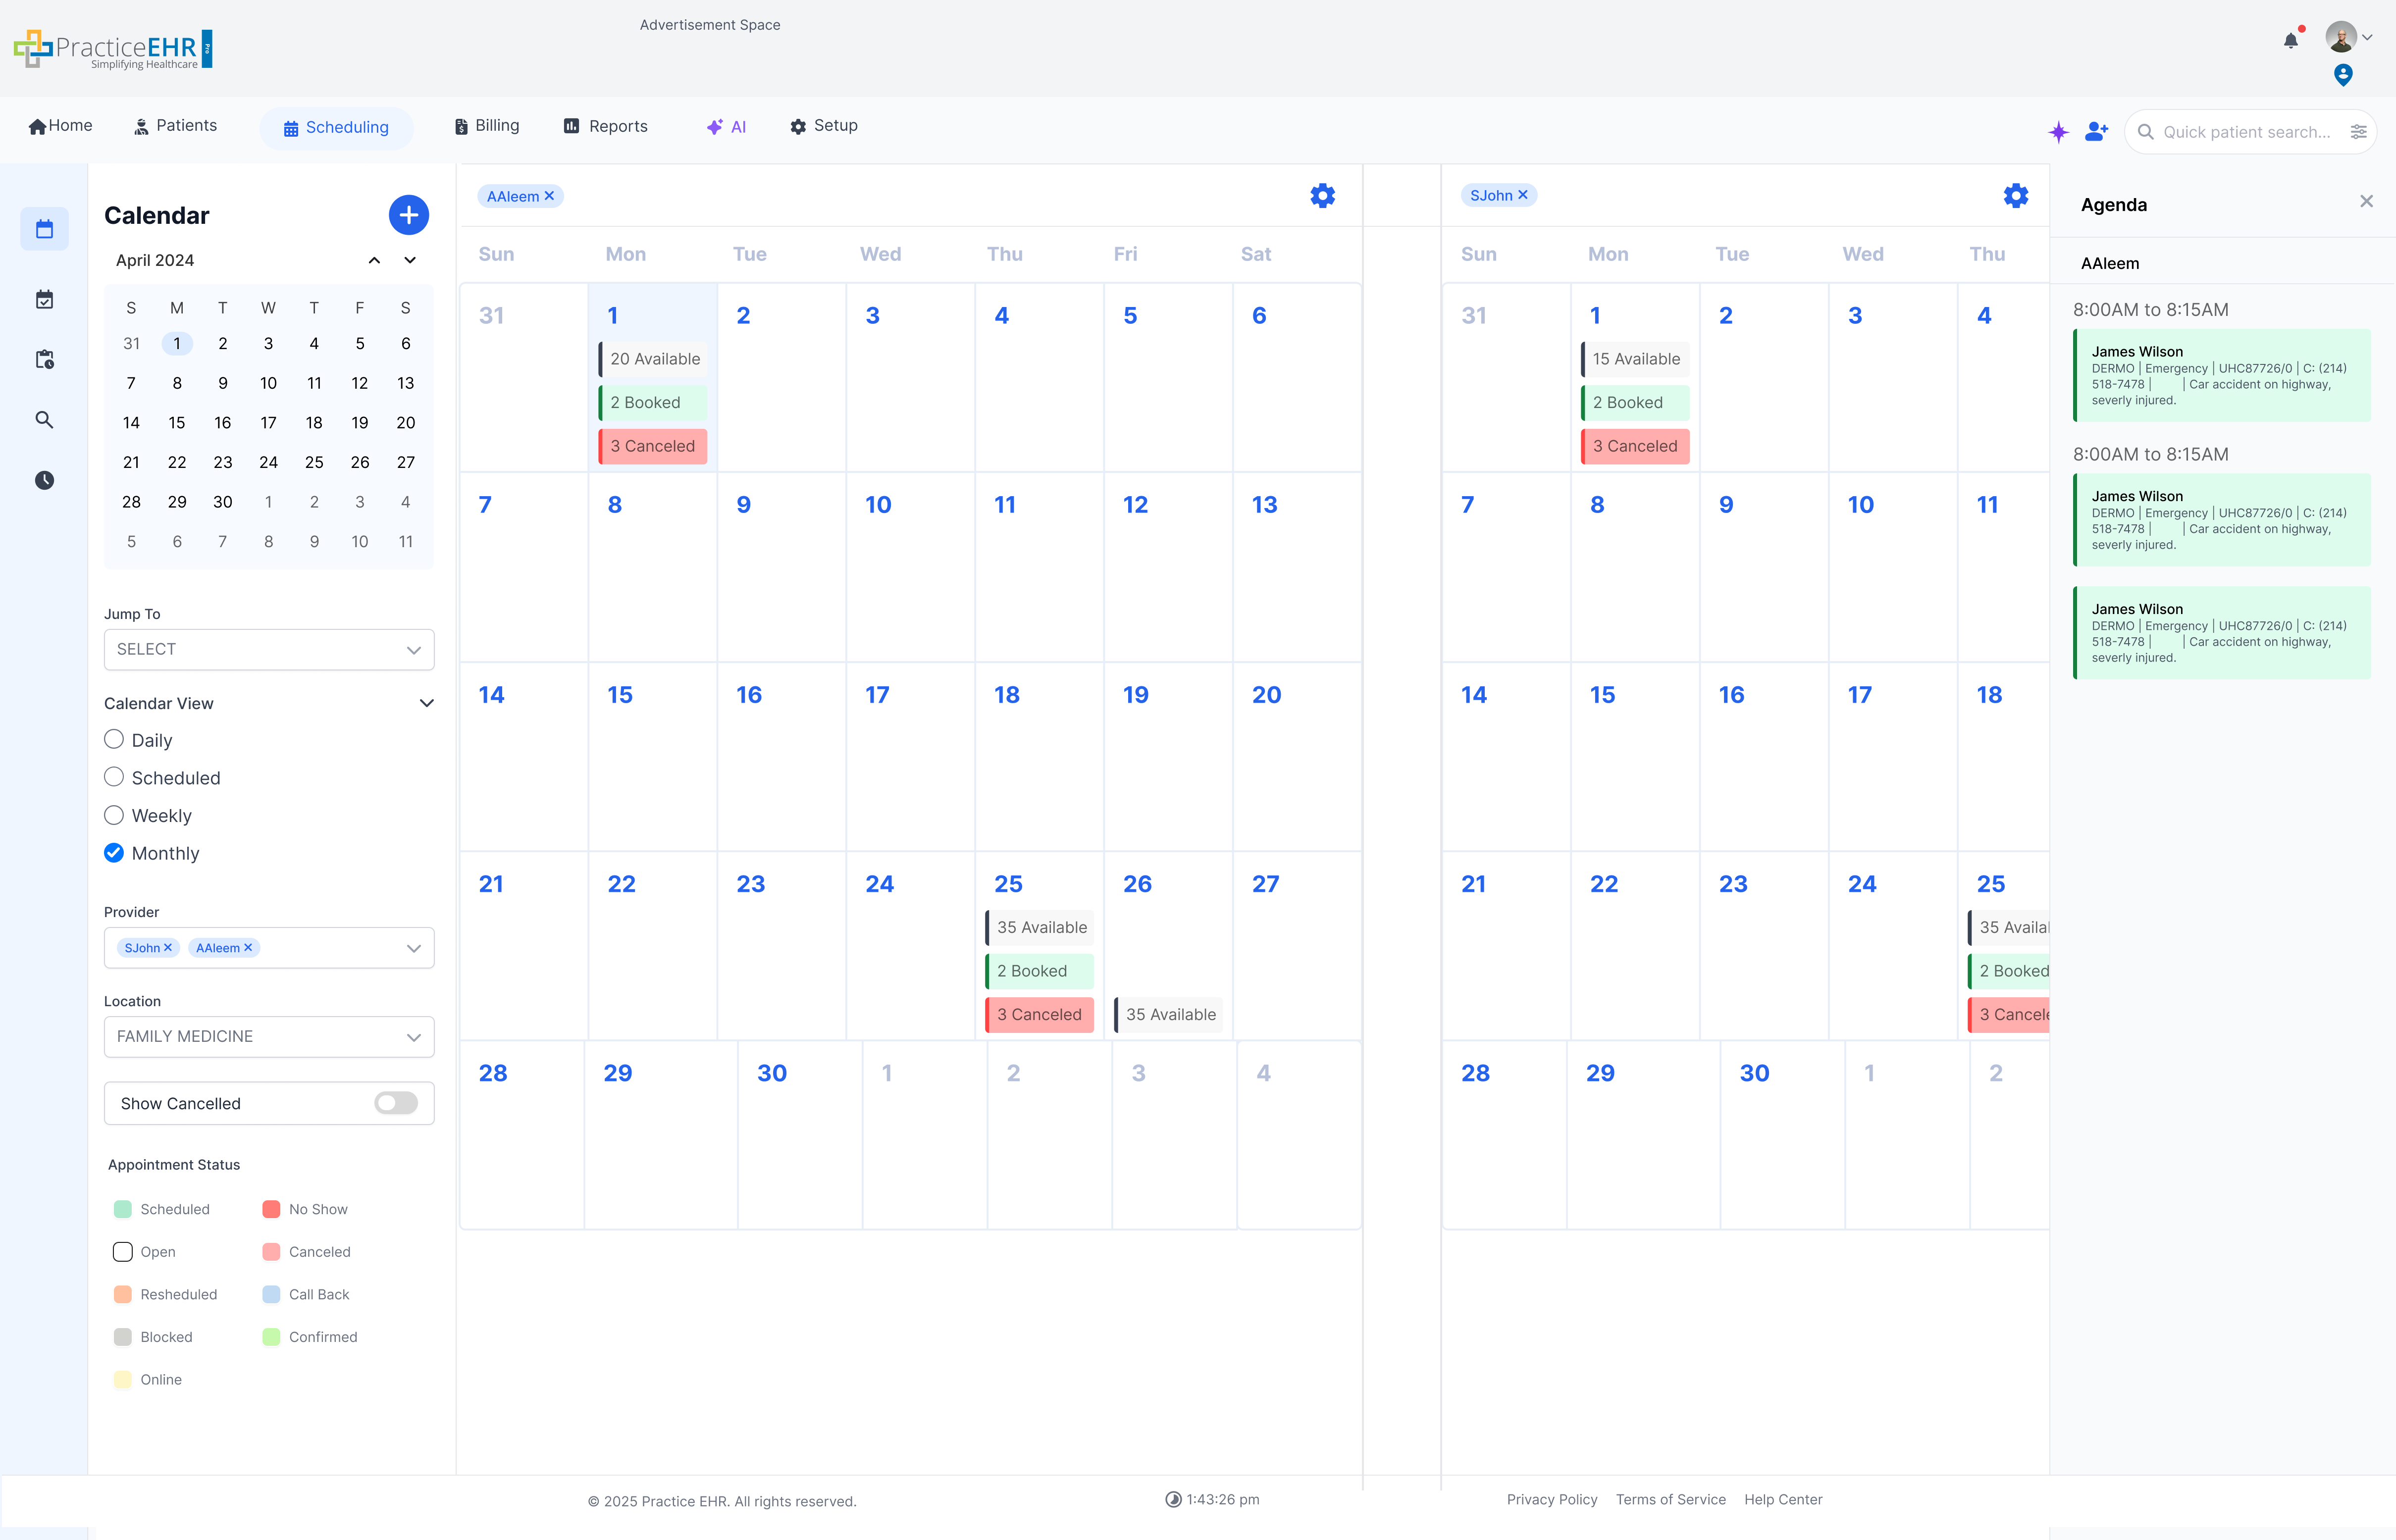
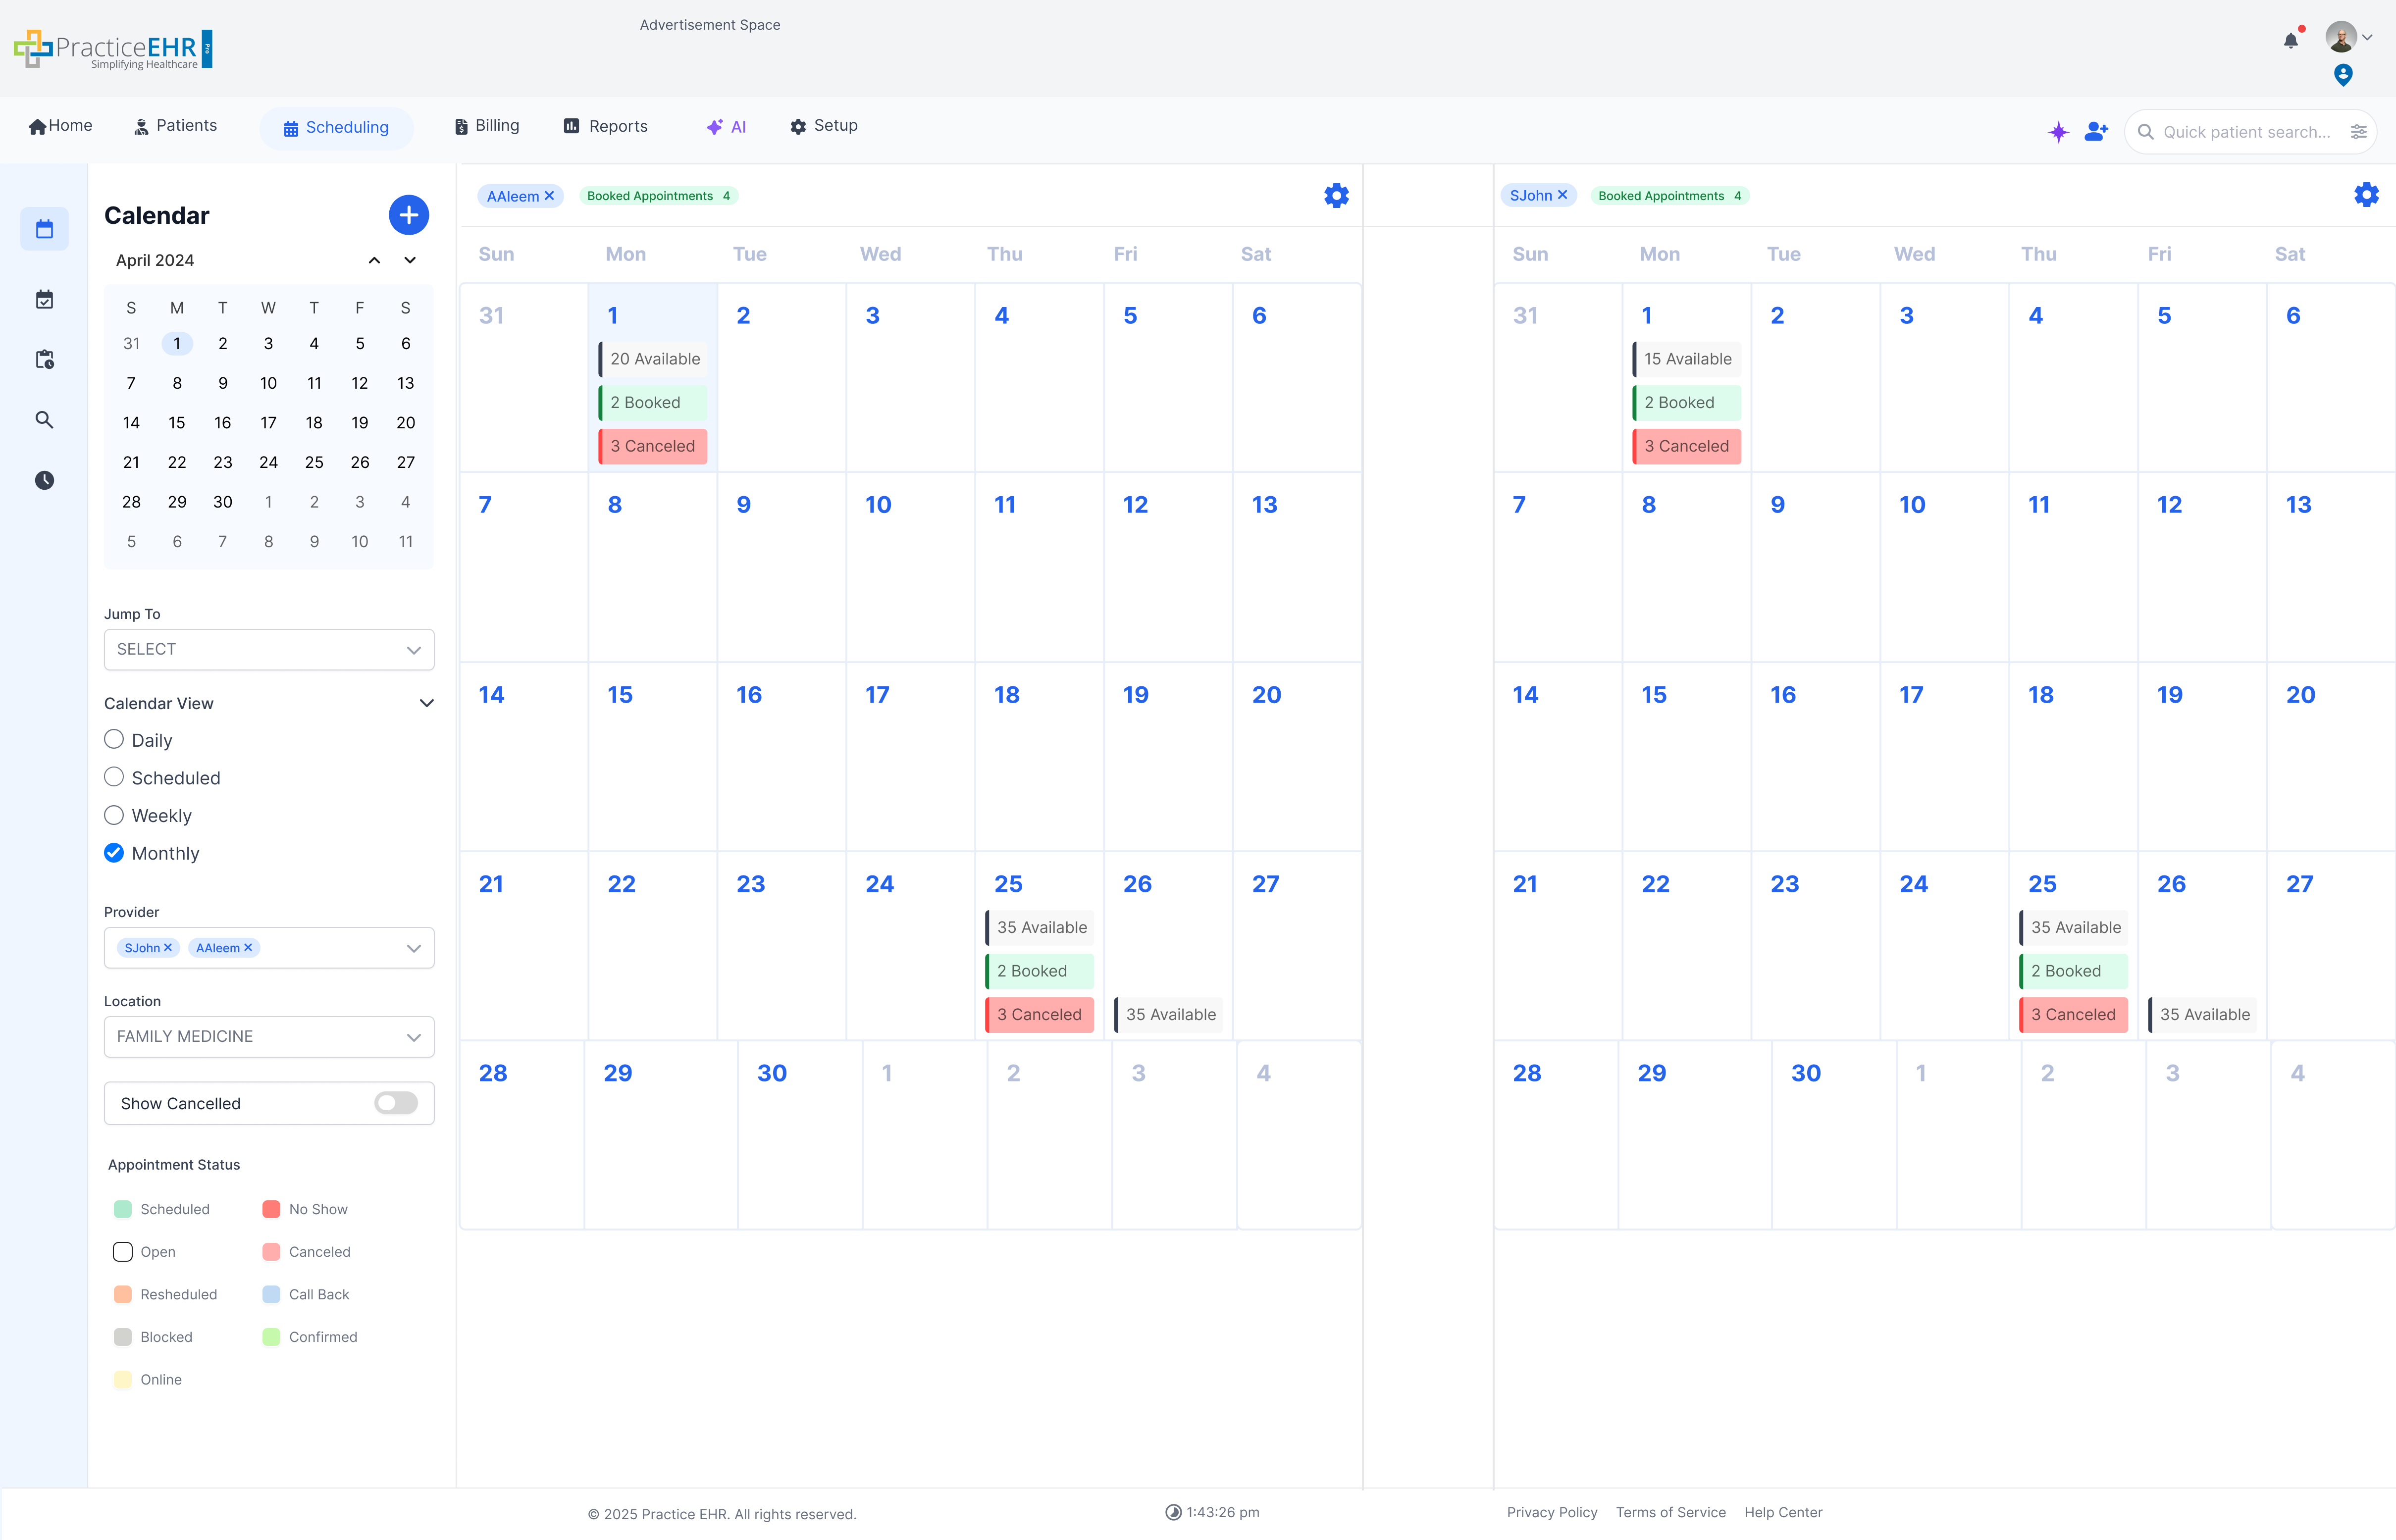
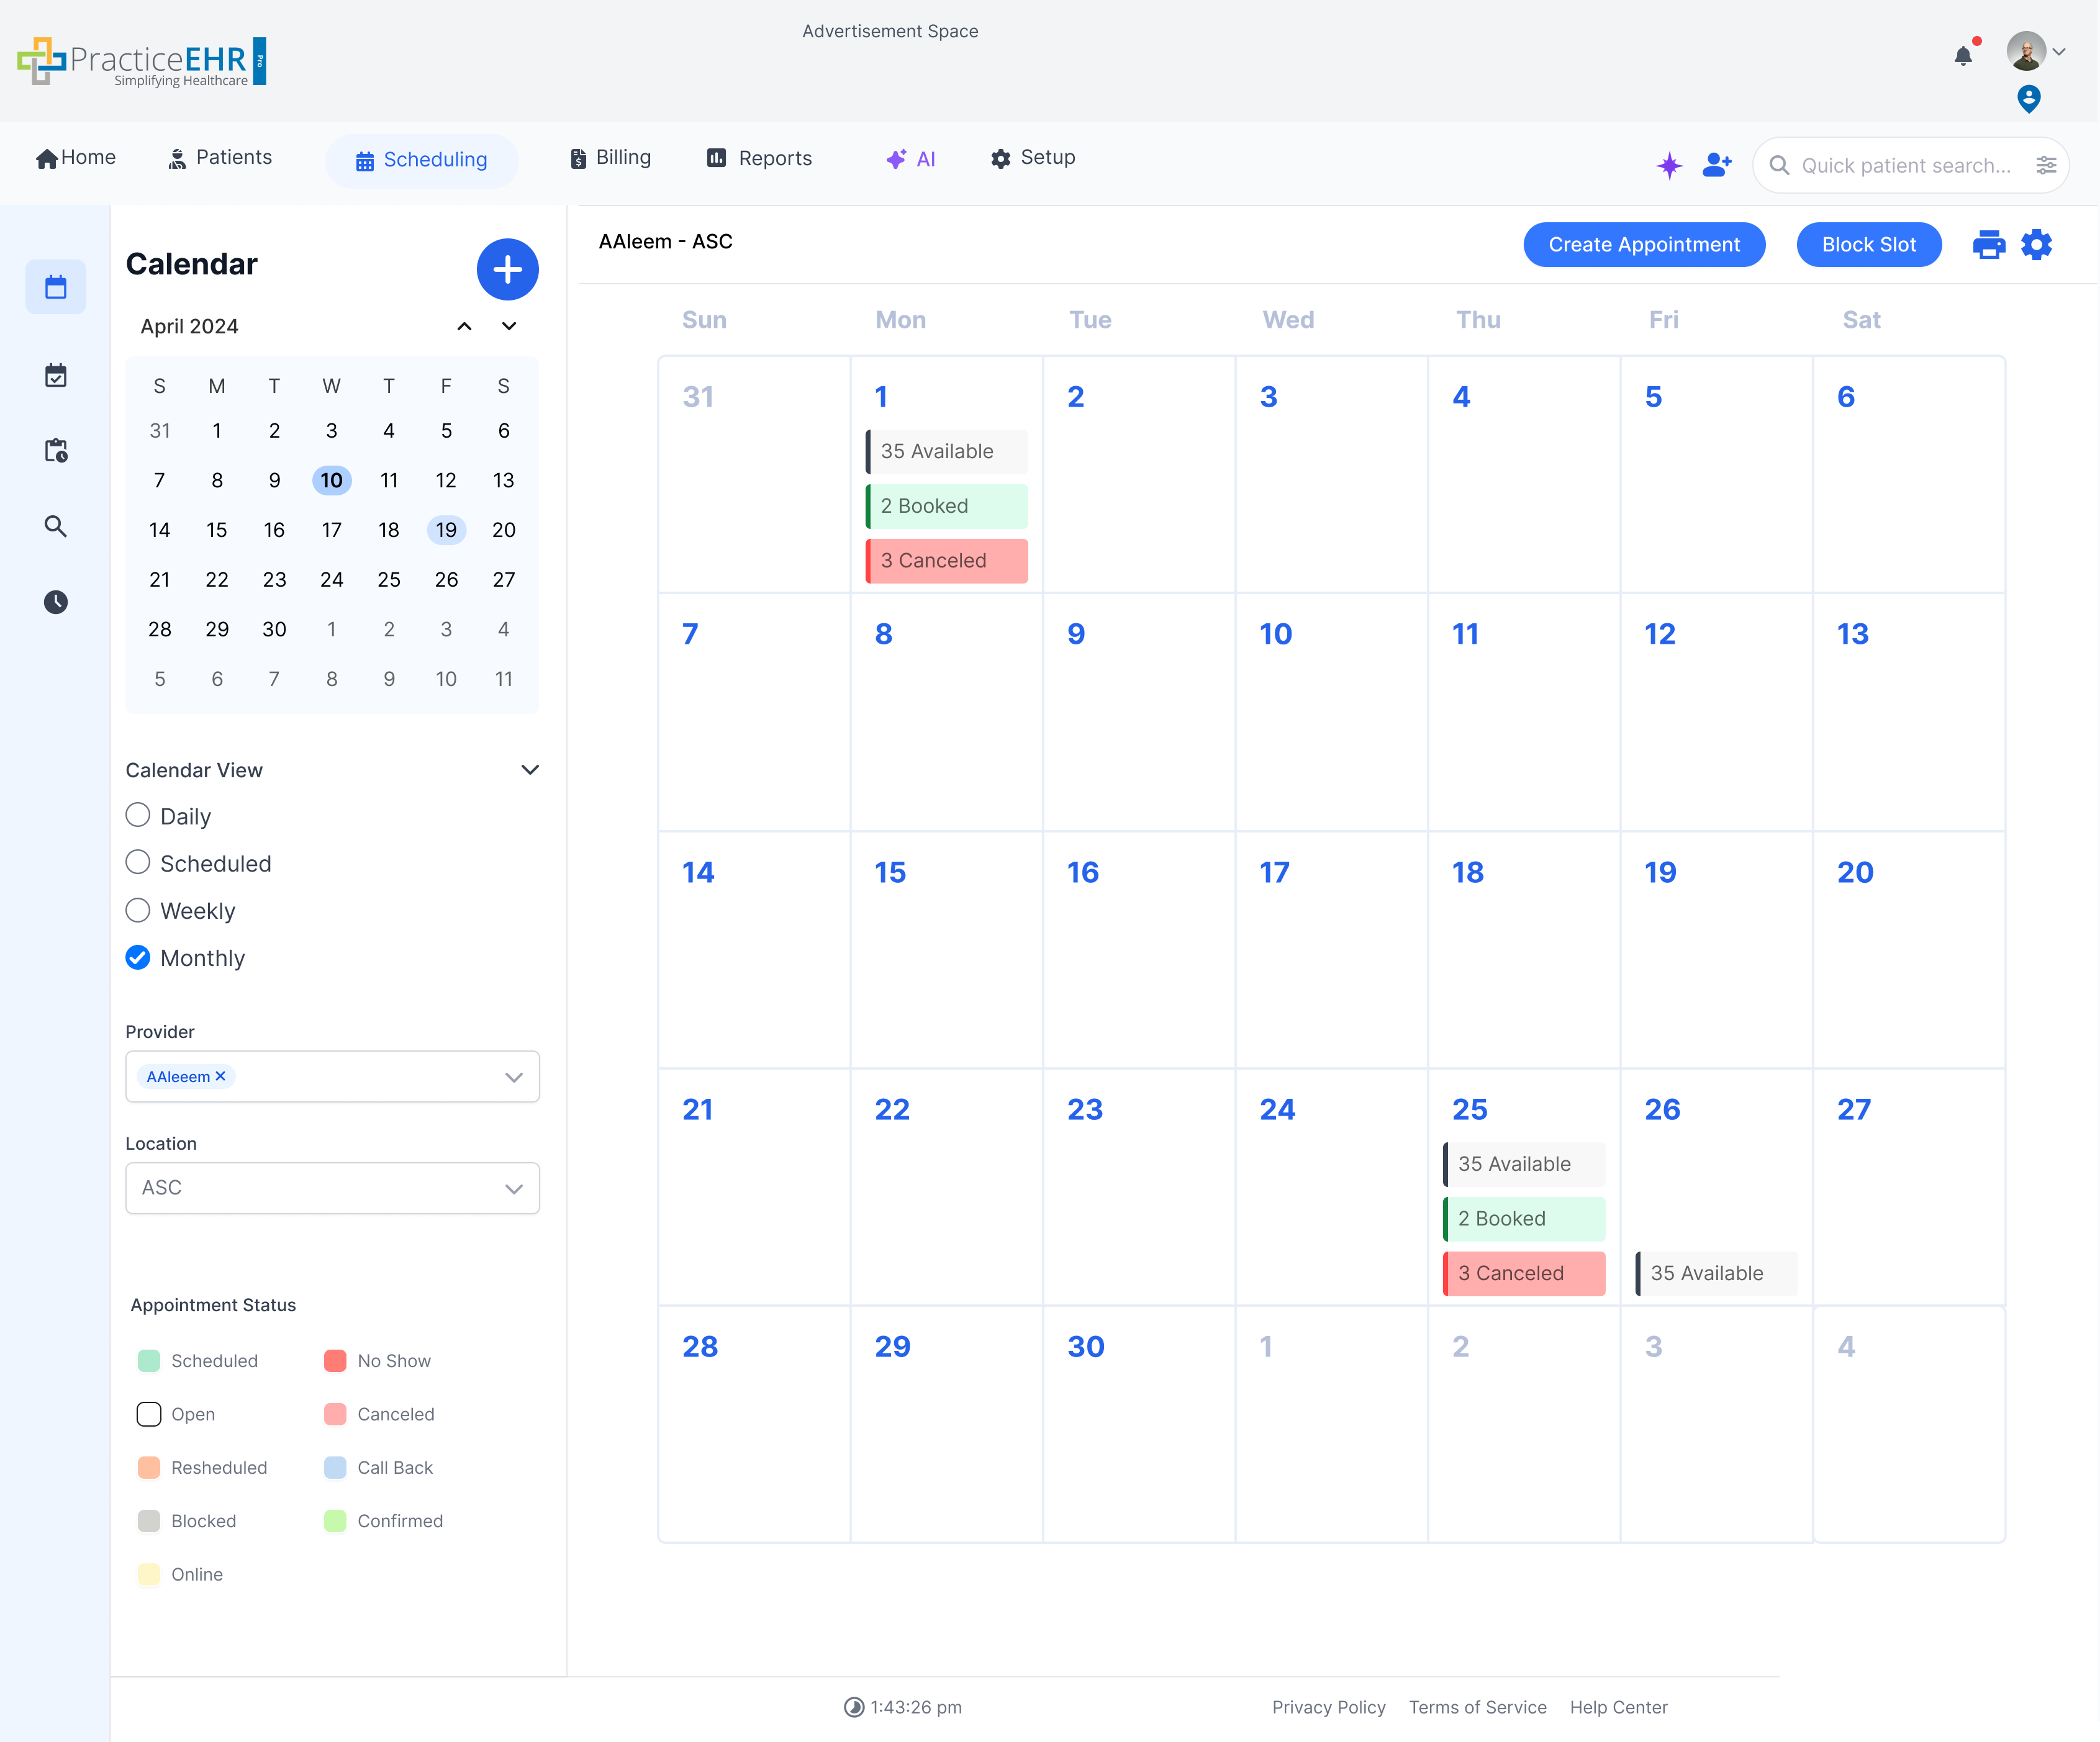
- Monthly
- ↪ Calendar Monthly View Date Selected
- ↪ Calendar Monthly View
- ↪ Calendar Monthly View Multi Provider
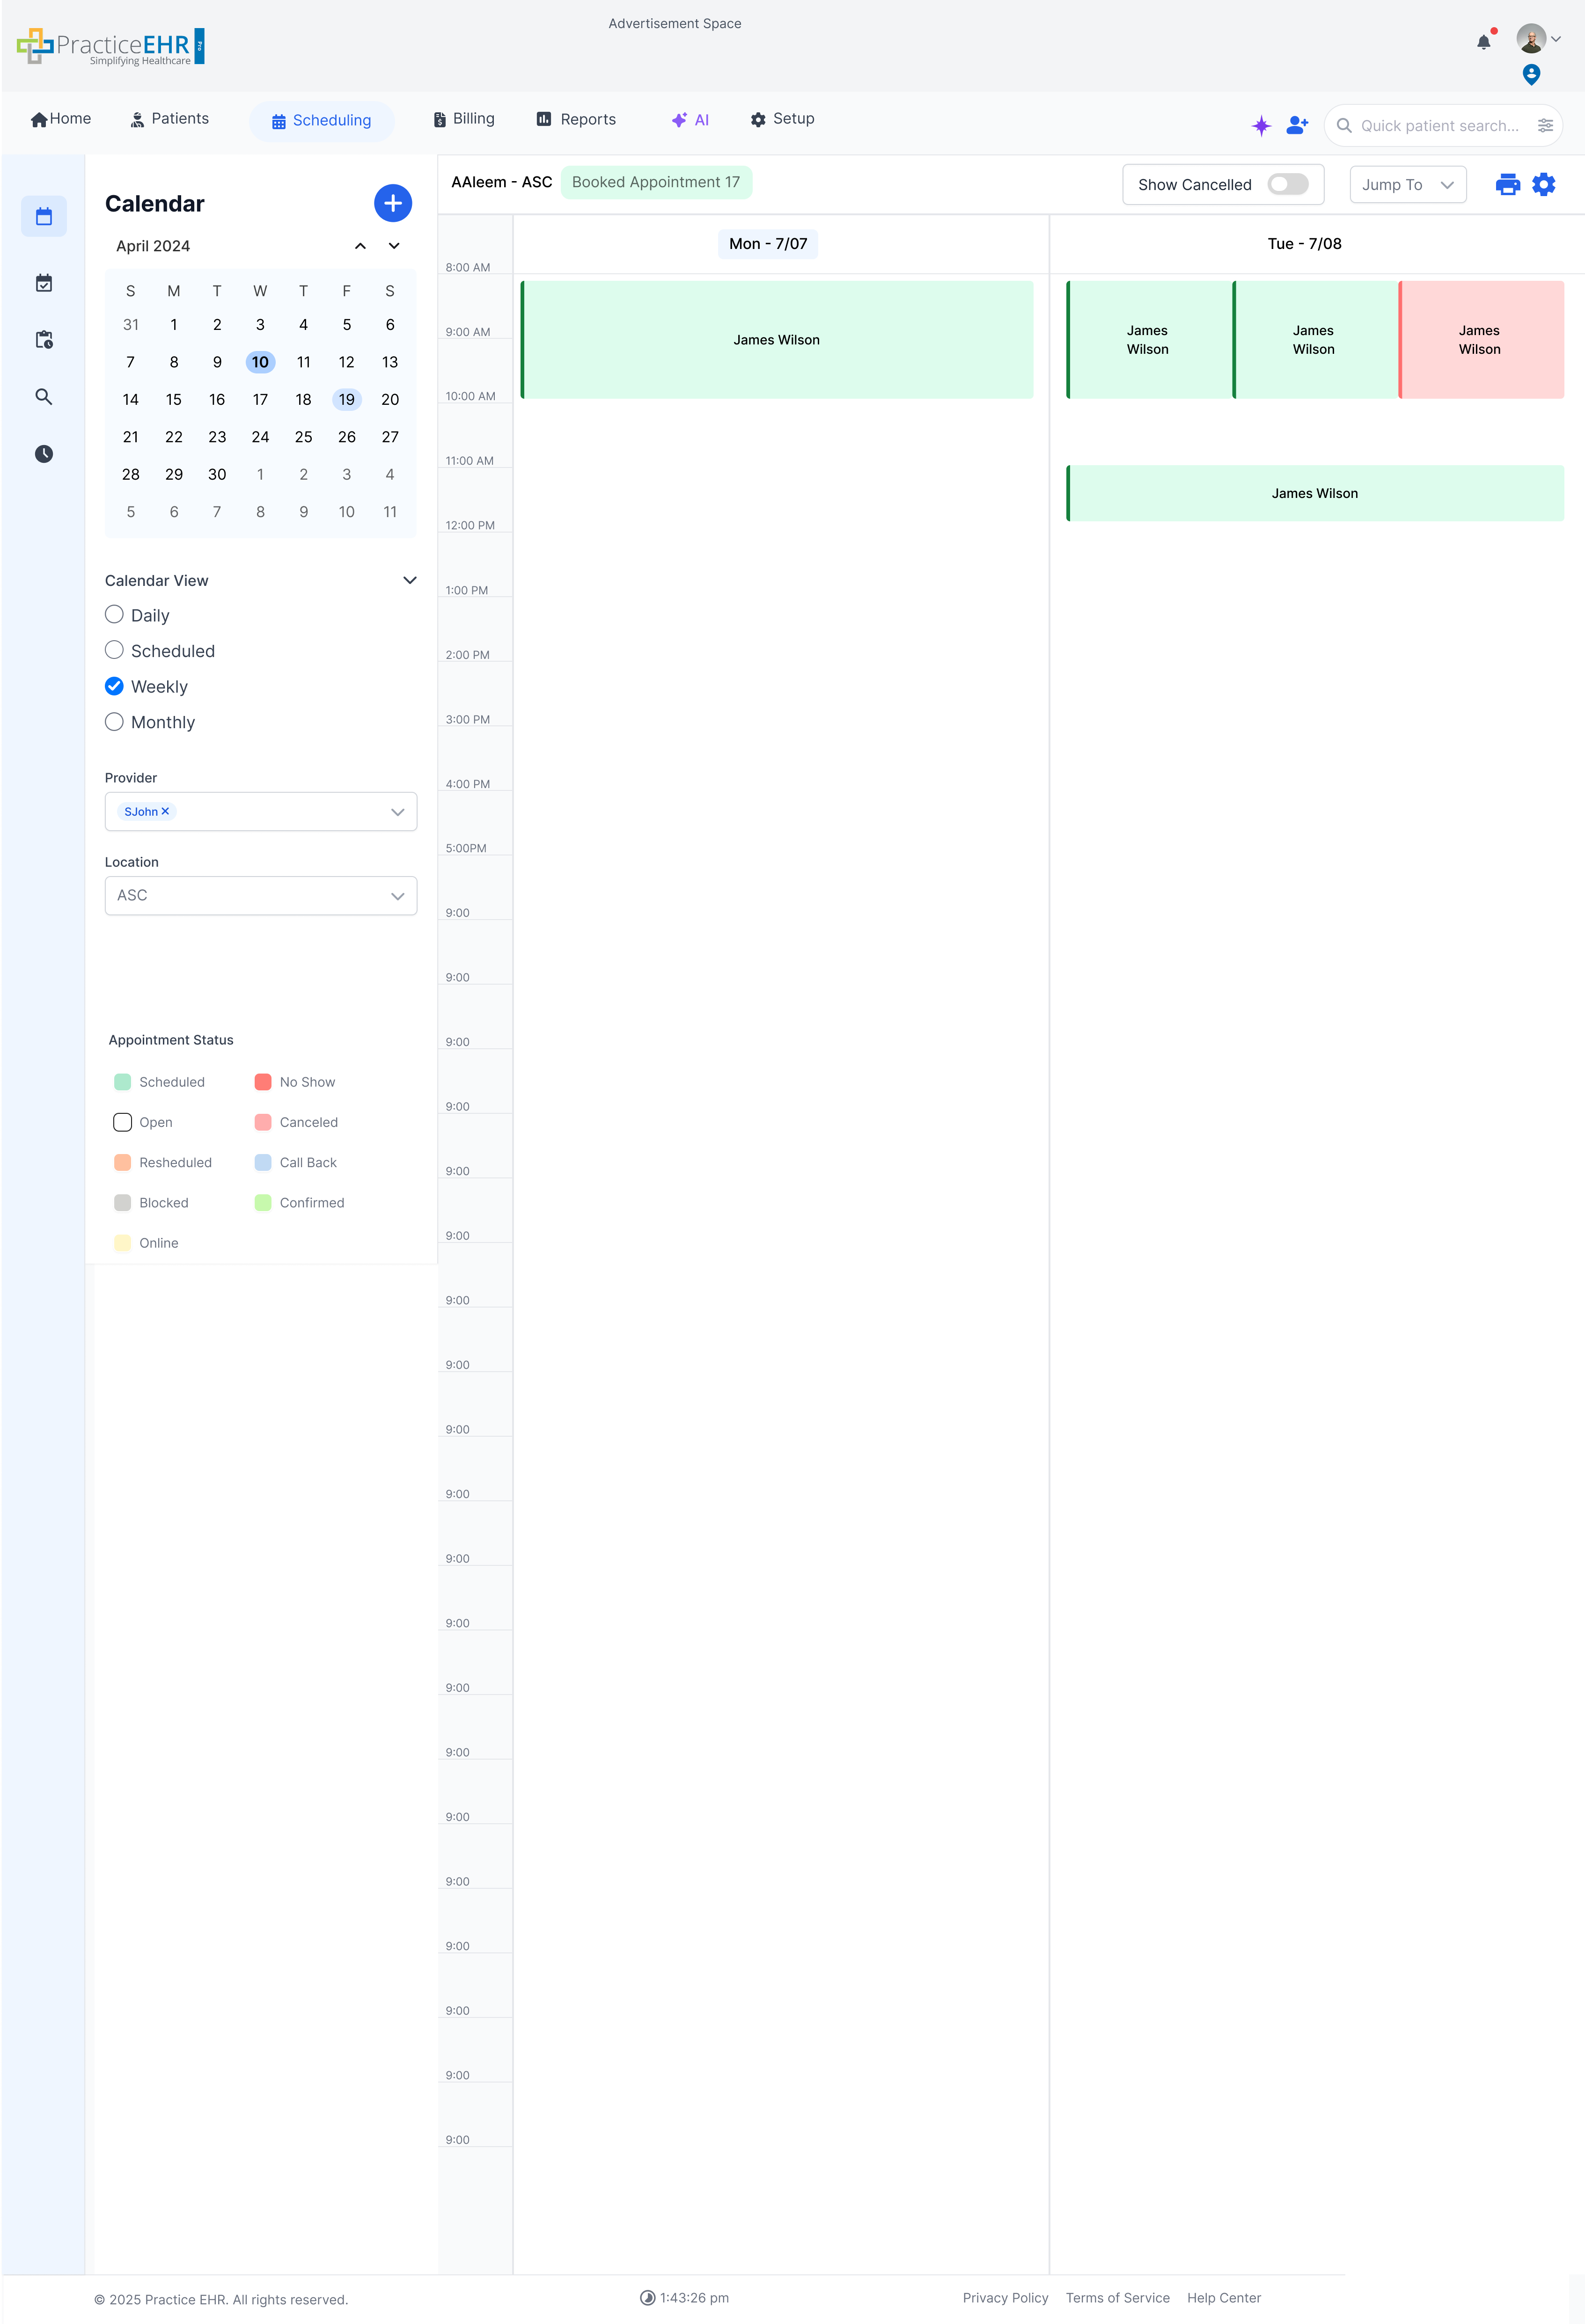
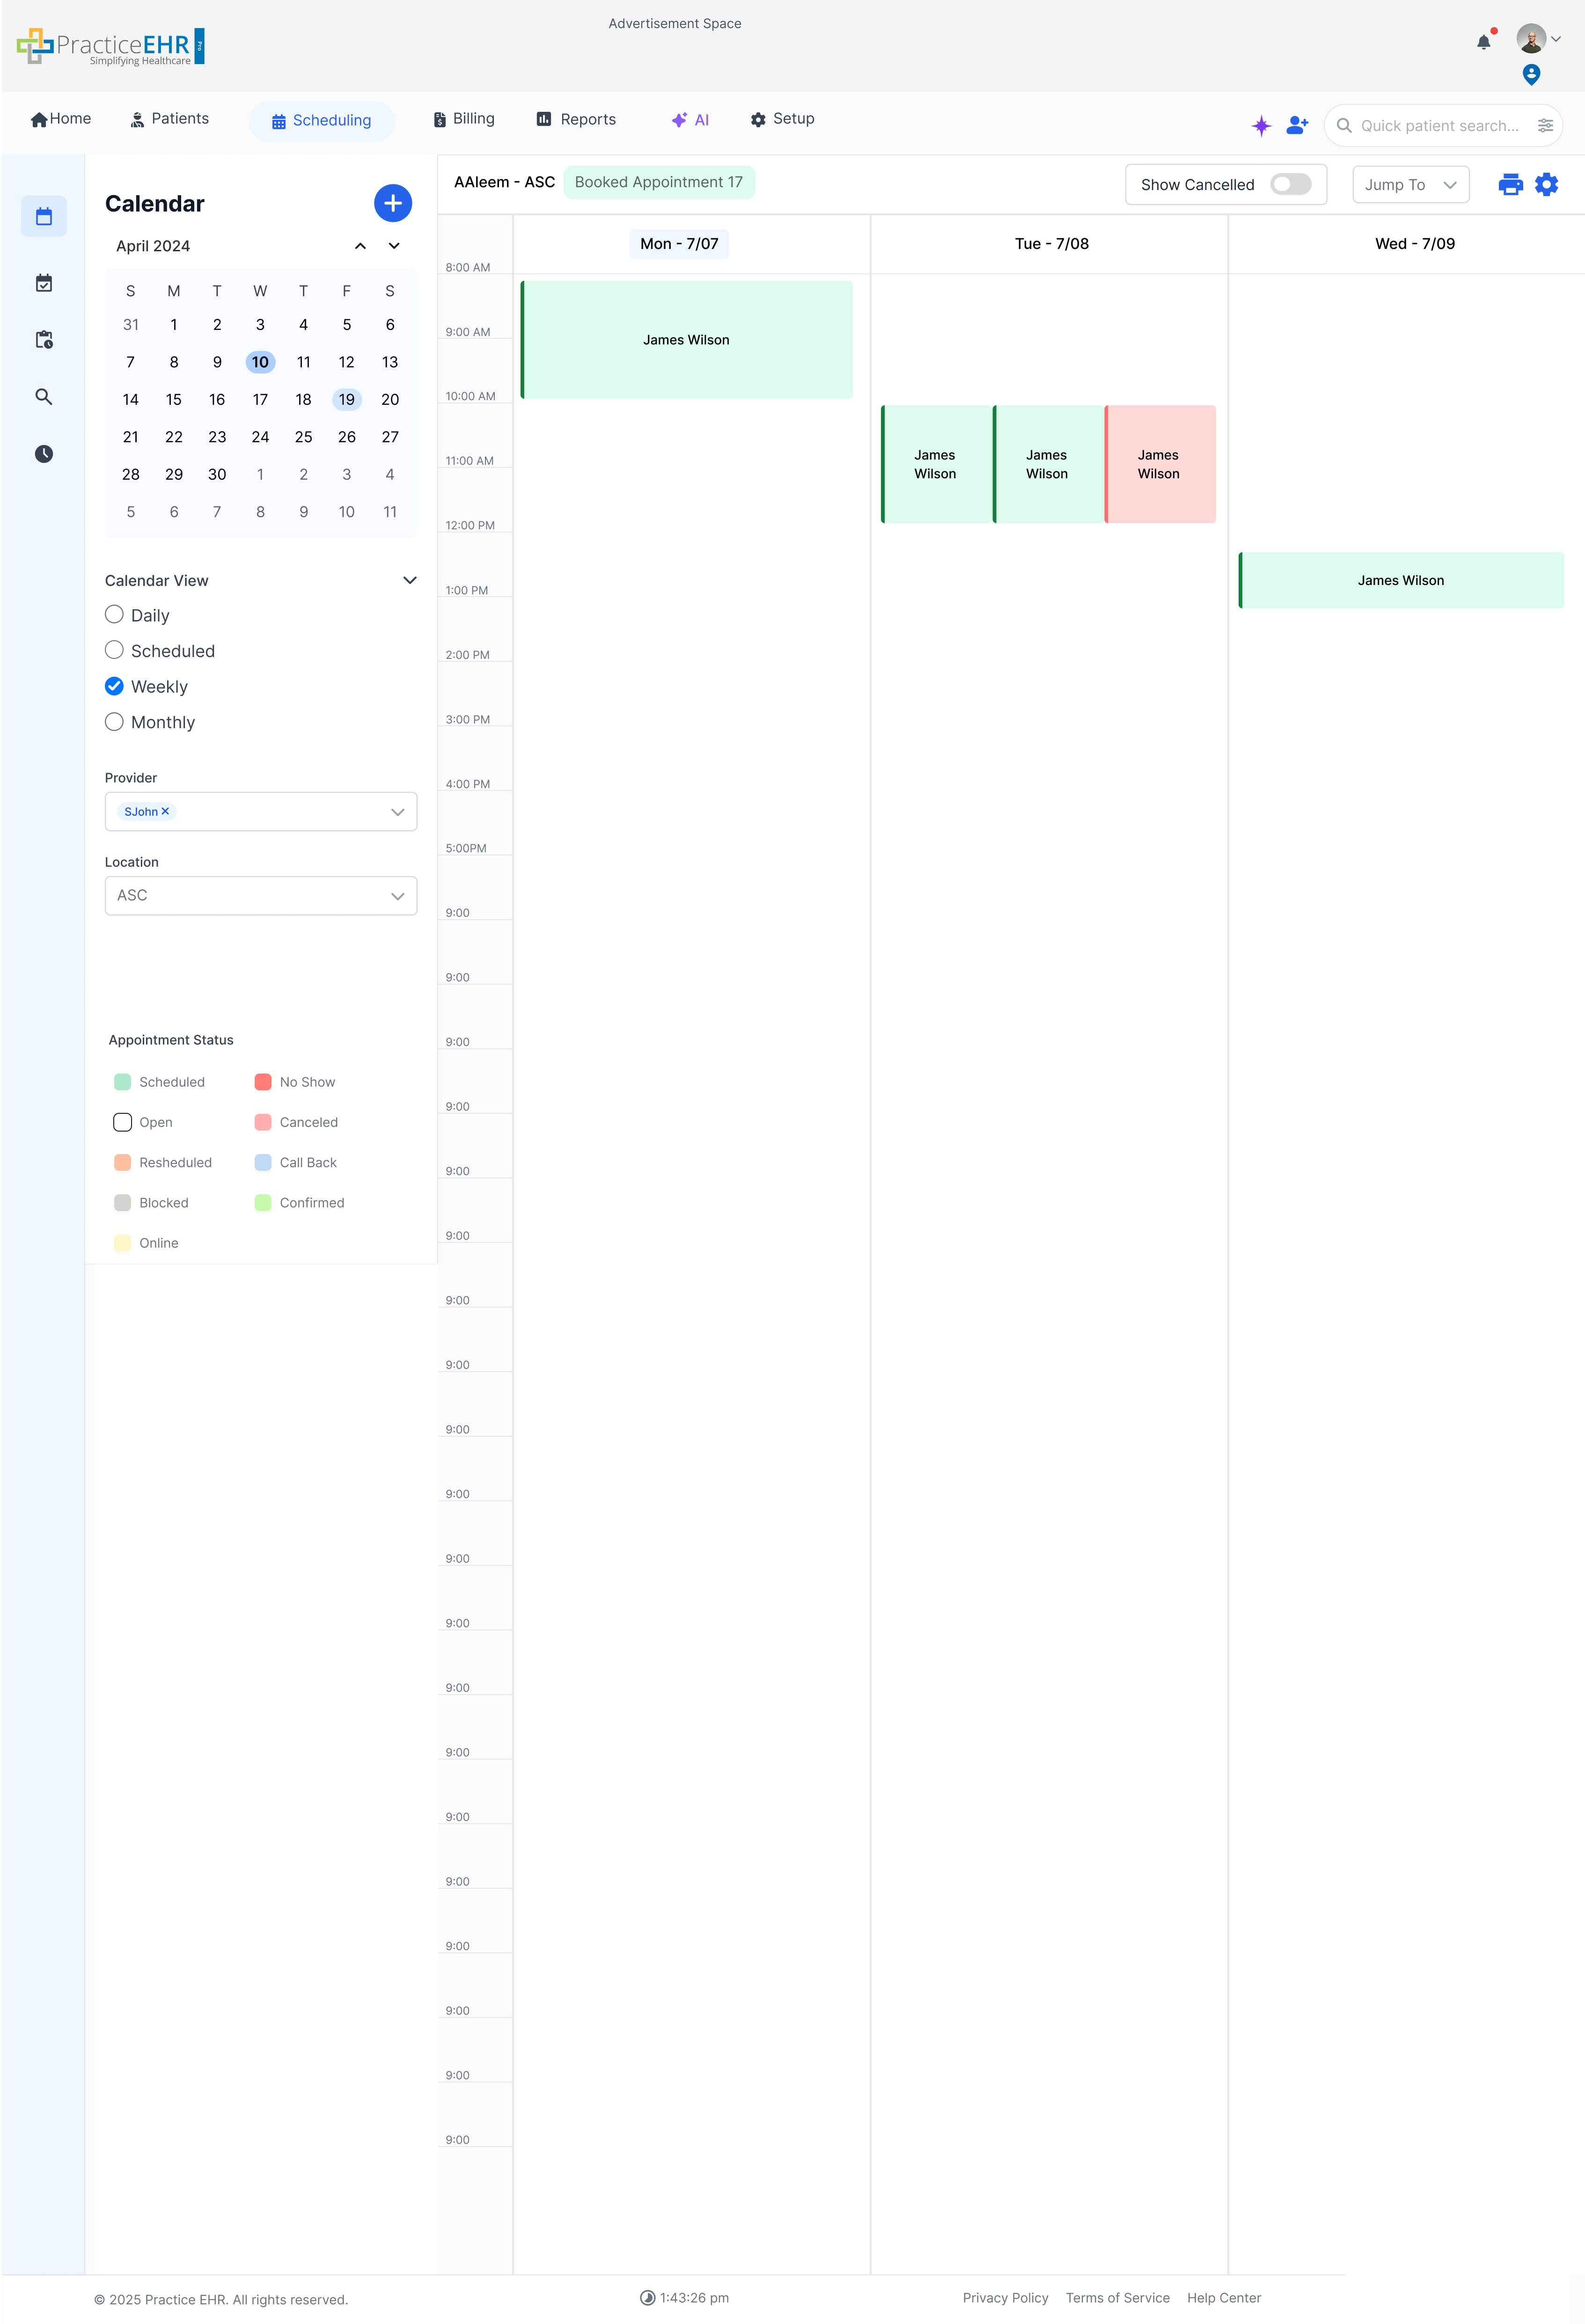
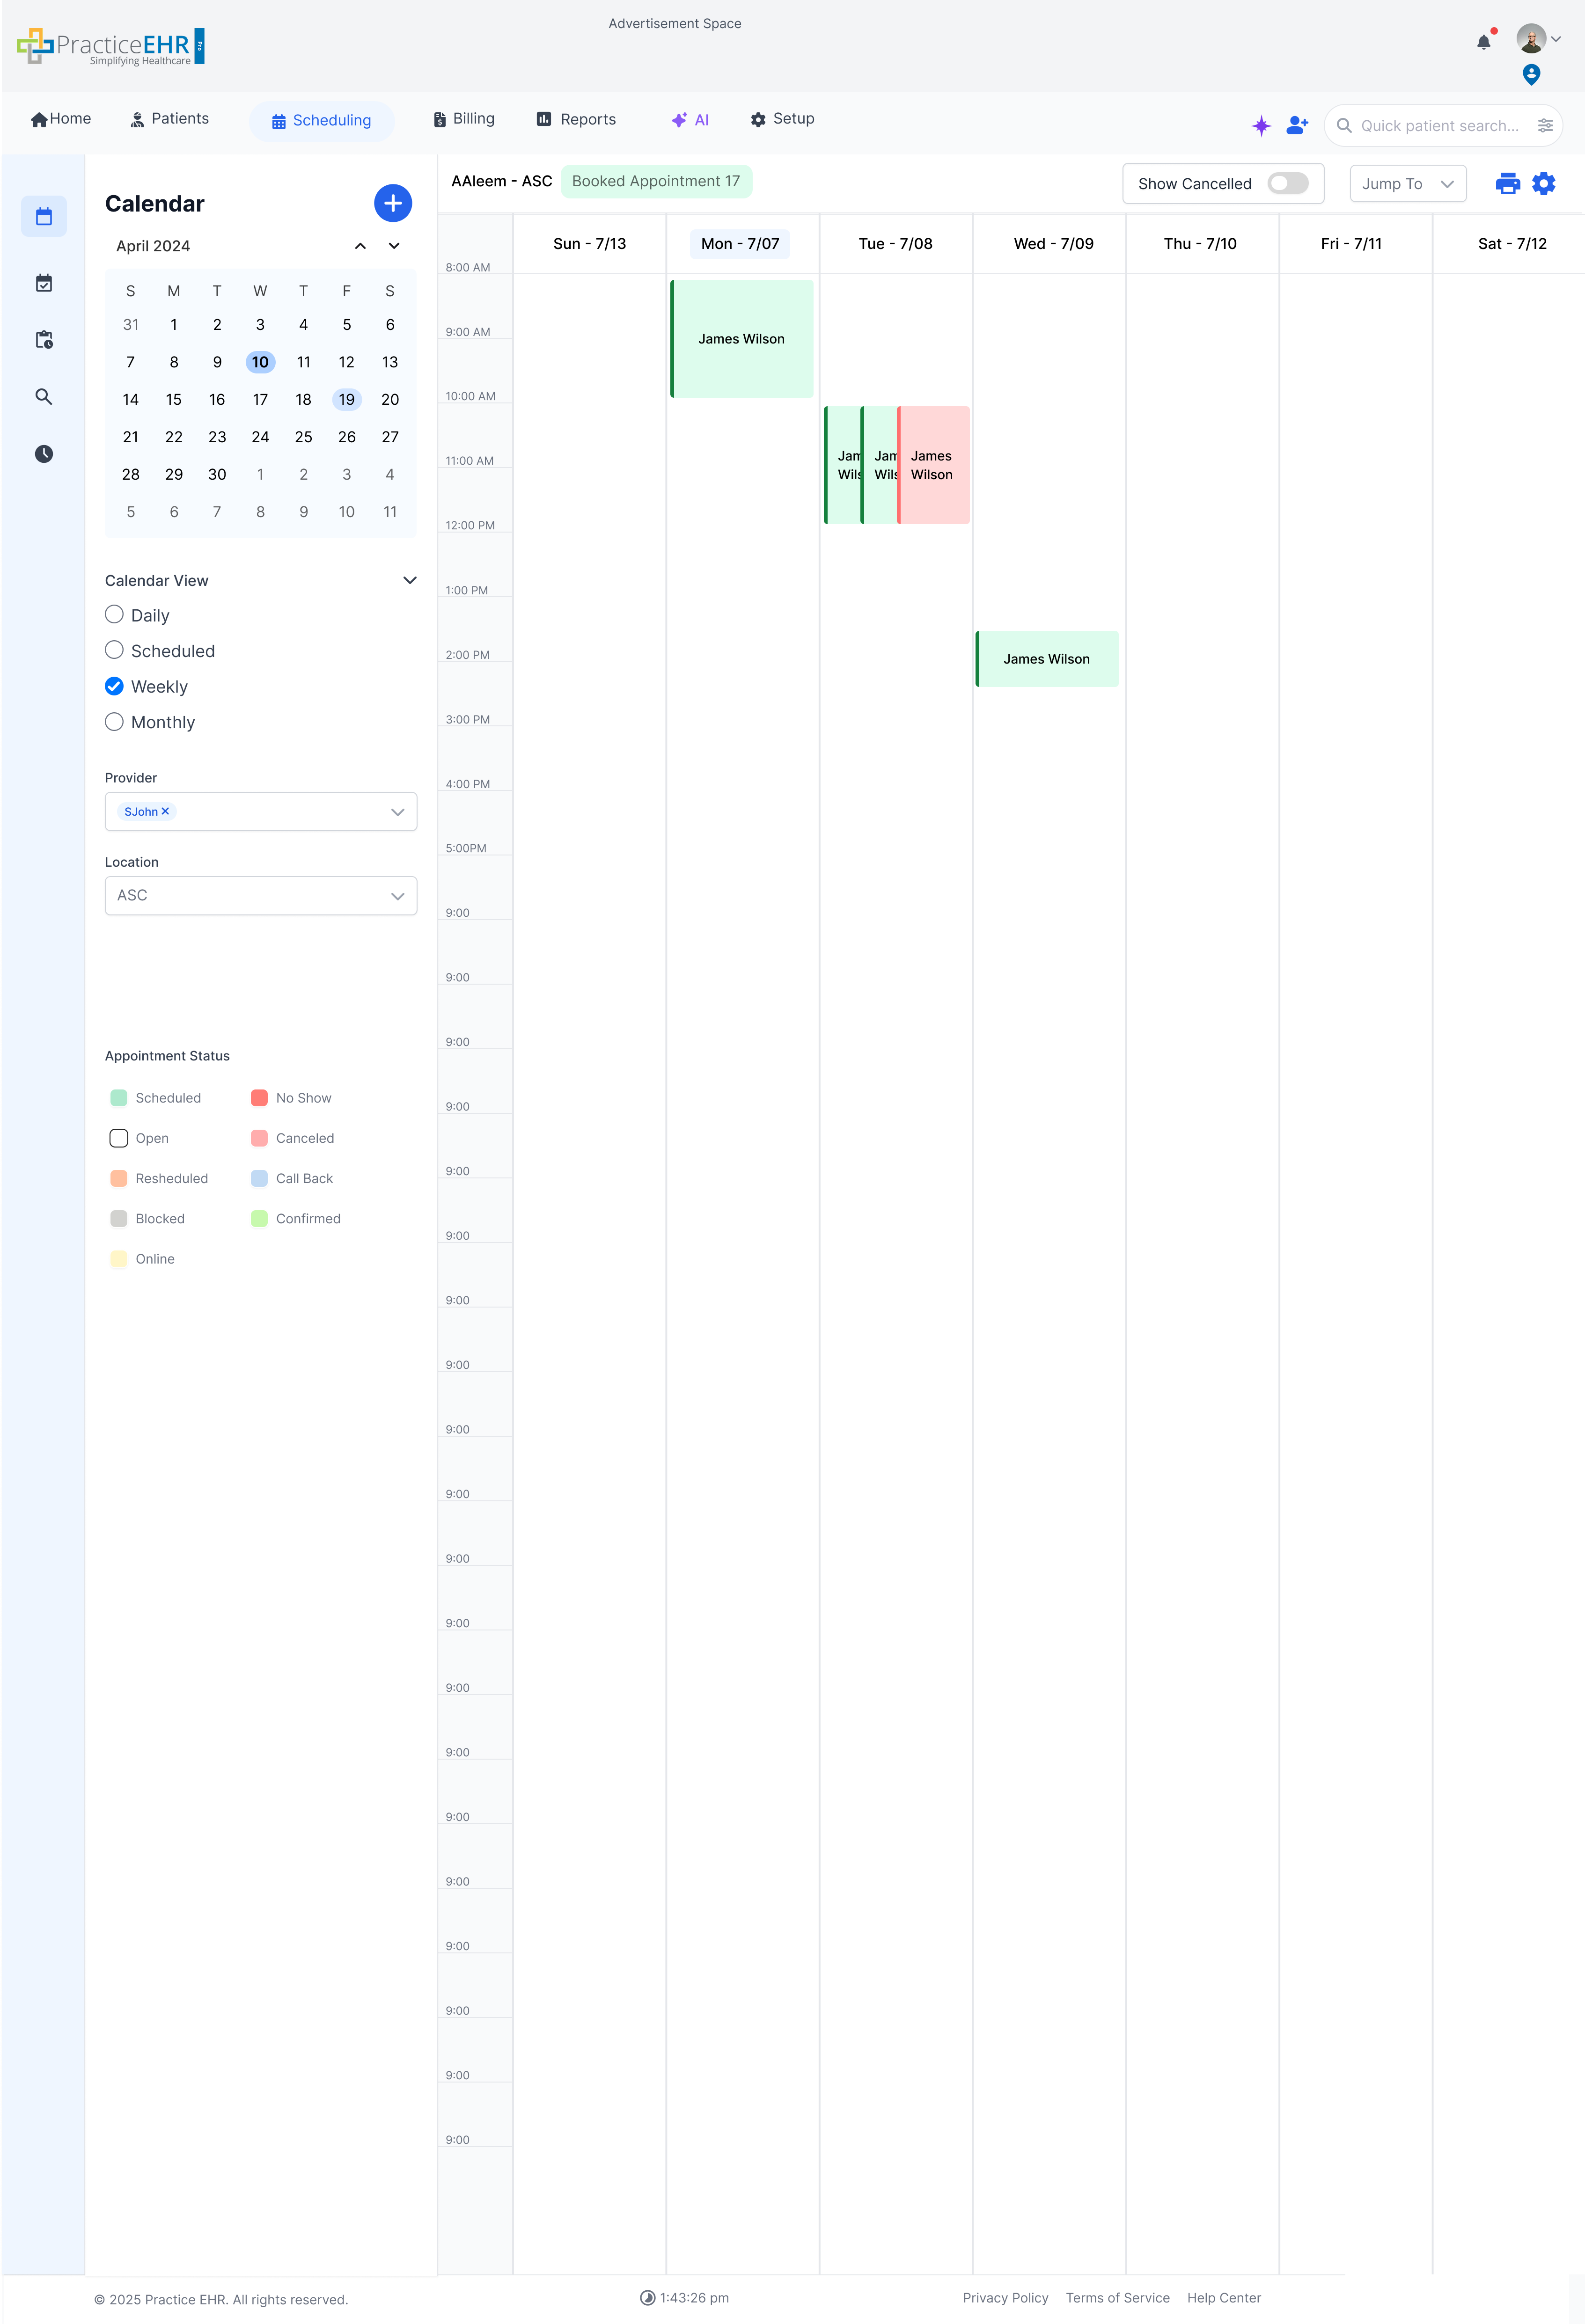
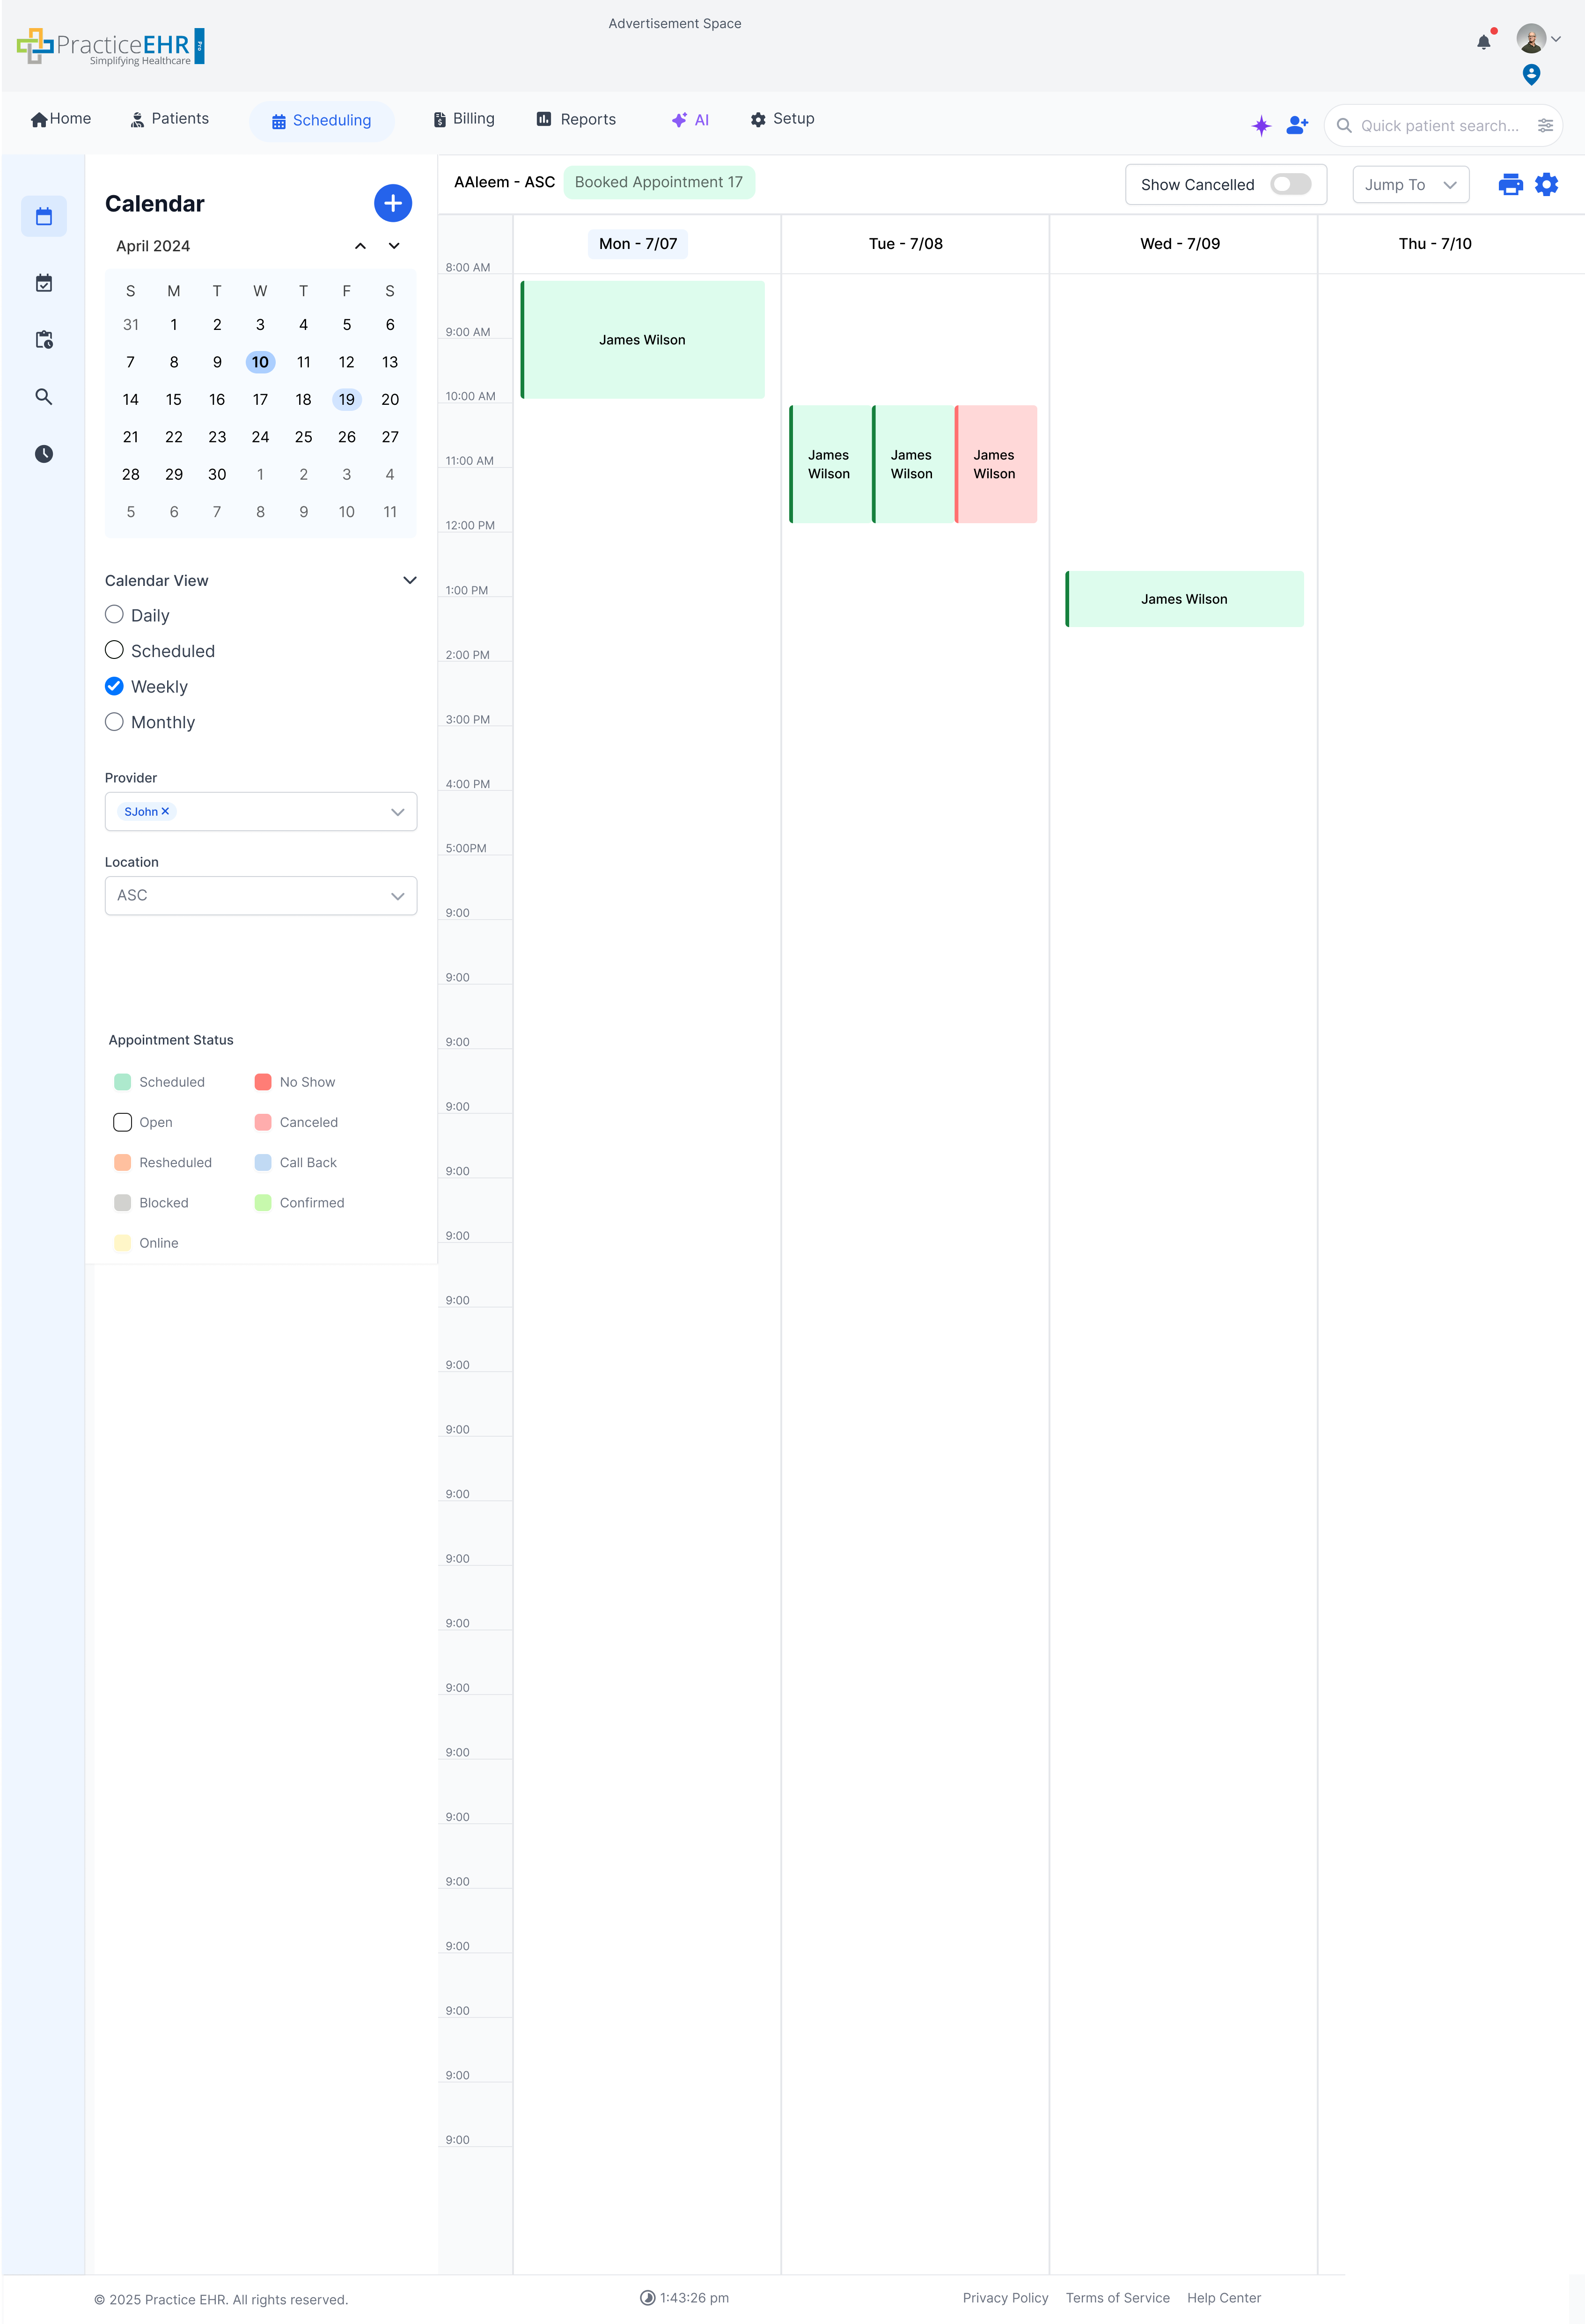
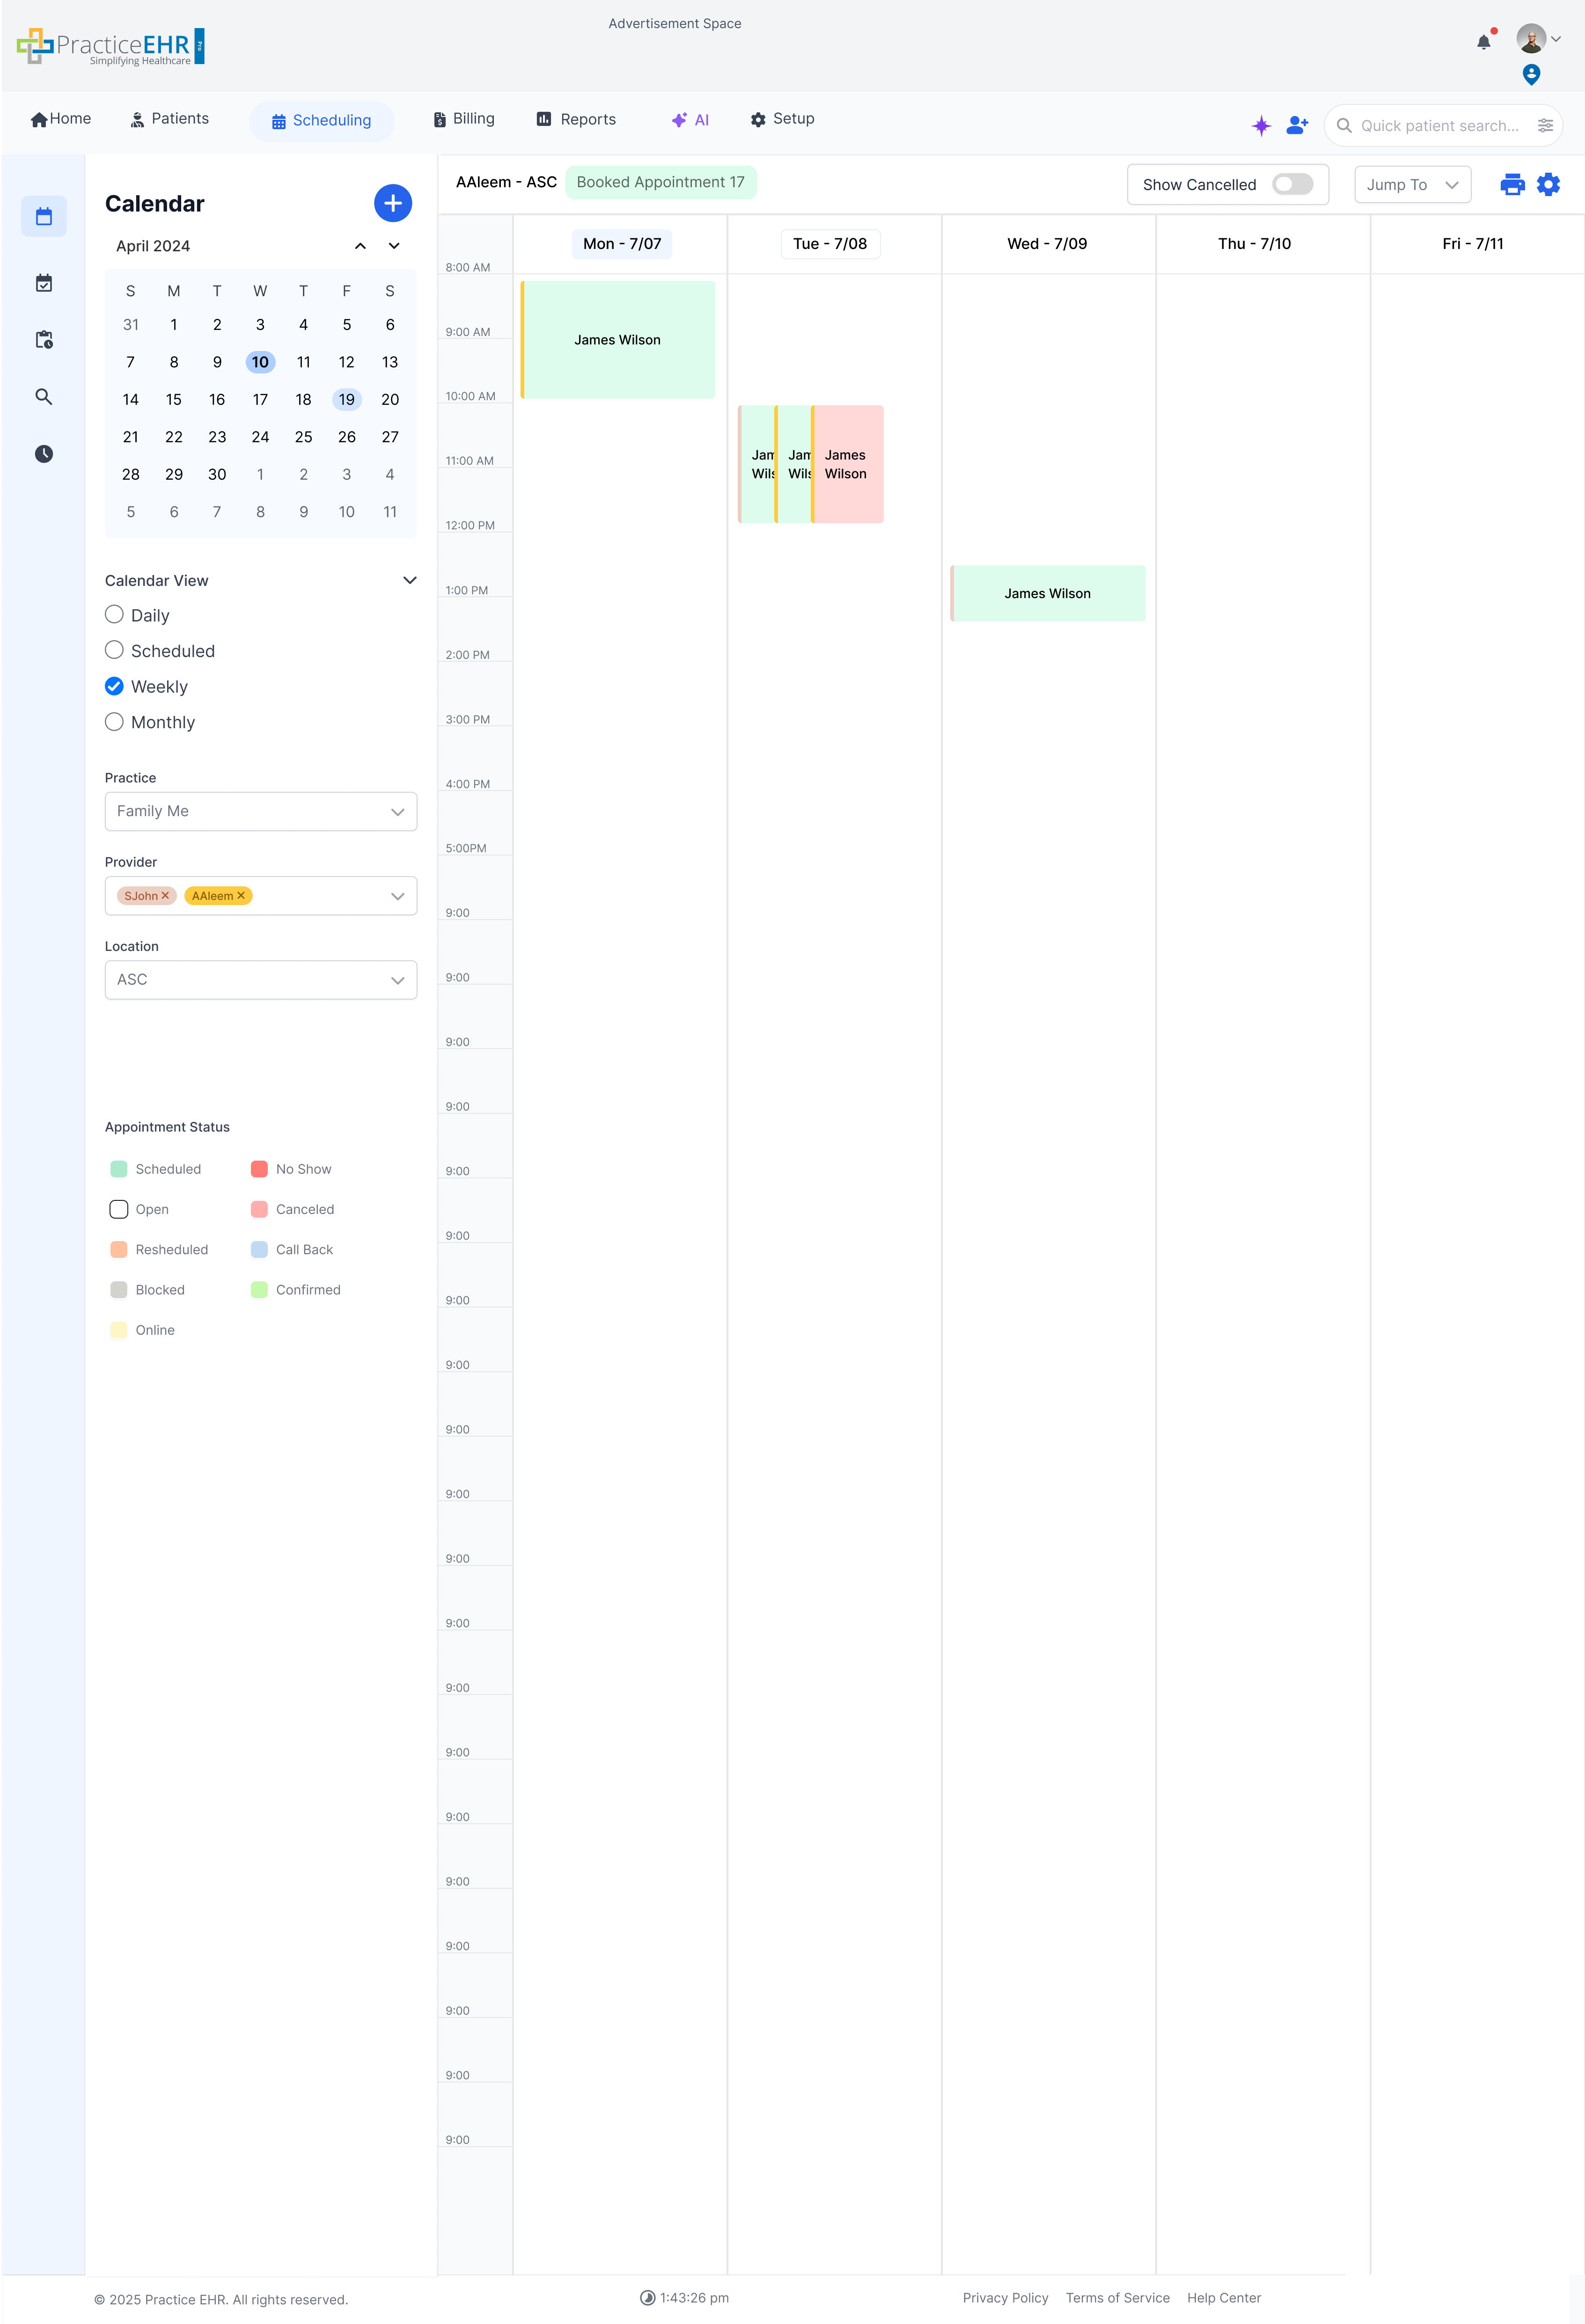
- Weekly
- ↪ Weekly View
- ↪ Week View Multi Provider
- ↪ Week View Multi Location
- Main Appointment Section
- ↪ Case 1: Patient enabled and ability to search and create
- ↪ Case 2: Patient disabled (Reason Not Enforced)
- ↪ Case 3: Reason Enforced
- ↪ Case 4: Recurring Appointment Toggle enabled
- ↪ Case 5: Schedule Alert Popup (6PM)
- Case 6: Appointment Detail
- Case 7: Multi Provider - Provider Enabled
Practice EHR Scheduling - Calendar View
Interactive GuideThis documentation covers the new scheduling interface in Practice EHR. The scheduling module has been completely redesigned to improve efficiency and user experience. Explore each section to understand the features and functionalities.
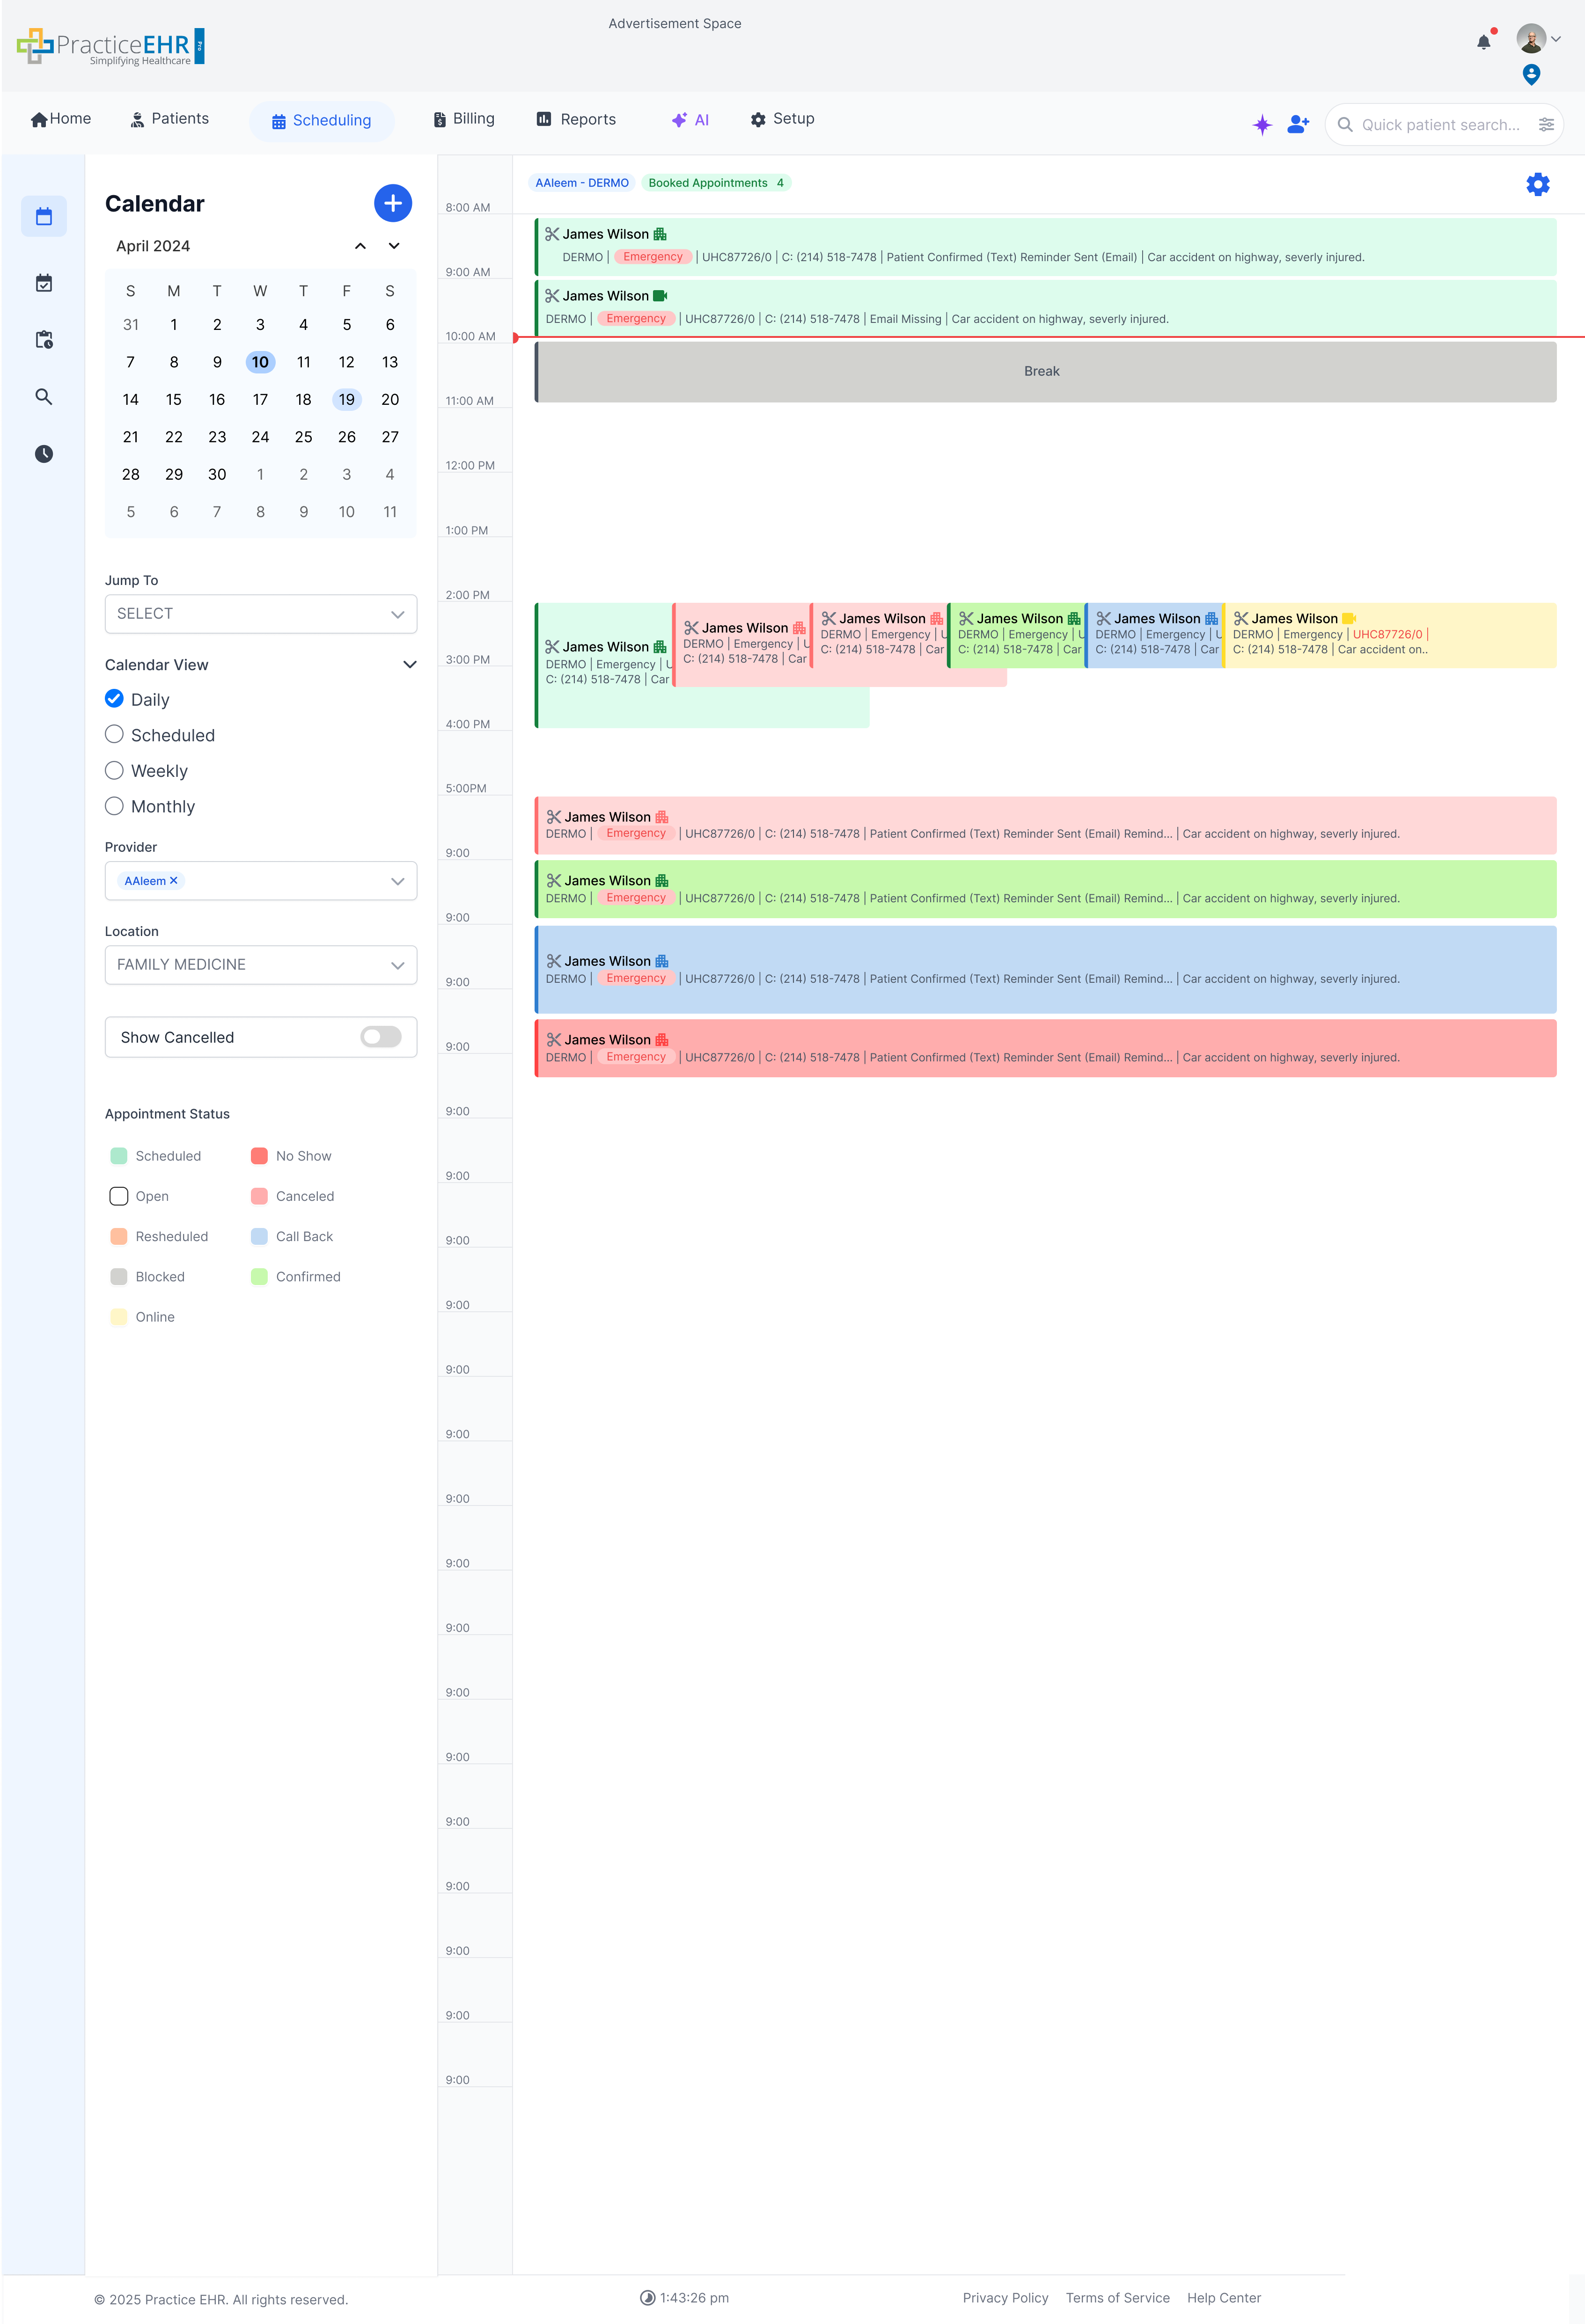
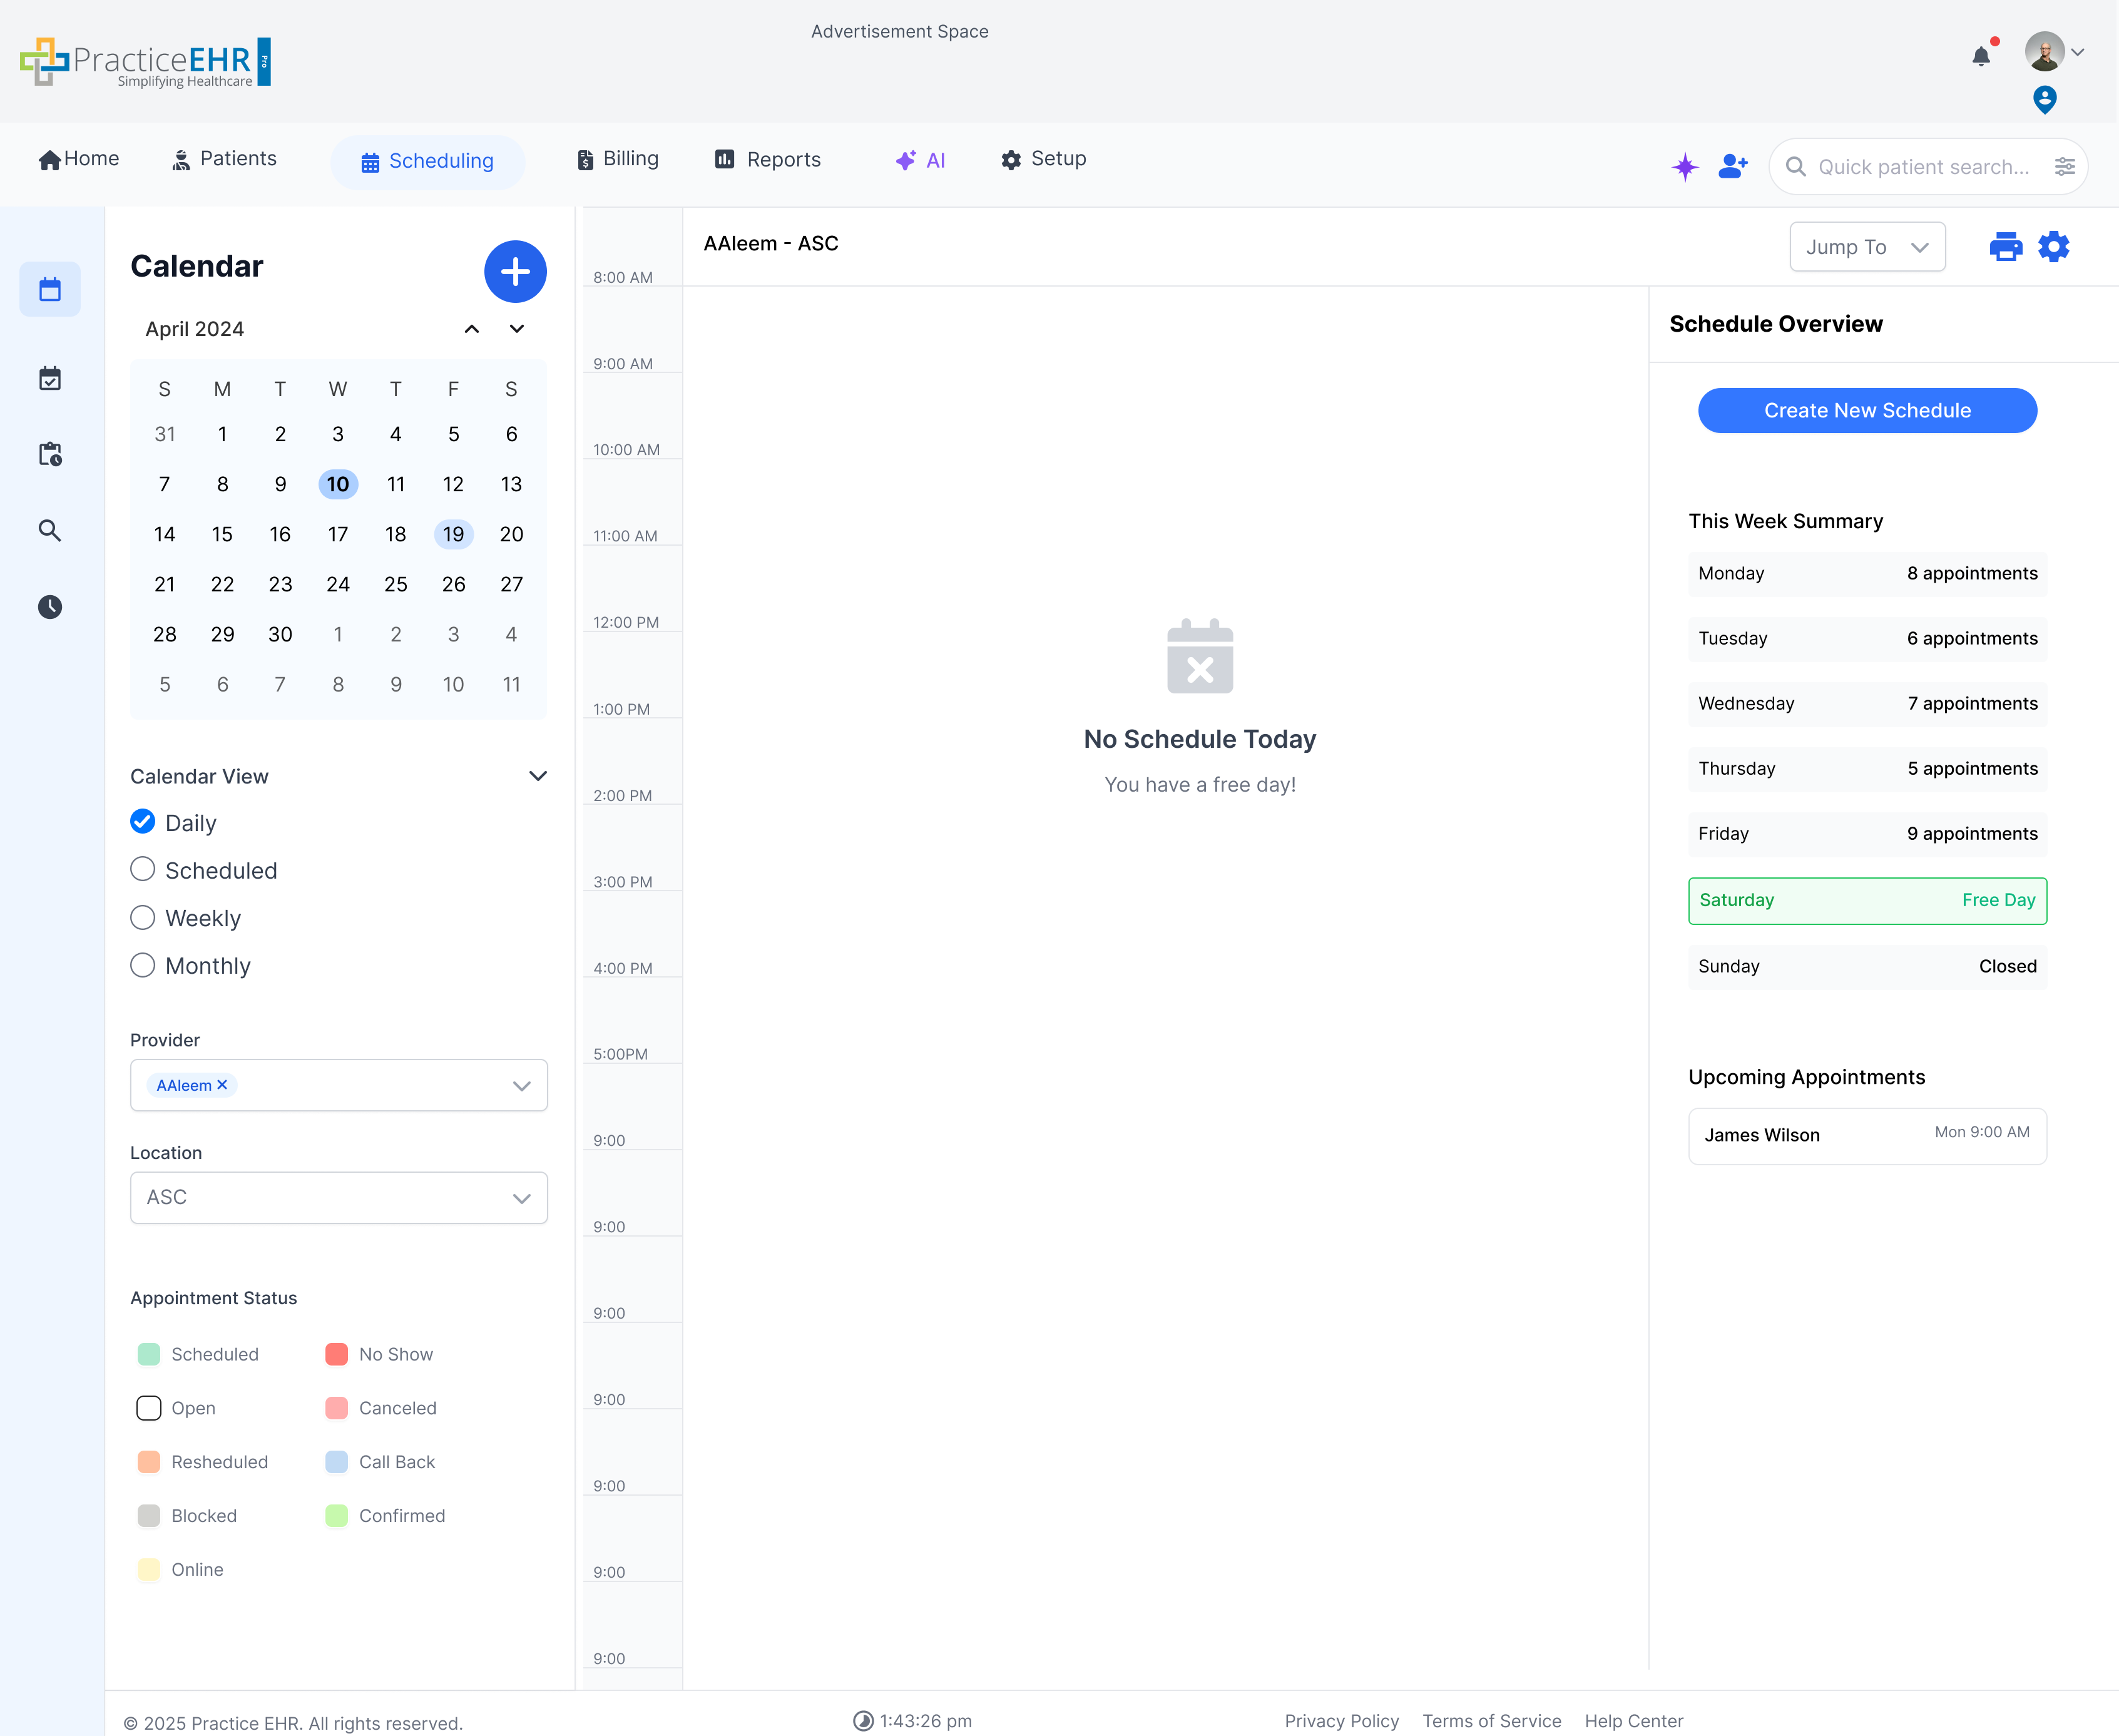
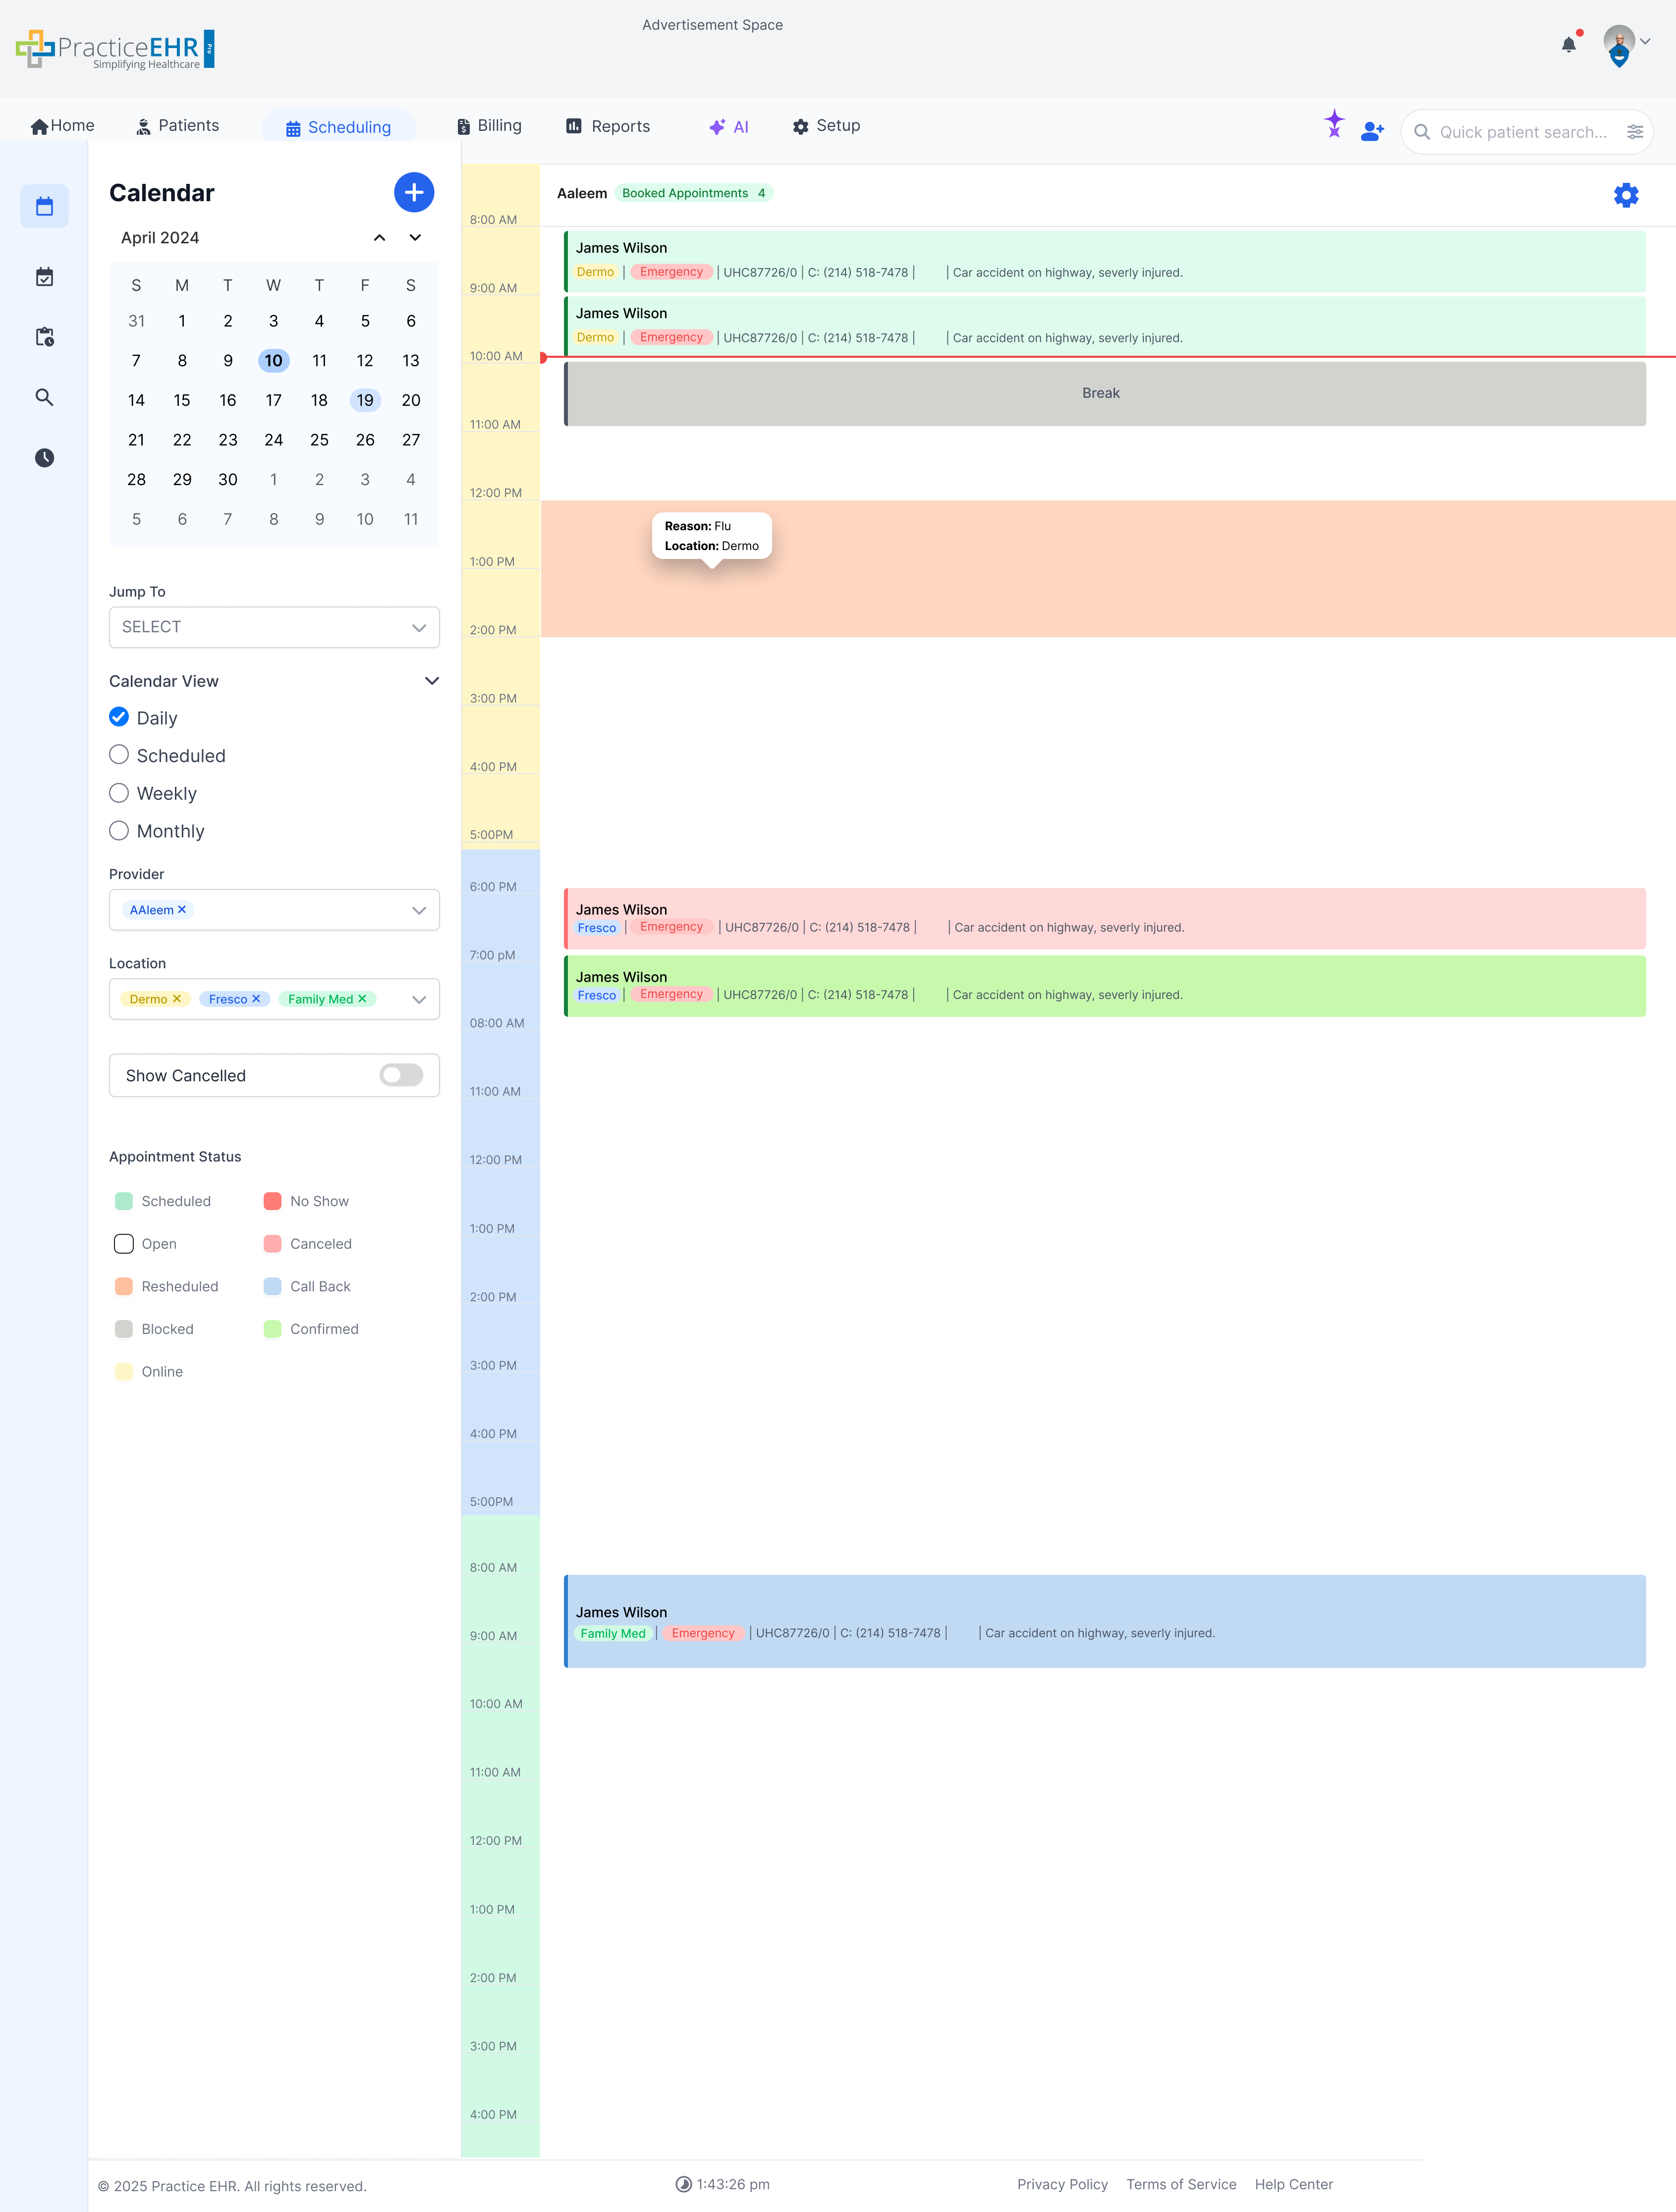
Daily: Single Provider
Unlinked Appointments
Daily calendar view showing appointments that are not linked to a patient schedule.
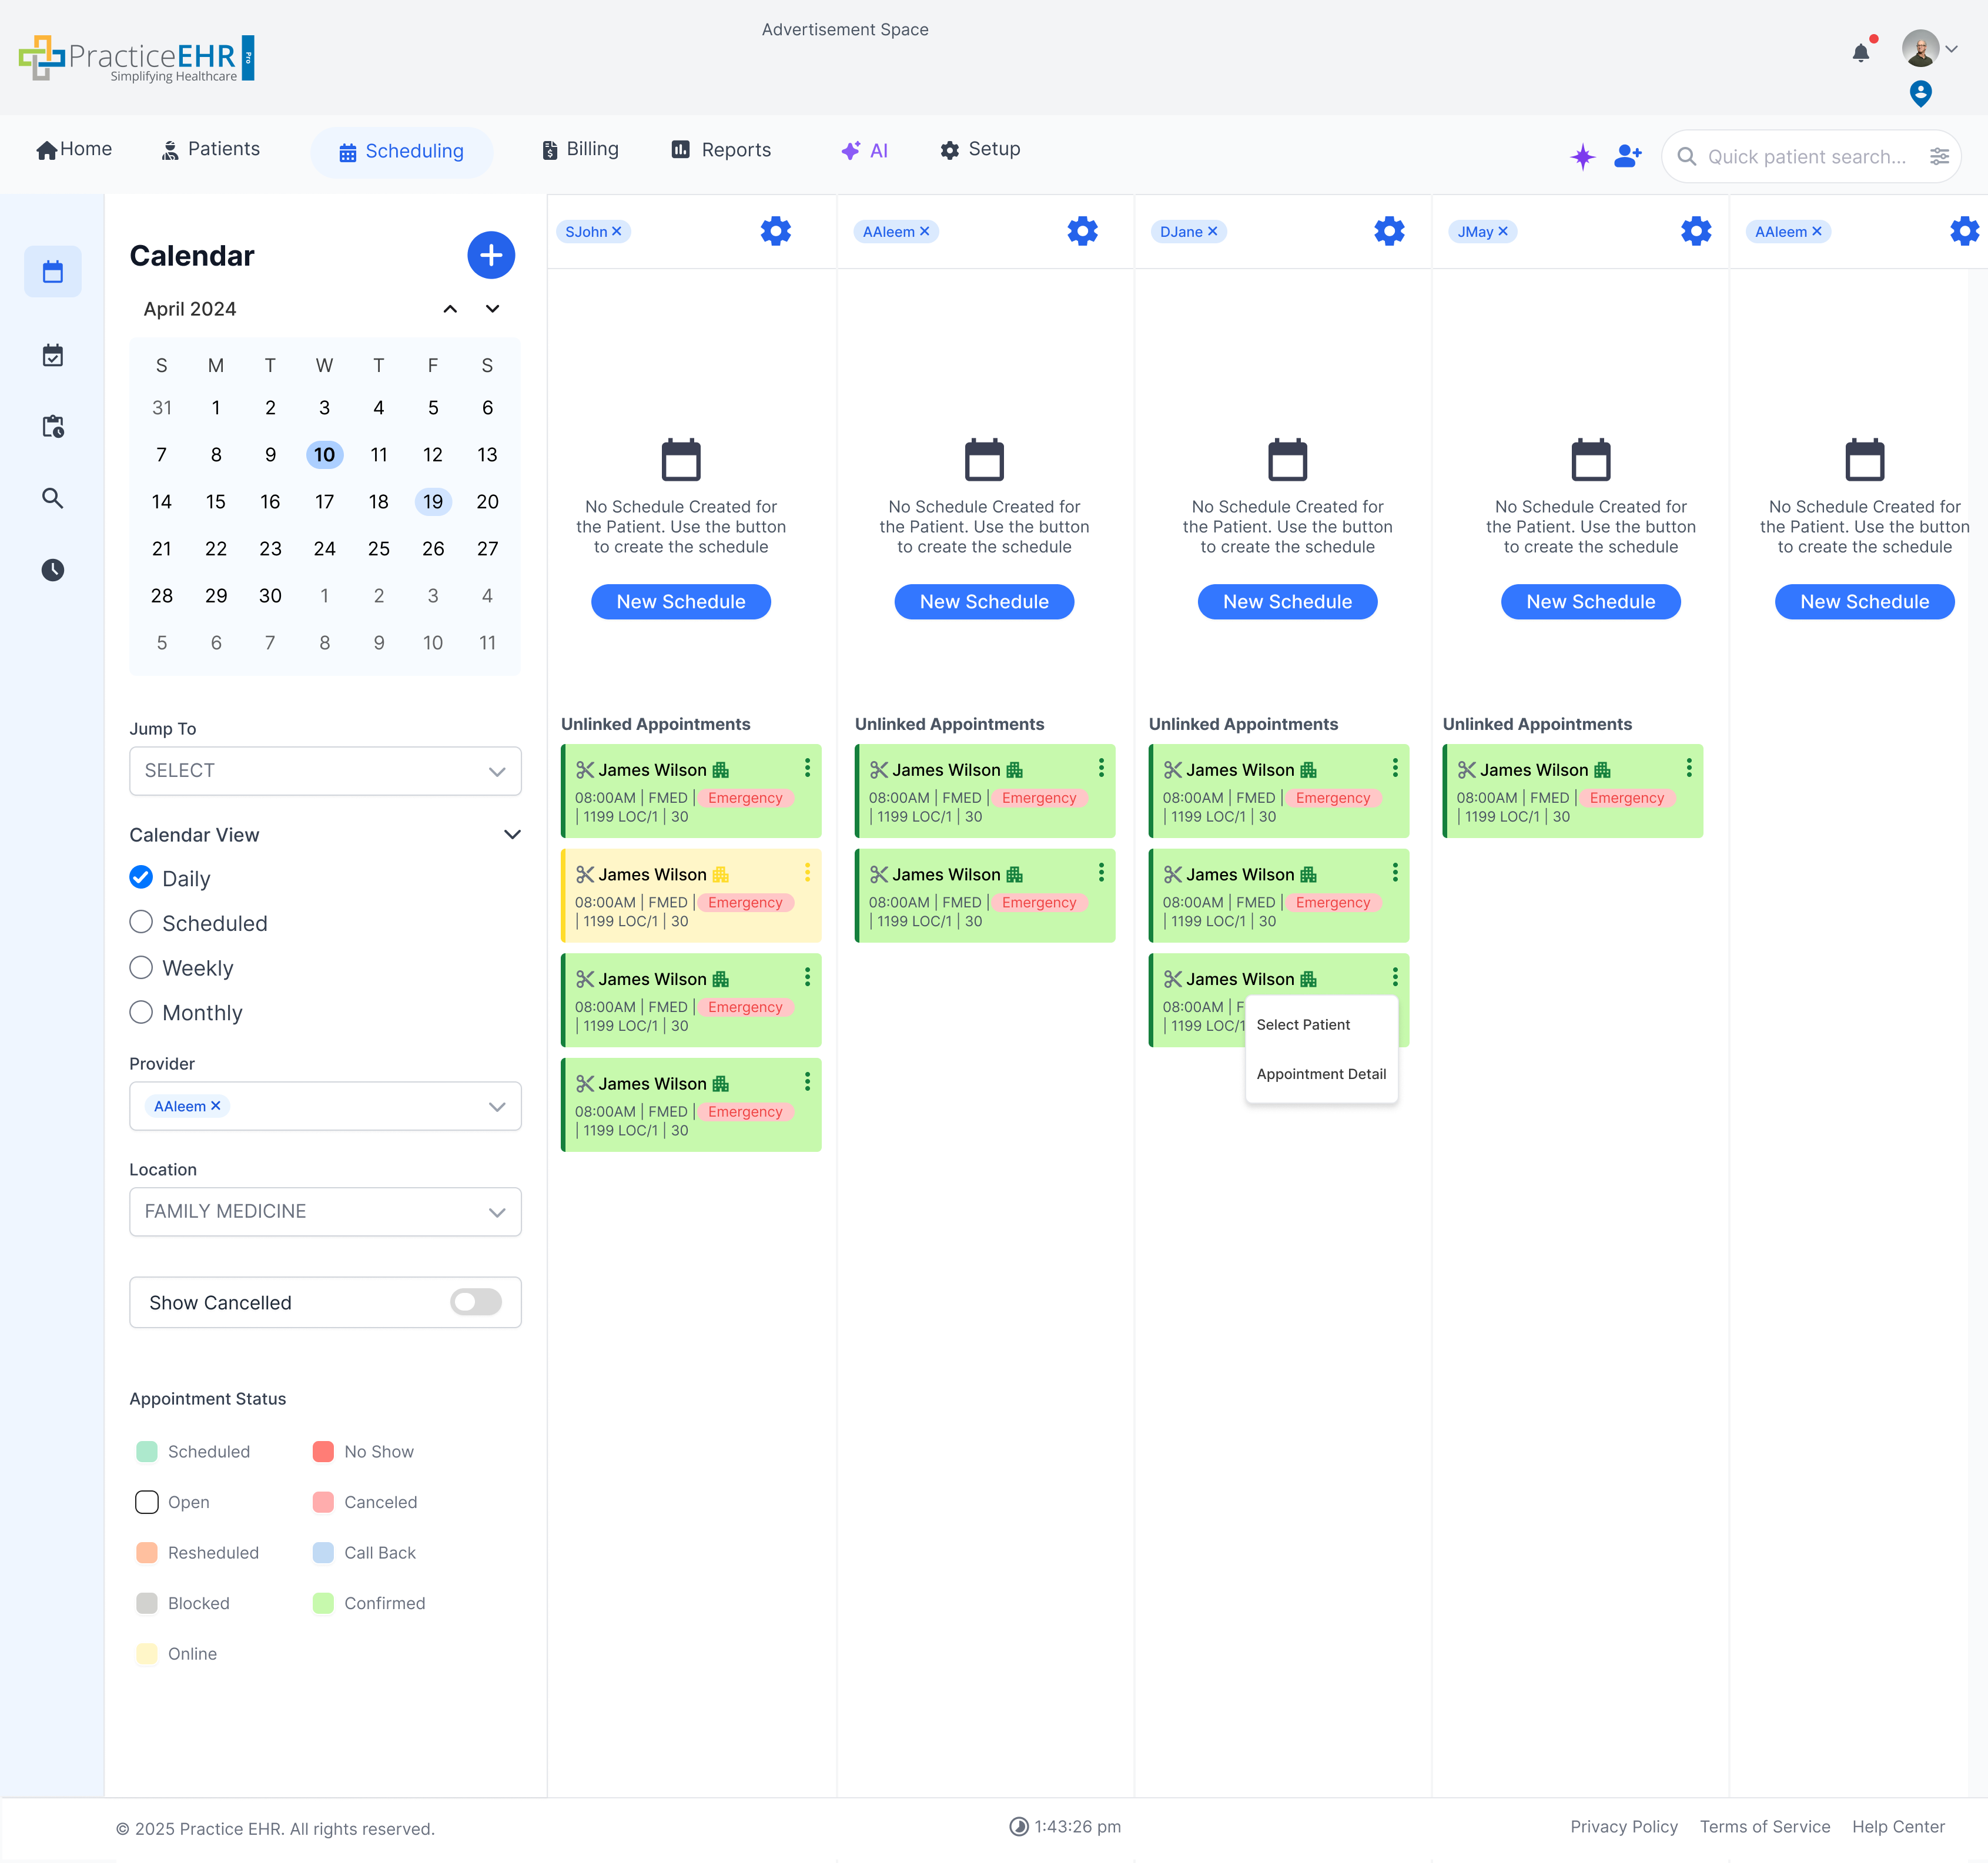
Key Features
- Unlinked Appointment Cards: Unlinked Appointments will show up as cards underneath their provider's calendar
- Menu Icon: The menu icon supports Select Patient and Appointment Detail.
Interaction Guide
- No schedule state: When no patient schedule exists, the screen prompts the user to create a new schedule.
- Link workflow: Use Select Patient from the menu to associate the appointment with the correct patient.
- Appointment review: Use Appointment Detail to open the full appointment record before linking or moving it.
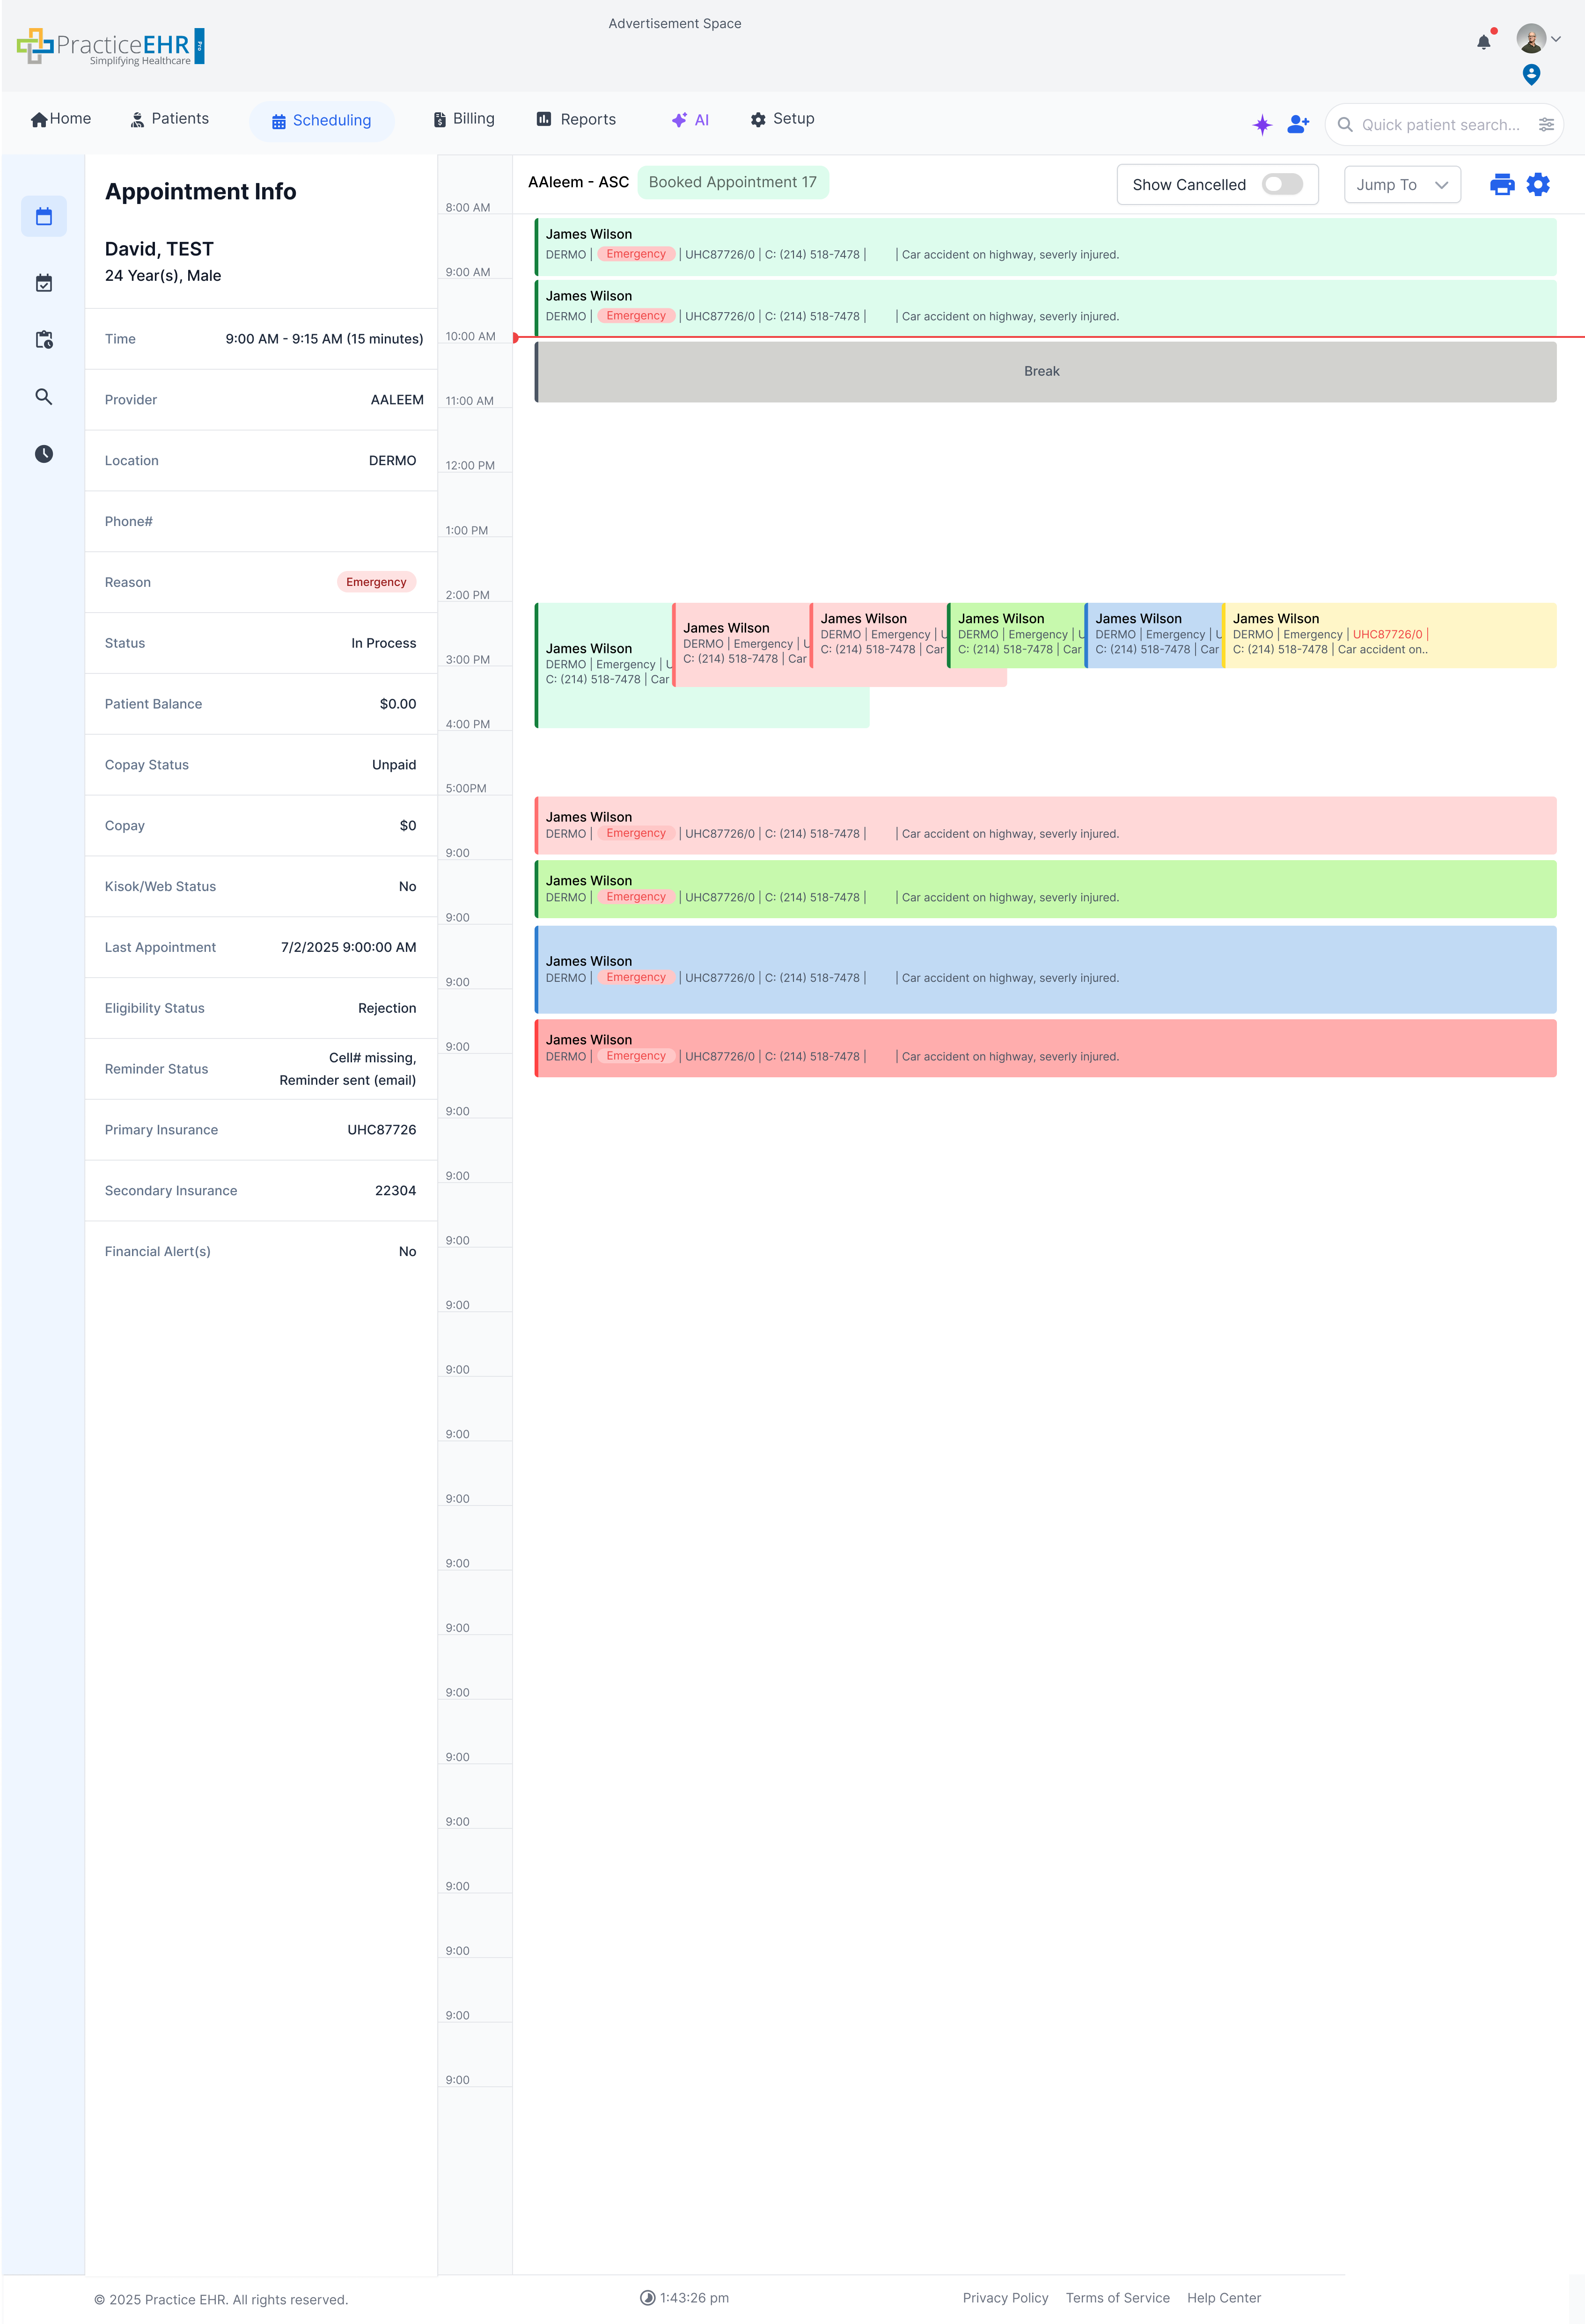
Schedule Detail on Hover
On hover more comprehensive appointment information appears on the left side of the screen.
Schedule Info Popup
This concise tooltip appears when selecting an appointment card, offering a quick summary.

Description
- This concise tooltip appears when selecting an appointment card, offering a quick summary of the scheduled event that consist Location, Reason, and Time.
- Time is editable from this popup.
- We also have an expand icon; clicking this will take the user to the appointment detail screen: View Here
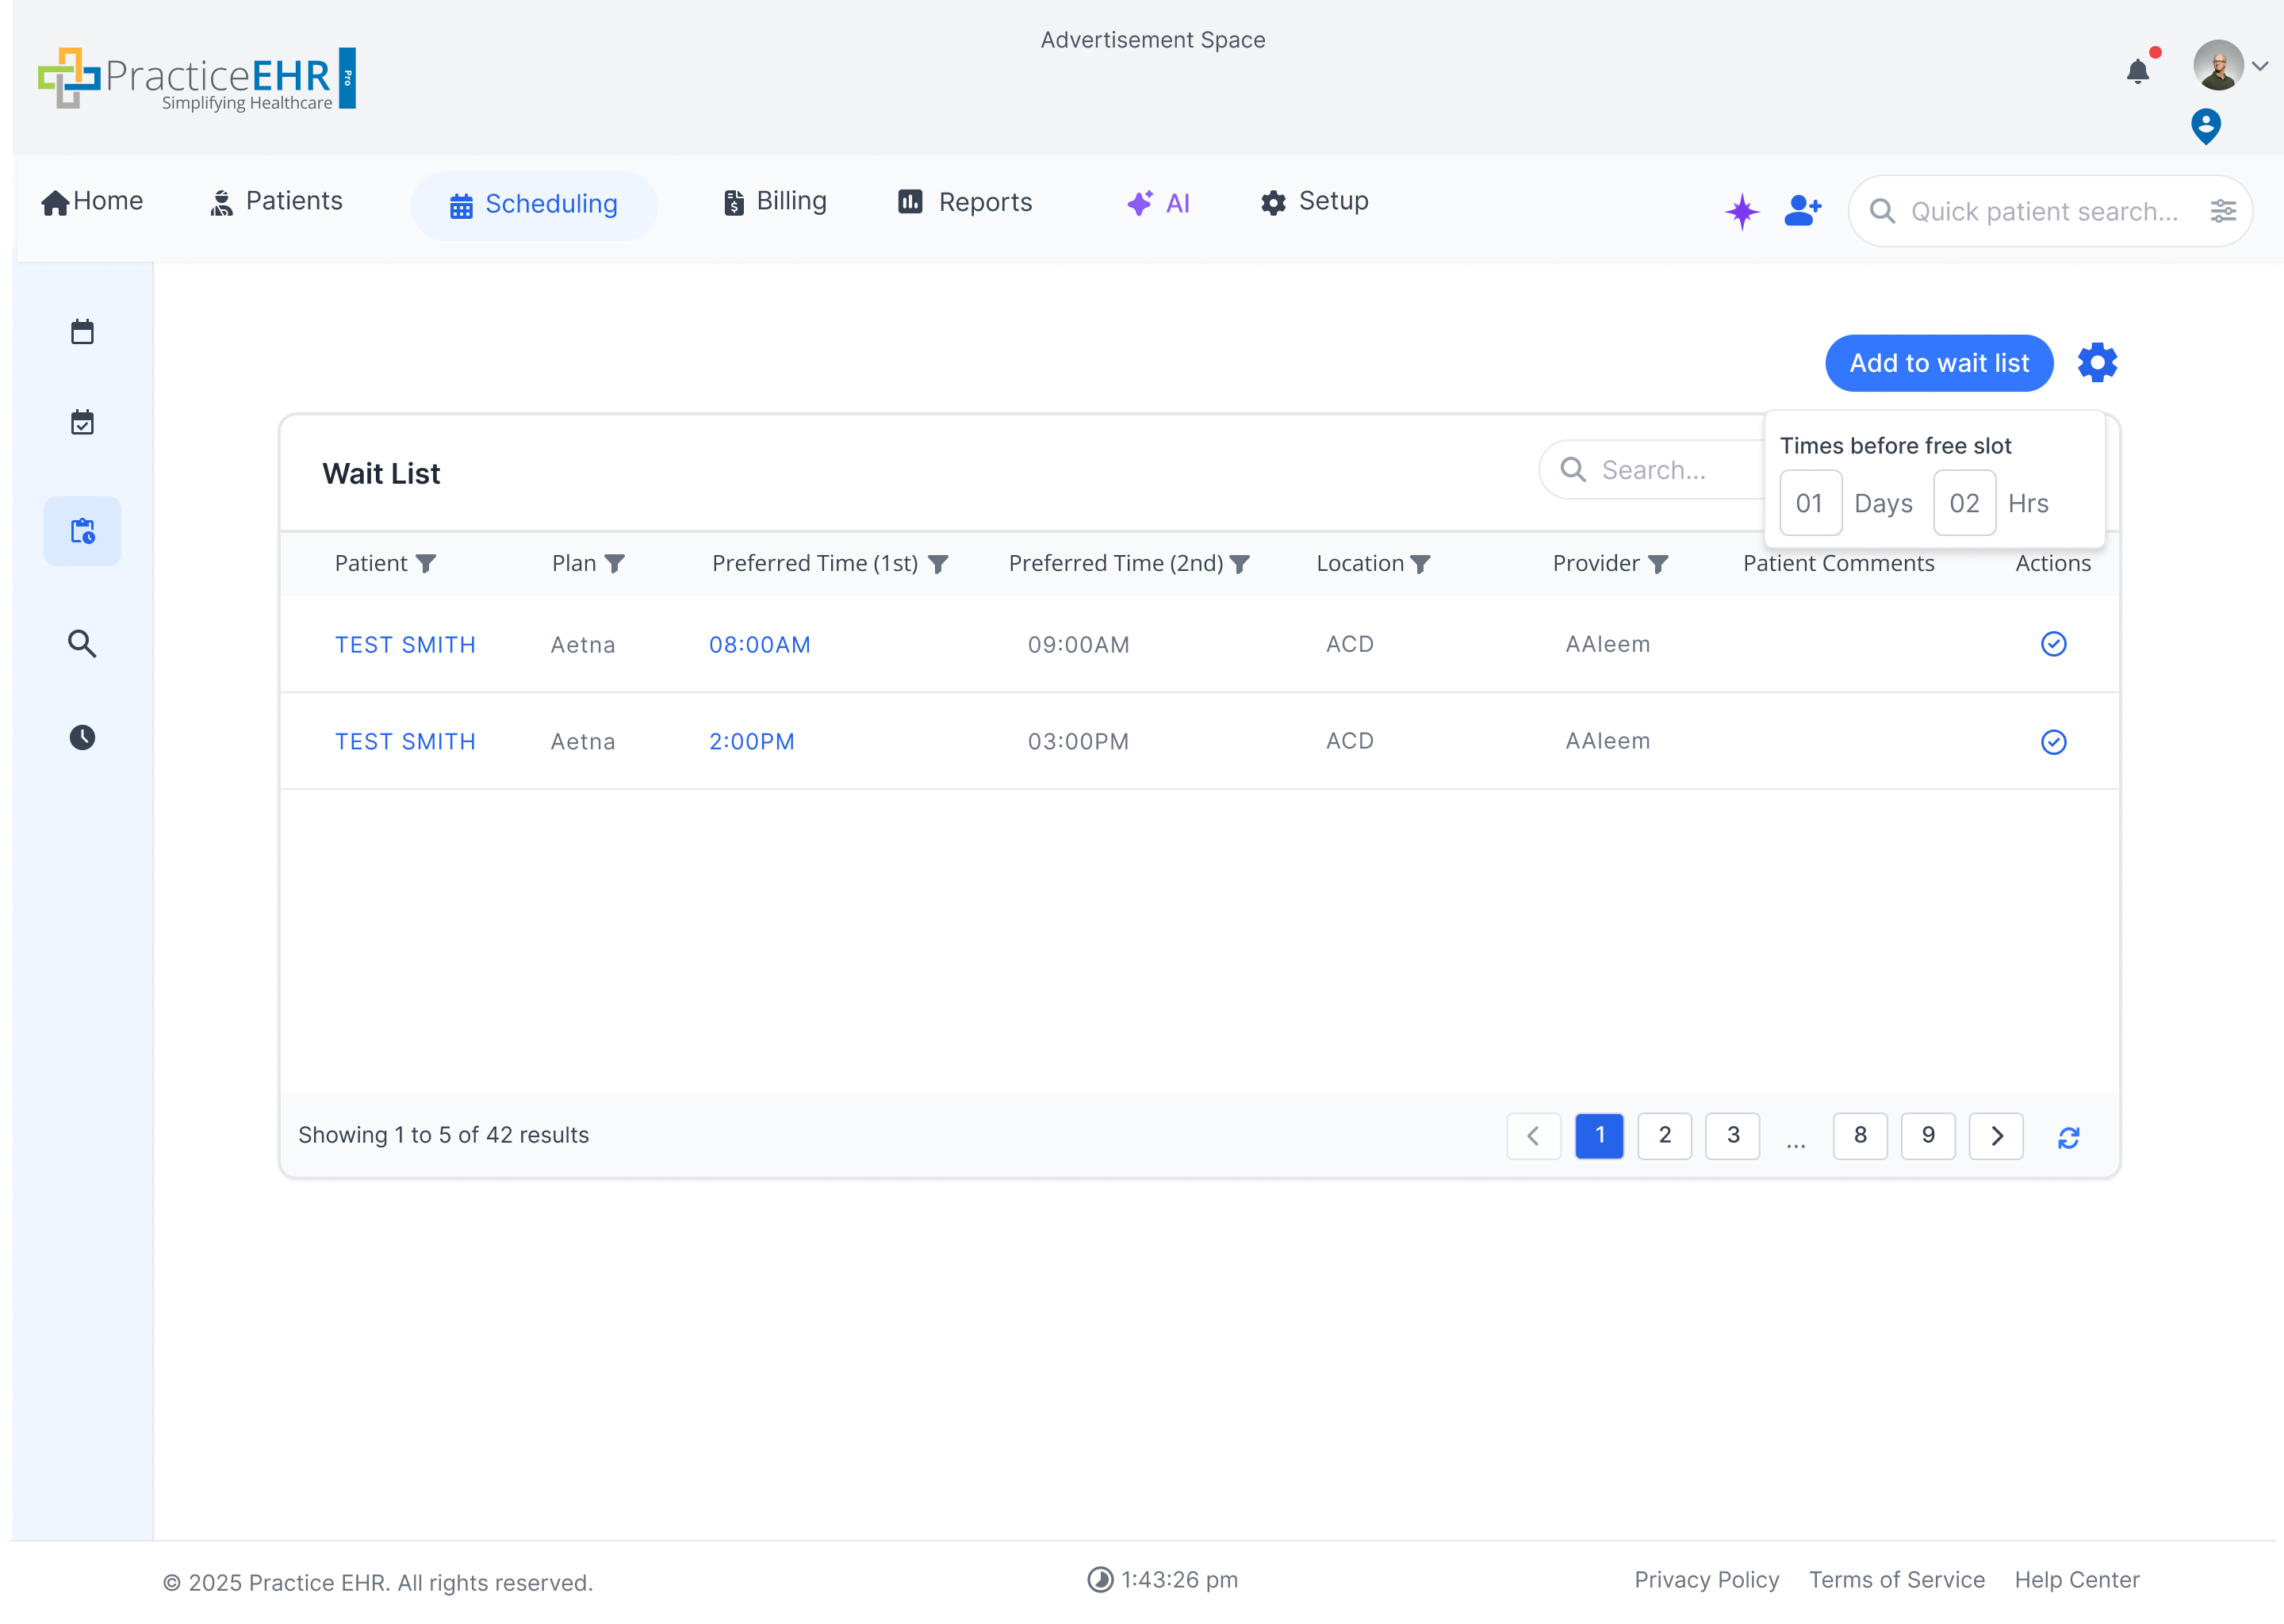
Waitlist Management
Waitlist Screen
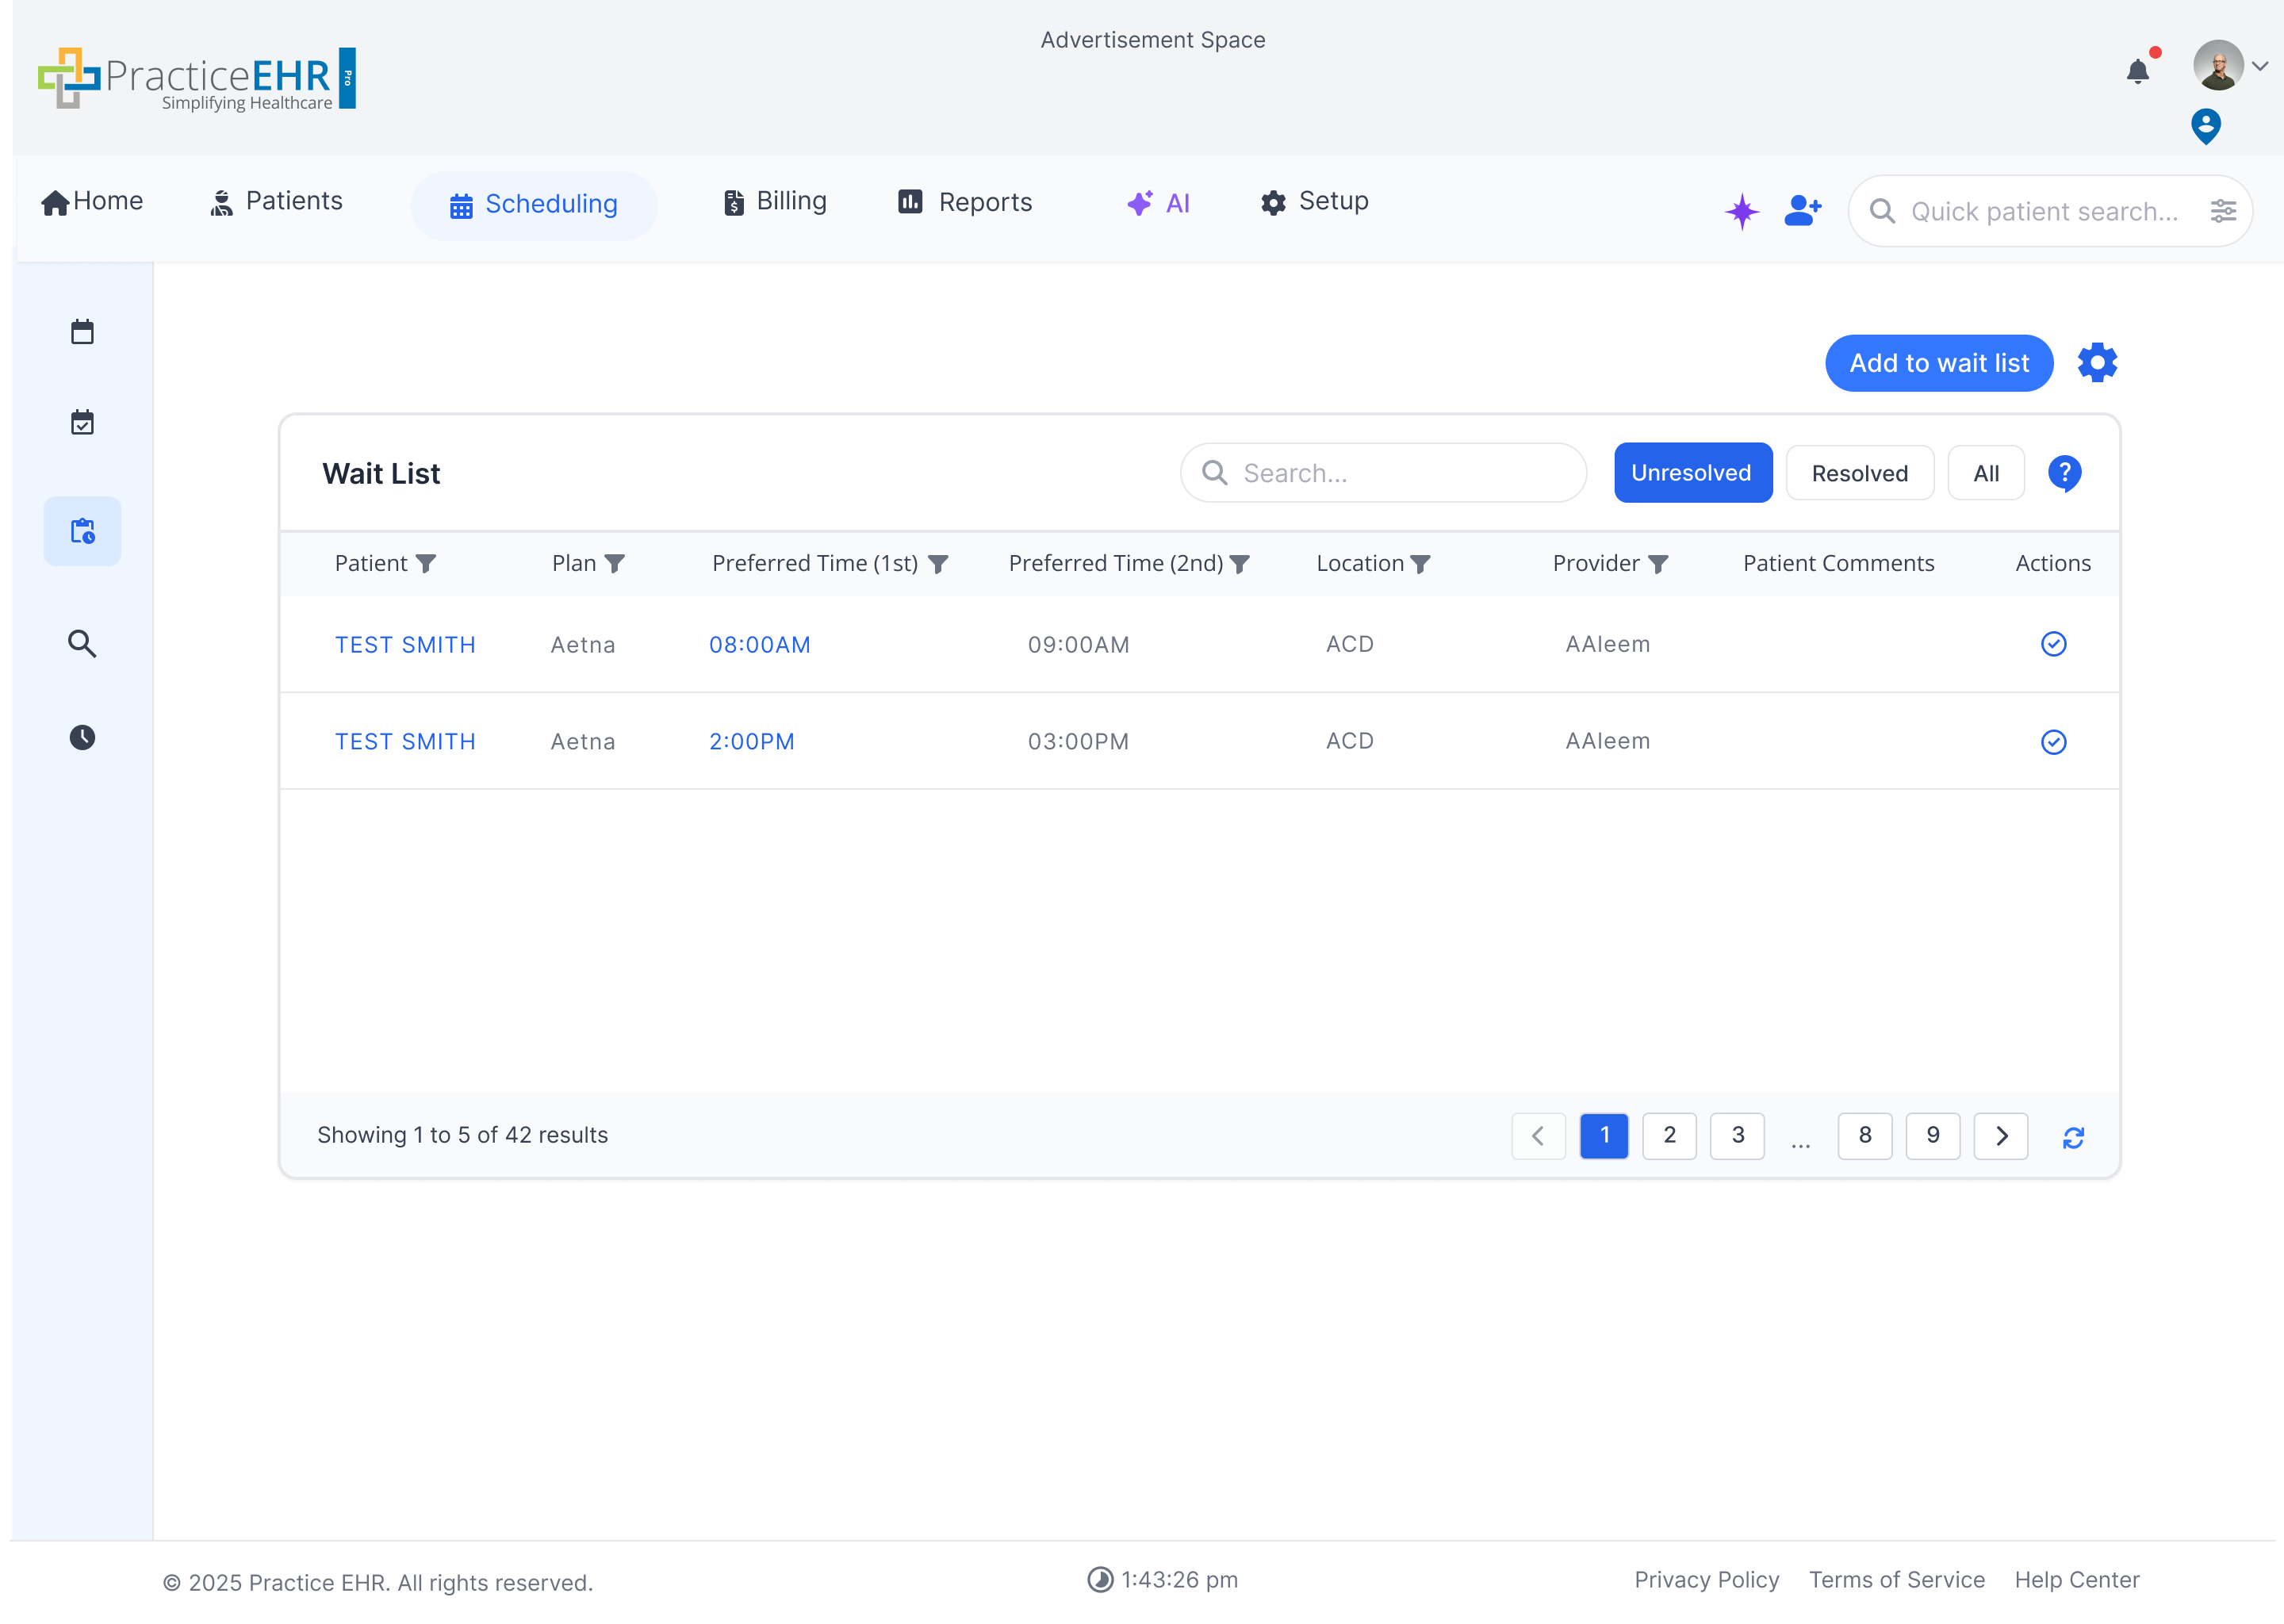
Description
- Main View: This is the primary dashboard for managing all waitlisted patients.
- Time before free slot: lets you set how early a patient should be notified before an open appointment time. For example, if you set it to 1 day and 2 hours, the system will only offer a waitlist spot if the free slot is at least that far in the future not last-minute ones.
- Patient List: Displays a sortable and filterable list of patients, including their name, preferred provider, desired date/time, and reason for visit.
- Status Filters: Filters are available so users can switch between unresolved items, resolved items, and all waitlist items.
- Quick Search: A search bar allows staff to quickly find a specific patient on the list.
- Actions: Users can click the Resolve icon in the Actions column to resolve a waitlist item. The "Add to Waitlist" button opens the modal (see next section) to add a new patient to this list.
- Preferred Time Match: When a preferred time becomes available, the waitlist item is moved to the Waitlist tab in the Create New Appointment modal so the user can complete scheduling.
Waitlist Management
Waitlist Screen (Gear Selected)
Description
- Main View: This is the primary dashboard for managing all waitlisted patients.
- Time before free slot: lets you set how early a patient should be notified before an open appointment time. For example, if you set it to 1 day and 2 hours, the system will only offer a waitlist spot if the free slot is at least that far in the future not last-minute ones.
- Patient List: Displays a sortable and filterable list of patients, including their name, preferred provider, desired date/time, and reason for visit.
- Status Filters: Filters are available so users can switch between unresolved items, resolved items, and all waitlist items.
- Quick Search: A search bar allows staff to quickly find a specific patient on the list.
- Actions: Users can click the Resolve icon in the Actions column to resolve a waitlist item. The "Add to Waitlist" button opens the modal (see next section) to add a new patient to this list.
- Preferred Time Match: When a preferred time becomes available, the waitlist item is moved to the Waitlist tab in the Create New Appointment modal so the user can complete scheduling.
Waitlist Management
Waitlist Details

Description
- Edit Existing Waitlist Entry: Opens the full details of a previously added waitlist item so staff can update the request without removing and re-adding it.
- Patient Name (Disabled): Only the Patient Name field is locked and cannot be changed once the entry is created. To change the patient, the entry must be removed and a new one added.
- All Other Fields Editable: Every other field — Provider, Location, Reason, Preferred Date/Time, Priority, Notes, and any other waitlist attributes — can be updated freely by the user.
- Save Changes: Updates are persisted to the same waitlist entry, so the history and preferred-time matching remain tied to the original record.
Waitlist Management
Add To Waitlist Modal
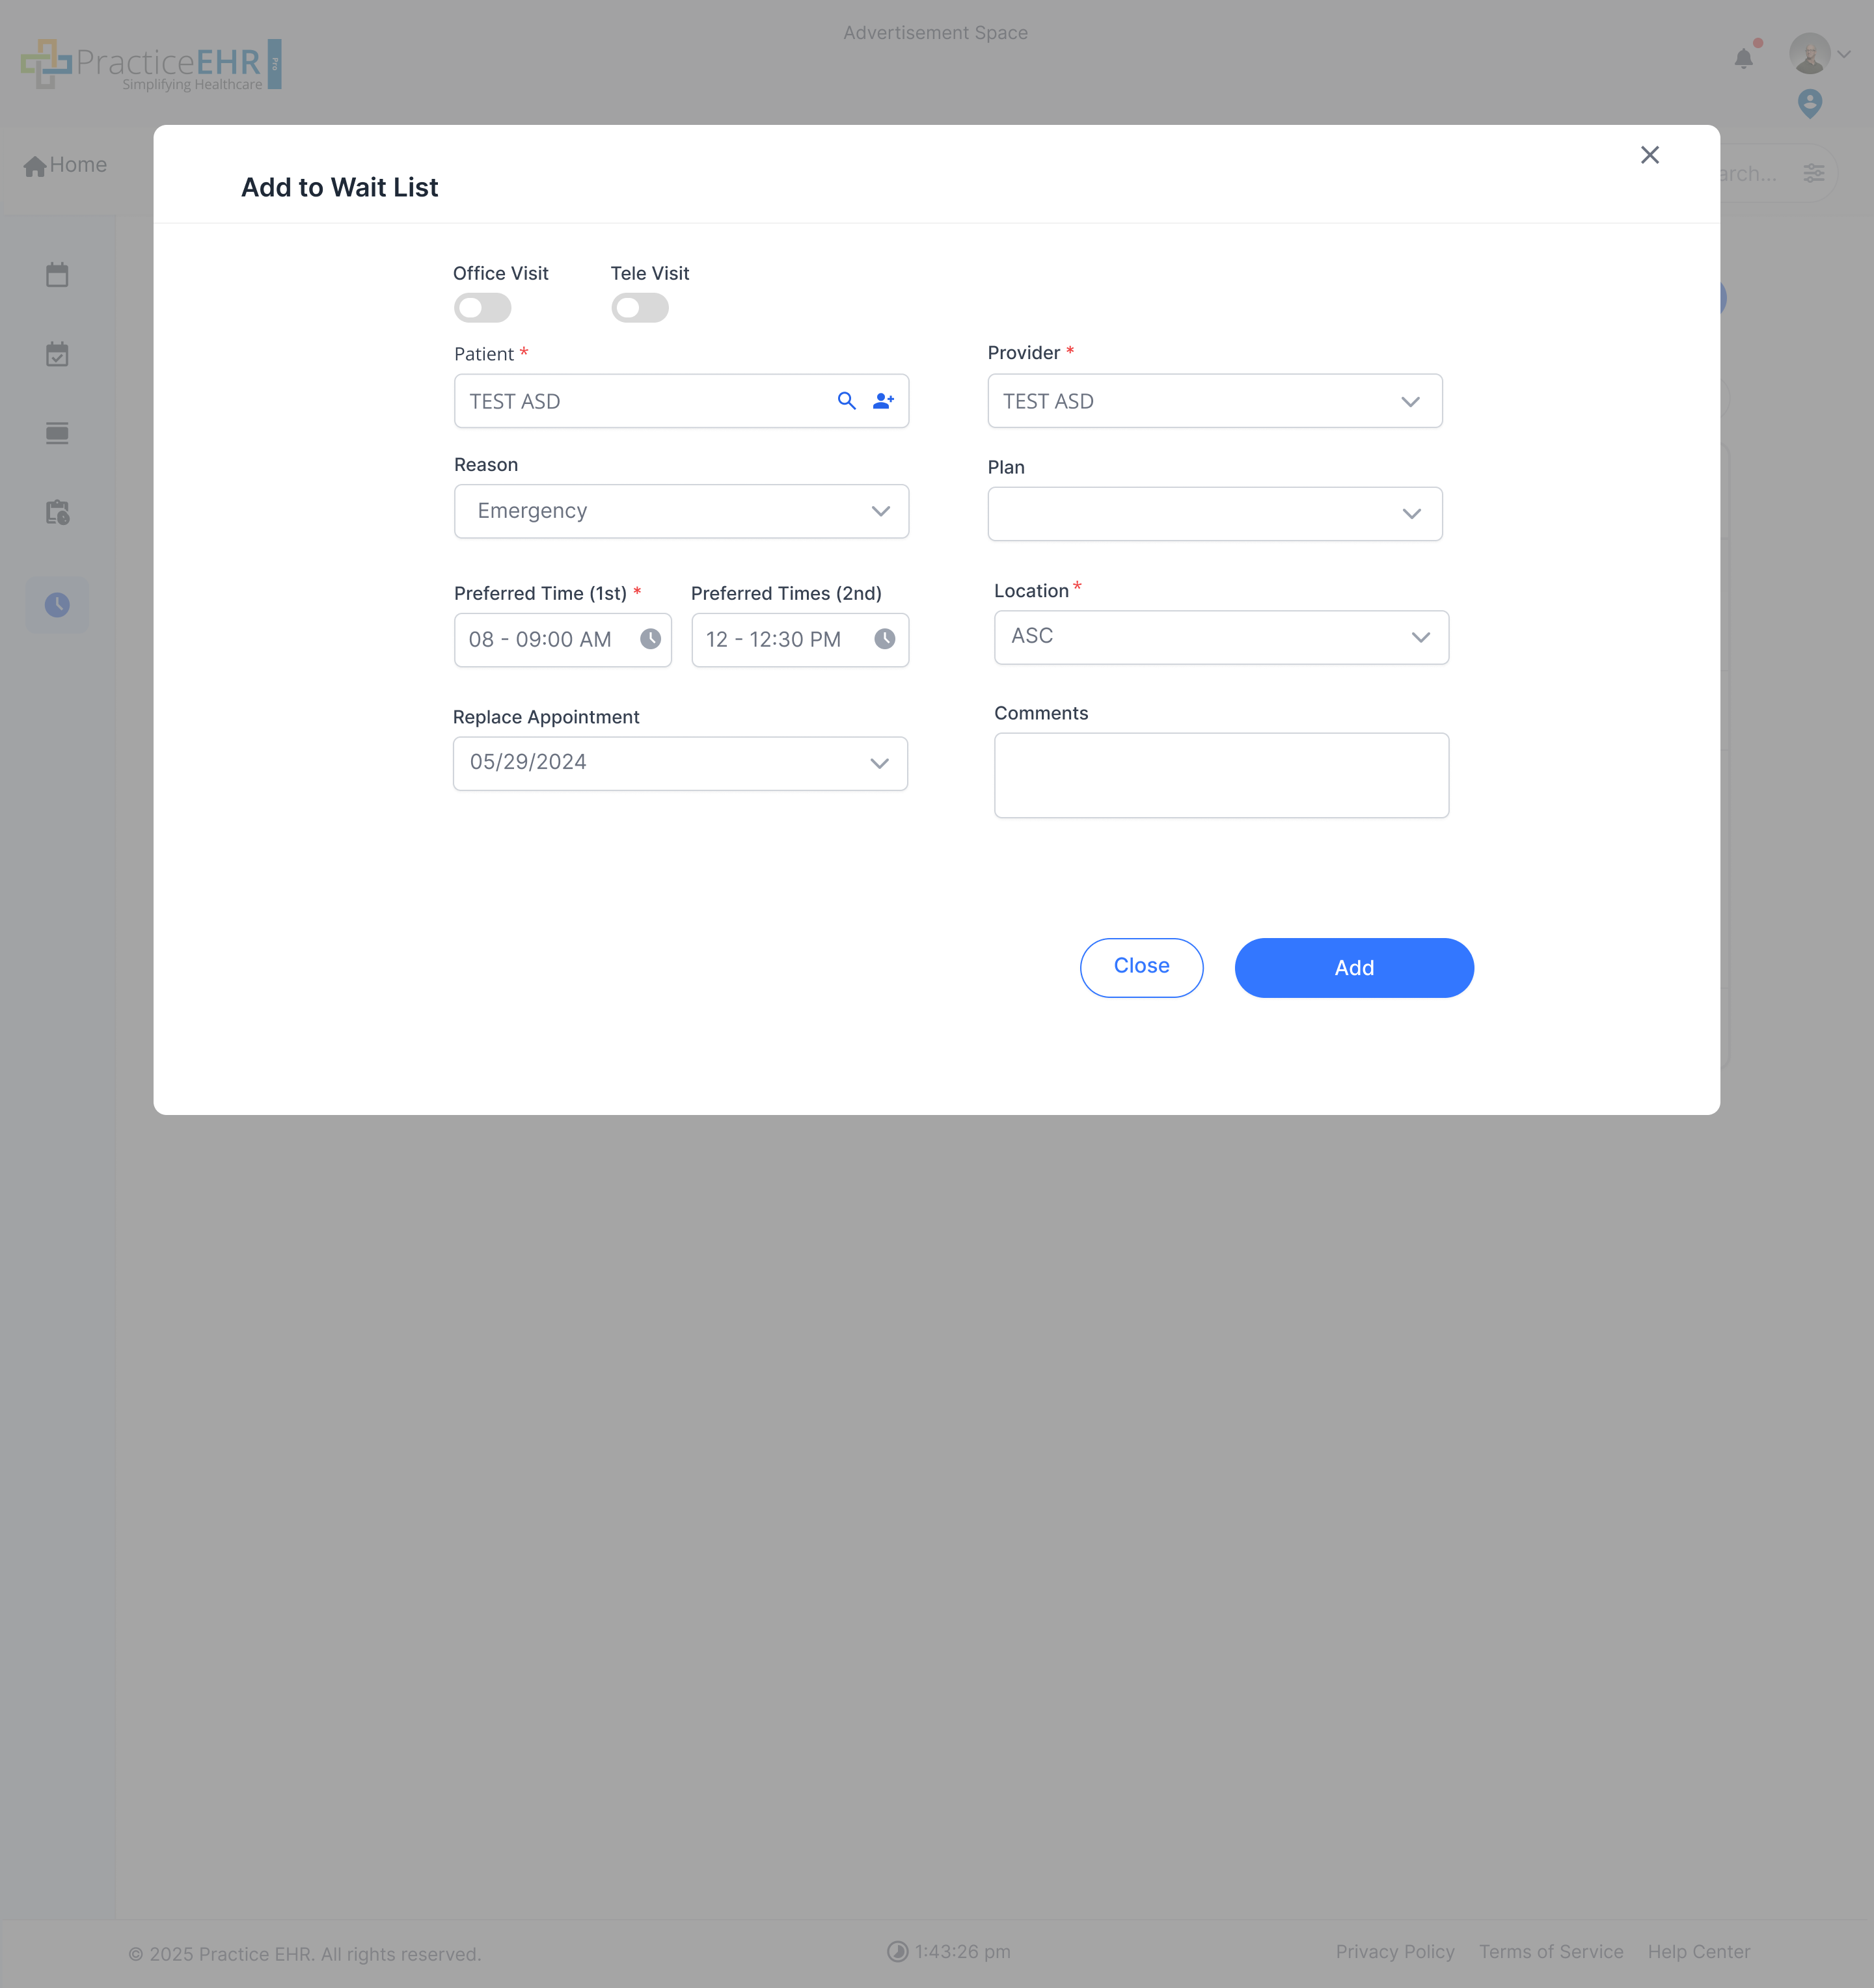
Description
- Visit Type: Allows staff to select between an "Office Visit" and a "Tele Visit".
- Preferred Times: Captures the patient's desired appointment times, with fields for "1st Preferred Time" and "2nd Preferred Time" to offer flexibility.
- Provider/Location: Standard fields to select the desired provider and location for the appointment.
- Replace Appointment: A specific field used when an existing, scheduled appointment is being moved *to* the waitlist (e.g., patient wants an earlier slot but will keep their current one as a backup).
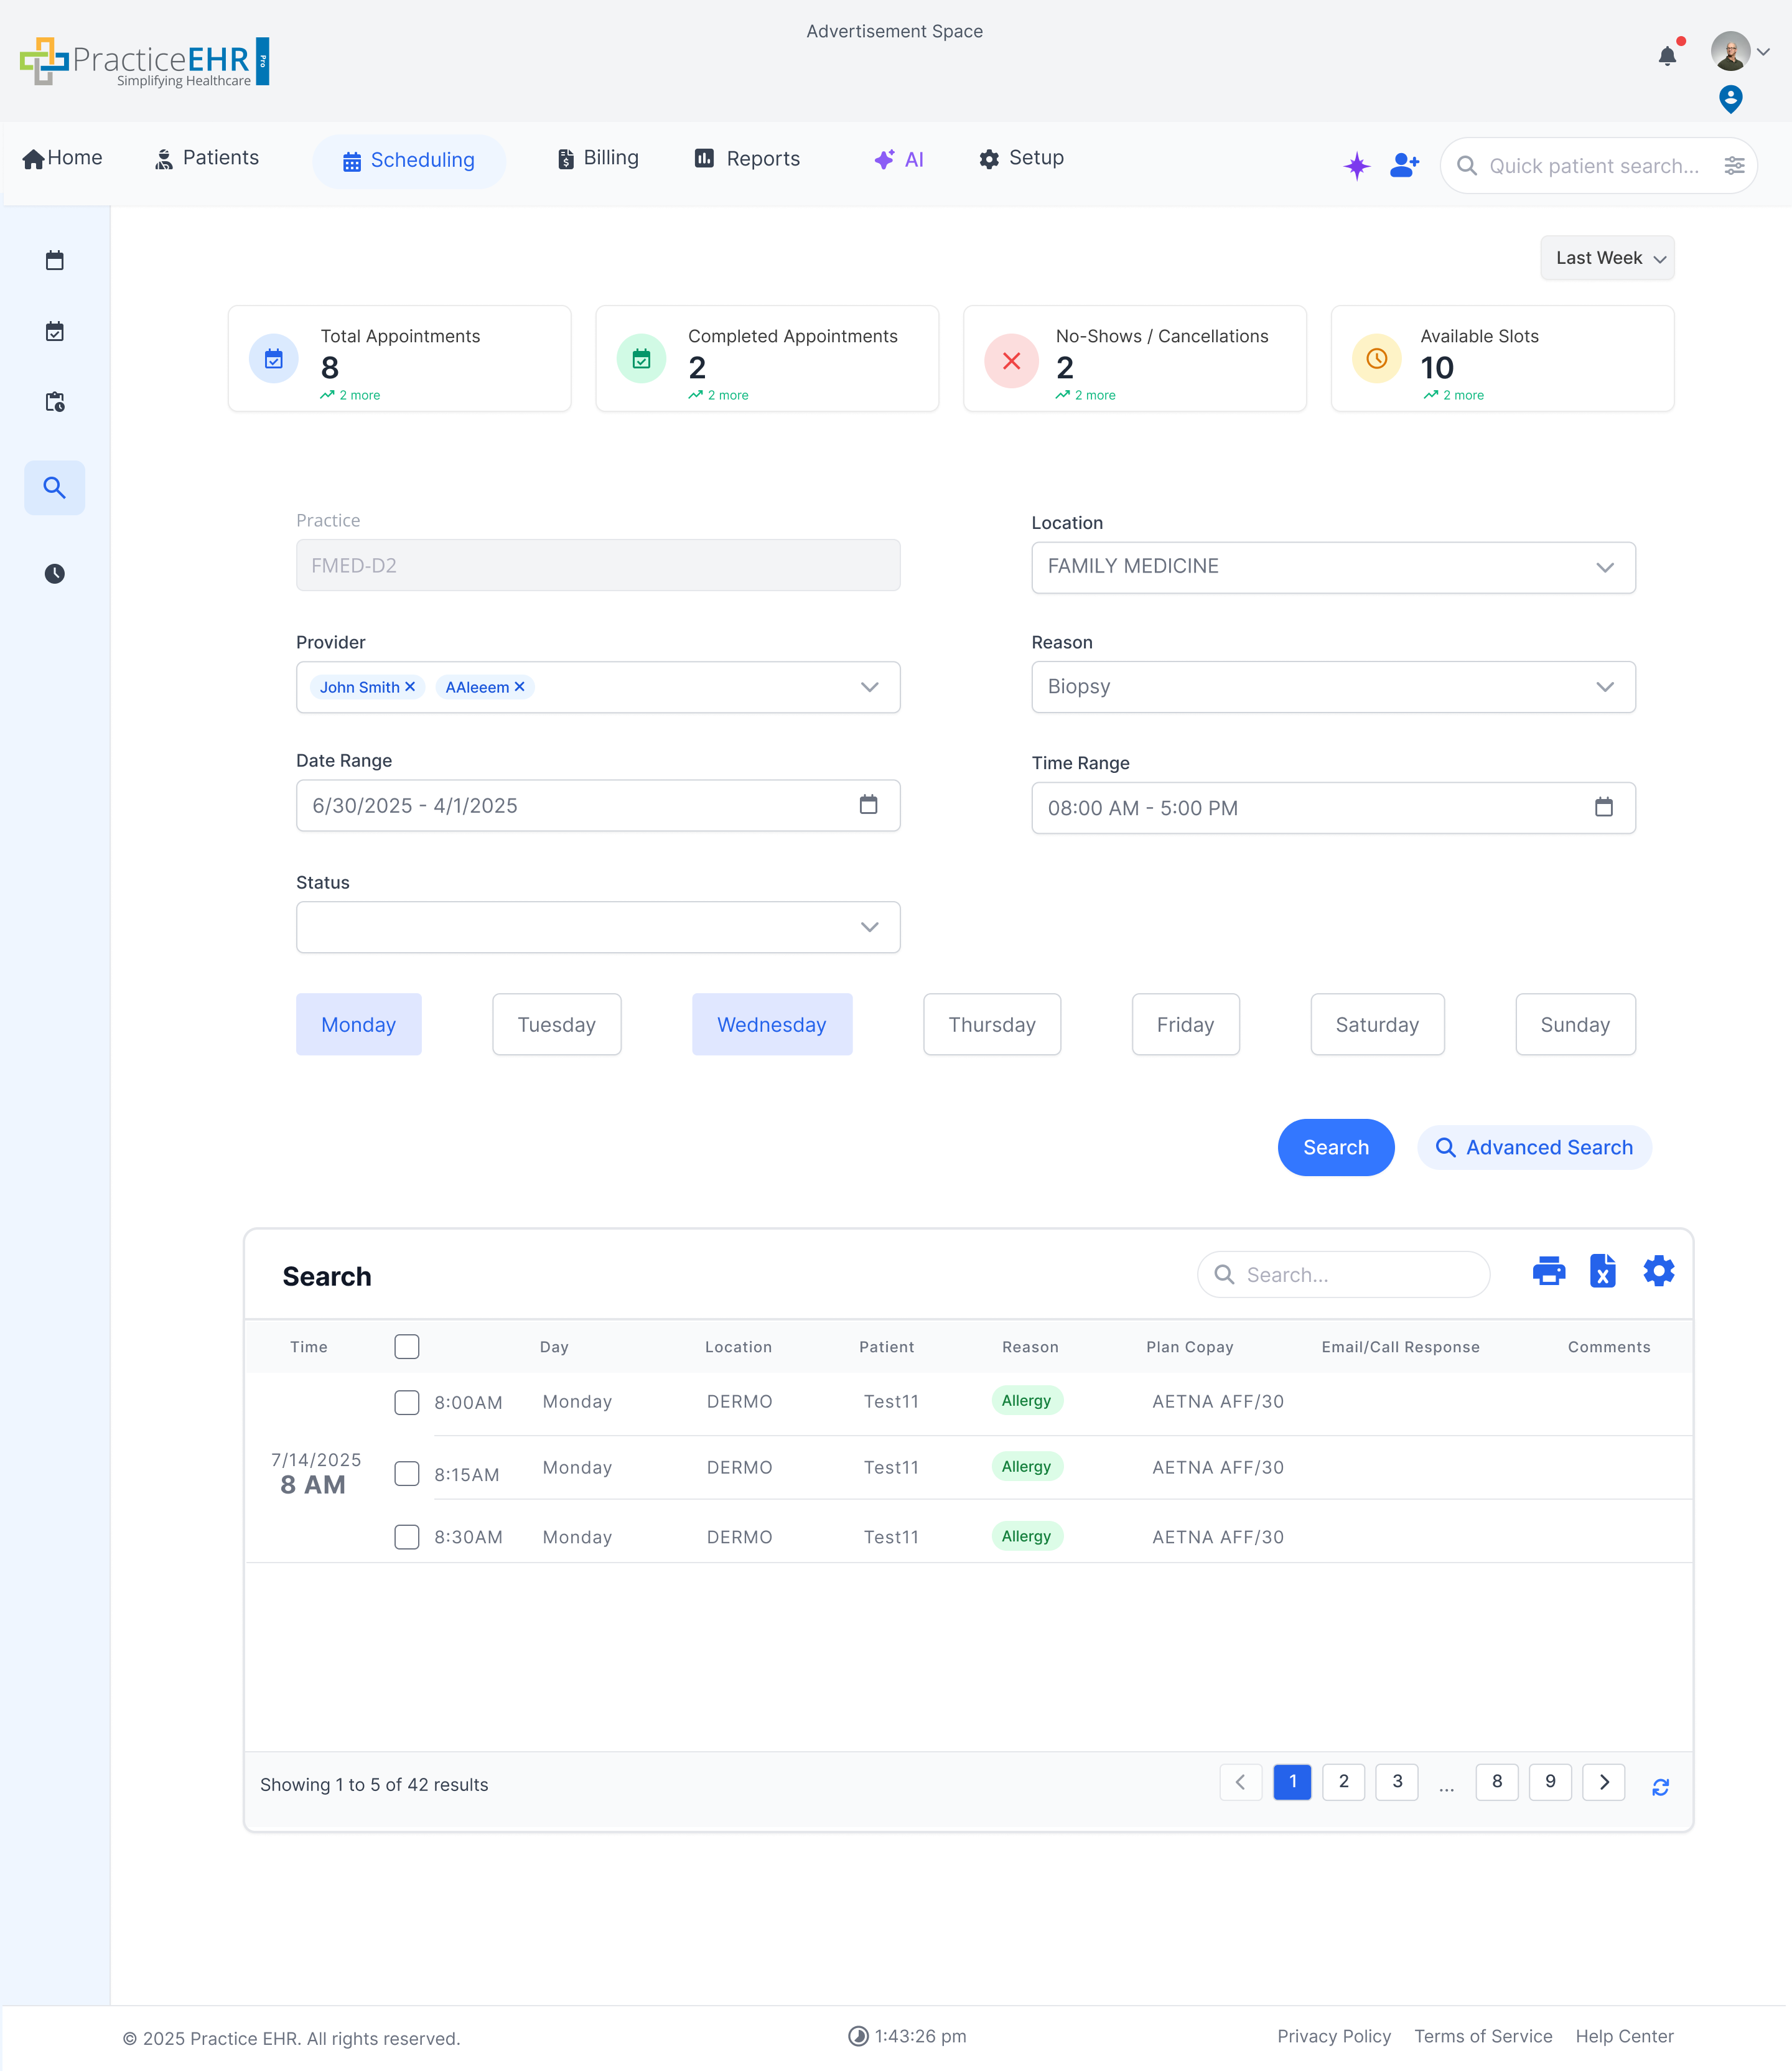
Search
This screen provides a comprehensive search function for finding appointments based on various criteria.

Key Features
- KPI Cards: At-a-glance metrics for Total Appointments, Completed, No-Shows, and Available Slots.
- Advanced Filters: Refine search by Practice, Provider, Location, Reason, Date Range, Time Range, and Status.
- Day of Week Toggle: Quickly filter by specific days (e.g., Monday, Tuesday).
Interaction Guide
- Set Filters: Use the dropdowns and date pickers to define your search criteria.
- Click "Search": Press the blue "Search" button to run the query and populate the results table.
- Navigate Results: Use the pagination controls at the bottom of the table to browse through multiple pages of results.
Search Advance Search
This screen provides a comprehensive search function for finding appointments based on various criteria.
Key Features
- KPI Cards: At-a-glance metrics for Total Appointments, Completed, No-Shows, and Available Slots.
- Advanced Filters: Refine search by Practice, Provider, Location, Reason, Date Range, Time Range, and Status.
- Day of Week Toggle: Quickly filter by specific days (e.g., Monday, Tuesday).
Interaction Guide
- Set Filters: Use the dropdowns and date pickers to define your search criteria.
- Click "Search": Press the blue "Search" button to run the query and populate the results table.
- Navigate Results: Use the pagination controls at the bottom of the table to browse through multiple pages of results.
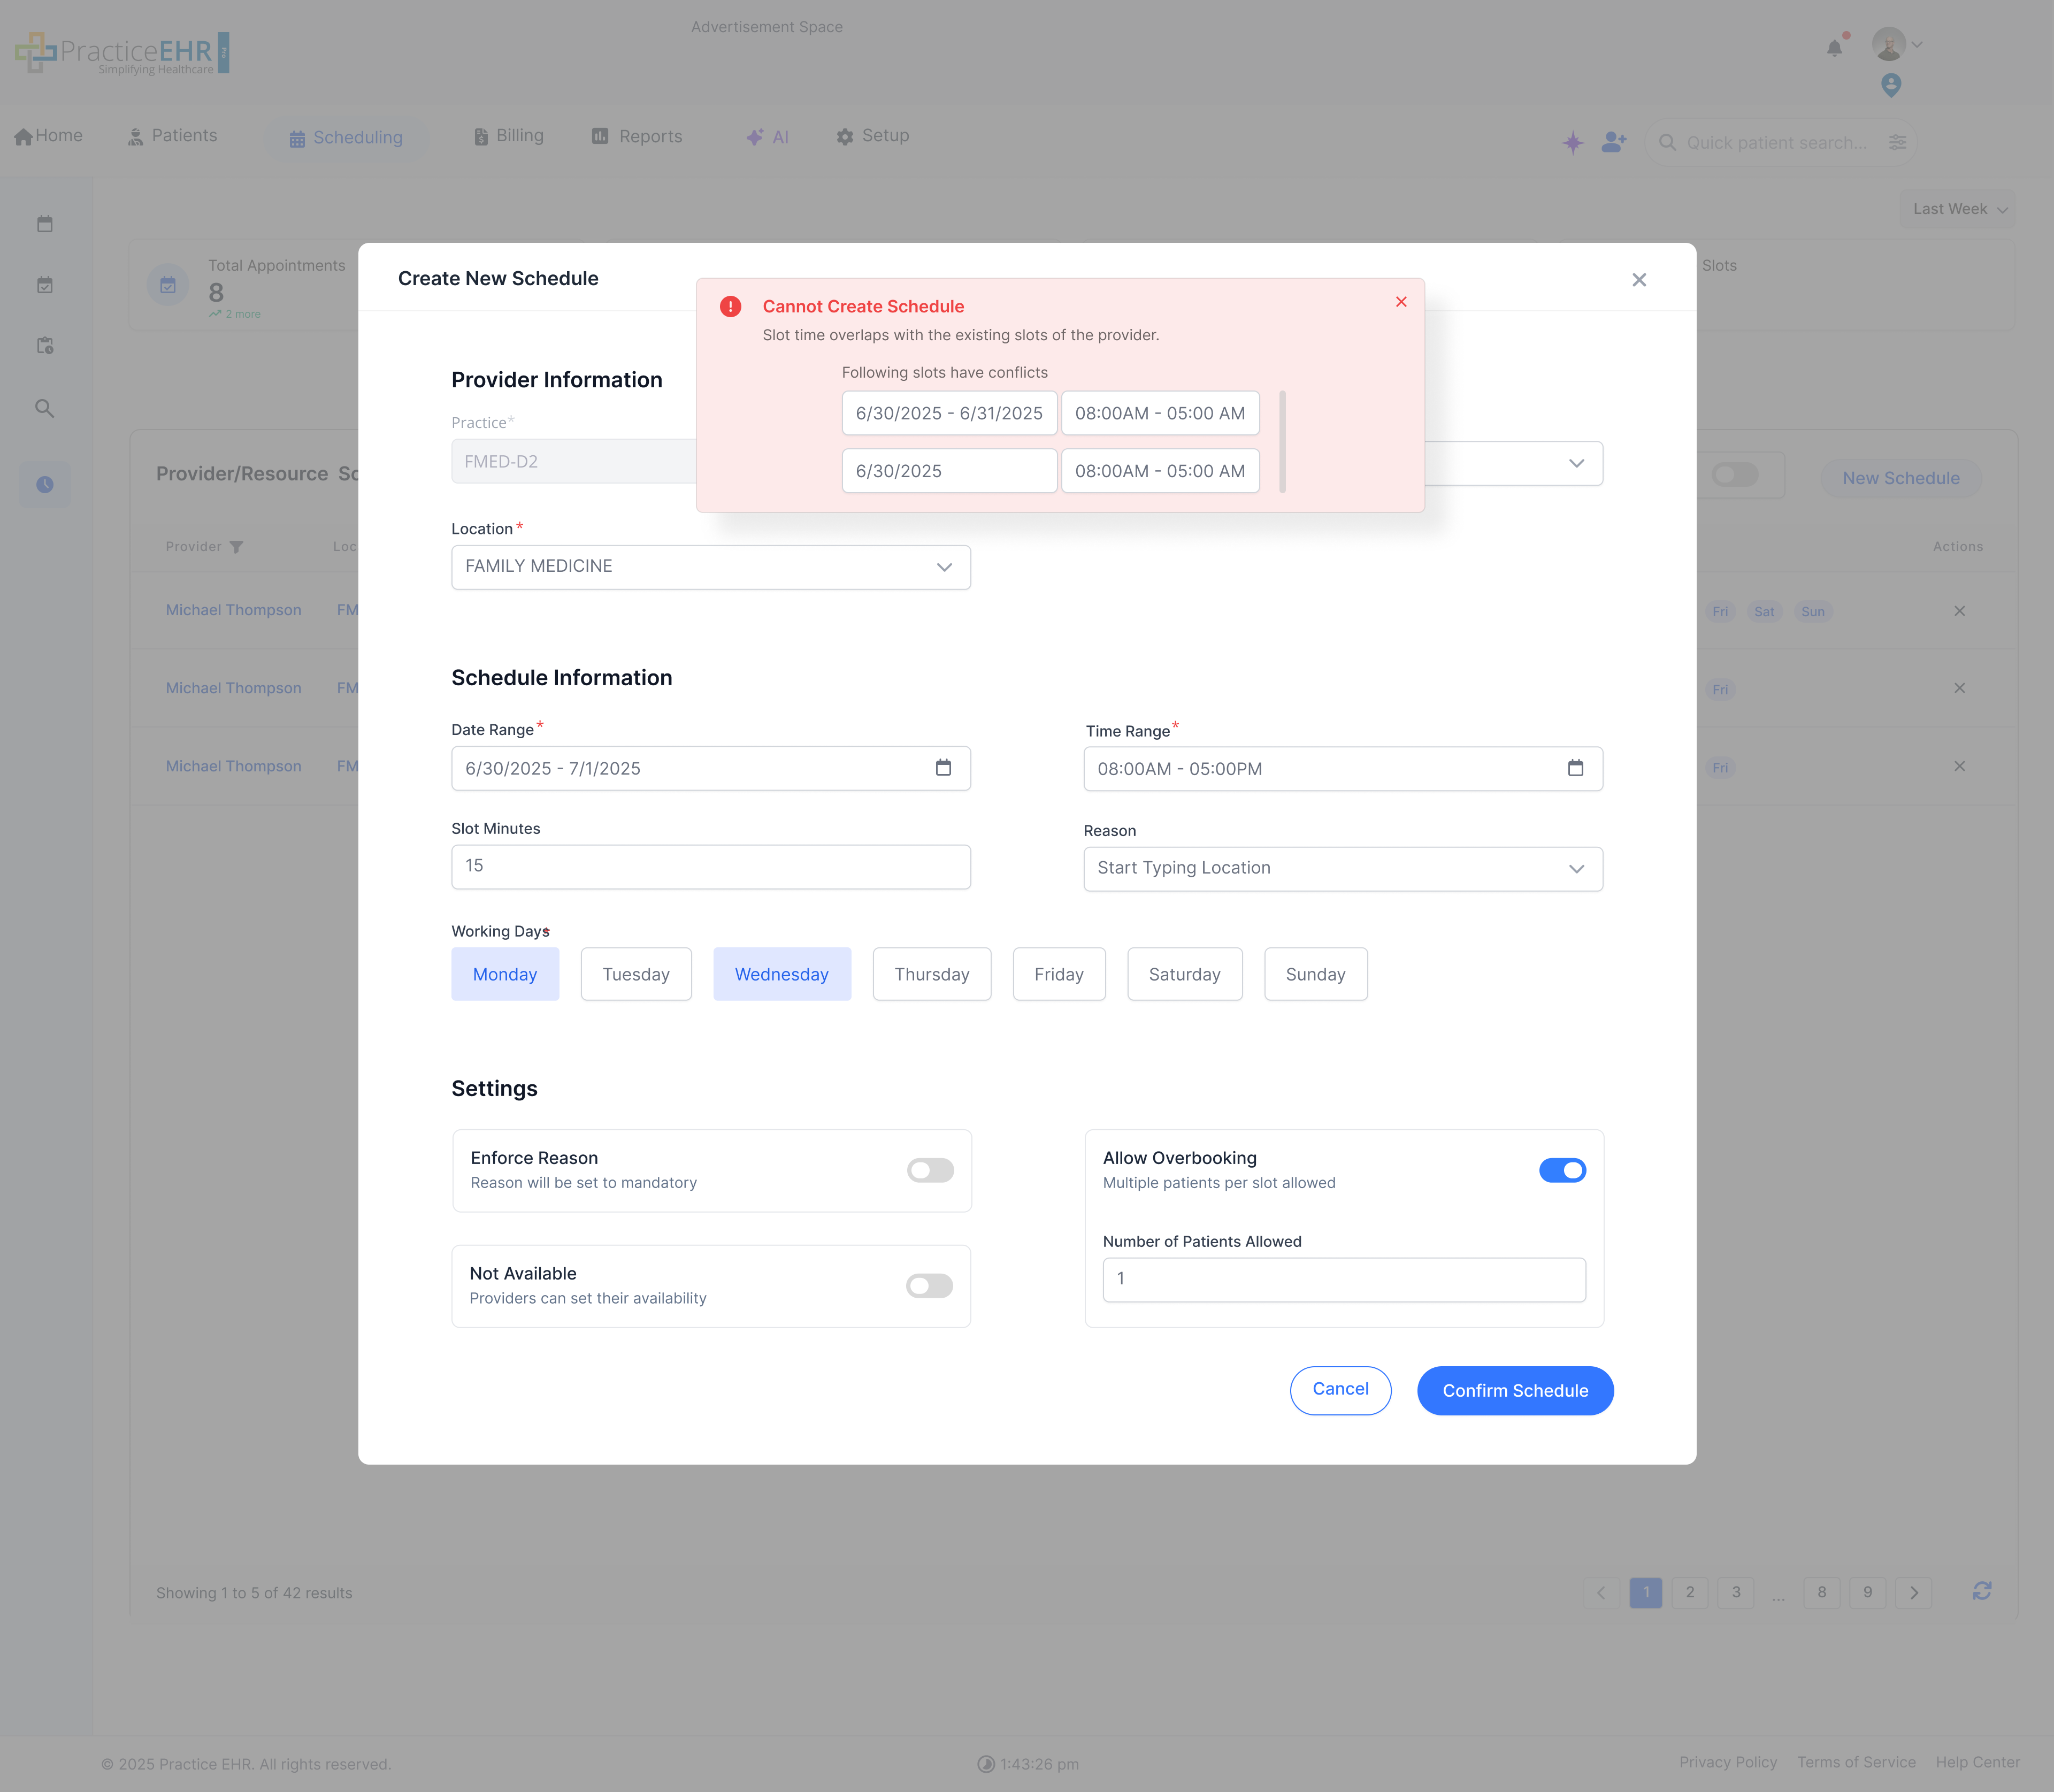
Change Location/Provider Restriction
System protection against duplicate slot allocation when transferring between providers.
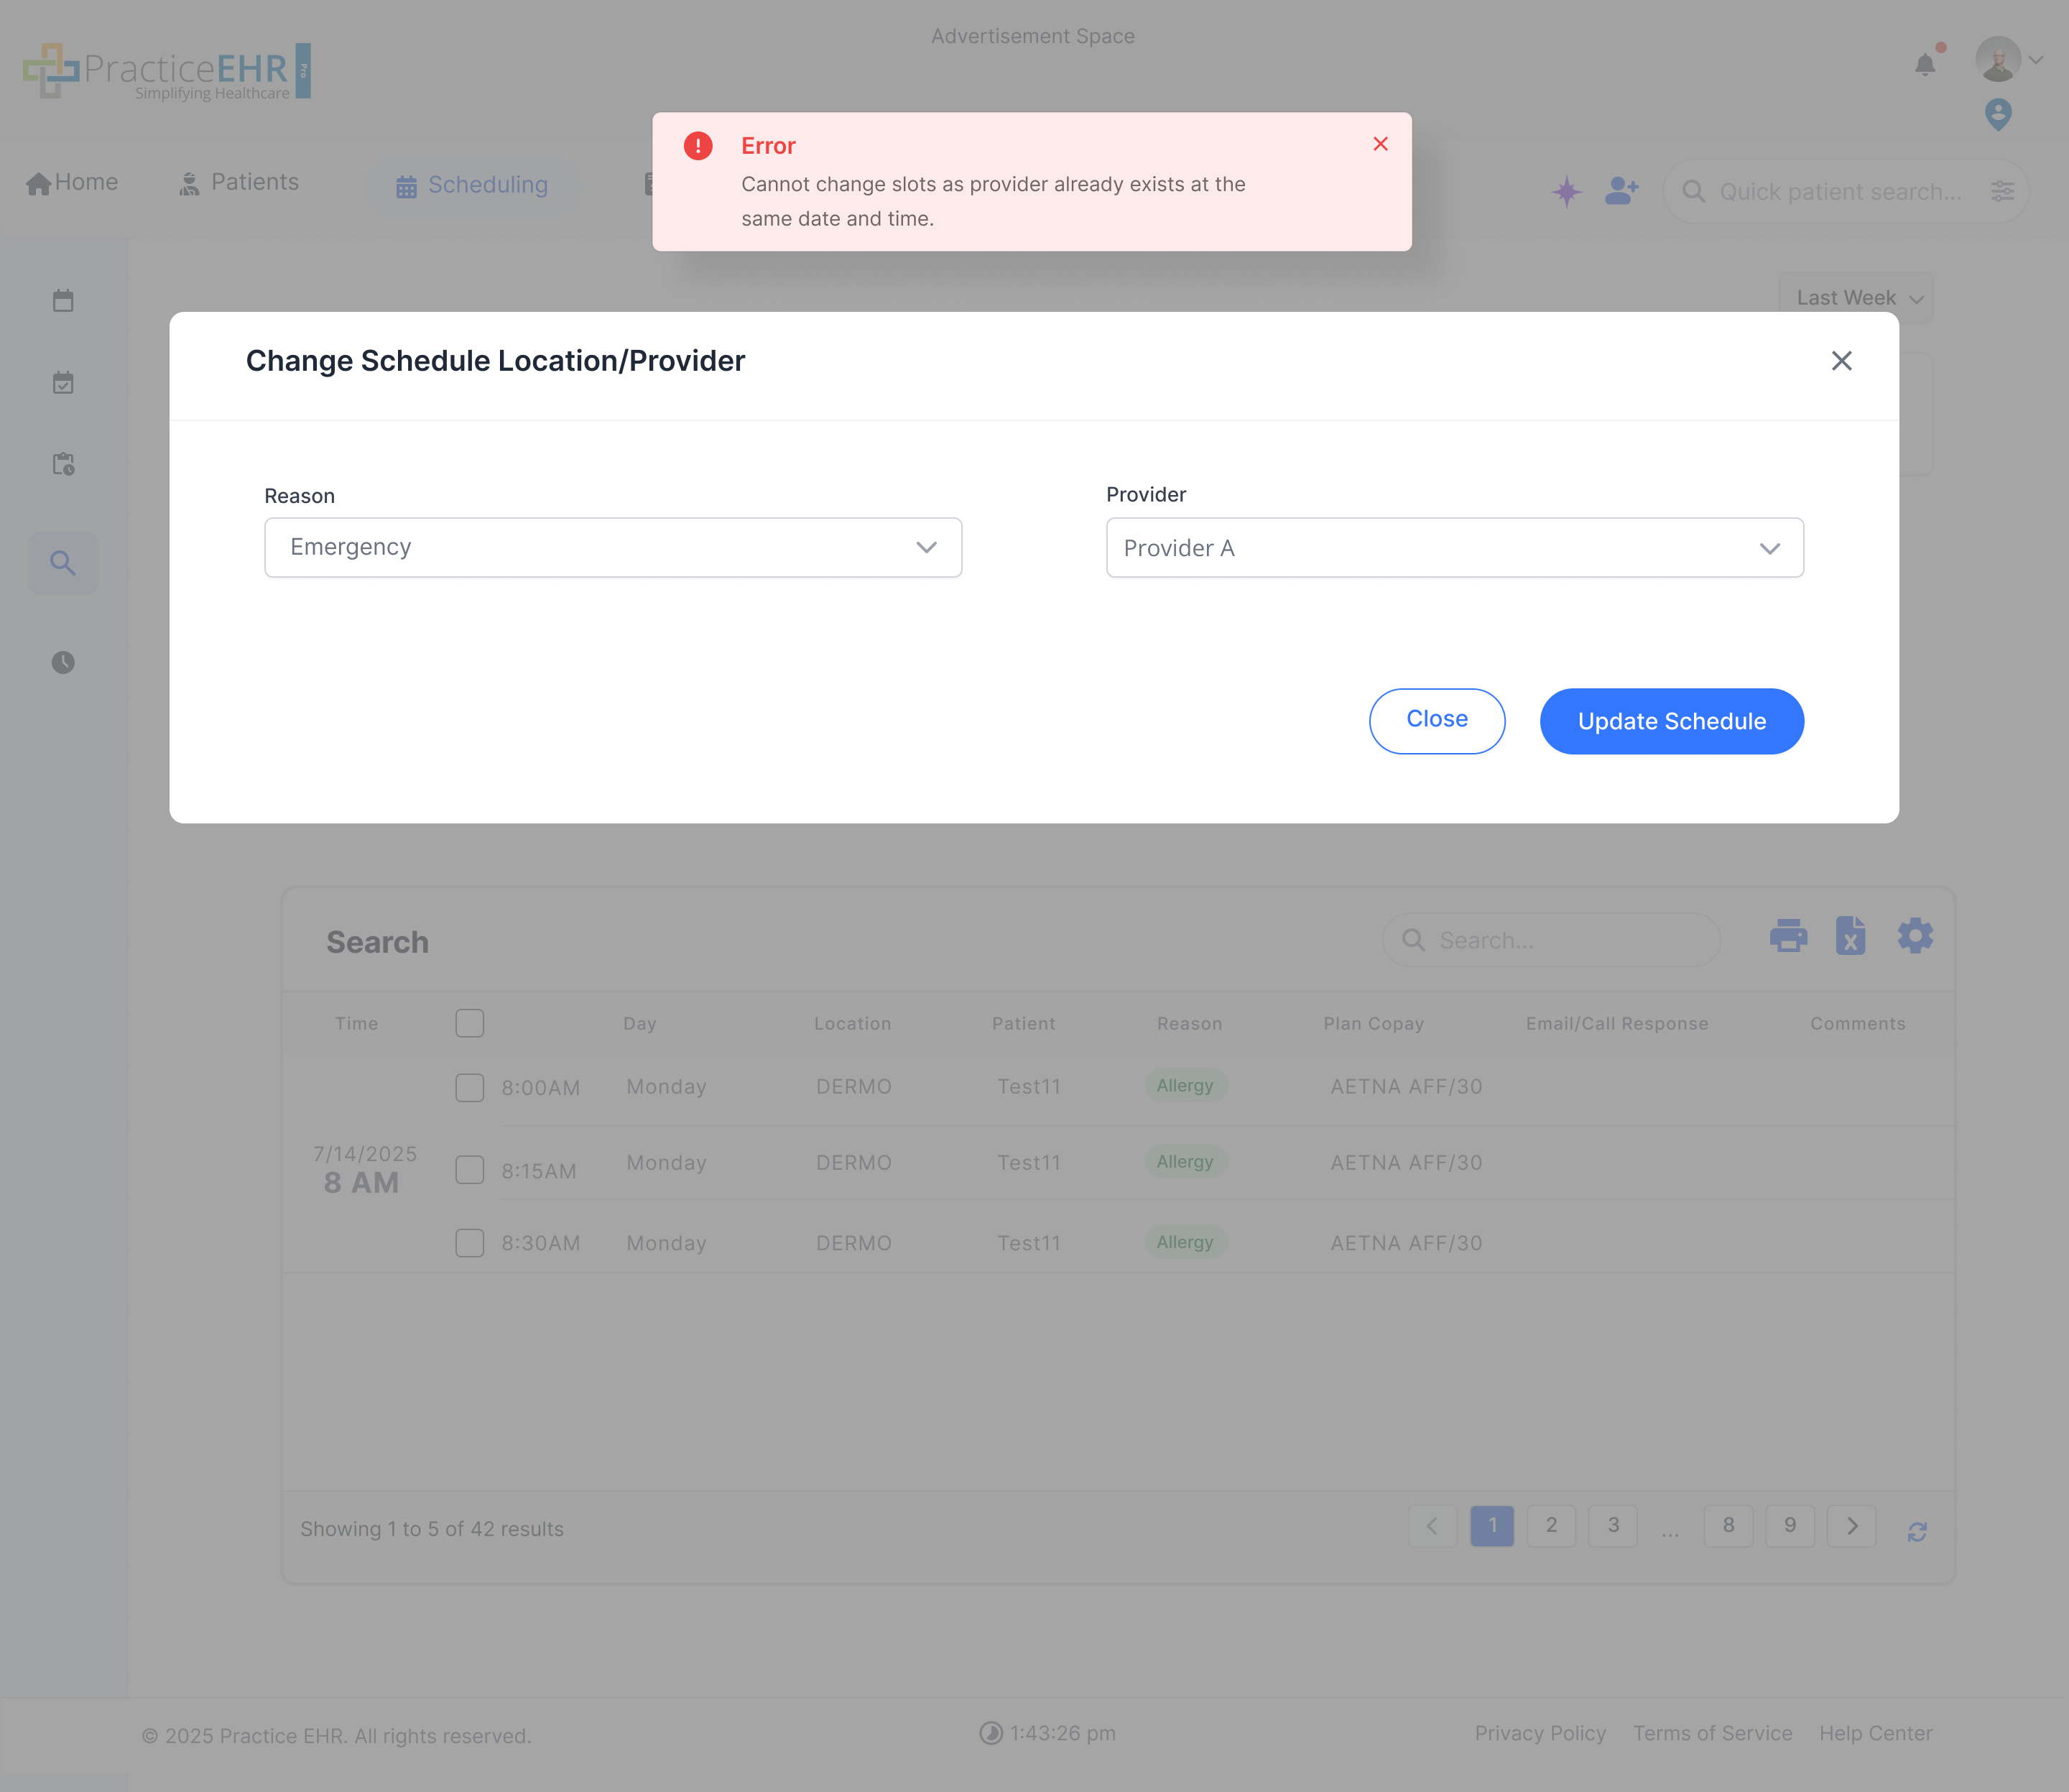
Restriction Details
When a user uses Change Location/Provider from the Calendar or Search tab to move slots from Provider B to Provider A, If Provider A already has a slot at the same date and time, the system will block the transfer and display an alert to prevent slot duplication.
How It Works
- Duplicate Check: System validates if the target provider already has an appointment at the selected date and time.
- Alert Display: If a conflict is detected, an alert message prevents the transfer.
- Safe Transfer: Only allows the move if no conflict exists with the target provider.
Create New Appointment
Case 7: Multi Provider - Provider Enabled

Description
- Context: This modal appears when the user clicks the generic + (Plus) icon while in Multi-Provider View.
- Provider Selection: Unlike single-column views where the provider is often locked, the Provider dropdown is enabled here. This allows the user to assign the appointment to any specific provider from the list.
- Reason Selection: The Reason field is also fully editable, allowing the user to select the appropriate visit reason from the dropdown menu.
Waitlist Management
Add To Waitlist Alert
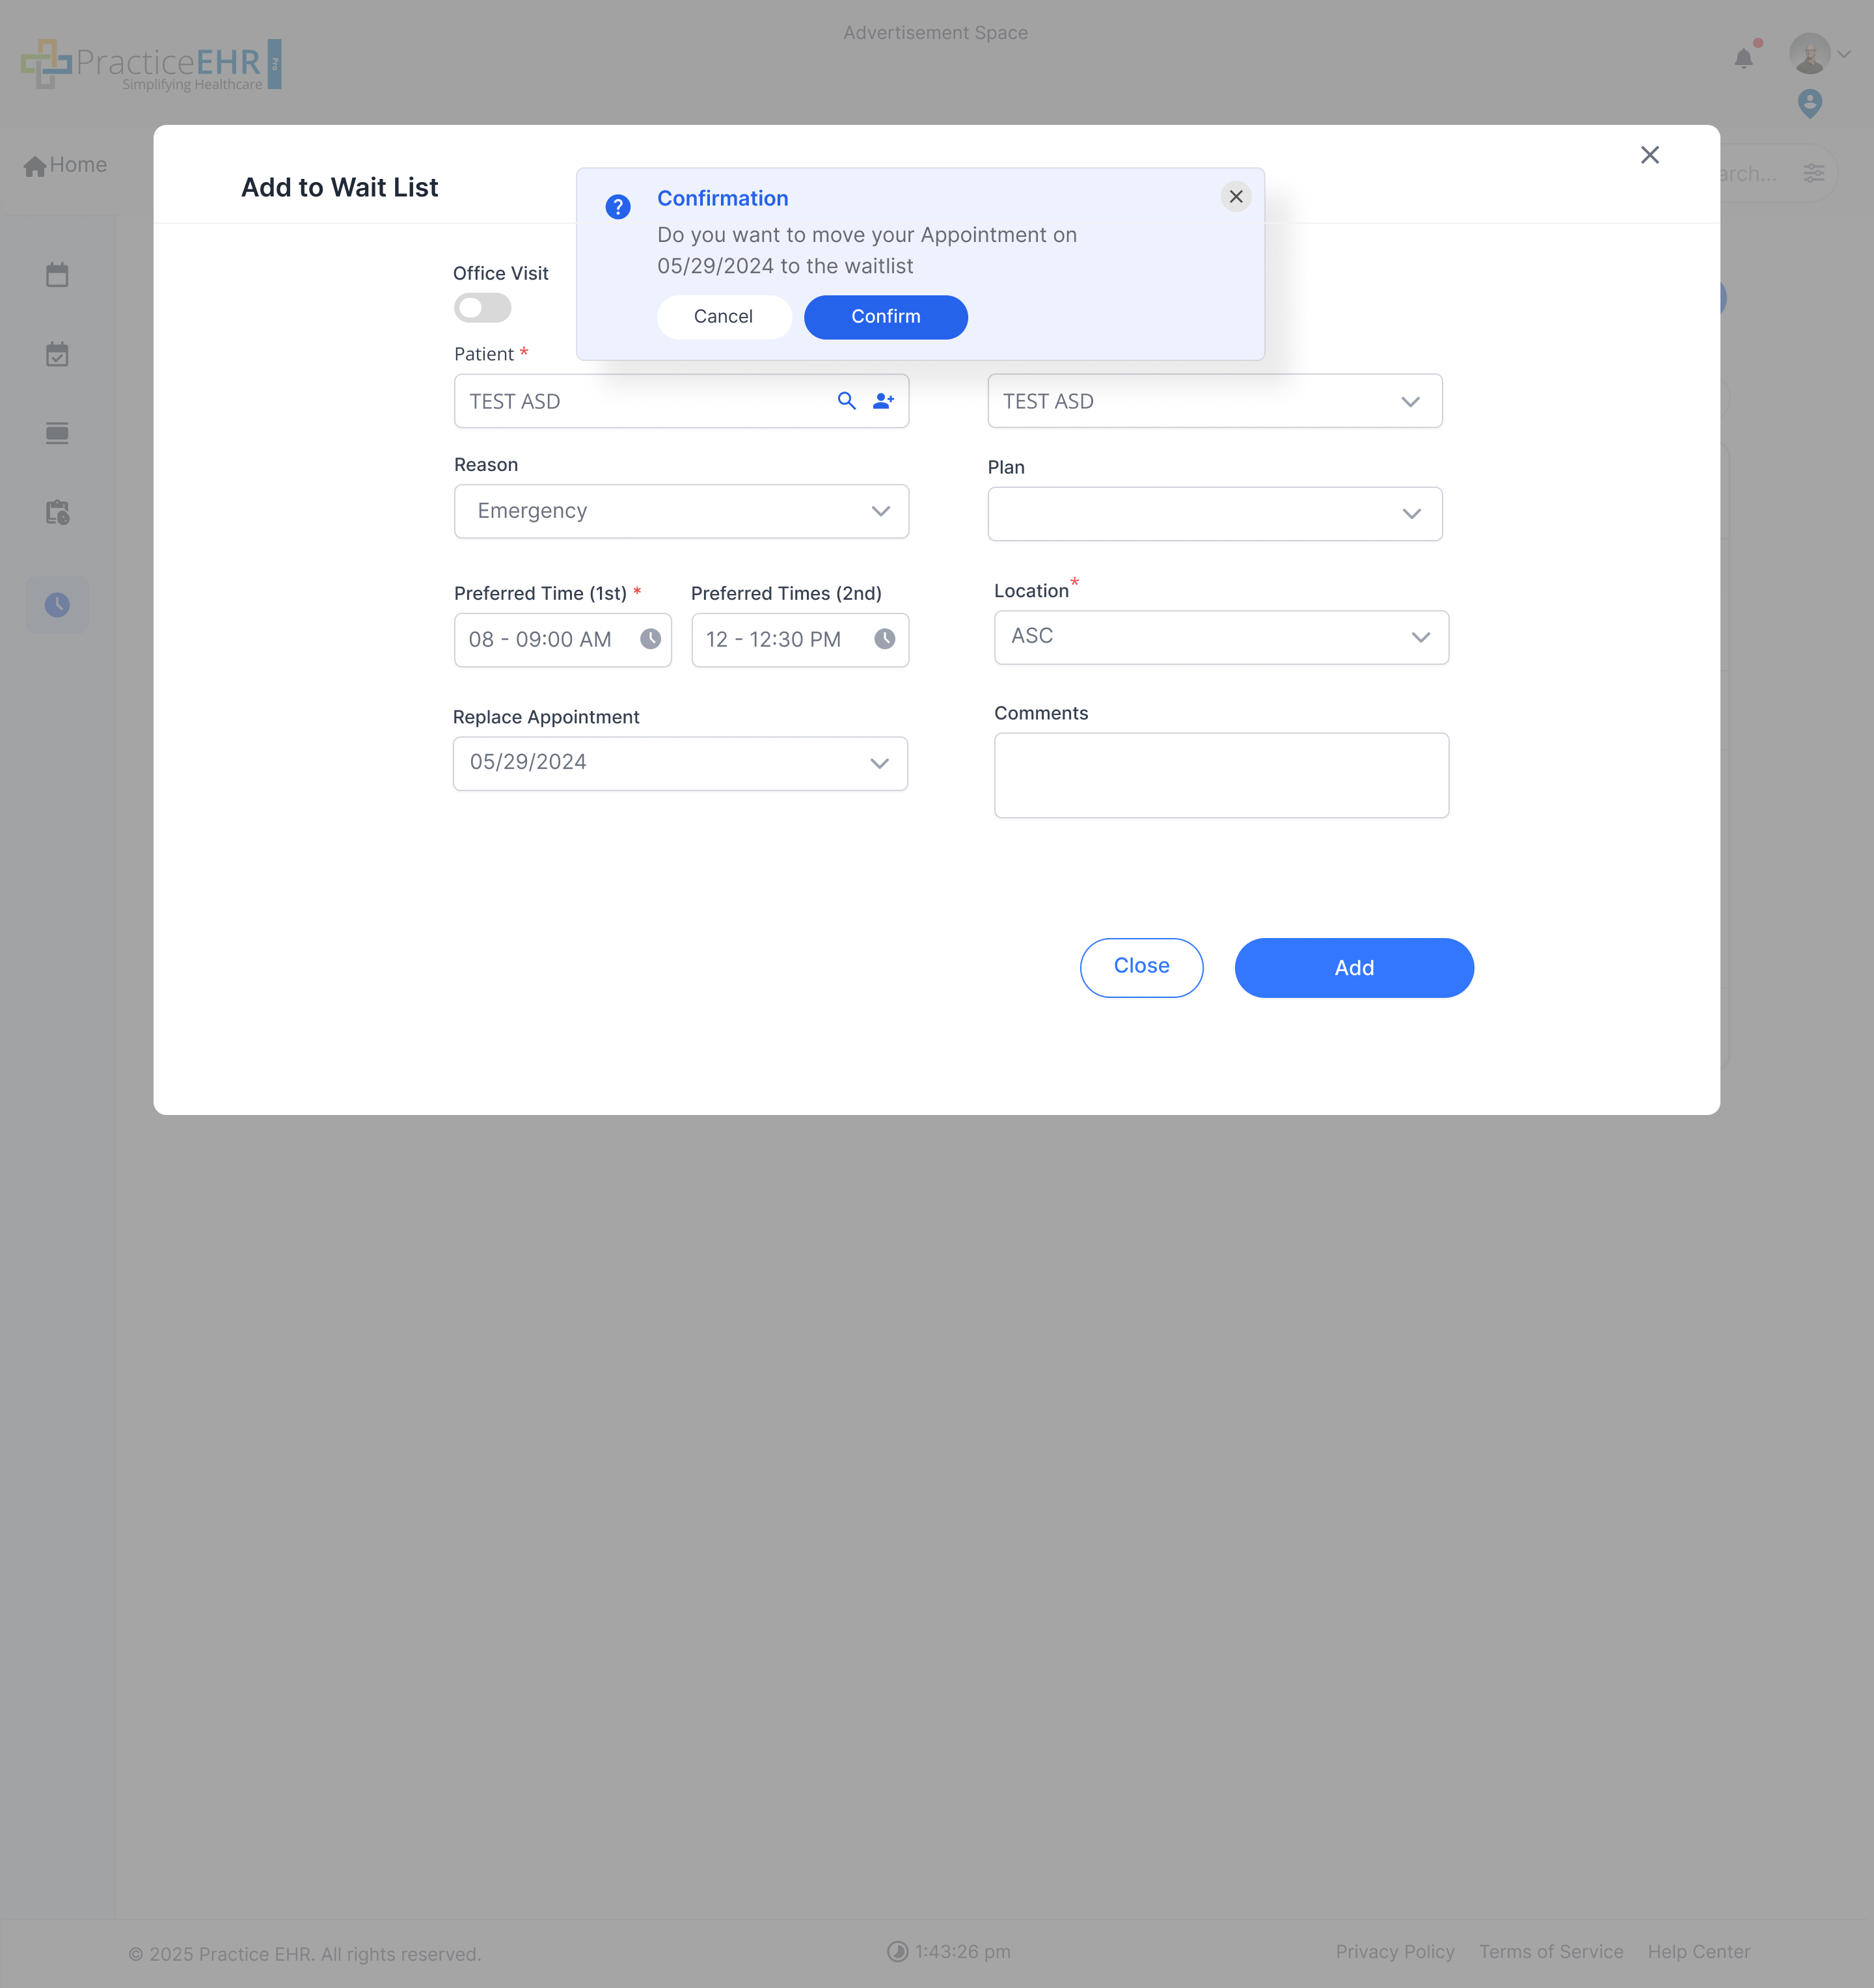
Description
- Trigger: This confirmation modal appears specifically when a user is moving an *existing, scheduled appointment* to the waitlist (using the "Replace Appointment" feature).
- Confirmation: It forces the user to confirm this action, asking "Are you sure you want to move this appointment to the waitlist ? " and displaying the date of the appointment being moved.
- Safeguard: This prevents staff from accidentally canceling a patient's confirmed appointment without a clear confirmation step.
Scheduling Day Sheet
Overview of all appointments, charges, and collections for a single business day. Use filters to select date and provider.
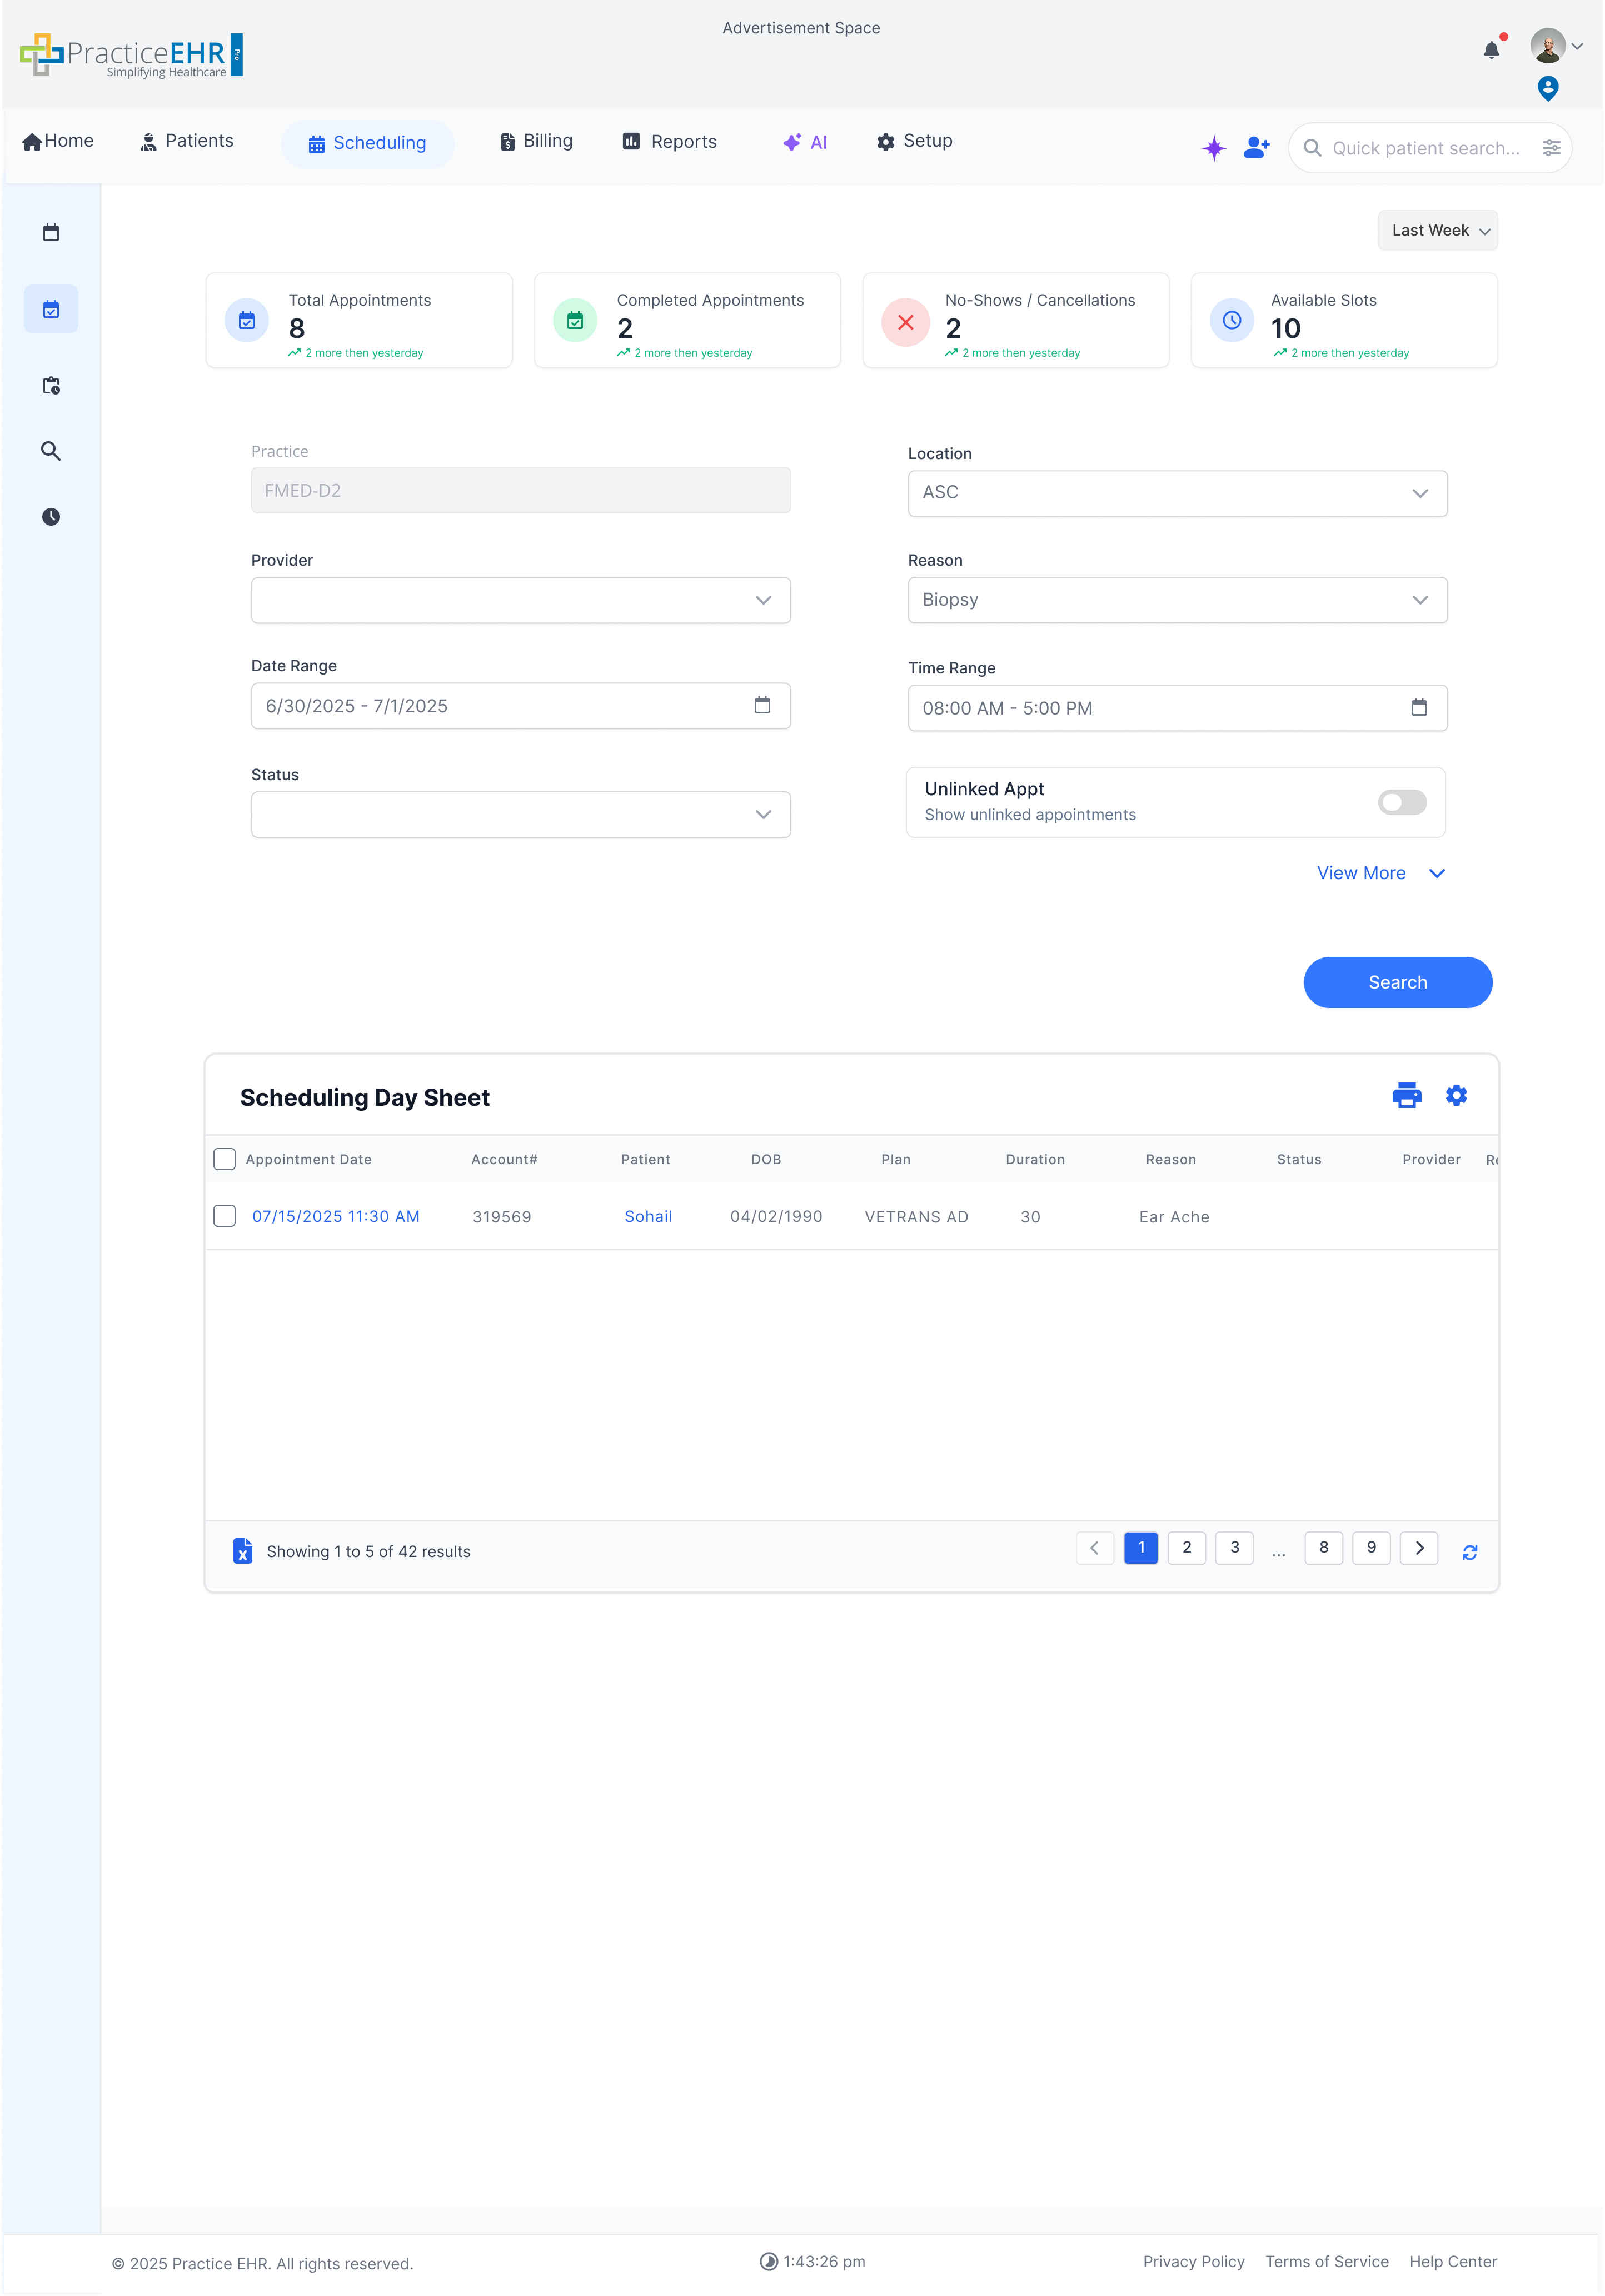
Key Features
- Daily Metrics View: Displays summary of Total Appointments, Completed, No-Shows, and Available Slots for selected period.
- Custom Filters: Dropdown allows users to change reporting window - today, last week, or last 2 weeks.
- Live Insights: Each KPI card includes trend indicators for quick performance feedback.
Interaction Guide
- Select Date Range: Use the dropdown to switch KPI context.
- Use Screenshot View: Understand layout and structure of the day sheet interface.
Provider Schedule
When user navigates to the Providers Schedule tab window, the following screen is shown.
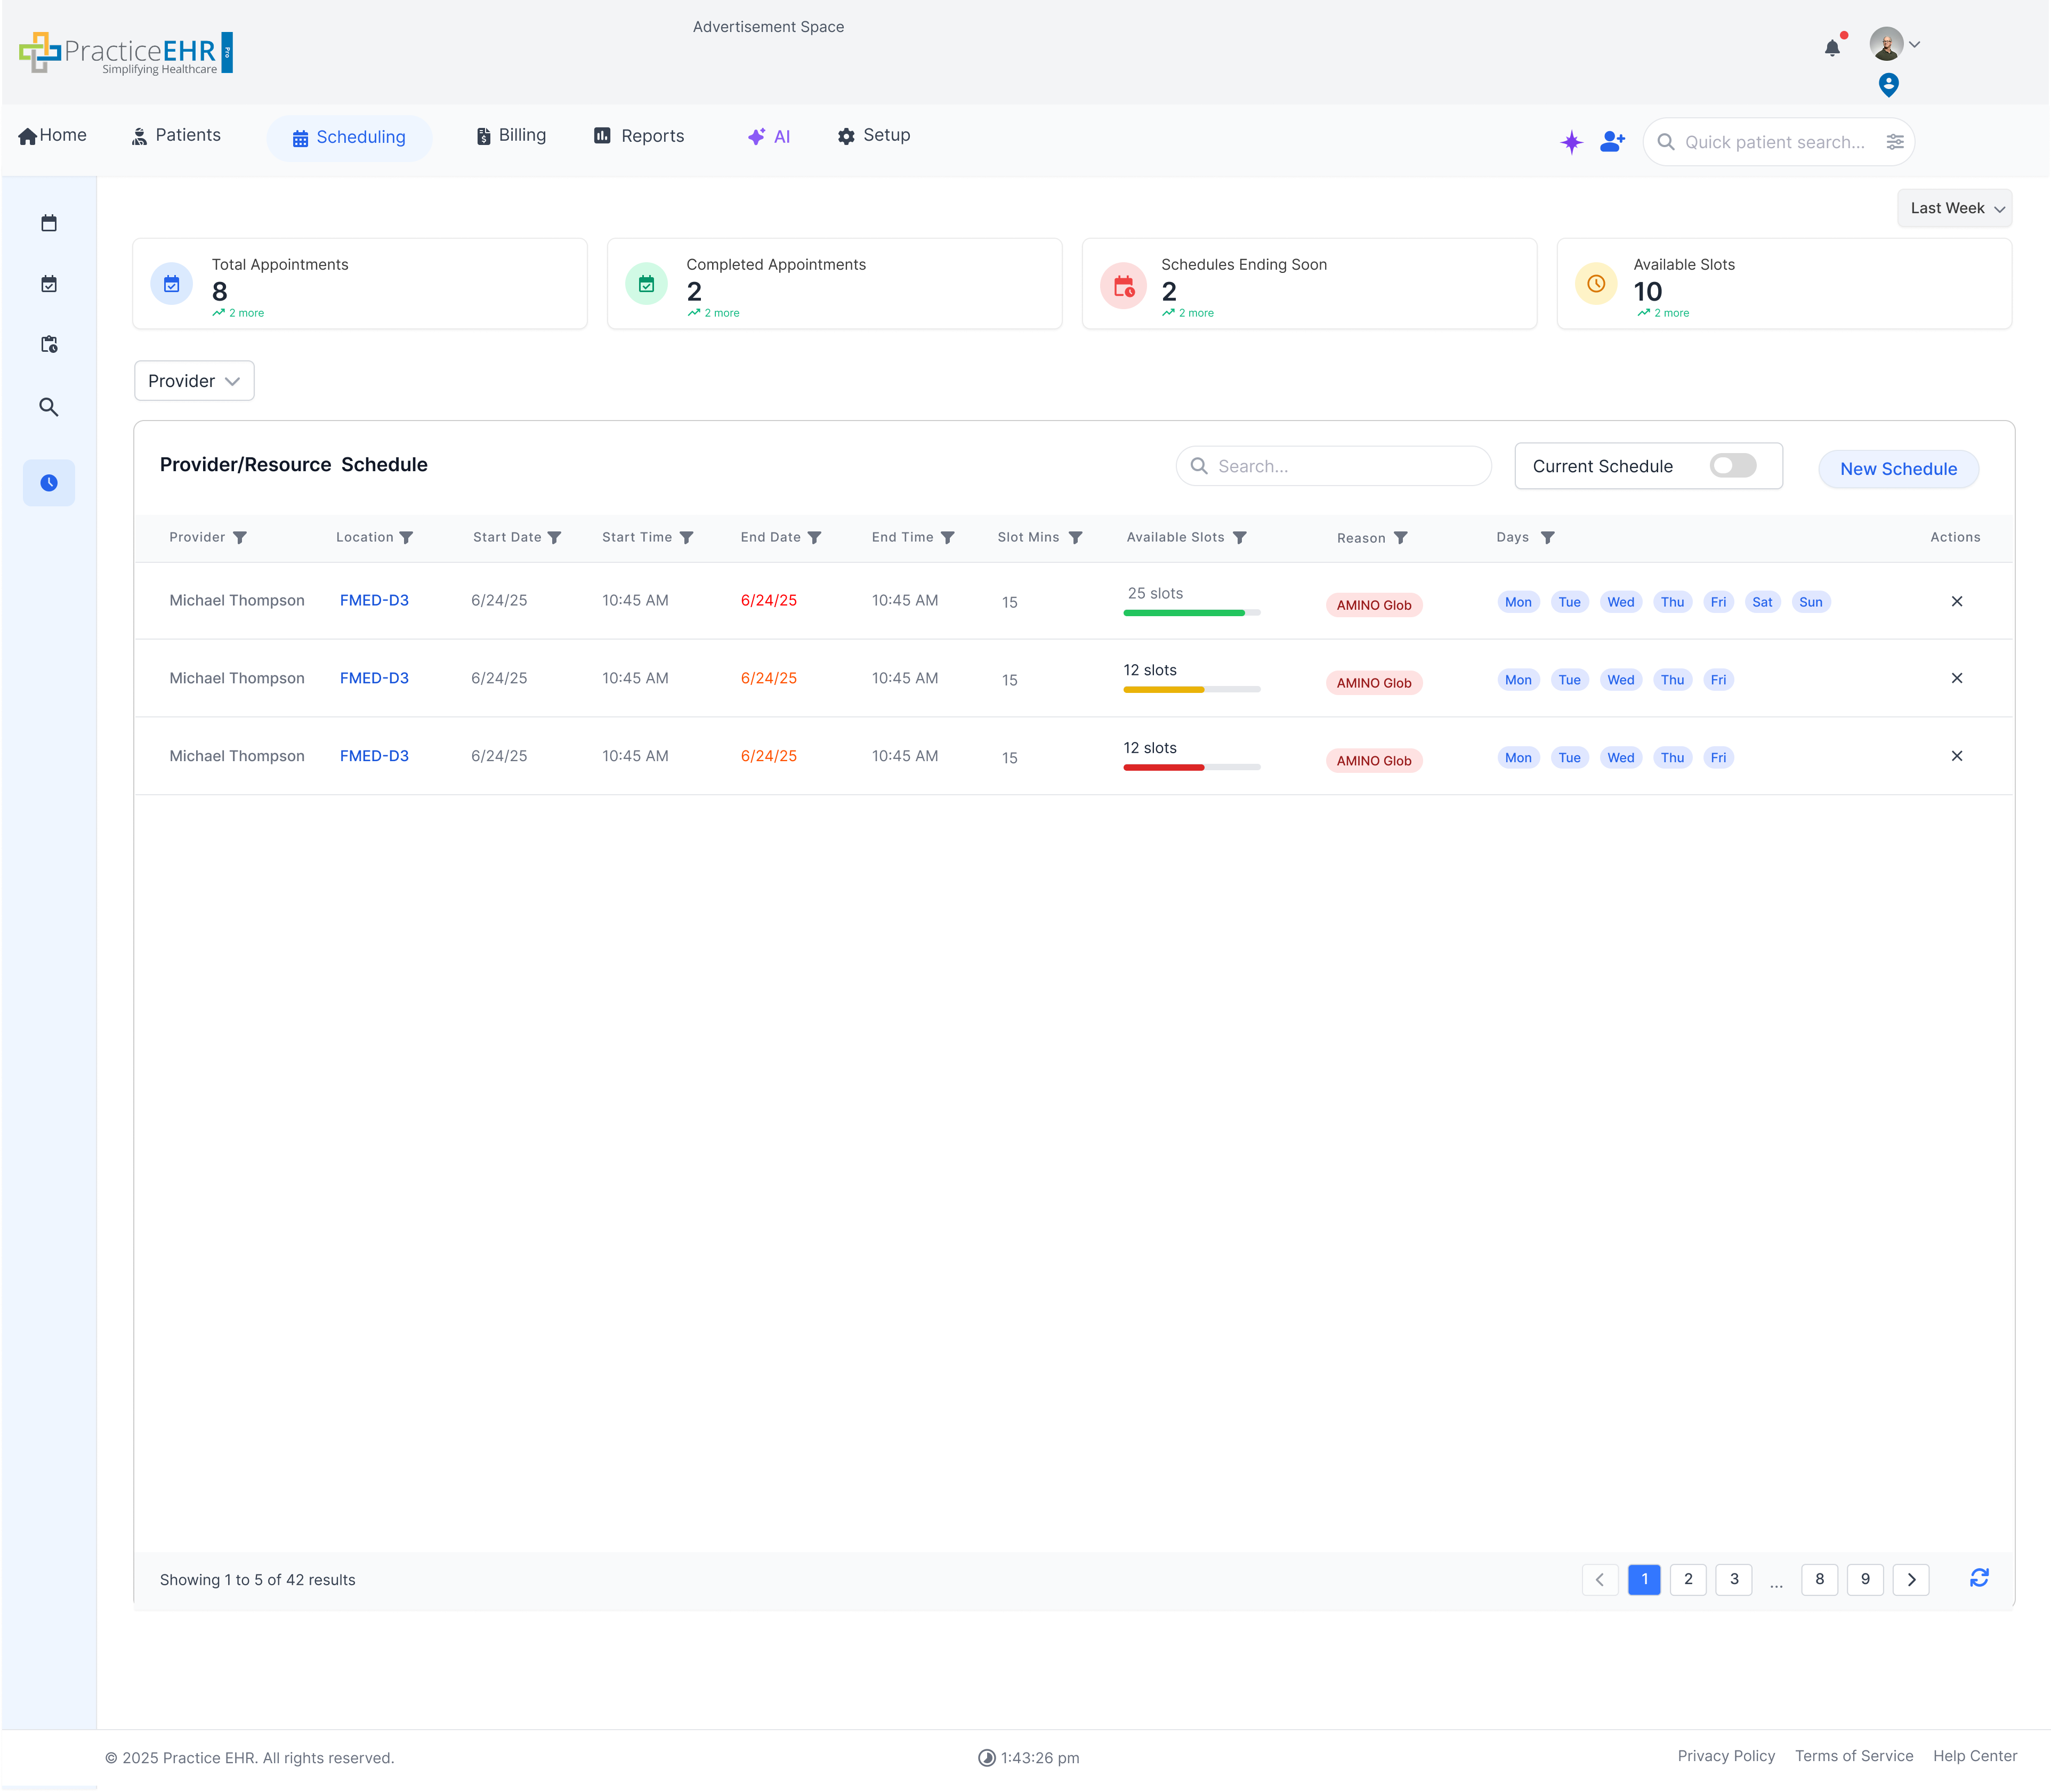
Key Features
- Availability Column: Easily view how many slots are available per day using visual color bars.
- Current Schedule: Enable the toggle to only view existing schedules.
- Color Indicators: Green shows days with above-average slot availability, yellow marks average availability, and red highlights below-average availability.
- End Date Status: The end date appears in red once it has passed, making expired schedules easy to identify.
Interaction Guide
- Hover over bars: See exact slot counts.
- Click on a day: View detailed breakdown of schedule.
- Click the location hyperlink: Open the schedule details for that location.
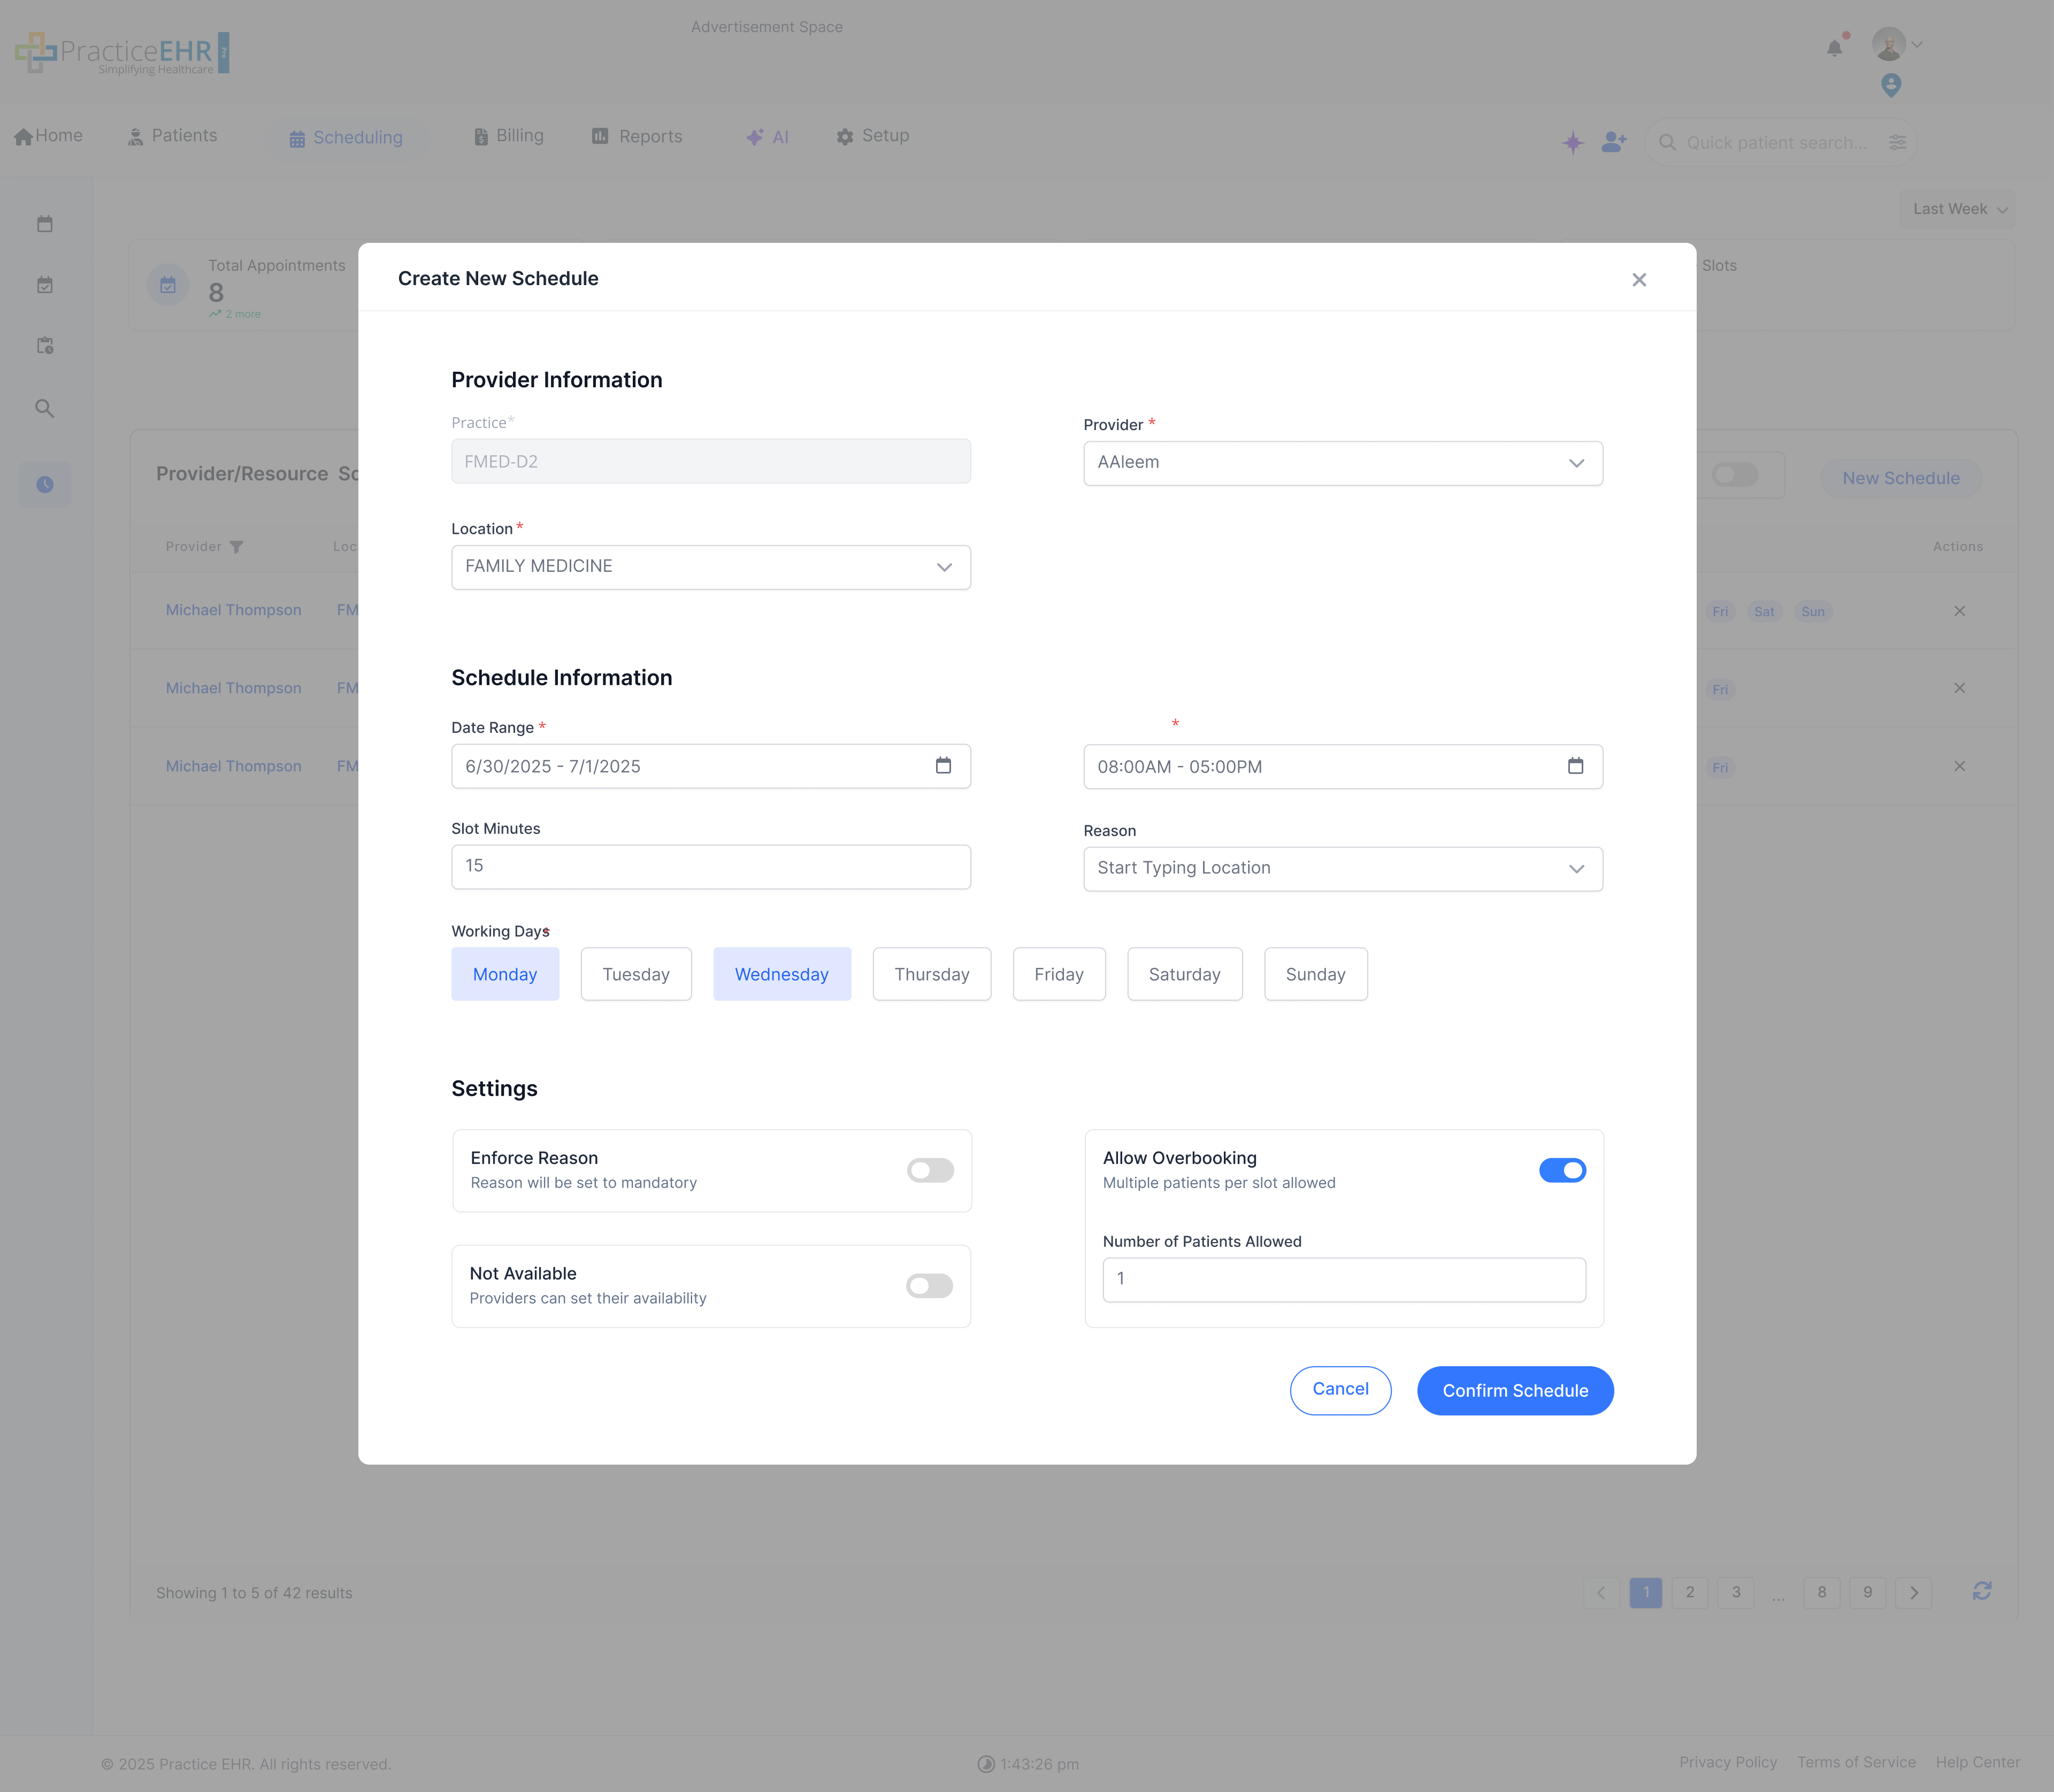
Key Features
- Full Page View: Opens in full-screen instead of modal.
- Gear Icon: Switch to batch mode via top-right icon.
- Breadcrumb Navigation: Easily go back to Provider Schedule.
Interaction Guide
- Fill form: Enter provider, location, and time.
- Watch for overlap alert: Error shown if there's a conflict.
- Use gear icon: To go to batch scheduling mode.
Tele Appointment Detail
This modal screen appears when a user clicks on a Tele Appointment from the calendar, allowing review of details and initiation of the video session.
Key Features
- Start Session: Large button to initiate the secure telehealth video call.
- Billing Information: Includes fields for **Plan Copy** and **Patient Charges** for quick review.
- Patient Comments: Dedicated field for any specific notes regarding the appointment.
Interaction Guide
- Click Appointment Card: Opens this detail modal from a calendar view.
- Start Session: Launches the video platform for the televisit.
- Proceed Next: Likely used to navigate to the next step in the clinical workflow (e.g., EMR charting).
Batch Schedule
When user selects batch schedule from the gear icon in Create New Schedule, the following screen is displayed.
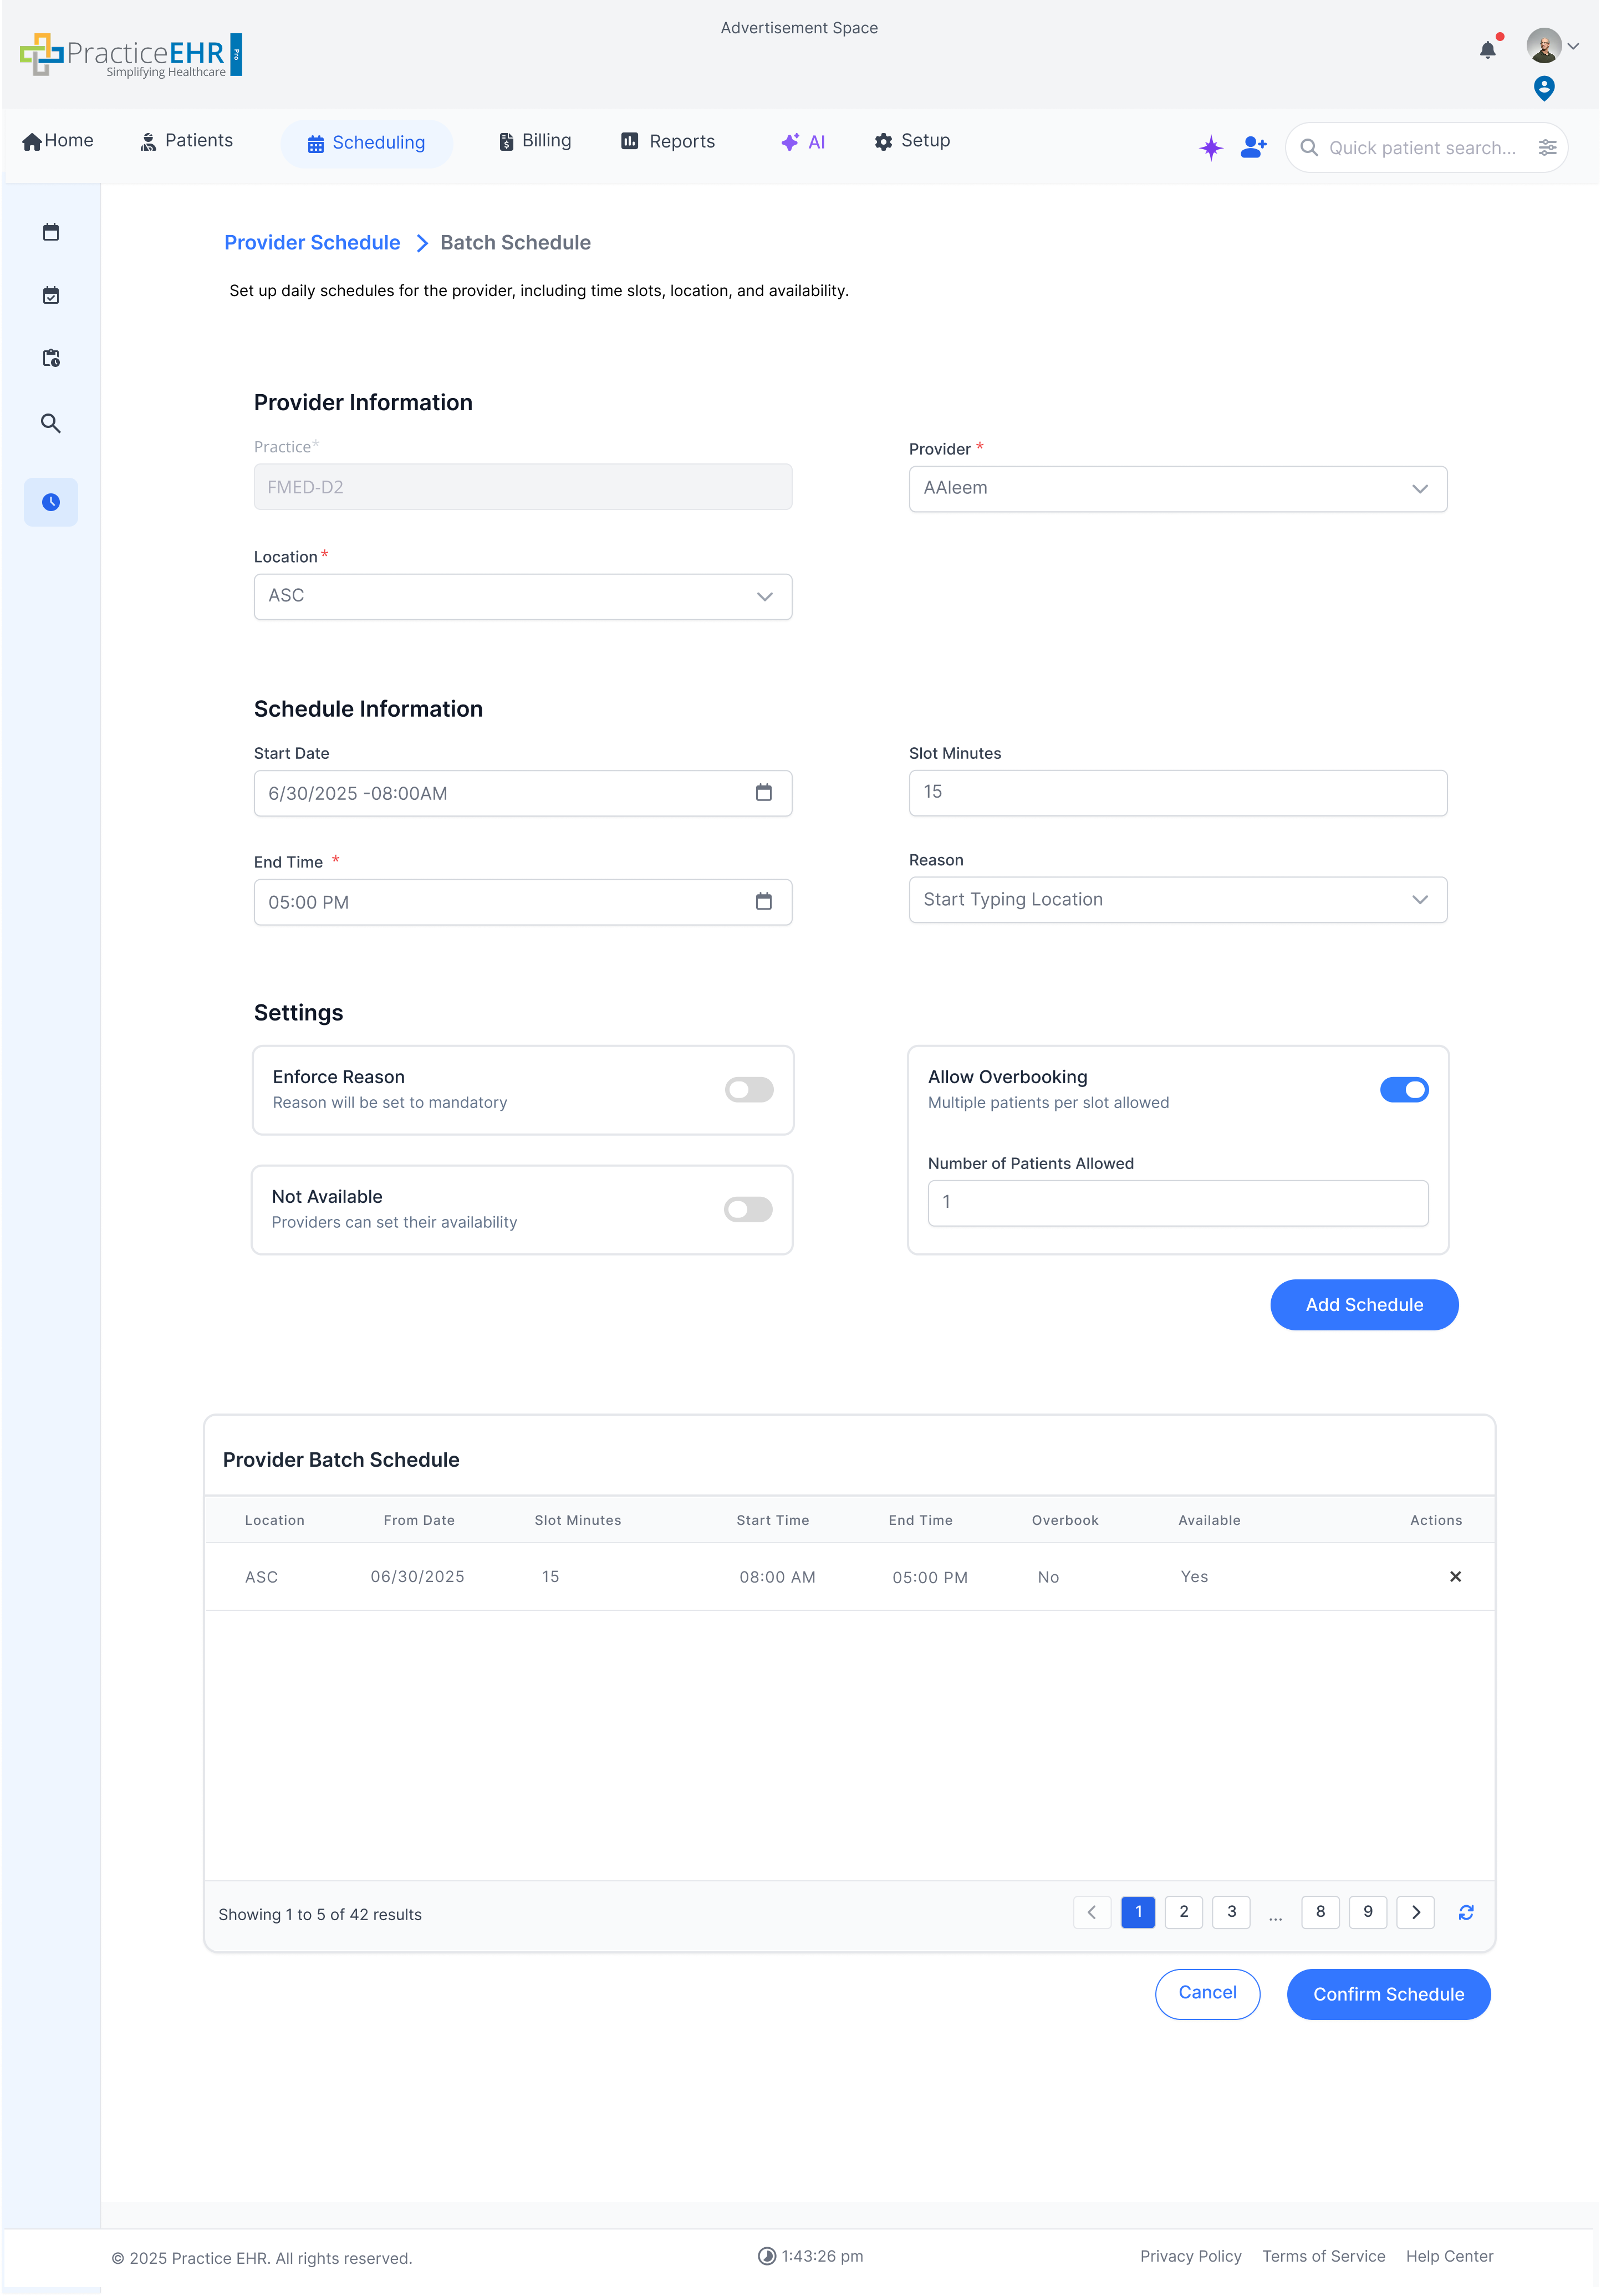
Key Features
- Bulk Scheduling: Schedule multiple days in a single action.
- Template Support: Use saved templates for recurring schedules.
Interaction Guide
- Select date range: Choose range for applying schedule.
- Define time slots: Apply consistent time ranges per day.
Week View Multi Location Multi Provider
A weekly view that shows multiple providers and their locations together when no specific location is selected.
Description
- When the user does not select any location, the schedule shows all locations for all selected providers in a single combined view.
- In multi-location mode, the slot background color indicates the location, making it easy to see where each slot belongs at a glance.
- The left border of the provider's schedule shows the enforced reason color whenever a reason is enforced.
- For each provider, multiple locations can be scrolled from top to bottom, so the user can see all location-specific schedules stacked vertically.
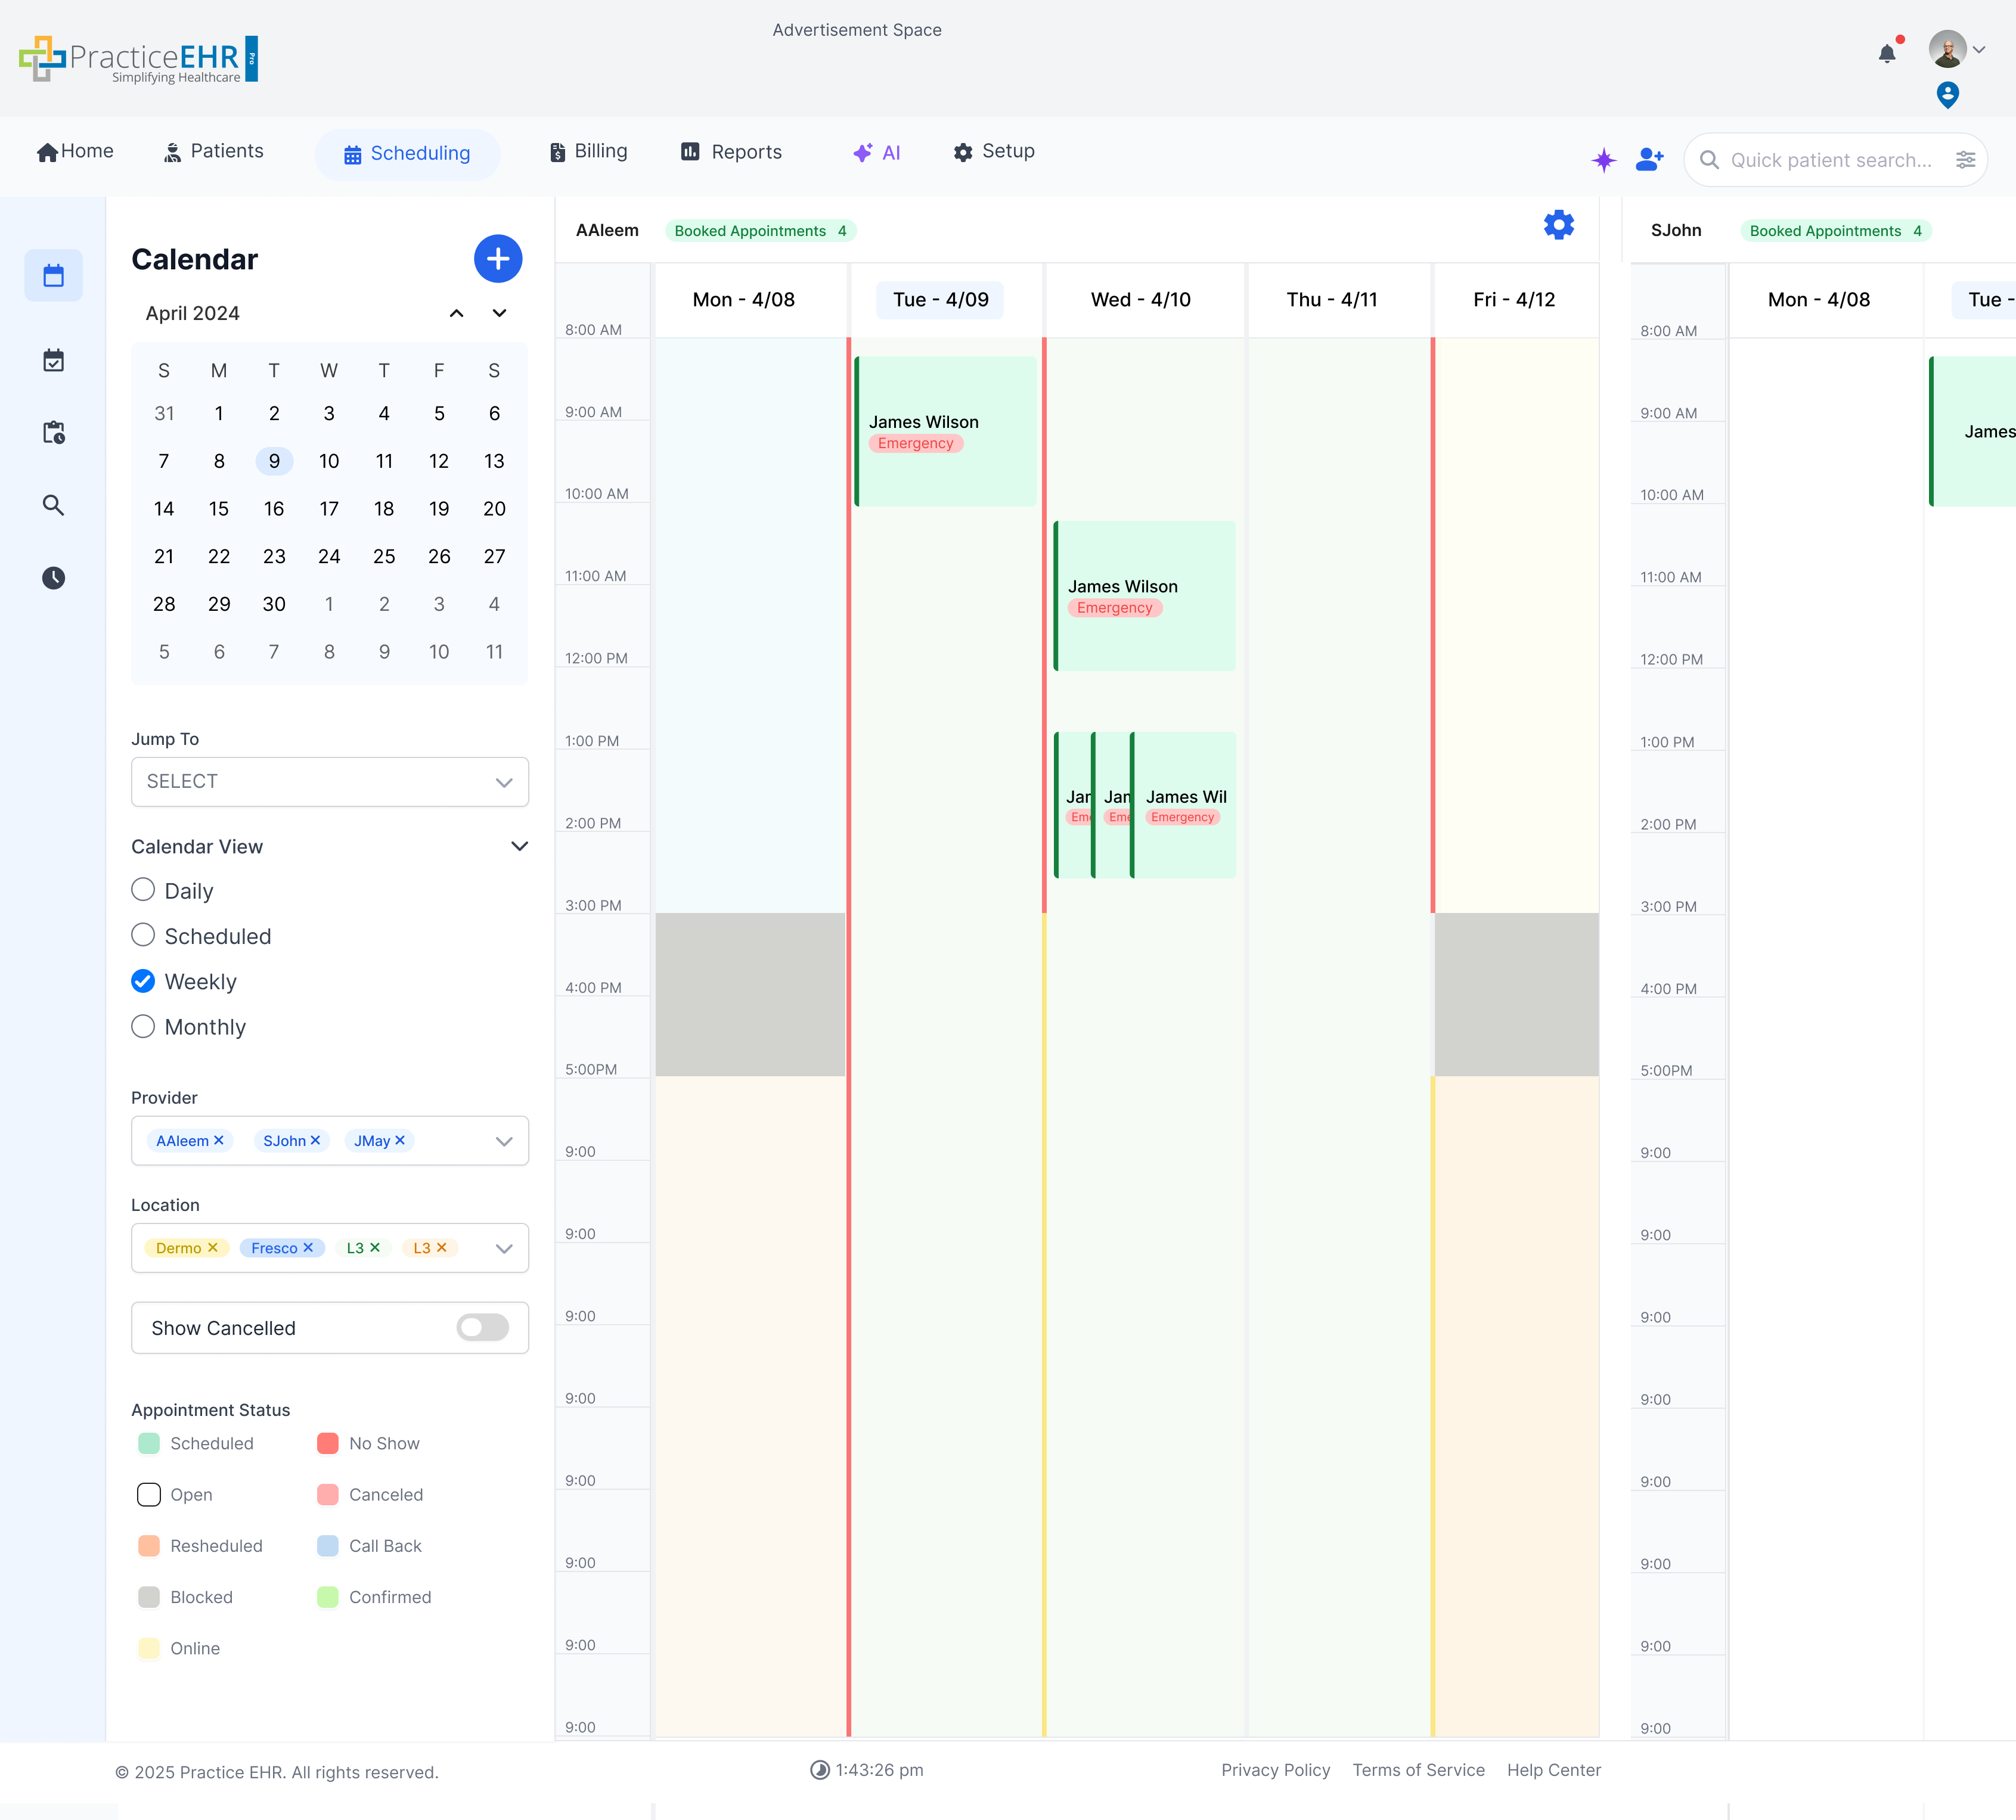
Week View Multi Provider
A comprehensive view showing multiple providers schedules over the course of a week.

Description
- This view allows the coordination of multiple providers across a weekly timeline.
- When multi-location is enabled, the slot background color shows the location for that schedule.
- The left border of the provider's schedule shows the enforced reason color whenever a reason is enforced.
- Columns are arranged by day, with providers grouped for quick comparison across the week.
Scheduled View Multi Location Multi Provider
In case when the user does not select any location, the whole schedule will be shown for all selected providers. Providers can be scrolled from left to right, and multi locations for each provider can be scrolled from top to bottom.
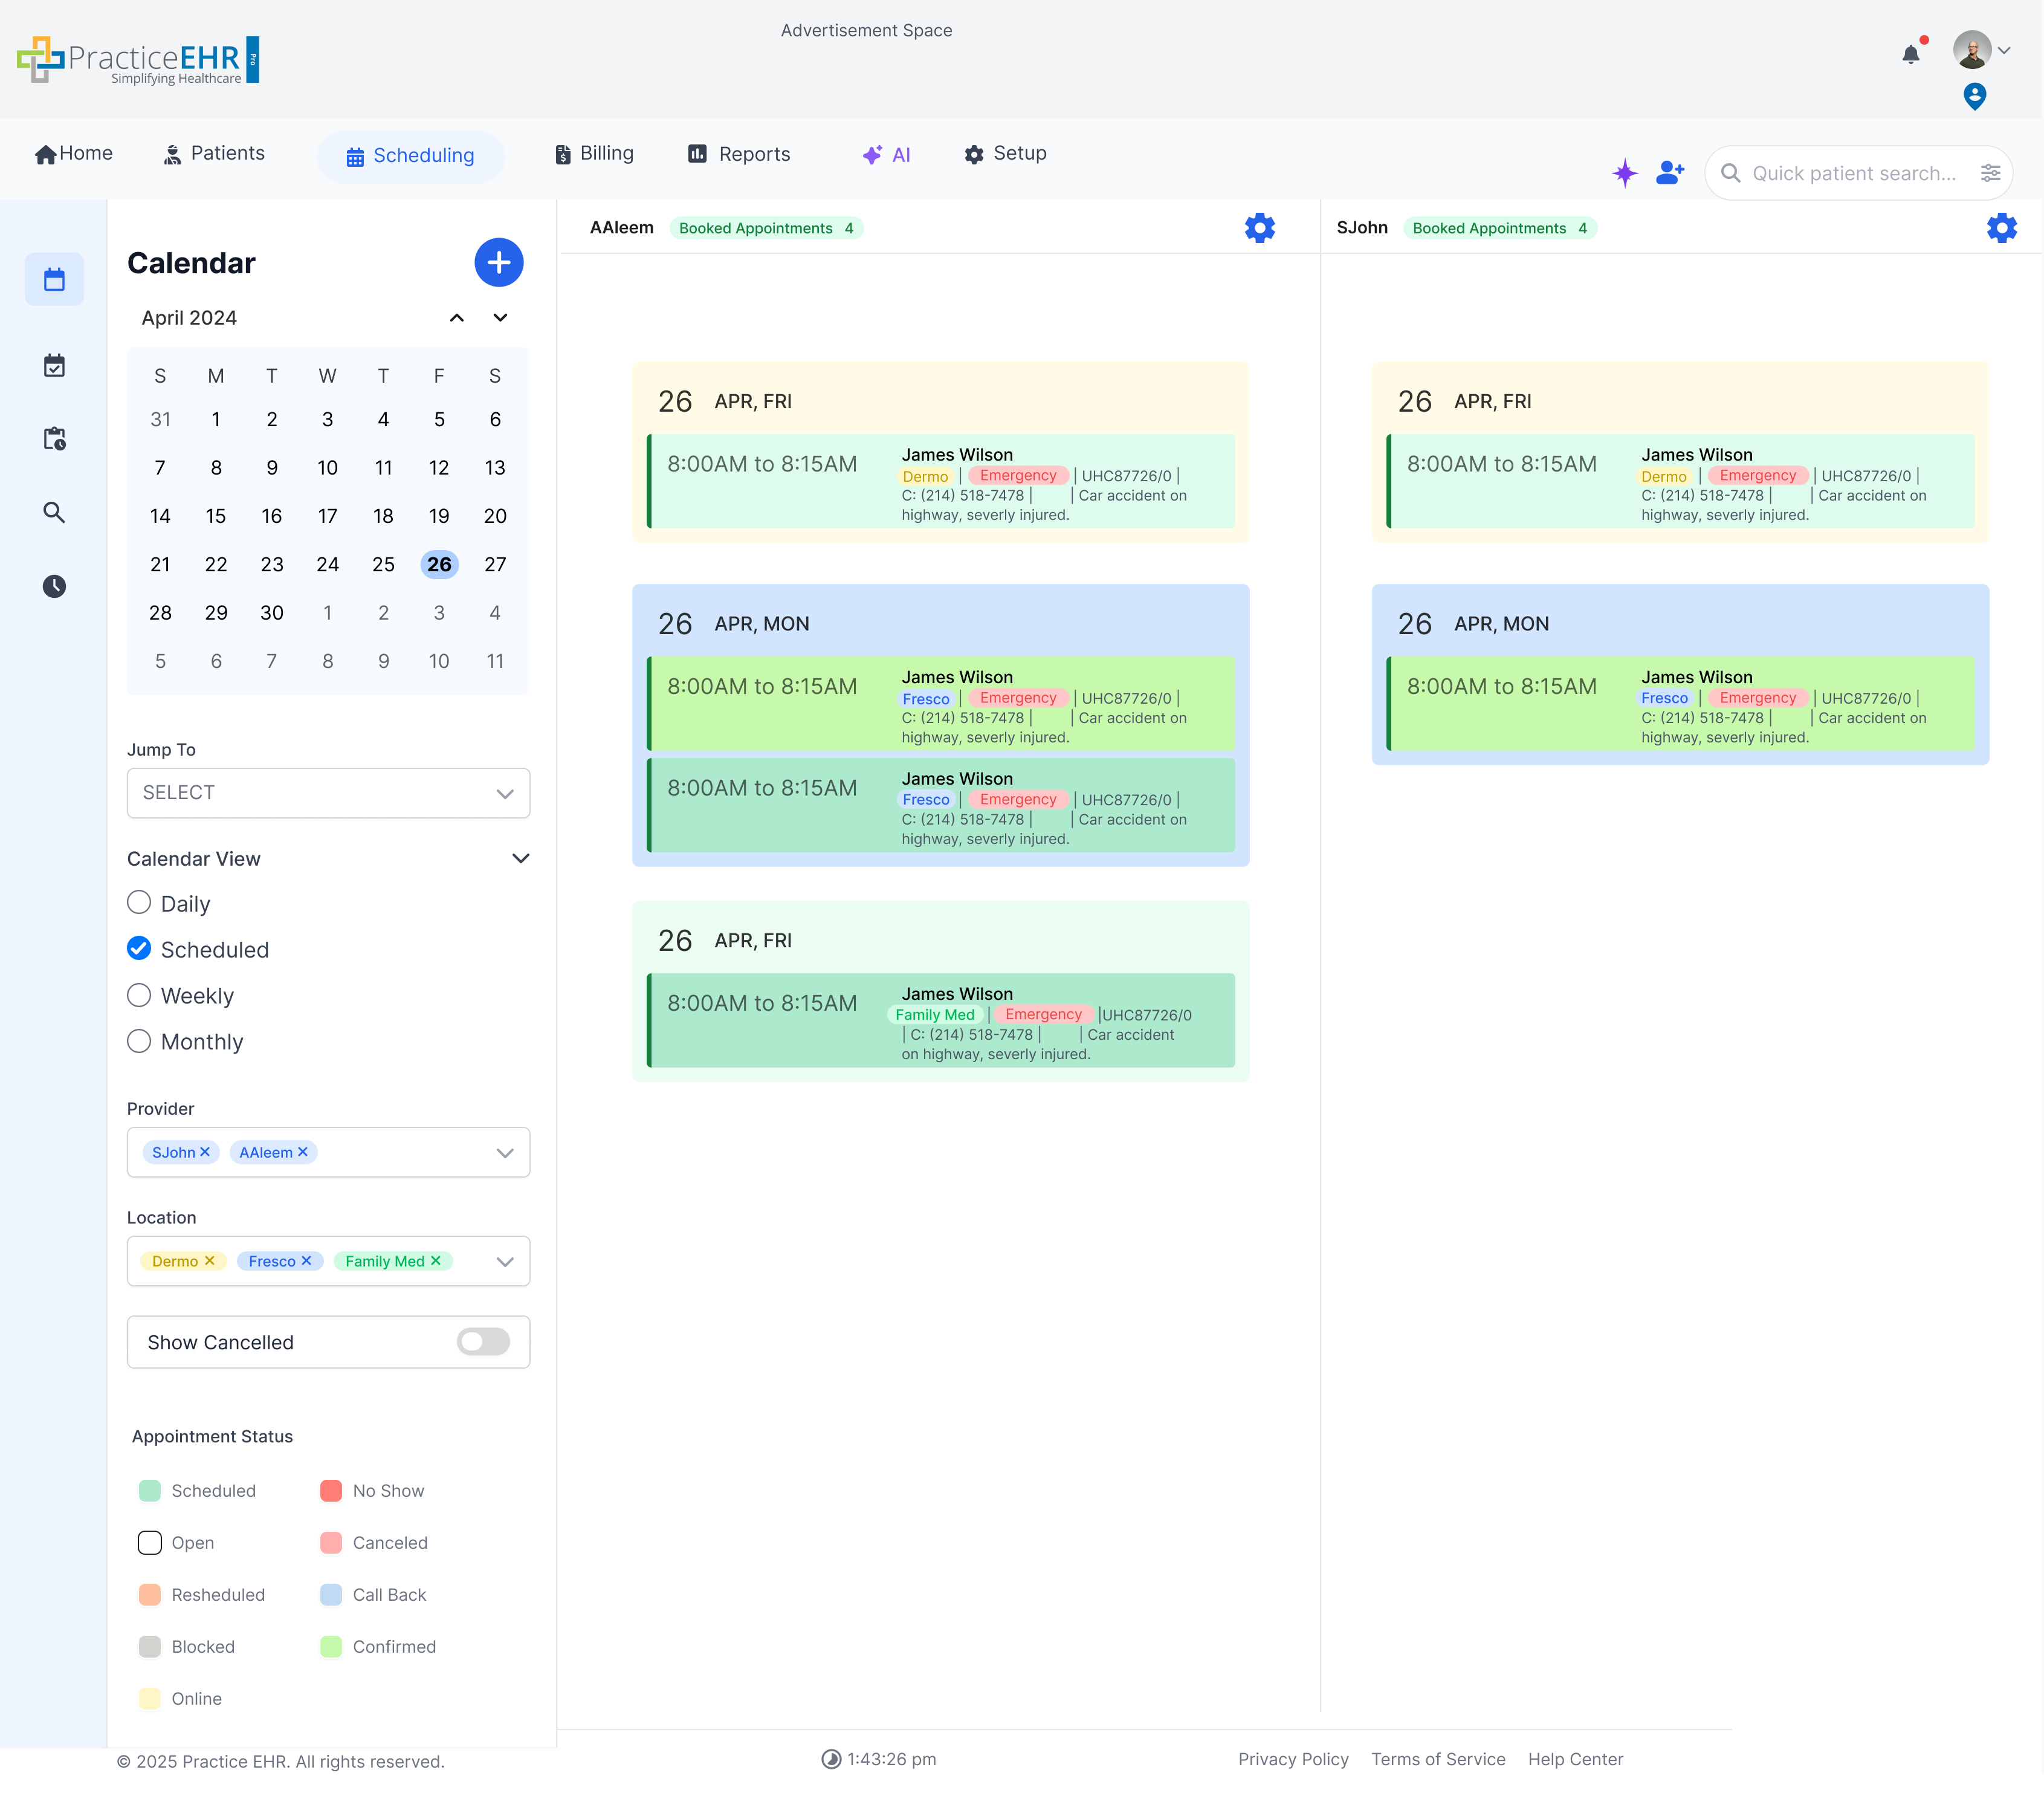
Description
- When the user does not select any location, the schedule shows all locations for all selected providers in a single combined view.
- In multi-location mode, the slot background color indicates the location, so users can immediately tell which location each slot belongs to.
- The left border of the provider's schedule shows the enforced reason color whenever a reason is enforced.
- For each provider, multiple locations can be scrolled from top to bottom, so all location-specific schedules are visible vertically.
Daily View Multi Location Multi Provider
In case when the user does not select any location, the whole schedule will be shown for all selected providers. Providers can be scrolled from left to right, and multi locations for each provider can be scrolled from top to bottom.
Description
- When the user does not select any location, the schedule shows all locations for all selected providers in a single combined view.
- In multi-location mode, the slot background color indicates the location, so users can immediately tell which location each slot belongs to.
- The left border of the provider's schedule shows the enforced reason color whenever a reason is enforced.
- For each provider, multiple locations can be scrolled from top to bottom, so all location-specific schedules are visible vertically.
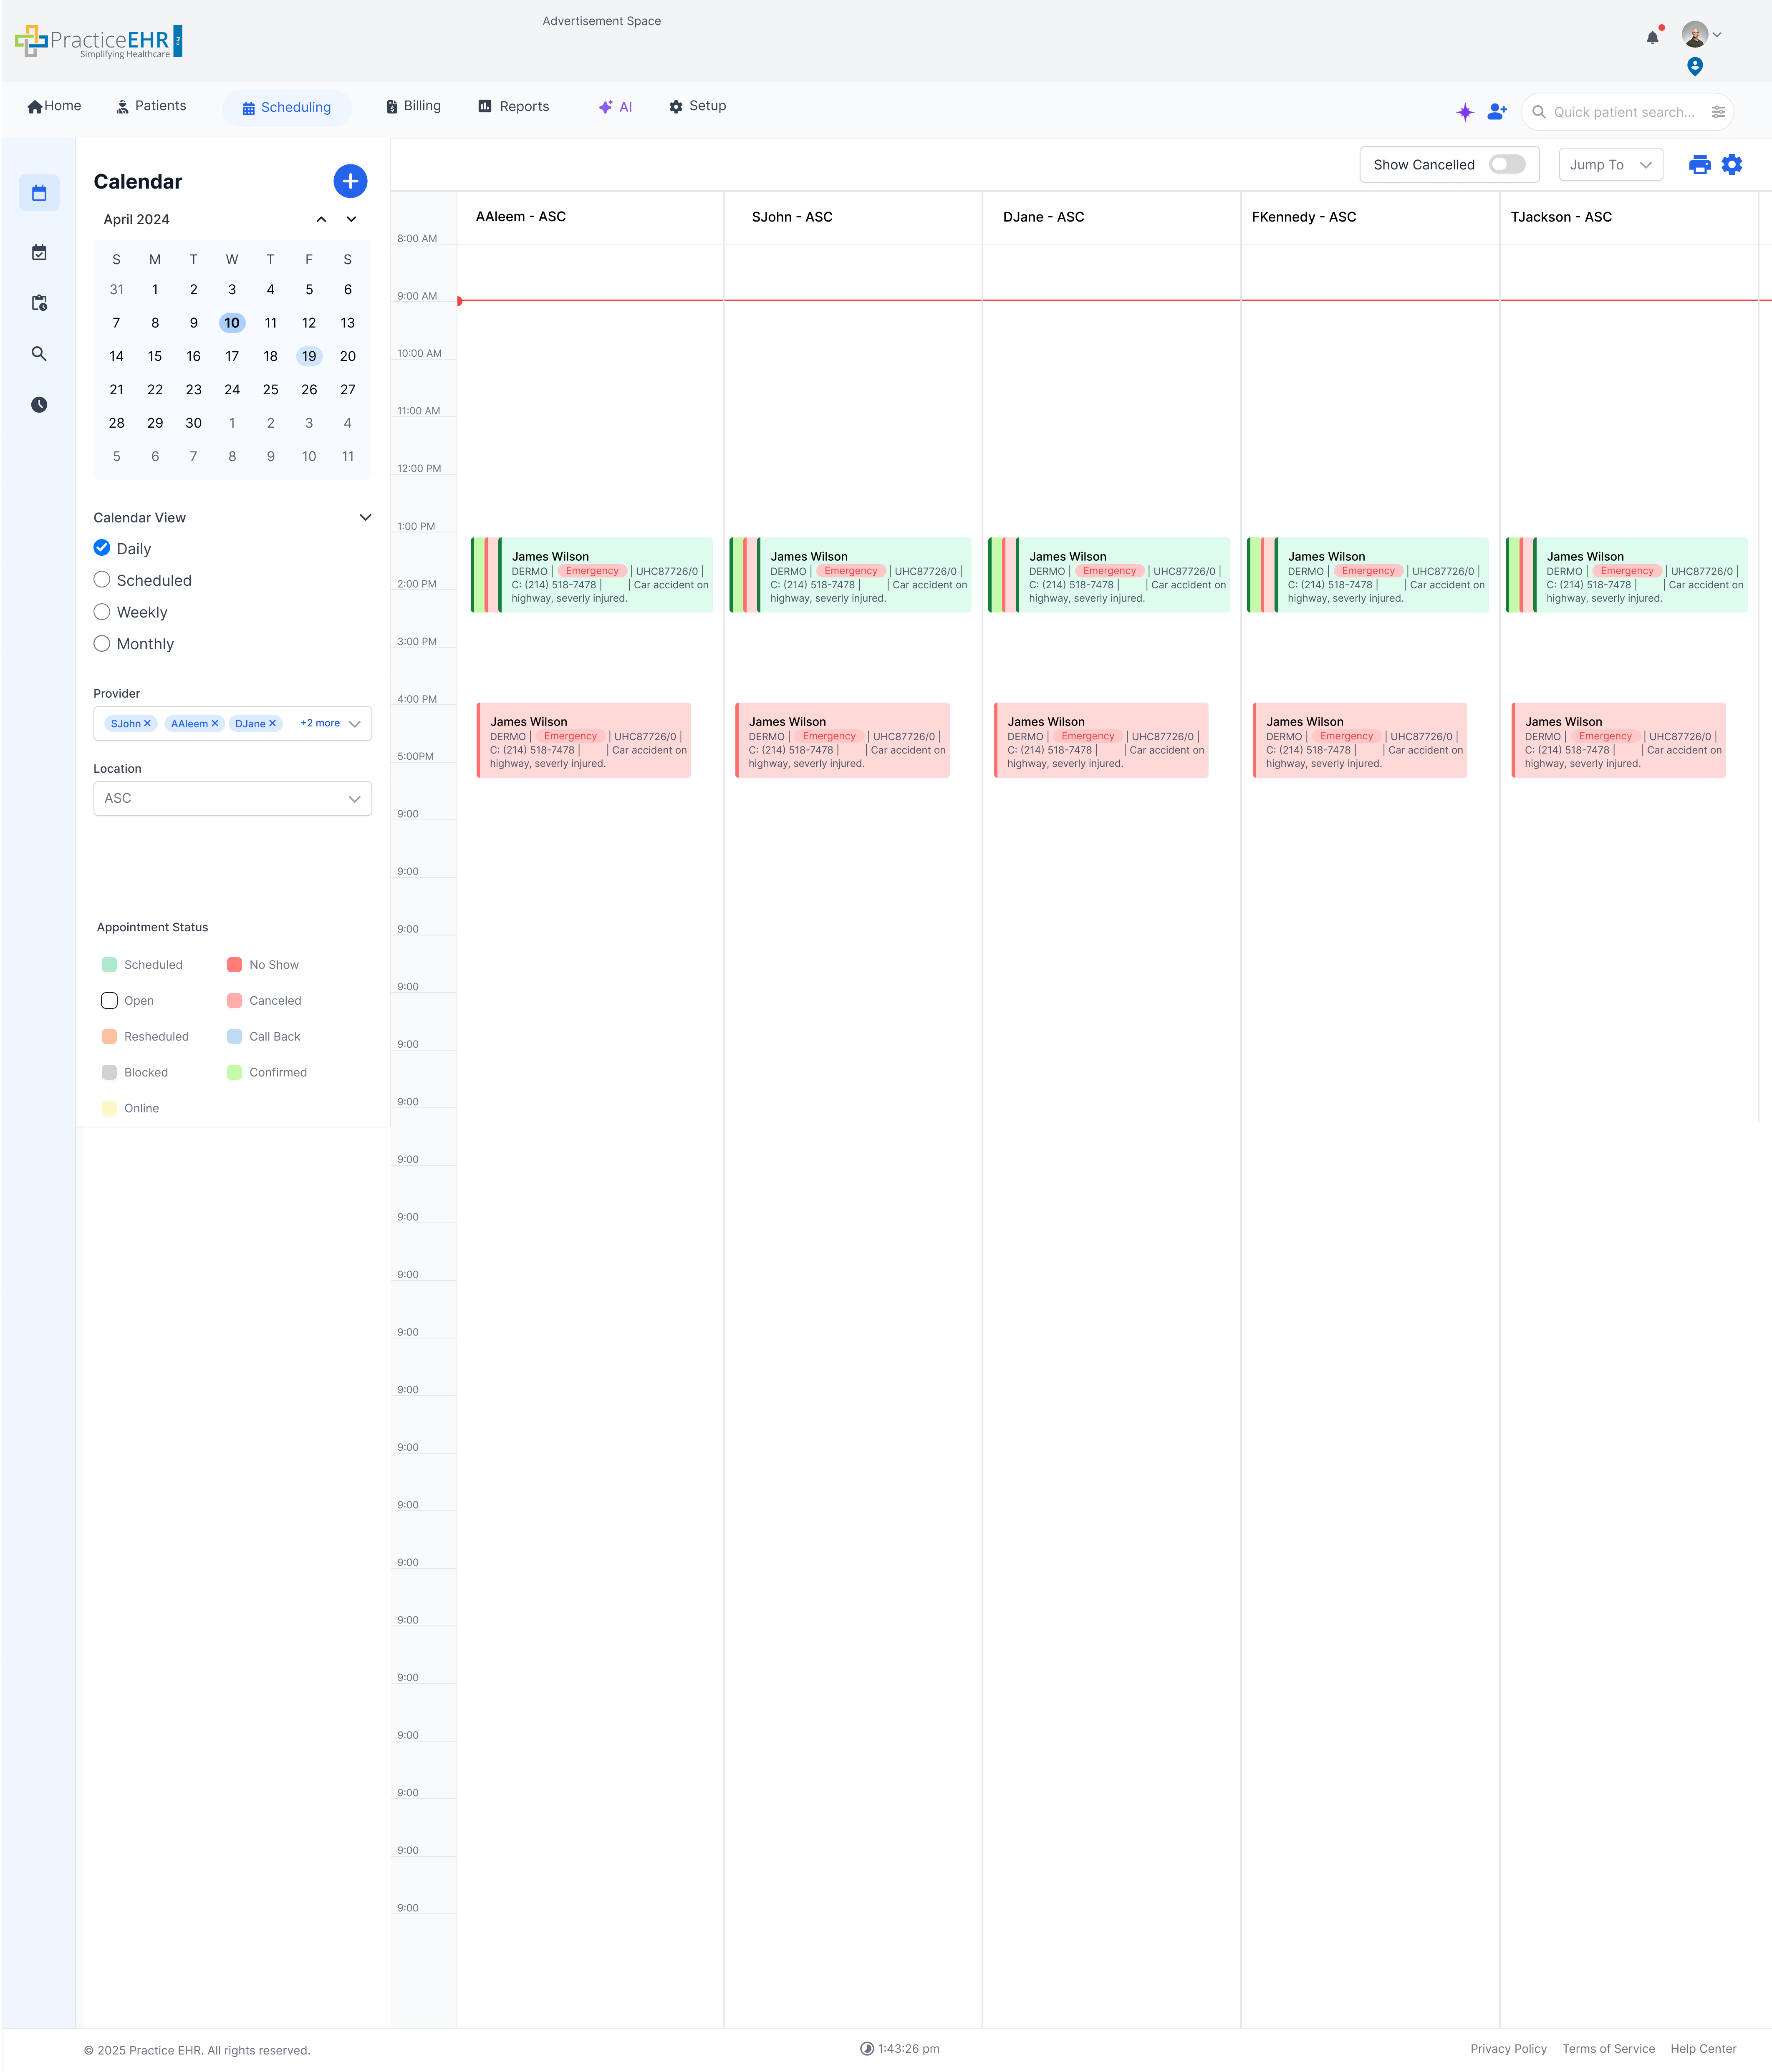
Daily View Multi Provider
Compare schedules side-by-side for multiple providers on a single day.
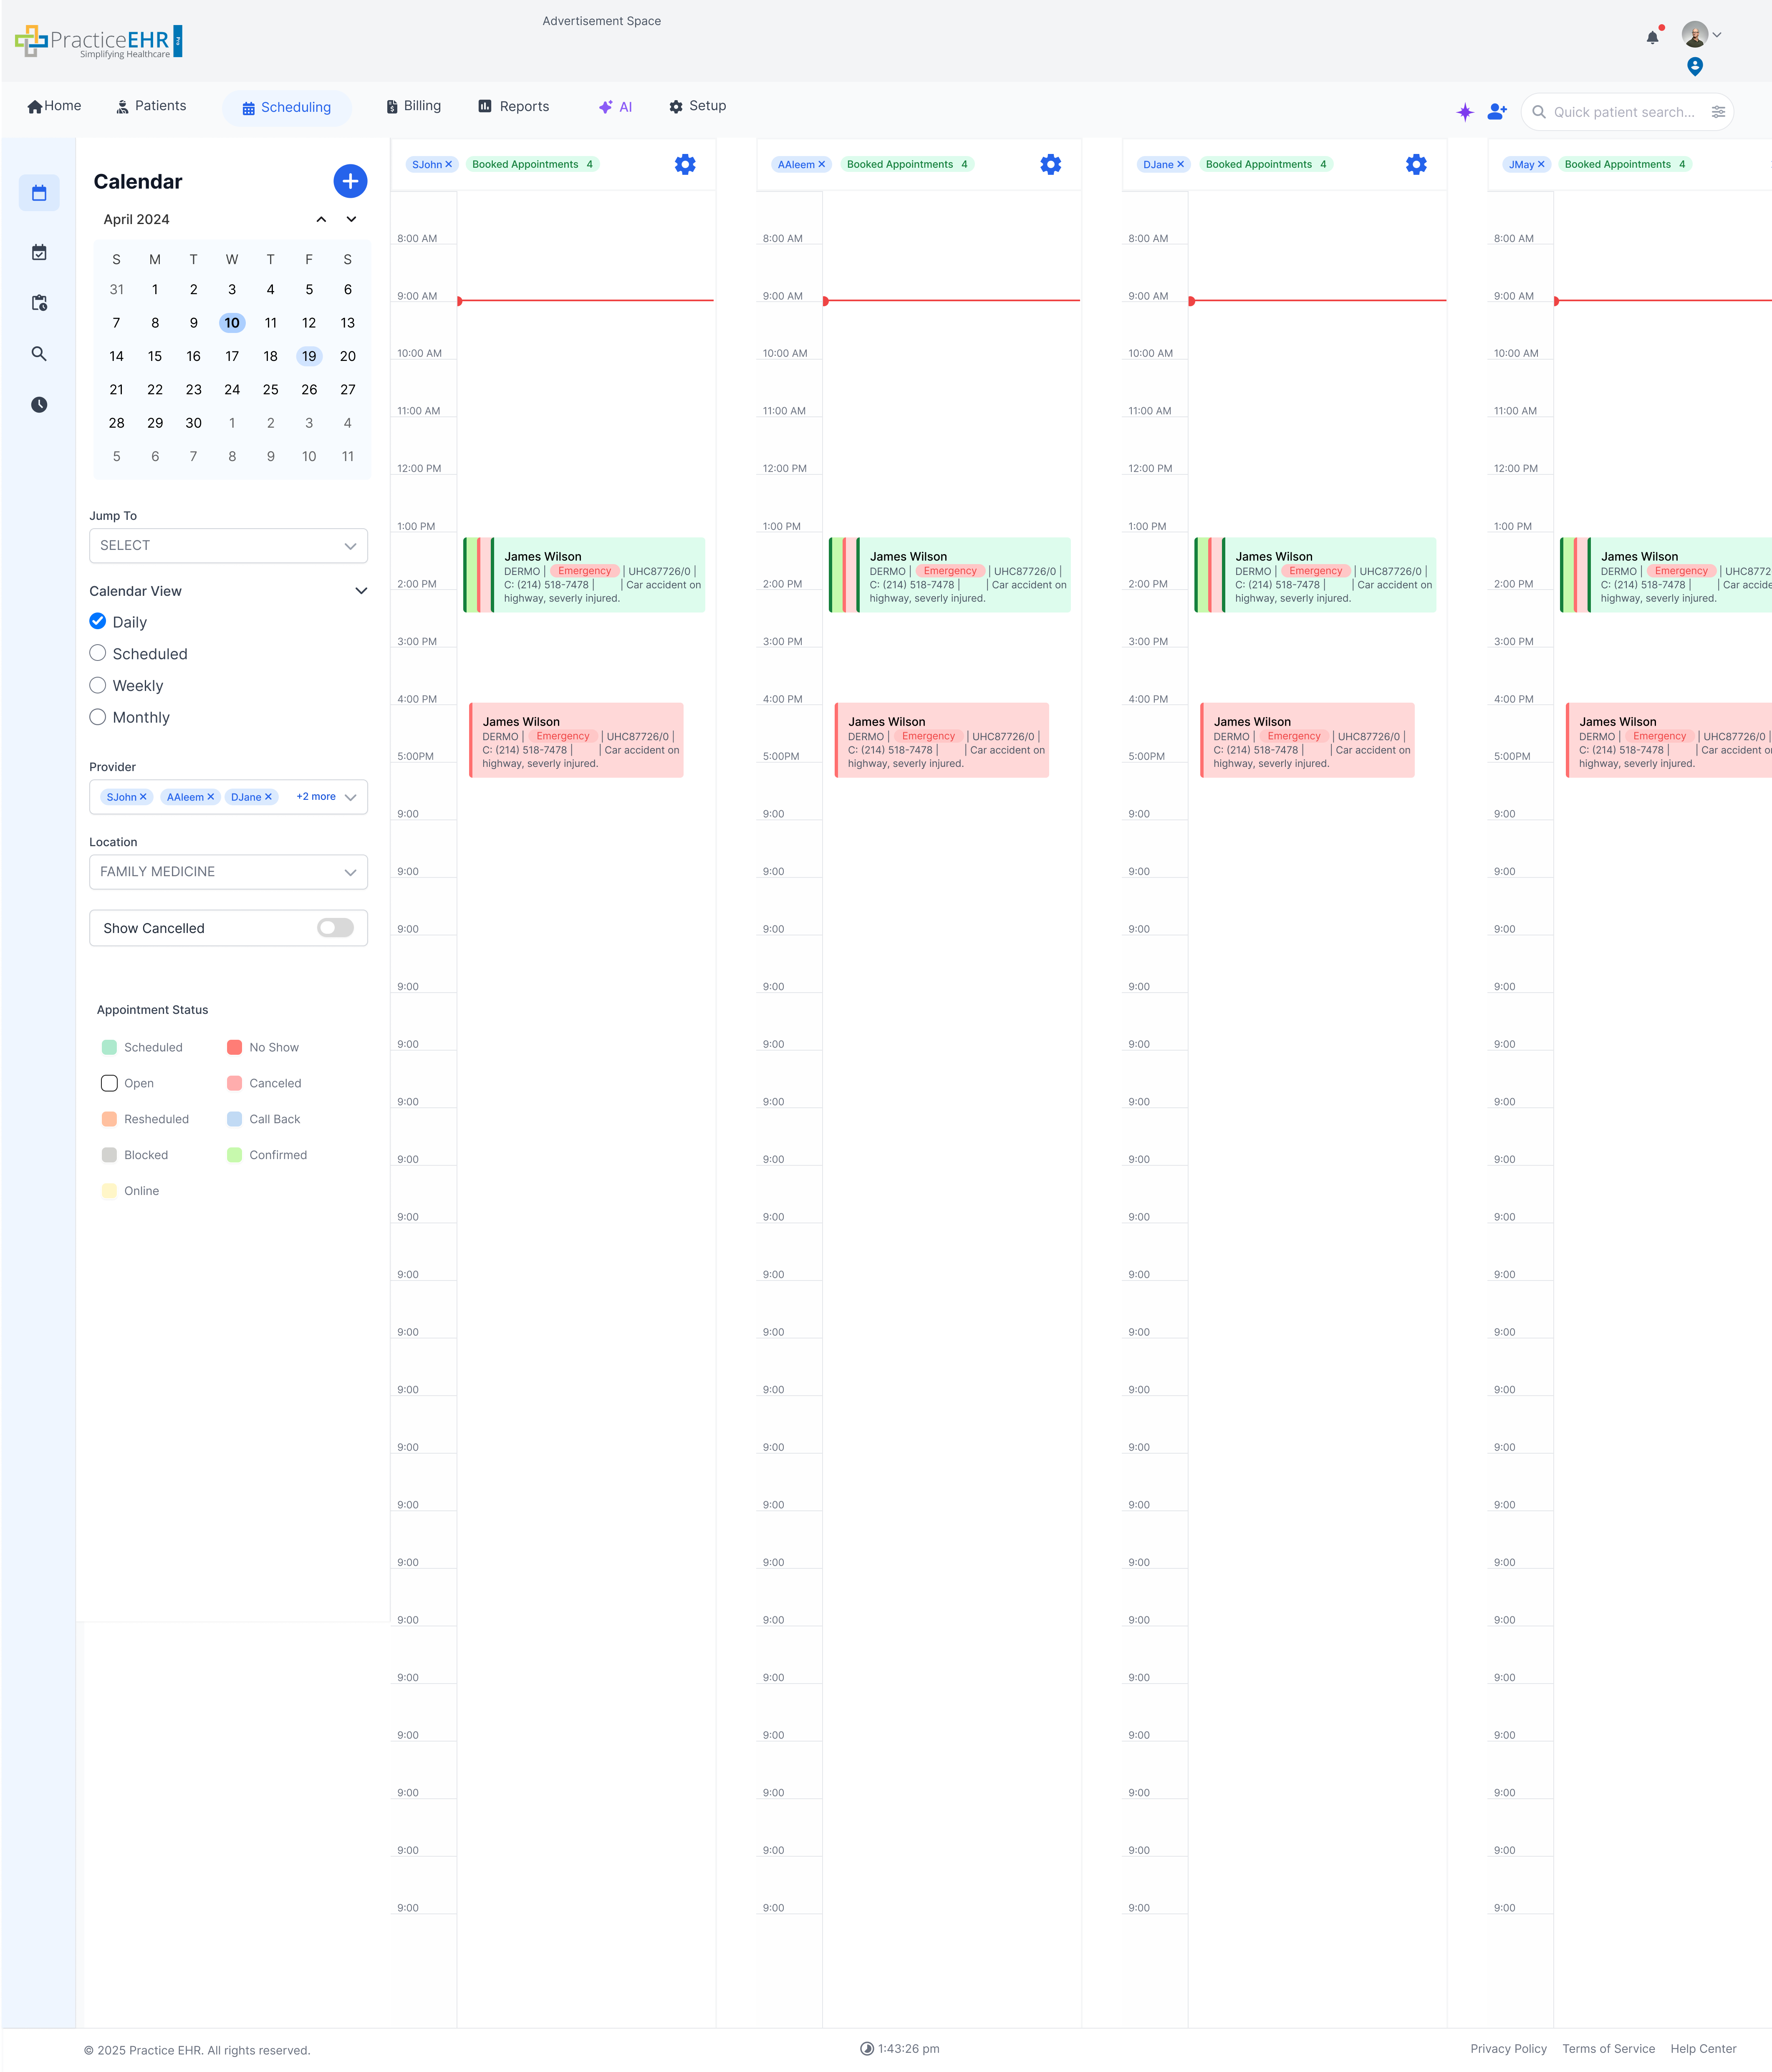
Key Features
- Side-by-Side Columns: Each provider gets a dedicated column, making it easy to spot gaps and overlaps.
- Resource Allocation: Quickly move appointments between providers to balance workload.
- Reason Highlighting: The left border of the provider's schedule shows the enforced reason color whenever a reason is enforced.
- Location Highlighting: When multi-location is enabled, the slot background color shows the location for that schedule.
Block Schedule
Restrict specific time slots or days to prevent appointments from being booked.
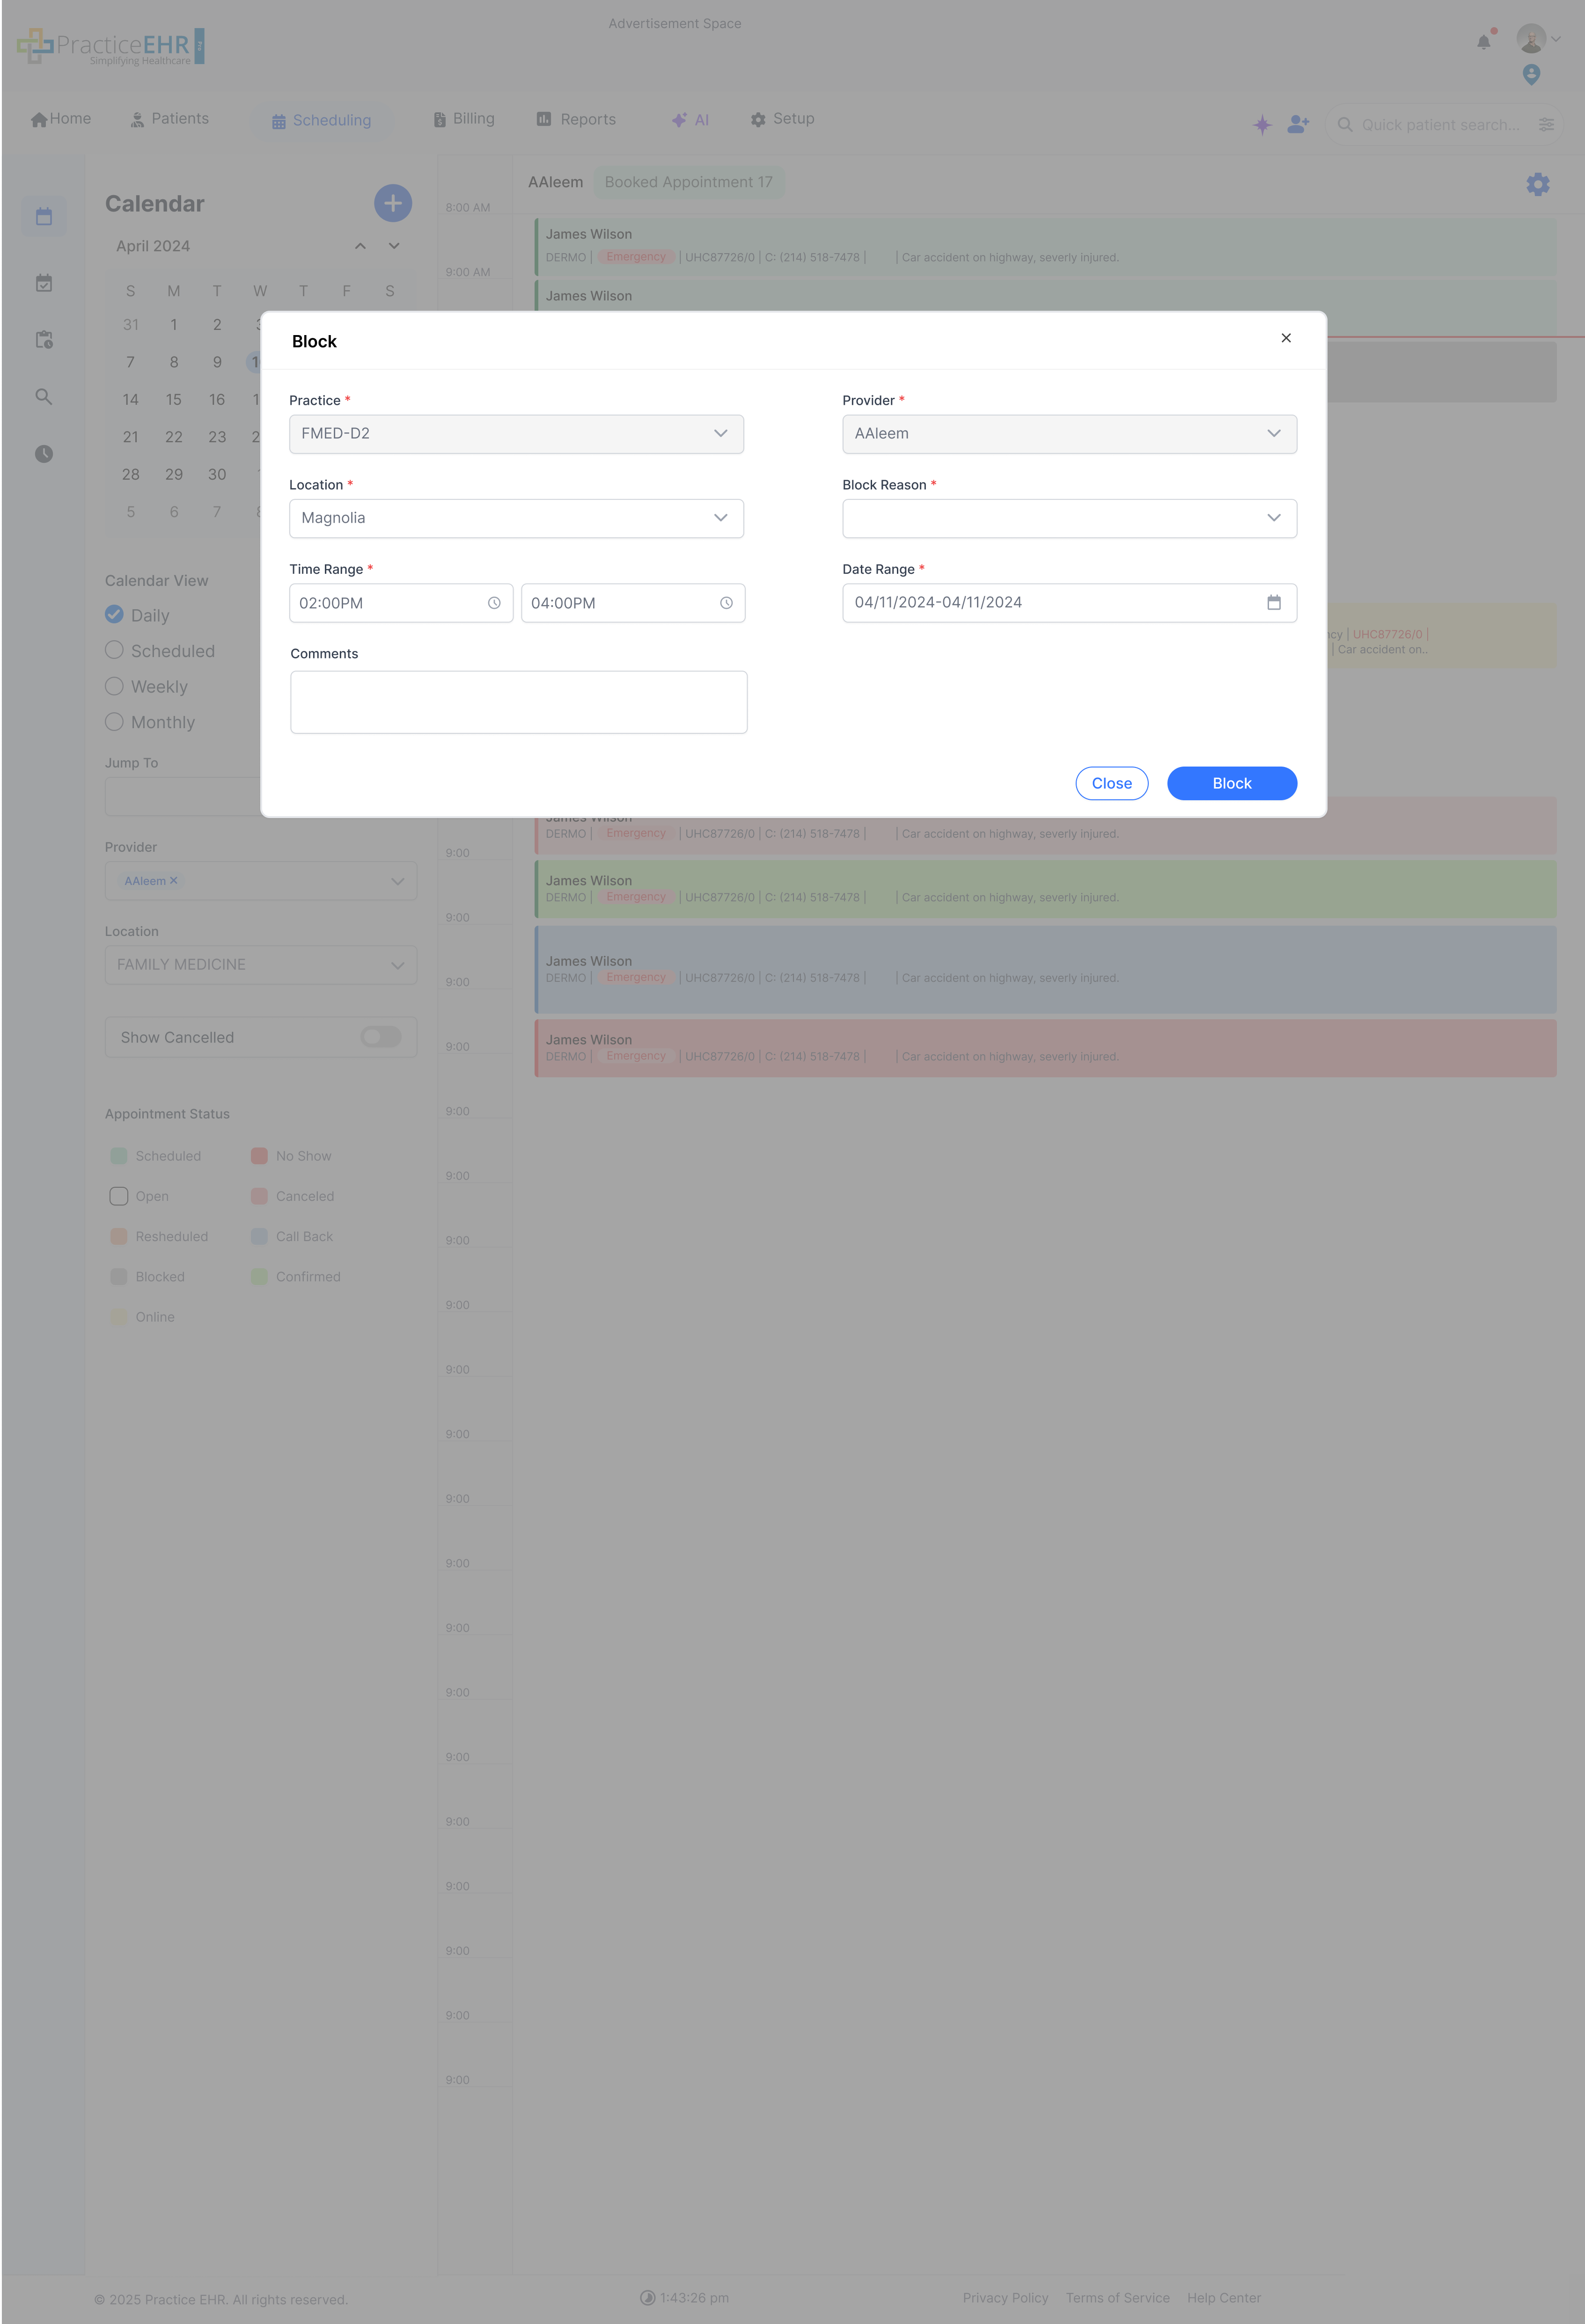
Interaction Guide
- Trigger: Accessed via the "Block Slot" option in the calendar gear Options.
- Fields:
- Select Practice, Provider, and Location.
- Define the Block Reason (e.g., Meeting, Surgery, Personal).
- Set the Time Range and Date Range.
Unblock Schedule
Remove restrictions to make time slots available for booking again.

Description
- Function: Used to open up previously blocked time.
- Confirmation: The user must confirm the Provider, Location, Time, and Date range they wish to unblock.
- Action: Clicking the blue "Unblock" button removes the visual block from the calendar and allows appointments to be scheduled in that slot immediately.
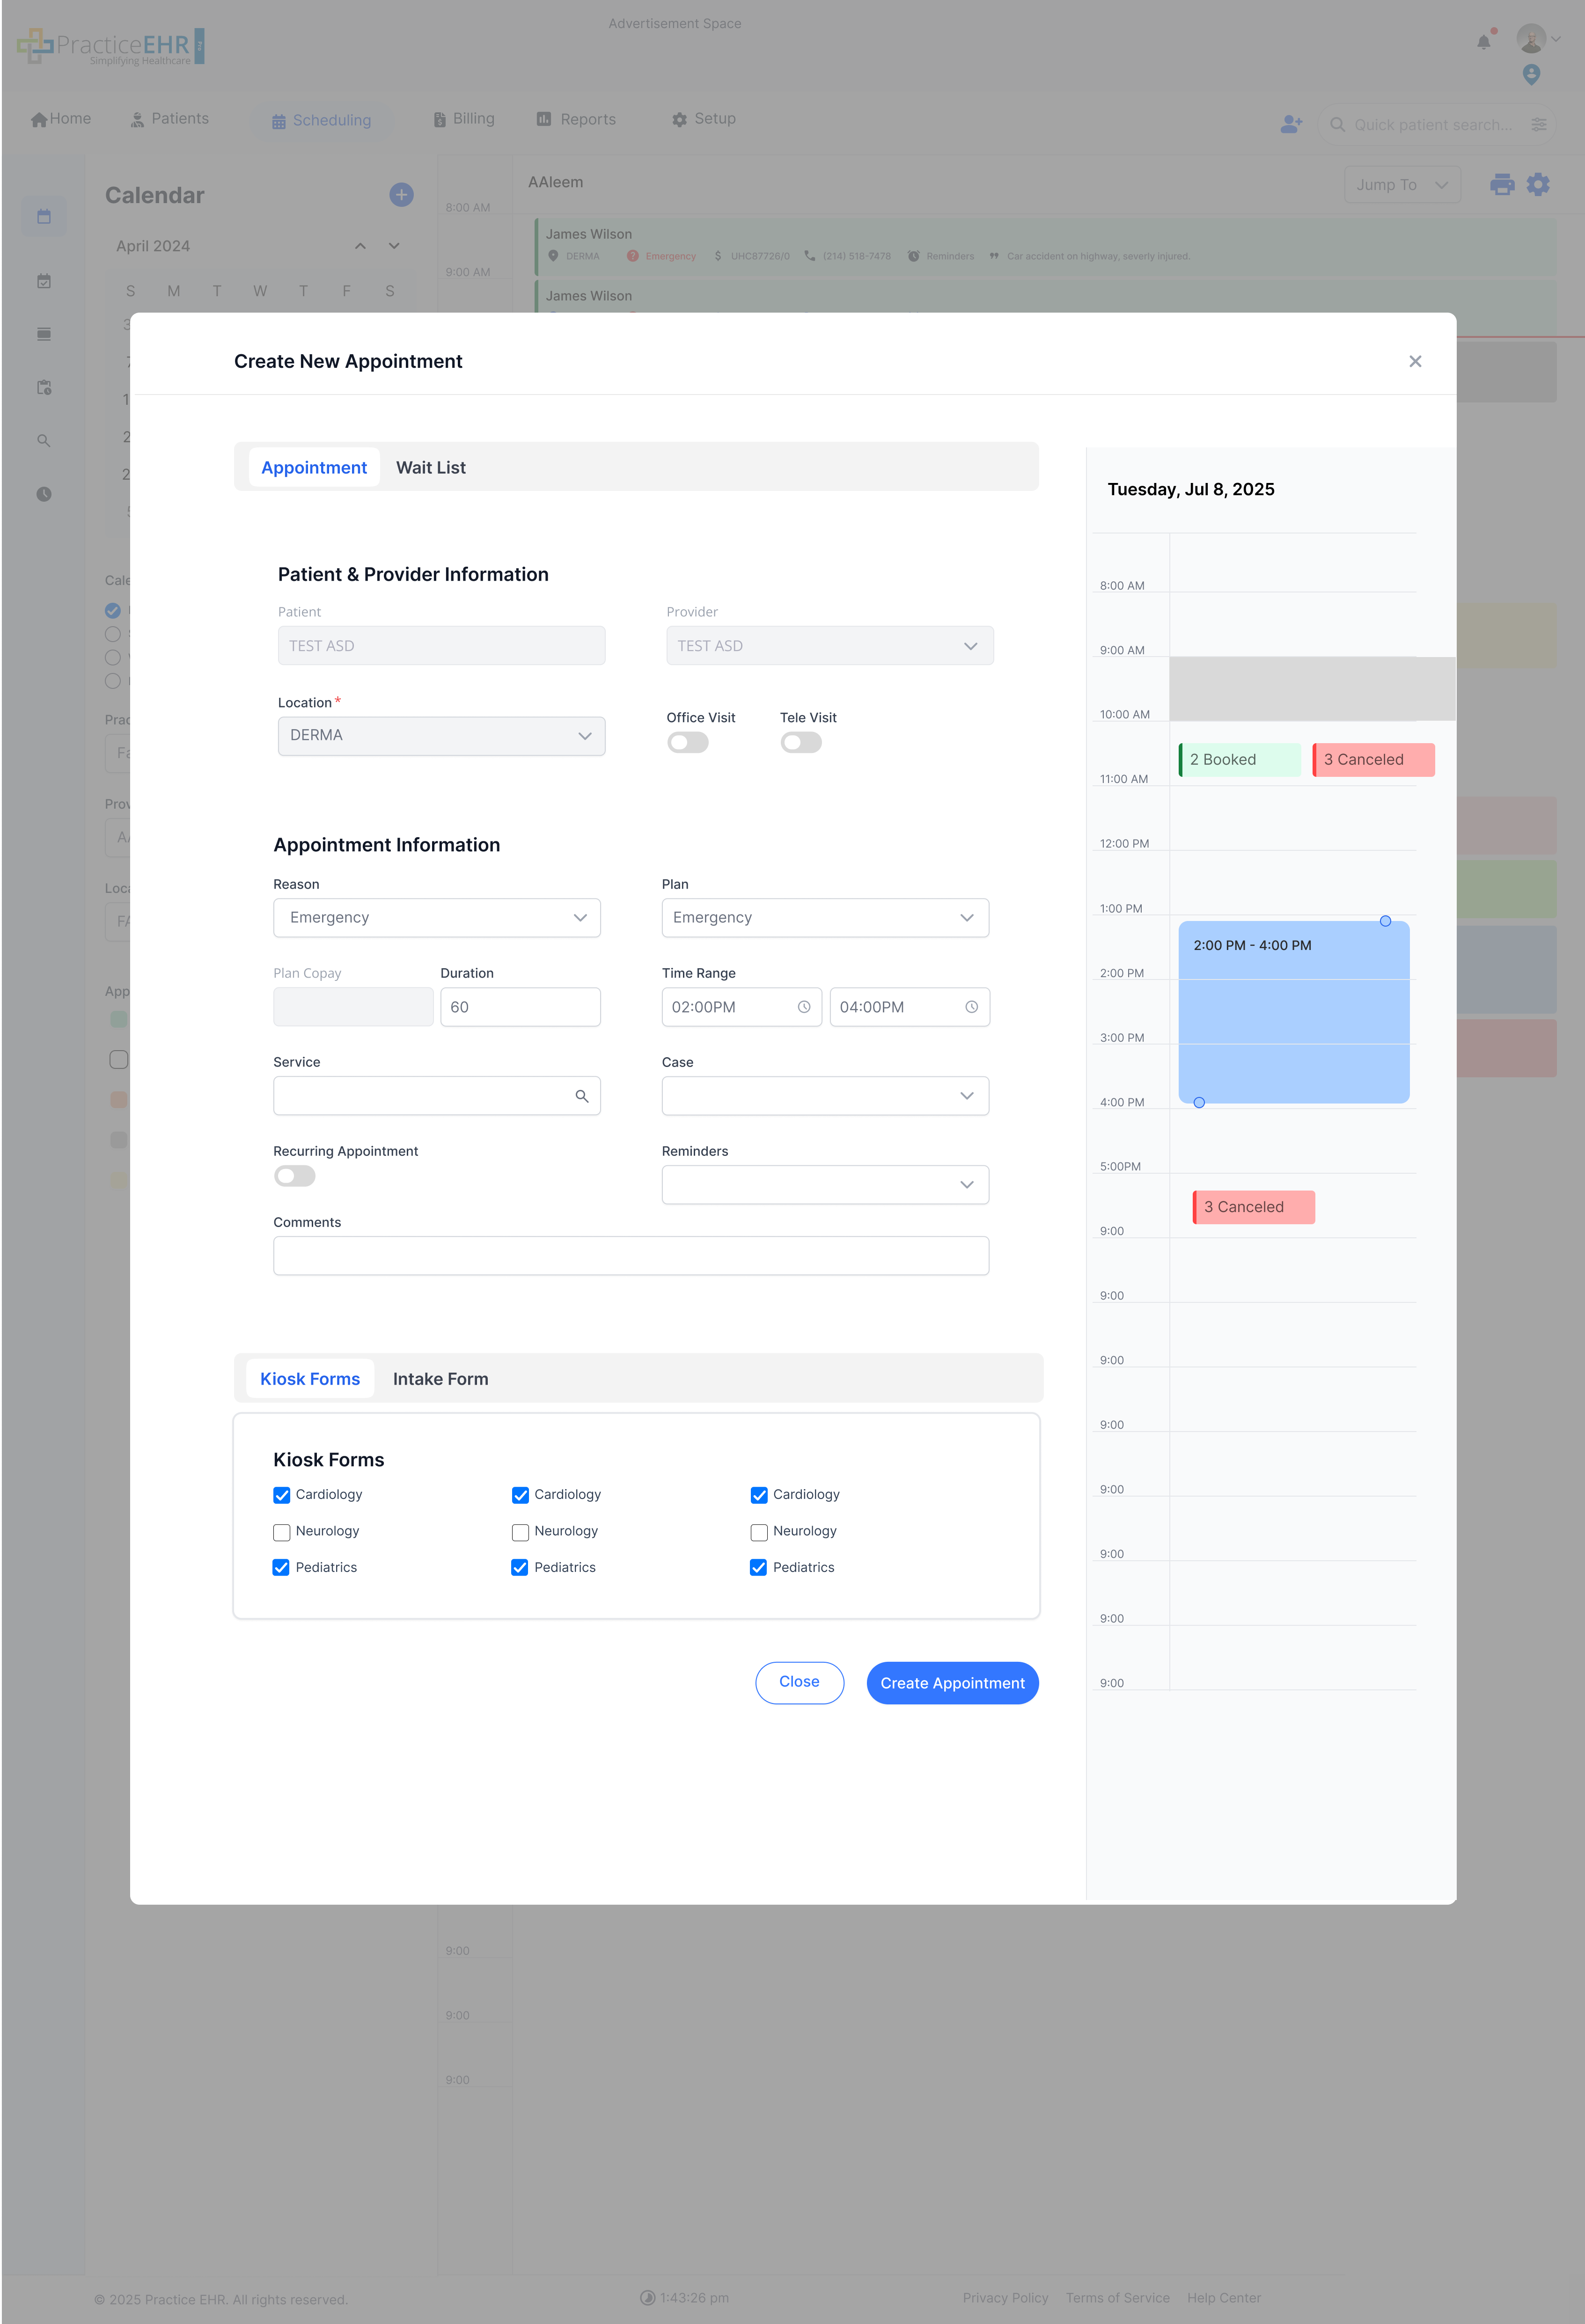
Create New Appointment
Case 1: Patient enabled and ability to search and create
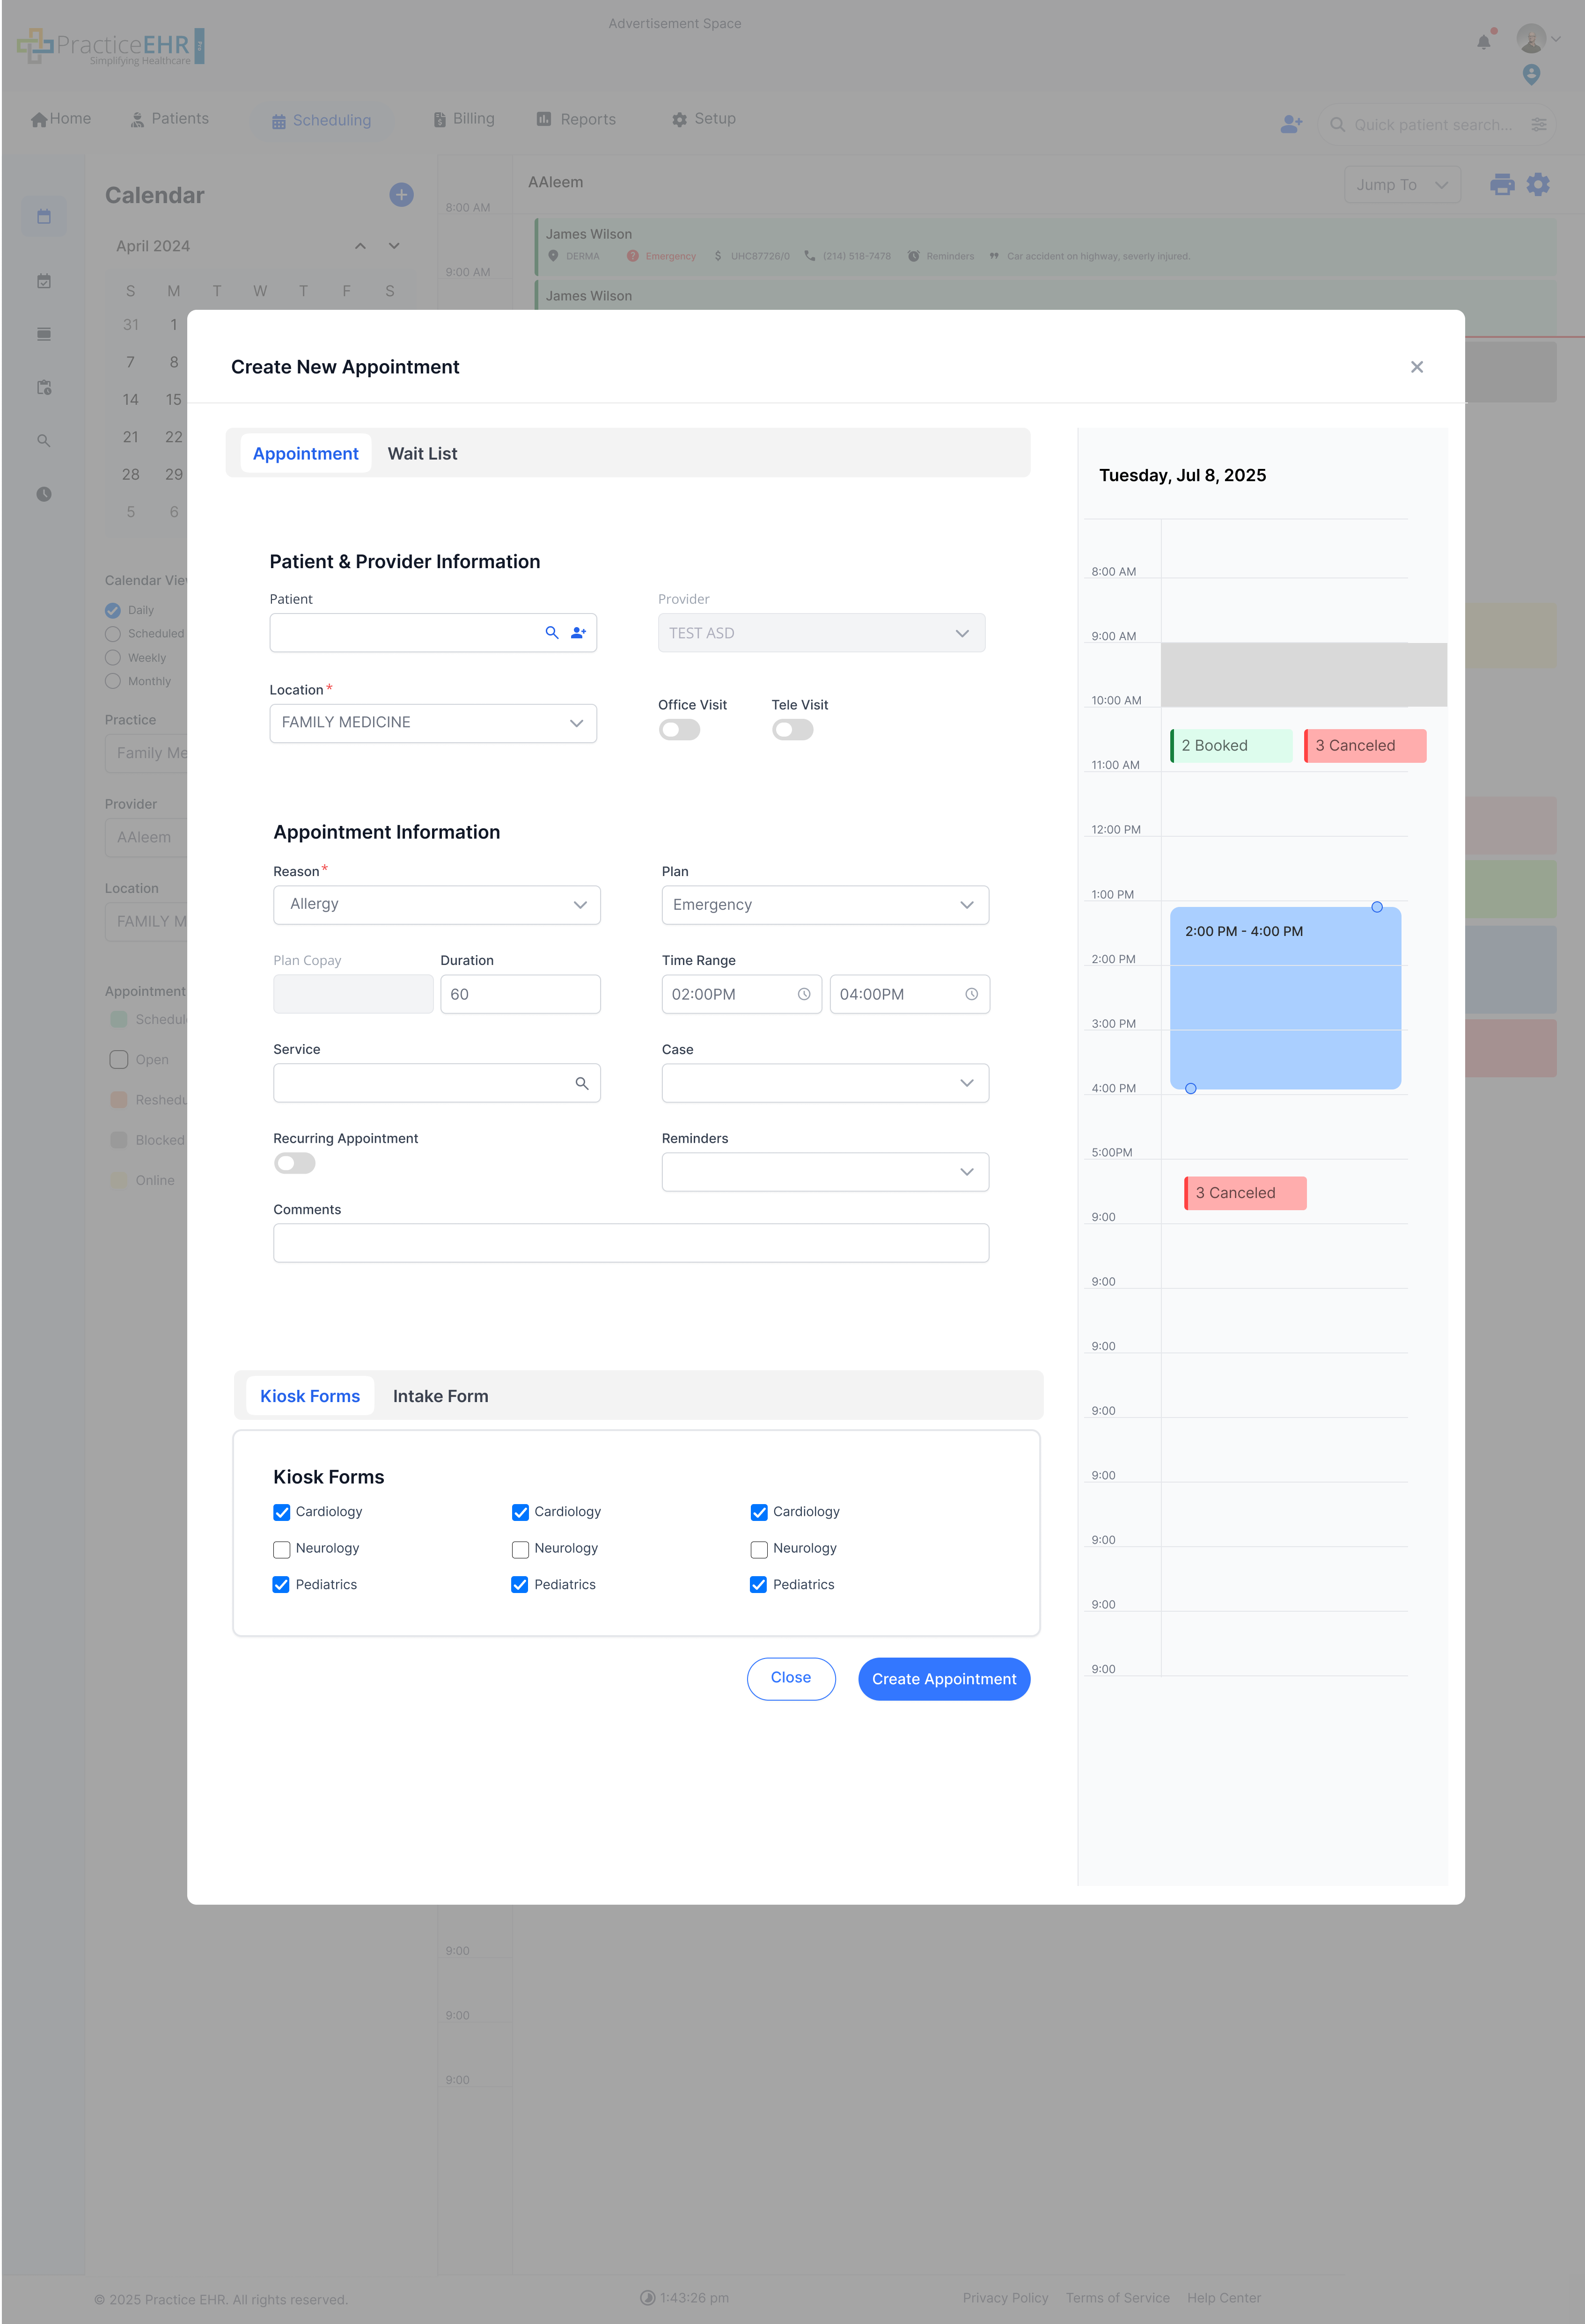
Description
- Patient Search/Create: The 'Patient' field is active, allowing the user to search for an existing patient by name or ID. A "Create Patient" button is also available for on-the-fly registration.
- Time/Duration Adjustment: The modal includes a mini-calendar view. The user can visually select an appointment time and duration by clicking and dragging the blue handles. The 'Time' and 'Duration' fields update automatically.
- Core Info: Standard fields for Location, Reason, and Visit Type are available for selection.
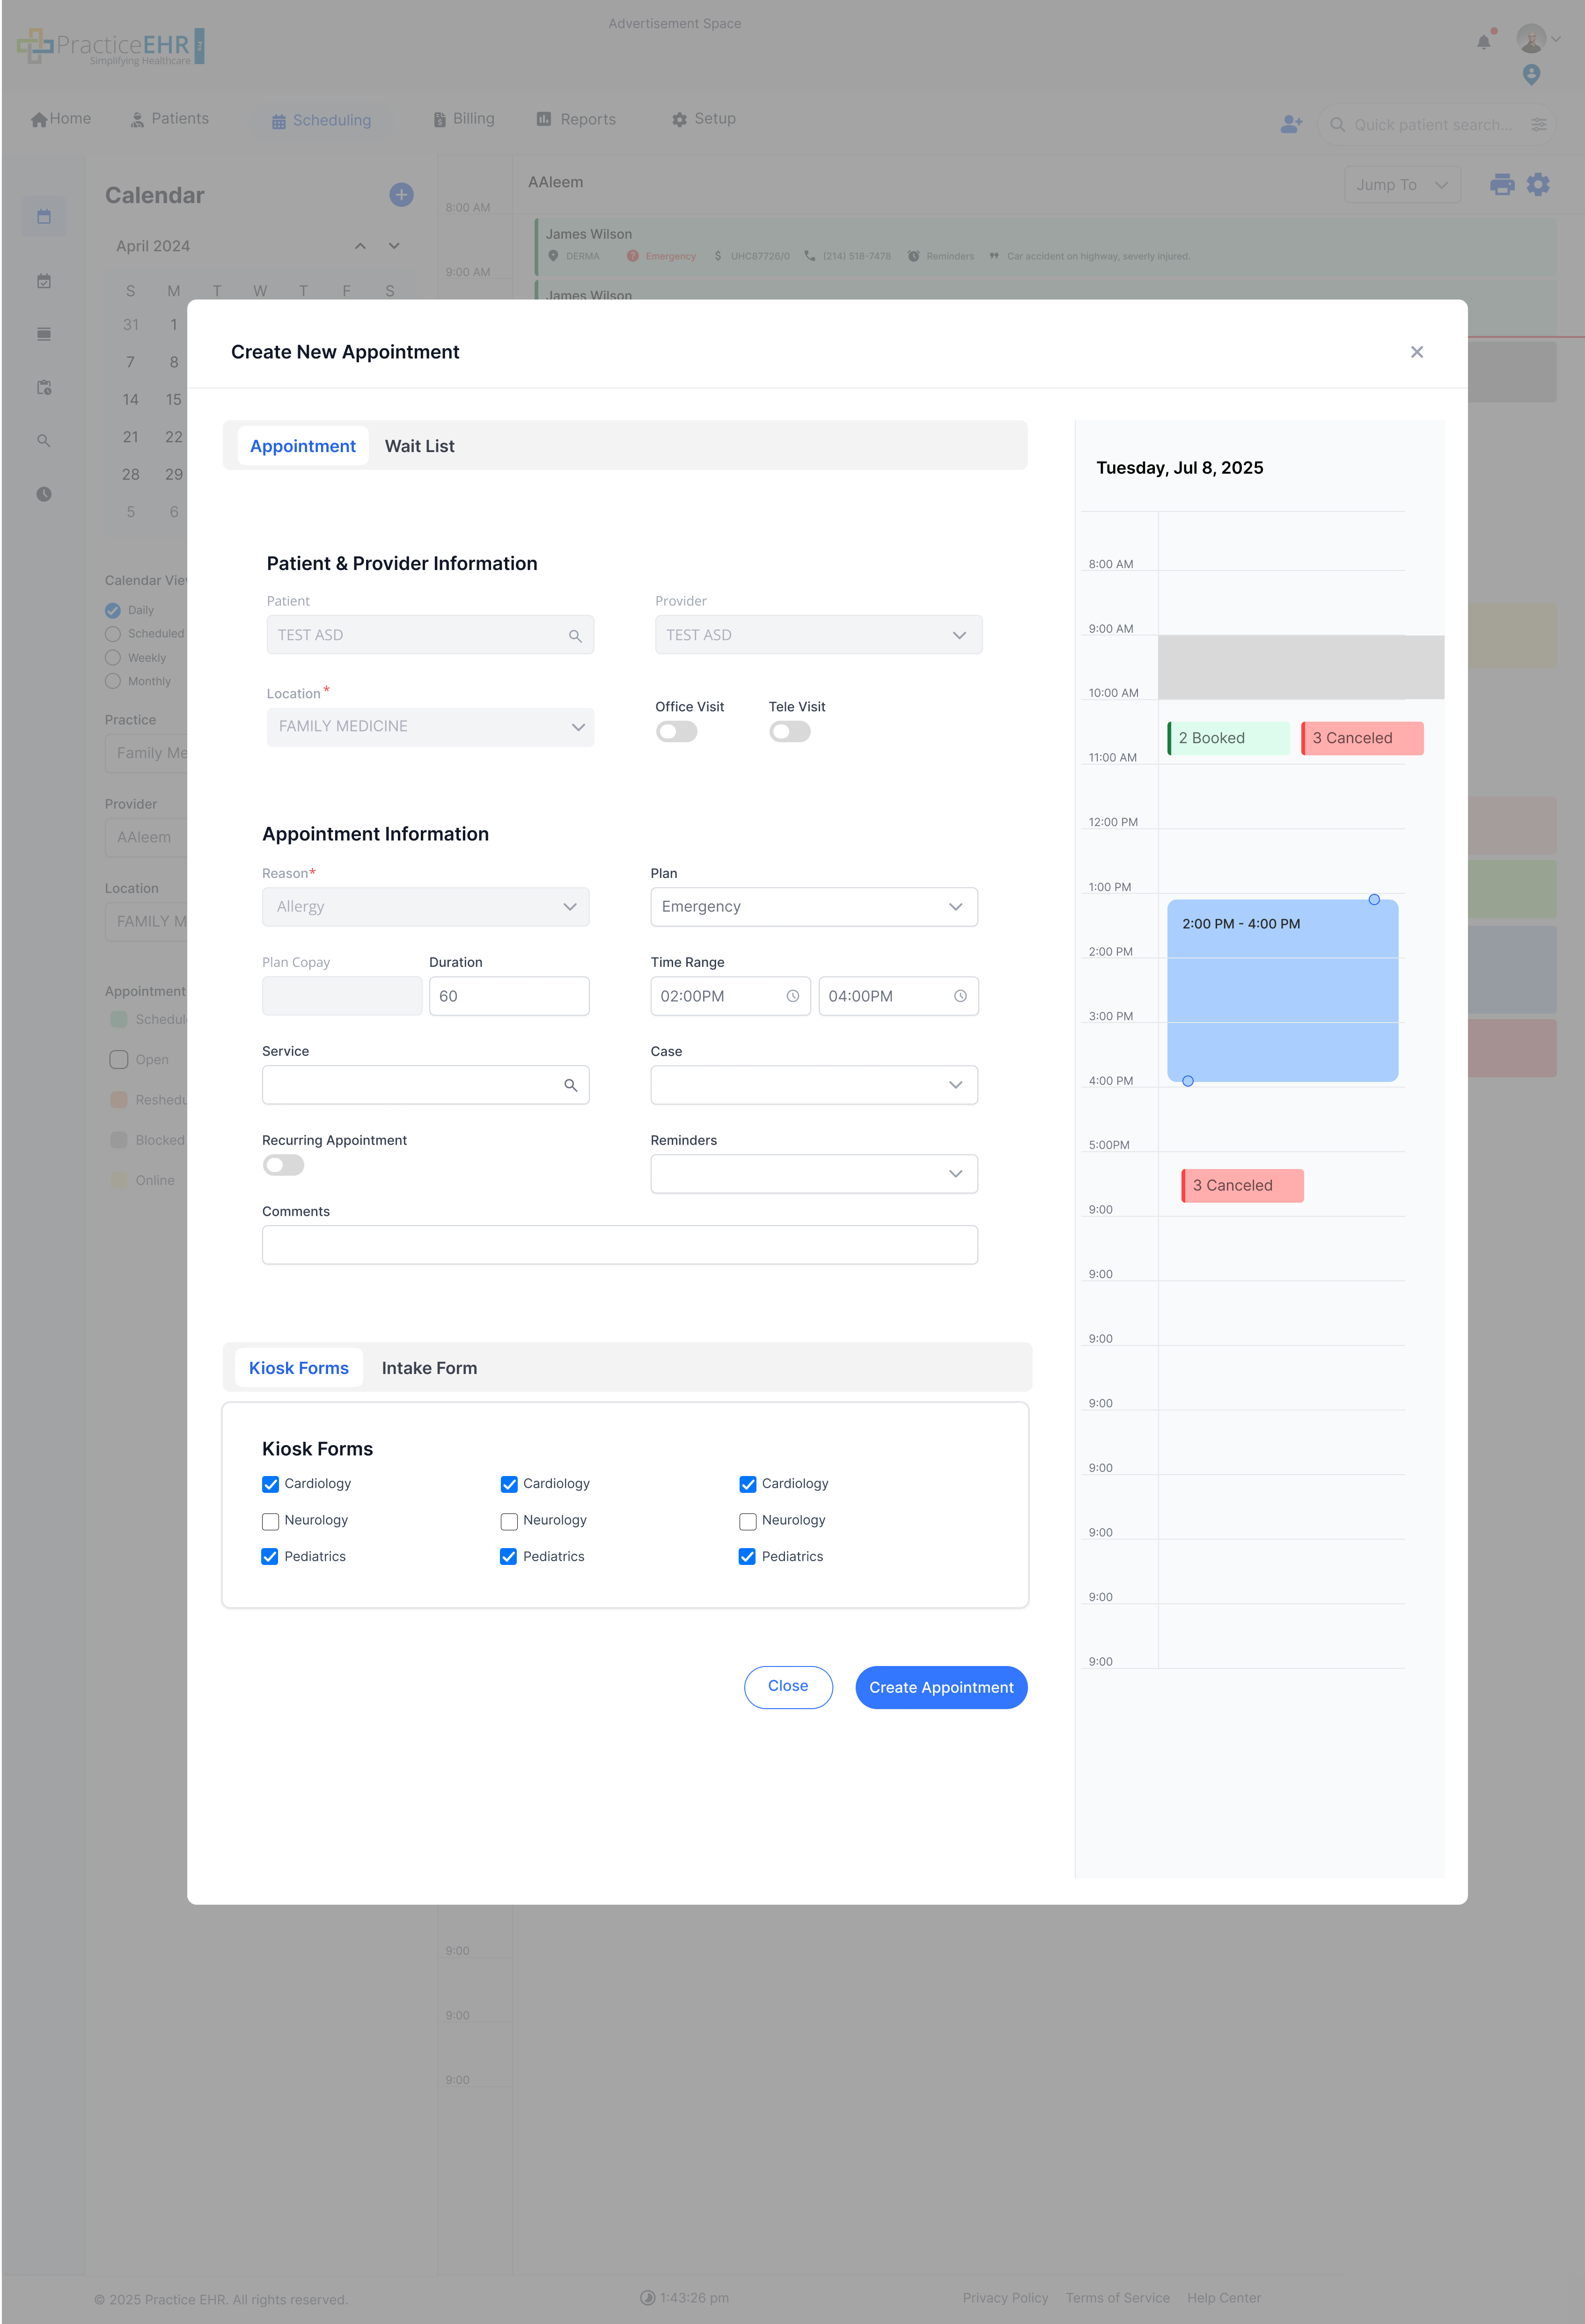
Create New Appointment
Case 2: Patient Disabled (Reason Not Enforced)
Description
- Context: This view appears when booking from a specific patient's chart or a pre-selected slot.
- Patient Field: The 'Patient' field is disabled and pre-populated with the selected patient's name.
- Reason Field: The 'Reason' field may show a default reason (e.g., "Office Visit"), but it remains editable, allowing the user to select a different reason from the dropdown if needed.
Create New Appointment
Case 3: Reason Enforced
Description
- Context: This view is triggered when clicking on a pre-defined "Block" or "Template" on the schedule that has a specific, enforced reason (e.g., "New Patient Consults Only").
- Locked Reason: Both the 'Patient' and 'Reason' fields are disabled. The 'Reason' field is locked to the one defined by the schedule block.
- Use Case: This ensures that specific time slots are reserved only for their intended purpose.
Create New Appointment
Case 4: Recurring Appointment Toggle enabled
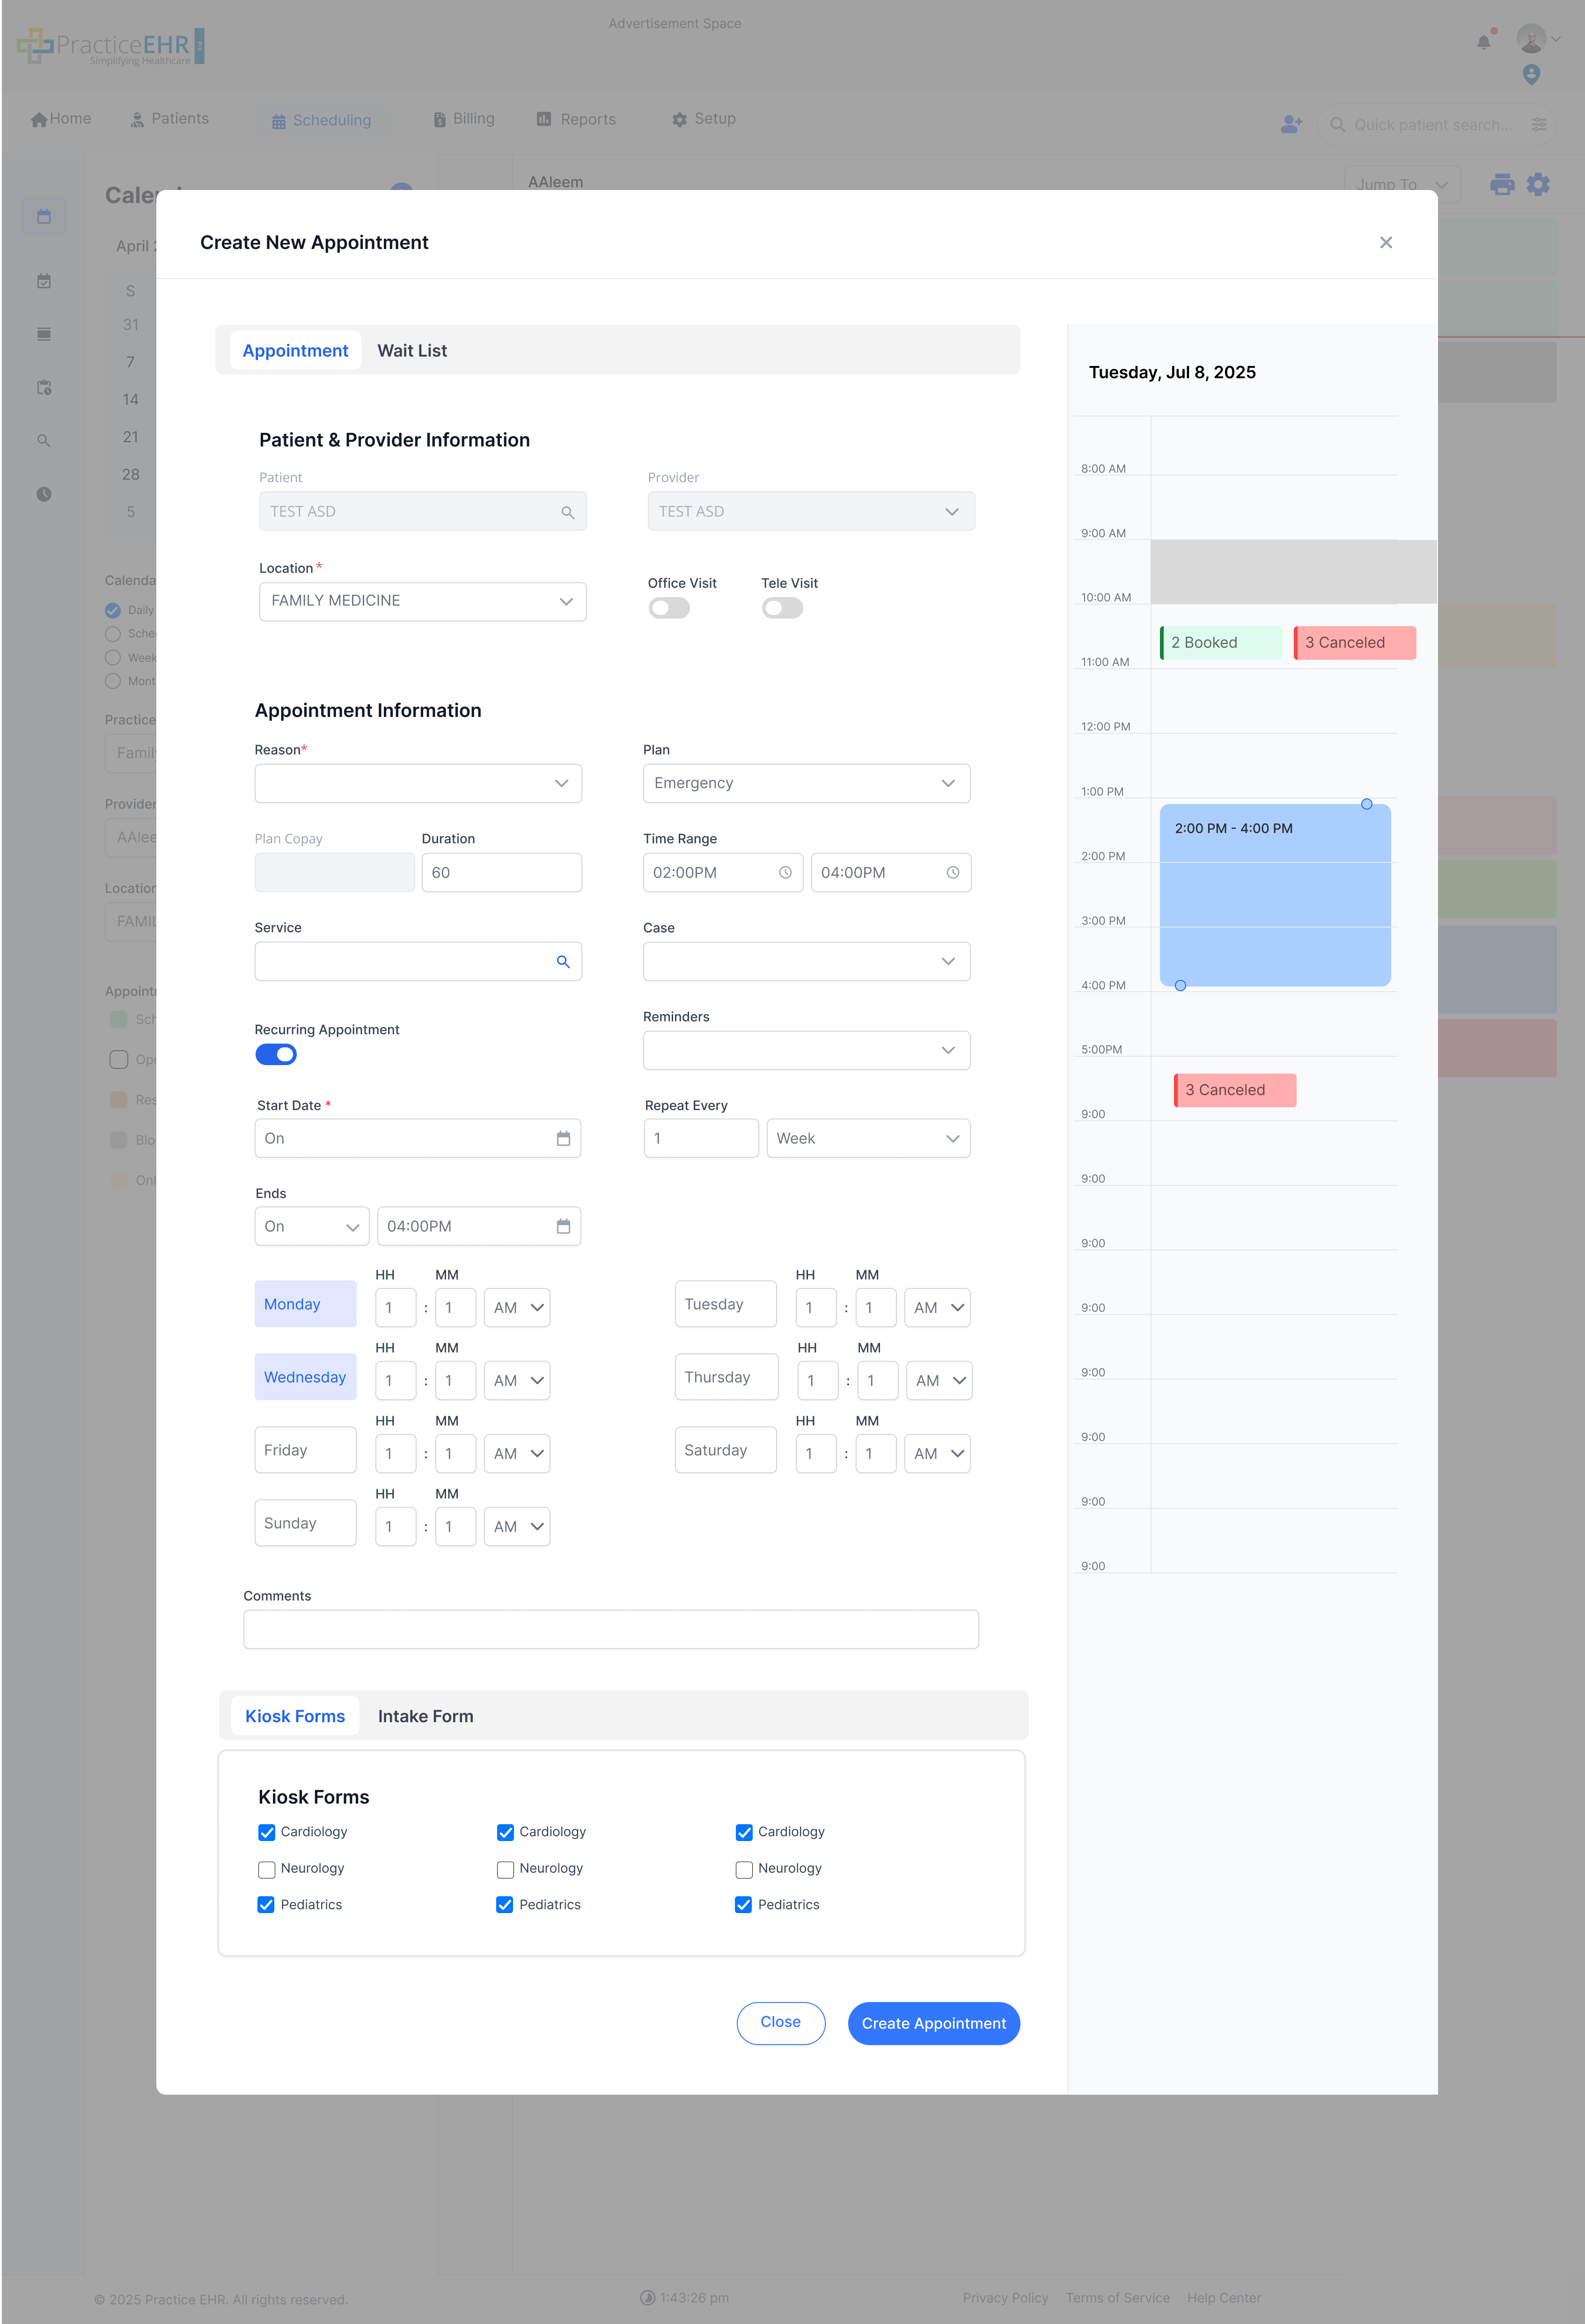
Description
- Recurring Toggle: The 'Recurring Appointment' switch is activated, revealing the recurrence pattern options.
- Pattern Selection: The user can define the recurrence frequency (e.g., "Weekly"), select the specific days (e.g., "Mon", "Wed", "Fri"), and set an "End Date" for the series.
- Series Creation: This allows for booking multiple appointments (e.g., for physical therapy) in a single action.
Create New Appointment
Case 5: Schedule Alert Popup (6PM)
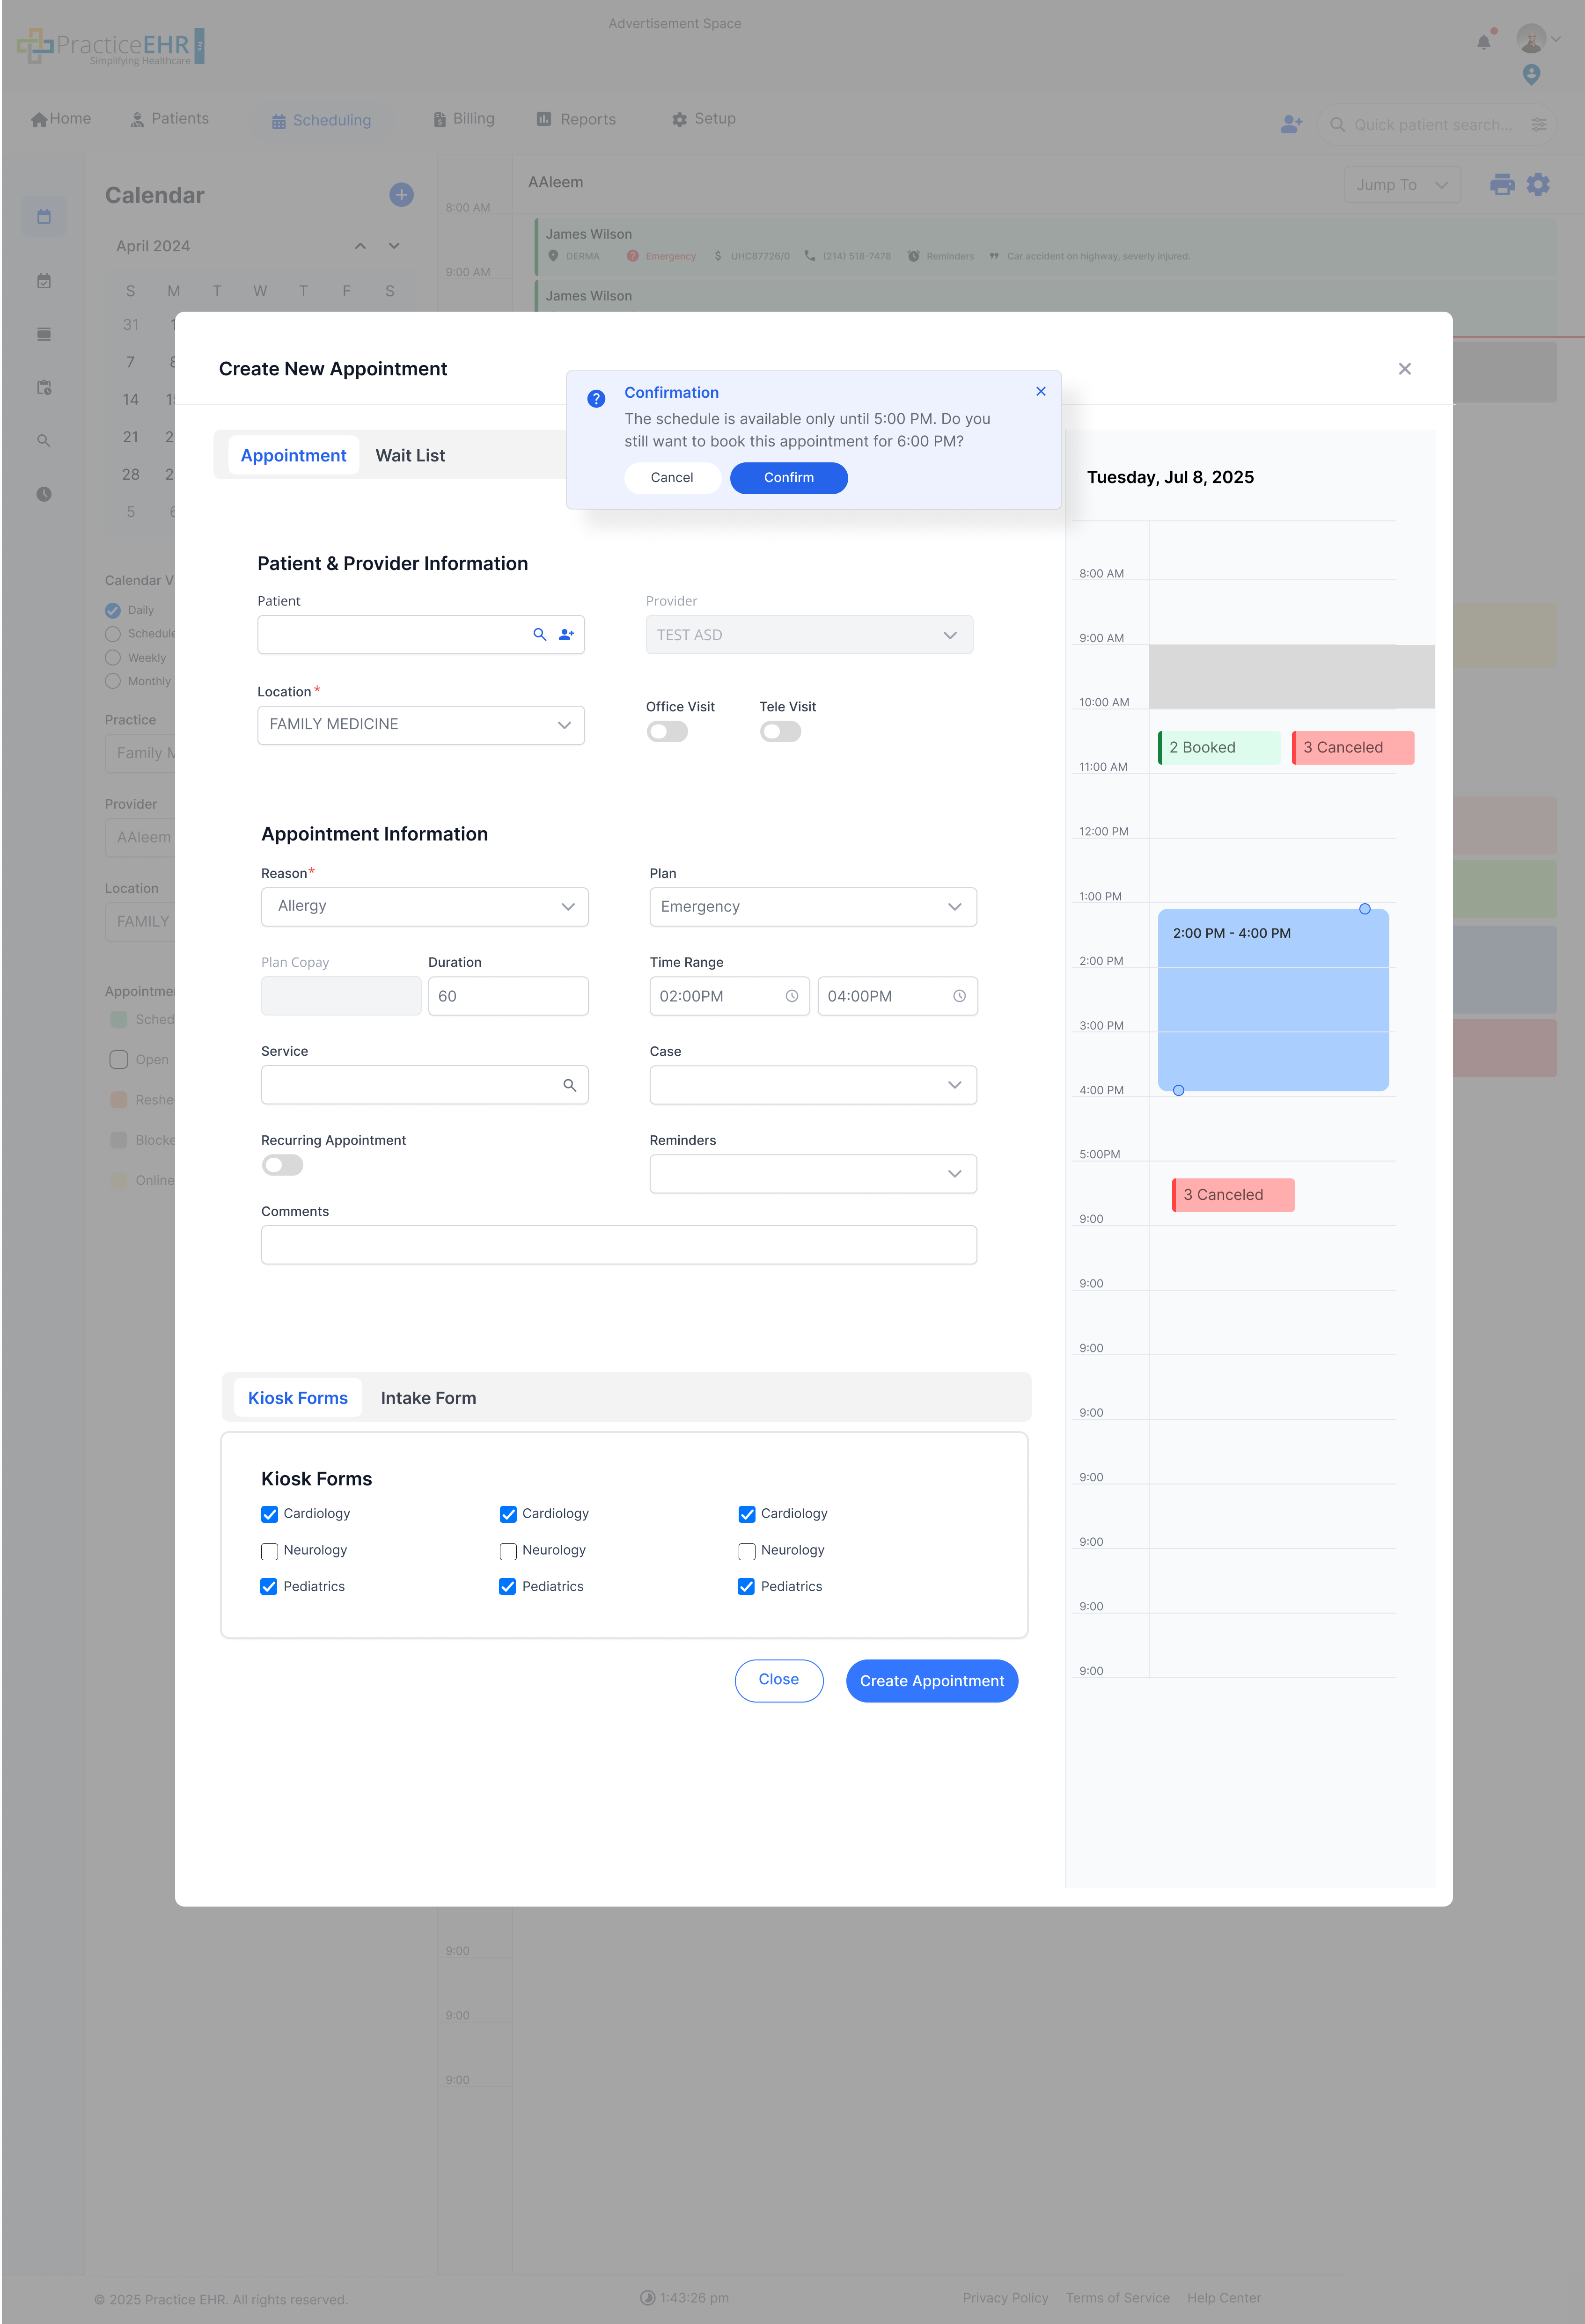
Description
- Trigger: This alert modal appears *after* the user tries to save an appointment that falls outside the provider's defined schedule (e.g., booking at 6 PM when the schedule ends at 5 PM).
- Confirmation: The system warns the user that the "Appointment is outside the provider's schedule" and requires explicit confirmation ("Yes") to proceed with the booking.
- Safeguard: This prevents accidental after-hours booking while still allowing flexibility for exceptions.
Create New Appointment
Case 6: Appointment Detail (Full Screen)
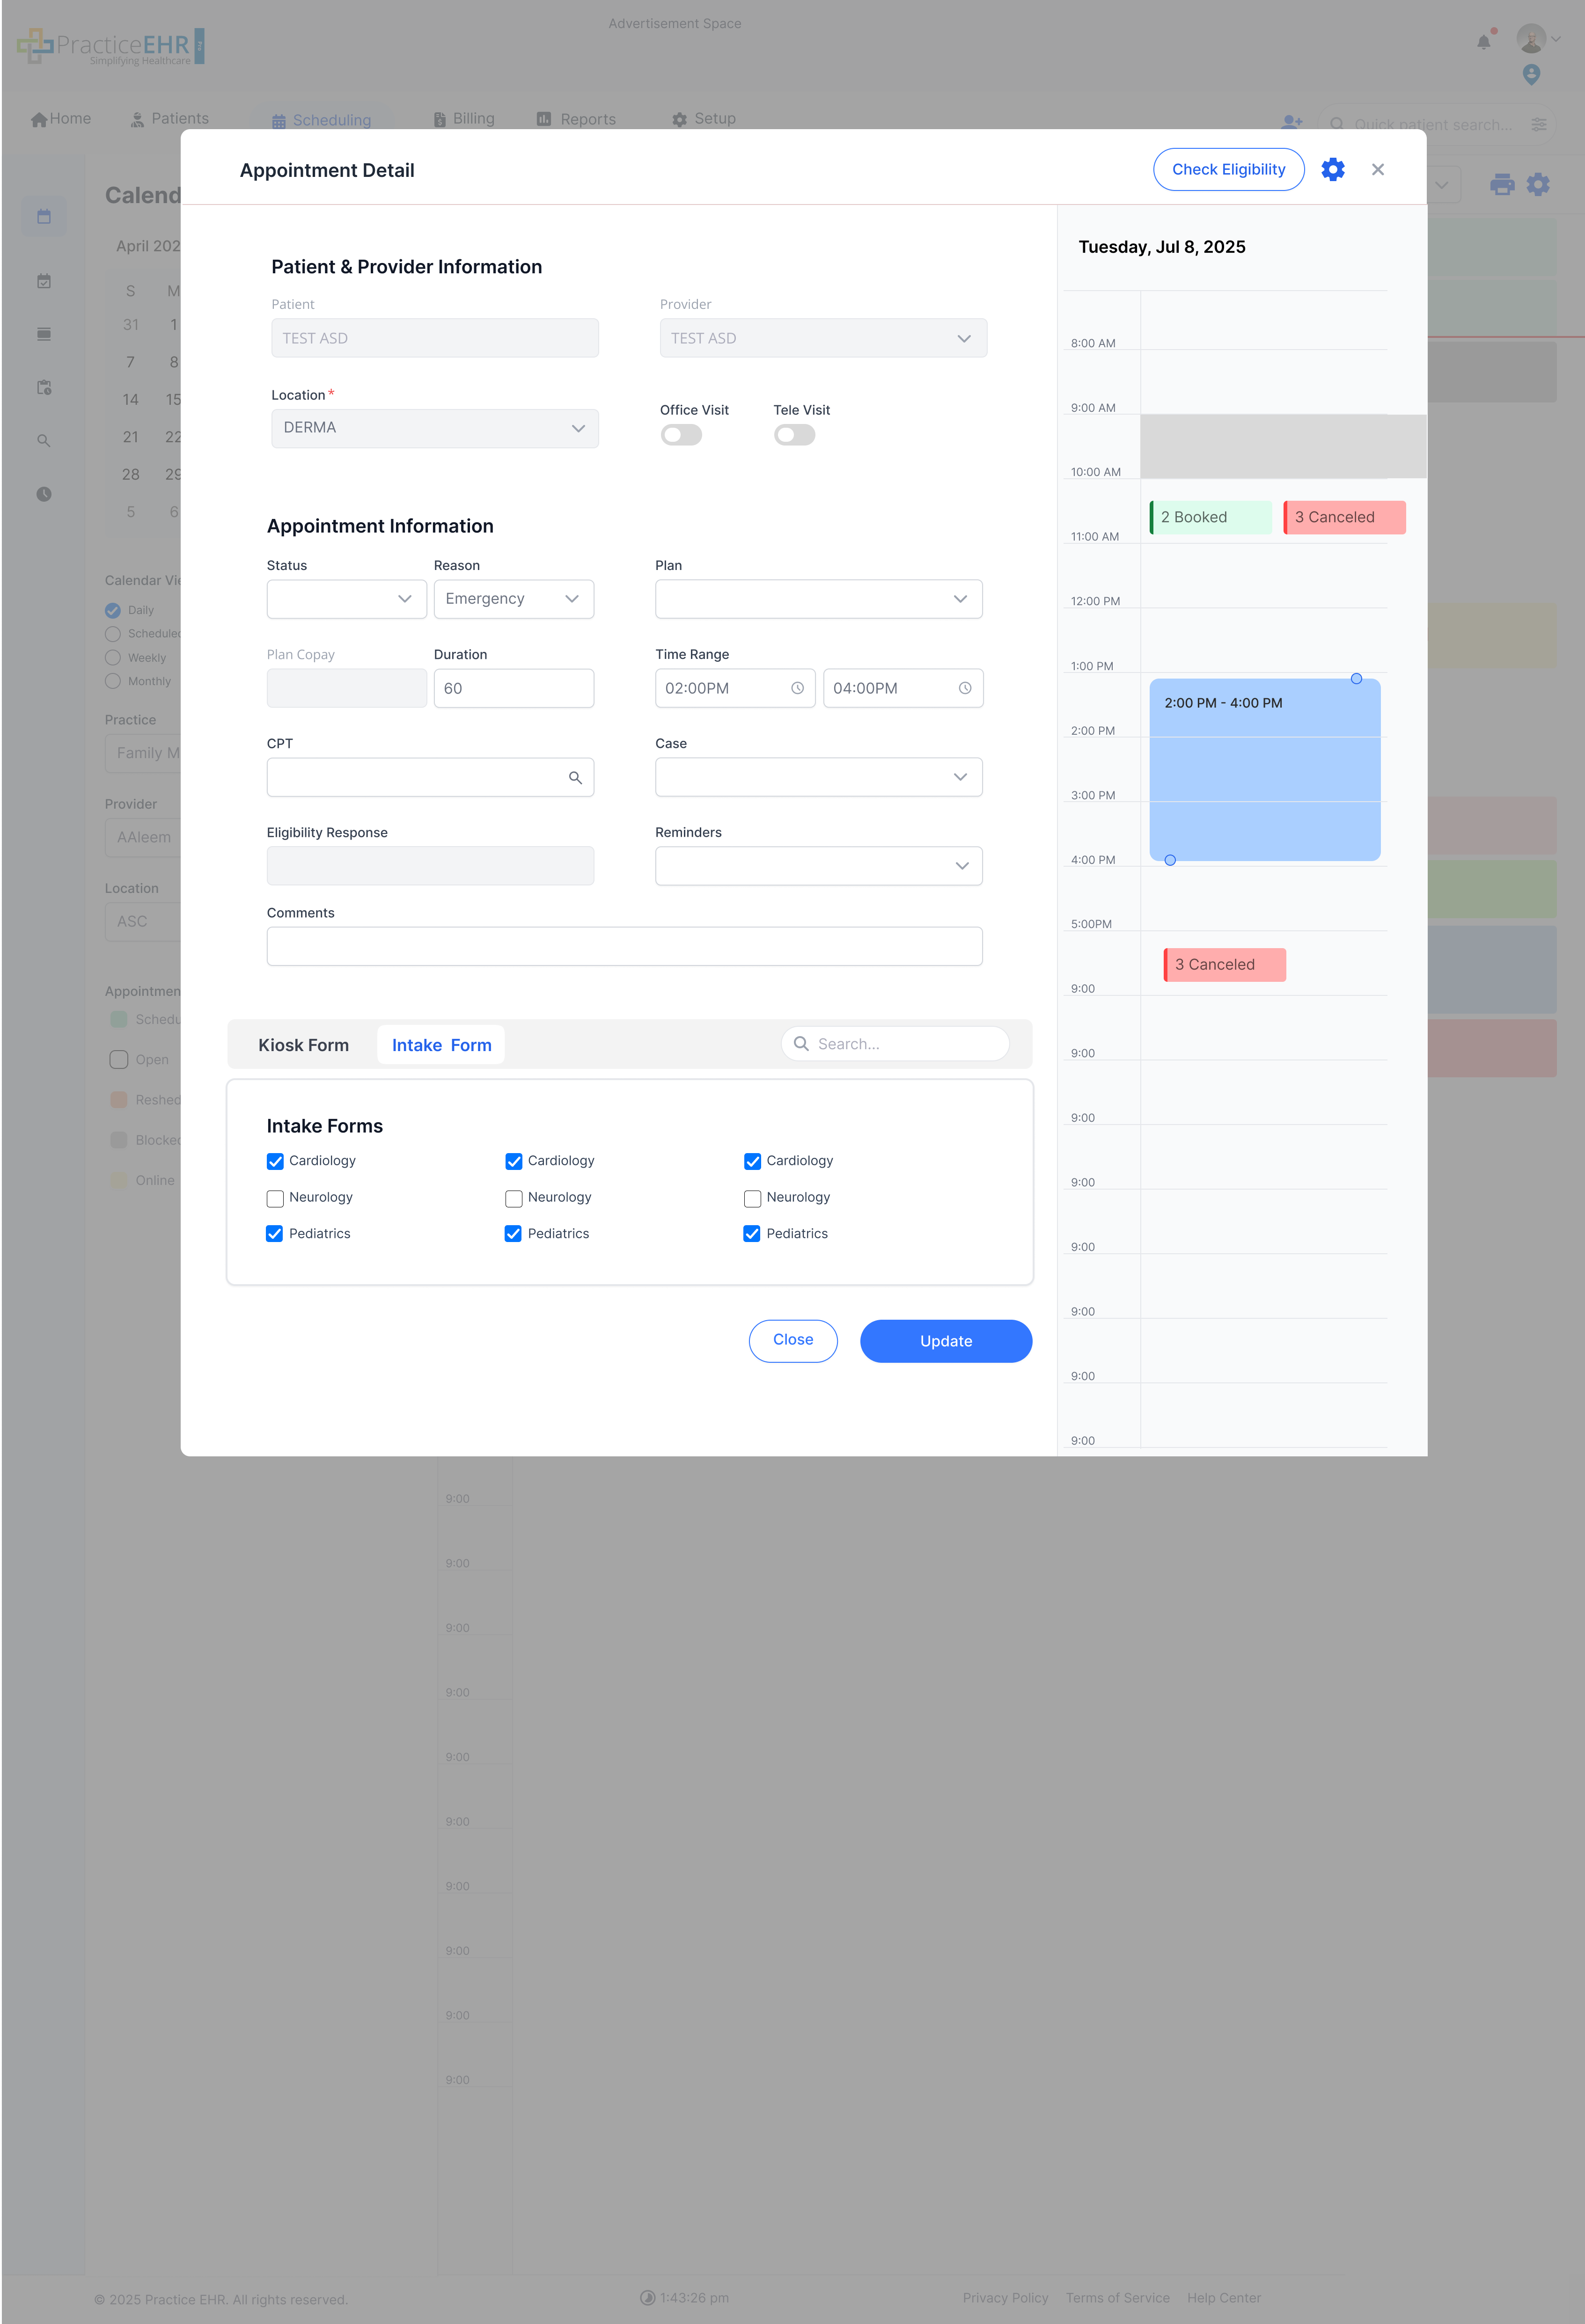
Description
The full-screen view displayed upon clicking an appointment card, showing all patient, scheduling, and billing details.
- Access: This is the full-screen modal that appears when a user clicks on an *existing* appointment card from the calendar.
- Time Adjustment: Like the creation modal, the time and duration can be adjusted here by dragging the blue handles.
- Status & Forms: Users can update the appointment status (e.g., "Checked In"), manage forms (send Kiosk or Intake forms), and proceed to billing.