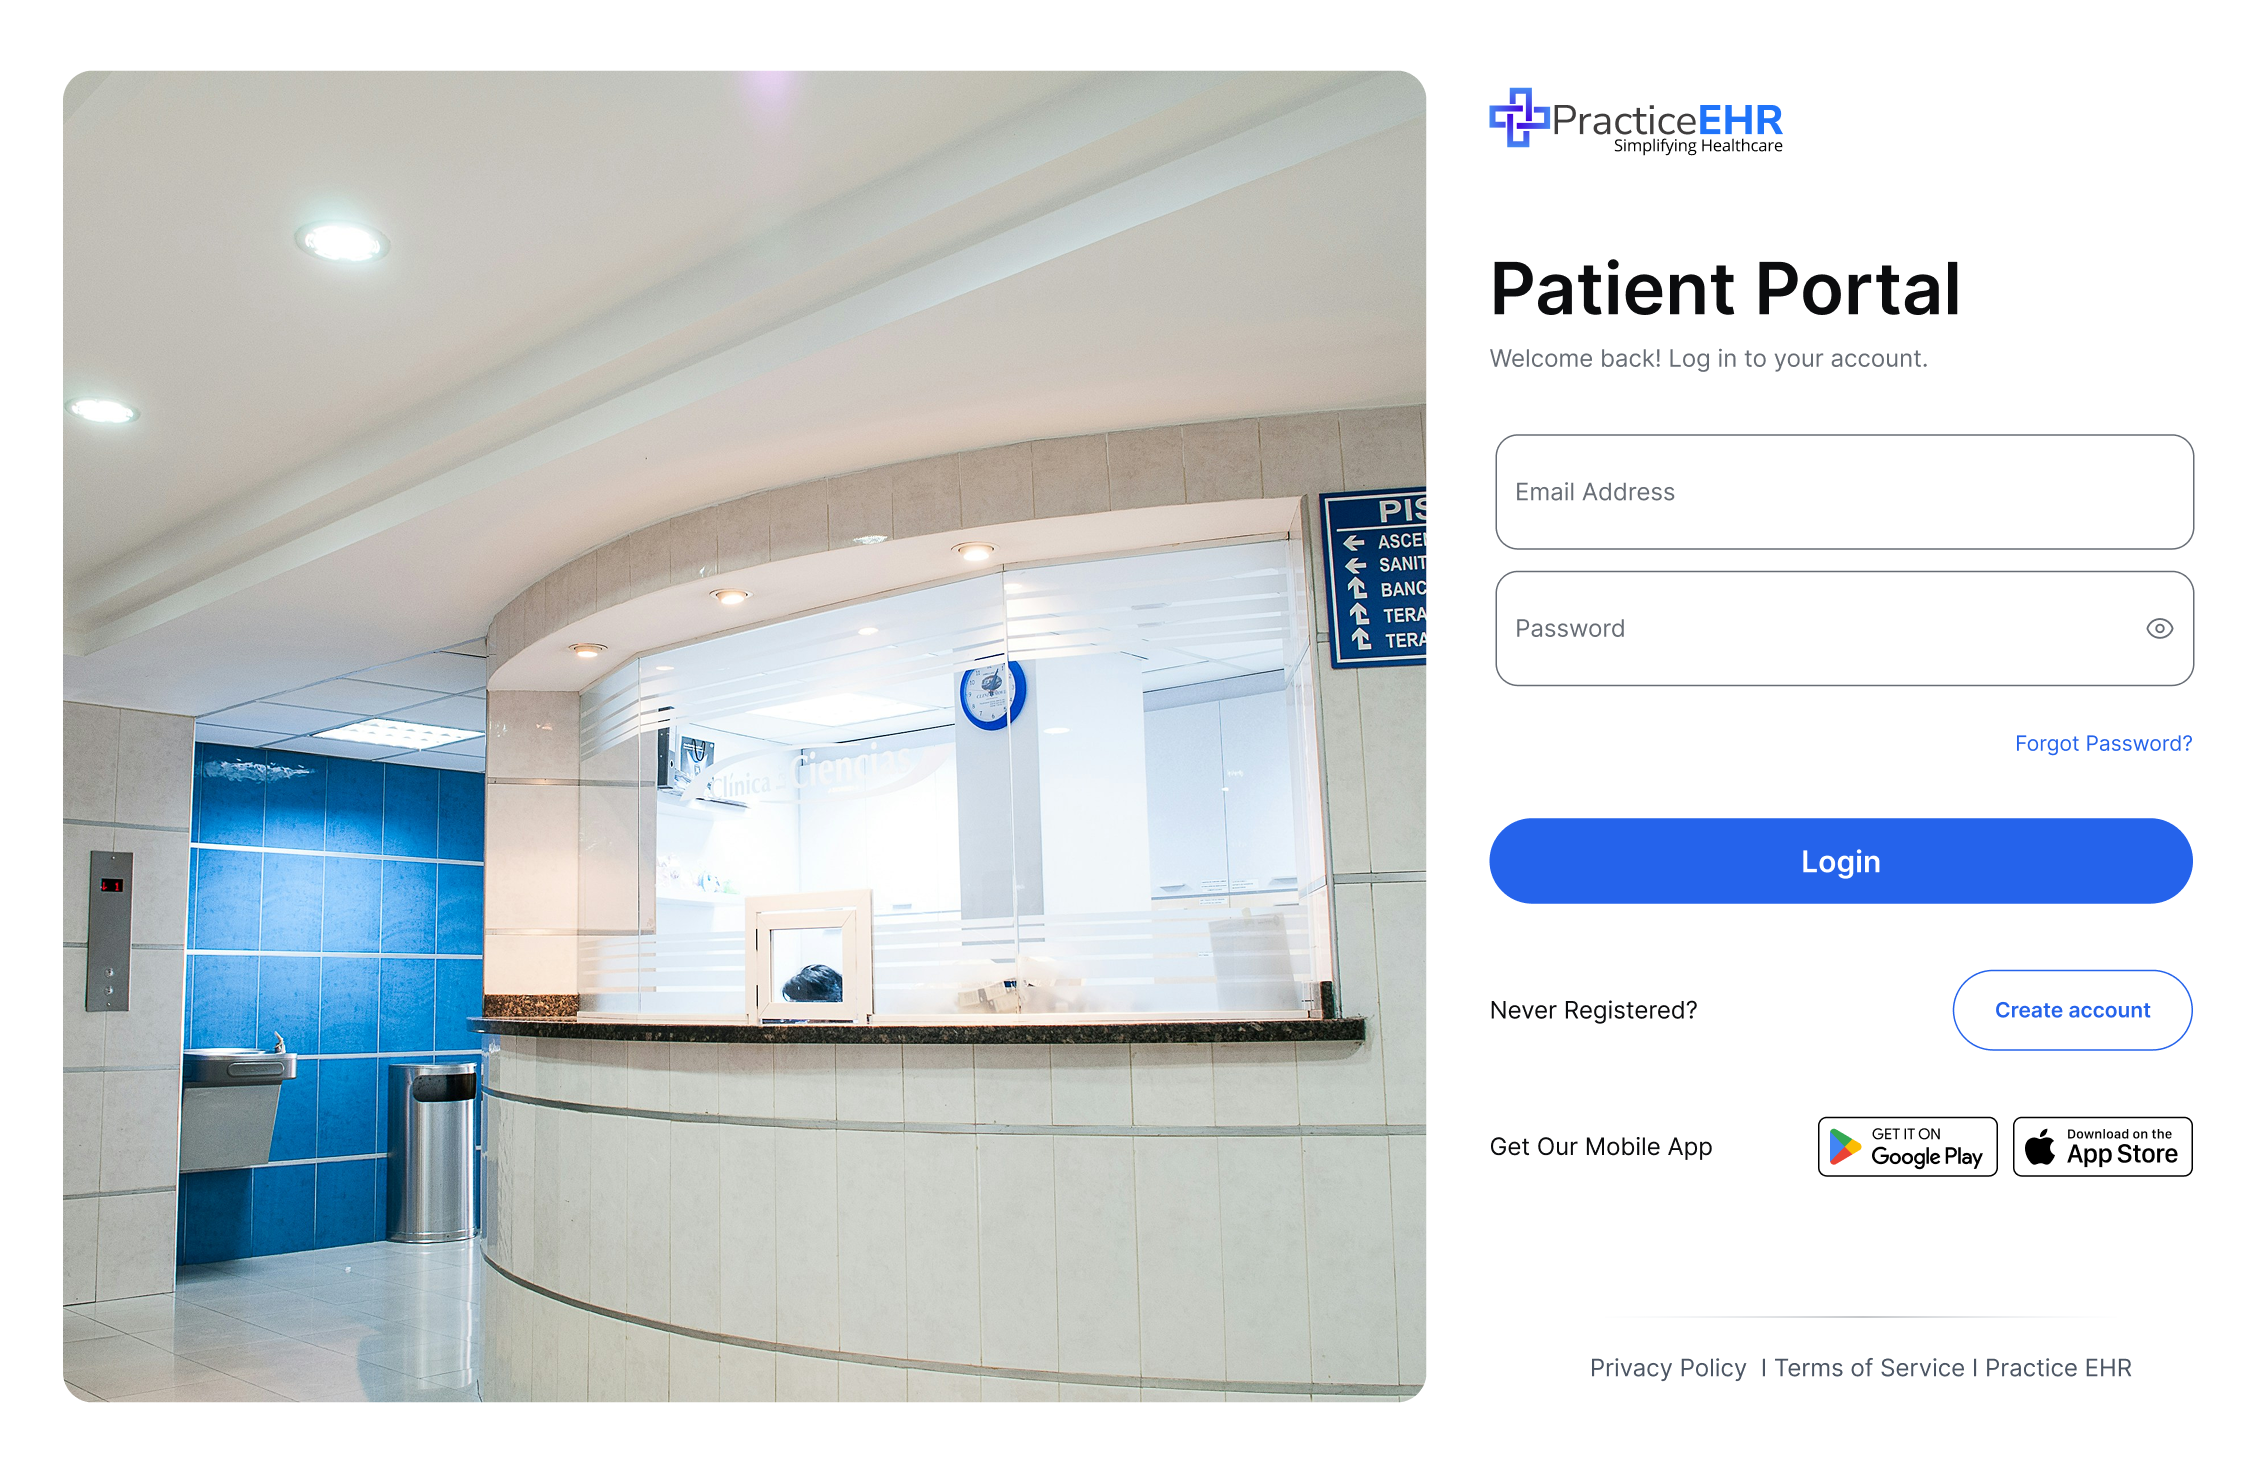
Access & Registration
Updated login and registration workflows for accessing the patient portal via the EHR system and website. Both New and Existing registration flows now include an email OTP verification step.
Patients start by completing either the New Patient or Existing Patient registration form. After submitting, they are redirected to an OTP screen to verify the email address entered here.
New Patient Registration
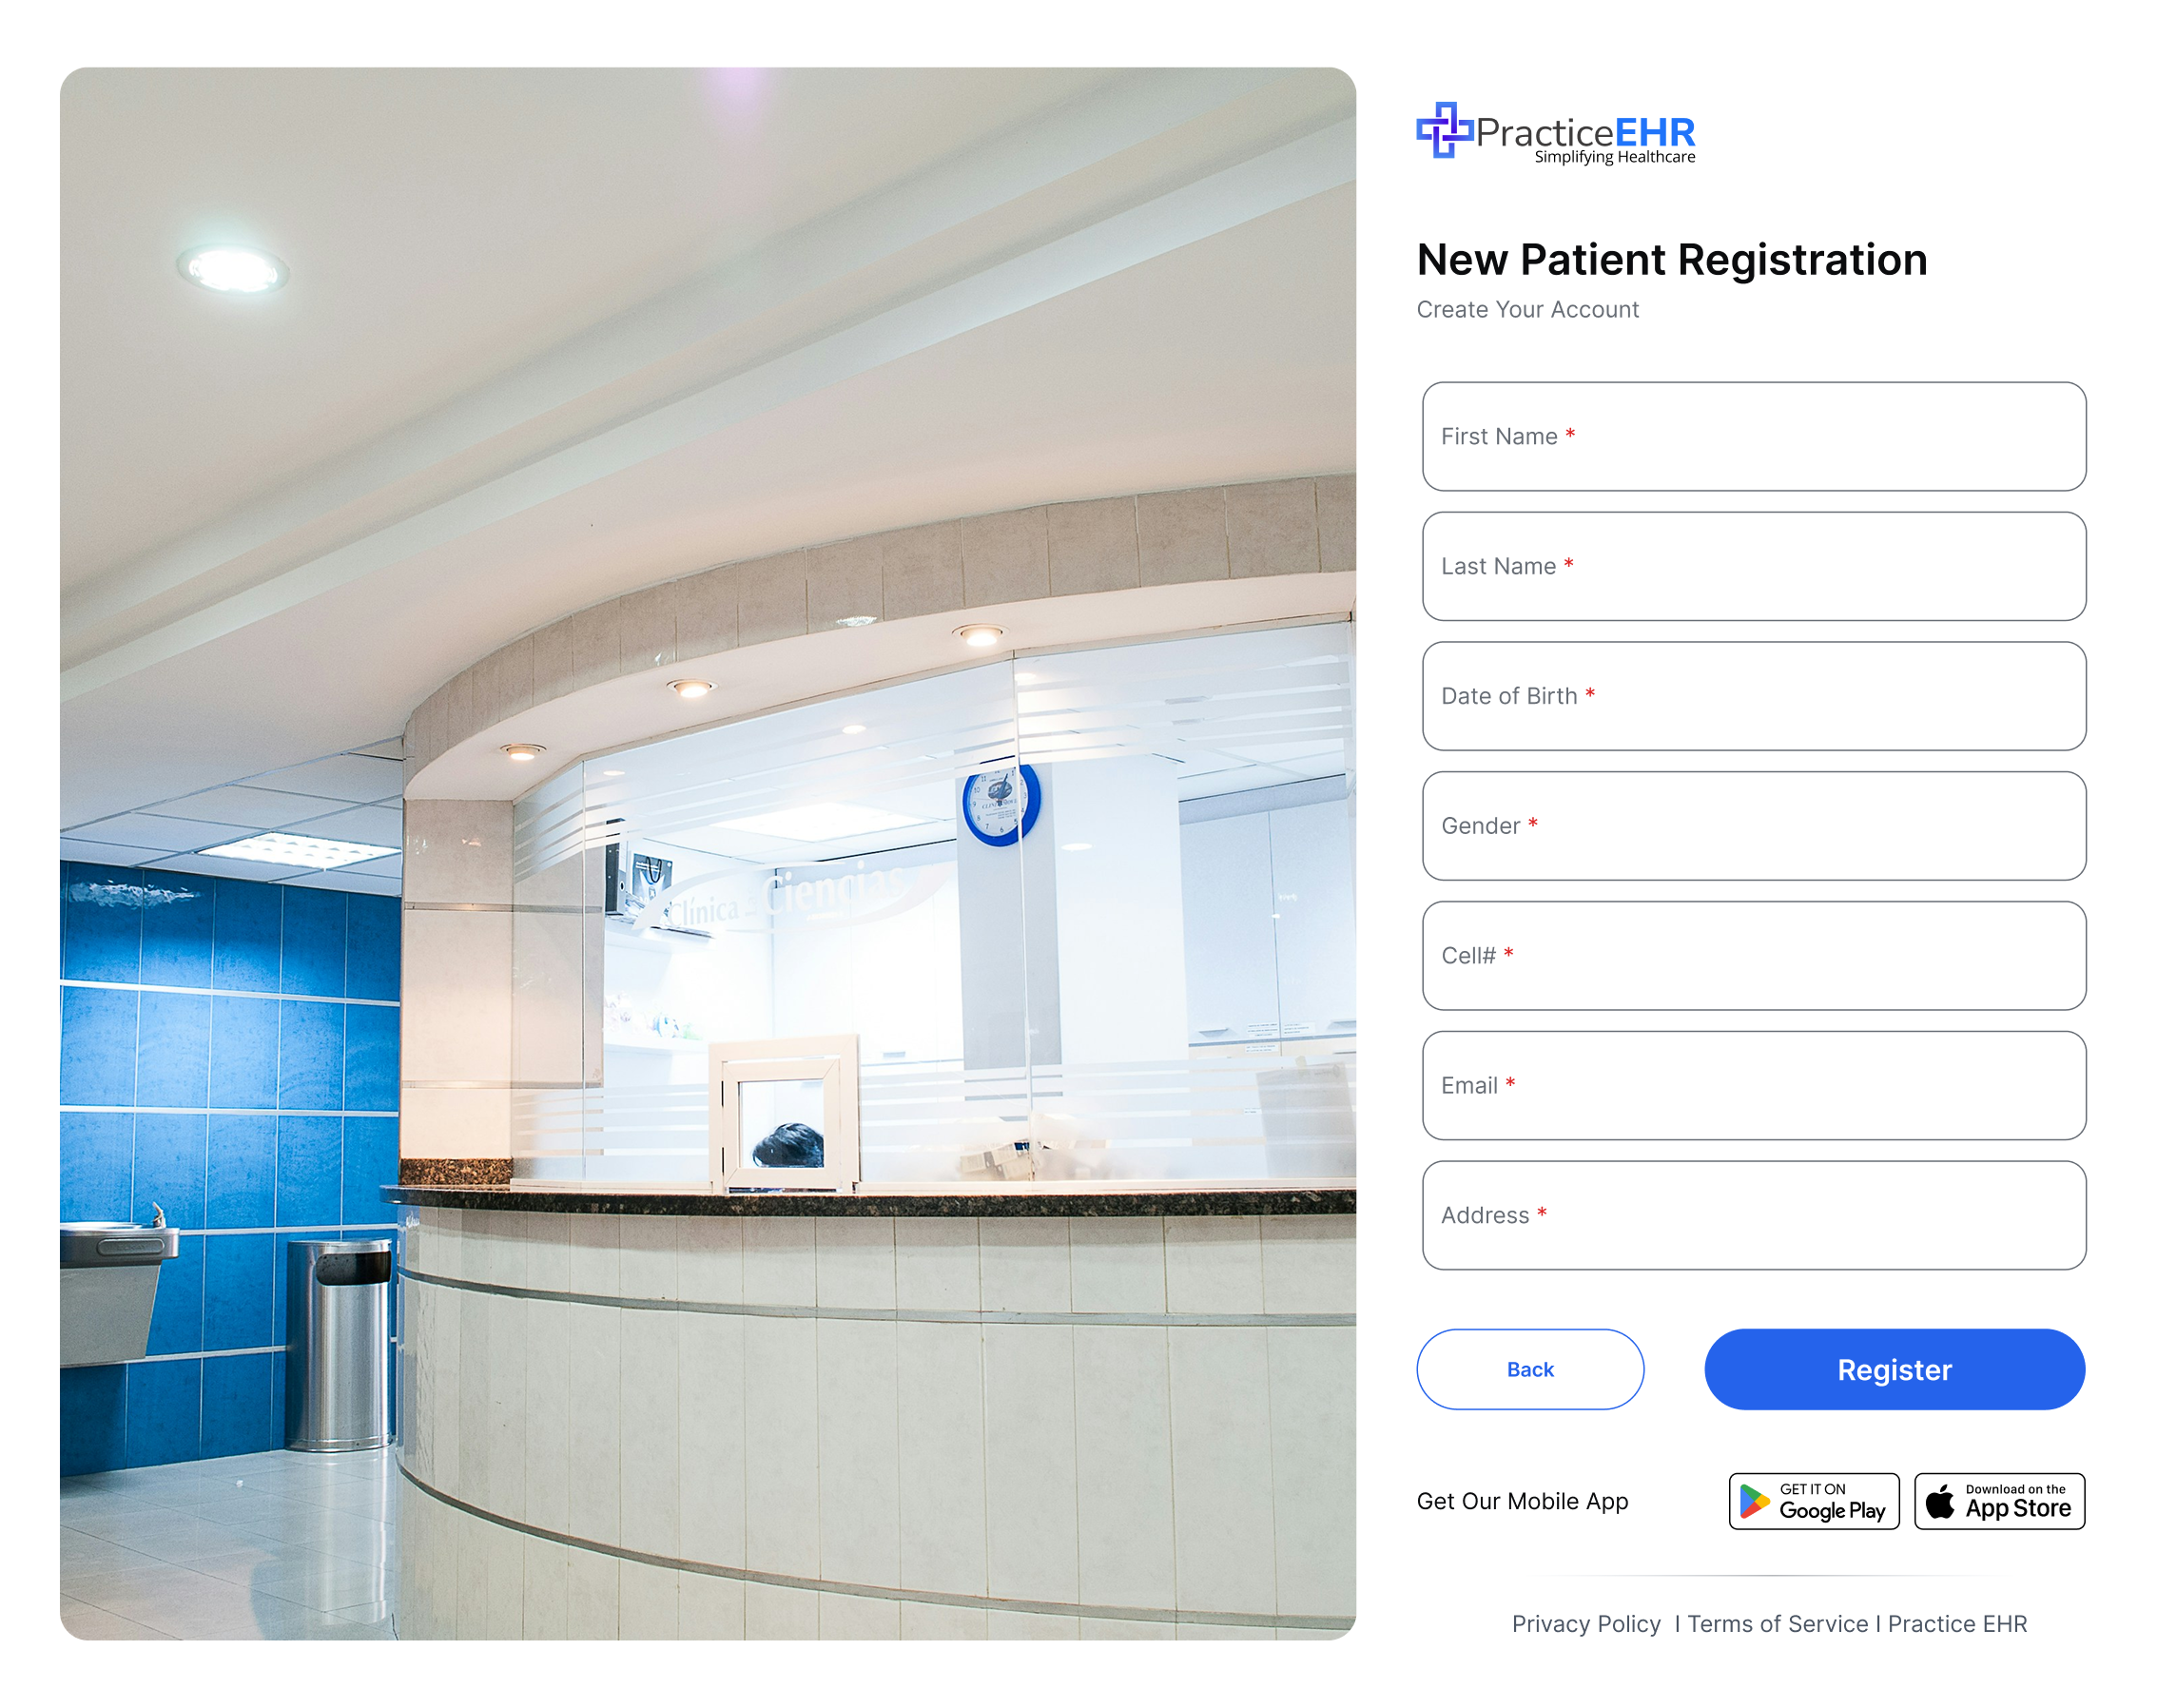
Fields for new patient registration have been streamlined to reduce onboarding friction.
Existing Patient Registration
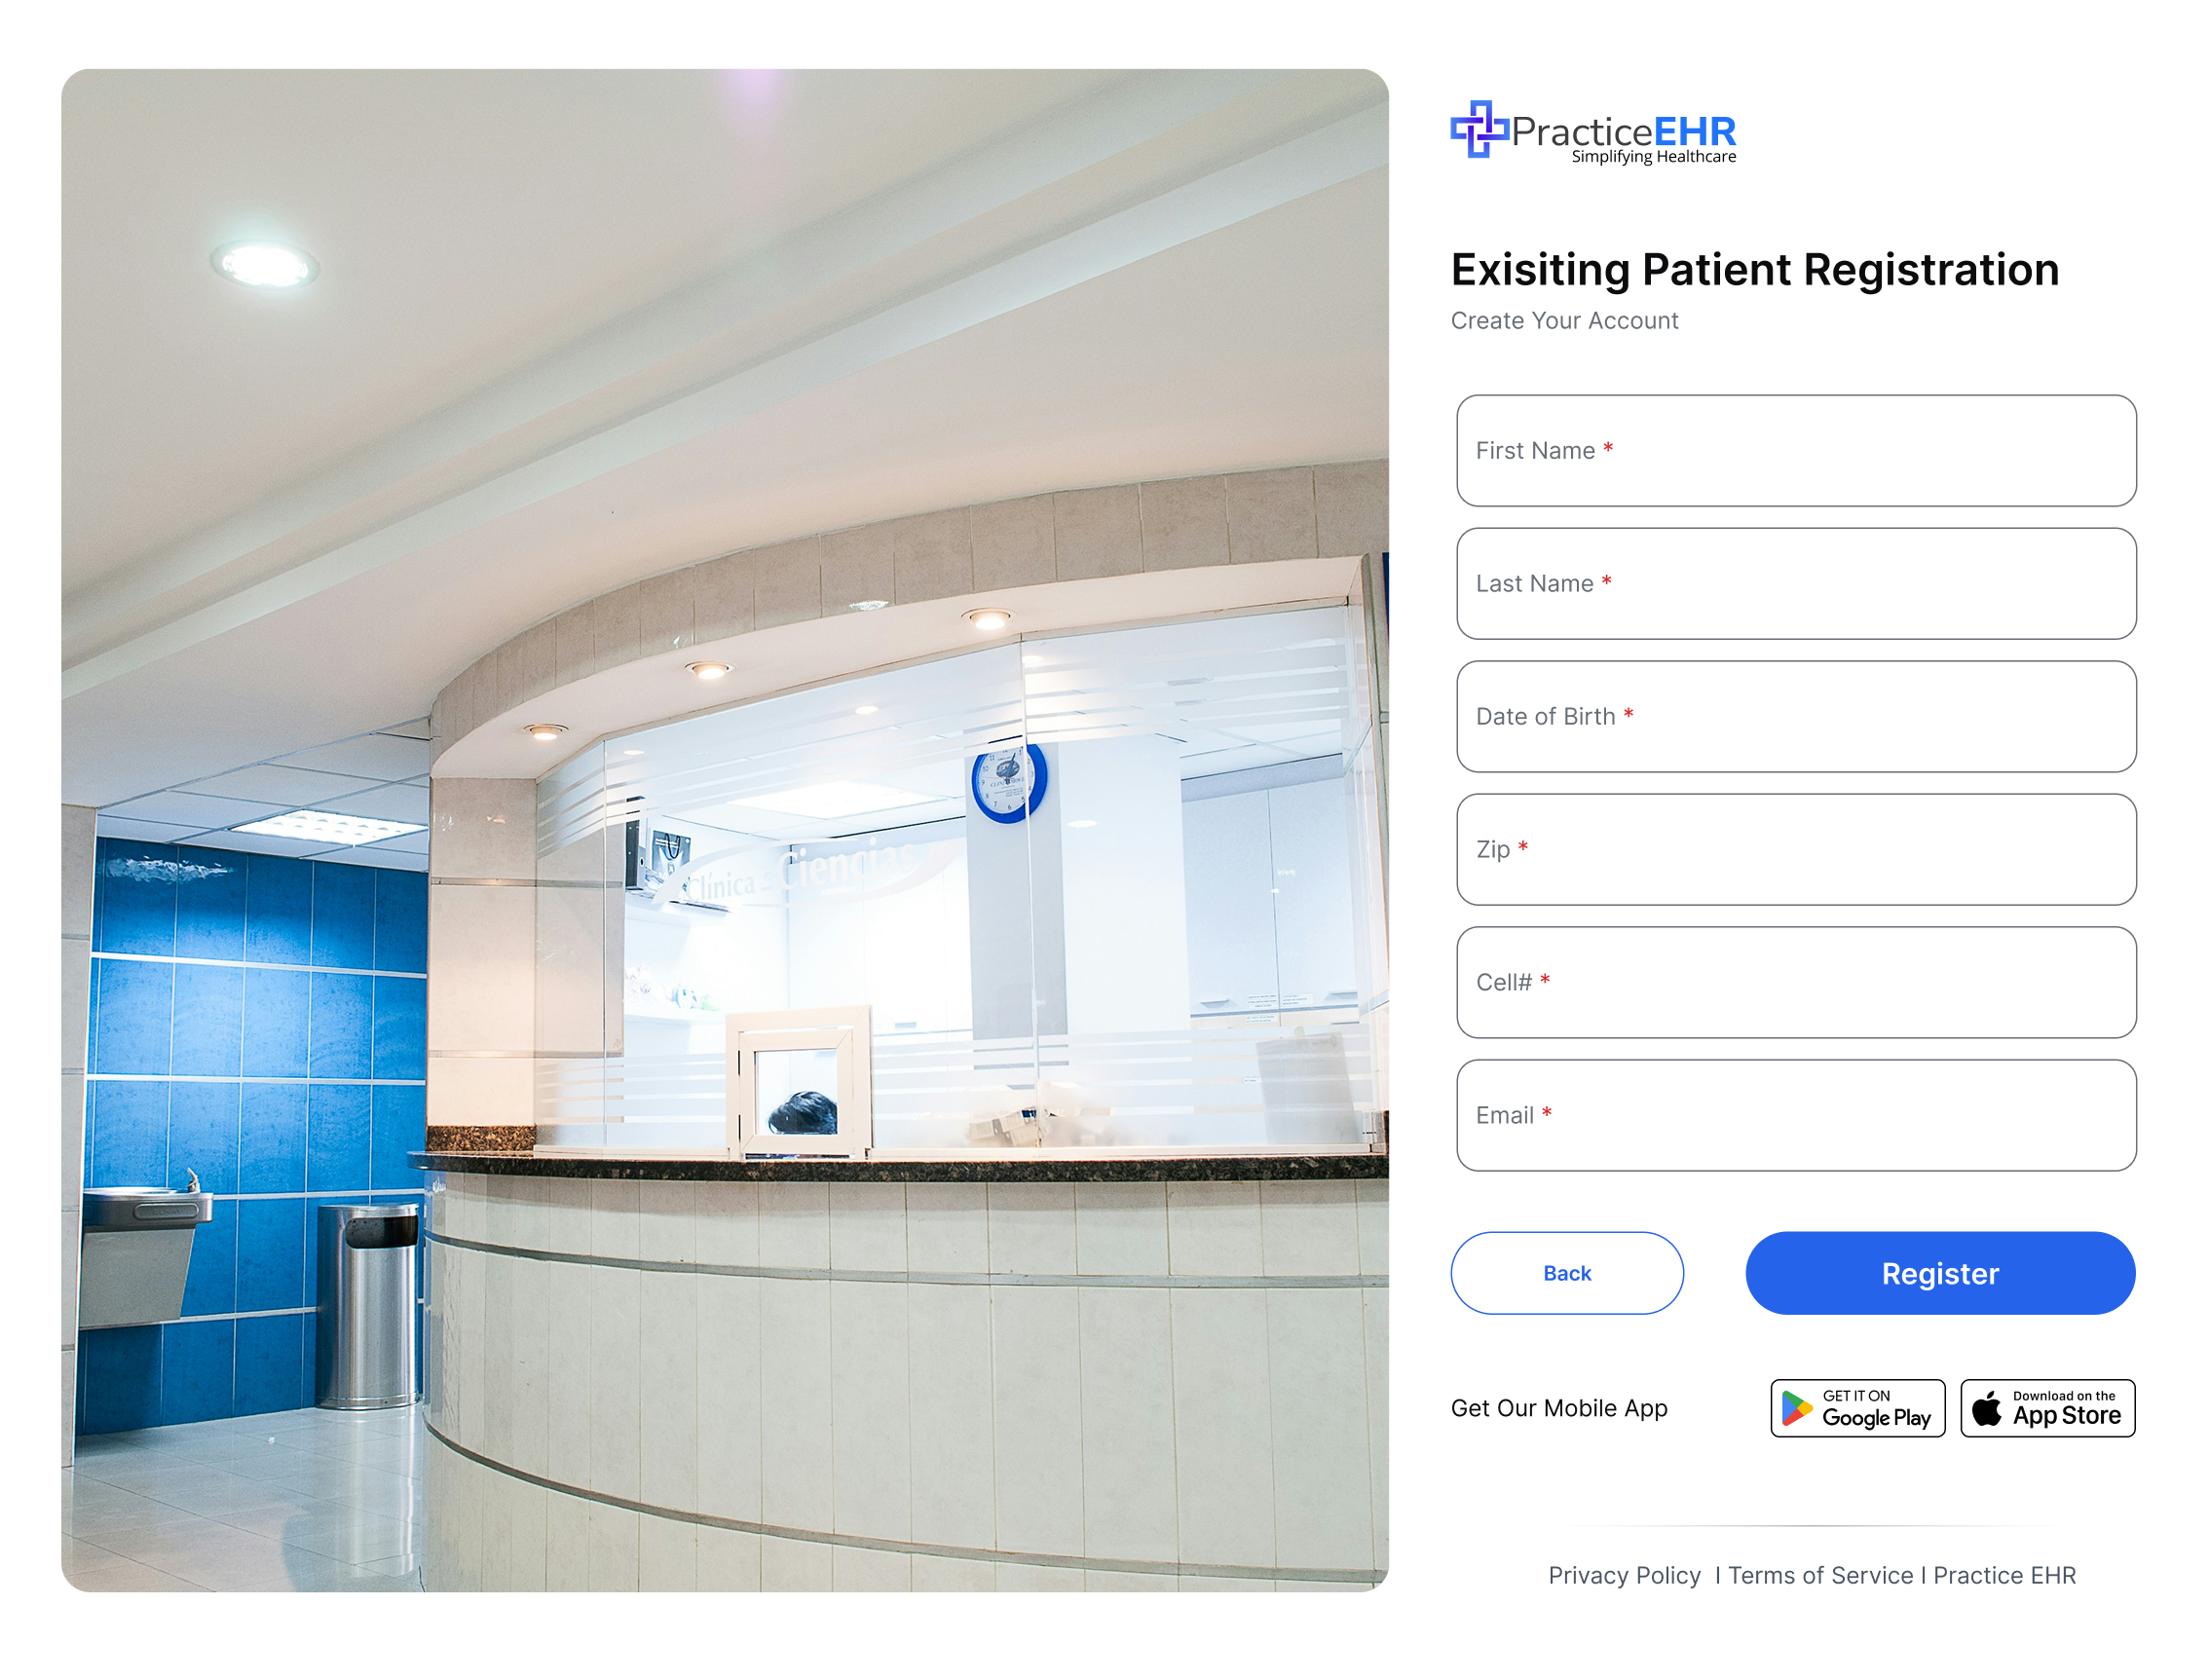
Existing patients can link their portal account using demographic details on file.
Step 2 - Email OTP Verification
Once the registration form is submitted, an OTP is emailed to the address provided. The user must enter this code to verify ownership of the email before they can activate the account.
New Patient - Verify Email
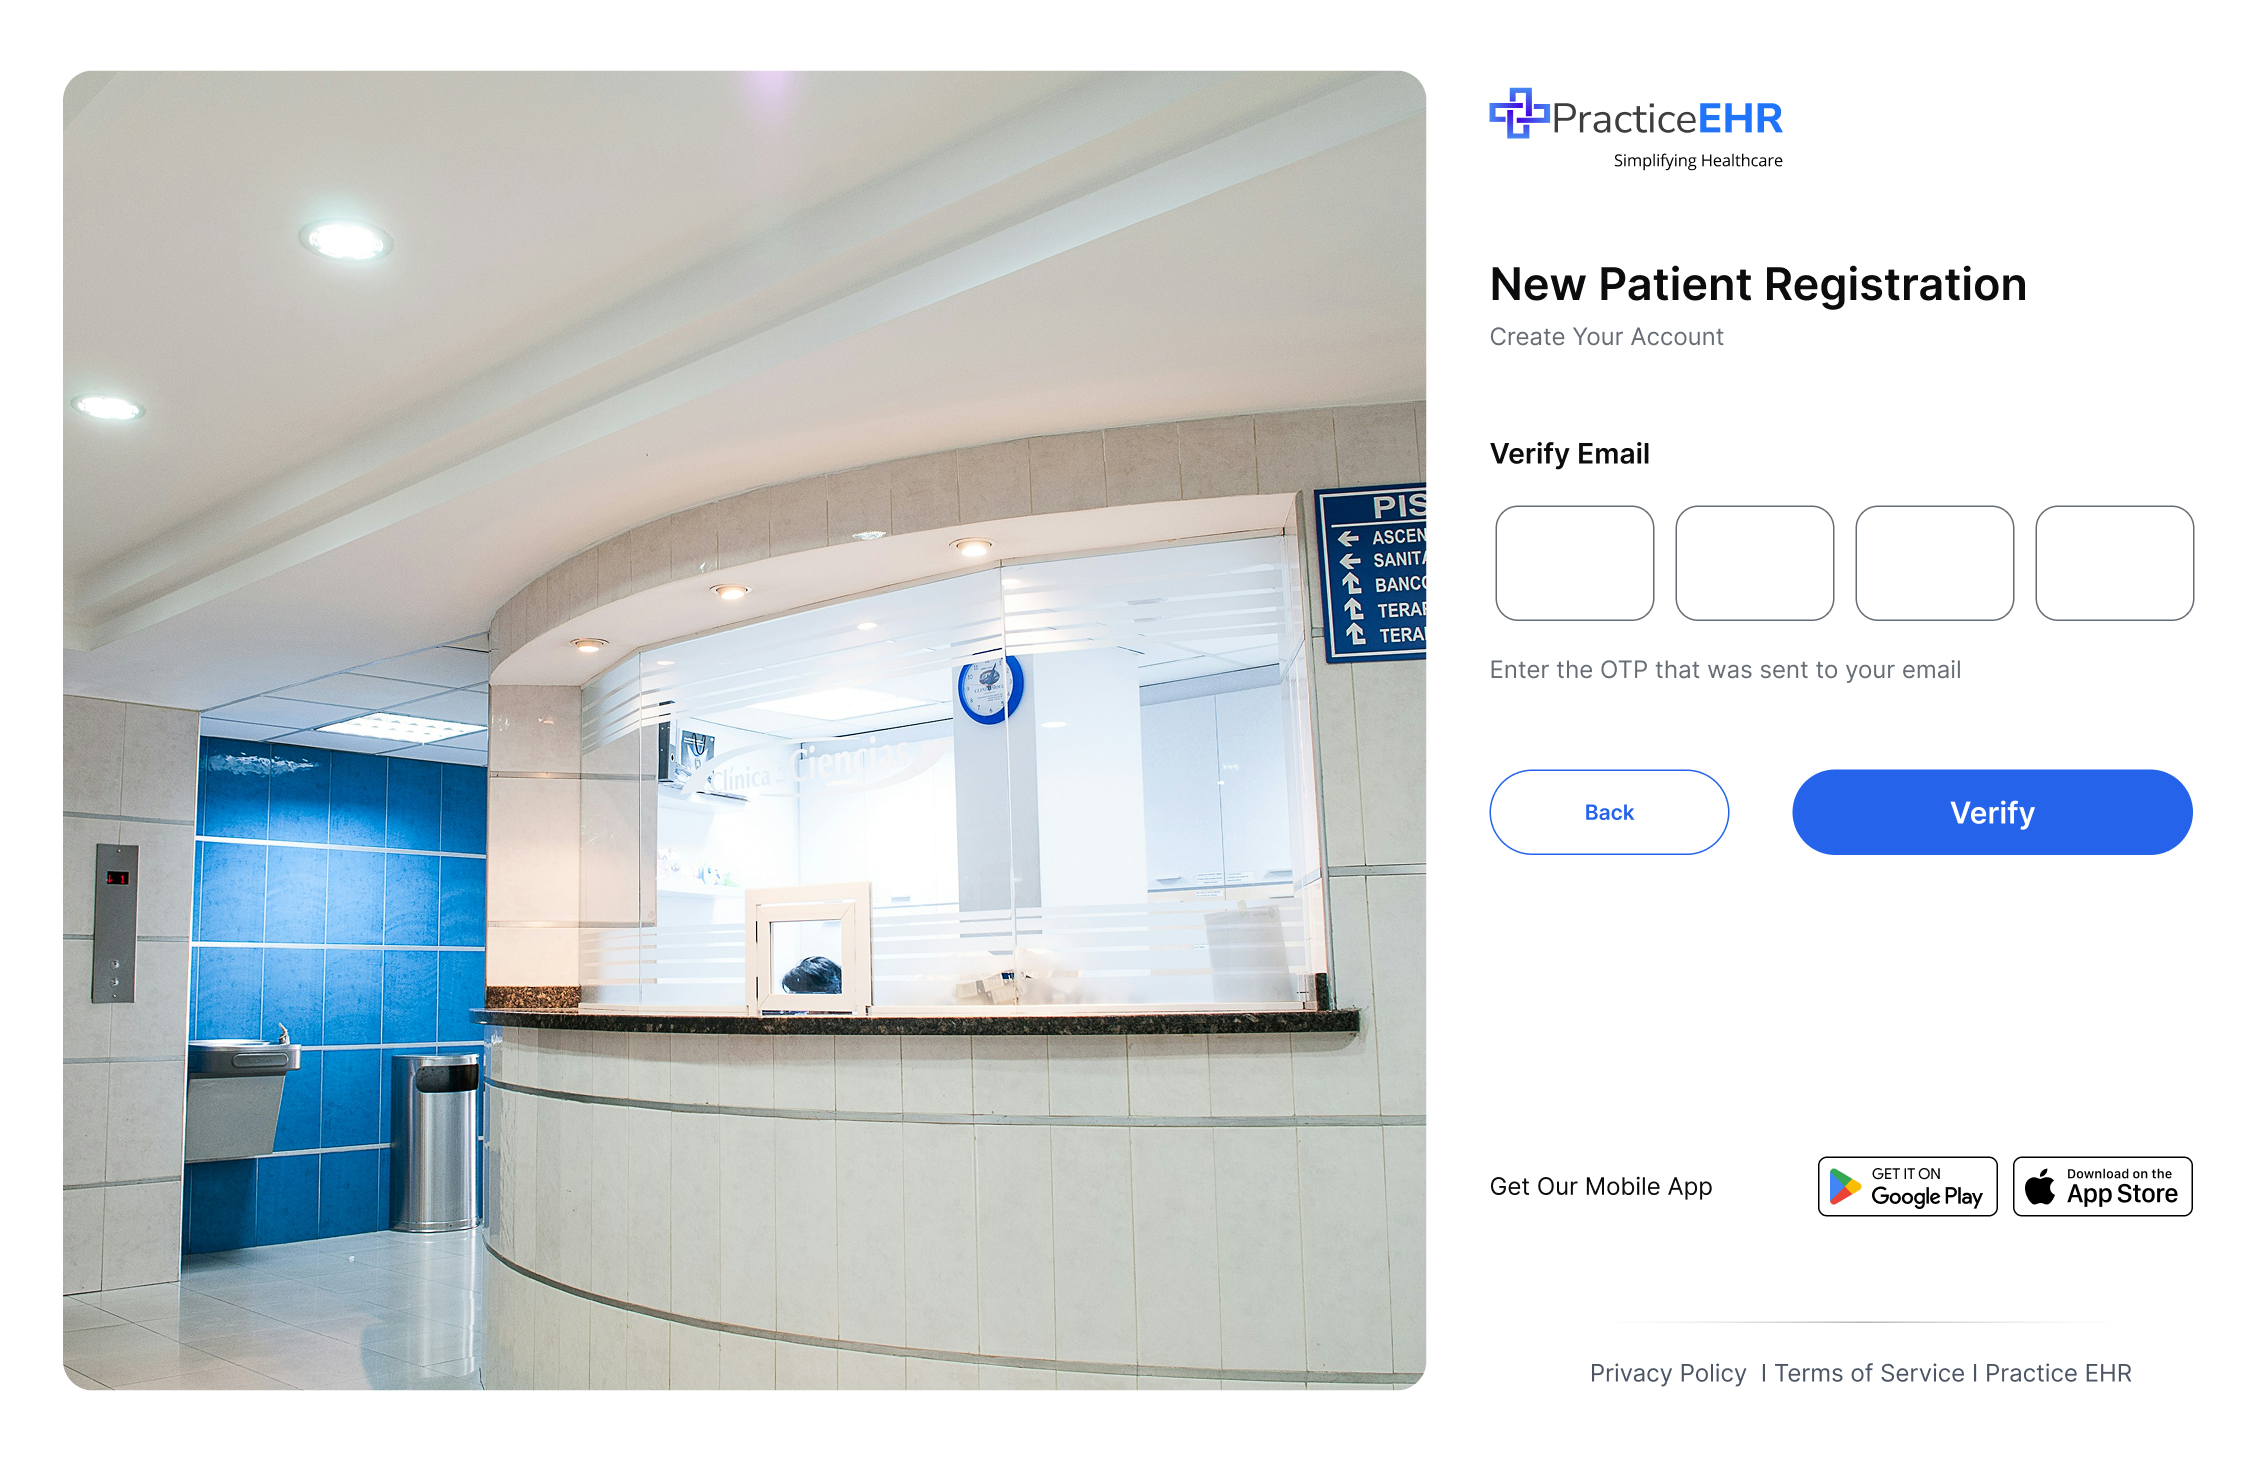
OTP fields validate the code sent to the new patient's email address.
Existing Patient - Verify Email

Existing patients follow the same OTP step to confirm the email on file.
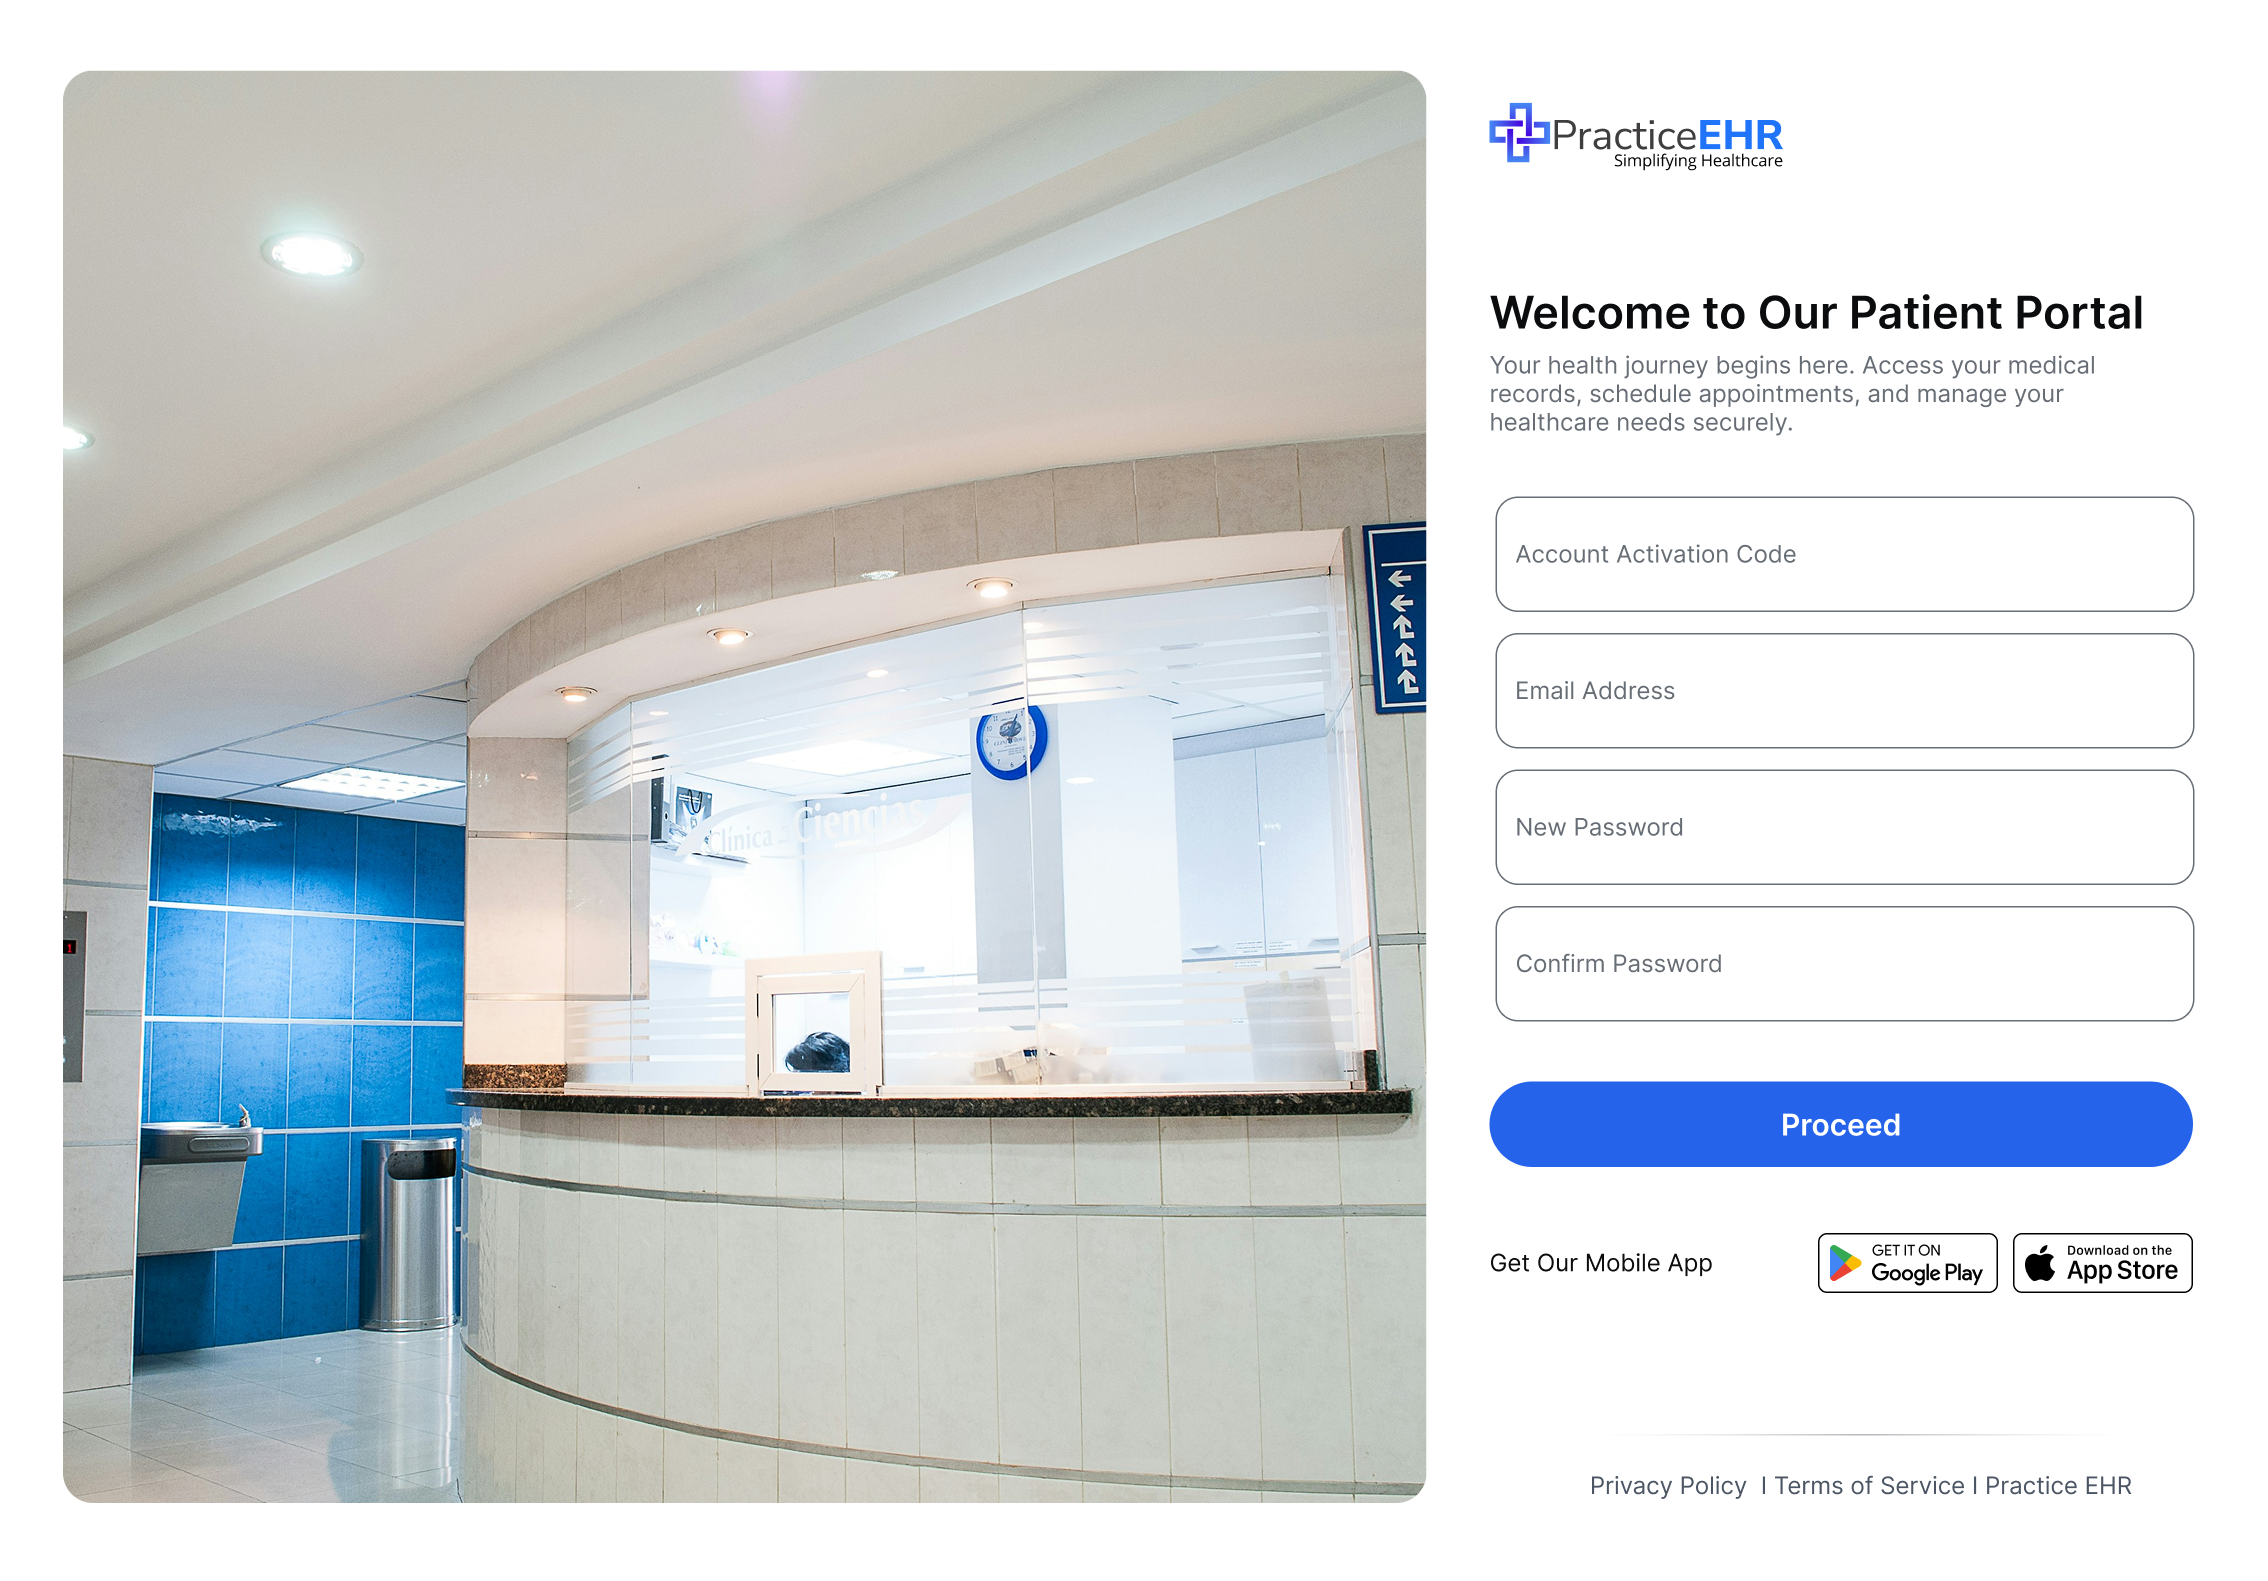
Step 3 - Account Activation & Password Setup
After successful OTP verification, patients land on the activation screen, where they enter their activation code (if applicable) and set their portal password.
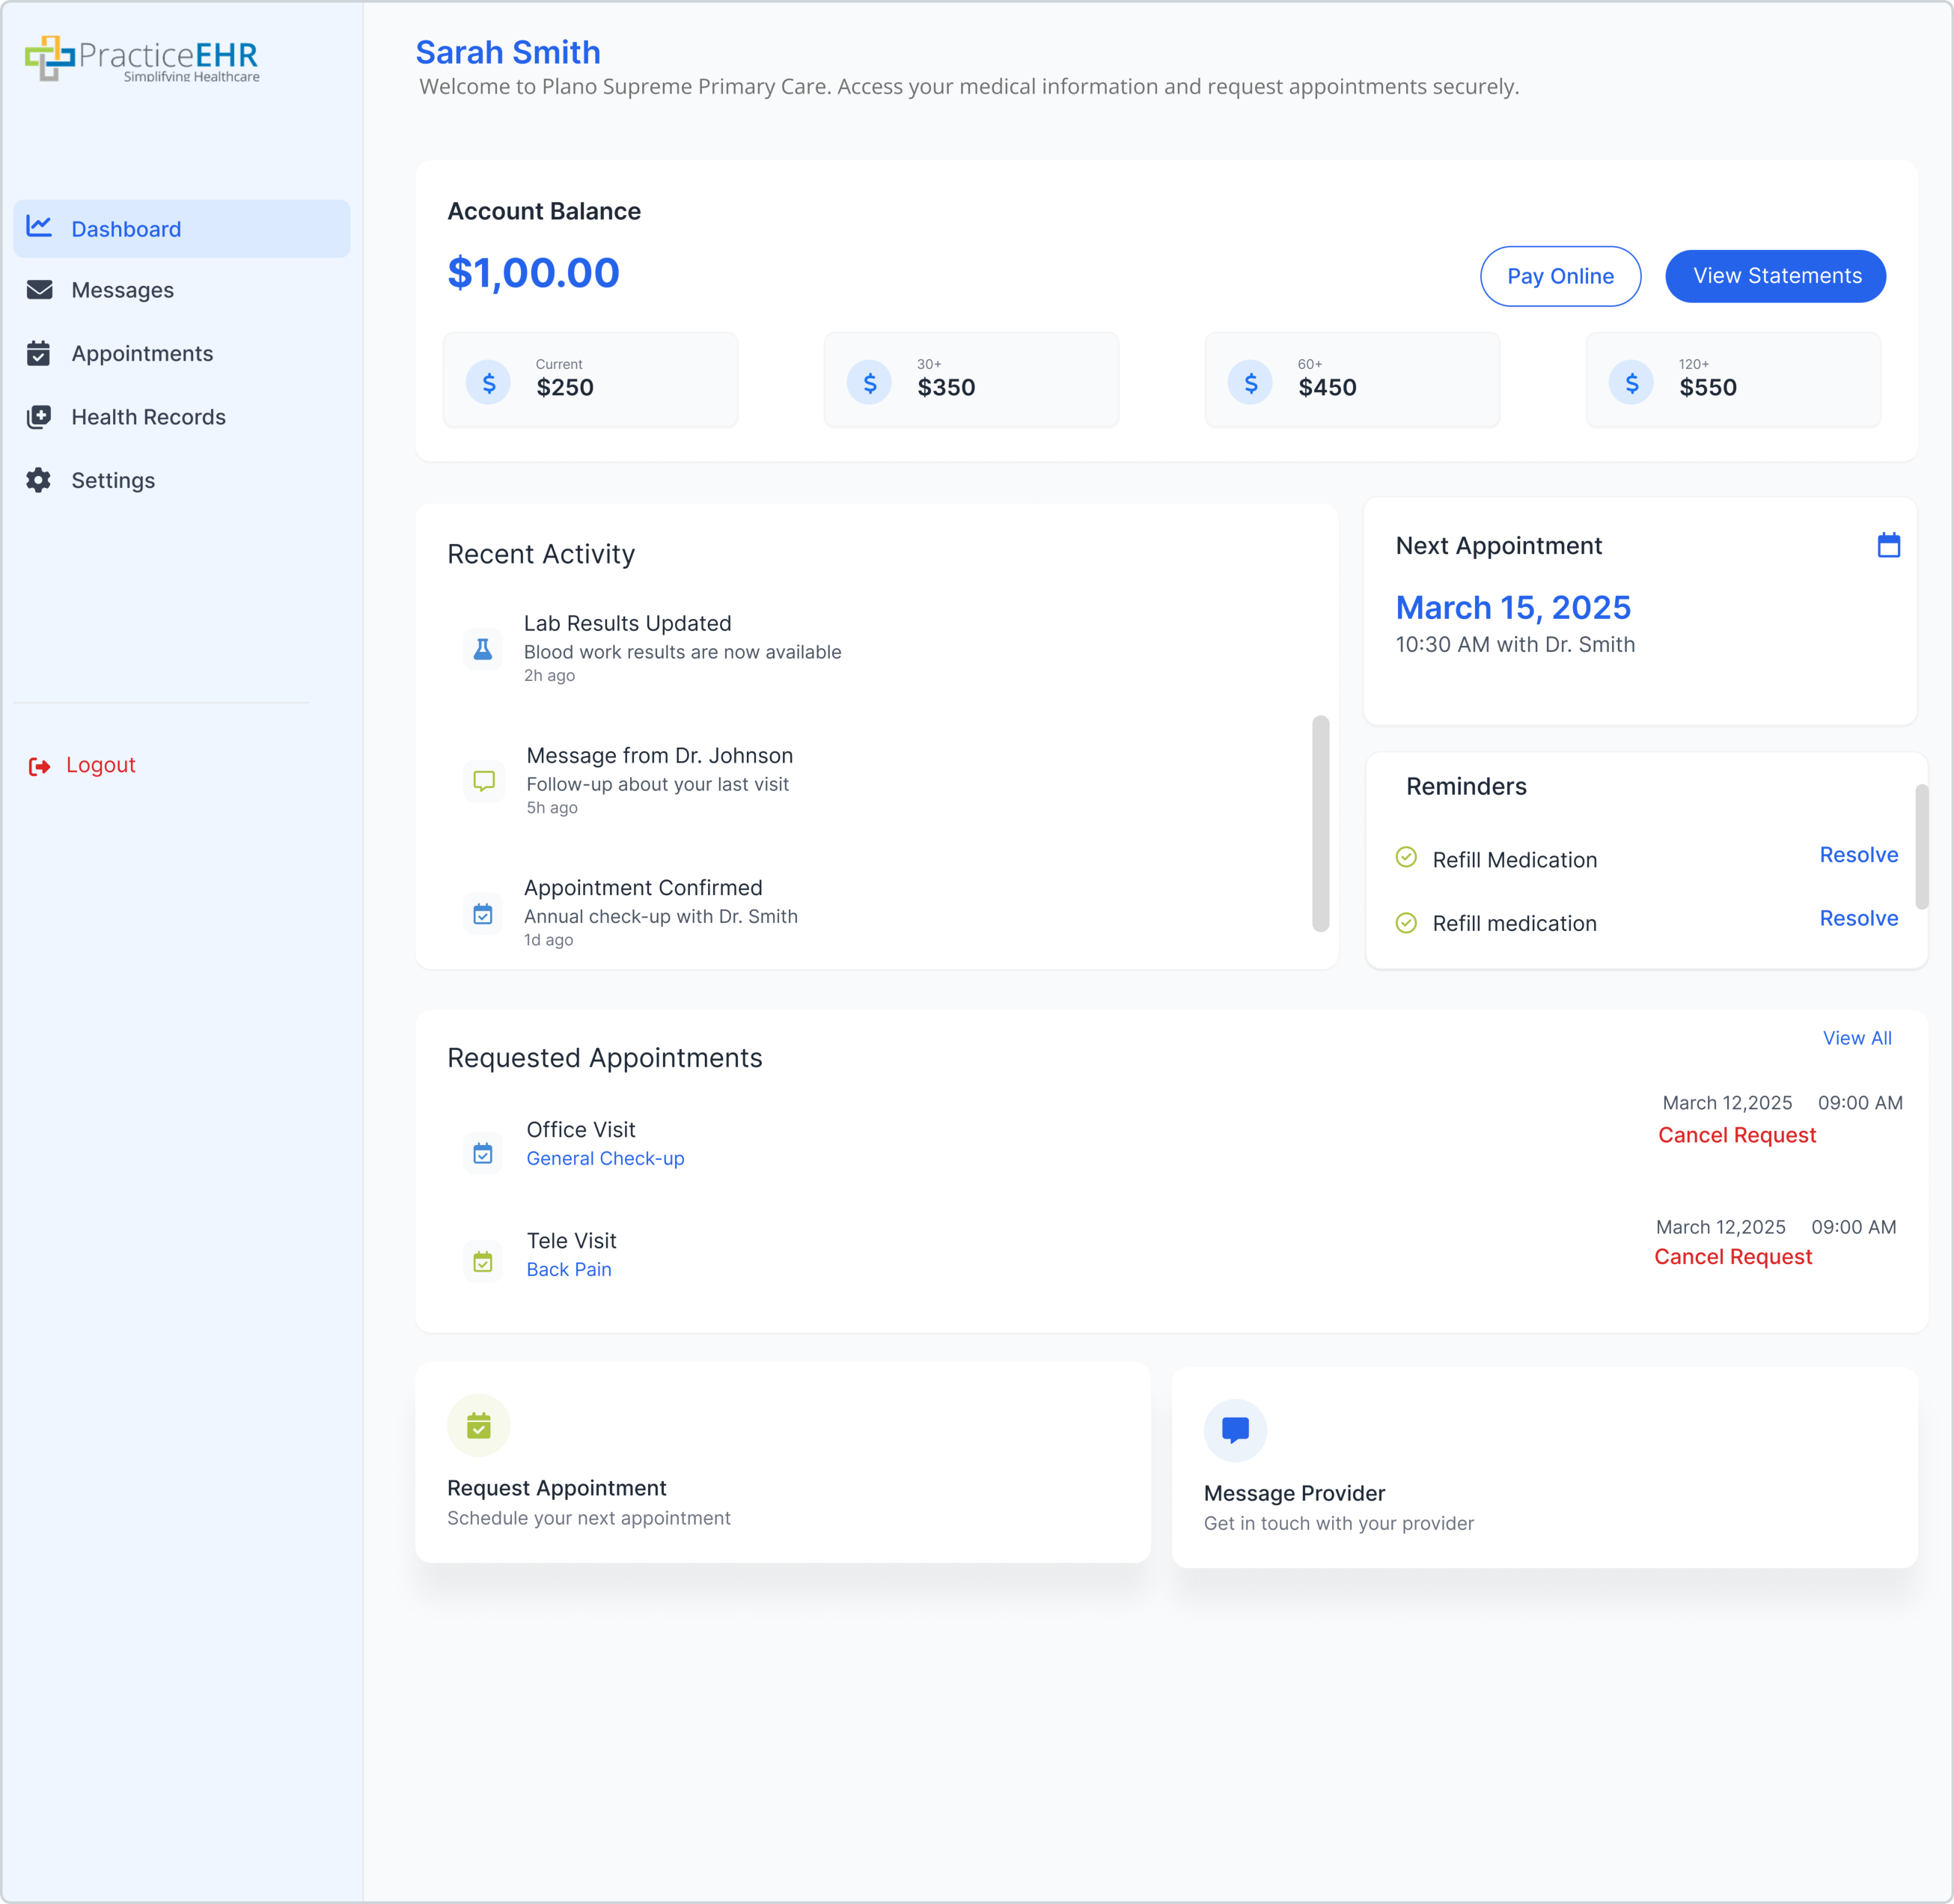
Dashboard
Overview of recent activity, appointments, and quick actions.
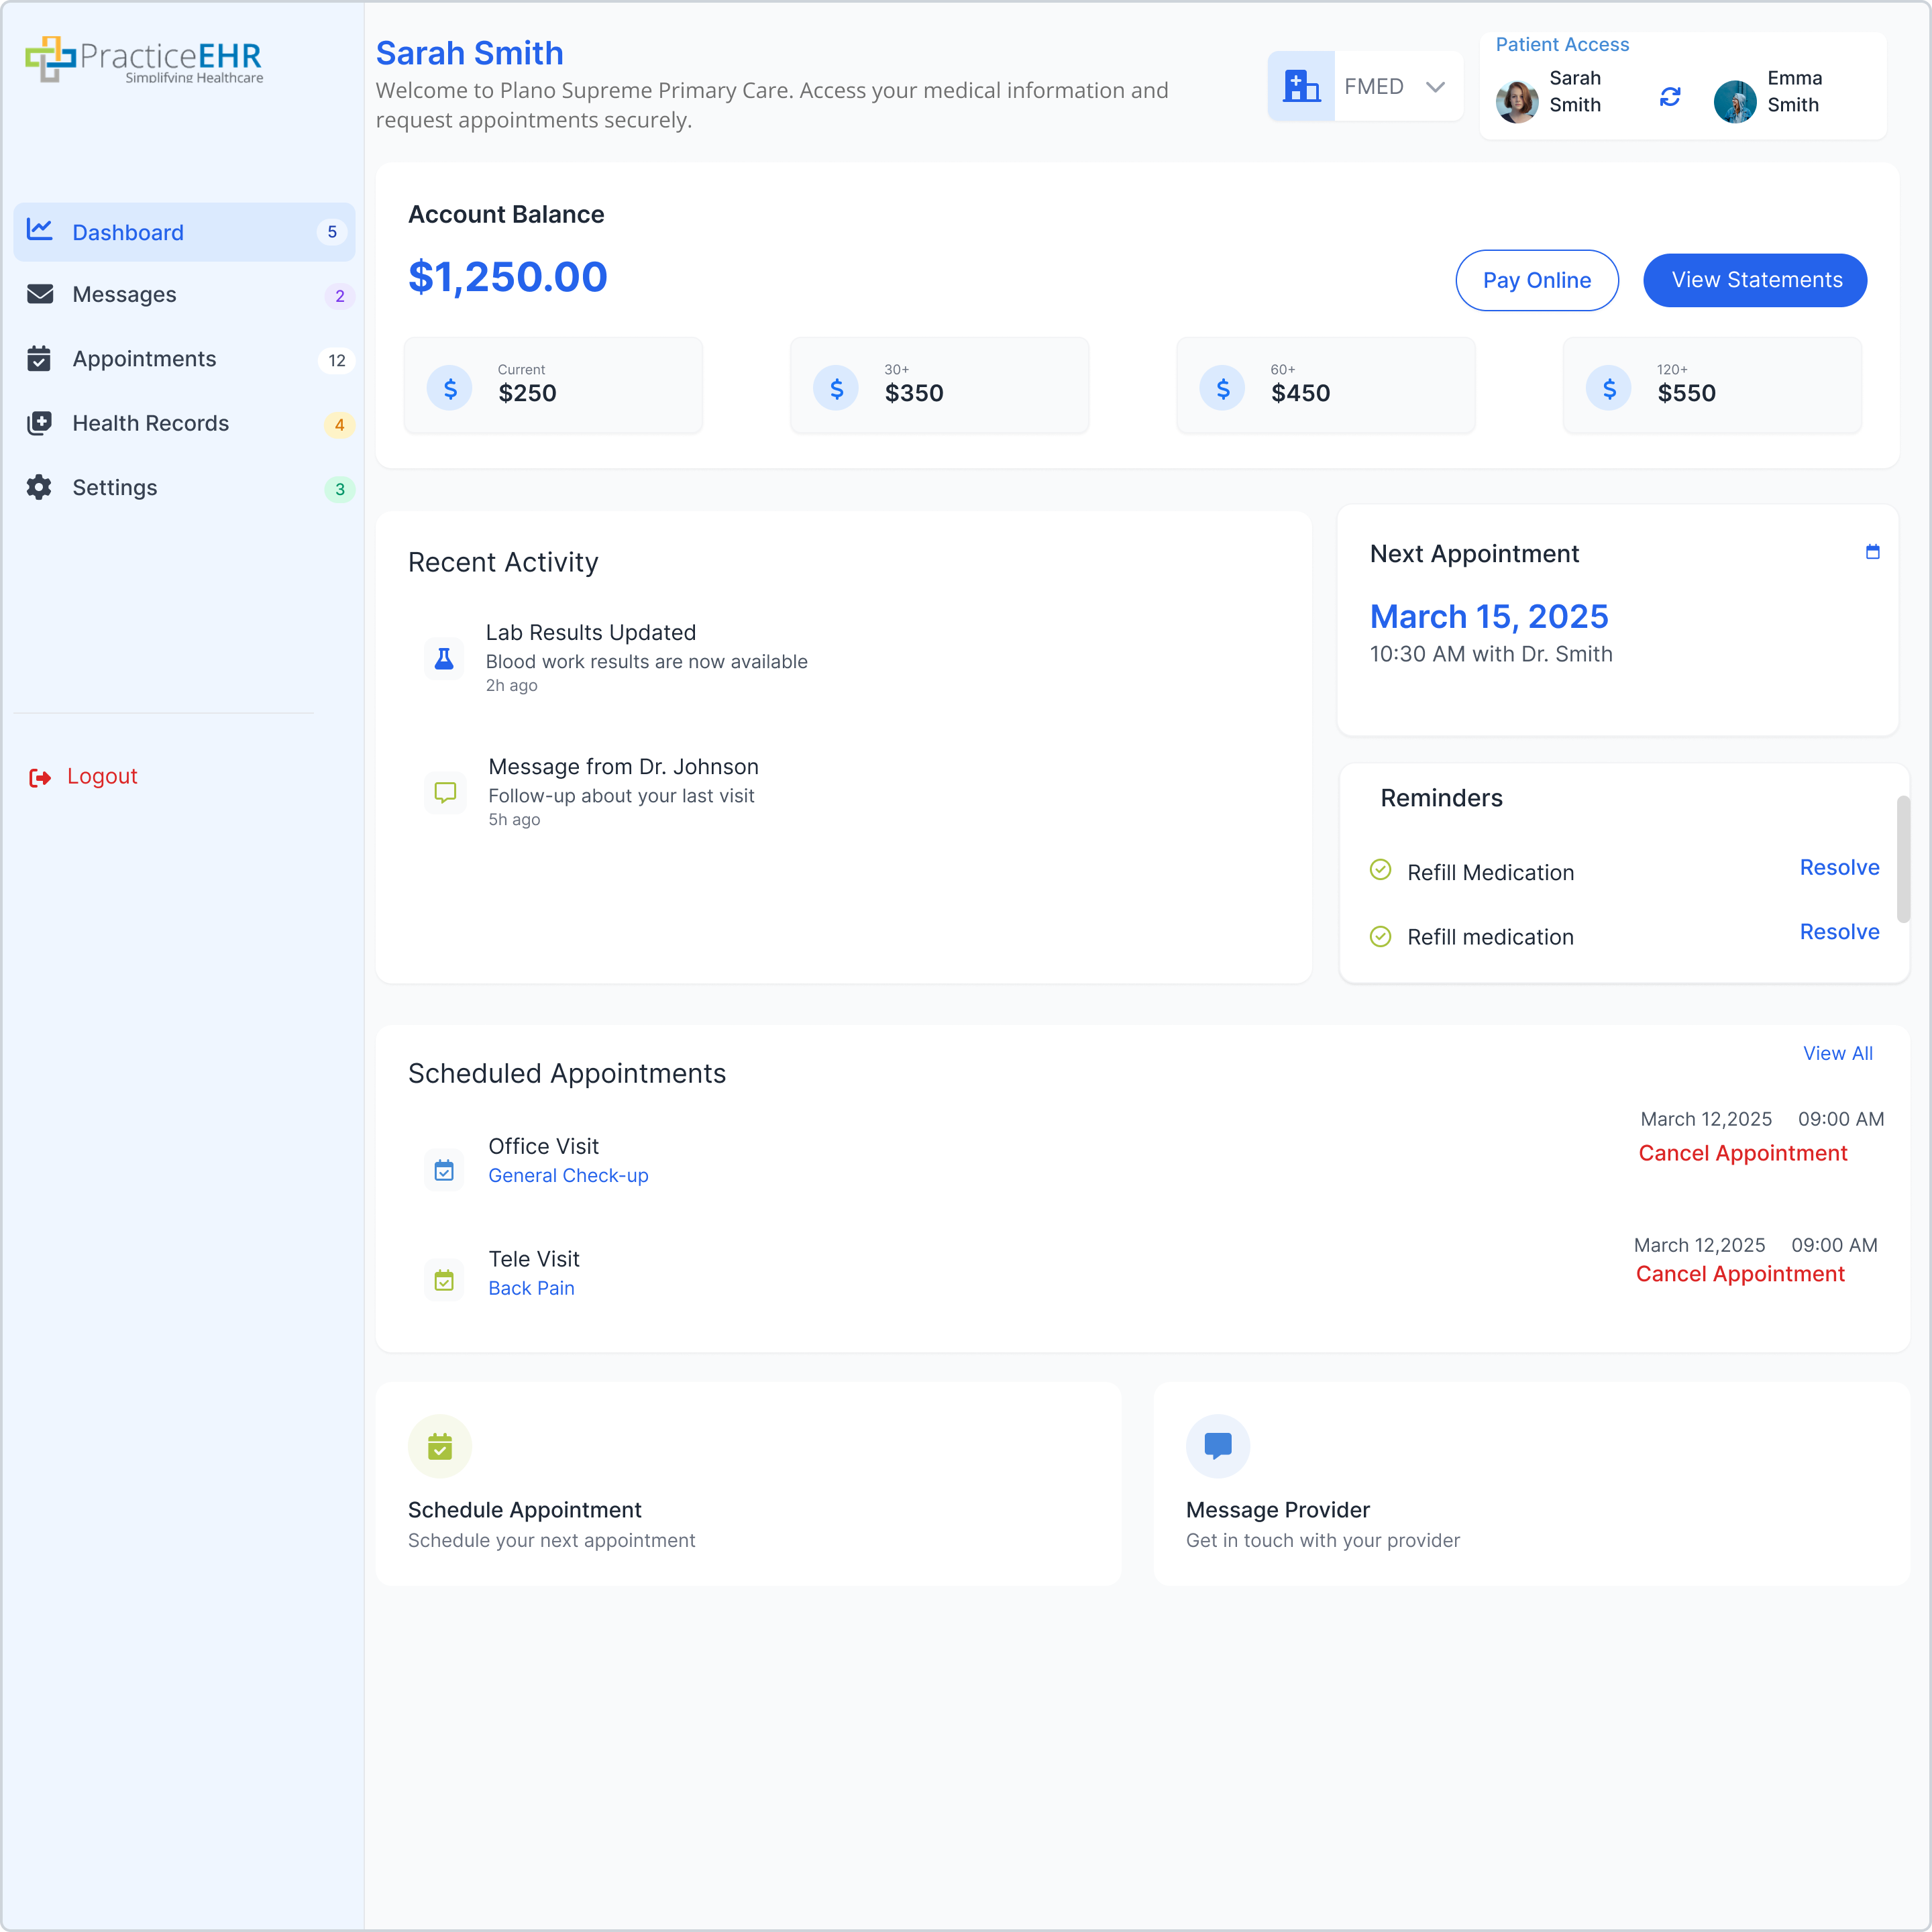
No new functionality added.
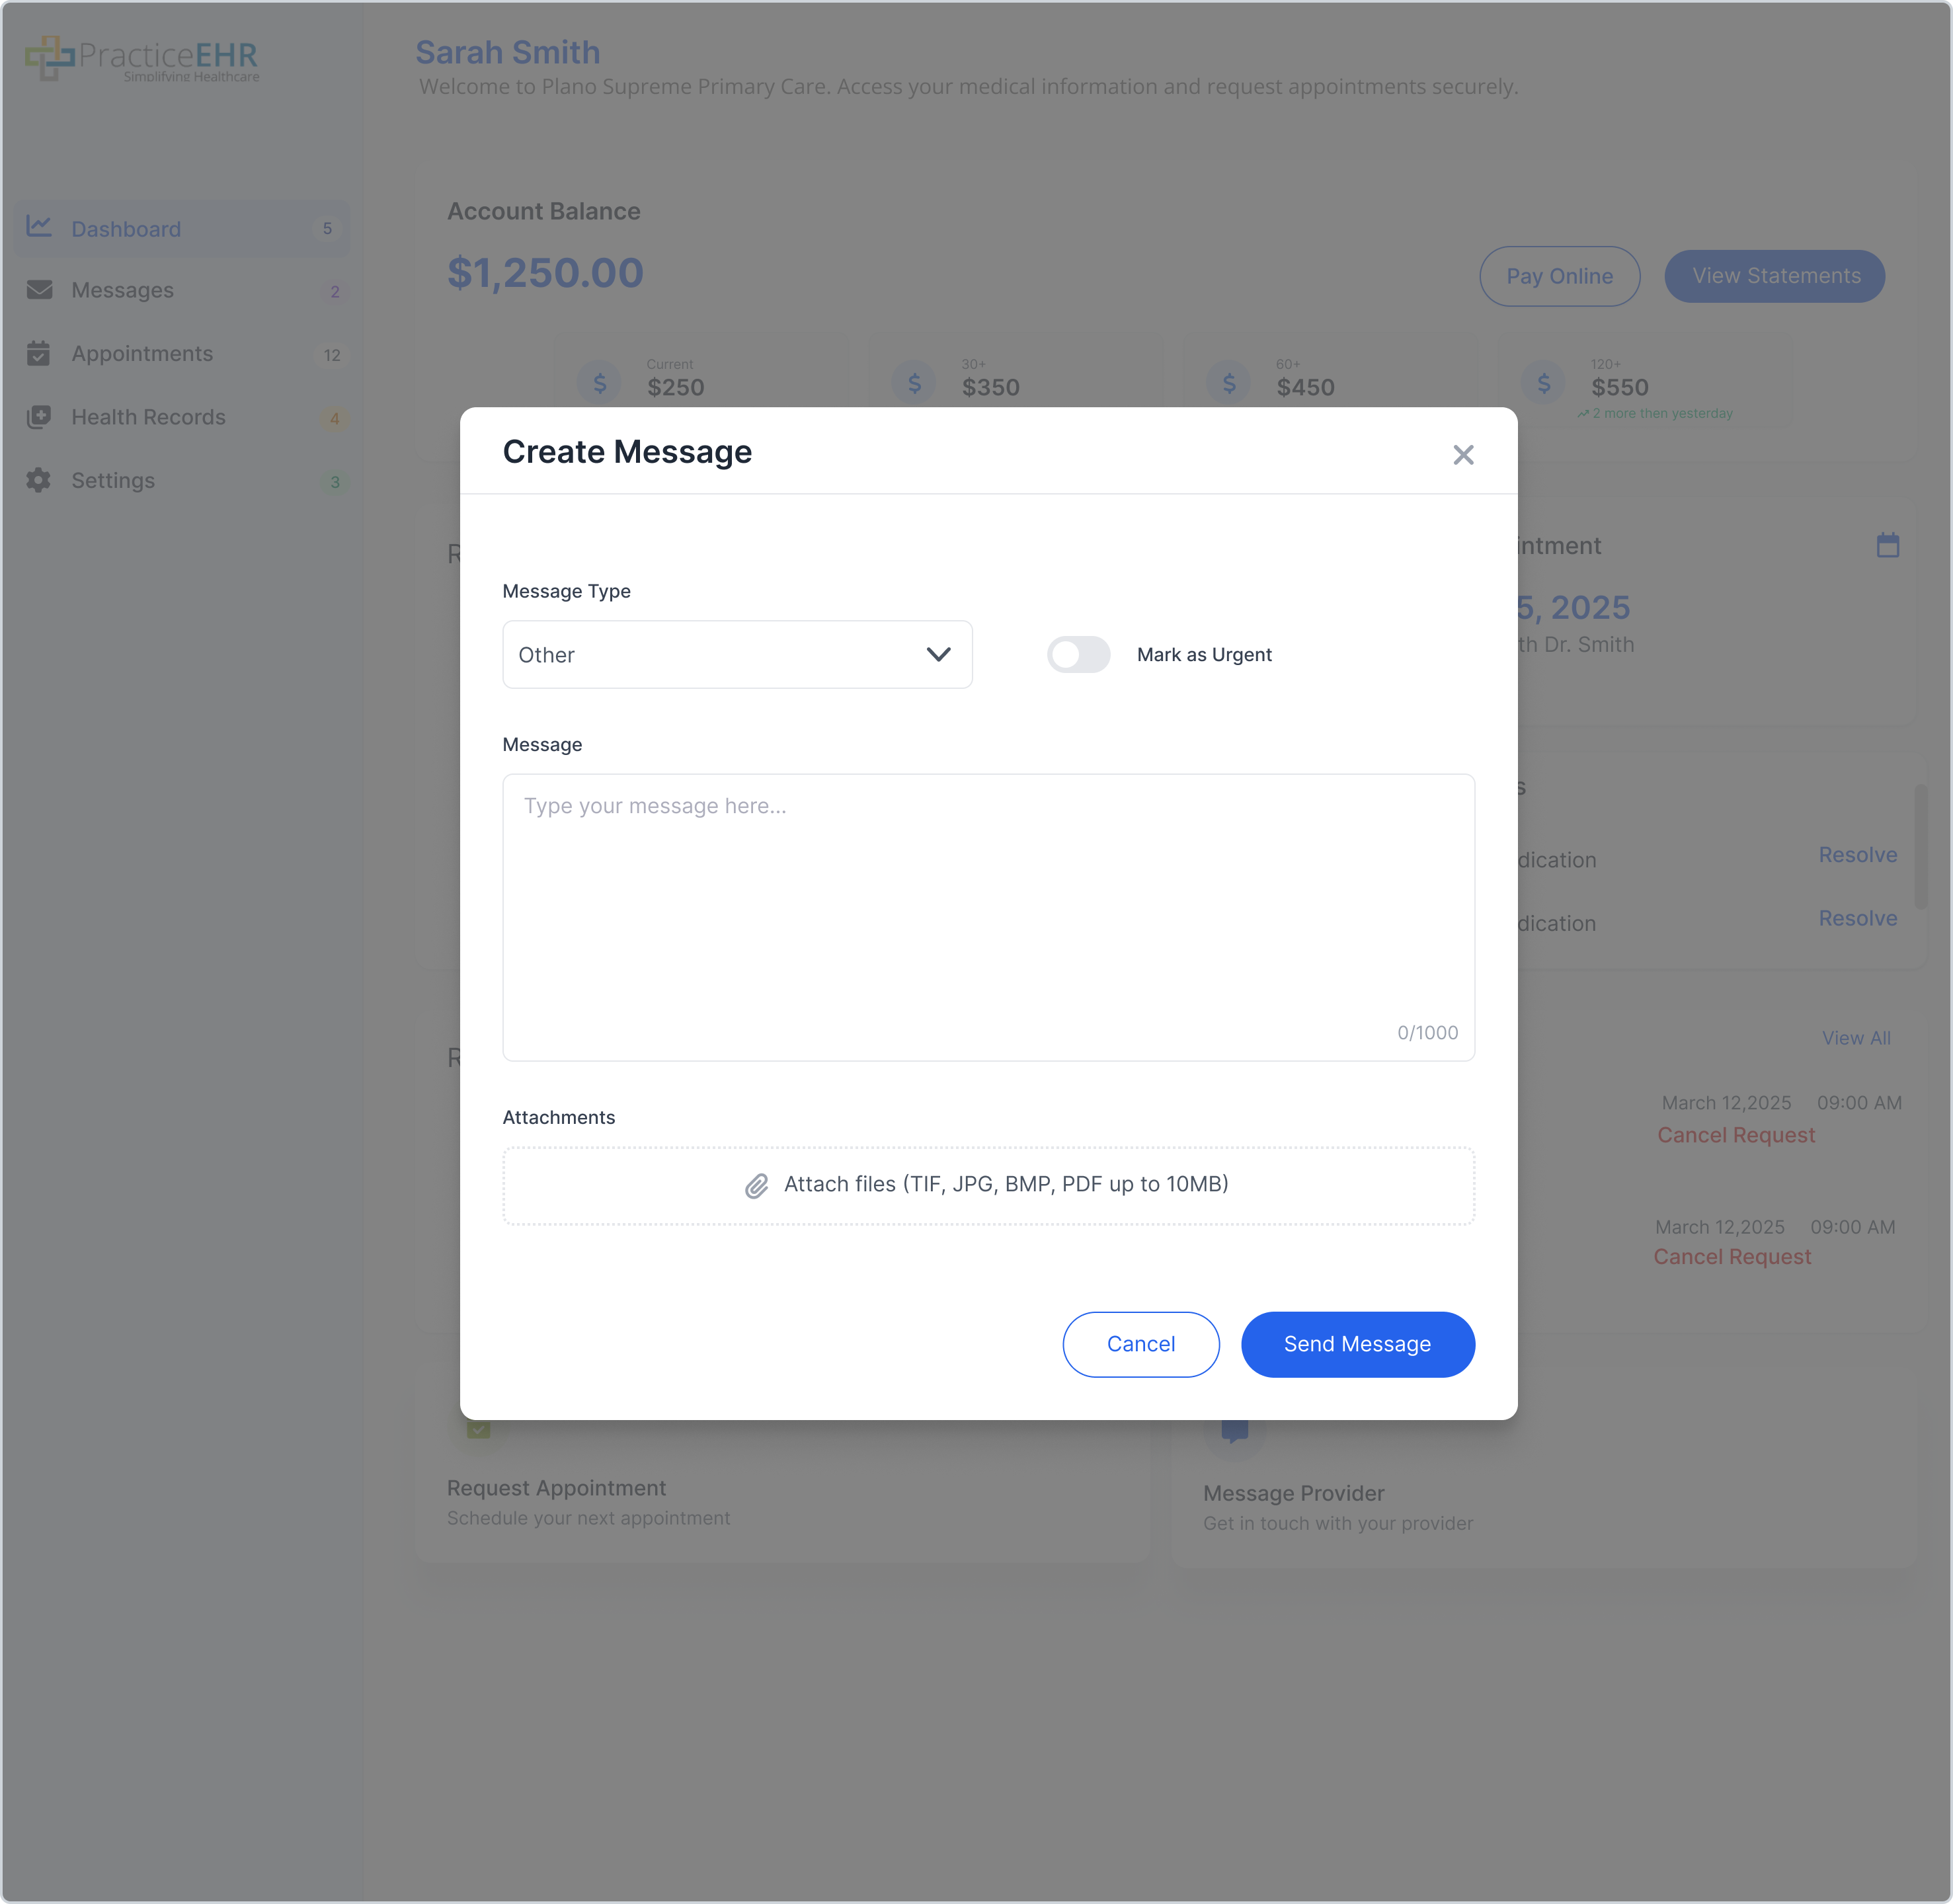
Messages
Communication hub separated by Active and Resolved threads.
Active Messages
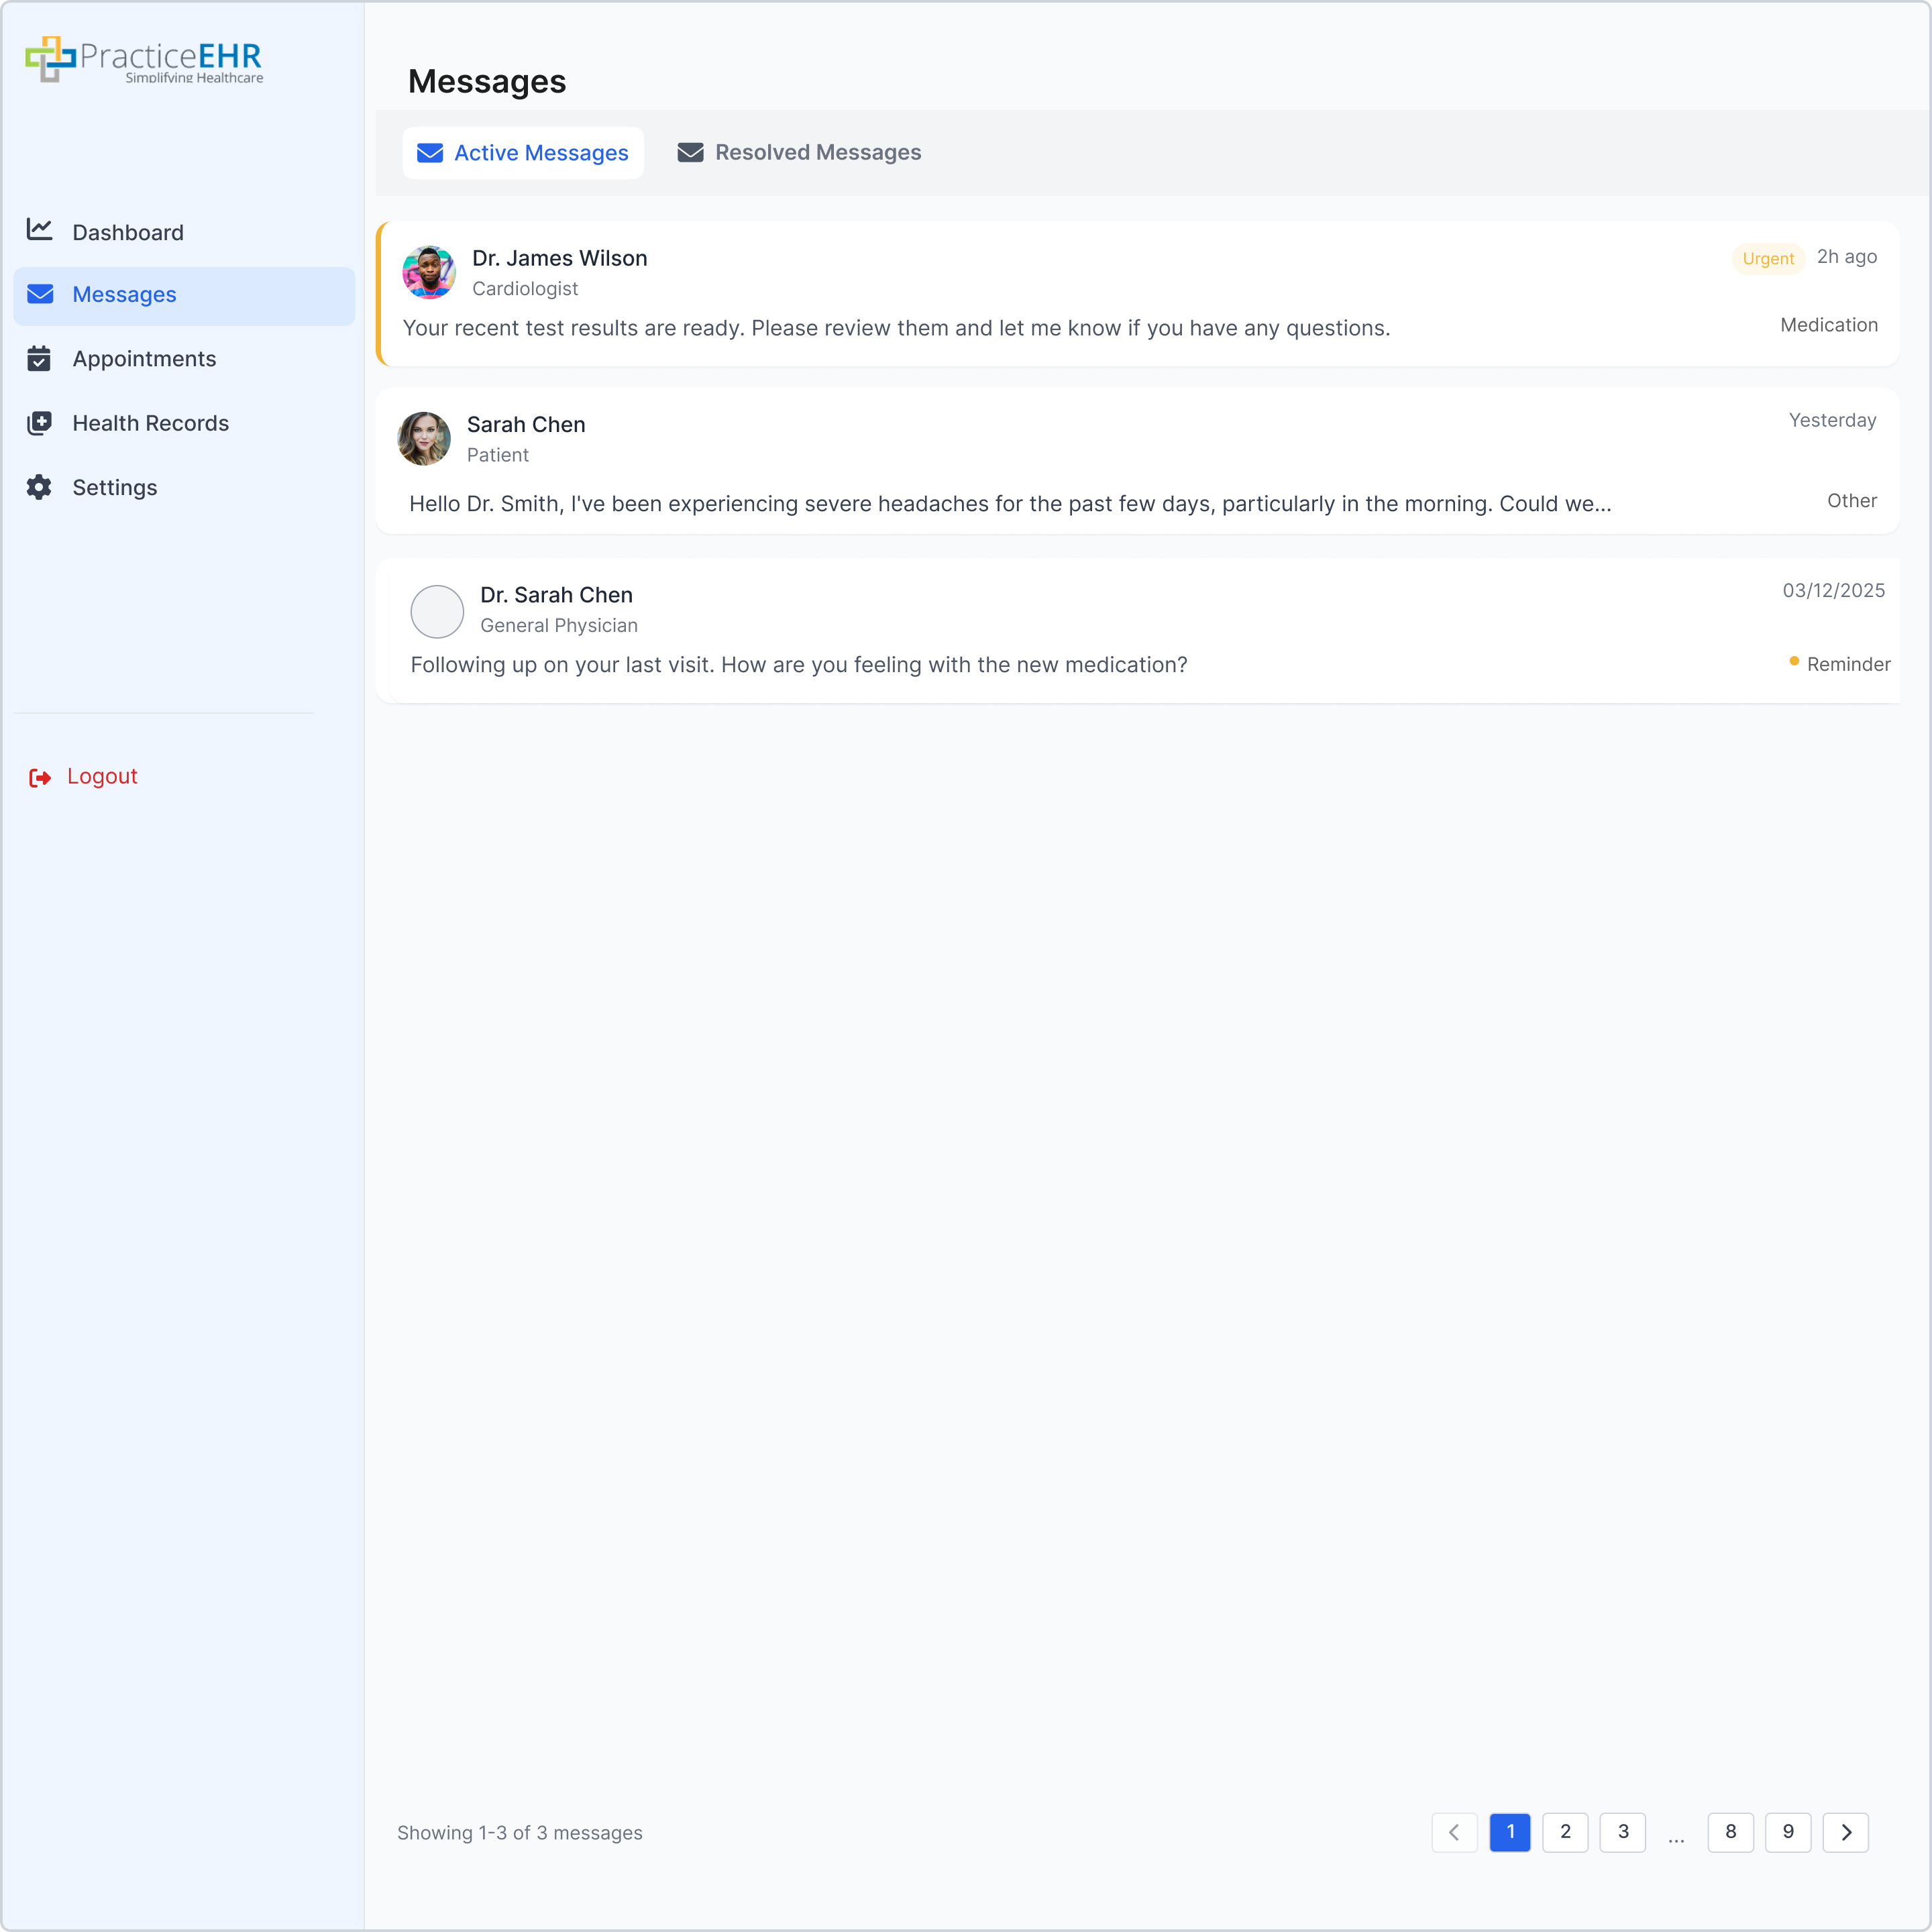
Includes a refresher button at the top.
Resolved Messages
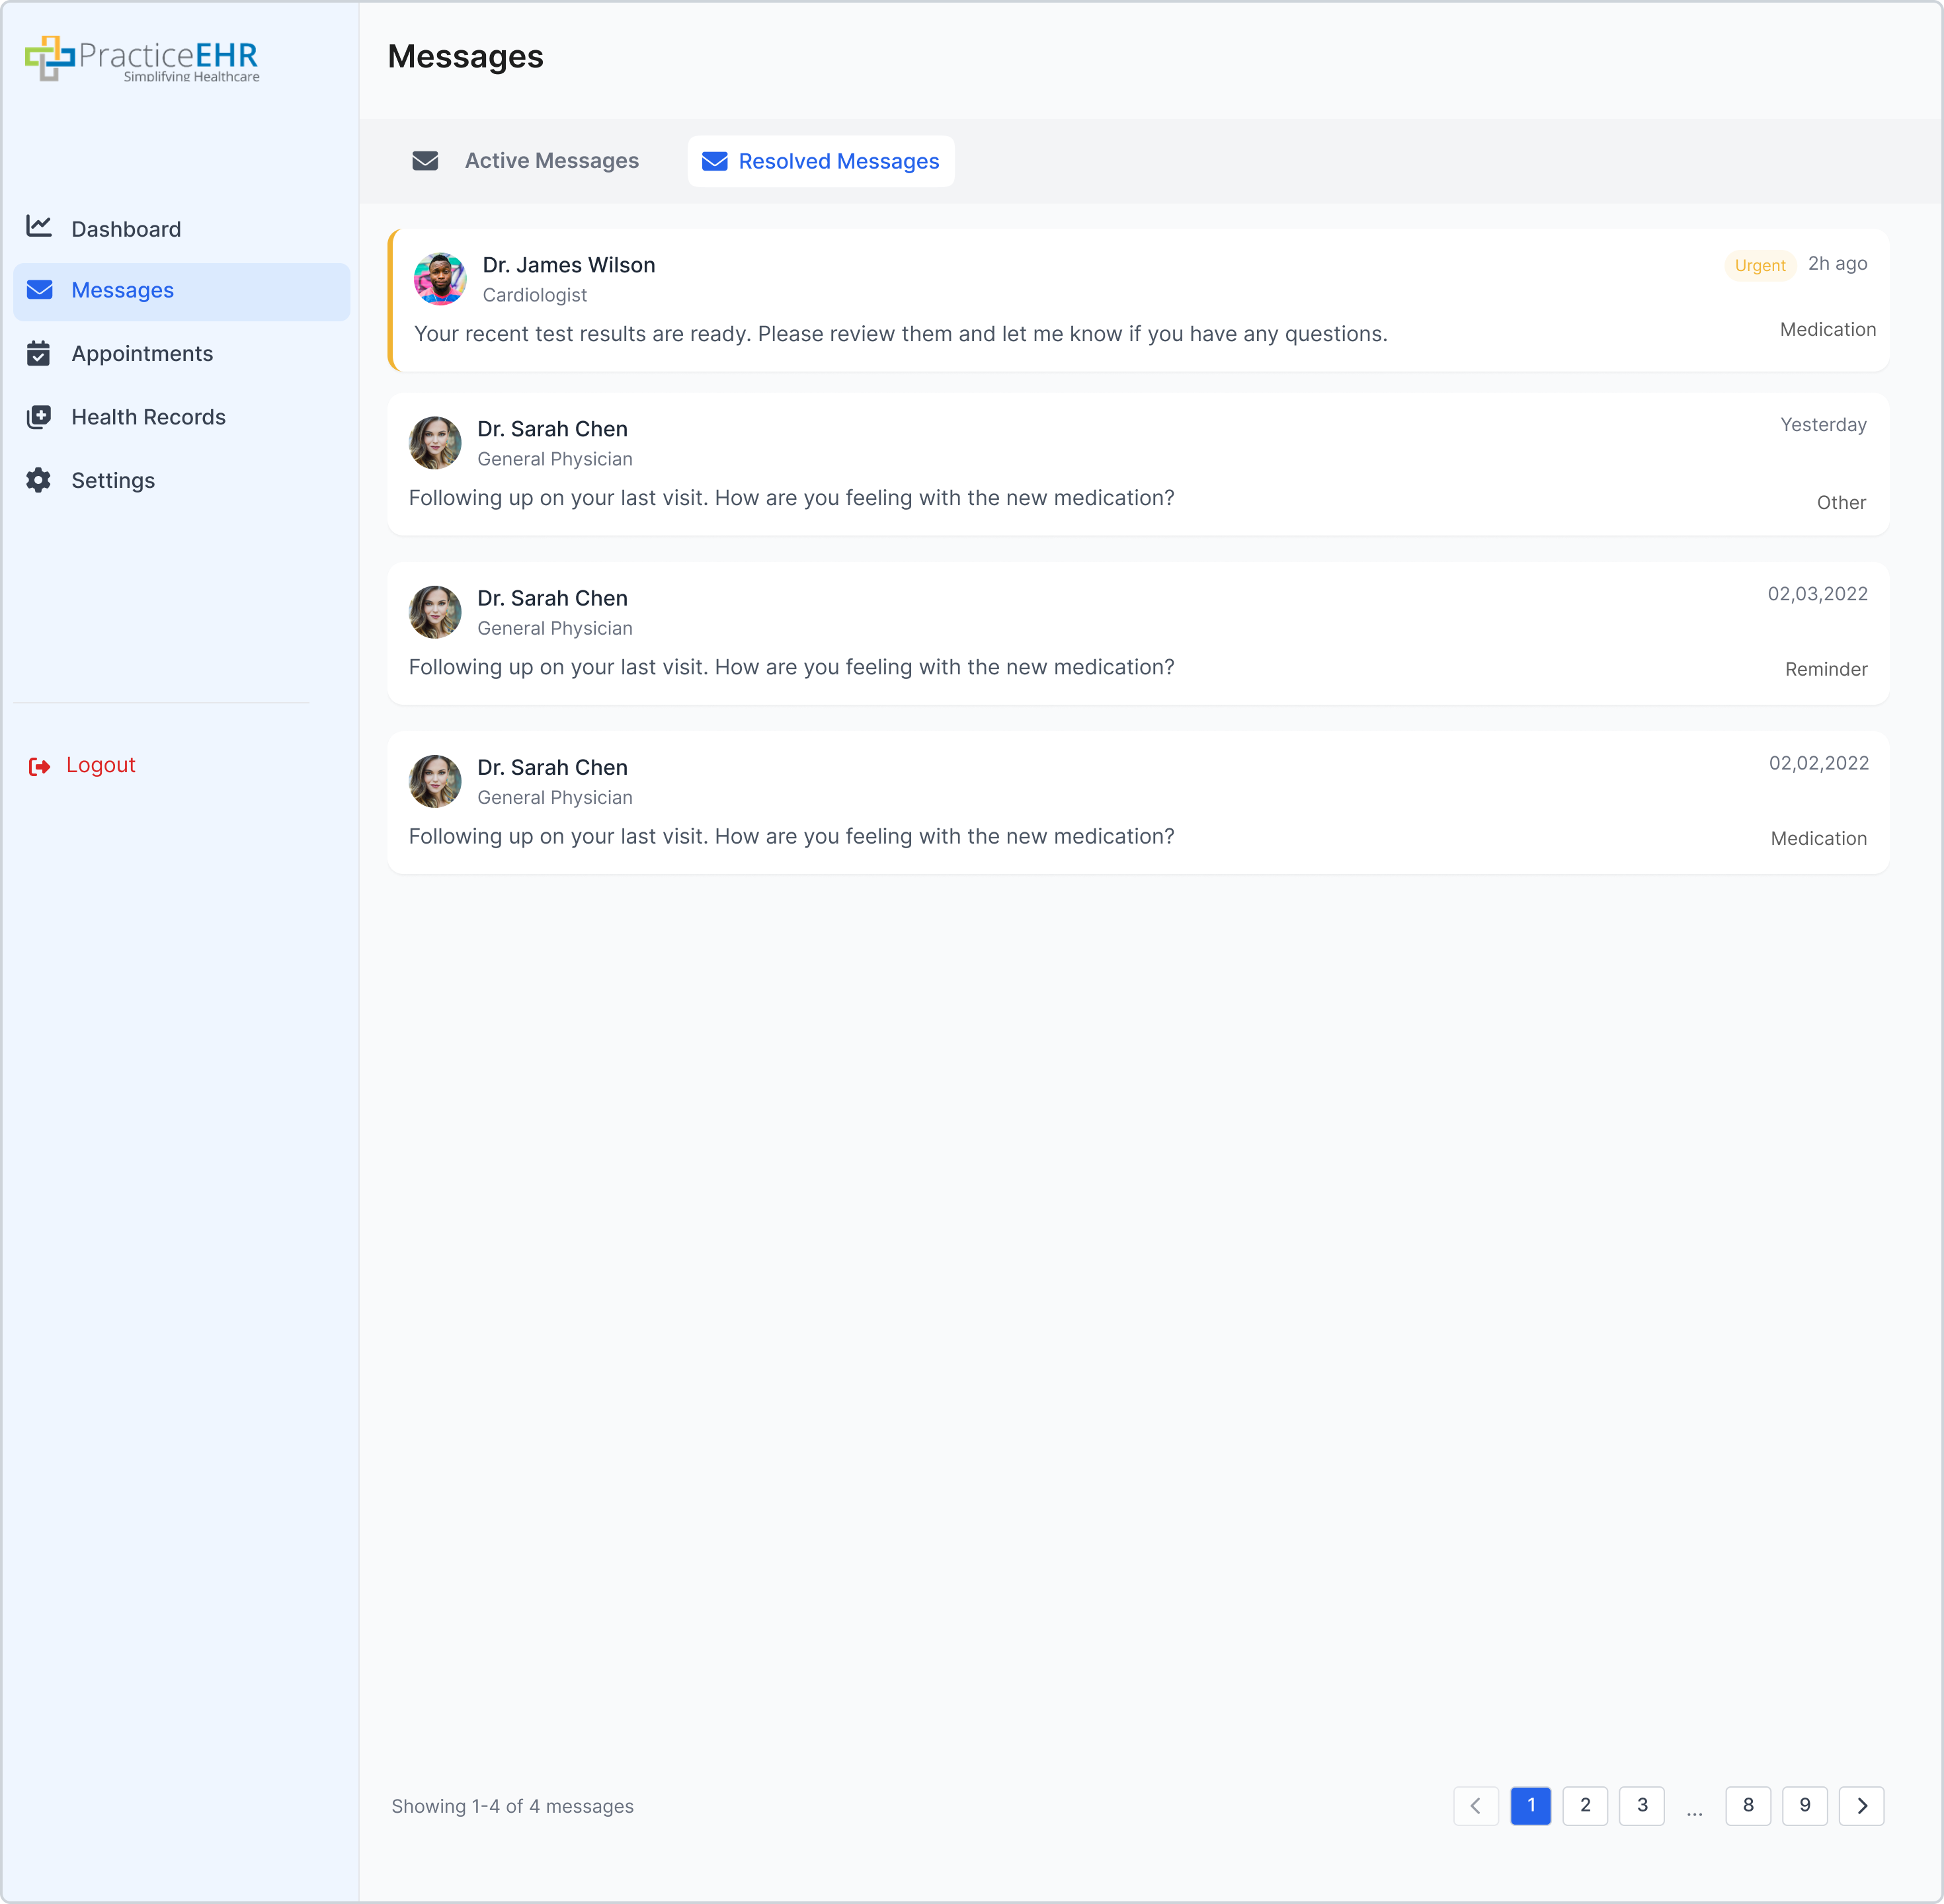
Reminders resolved from the dashboard also appear here.
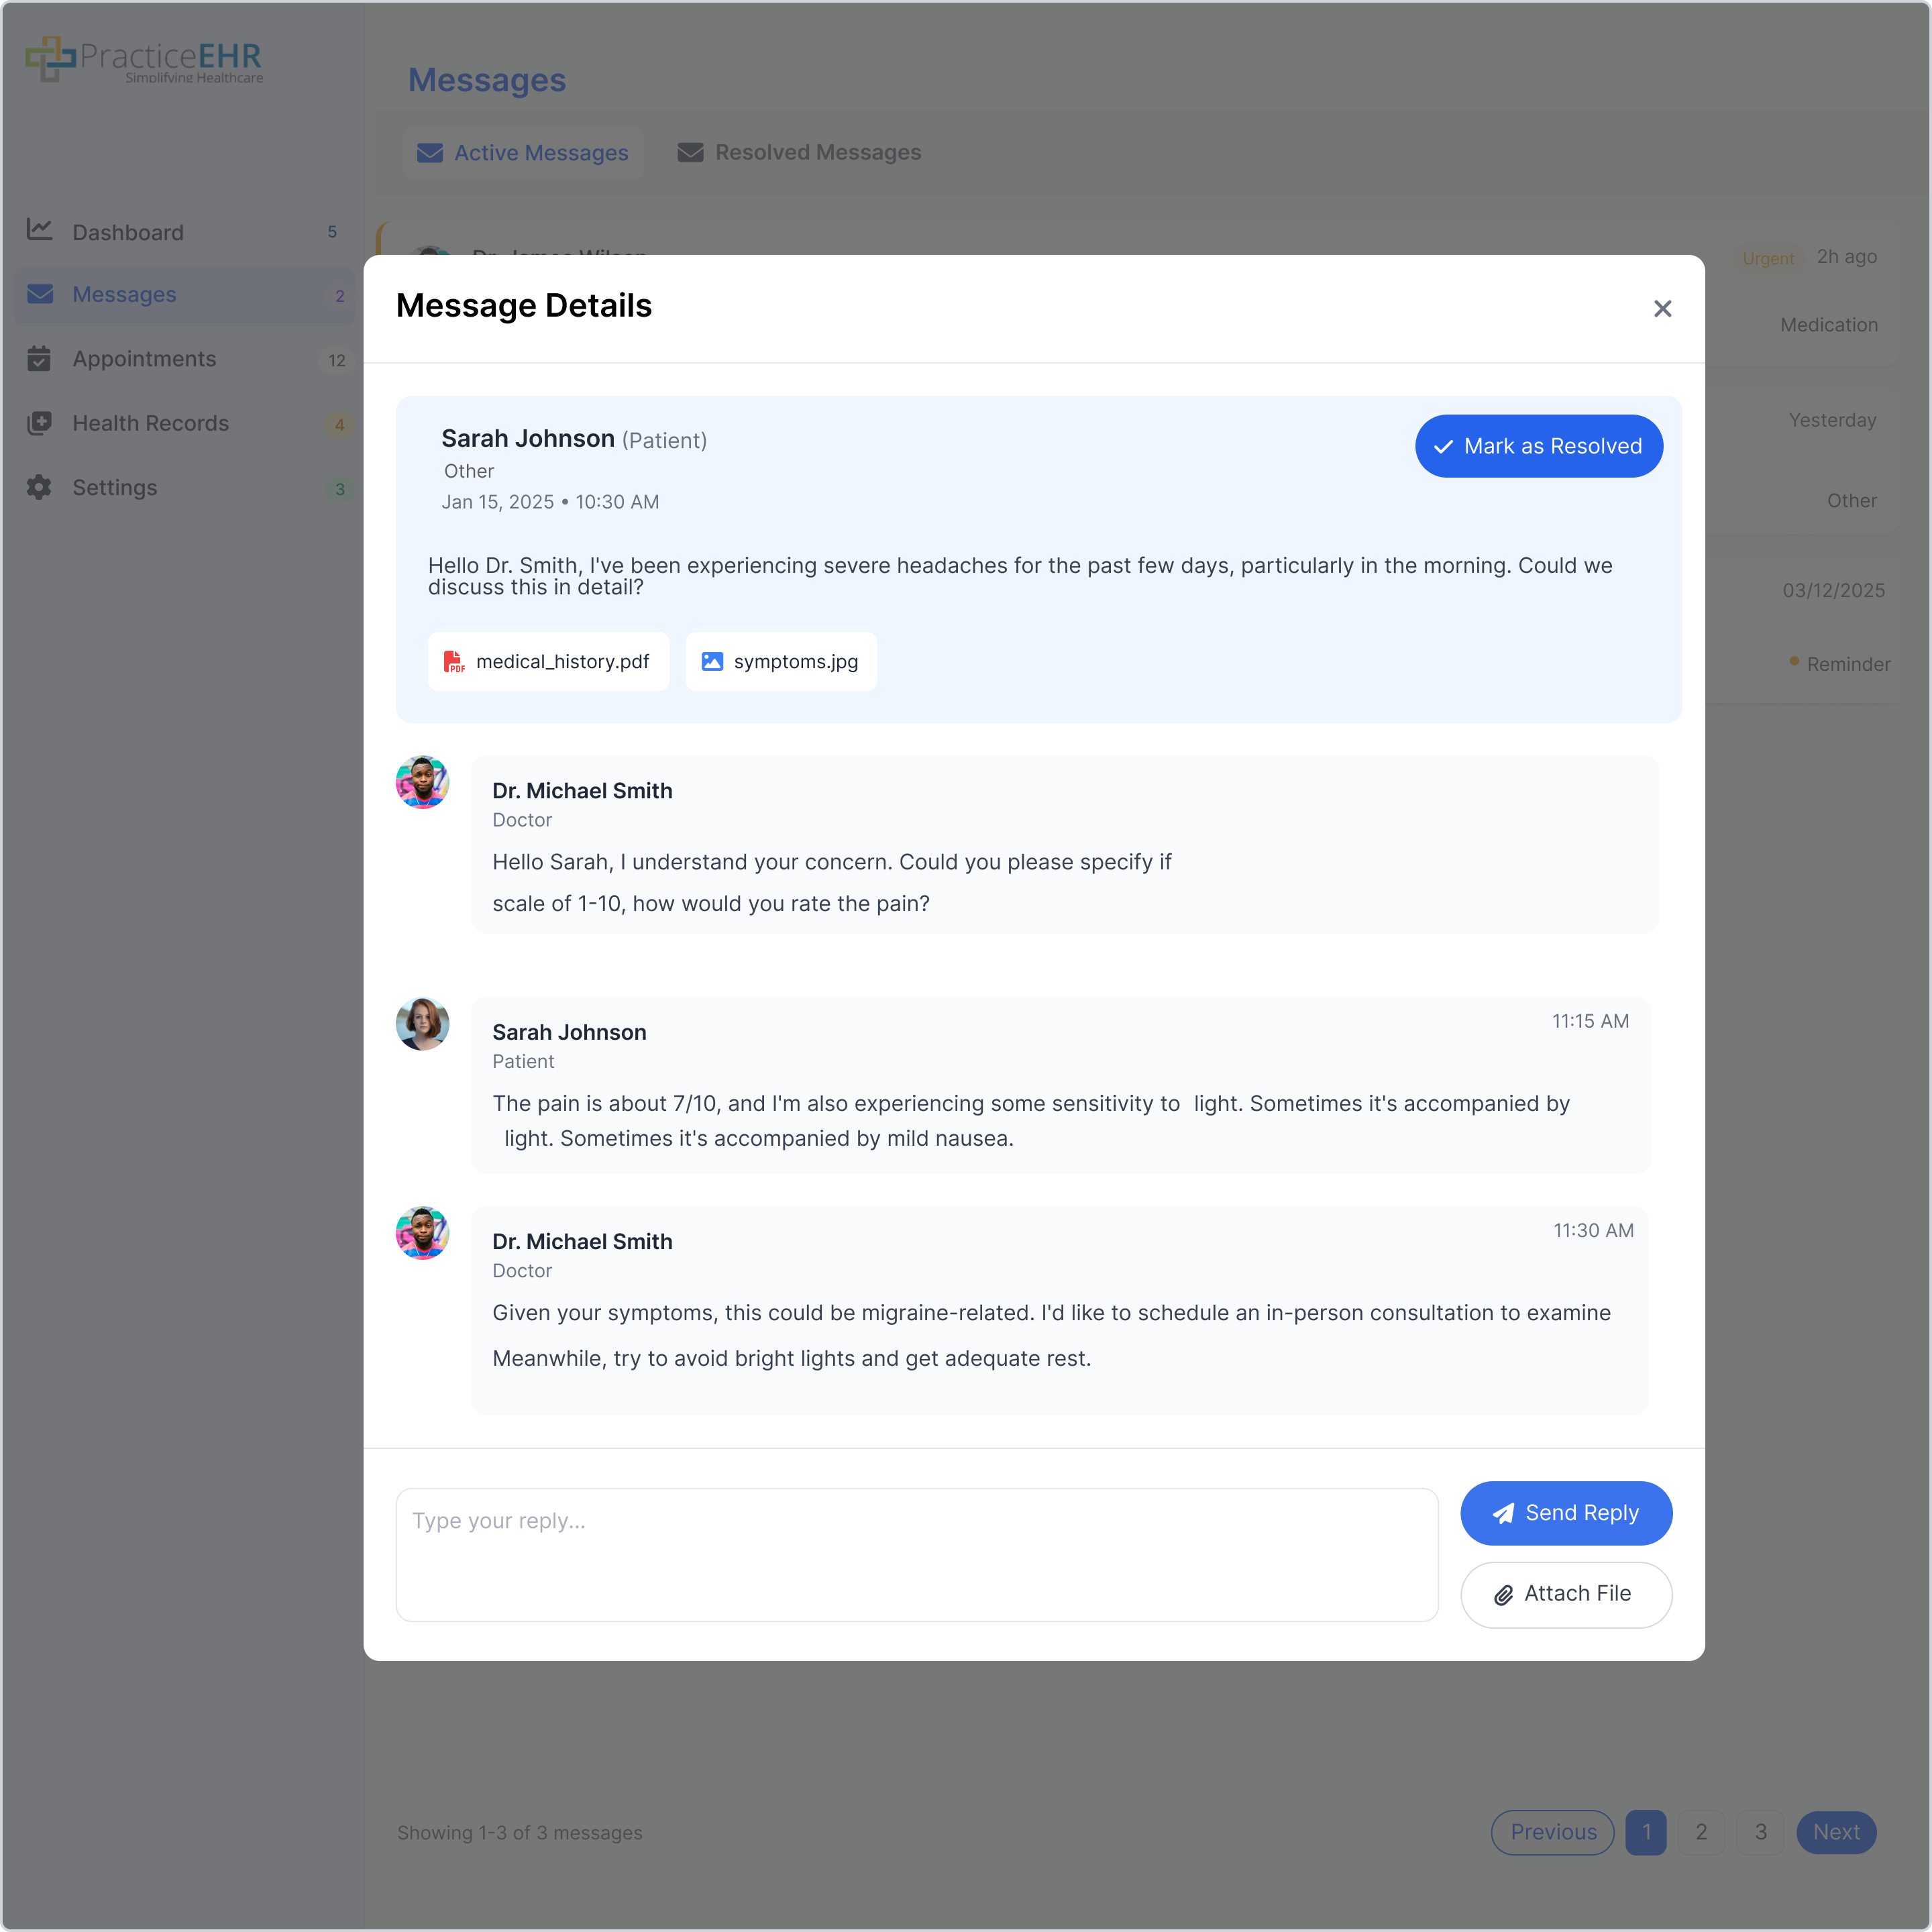
Clicking a message card opens the detailed thread view.
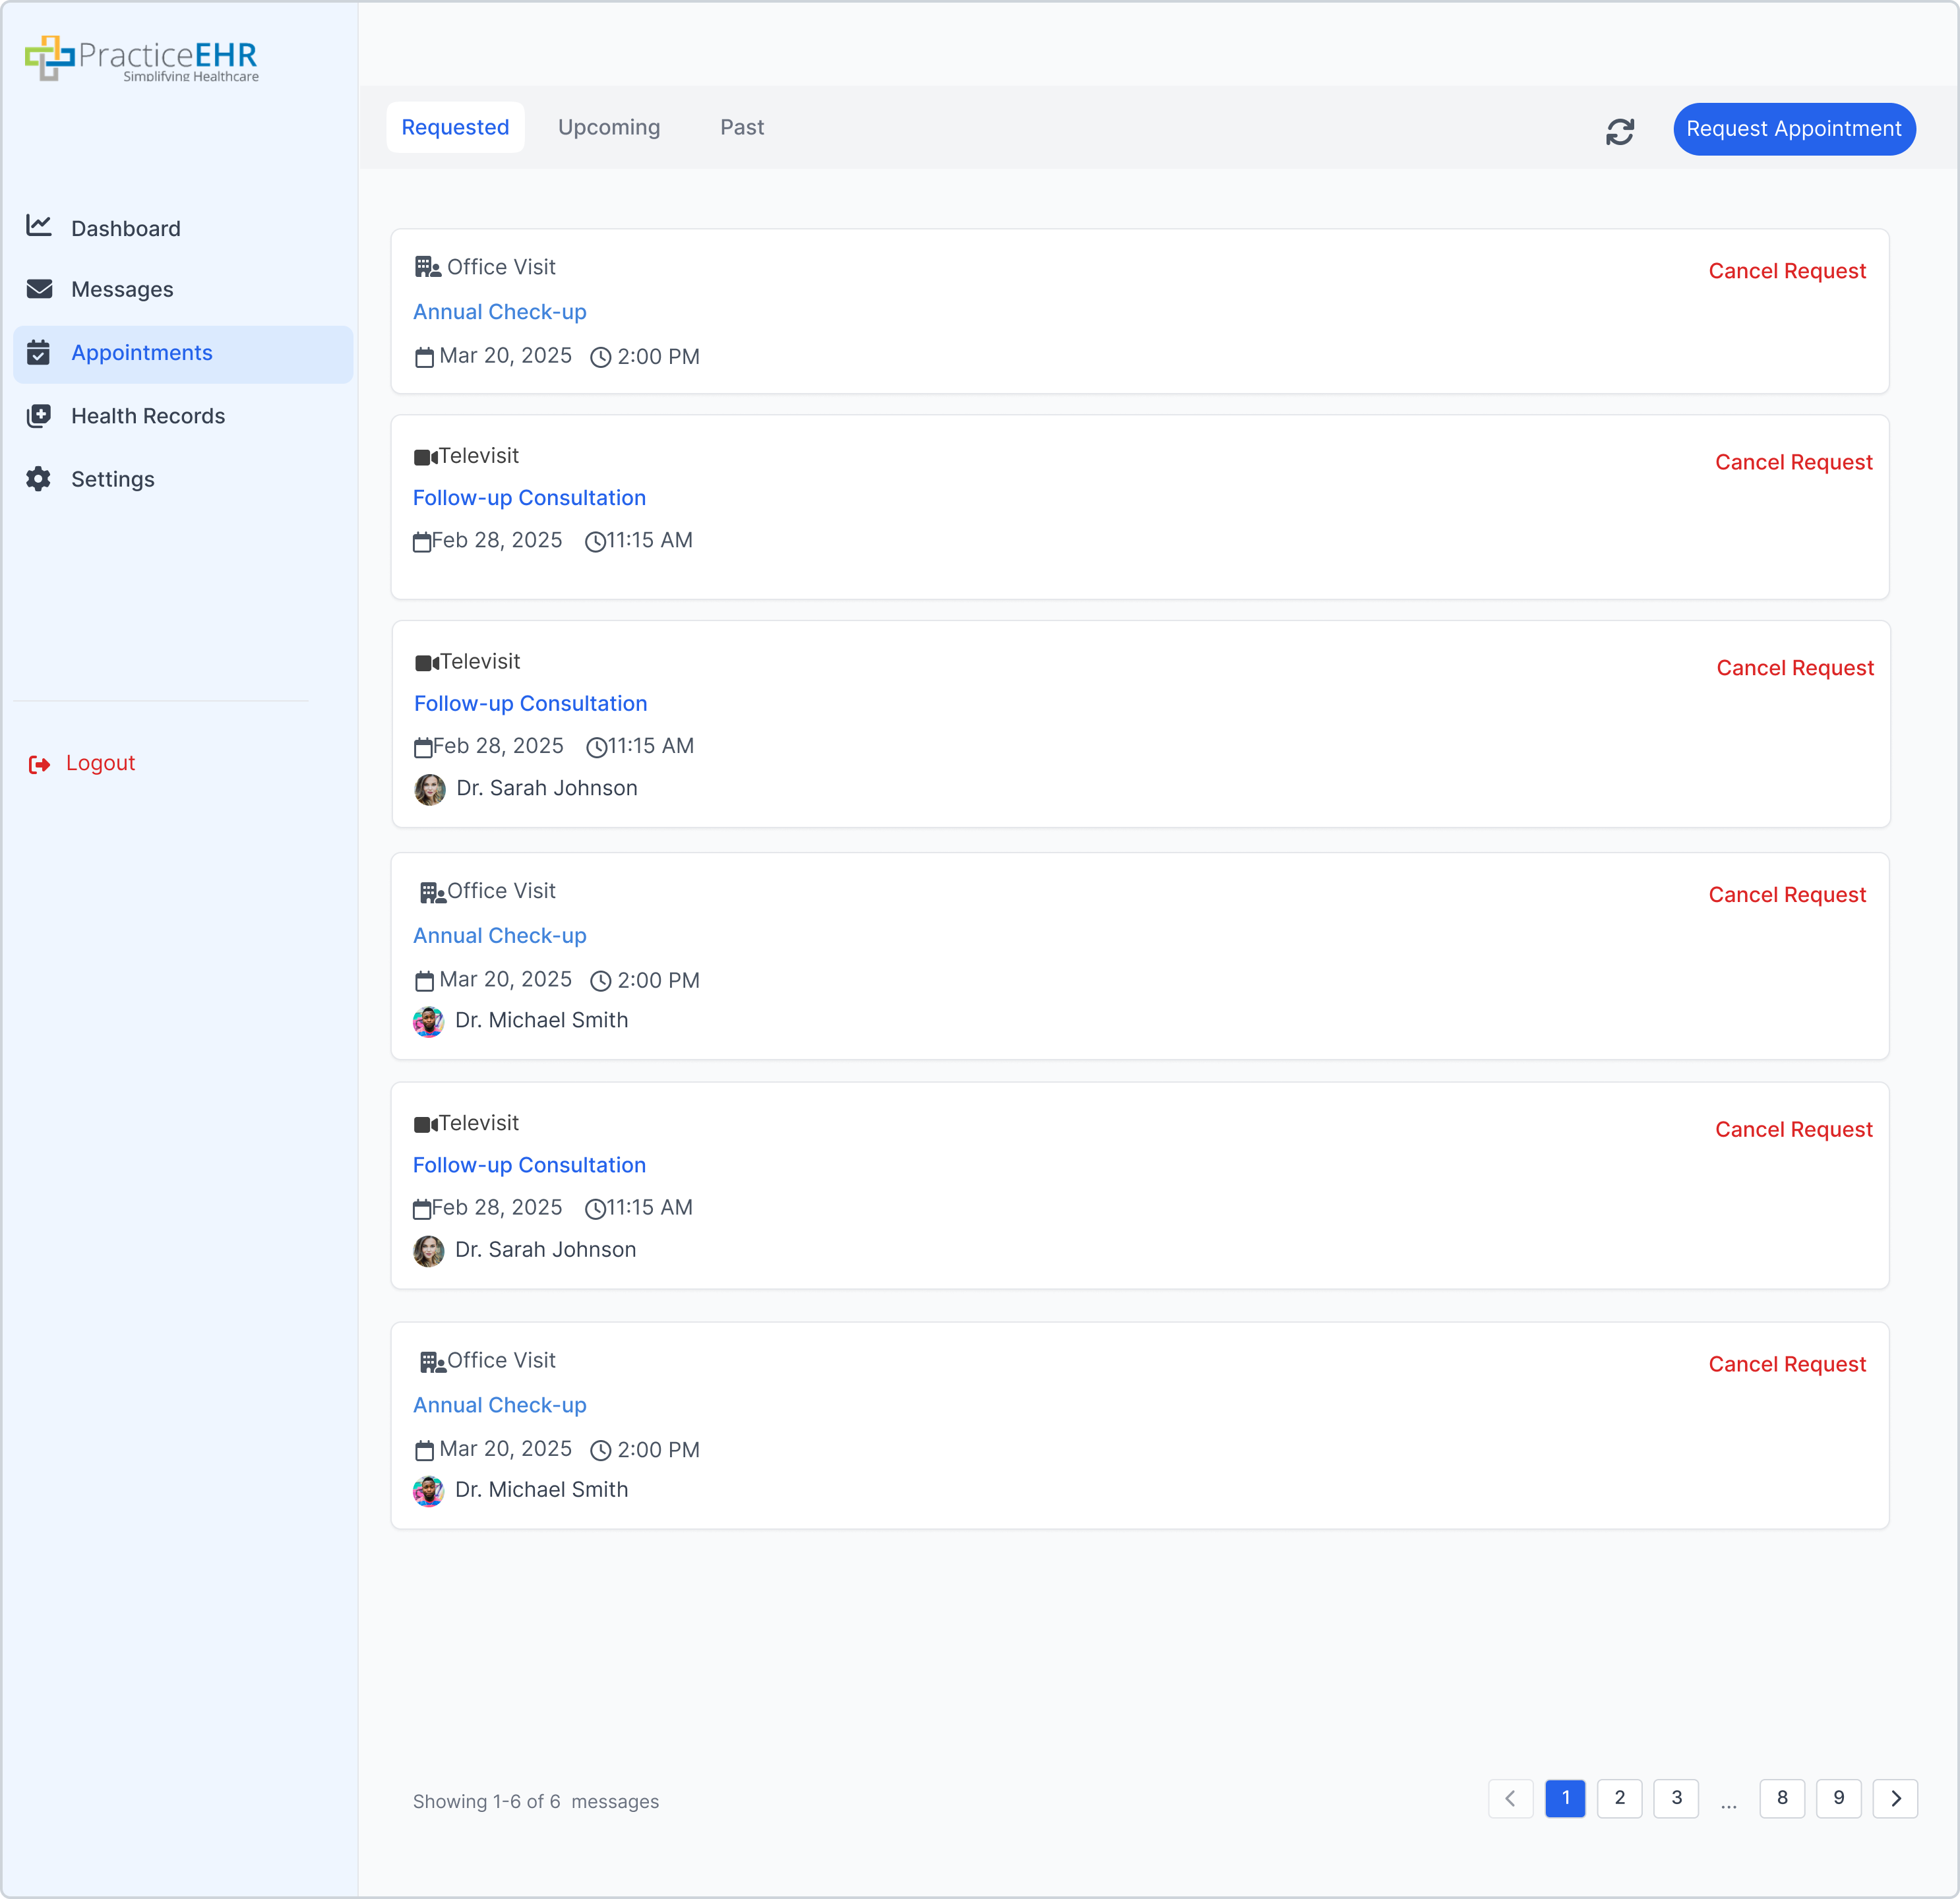
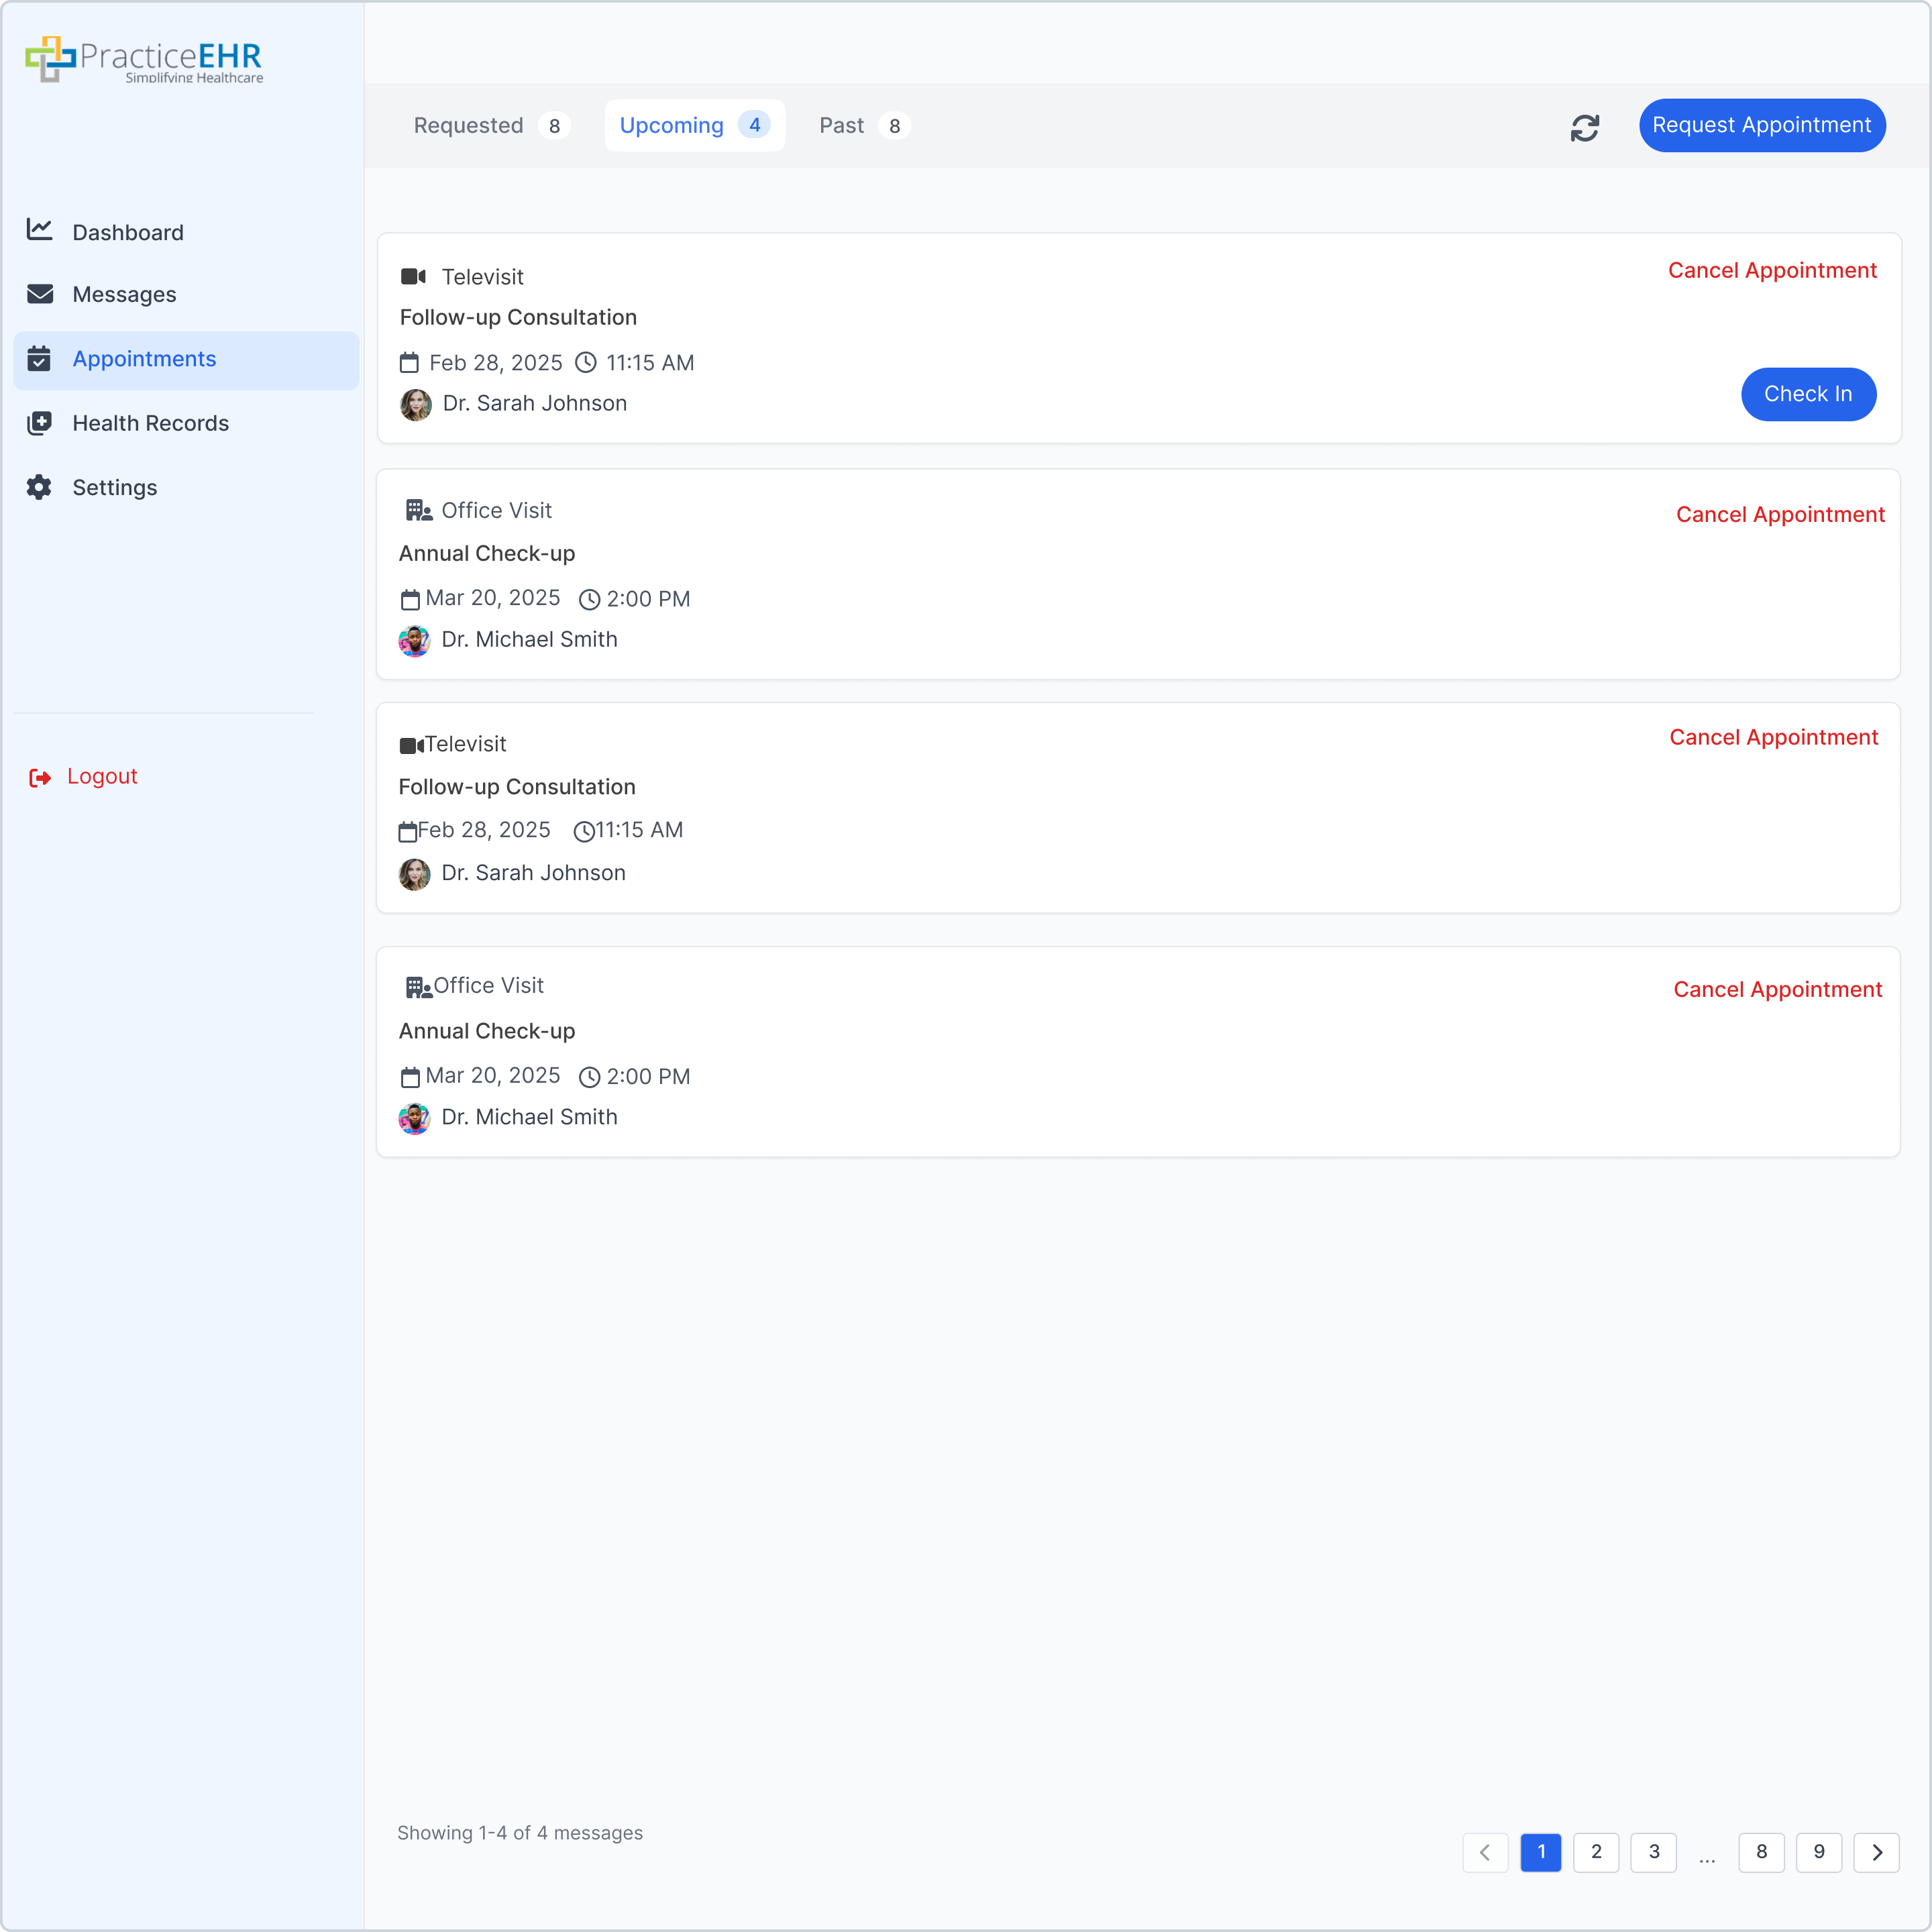
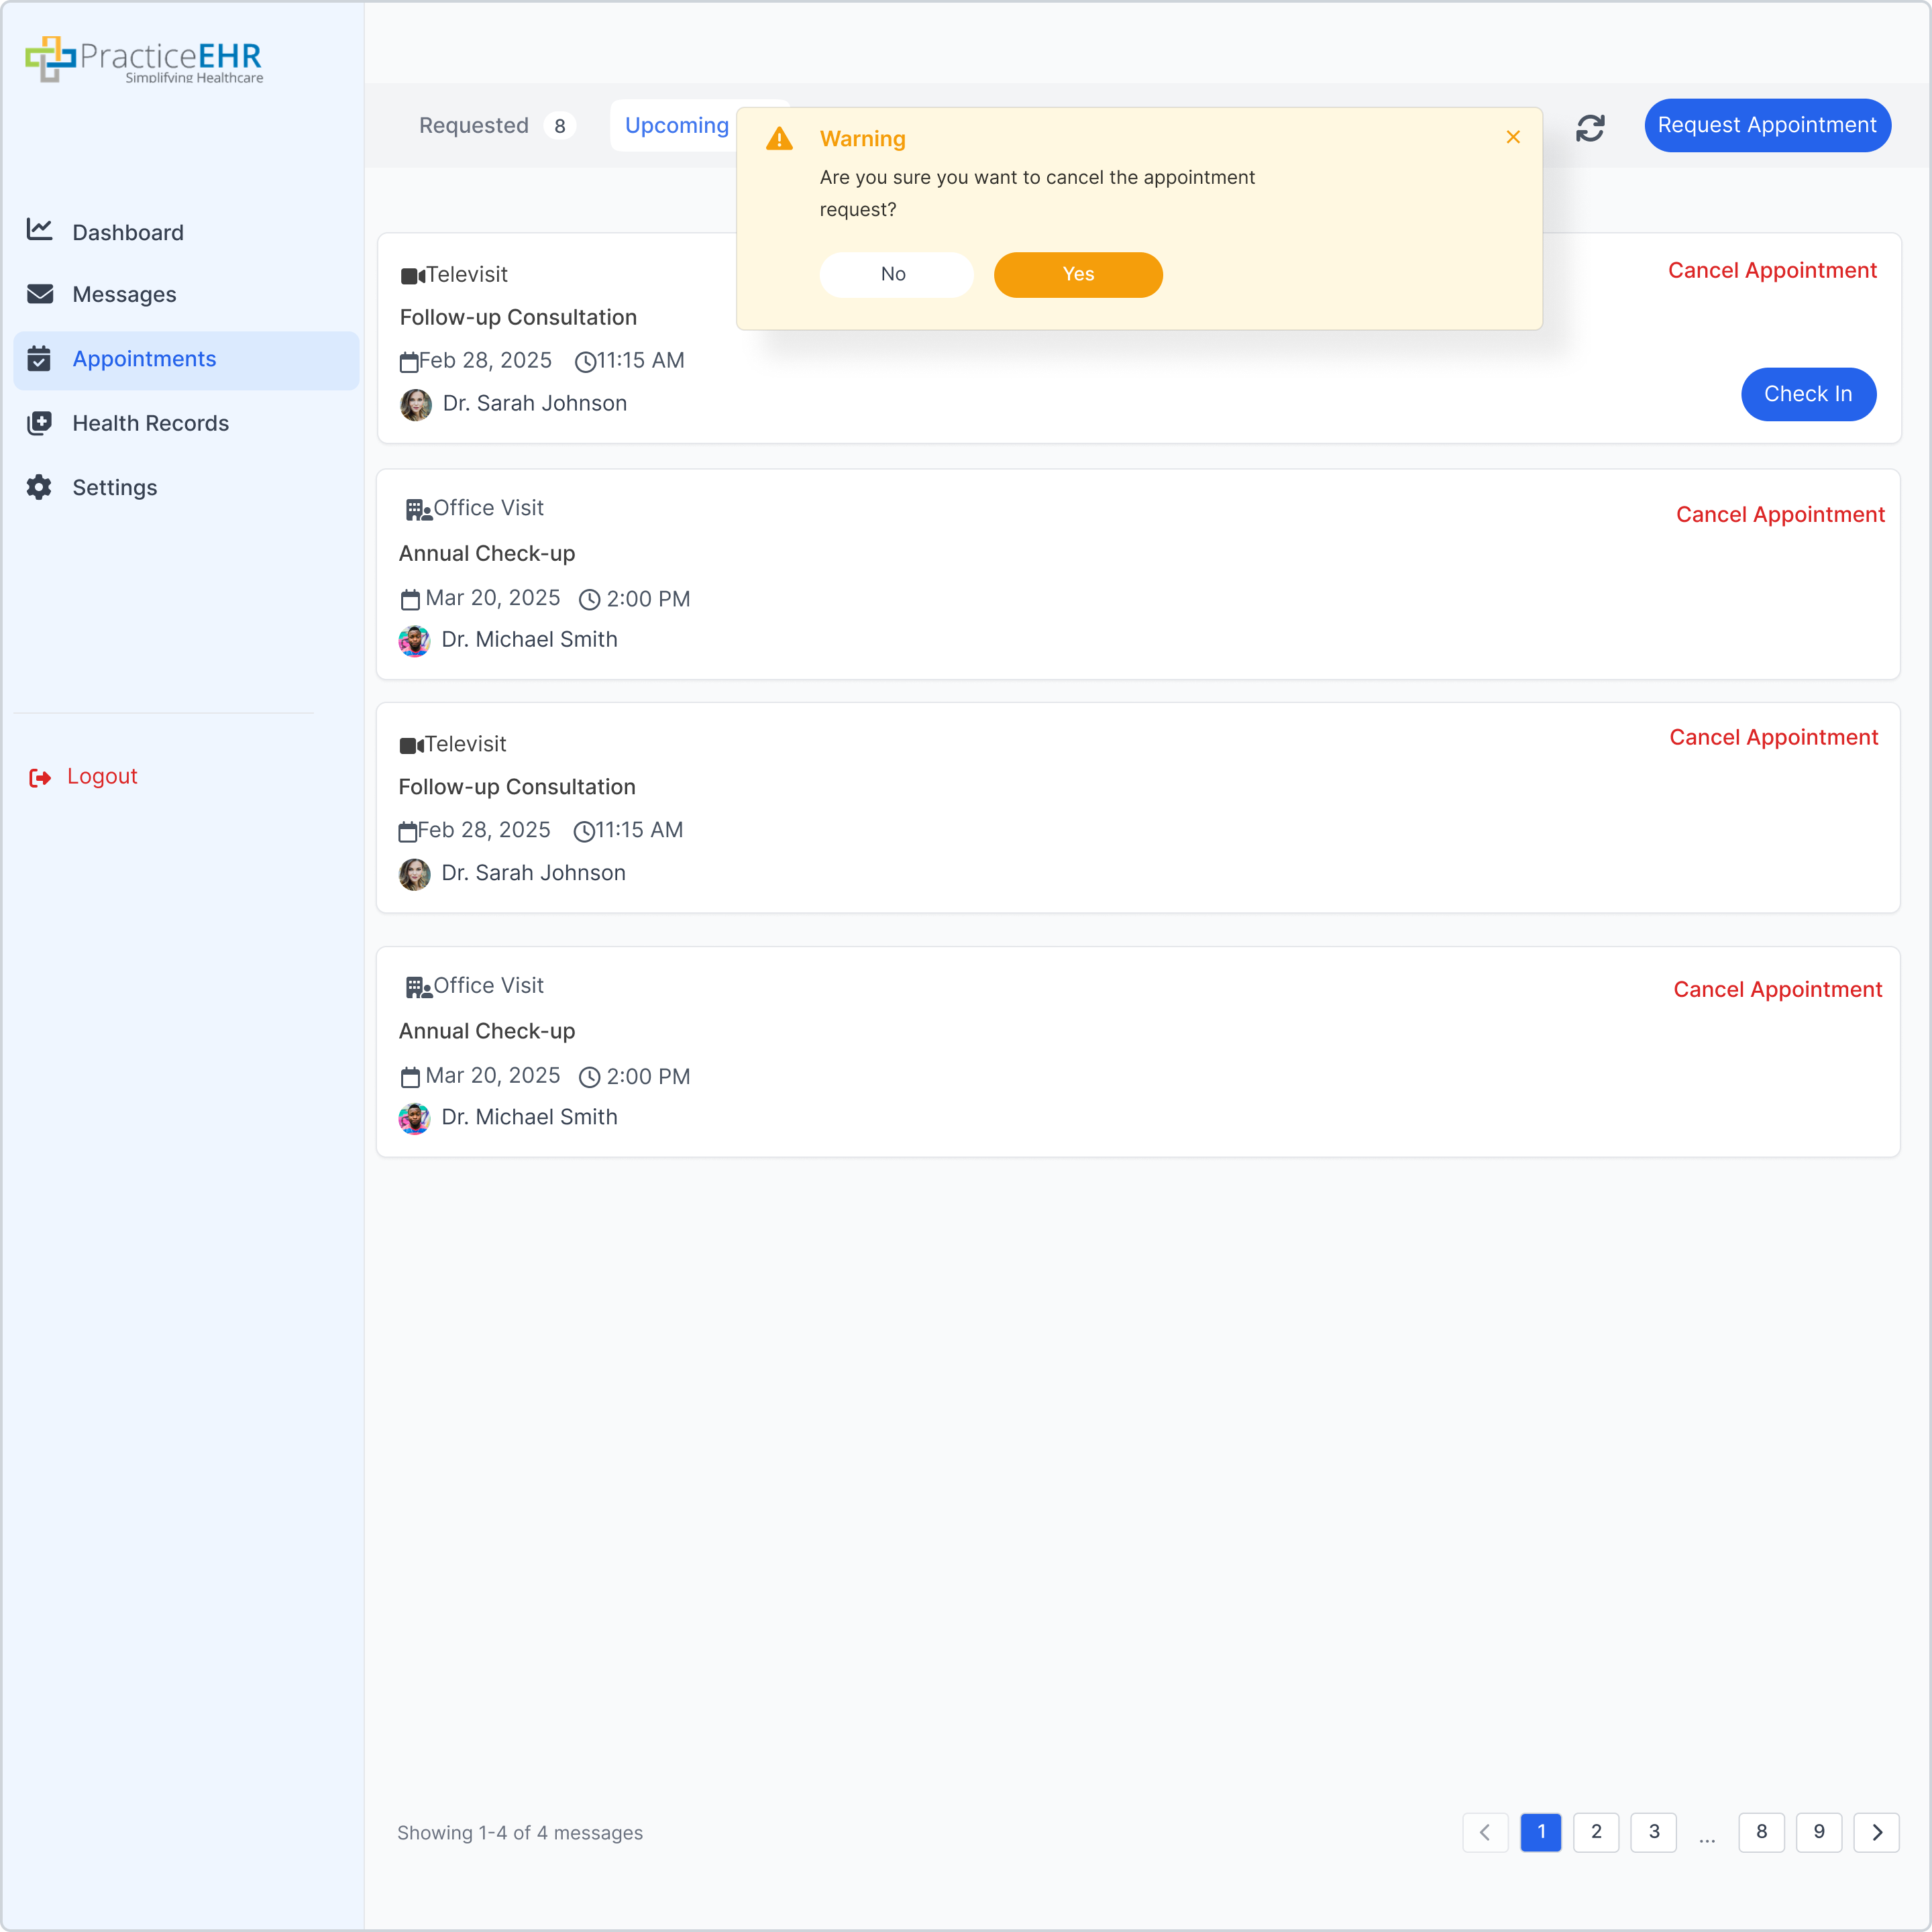
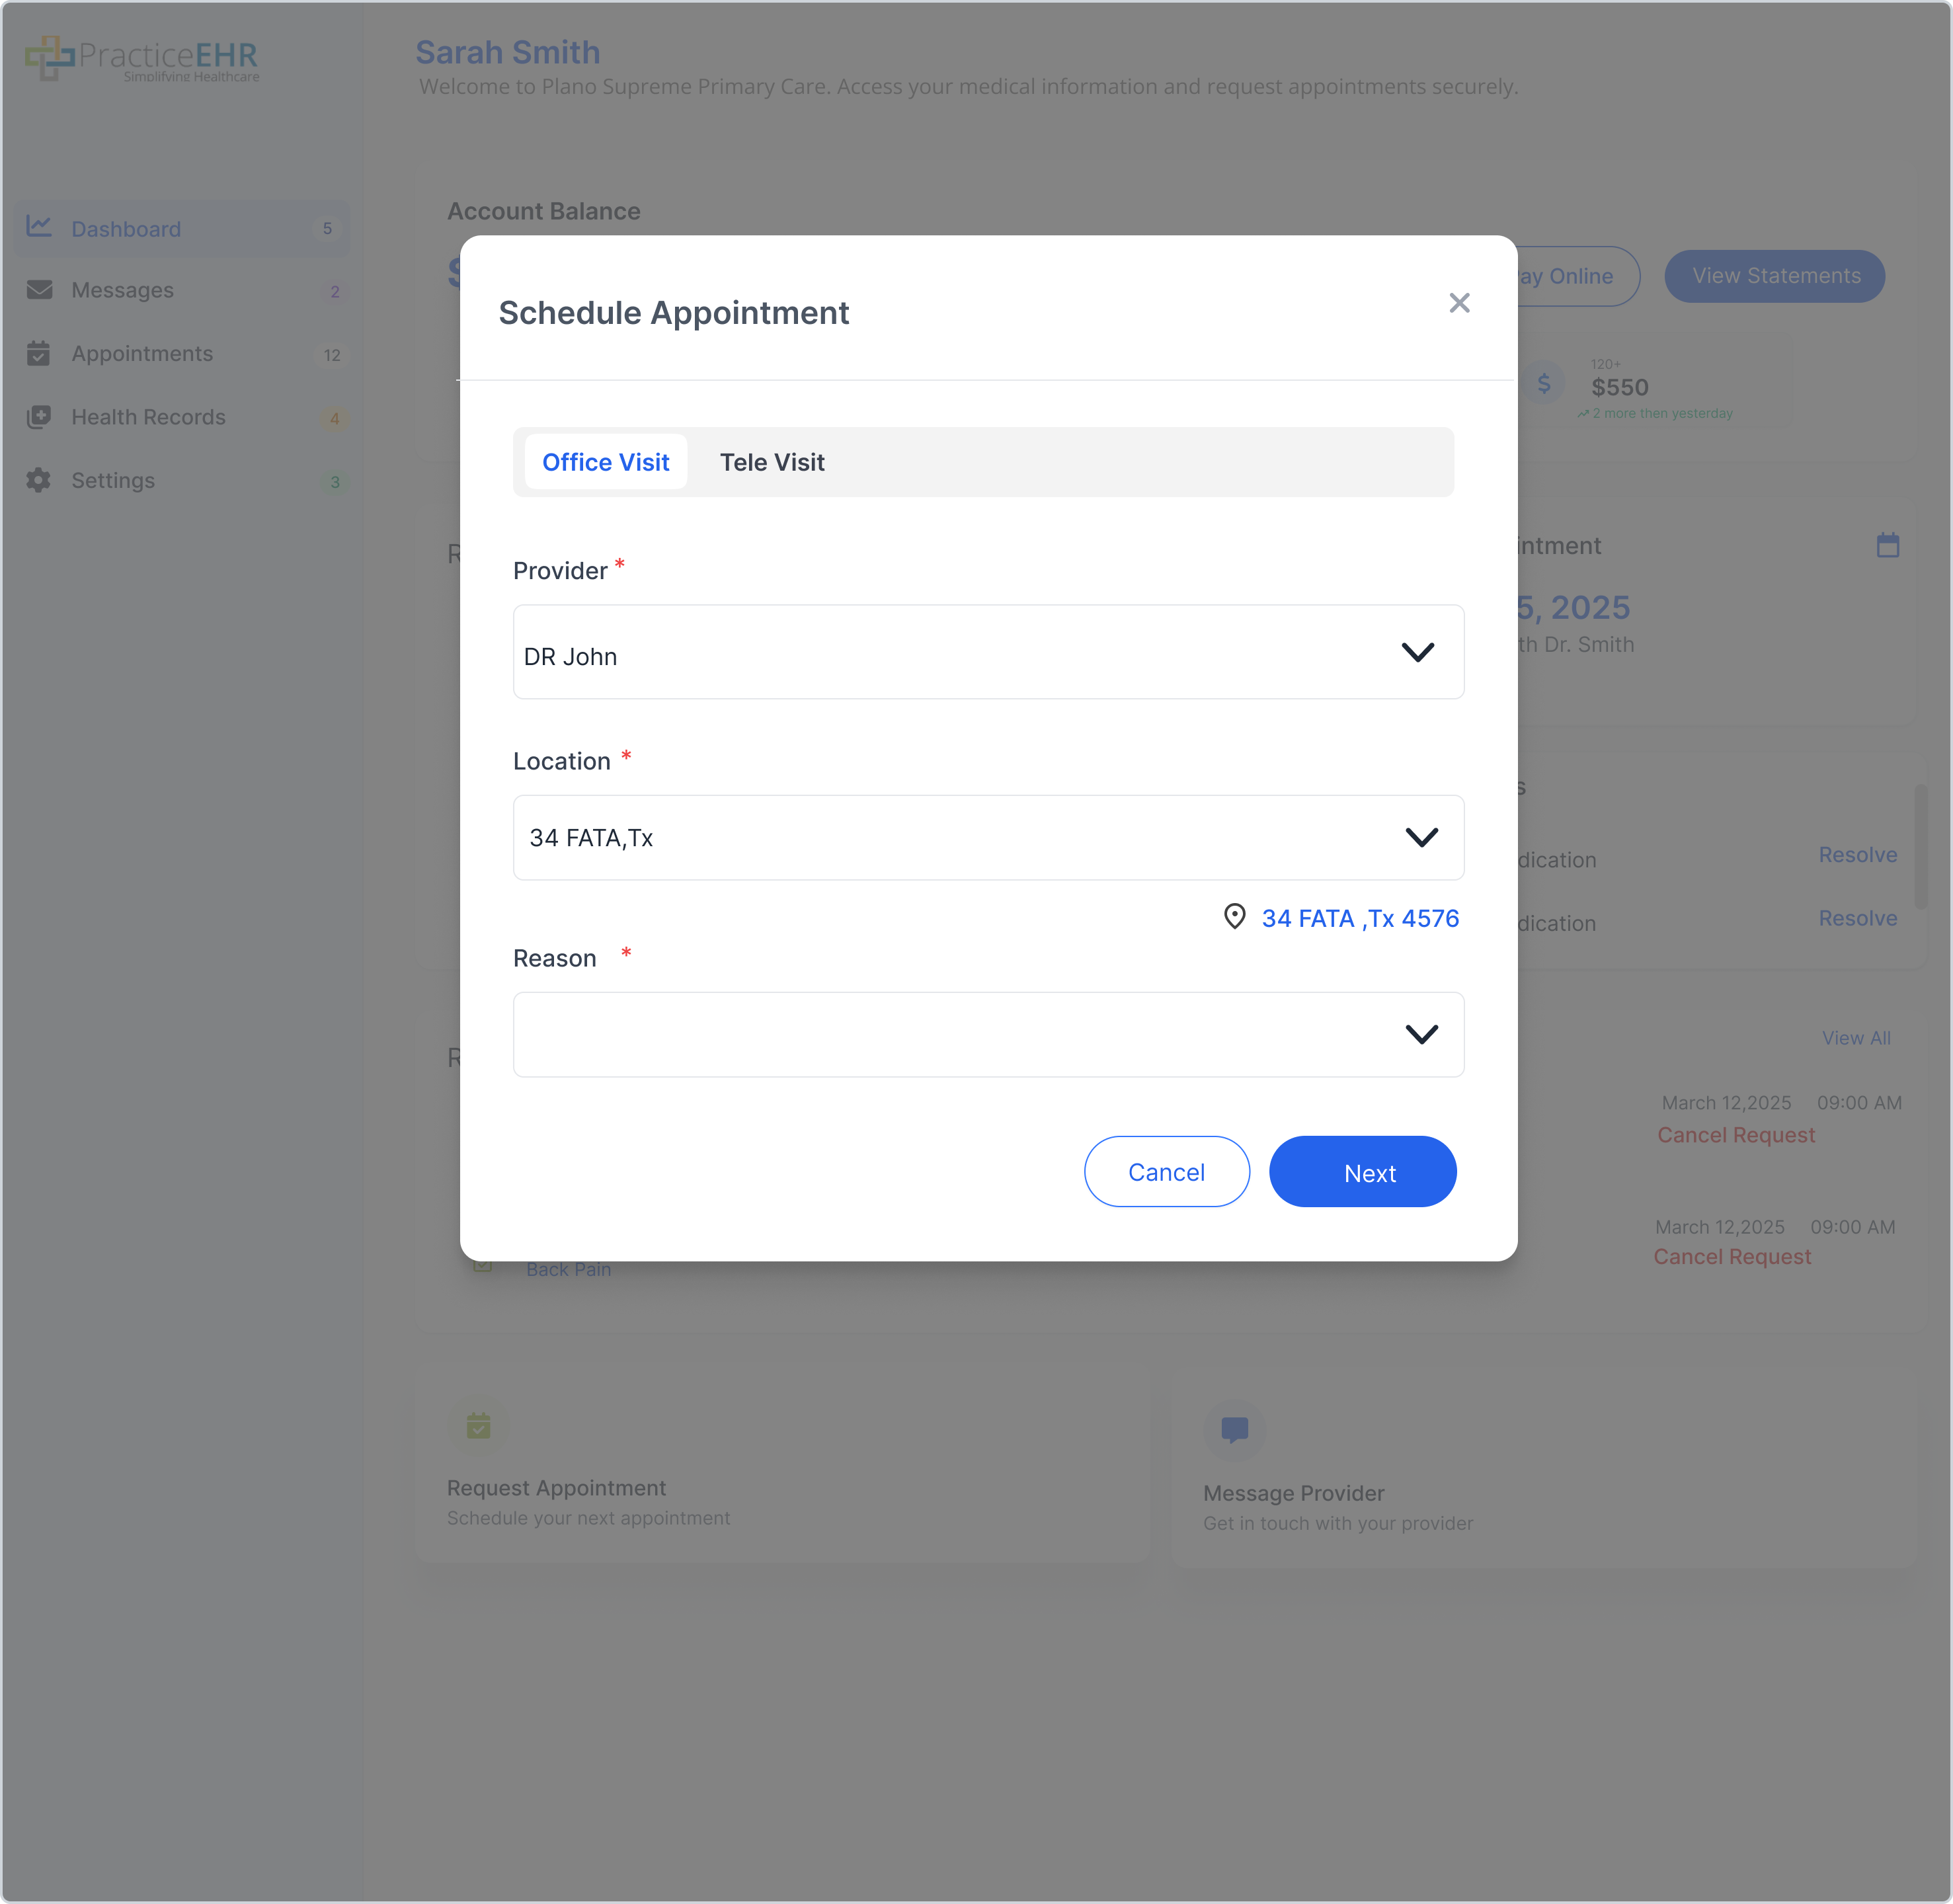
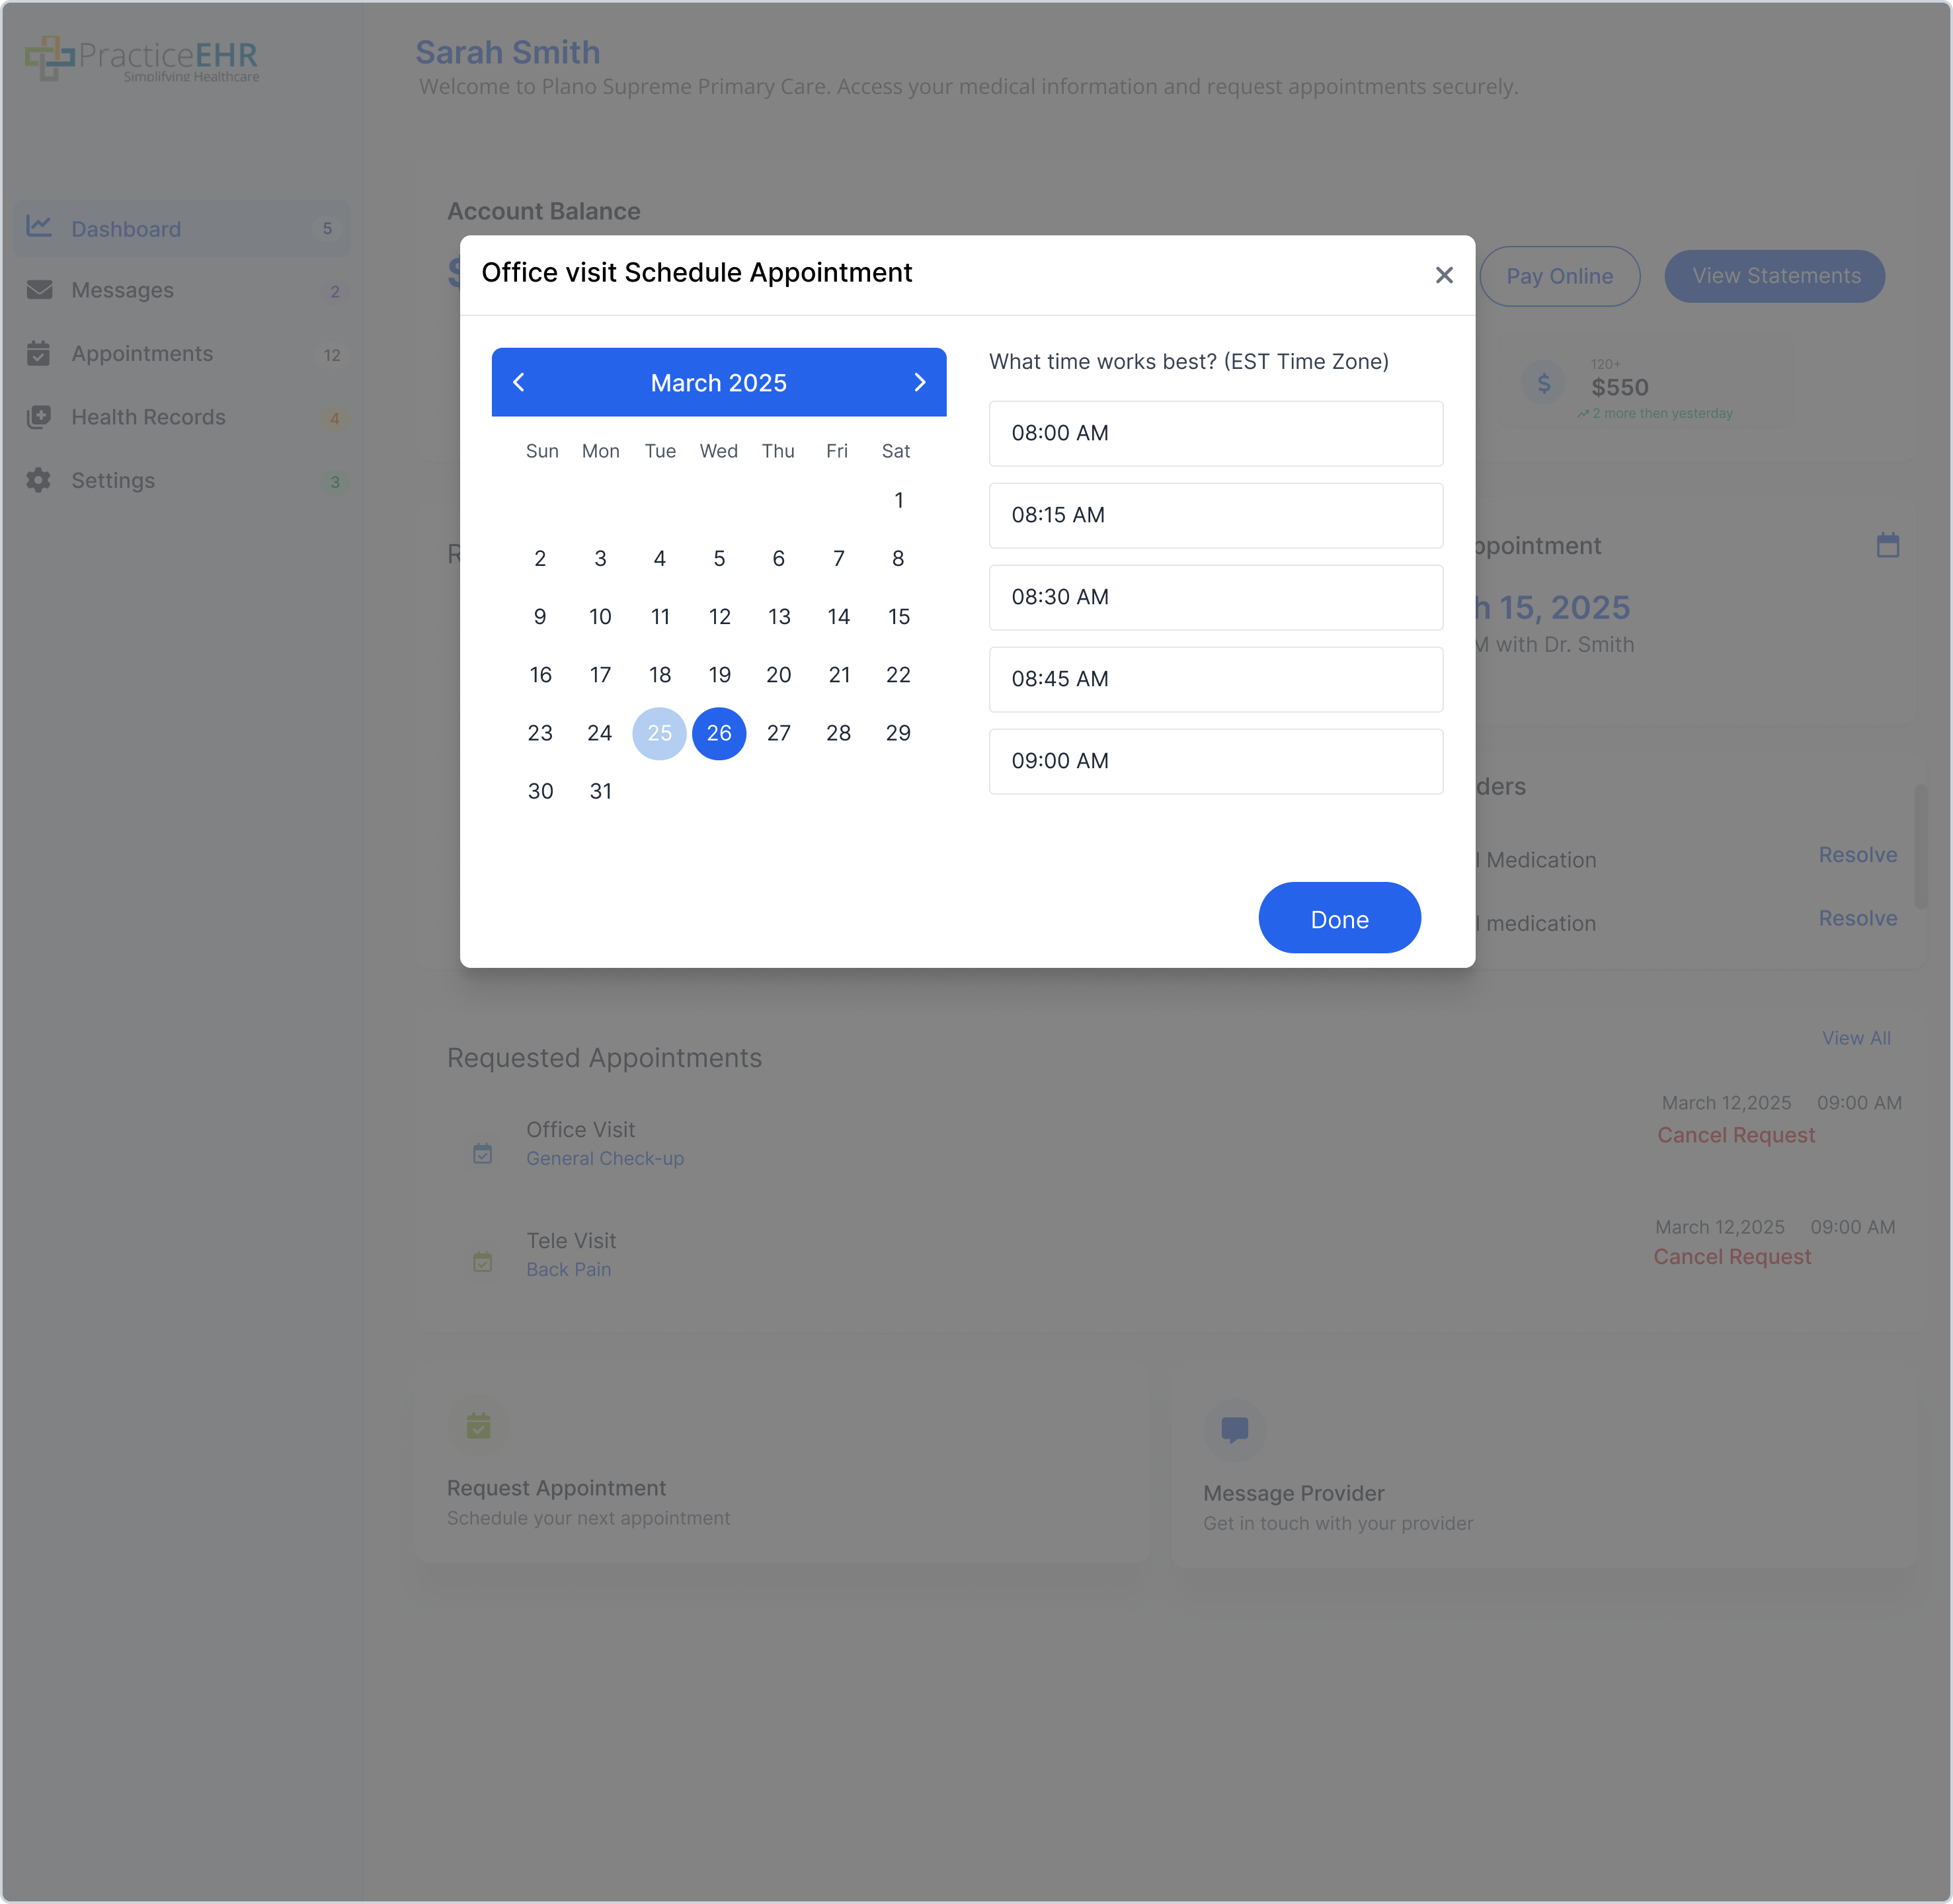
Appointments
View requested, upcoming, and past appointments, or schedule new ones.
Requested Appointments
Upcoming Appointments
Past Appointments
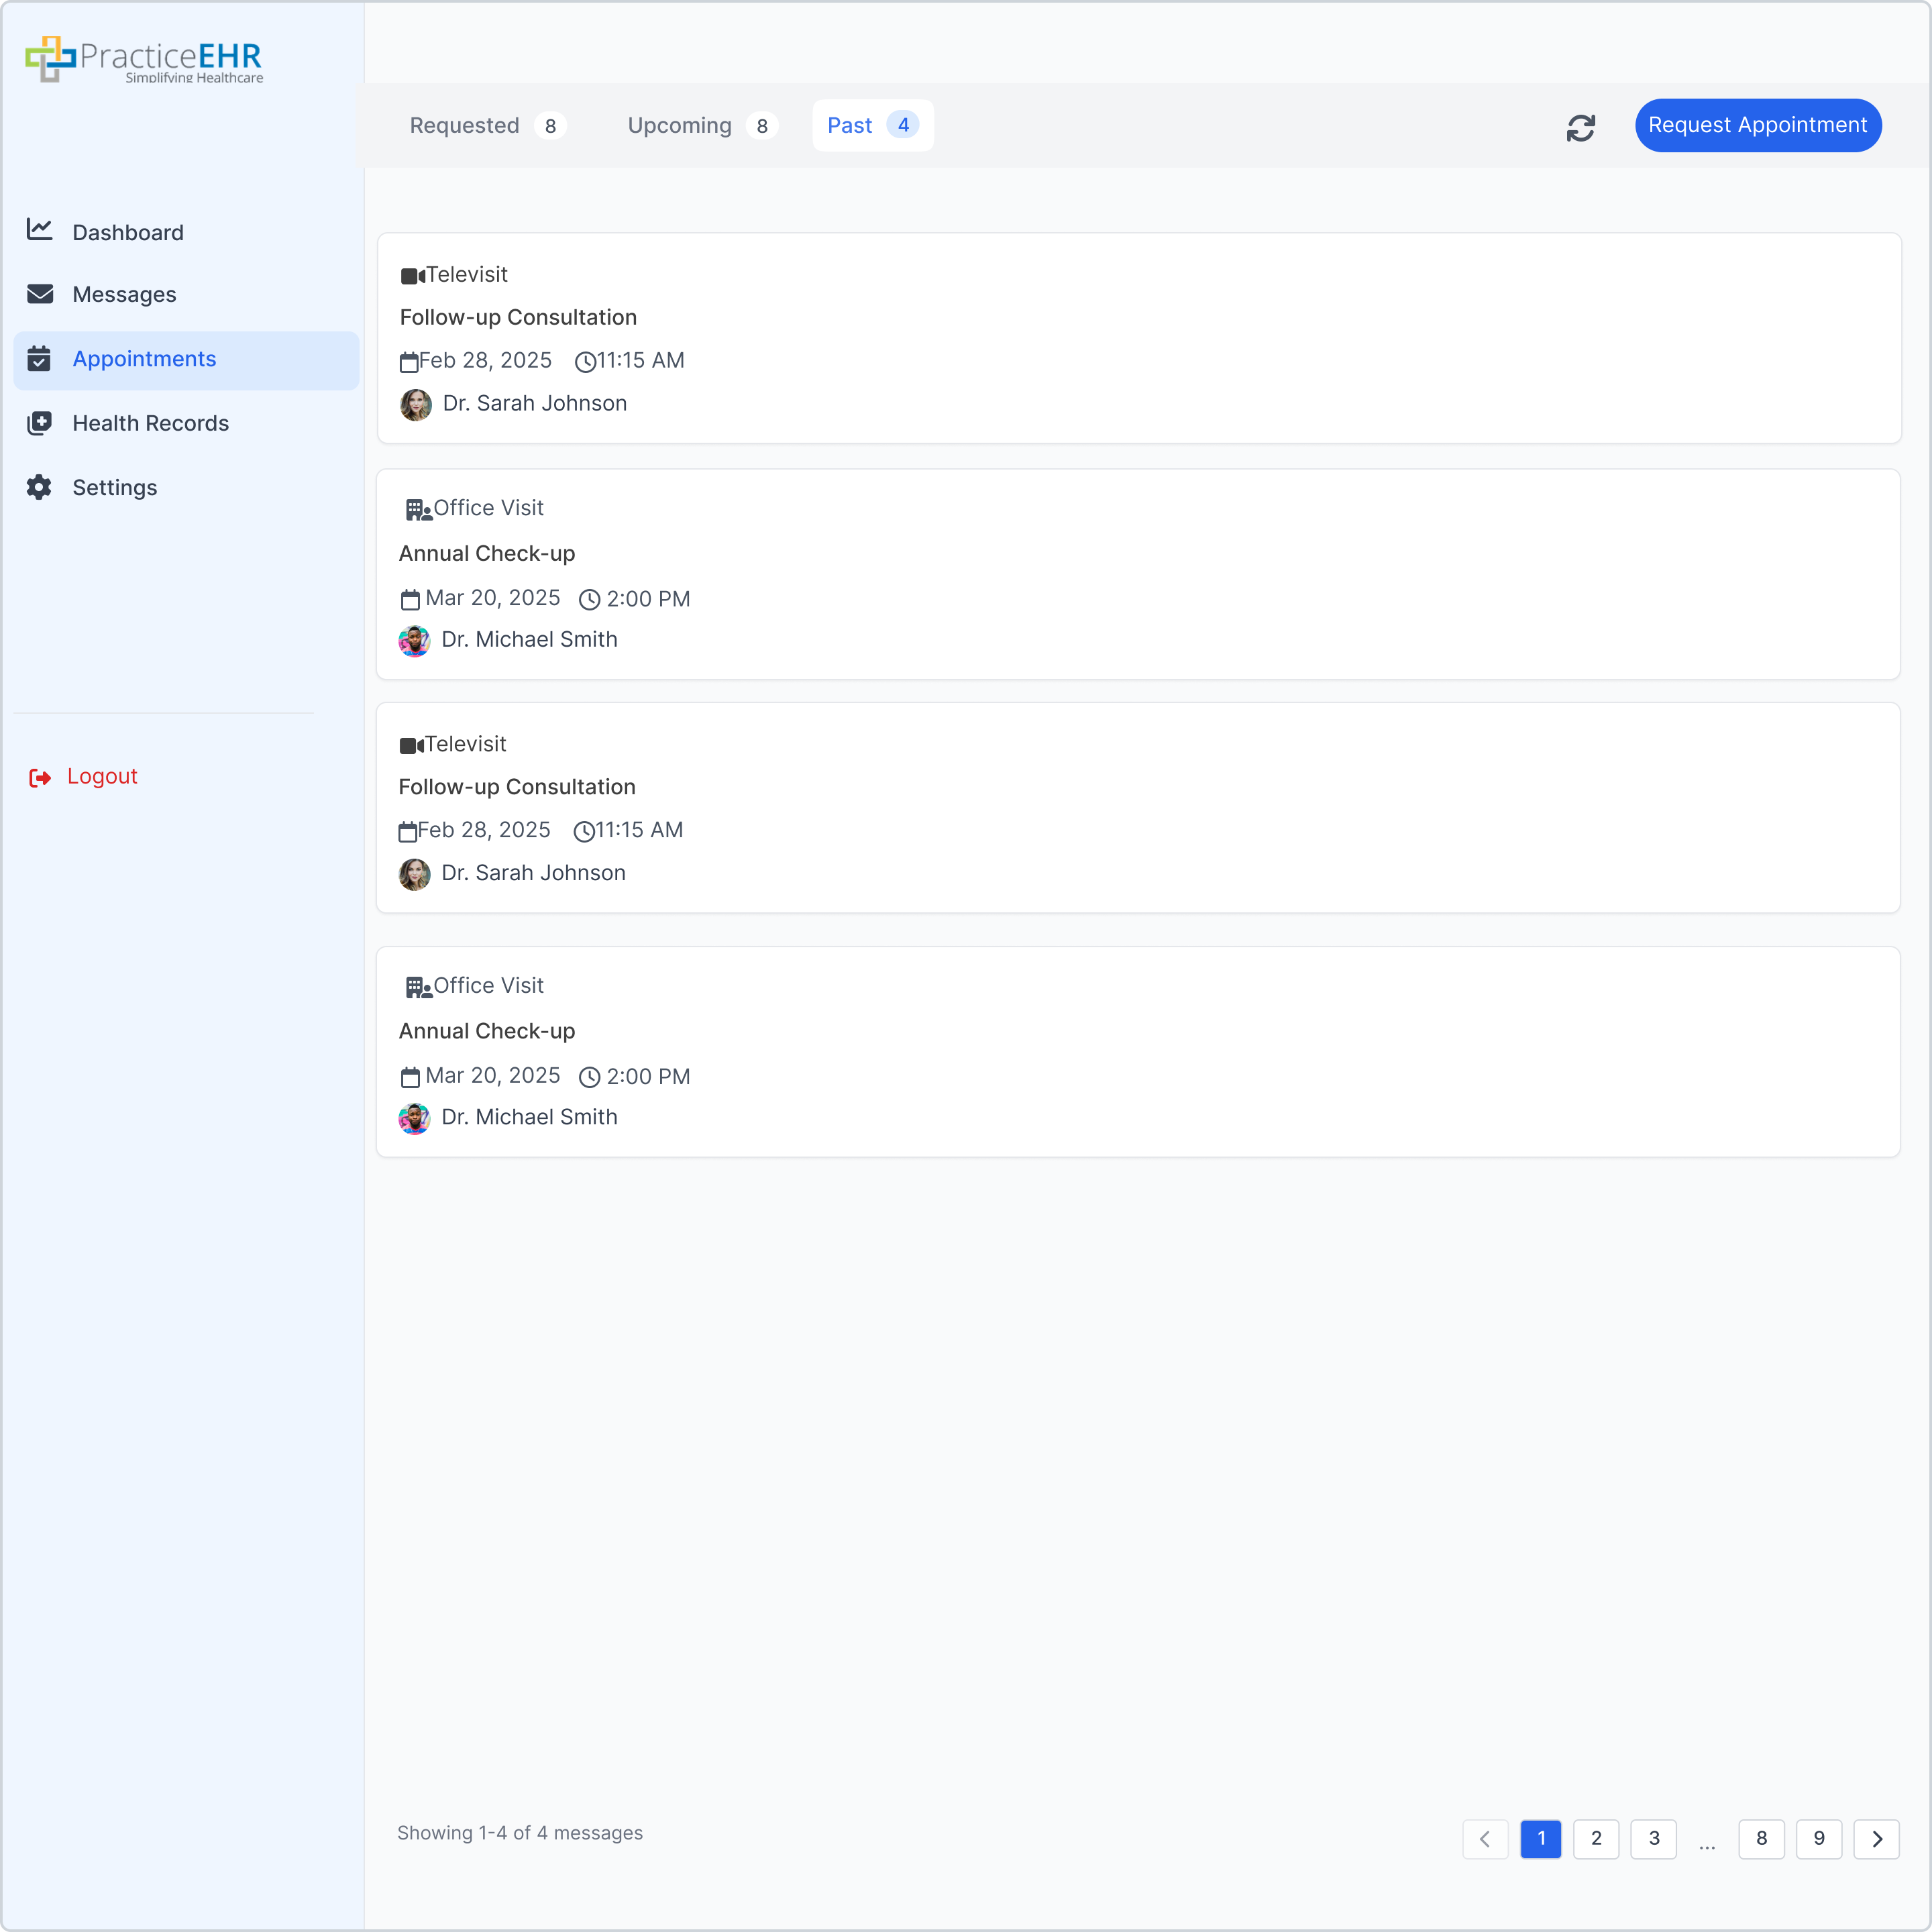
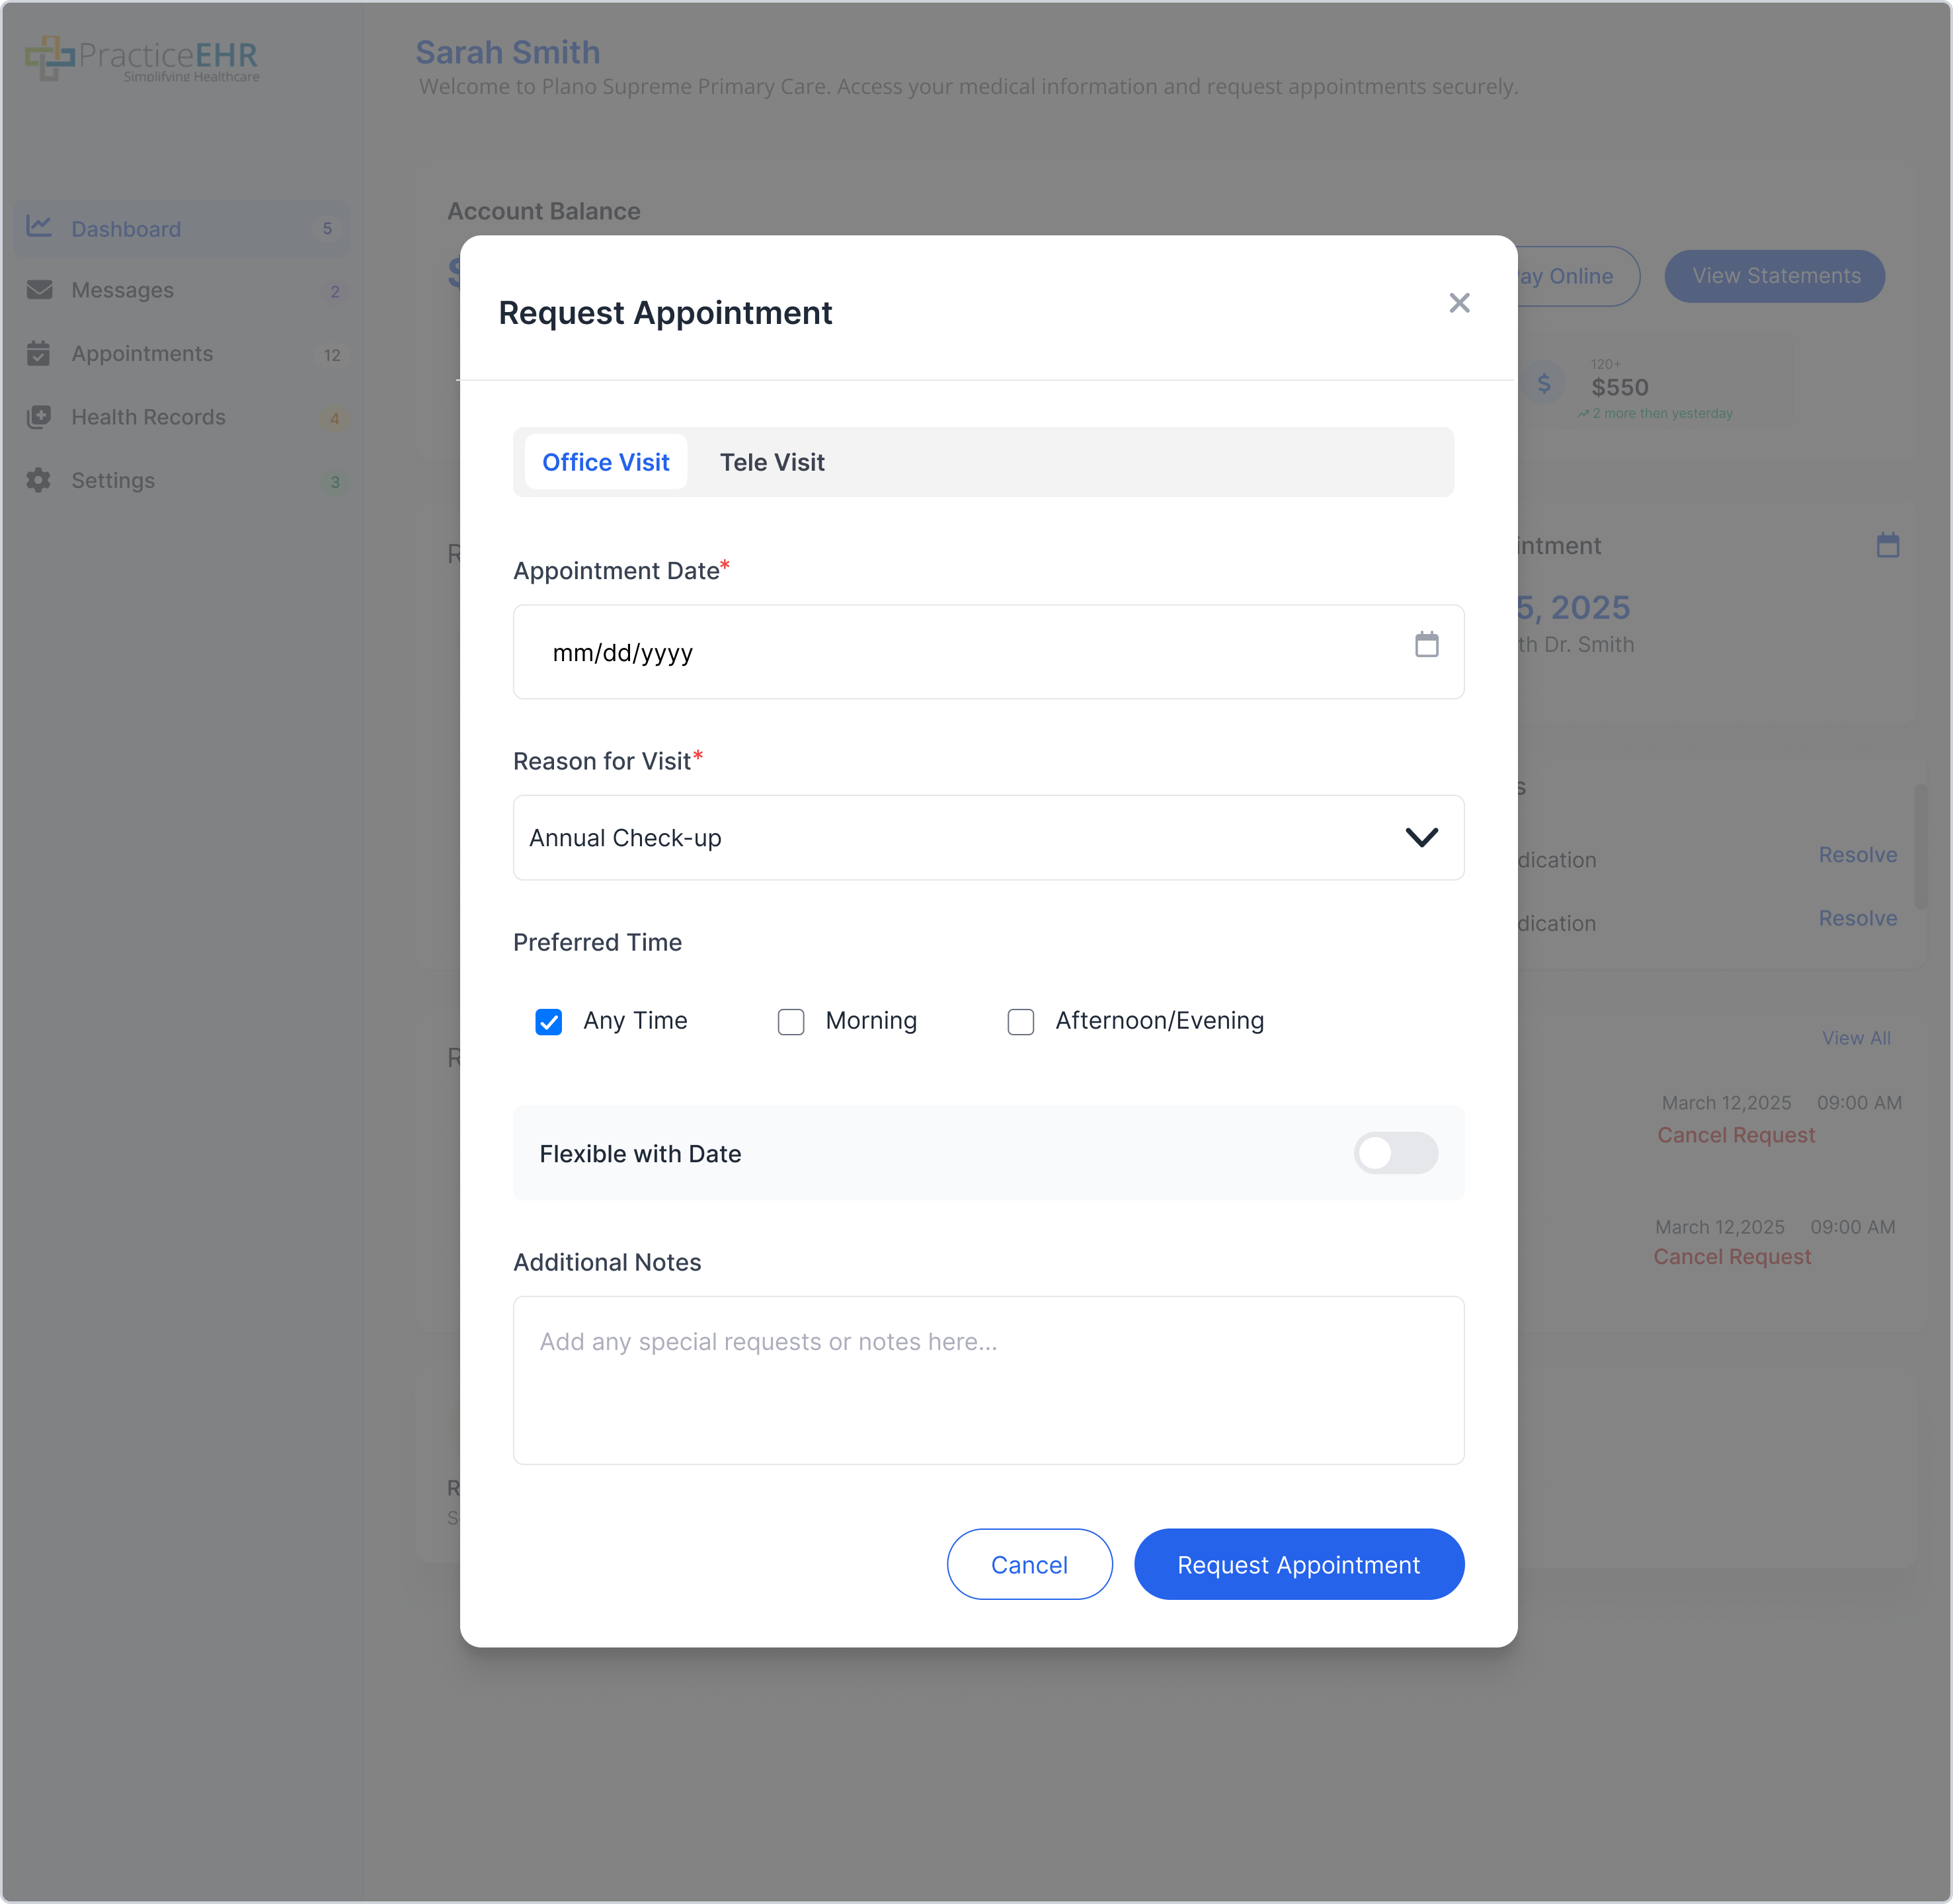
When the Portal Online Appointment Flag is enabled, "Request Appointment" is replaced with "Schedule Appointment".
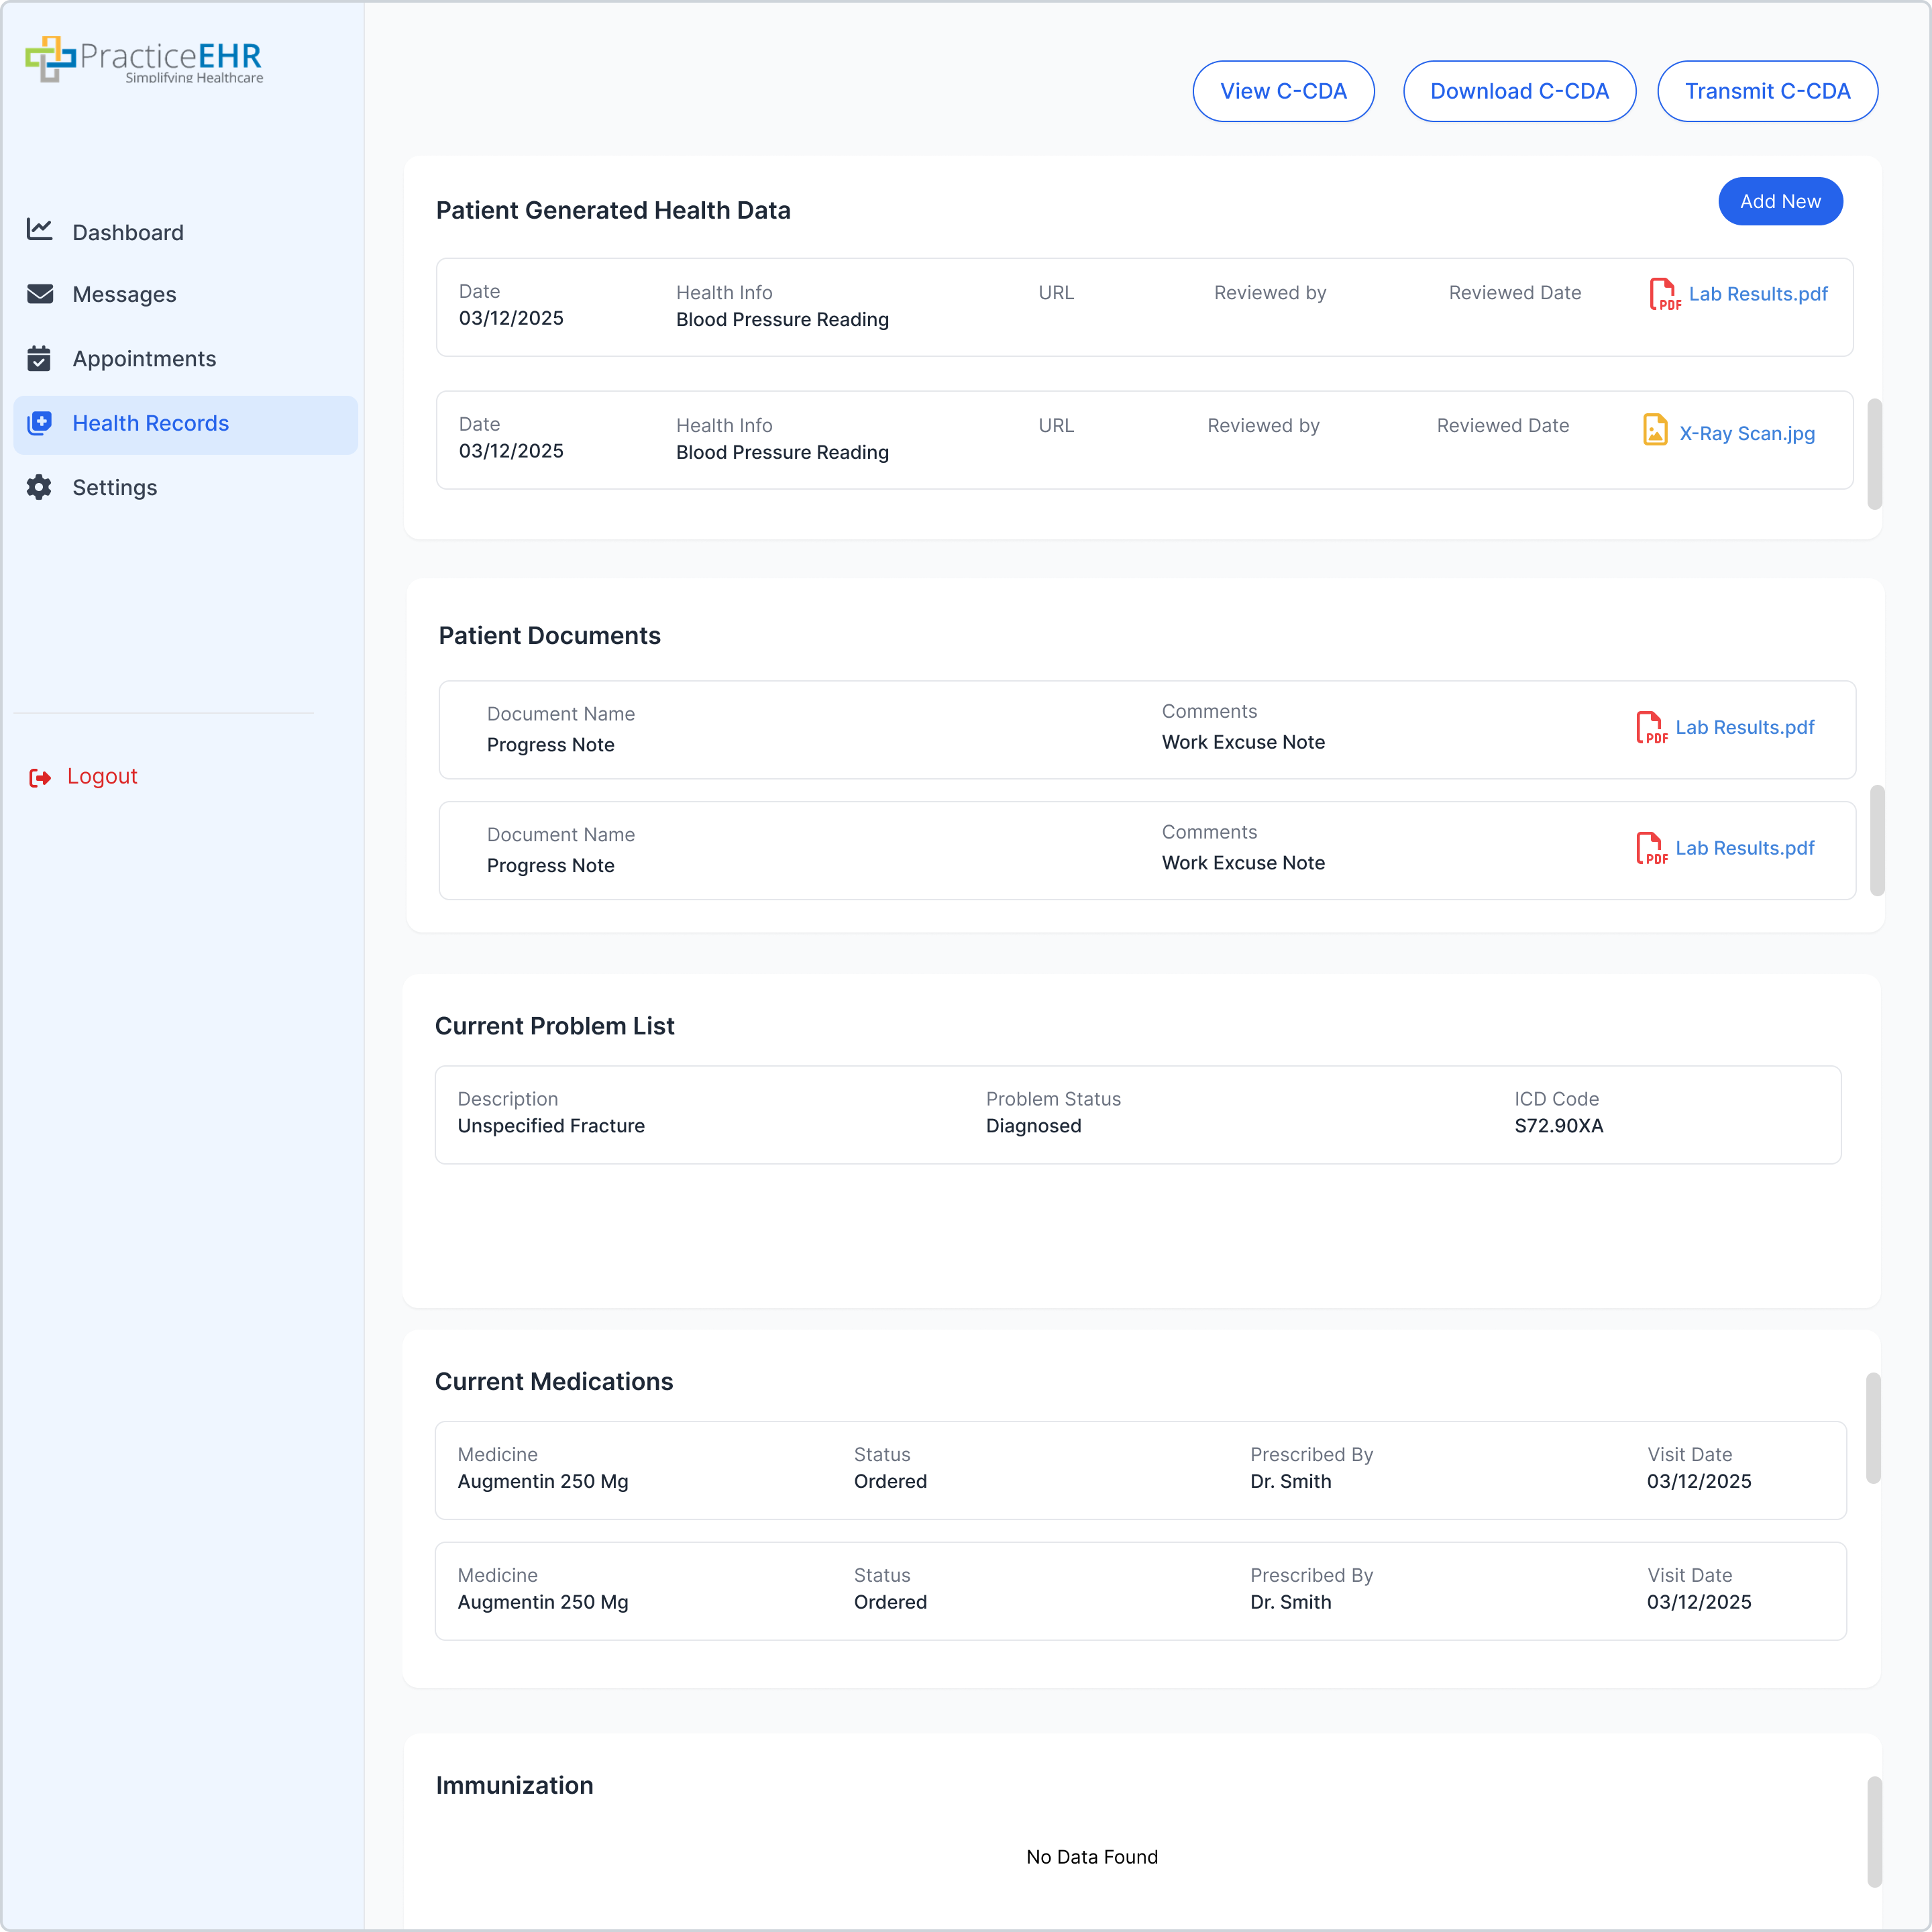
Health Records
Patient chart summaries and C-CDA transmission.
Screen #8: Records List
Transmit C-CDA Modal
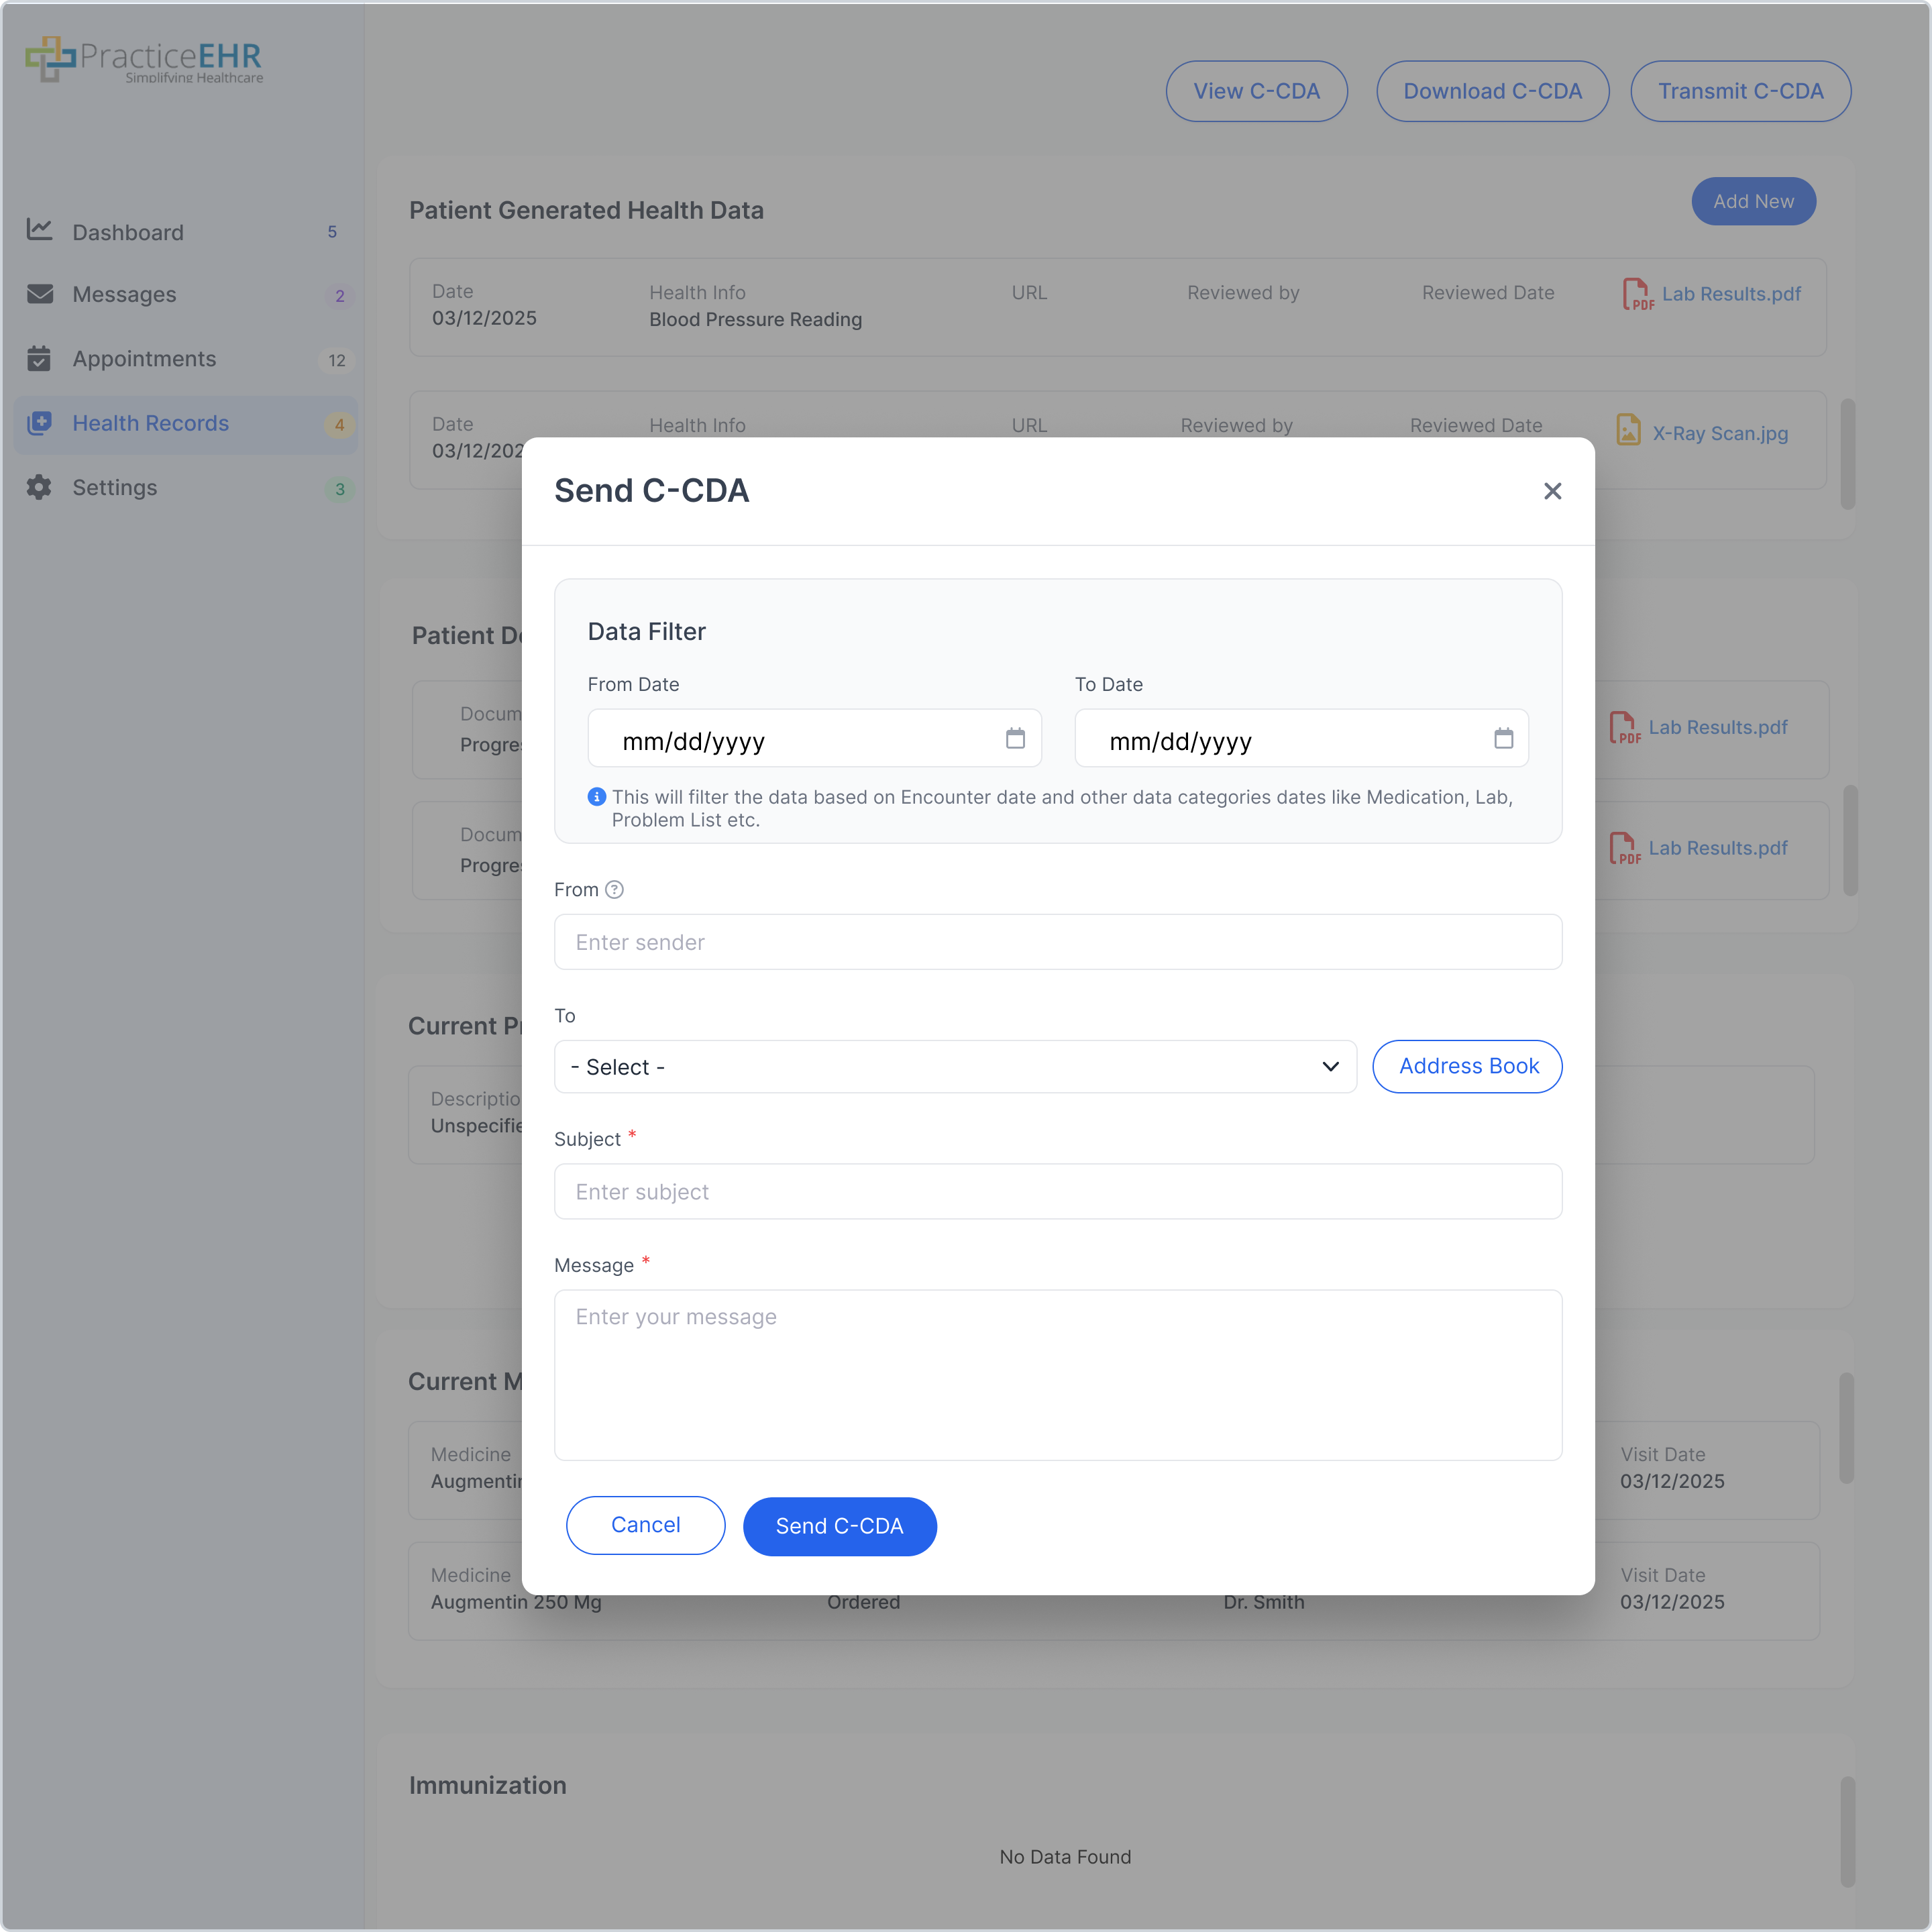
Triggered by clicking the "Transmit C-CDA" button.
Statements & Payments
Authenticated Patient Portal flow for viewing statements and paying outstanding balances online. Reference: PEHR-1236 — Scenario 6.
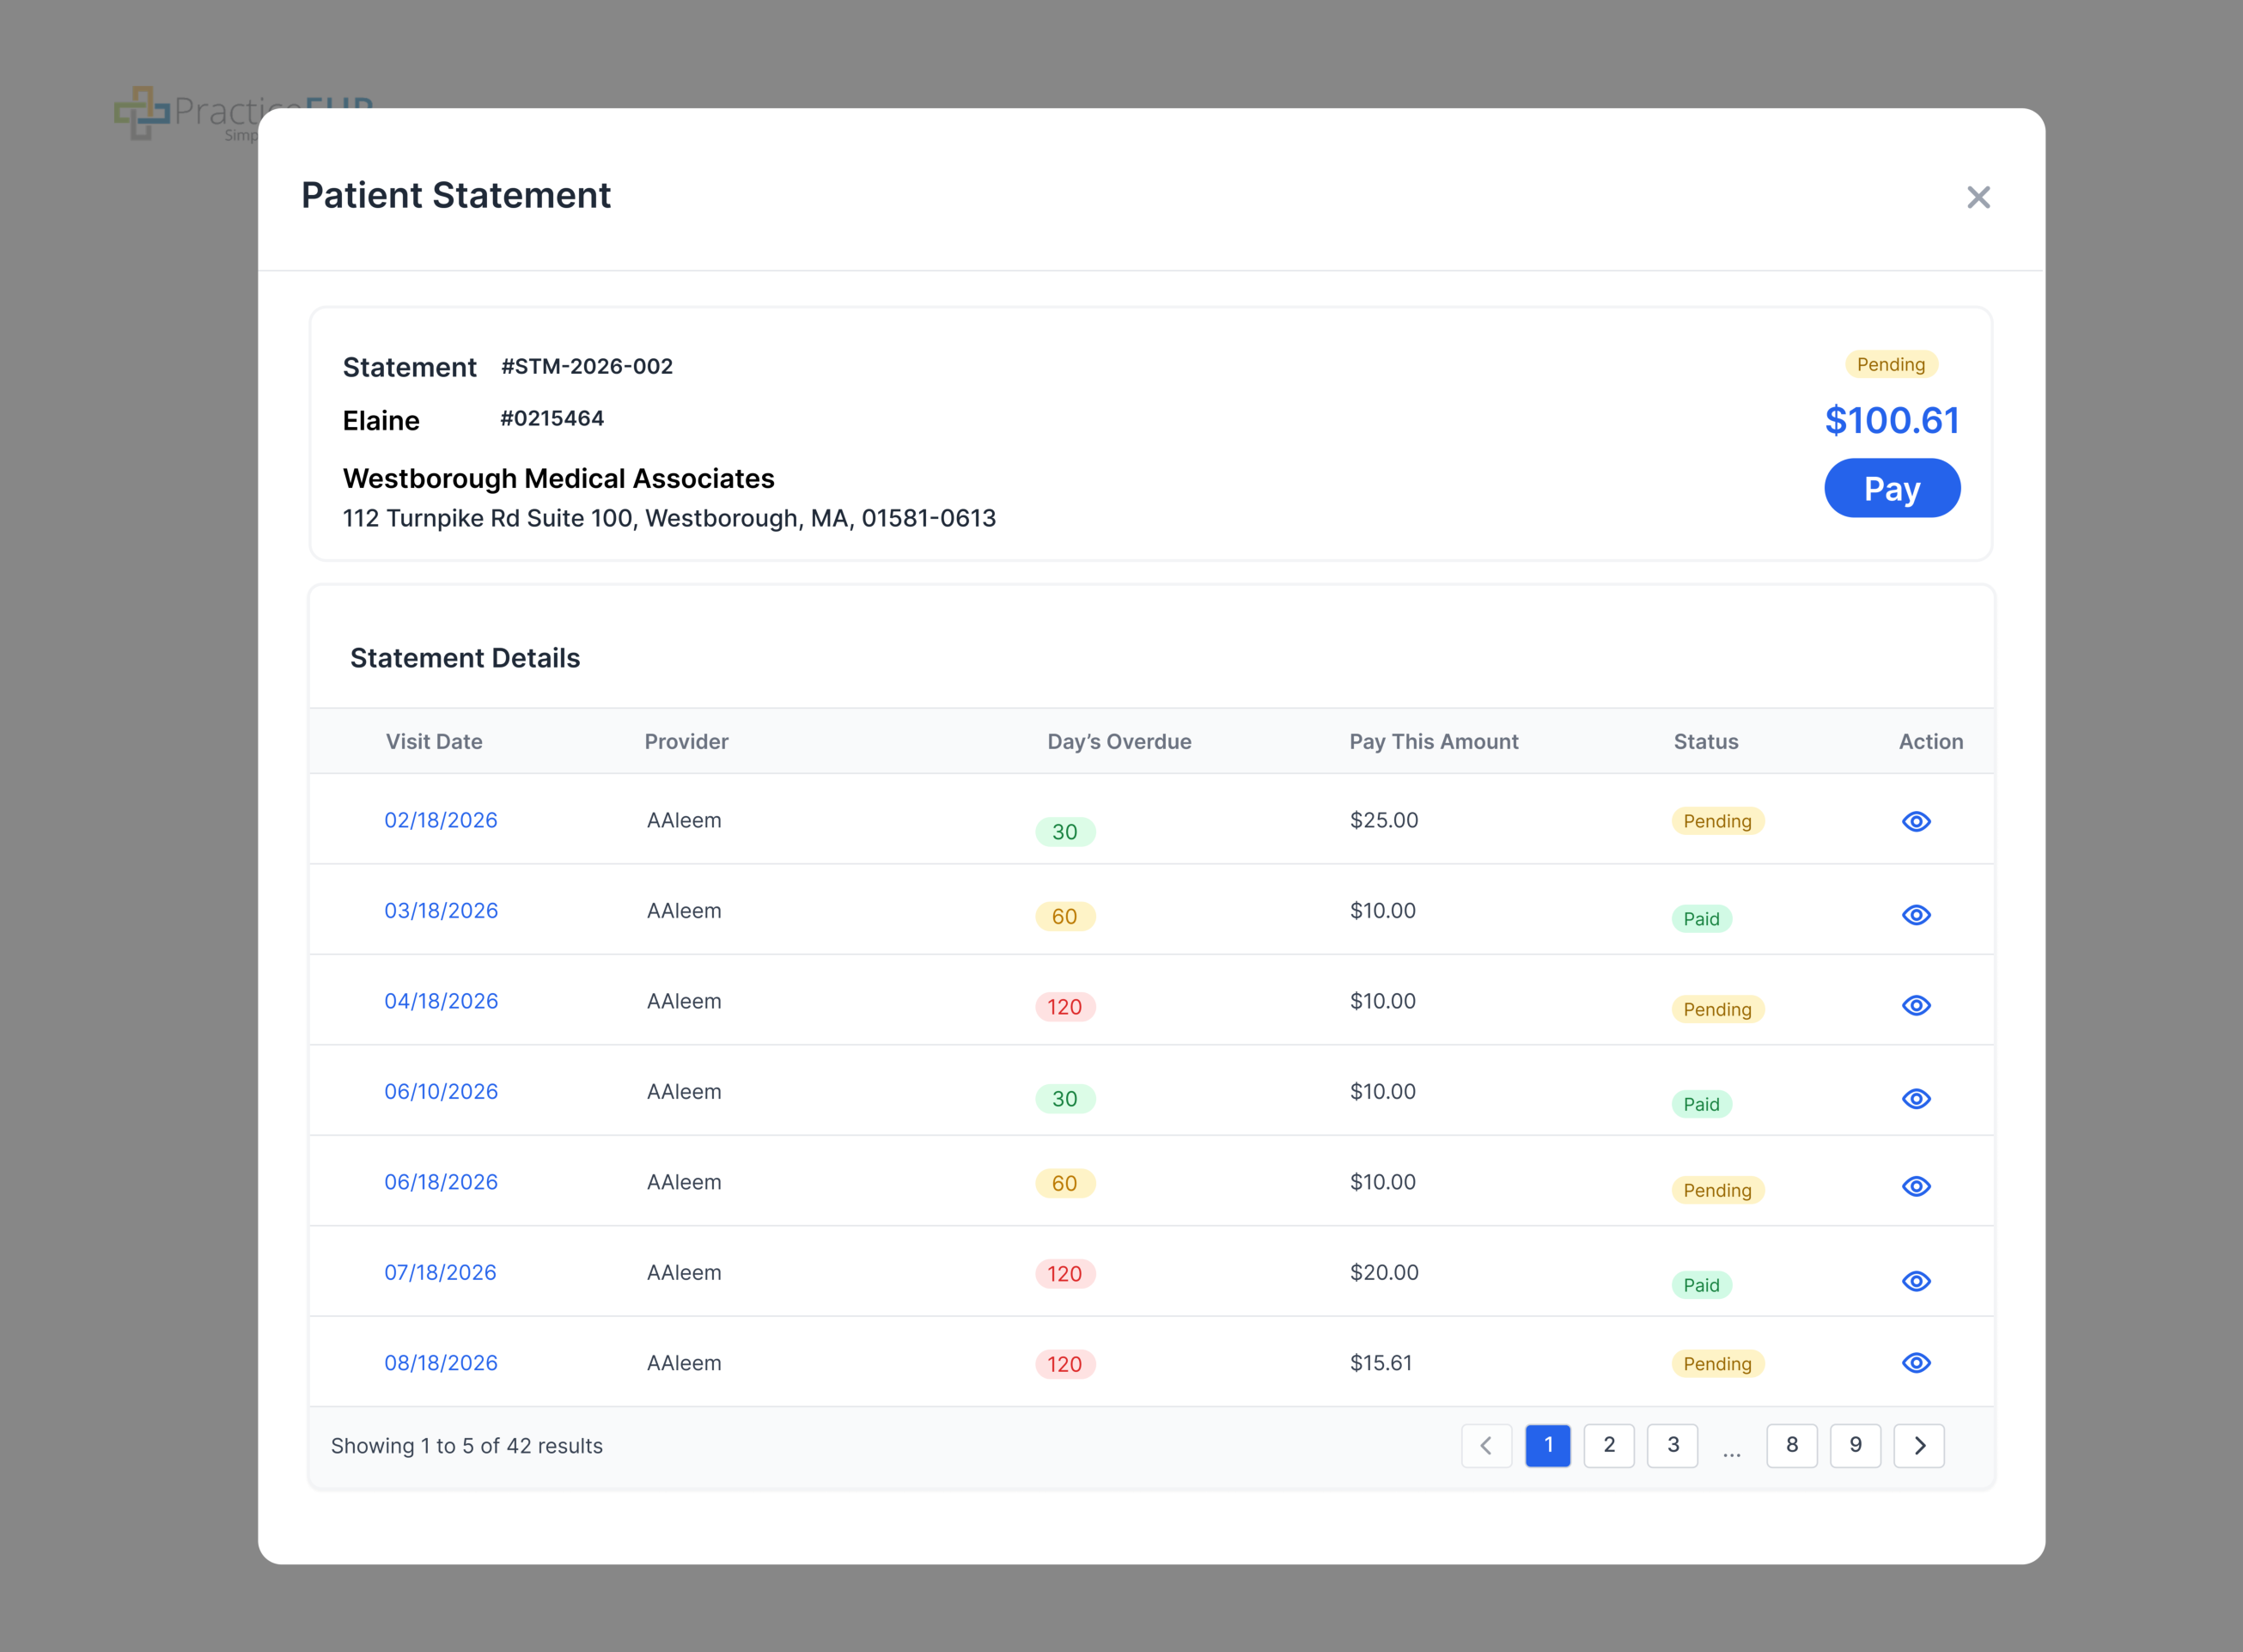
Header Details
- Statement Number
- Patient Name
- Account Number
- Practice Name
- Total Pending Amount
- Statement Status
Grid Columns
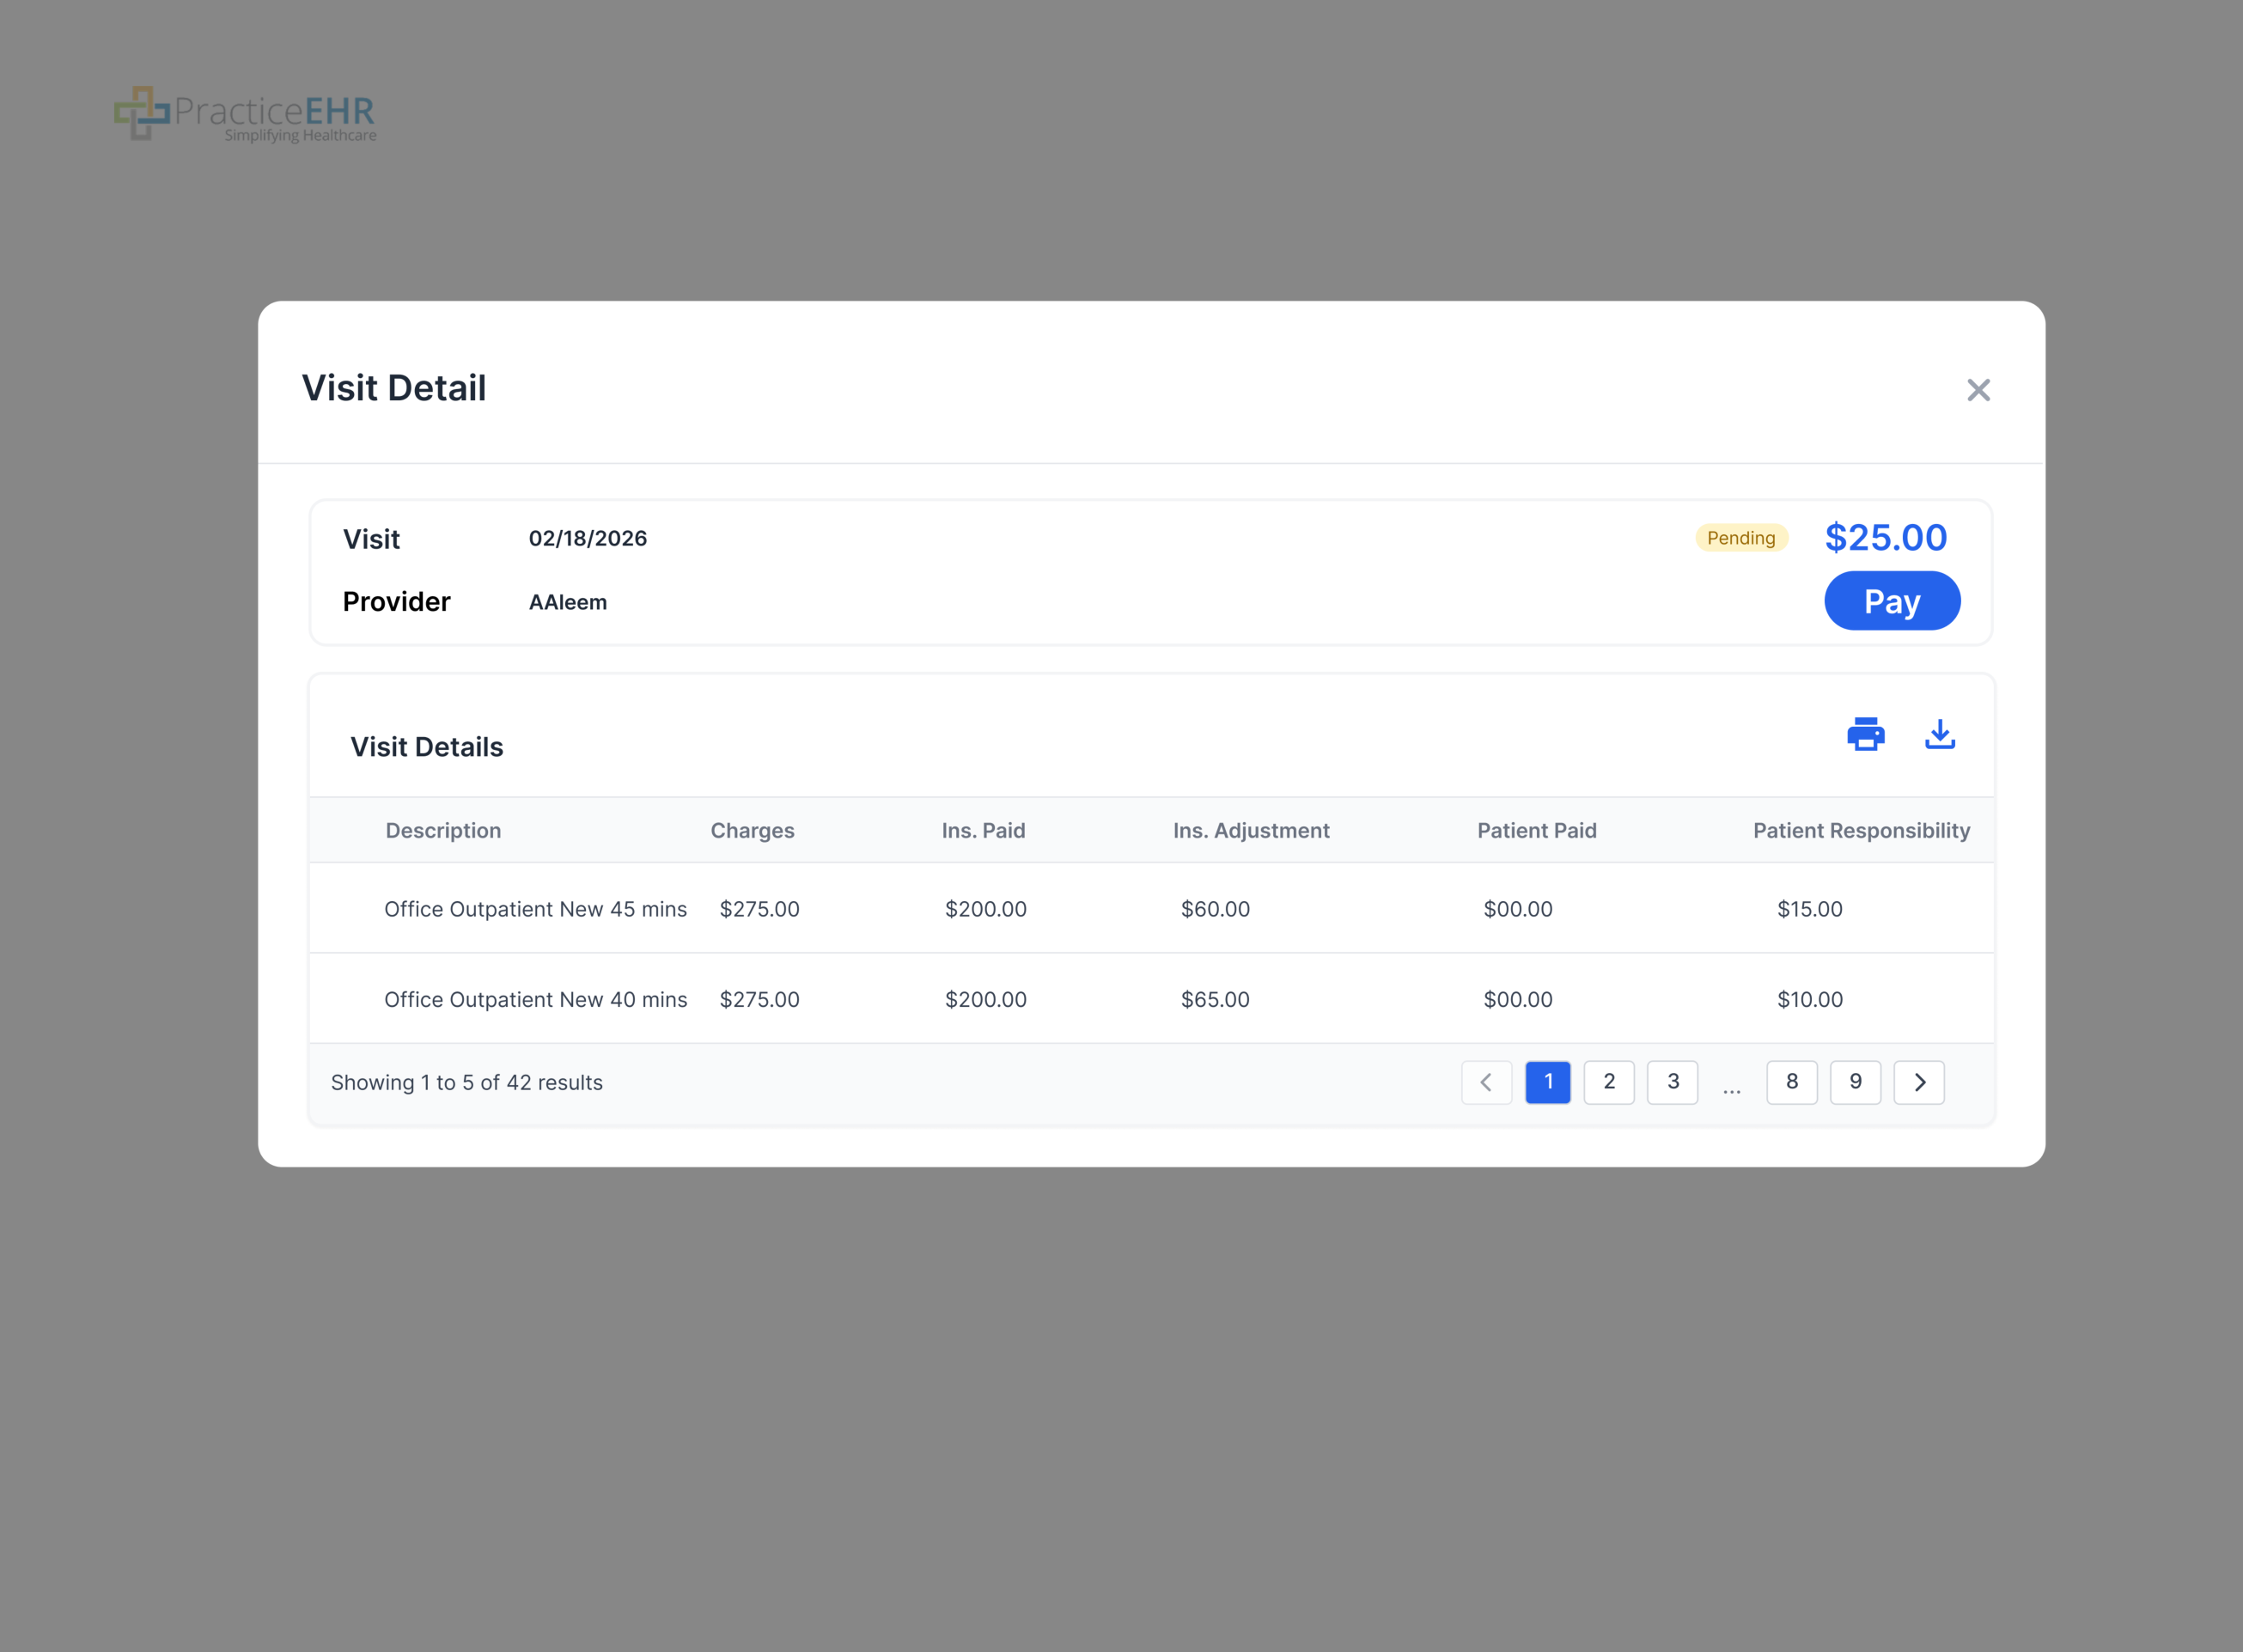
- Visit Date (hyperlinked)
- Provider
- Days Overdue (color pill: 0–30 Green, 30–60 Yellow, 90+ Red)
- Pay This Amount
- Status (Pending / Paid)
- View — Eye icon for PDF preview
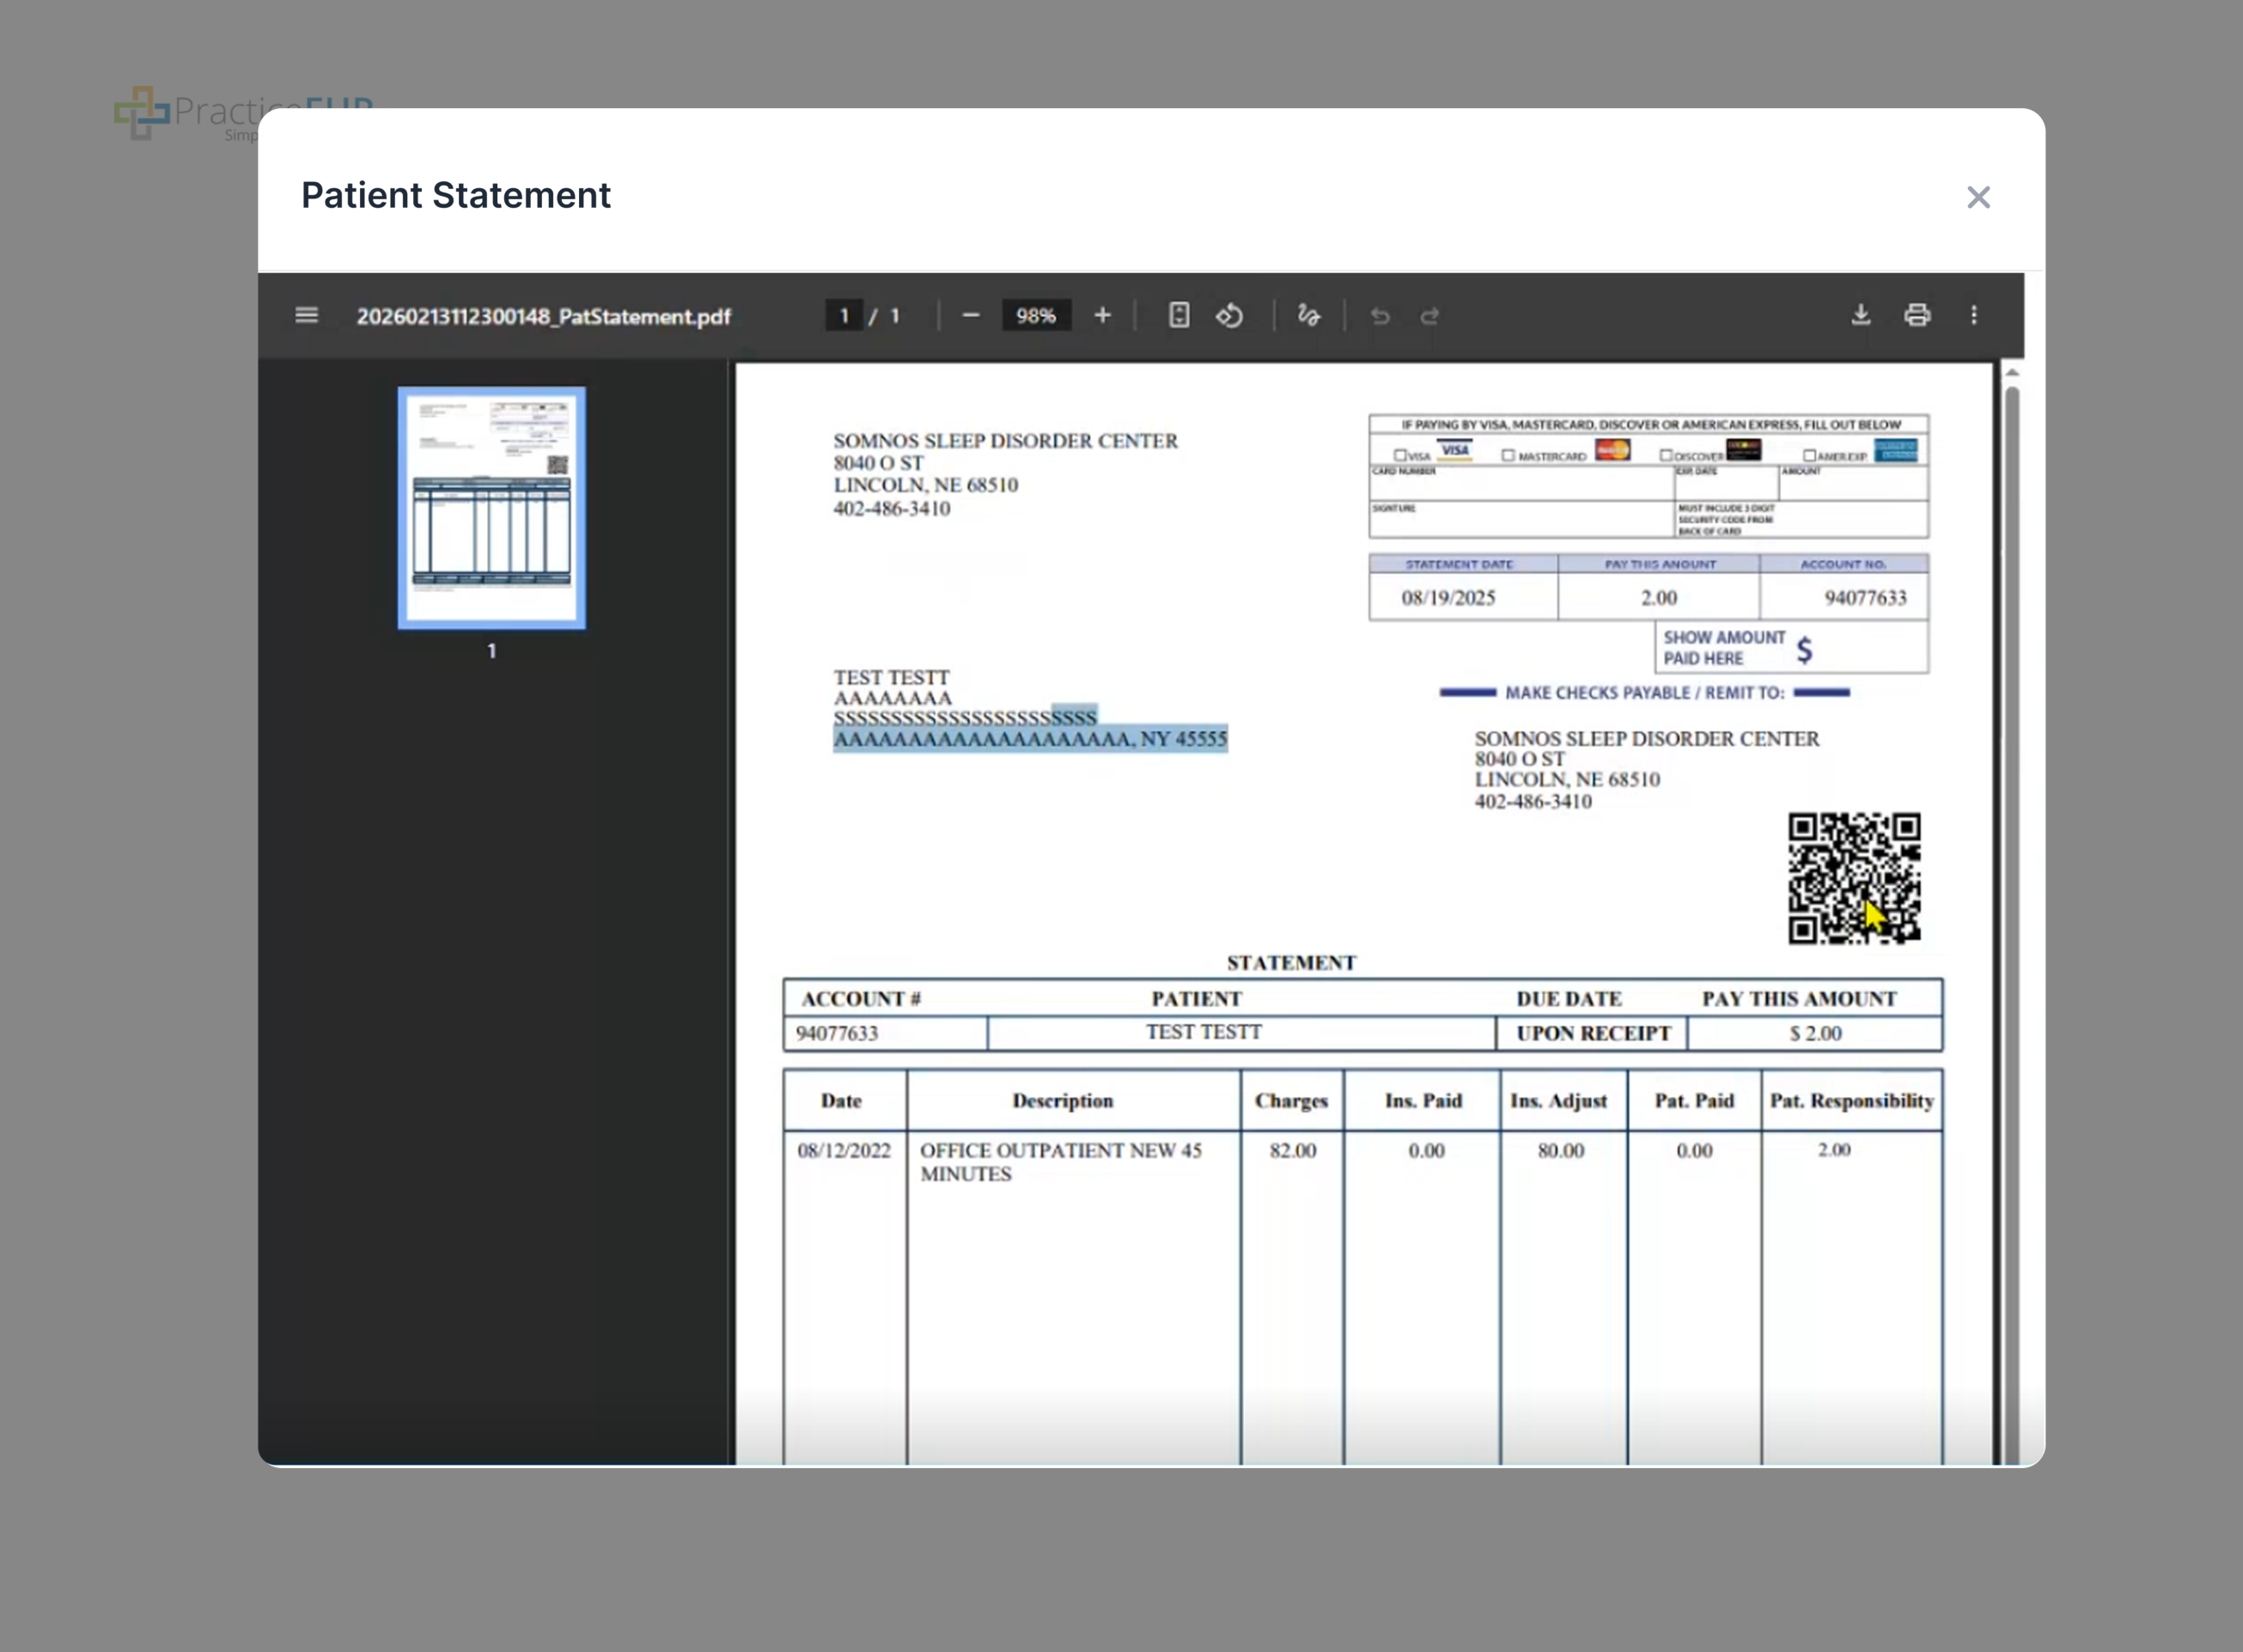
Triggered when the patient clicks the Eye icon in the View column. The system opens a PDF preview of the selected statement.
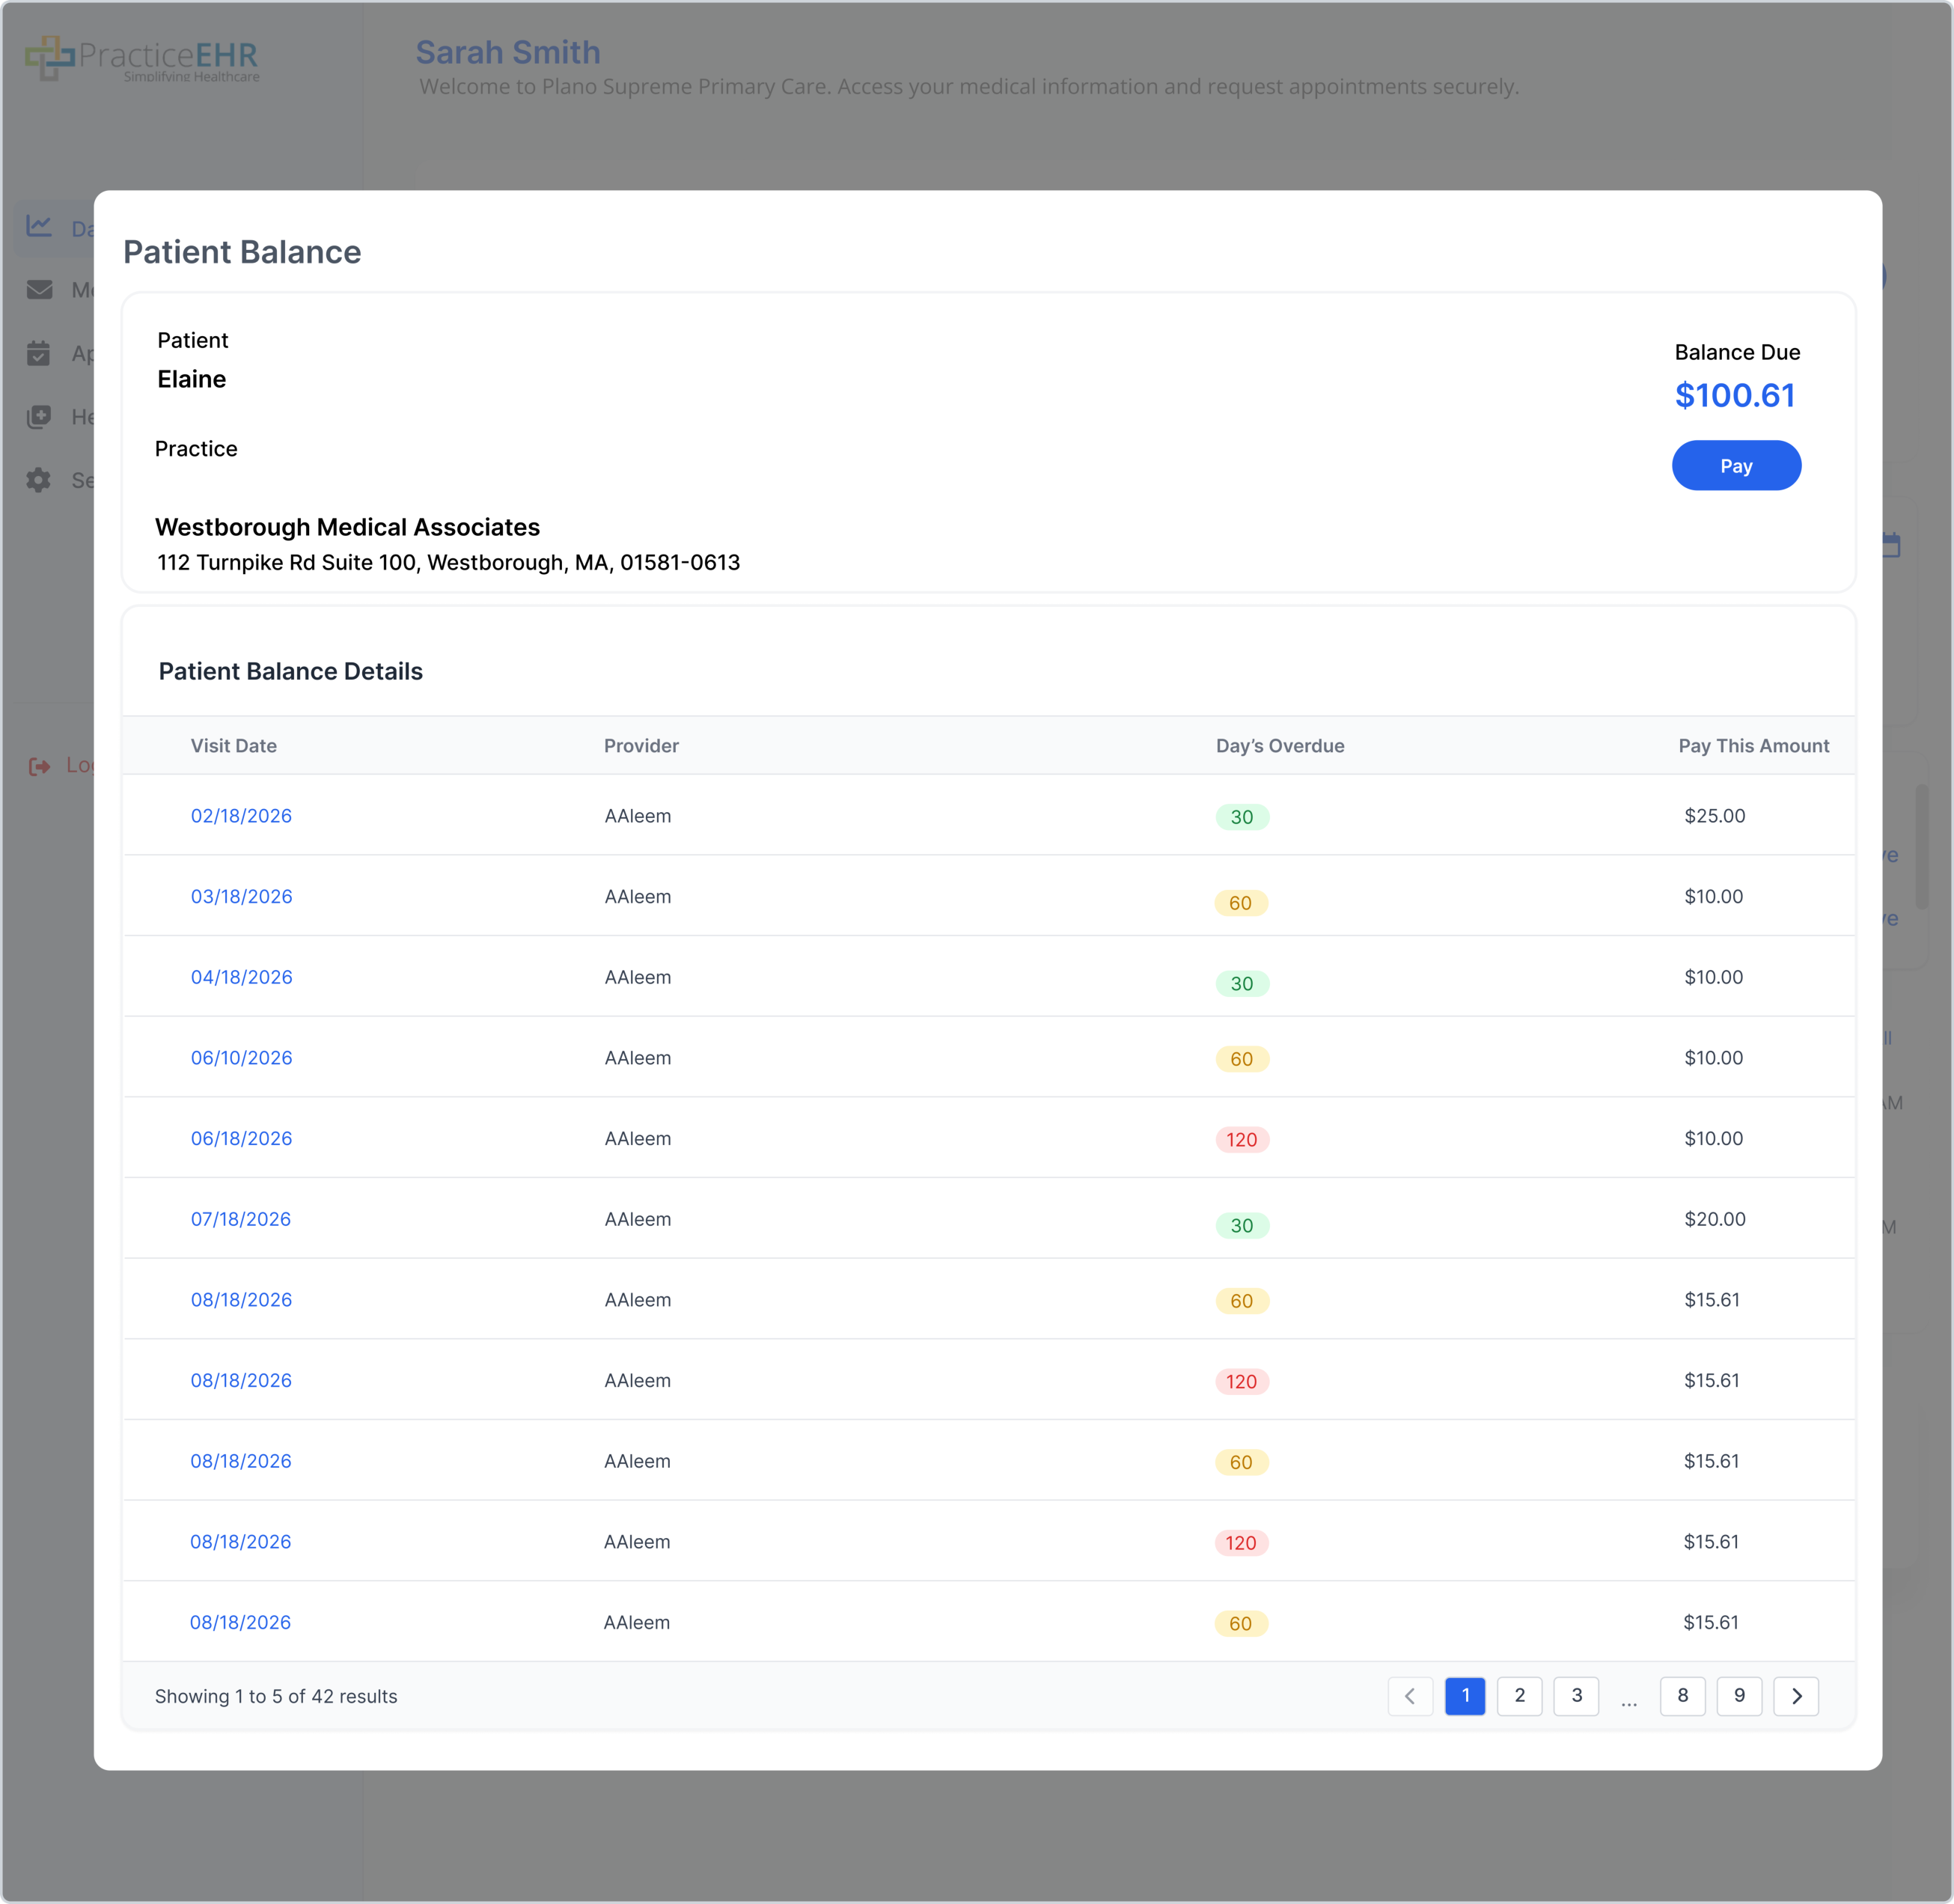
Header Details
- Patient Name
- Practice Name & Address
- Balance Due (running total)
- Pay button
Grid Columns
- Visit Date (hyperlinked → Visit Detail)
- Provider
- Day's Overdue (color pill)
- Pay This Amount
Note: Balance Due displayed at the top equals the sum of all Pay This Amount values across pending visits.
Triggered when the patient clicks the Pay button from the Patient Balance modal, the Statement modal, or the Visit Detail modal. The Payment Details modal collects card information and the amount to charge.
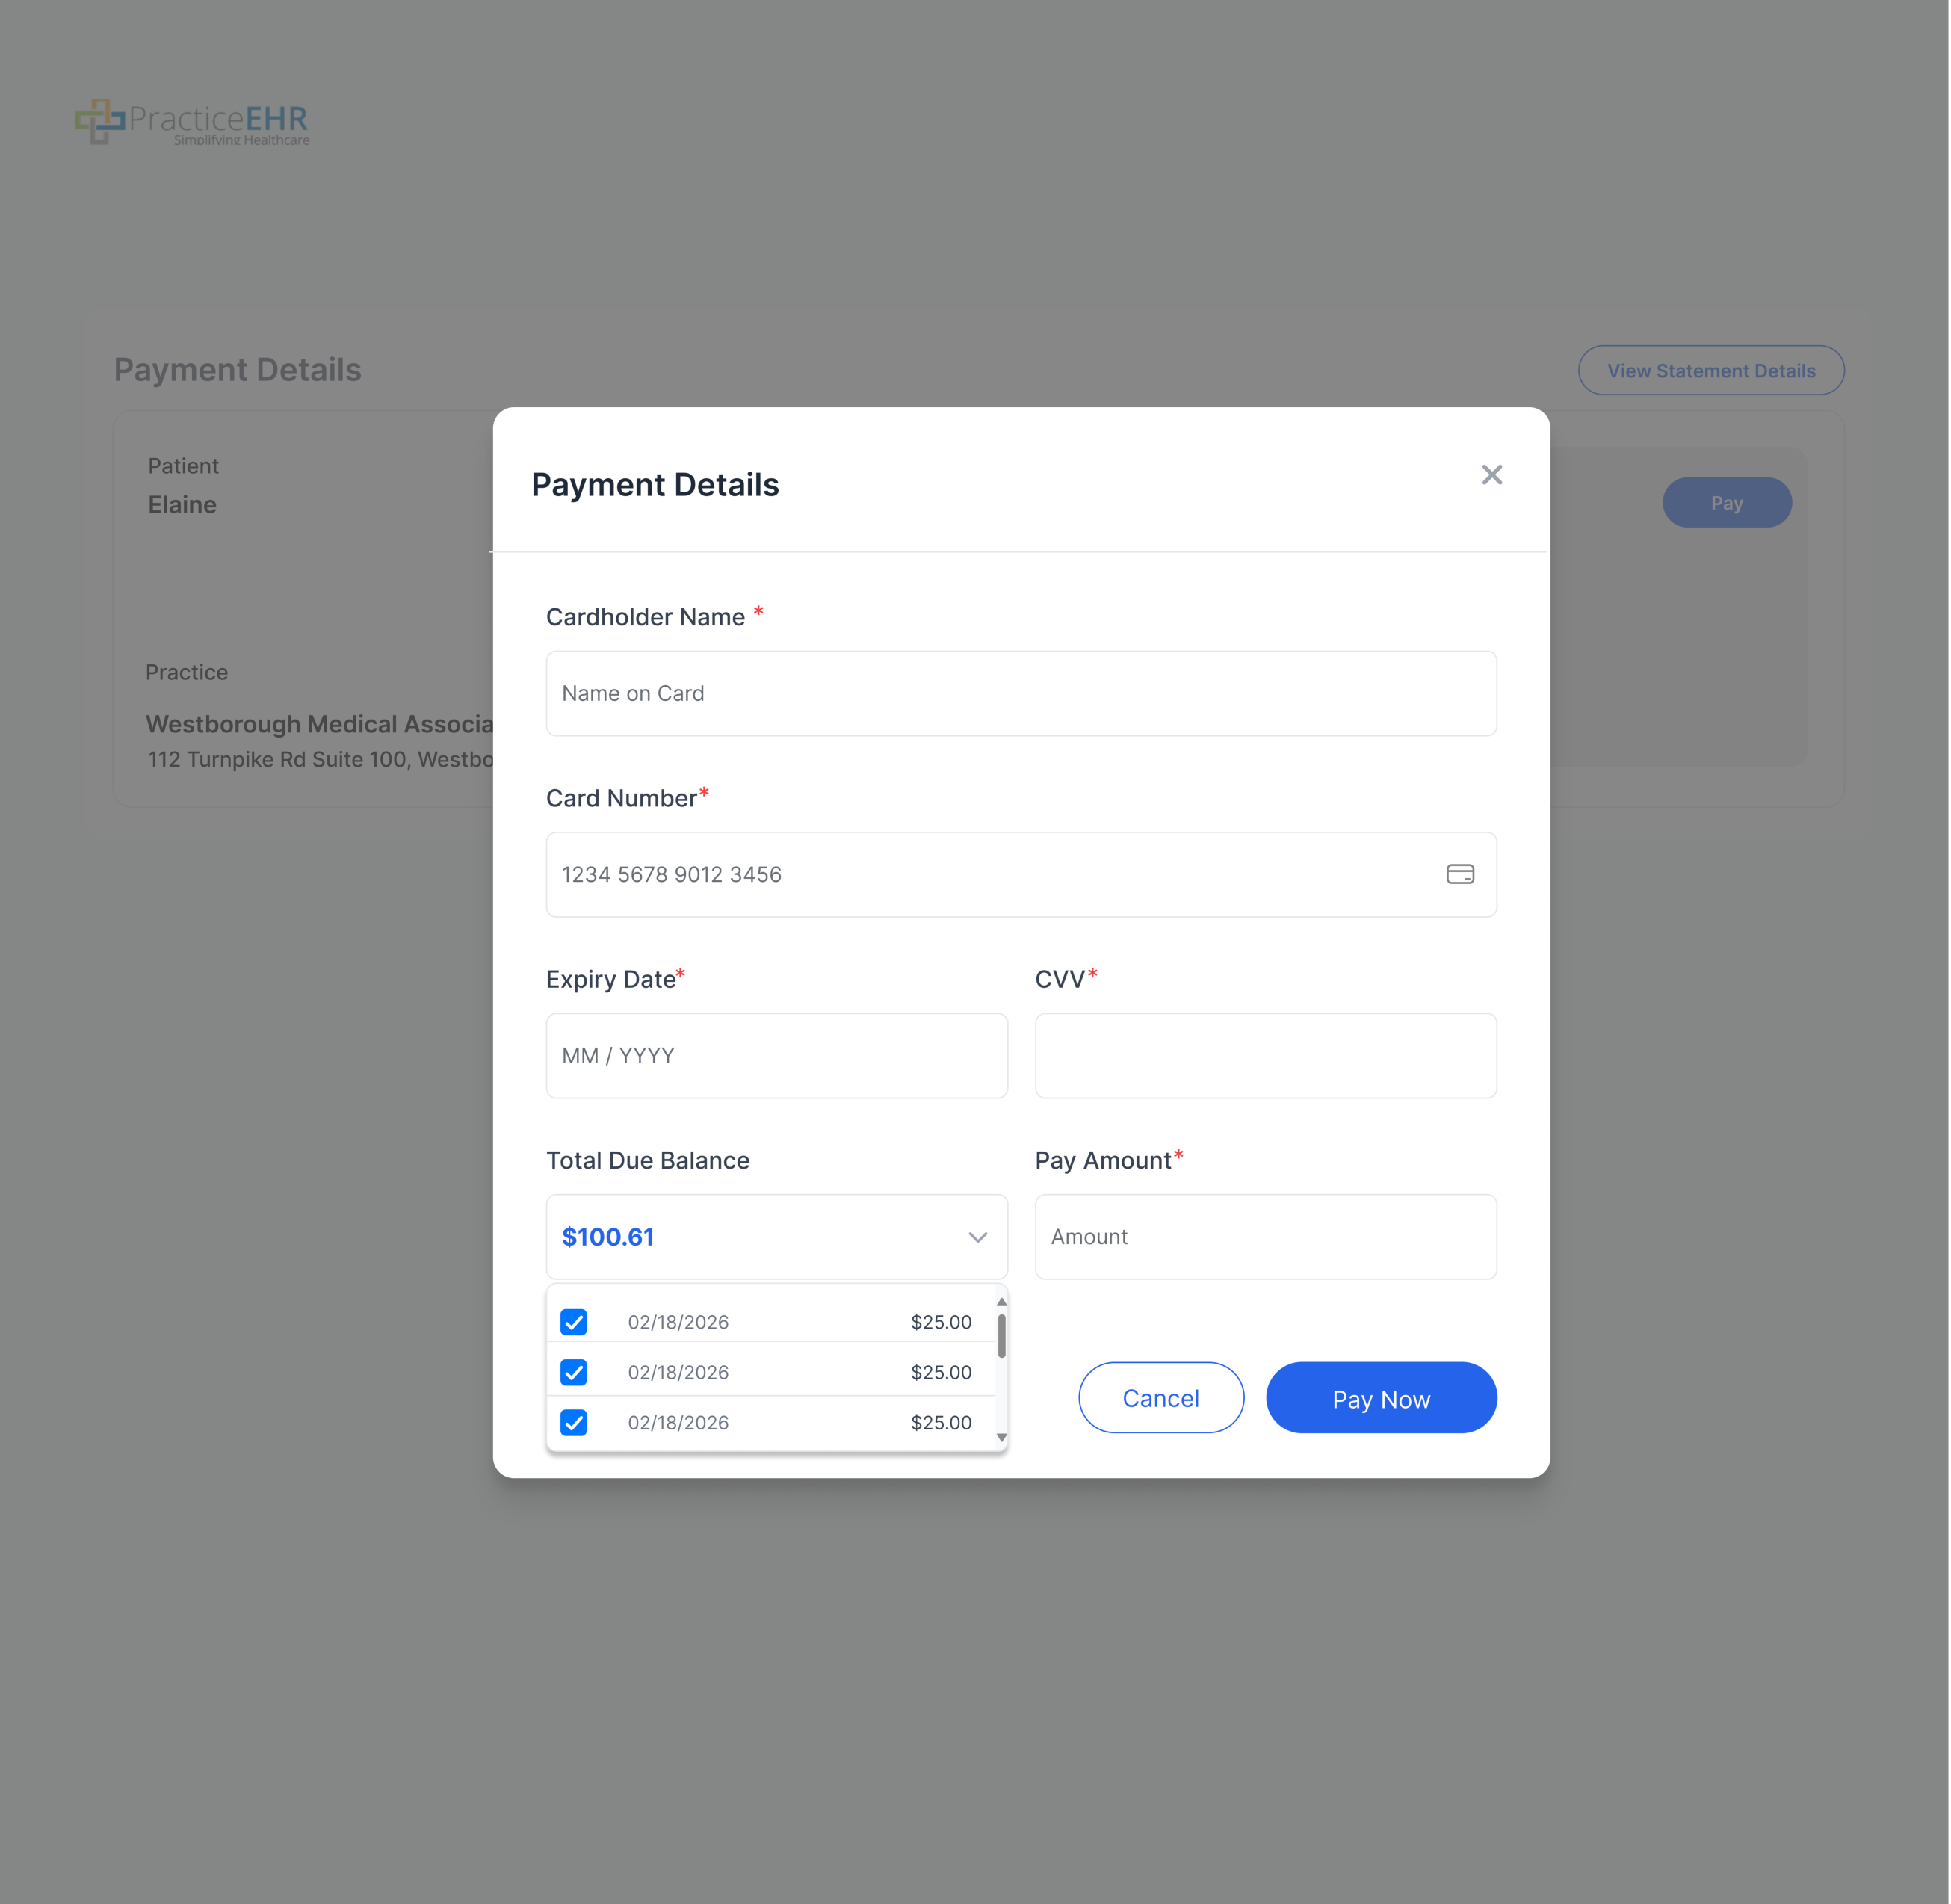
Mandatory Fields
- Cardholder Name*
- Card Number*
- Expiry Date* (MM / YYYY)
- CVV*
- Pay Amount*
Total Due Balance Dropdown
- Auto-populates with the sum of all pending visits.
- Dropdown lists every pending visit, preselected by default.
- Deselecting a visit dynamically recalculates the total.
- Each row shows visit date and Pay This Amount.
Validation & Submission Rules
- On Pay Now, missing or invalid mandatory fields surface inline errors and block submission.
- When Pay Amount exceeds the Total Due Balance, the excess is applied to the patient's advance balance.
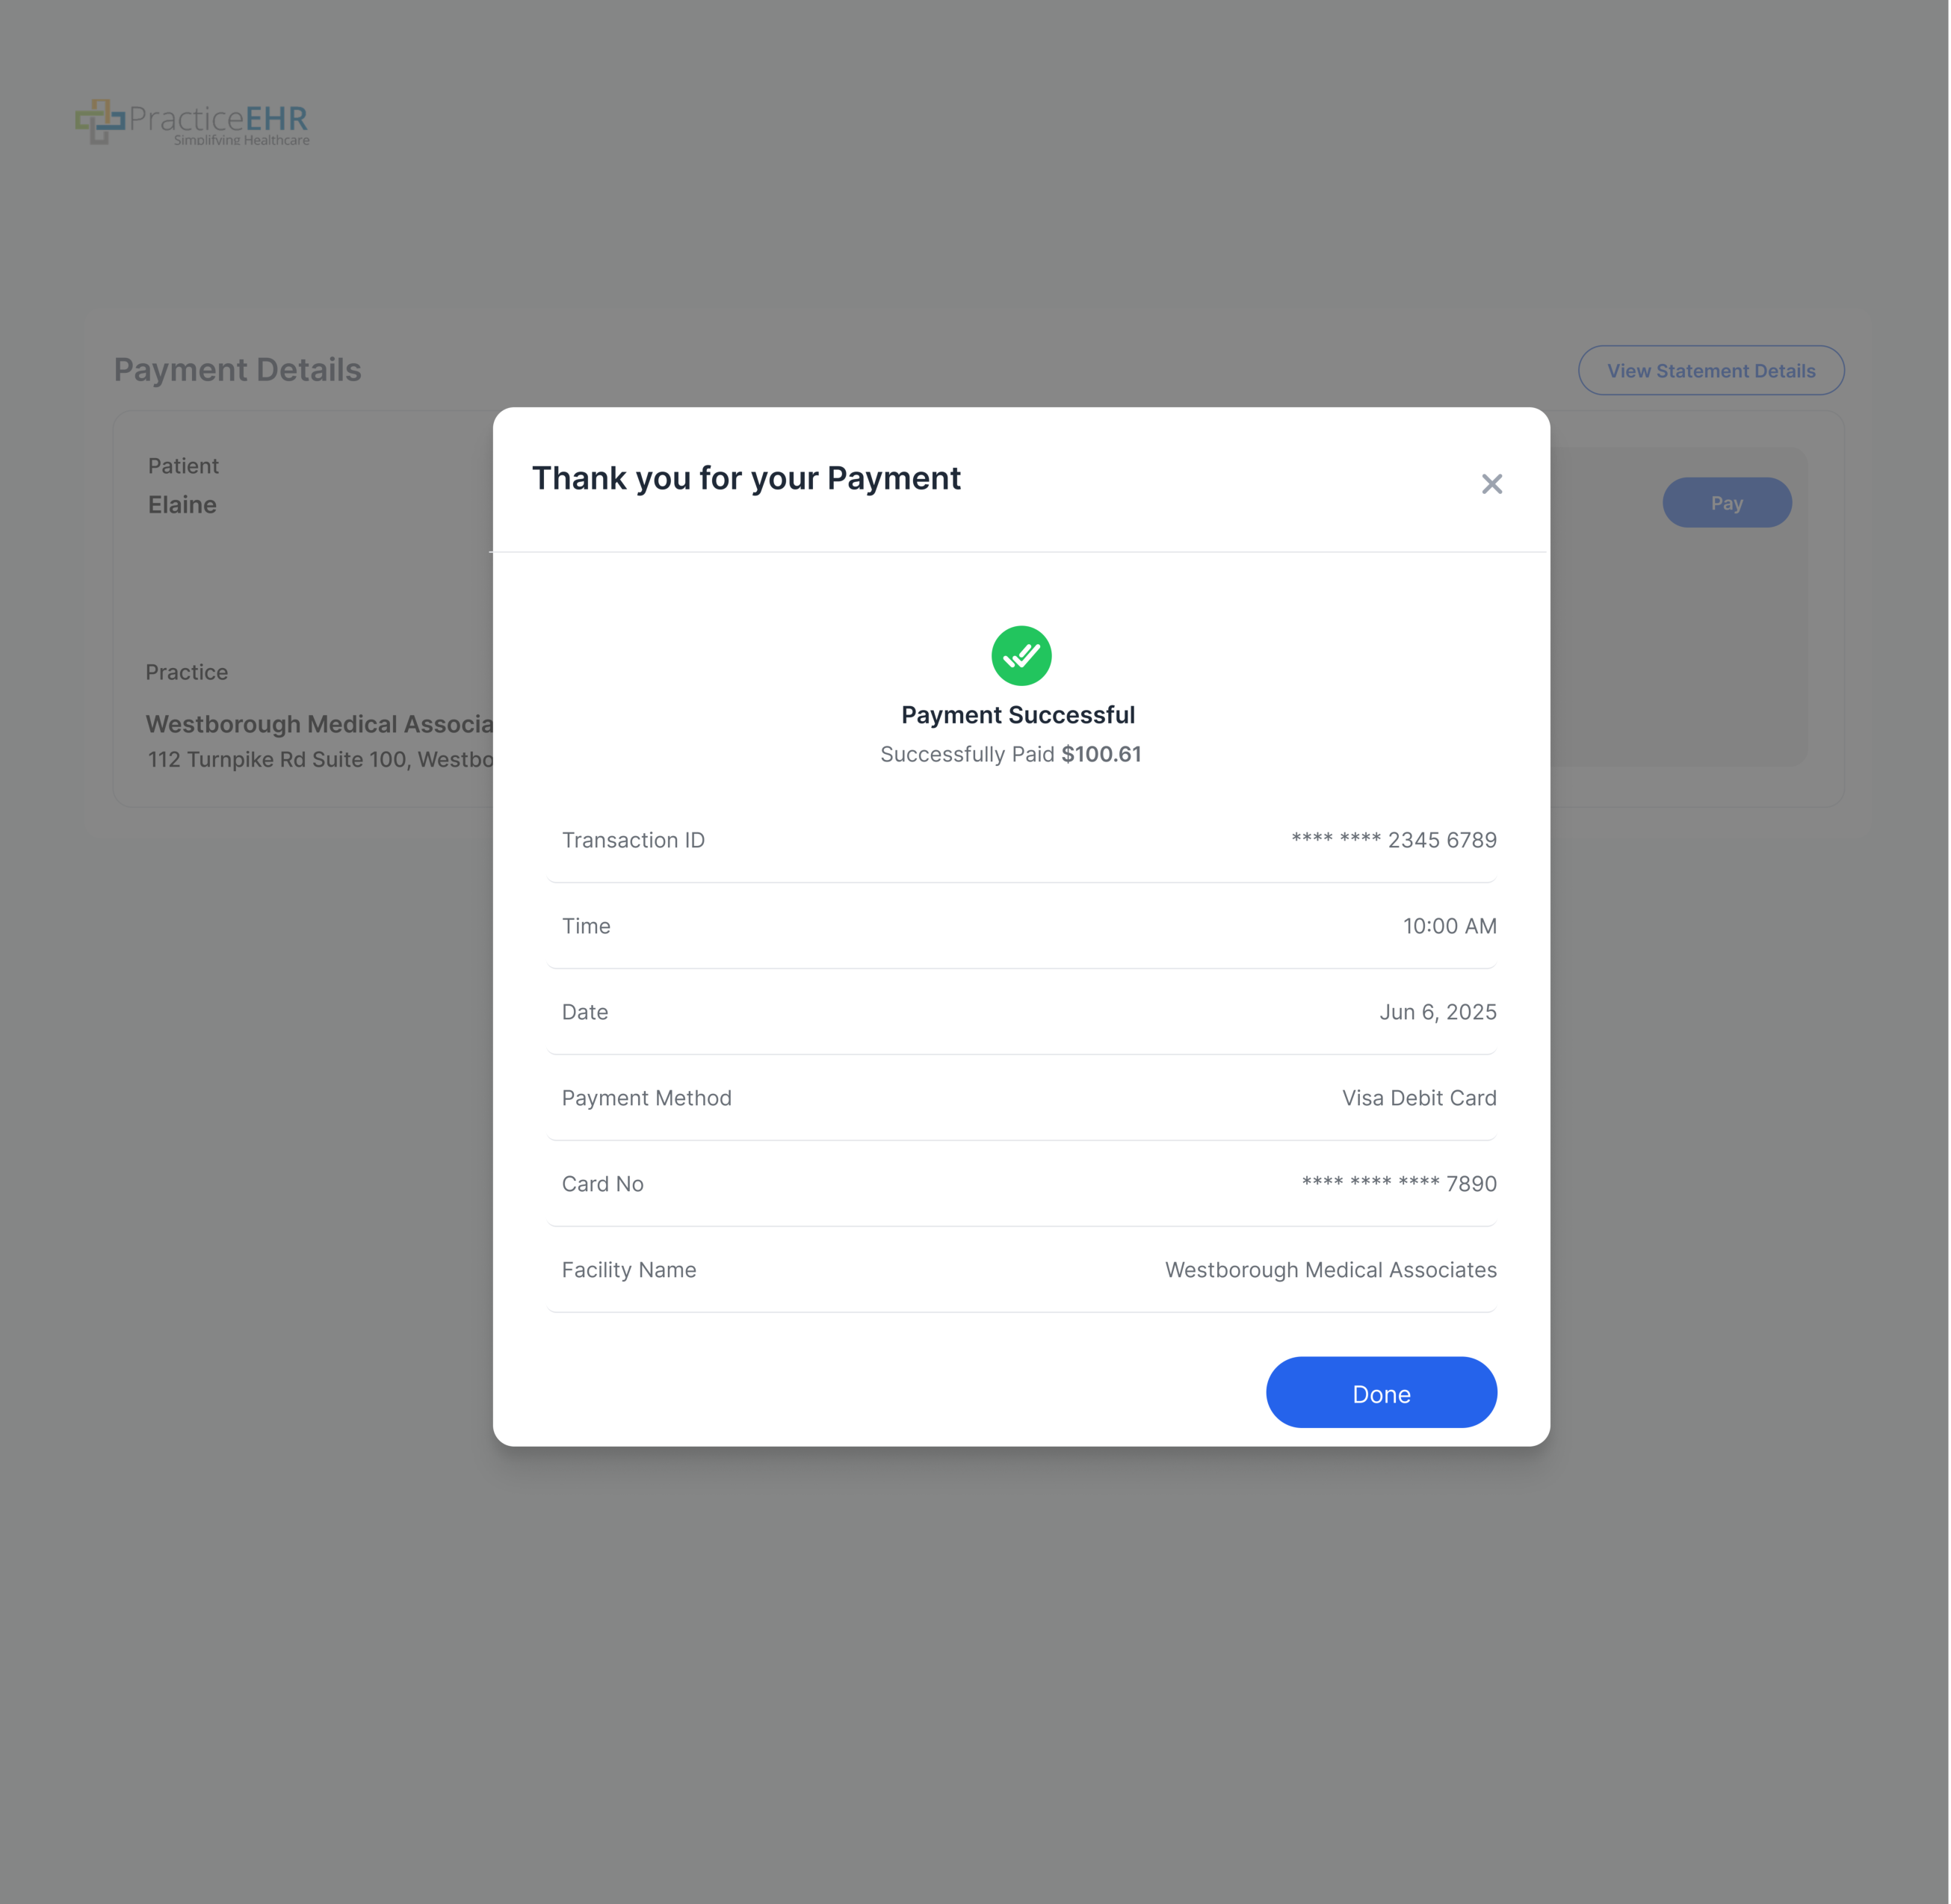
- When all fields are valid, the system processes the payment securely.
- The Cancel button closes the modal without charging.
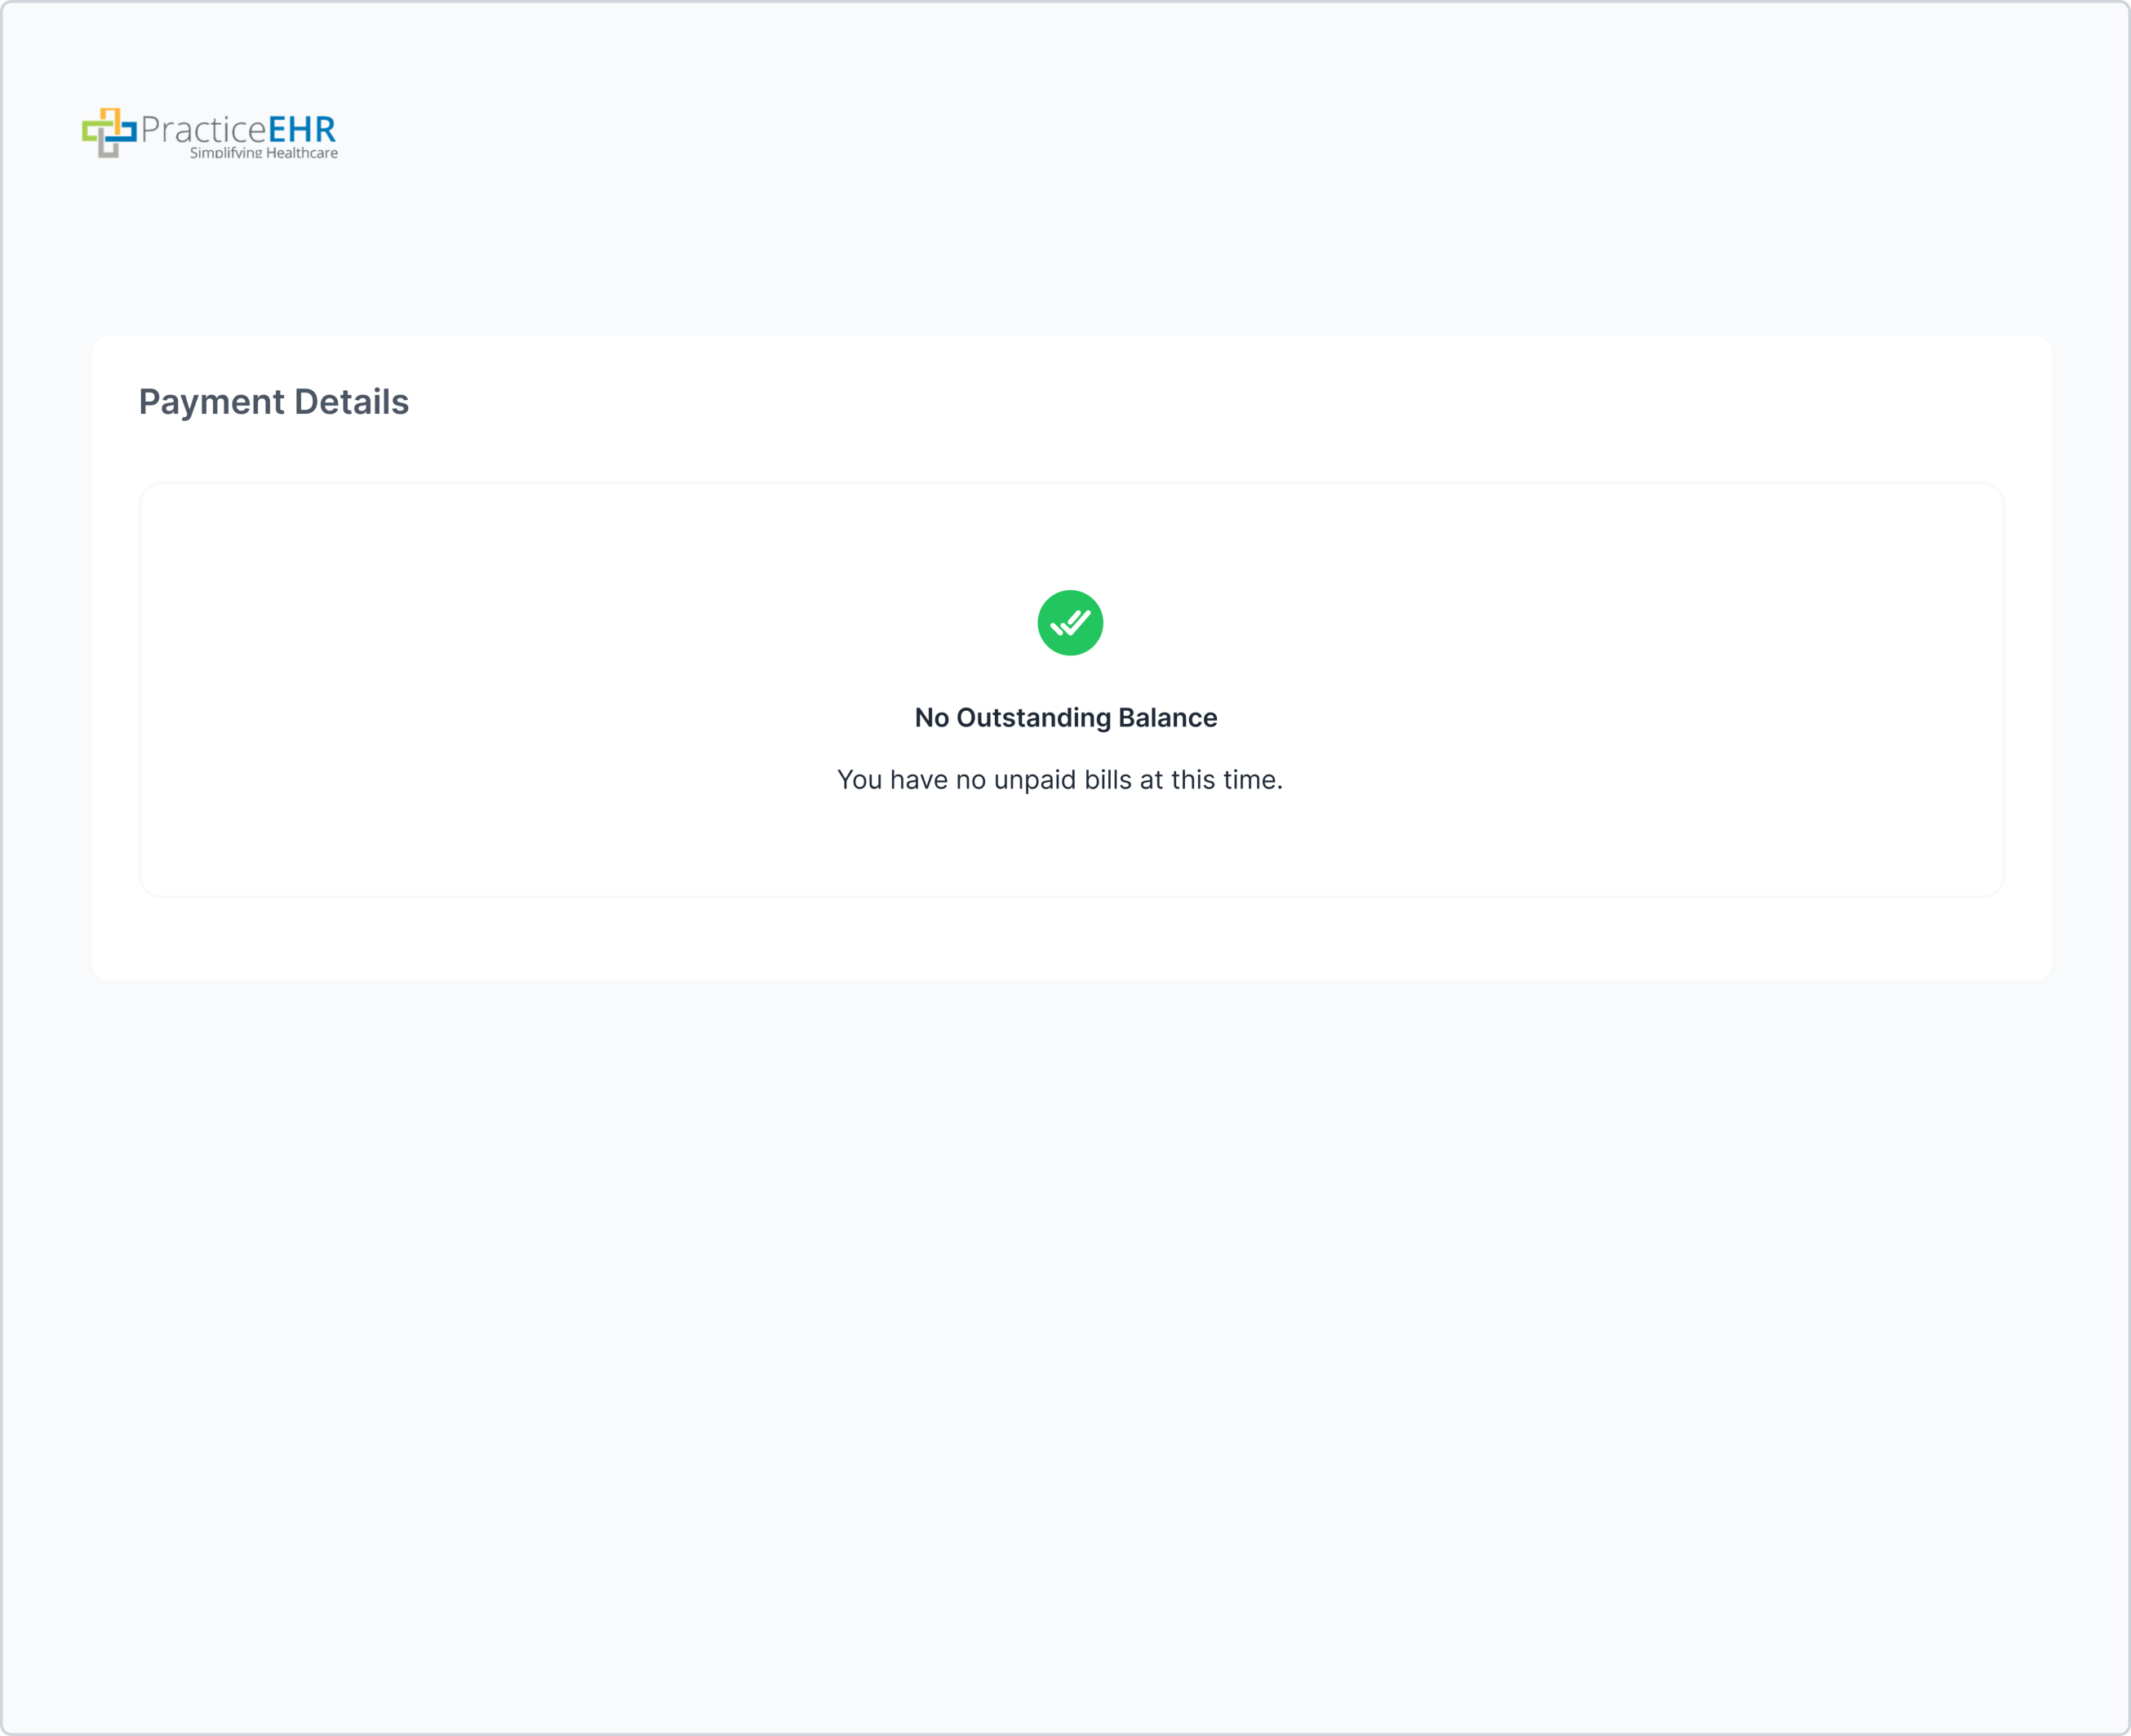
When the patient account has no pending charges, the system displays a clear empty state with the message "You have no unpaid bills at this time." No Pay action is rendered.
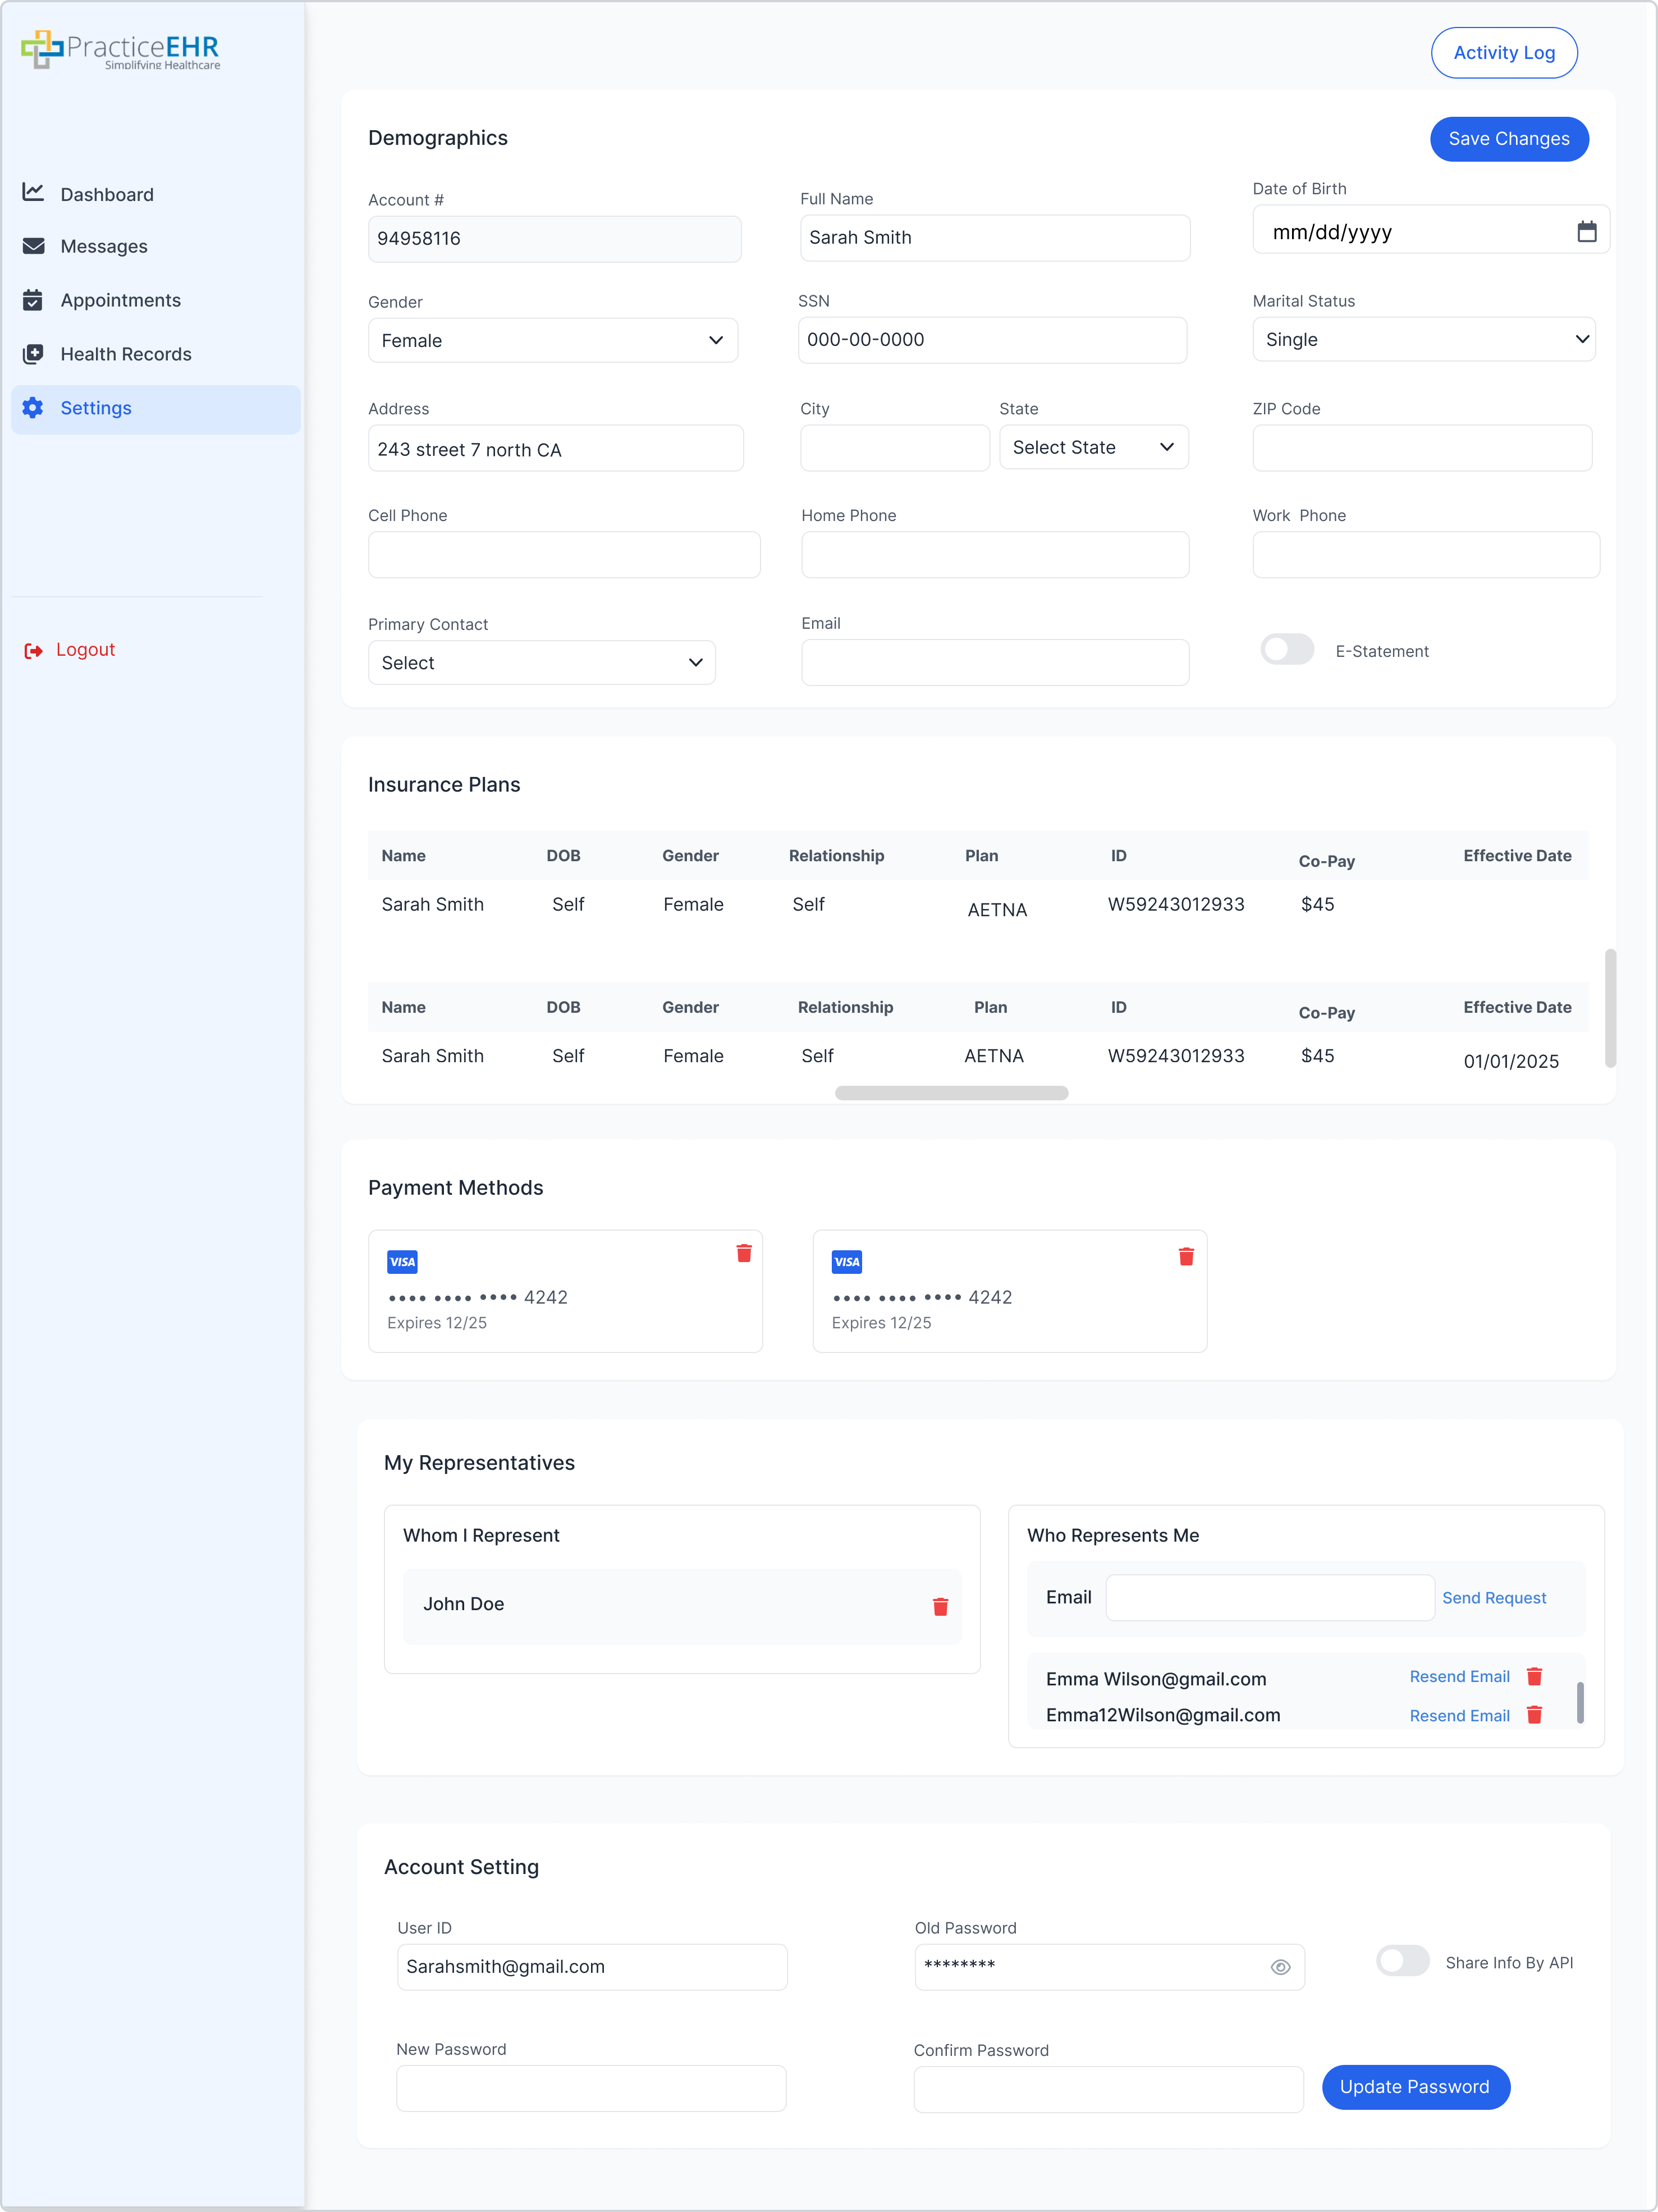
Settings
Manage Demographics, Insurance, Payment Methods, Representatives, and Account Settings.
New: SMS Reminders Toggle
An SMS Reminders toggle has been added to the Account Setting section. Patients can turn it on to get text message reminders for their appointments and updates. Standard message and data rates may apply.
Hovering over the info icon next to the toggle displays a brief tooltip explaining what the toggle does, so users understand the behavior before enabling it.
Save Confirmation
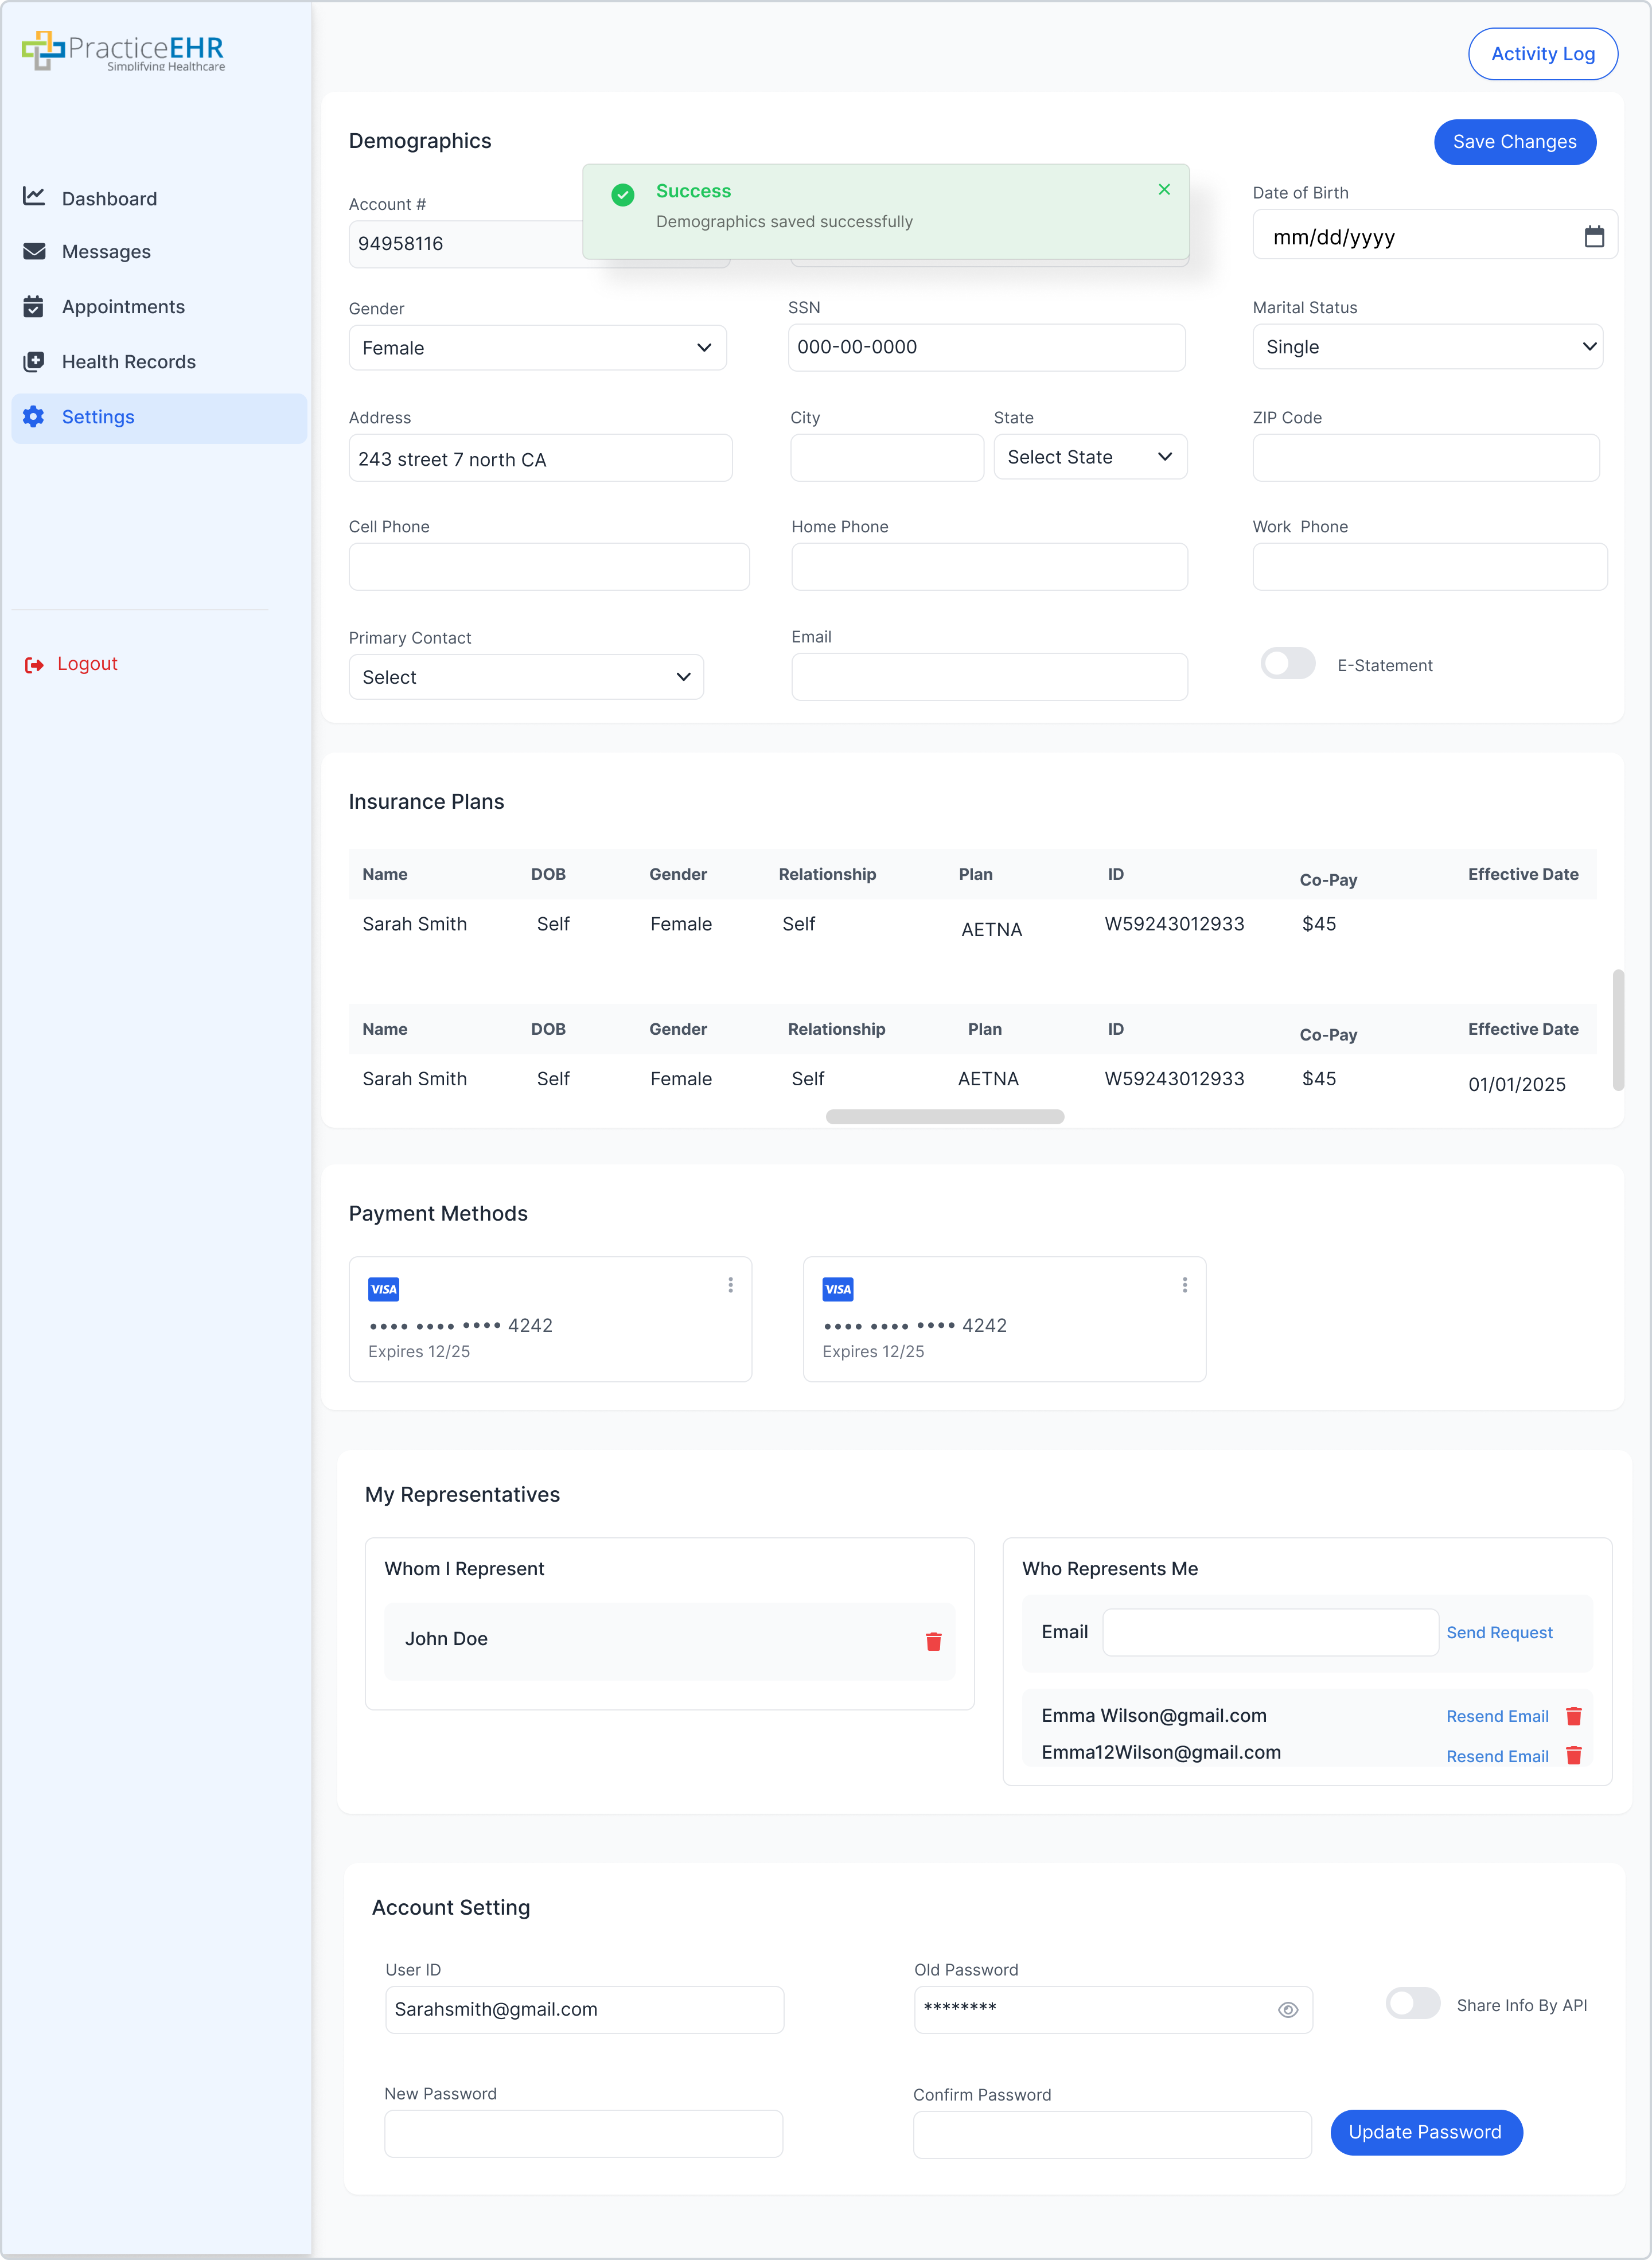
Appearance of success toast on save.
Delete Representative

Confirmation dialog when deleting a representative.
New: Scan & Import Buttons
Two new actions, Scan and Import, have been added to the Settings header next to the existing Activity Log button. Patients can now digitize their Insurance Card or Driving License and the captured data automatically populates the Demographics and Insurance Plans sections.
Clicking either button opens a dropdown with two document types: Insurance Card (data flows into Insurance Plans) and Driving License (data flows into Demographics). Auto-extracted values are pre-filled but editable; patients must click Save Changes to commit.
Import Flow

Upload File(s) modal opens with the Document Type pre-filled based on the dropdown selection, a drag-and-drop zone, and Close / Upload File buttons.
How it works
- Drag and drop a valid image or PDF, or click to browse.
- Click Upload File to submit.
- Insurance Card populates Insurance Plans (Name, DOB, Gender, Relationship, Plan, ID, Co-Pay, Effective Date).
- Driving License populates Demographics (Full Name, DOB, Gender, Address, City, State, ZIP Code).
- Unsupported format, empty upload, or oversized files show an inline error.
Scan Flow
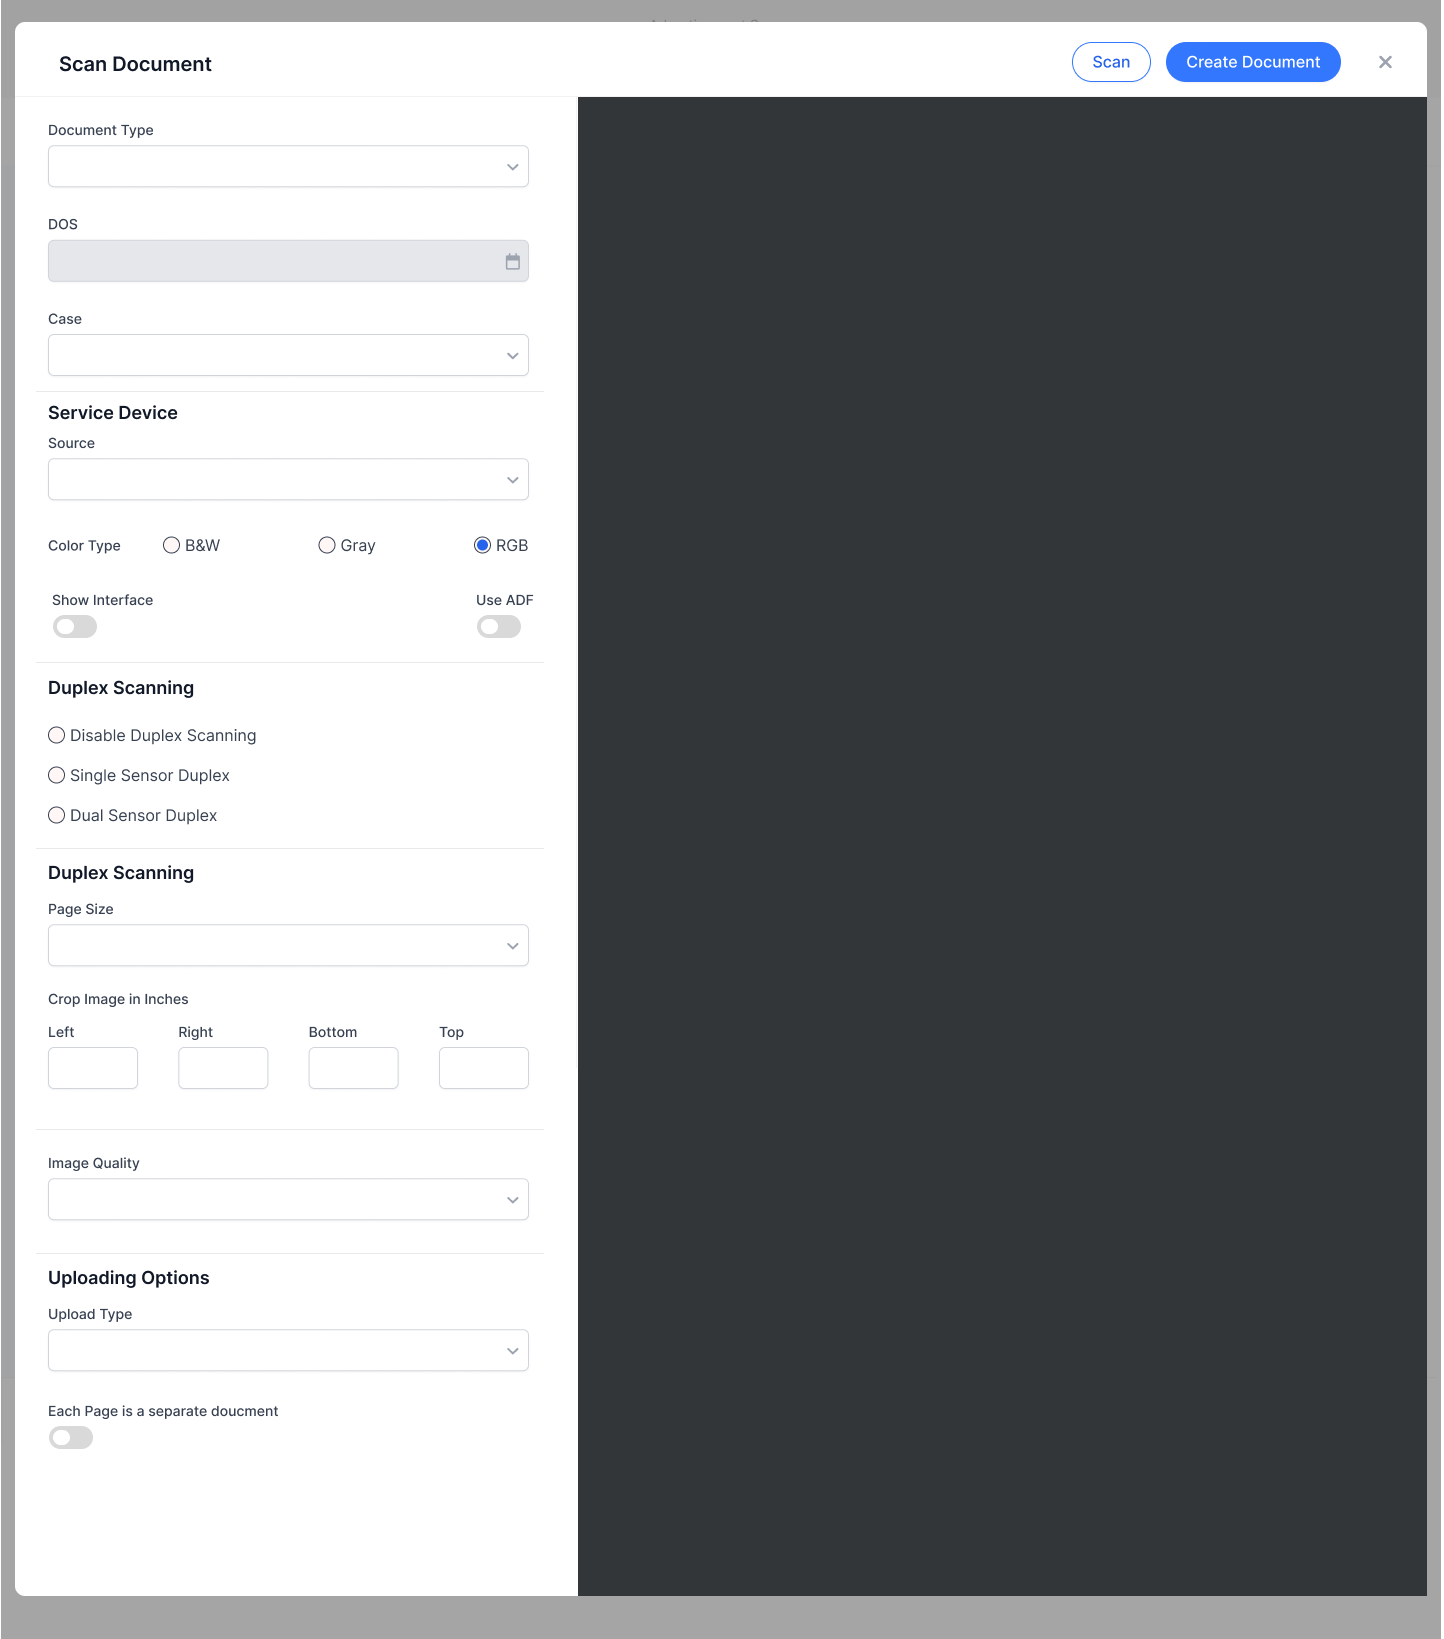
Scan Document modal with hardware-scanner configuration on the left and live preview pane on the right.
Configuration Groups
- Document Type pre-set from the dropdown selection, plus DOS and Case.
- Service Device: Source, Color Type (B&W / Gray / RGB default), Show Interface toggle, Use ADF toggle.
- Duplex Scanning: Disable / Single Sensor / Dual Sensor.
- Page Size, Crop Image in Inches (Left / Right / Bottom / Top), and Image Quality.
- Uploading Options: Upload Type plus Each Page is a separate document toggle.
- Click Scan to capture, then Create Document to save and update the relevant section.
- If no scanner is detected, Source shows "No device found" and the Scan button is disabled.
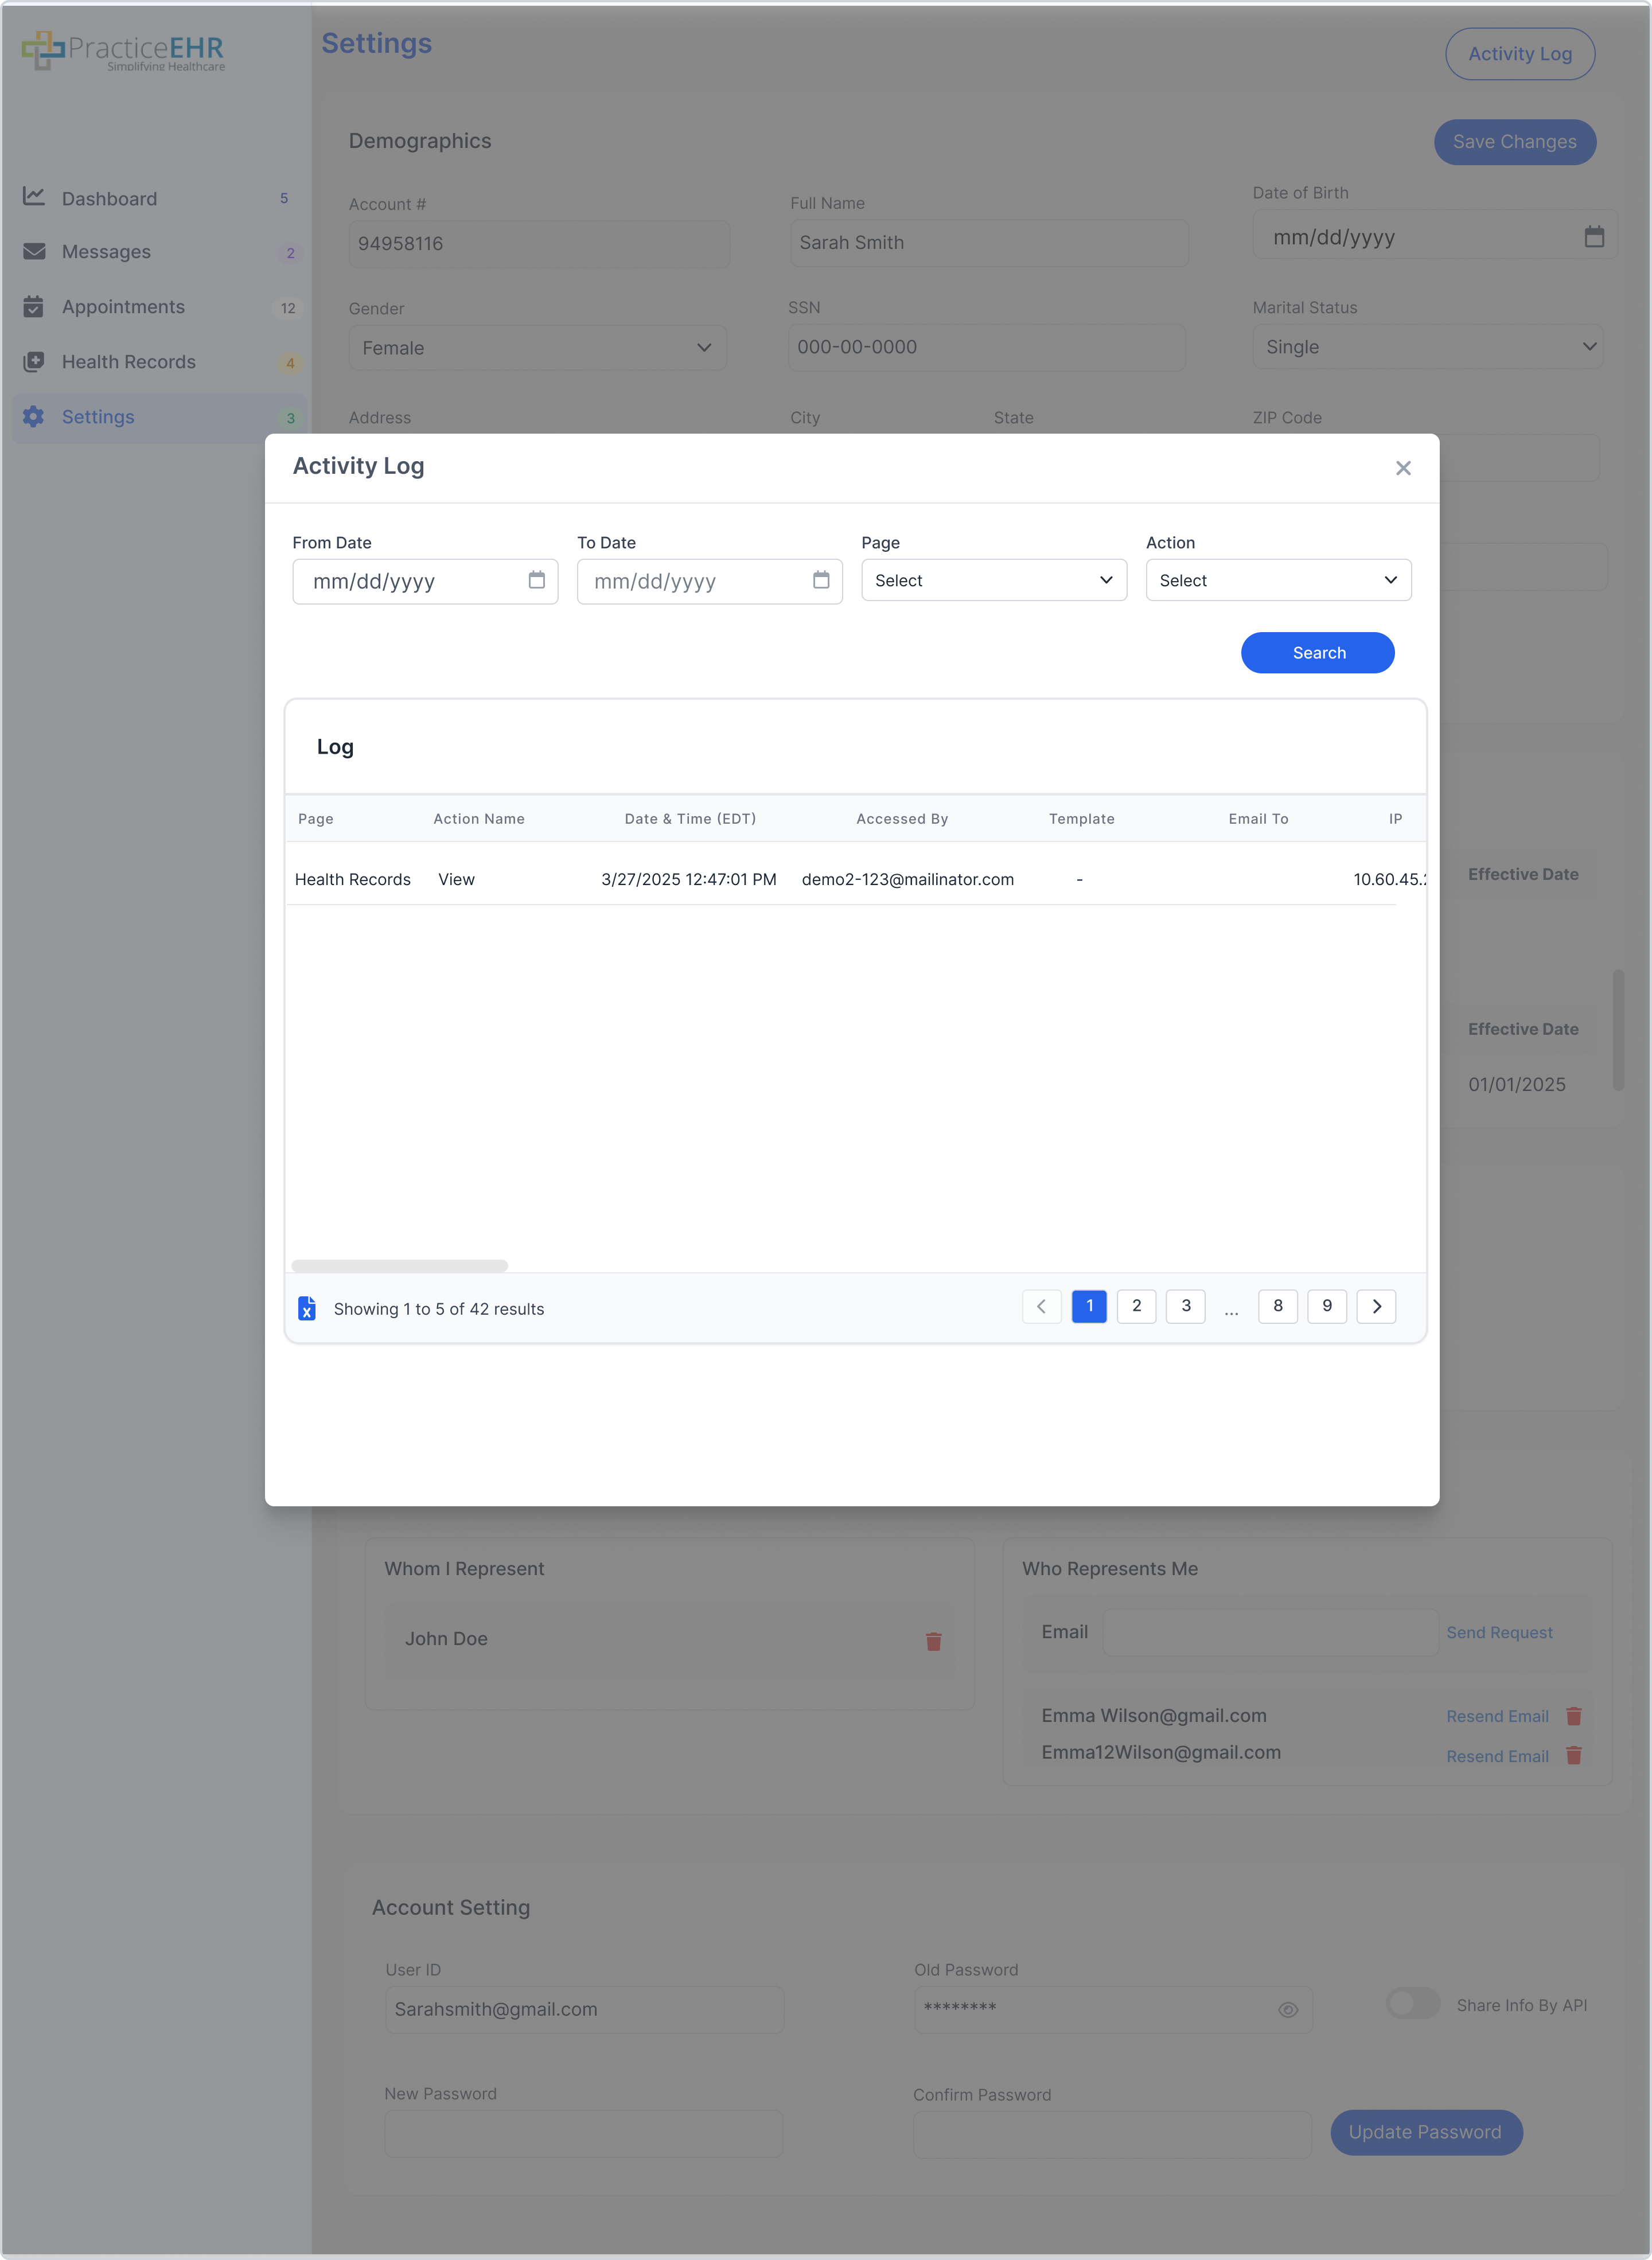
Activity Log
Account Switching
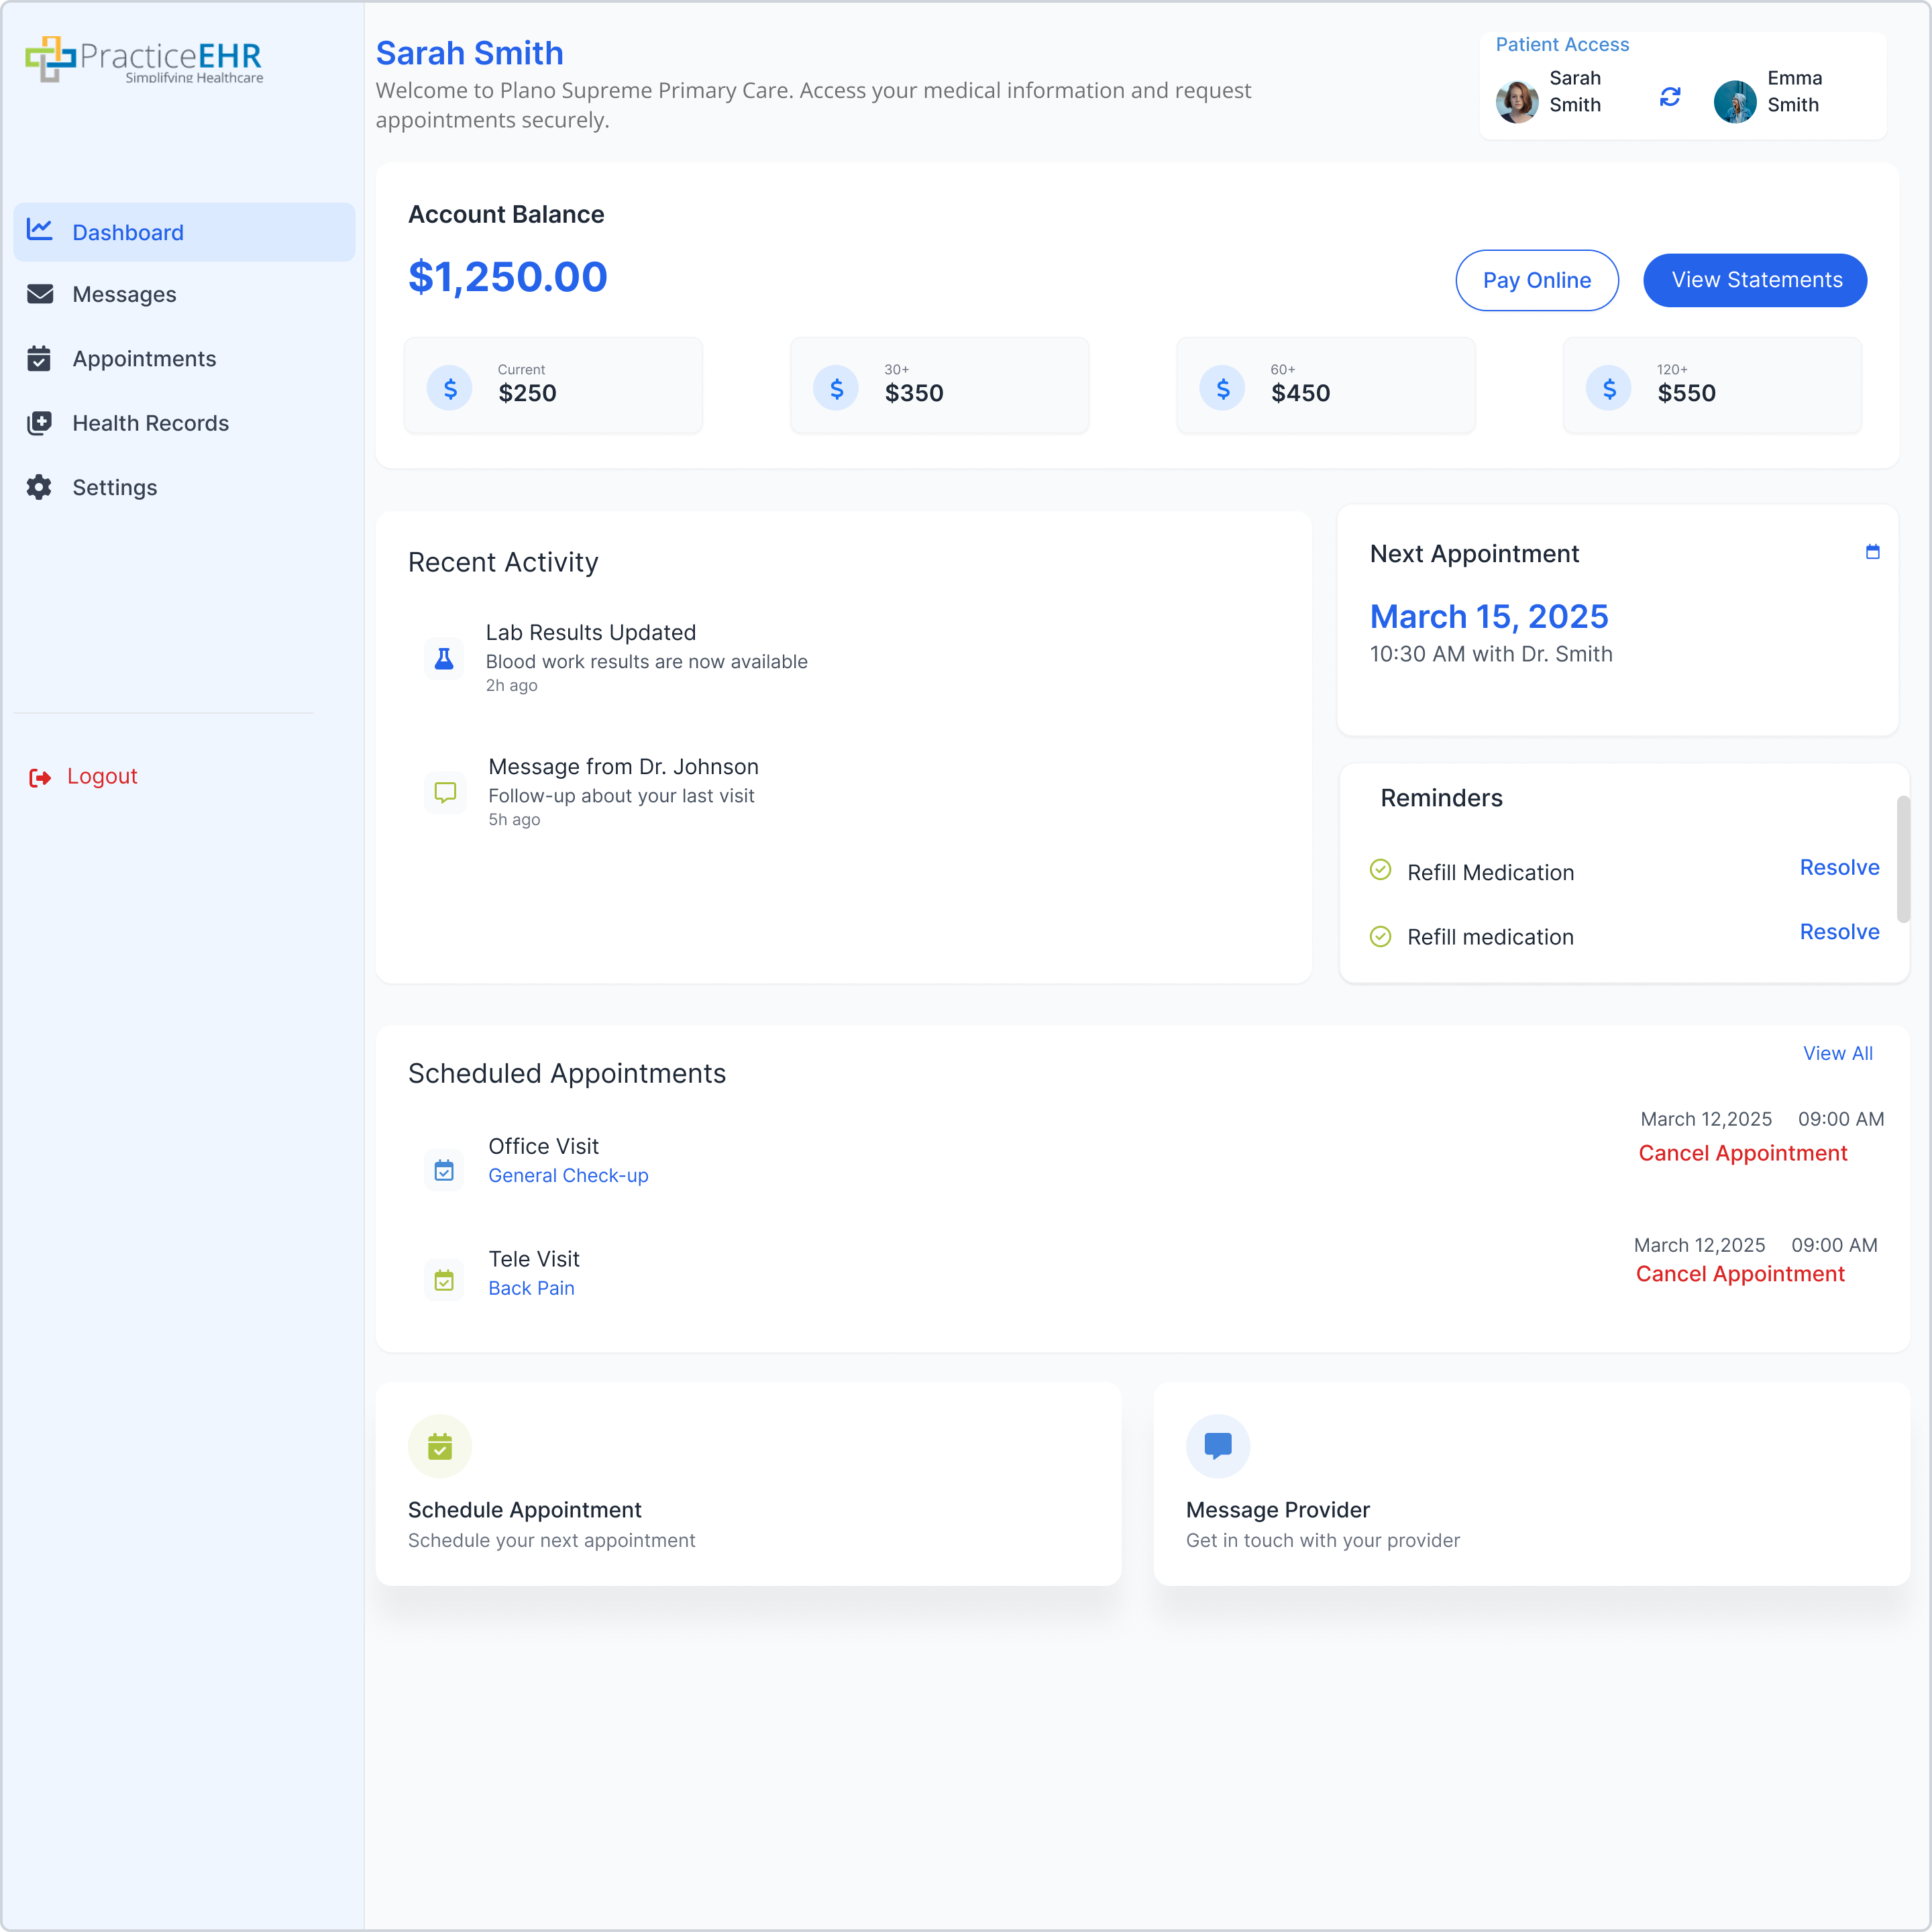
After adding a representative, users can toggle between patient accounts using the switching icon in the top right corner.